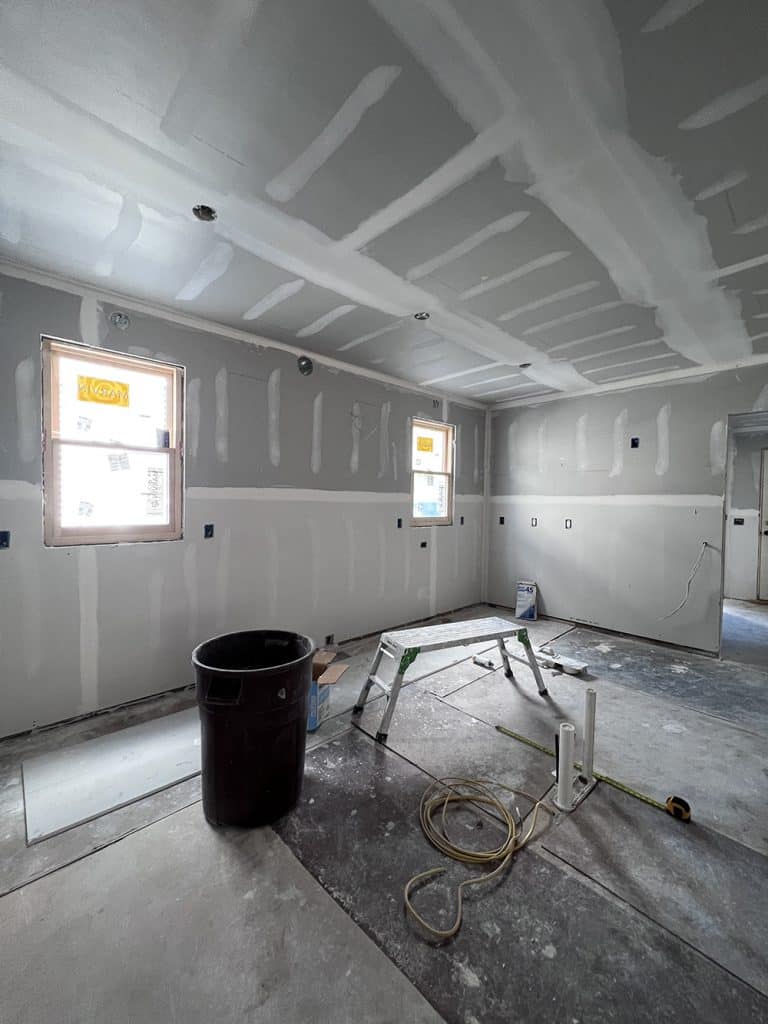
Front Door Makeover (And Pavers Too)

by Scoops on May 9, 2013 · 2 comments

Front Steps Before & After
Okay guys, let’s just stop calling this Deuce Cities Henhouse and start calling it Deuce Cities Gardening4Lyfe blog, cause that’s what your in for in the coming posts. Not only that, I’m going entrance makeover crazy over here too, somebody stop me!

I don’t know if you’ve ever had front steps that were on the verge of crumbling, but we have for years. It’s been a mess, and although these steps are falling apart, there is a lot to be said for holding off on that expensive concrete repair bill for yet another season. That stuff is spendy! I know that fixing up the stairs and front walk would really improve the curb appeal of the house, but spending that kind of money this summer isn’t something we had in the cards. In the meantime I will continue to repair these babies the best I know how; with a little bit of cement and a lot of concrete/patio paint.

As you can see, the difference is really night and day. If I can continue to keep the steps clean and tidy throughout the summer I believe we can bring these sad-ol’-steps through another winter. Hopefully next spring new front steps and a concrete walkup will be on the horizon.

New Pavers
In other front of the house news, has anyone ever had your awesome neighbor ask you if you want a pile of pavers? Let me rephrase that, have you ever seen your neighbor removing pavers and putting them next to his garbage, and then out of curiosity and excitment you send him a quick text saying:

Me: “Cool, bricks?”

Him: “Those are old. They are taking them away.”

Me: “Do I need them?”

Him: “I don’t know”

Anyhow, I got a pile of new pavers and you know I love me some pavers. Over the years, I’ve added paver boarders to ALL of our backyard gardens using reclaimed bricks that I’ve salvaged from my parents house after they re-sided. It makes mowing a breeze, and I think it looks really sharp. Yep, I said that, sharp. So when my neighbor was offering me his pavers, of course I was going to take them, duh. I have front gardens that need to be edged.

Installing Pavers
I wish I would have taken more process photos to share with you, but really, I was installing these bad boys the second I had a chance. Since I’ve done this a million times before I just jumped right in. My favorite tools for this type of project are what we call here in the midwest an “ice chipper” or you might call it an “edger”, and a flat edged shovel. I also keep a bag or two of sand nearby for leveling and a broom to sweep dirt and sand into the space between the pavers when I’m done.

Basically the method is to use the ice chipper to cut through the grass following the edge of your garden (just as you would use an edger, but obviously, this is an ice chipper). You don’t need to leave any extra room for your pavers, just layout the pavers and cut through the grass directly where the edge of the paver meets the grass. Next I use the shovel to dig down about 3″ and then remove the sod from the space the pavers are to go. Using the straight edge of the shovel, dig down and back under the sod using one fluid motion. I work in sections of about 3 feet at a time. Once I get the grass removed, I reserve it, usually piling it on some cardboard as to not get the yard all messied up. Eventually you’ll need to use some of the reserved grass for filling in the gaps, so don’t toss it just yet. Take the straight edge of ice chipper and run it over the soil, scraping away any excess dirt that didn’t get removed with the shovel. Apply pressure to the chipper as you passover the soil to level out the area.

I usually lay the pavers at a slight incline, it’s just a preference. Feel free to lay them totally level if you want. I find it easier to do it this way and I like the way it looks. I lay the pavers one by one, making sure they meet up and lay flush with the grass. If the pavers are not fitting correctly I use the sand to adjust their height, or if too high, I use the ice chipper to scrape away more soil. Once I get my pavers laid out and level, I take the leftover soil and spread it across the top of the pavers. I use a push broom to sweep the soil into the cracks, thus putting those pavers in their place! No matter how precise I am with my edging there is almost always a bald spot between the pavers and the grass. This is where your pile of leftover sod comes in handy. Break the sod into sections and use it to fill the gaps between the pavers and the lawn. This will give your new pavers an instant finished edge. Make sure to water in the coming weeks so that transplanted grass takes root, and be careful mowing the first few times too.

*Of course, if you were actually laying a patio, there would be much more to the process then what I just described, but I have found that this method works perfectly-awesomely for edging a garden. The results look finished and clean, and all for a few hours of work.

Pavers in the Front Foundation Garden
Check it, this border continues all the way around the house. I ran out of bricks before I finished, so I guess I’ll just have to add another project to my gardeny list, schucks.

Related posts:

{ 2 comments }

Around the House, gardening, Outdoor

Back Door Makeover

by Scoops on May 8, 2013 · 5 comments

Back Door Before and After
Hey-O! I don’t know about you guys, but now that it’s finally made it to spring ’round these parts I’ve been trying to make up for lost time. I’ve been doing outdoor projects left and right trying to get everything ship shape and ready for spring and summer enjoymentz. I have a whole to-do list of small outdoor projects that need to get done, and I’ve been checking them off! Feels so good.

I think after tackling the big spring indoor to-do list, I’ve decided to make an outdoor to-do list chalked full of projects that have been nagging at me forever. Like for example, painting the purple back door gray, and repairing and painting the steps to match the house. I mean dirty green steps are cool and all, but c’mon.

So I’ve spent the last two afternoons painting doors and steps, hanging new/old house numbers and making the backyard vibes even more righteous then they already were.


The patio and back entrance are getting closer and closer to being super cool. I’ve tackled the stairs, door and house nums, now I need mother nature to do the rest. I’m still waiting on grass, leaves and plants to make this scene even tyter. I’m confident it won’t be long. I also need plants in the window boxes and in the world’s most giant planter.

Speaking of that giant planter, what does one do with a giant planter at the base of her steps that’s peeling paint and falling apart in a major way? I’m sure it’s original to the house, so I don’t want to destroy it, but I don’t know if I can keep living with it in the state that it’s in. Any ideas on the will be welcomed!

Also, did you notice my new white umbrella? I picked it up at target online and I love it because it’s big and it tilts. Keeps us in the shade when we need to be shaded!


Progress shot… looking so much nicer already. I know the stairs are light and will get dirty over time, but hey, that’s what hoses are for.


I gotta tell you guys about these house numbers. These were originally on the front of the house, but when we had the house painted last year the frieze was painted dark gray (the same color as the back door now), and the black house numbers did not show from the street, duh me. I had picked up these babies for the front of the house, in pewter at the The Home Depot for fairly inexpensive, I’m talking $6 a piece. After replacing the front house numbers with the new pewter ones, I was left with our old house numbers in black. I figured since I like them so much that I would mount them on a white board and hang them over the door in the back of the house. I know that’s kind of a weird thing to do, hang house numbers on the back of your house, but here in MPLS (aka Minneapolis) we have a city full of alley ways, and it’s not out of the ordinary to see numbers on the back of a house.


The installations on these numbers couldn’t be any simpler either. They include templates that you can line up and arrange and level and space. Then you just have to drill holes and insert your numbers. Voila!

Okay, enough bloggin, back to outside work!

Related posts:

{ 5 comments }

Around the House, Outdoor

Porch Time!

by Scoops on May 7, 2013 · 0 comments

Porch Timez With my Boyz
Hey guys, Just wanted to let you know that awesome stuff is happening here!! The weather has finally turned and the kids and I are enjoying every minute of it. I haven’t been tied to the computer in days, and I’m loving it. We are spending every waking minute in the porch or backyard. 7 months of winter makes all very excited to be enjoying time in our shortz!

I do have some cool outside projects in the works and I hope to be finishing them up in the next day or two so I can share with you. I’m working hard to get a cool post out on the internetz tomorrow! See you soon friends!!

Related posts:

{ 0 comments }

Kids, My Life, Porch

Cabin Bartender :
Cabin Bartender : Uncle Matt

Happy Spring from the Cabin Bartender!

After many endless, frigid, whiskey soothed months of yet another Minnesotan hibernation, spring has finally sprung. The sunny afternoon has replaced our darkened days. Blades of tired grass are being slowly reanimated by the welcome warmth of our new season. Life is returning to the backyards of our homes! If there is ever a season for a champagne cocktail, spring is it. Pick up a bottle of bubbly and try this celebratory cocktail. The bitterness and herbal complexity of Campari, a classic summer spirit, nestles right up against the sweet bubbly dryness of the sparkling wine. If you want a stronger kick in the jean shorts, add some rum and lots of fresh lime and you have a cool new sweaty summer buddy:

-Uncle Matt, Cabin Bartender


The ‘Pane N’ Pari

▼ 1.25 oz Campari
▼ .75 oz Rum
▼ Juice of 1 lime or fresh grapefruit juice
▼ 1/2 cup champagne
▼ 1 oz soda water

Add ingredients in order, top with lots of champagne and a splash of soda water. Serve over ice and garnish with a slice of lime.
 
Cabin Bartender / Matt Scharenbroich
Matt Scharenbroich, better known as Finn & Gus’ amazing Uncle Matt, is an expert at making food and drinks delicious. When he’s not feeding his friends the best cocktails, he’s making cool art and animations, you can find him over here!

Related posts:

{ 0 comments }

Eats

My April Garden

by Scoops on April 30, 2013 · 4 comments

Daylilies

Lilies
Well guys, I had to do it. I just had to post photos of my April garden, not posting would just be too sad. If you remember, by this time last year I had already posted about my March and April gardens.

Still, the bits of green popping up throughout the yard give me hope. I’m sure my neighbors think I’m crazy. I’m out there every few hours trying to see if I can spot anything new. I am so ready to see stuff growing! Now, should I even mention the record 6″ of snow that is predicted to begin tomorrow evening? Fer real guys, this is crazed, and I could, and probably will cry.


Tulips
Fox Trot, Spring Green & Peach Blossom

Tulips
One of the most exciting things about this years spring garden are the new additions I planted last fall. I planted 50 bulbs last year, apprx 30 Tulips in a variety of colors and 20 Daffodils. I’ve seen a few of these babies begin to pop up but I am eager to see them all! I hope that all my new bulbs made it through the winter, and will make an appearance in the coming week. I am hoping so hard this layer of snow doesn’t ruin what’s already sprouted up.


Creeping Sedums

Creeping Sedums
Sedums are always one of the first things to spot in the yard, I'm pretty sure you could spot them in the middle of winter if you were to remove all the snow. They're hardy little sons of guns.


Iris
Variegated Sweet Iris

Variegated Sweet Iris
I ordered two new Iris bulbs from Jackson & Perkins last fall too. I've seen these around the neighborhood a few times, and have always been envious. They are called Variegated Sweet Iris and have a light purple flower with variegate foliage ranging from green, to yellow-green to white. They look amazing even after they have flowered in the spring. I put them out on the boulevard figuring these hardy plants could take the beating from the snow, salt and sand during the winter months. Let's get on with it already, can't wait to see this new stuff!


Sedum

Sedum
These Sedum know how to grow and make feel like spring is on its way.


Bleeding Hearts

Bleeding Hearts
The Bleeding Hearts are popping! I took these photos yesterday, and today they are already twice as high. I give it two weeks tops for these guys to be 18" and blooming like crazy.


Pagoda Dogwood

Pagoda Dogwood
The buds are just coming out on the trees. I can see their round silhouettes all over the place and it makes me so amped. I'm always excited to see the Dogwoods and Crab Apple trees starting to bud in the spring, cause that means beautiful flowering trees in no time at all.

Seriously, wish me luck the next couple of days guys. I don't know how much more of this weather I can take.

{ 4 comments }

gardening