


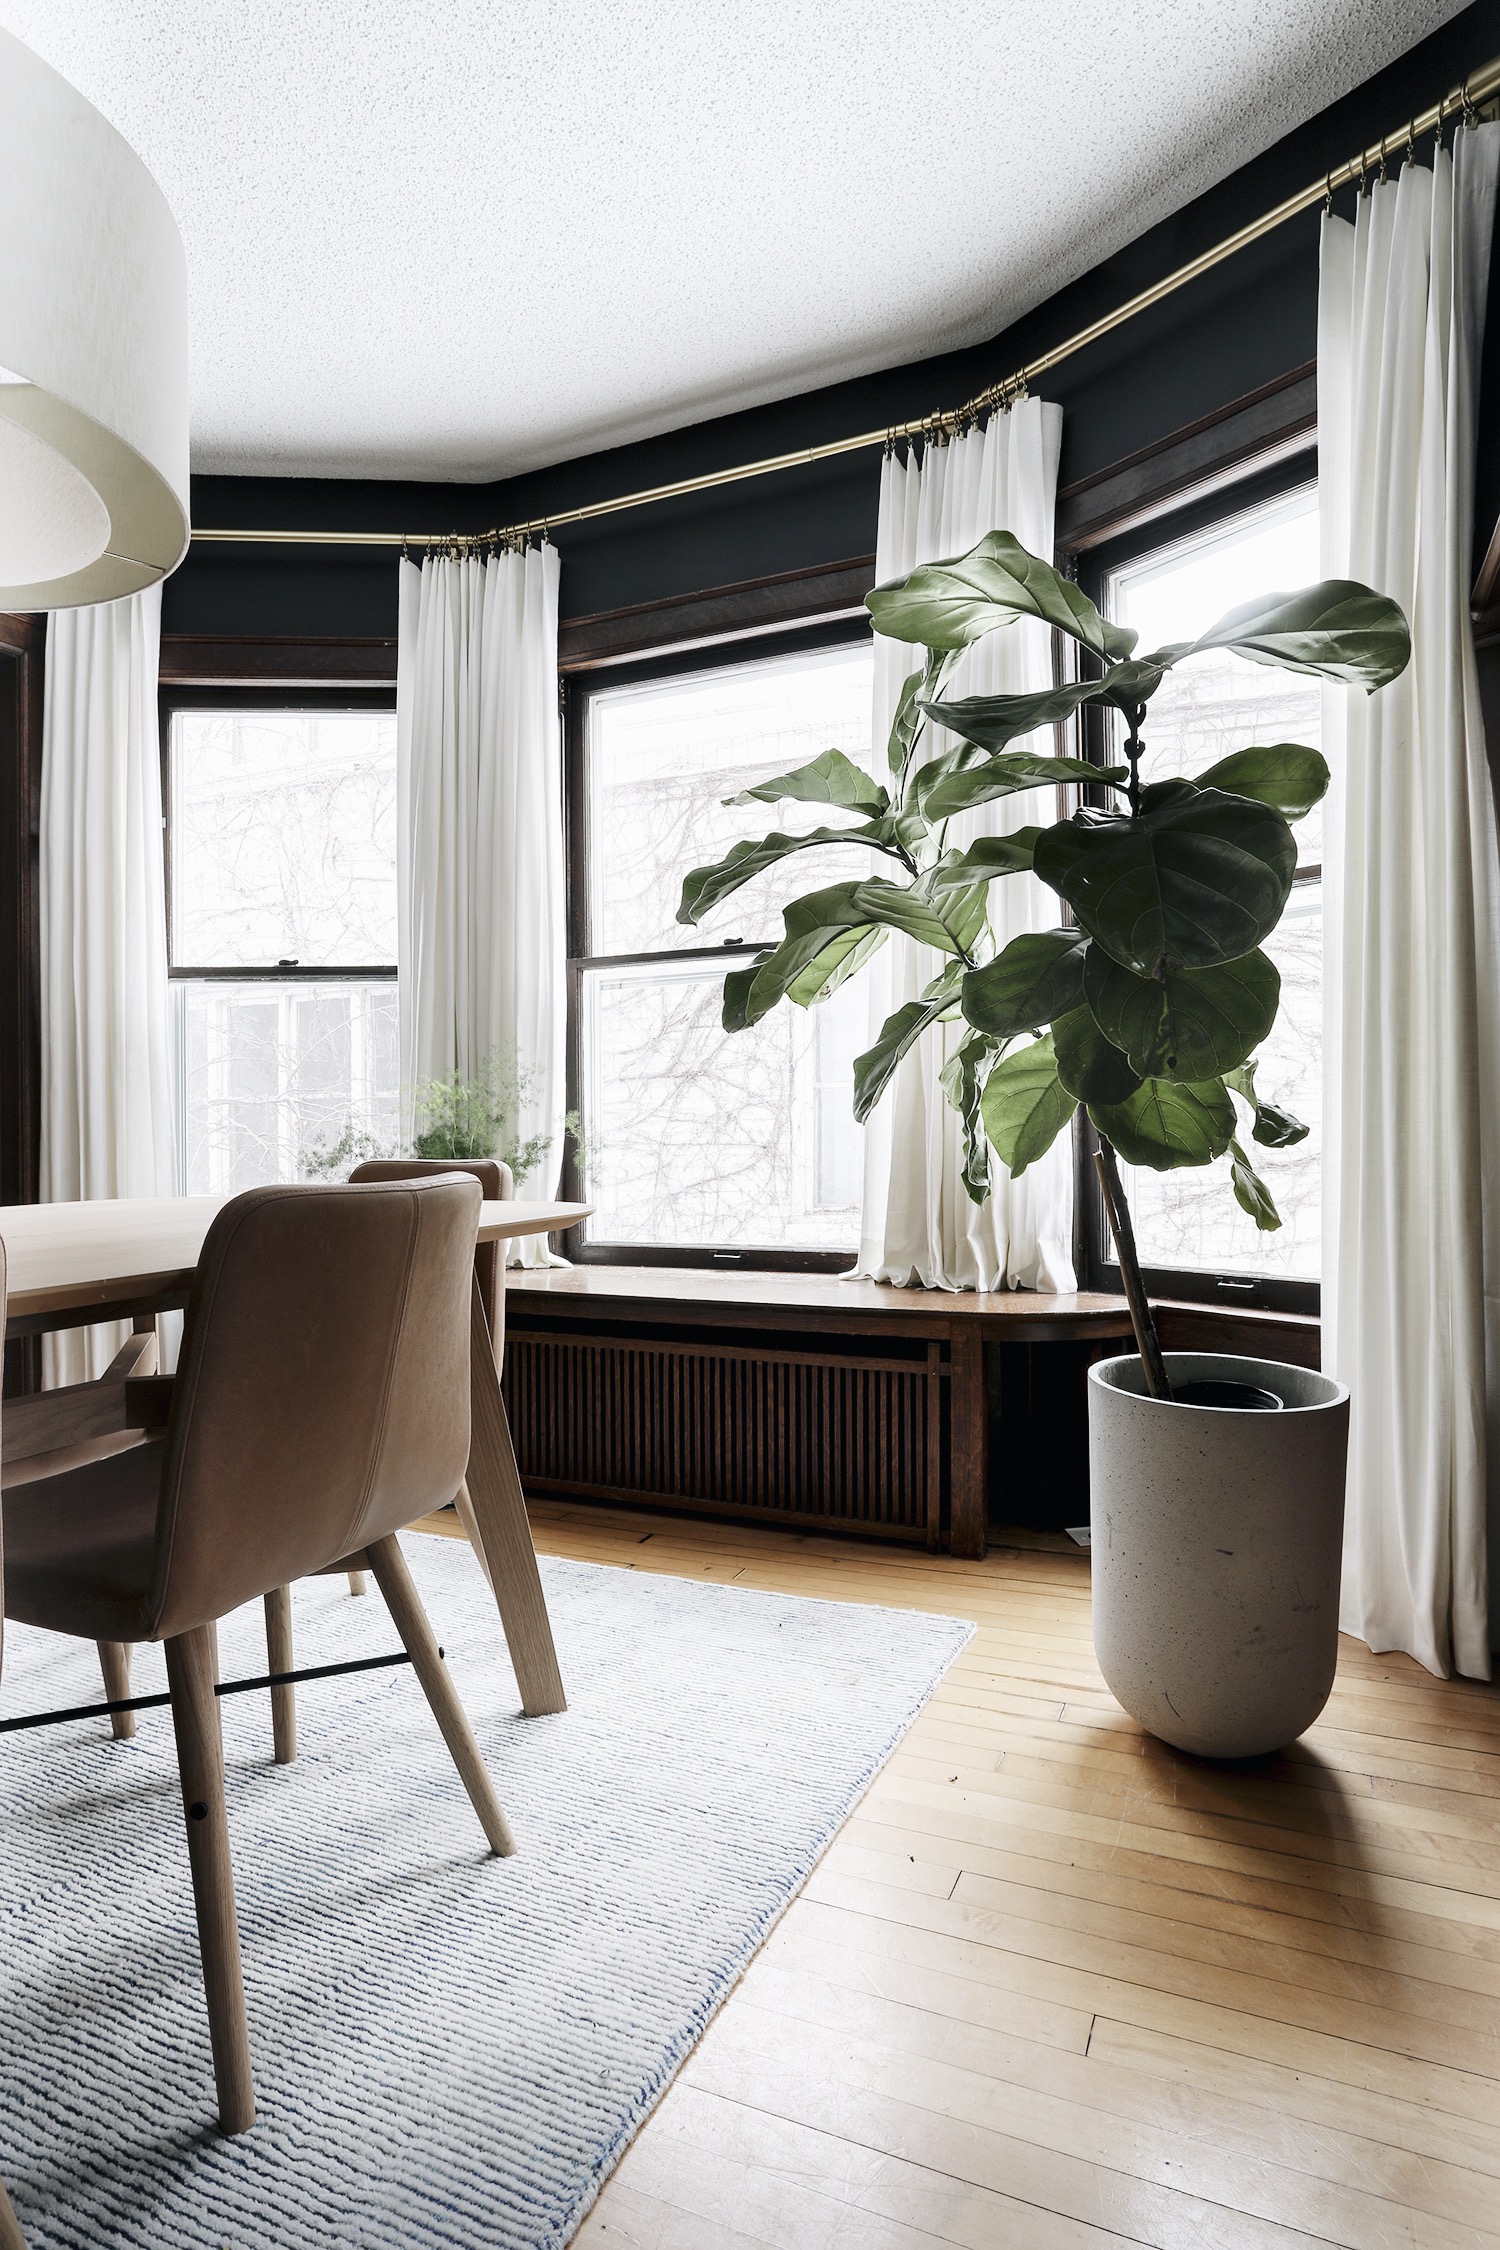
Last weekend I started to work on one of my many 2019 goals. I began the facelift of our dining room by installing curtains in our bay window. This is something that I’ve wanted to do for sooooo long. I was always paralyzed by how to actually go about installing a curtain in a bay window with a radiator below the main window. This involved different length curtains, and since privacy wasn’t my number one priority I had just flanked the window with two curtains on each side for the last 9 years or so.
This would have been fine and good, but then I saw Nicole’s blog post on how she added curtains to her bay window and had the same exact radiator problem I did. She solved the problem that I couldn’t seem to wrap my head around, and it looked great.
For whatever reason I had the hardest time finding rods for the bay window. If you google “angle curtain rods”, “bay window curtain rods” or “curtain corners” or a handful of different terms the results are lacking. It wasn’t until I googled “drapery corner connector” (duh) that I got a result that seemed promising. I really wanted to use the same style rod and finial that I used in the living room. The dining and living are practically the same space, so it would seem funny if I were to use two different type of rods. The rods I had hung in the living room aren’t offered with a corner connector. What’s a lady to do? I decided to take a chance and I ordered two corner connector from Ballard design and three brass rods to fit my curtains. Lucky for me, the brass of both the connector and the rod are nearly the same AND they fit together perfectly. I’m so happy to have the solution I was hoping for.
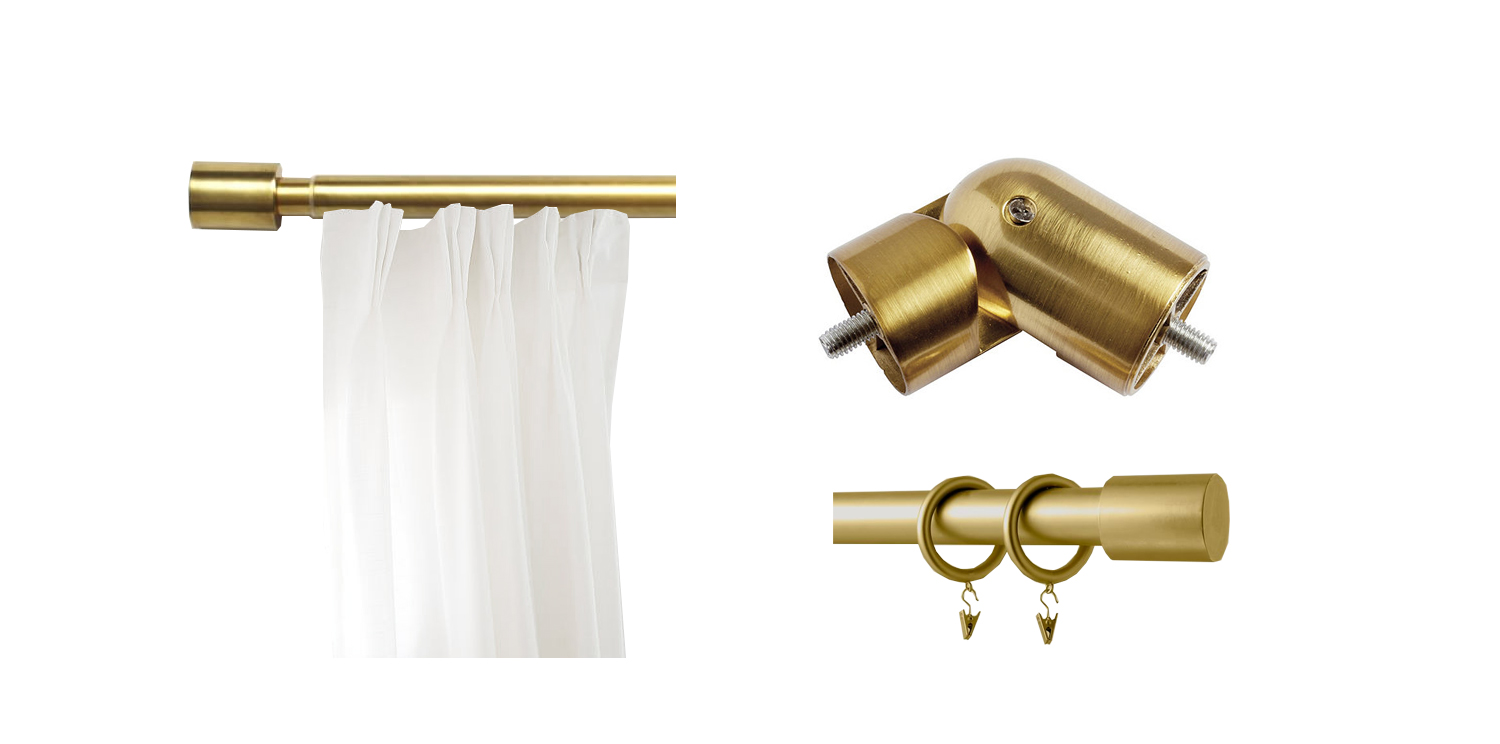
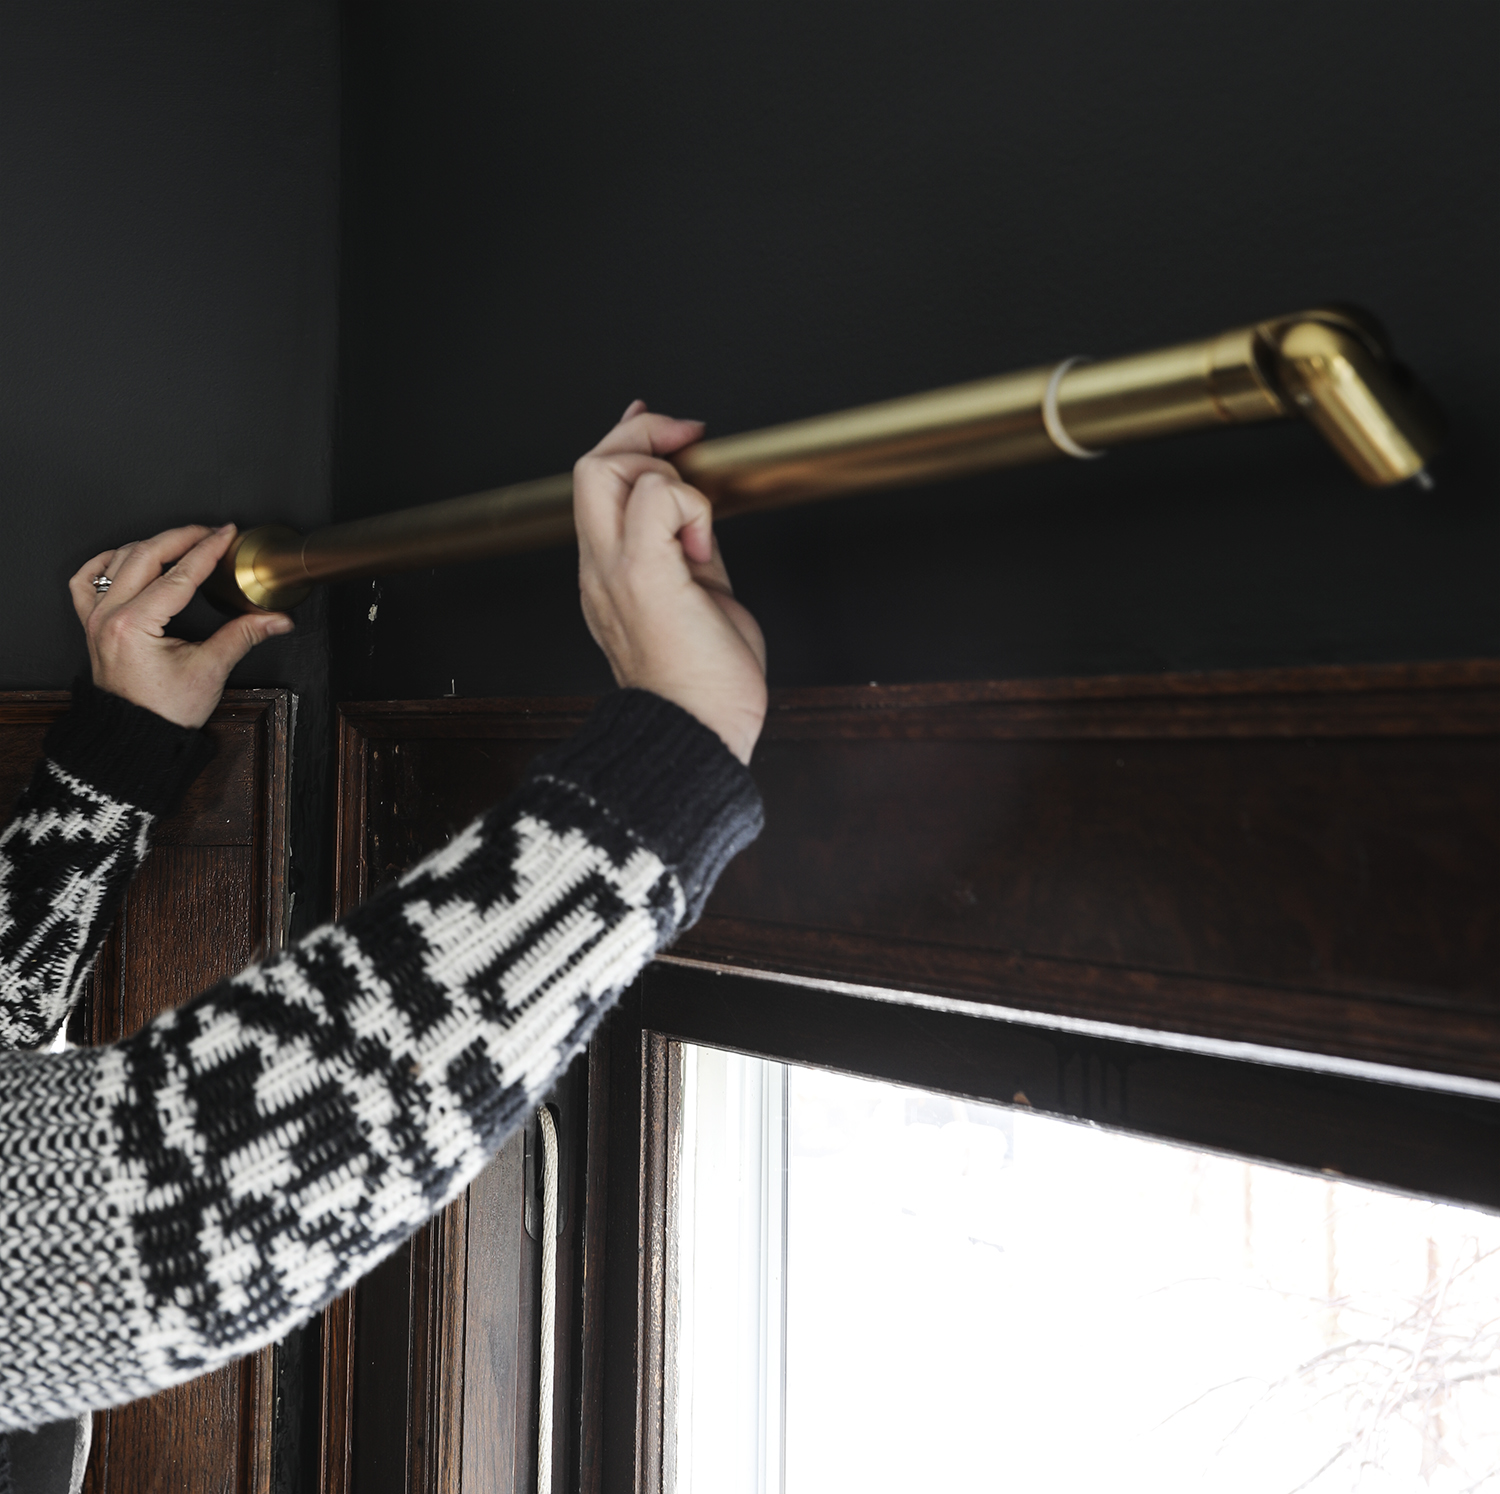
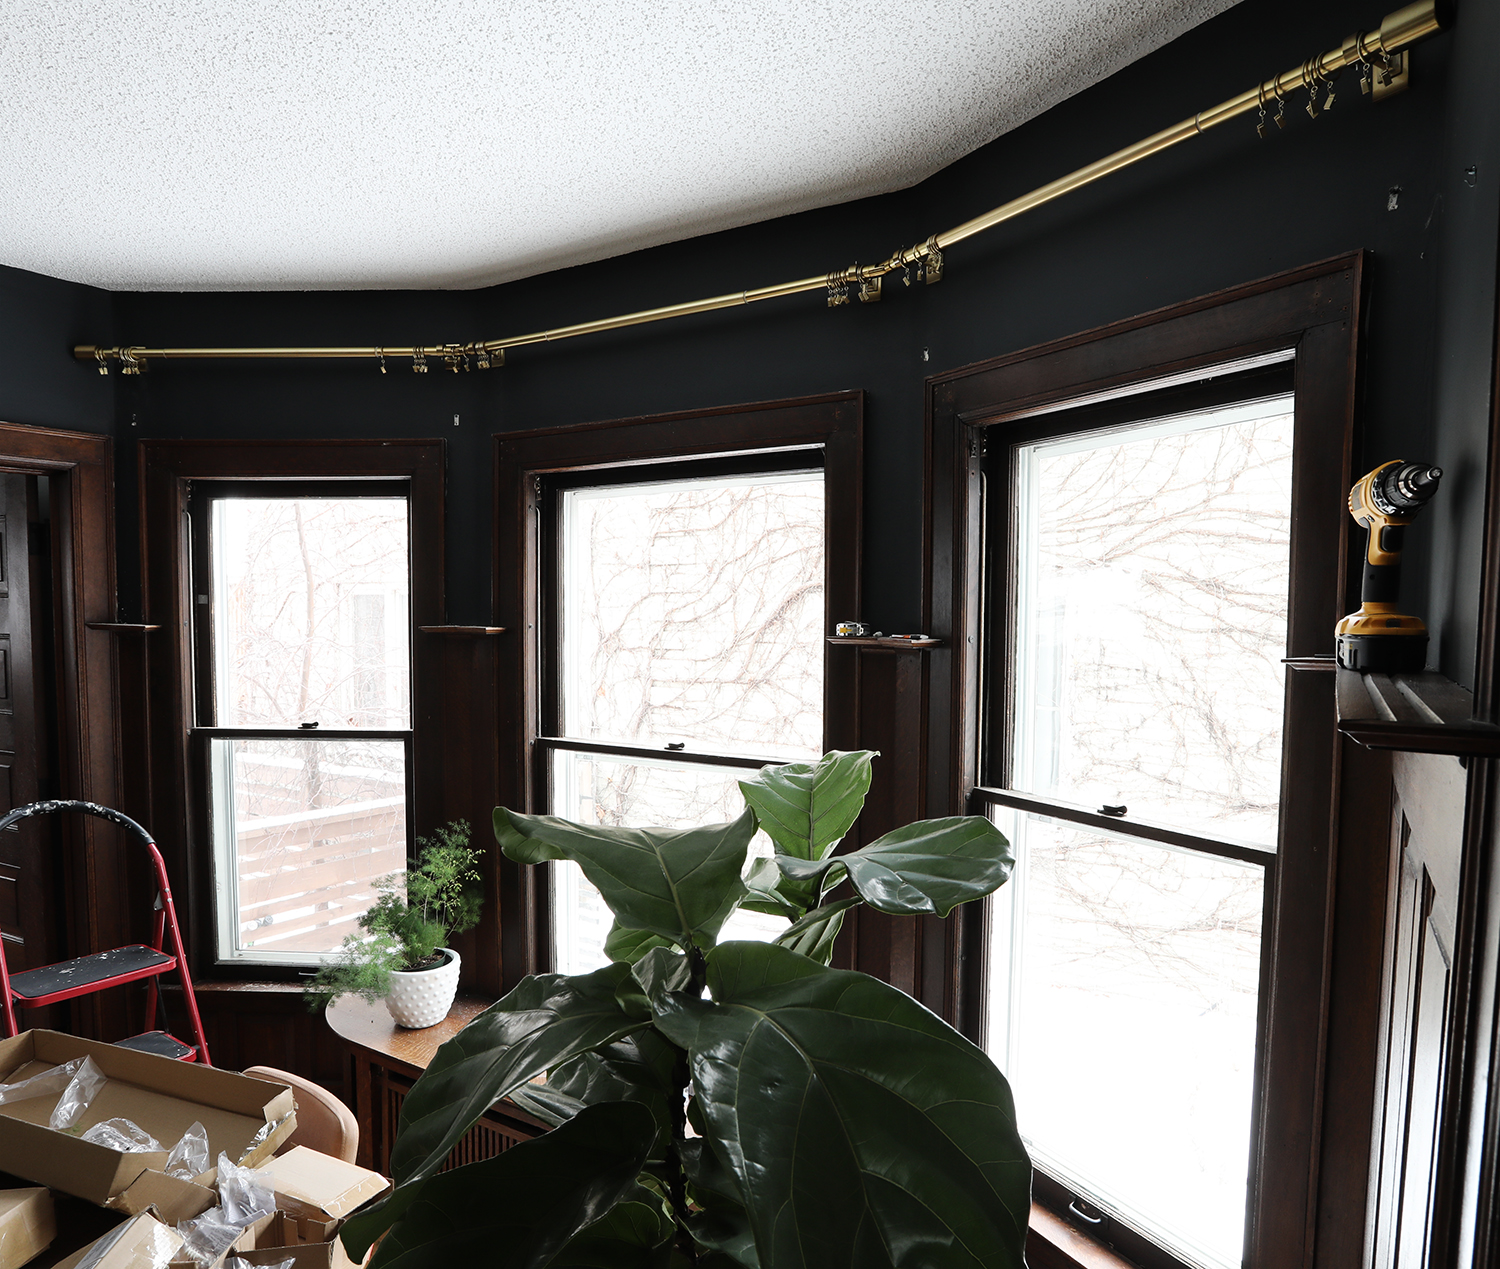
Dry fit your rods. Before you begin anything you want to unpack your rods, and dry fit with the finials attached. Remember, your rods are going to project from the wall 4″ or so, so you want to guarantee that everything will fit. It was a tight squeeze for me. Normally I would place the rod supports further out on each side, but because the space was so tight I lined them up with the exact edge of the window trim.
Determine the height you’d like to place your rods at. Rule of thumb is typically high and wide to make your window feel grand. For me, I could only accommodate the “high” part of that equation. I matched the height of the living room rods. They float 10.5″ above the top of the window trim. I would also recommend starting on one side of the bay window and moving across. I will be starting my project on the left window.
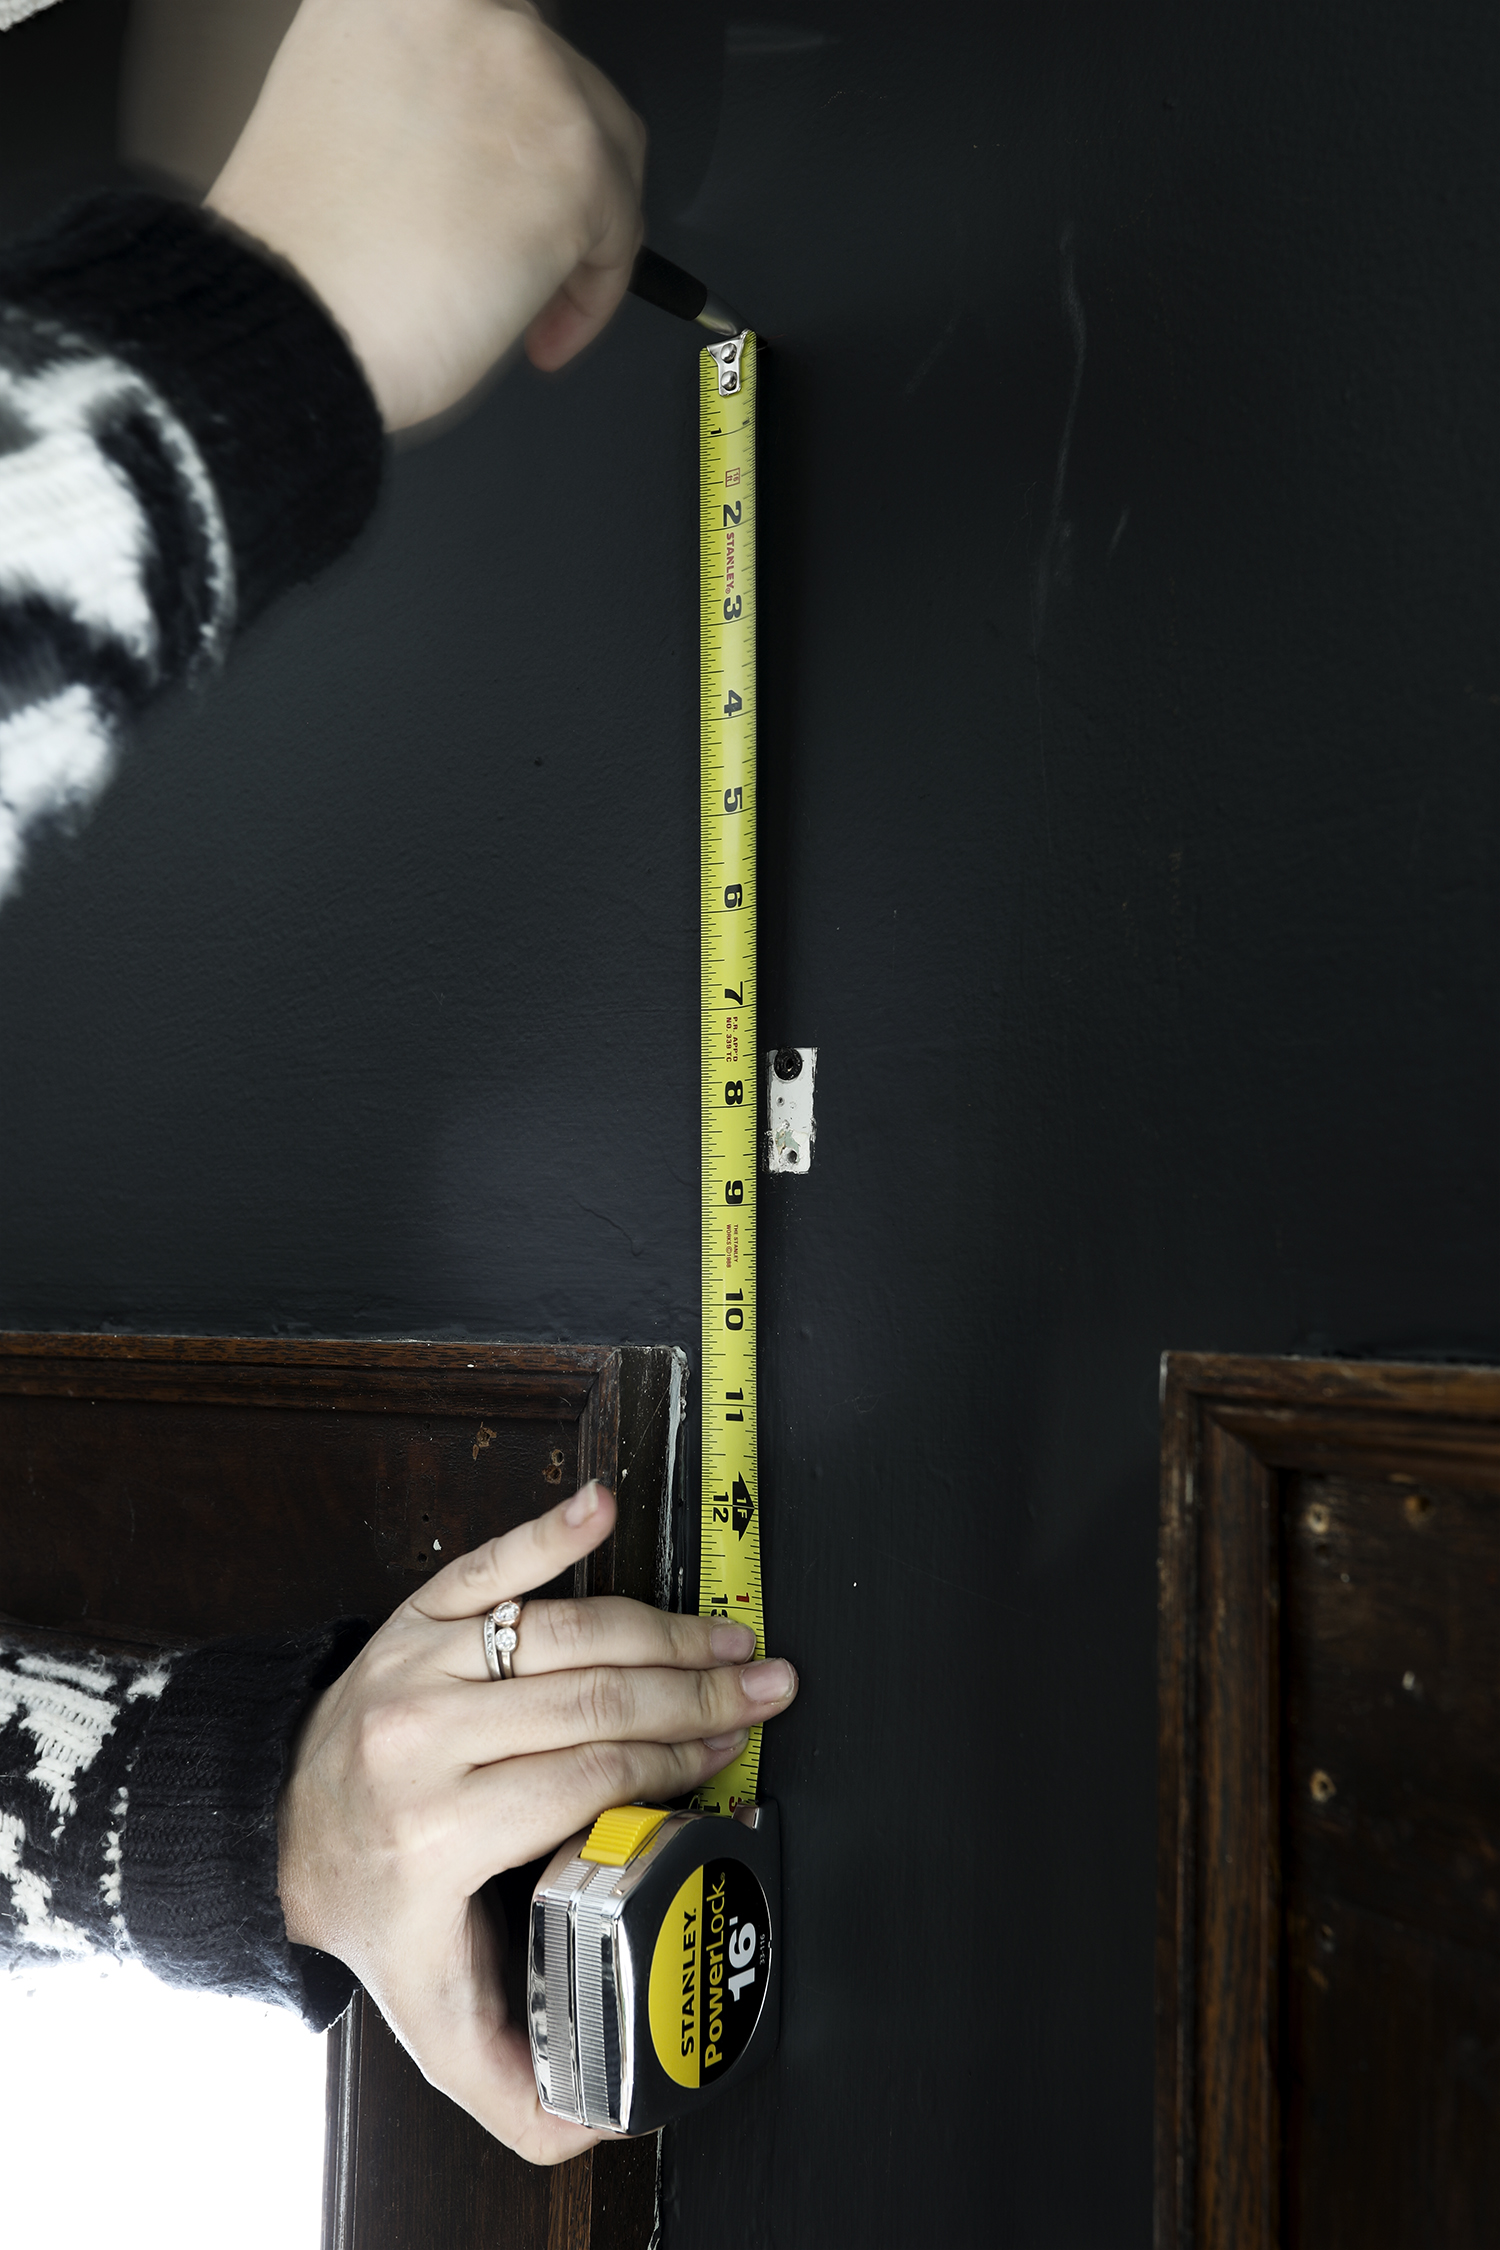
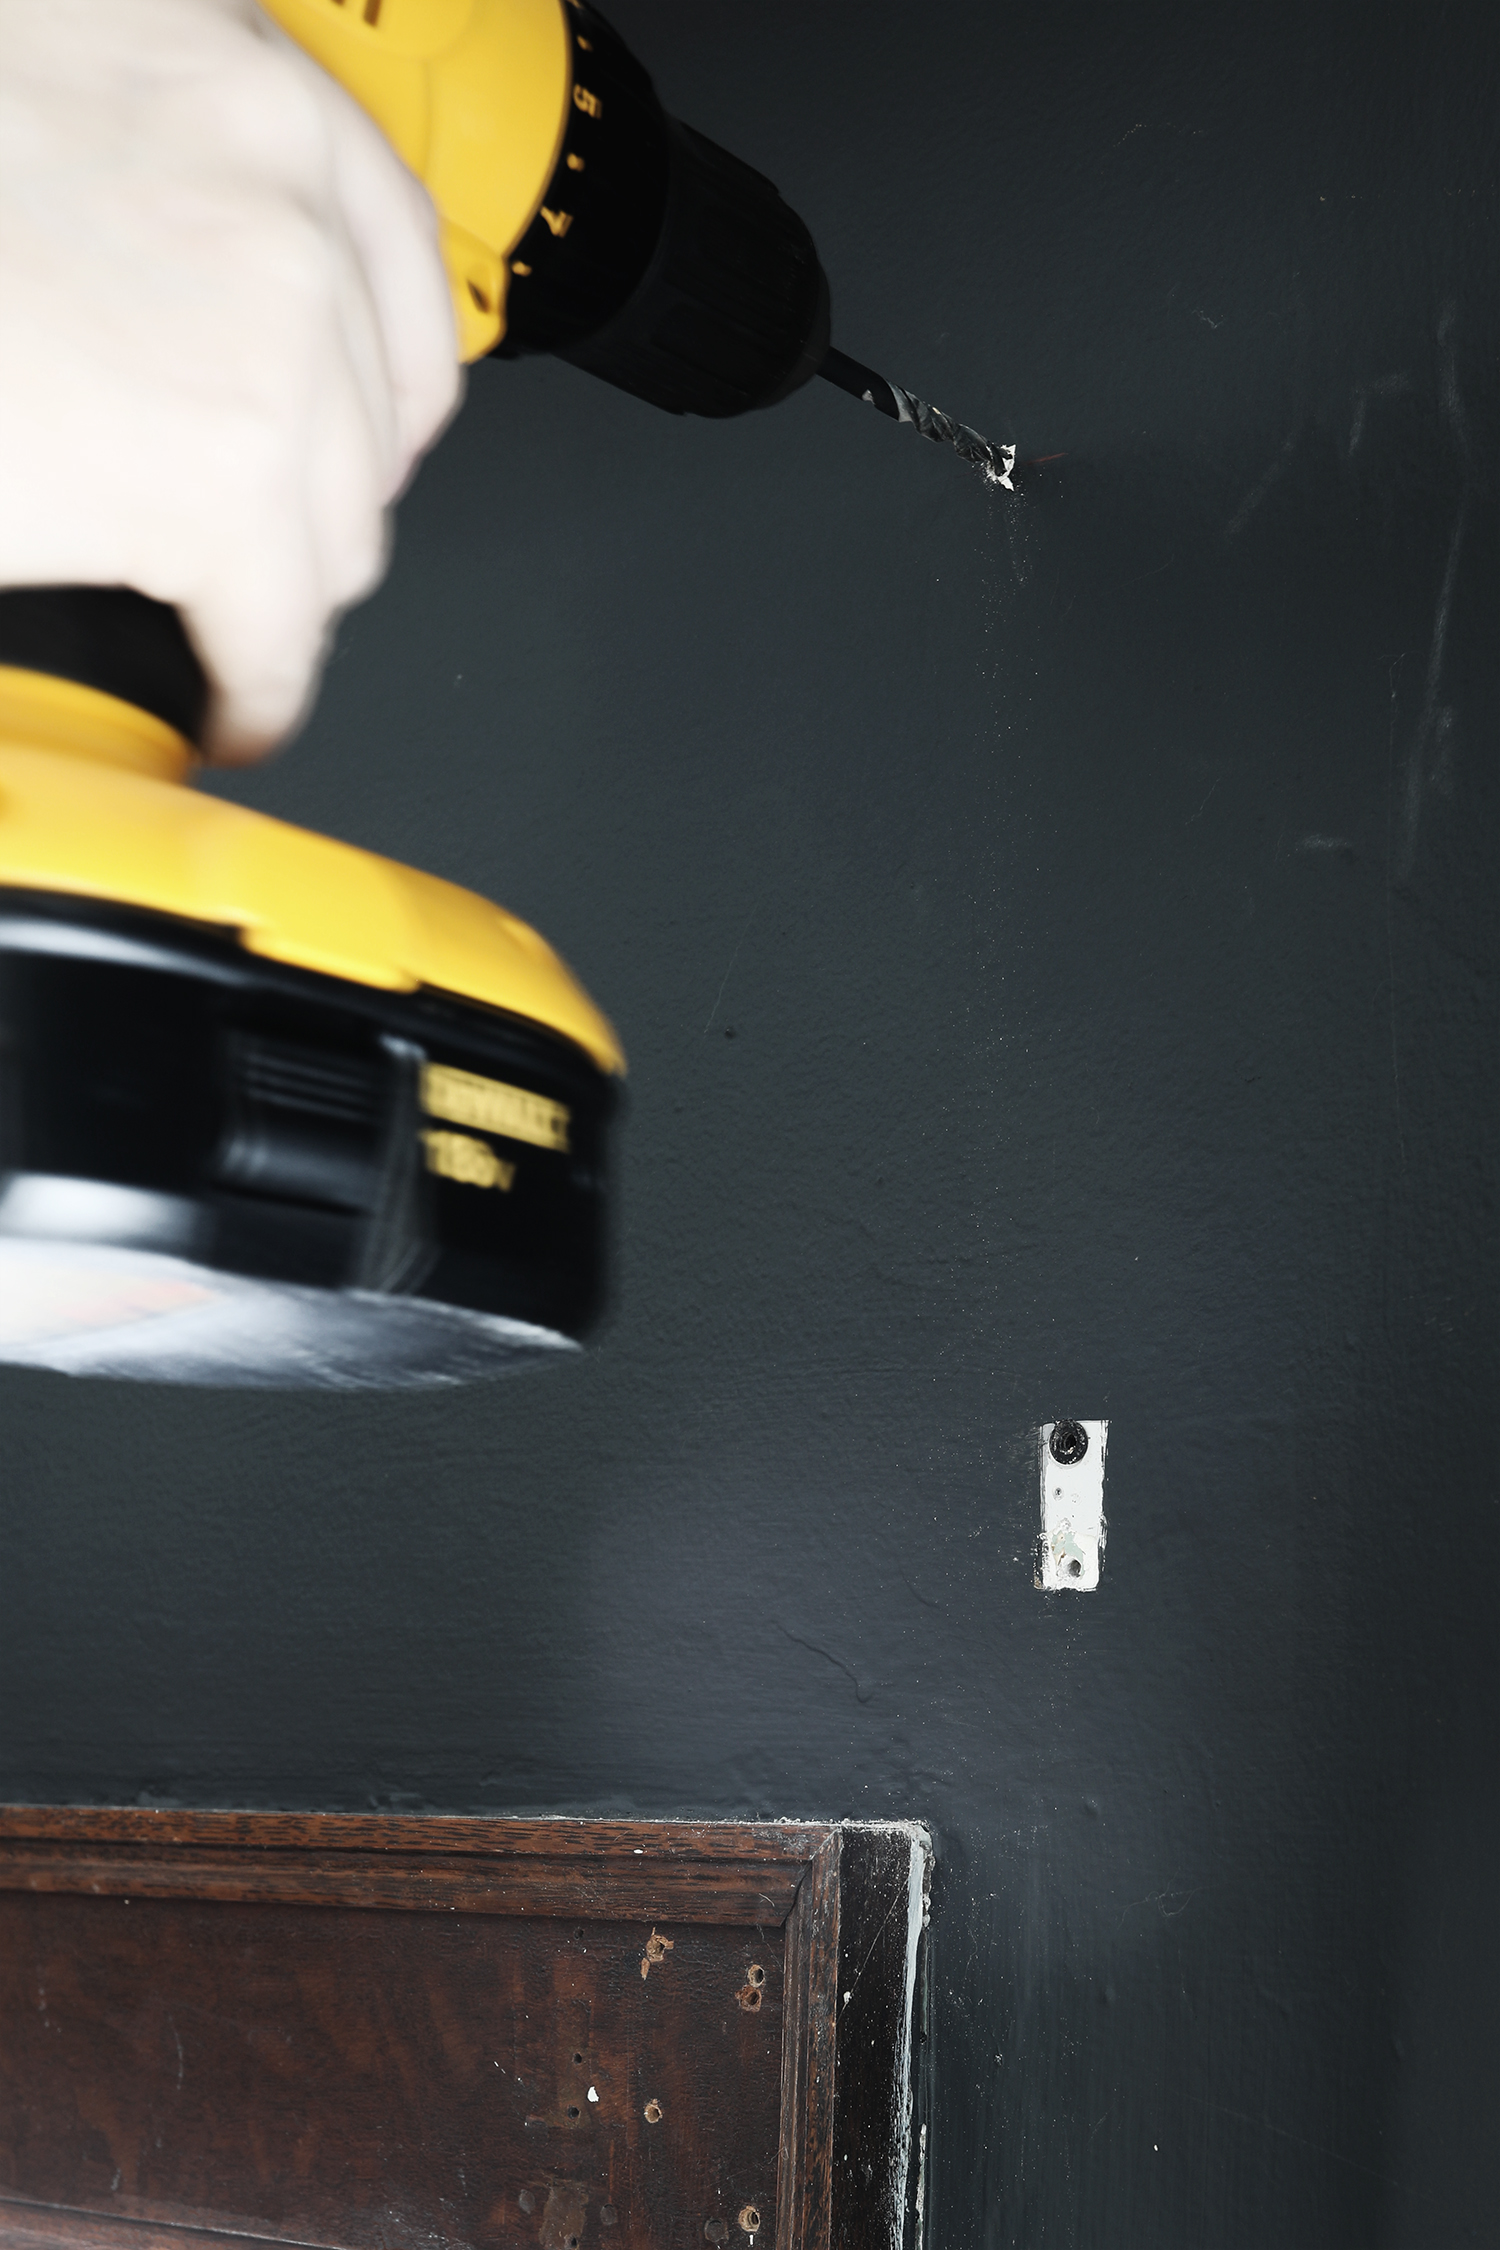
Use a tape measure to mark the placement of your brackets. A level is also a good tool to have around. Double check your level from mark to mark. I needed to make sure I was plumb from the edge of the window trim to the place I marked. If you have a laser level, now would be the perfect time to use it. I left mine at the cabin.
The hardware for this curtain rod included a metal cleat to attach the bracket to the wall. Make sure you are using proper anchoring hardware if you do not have a stud that you can screw into. For plaster walls I would recommend a masonry anchor with a plastic sleeve, and for drywall or sheet rock, try a self tapping anchor.
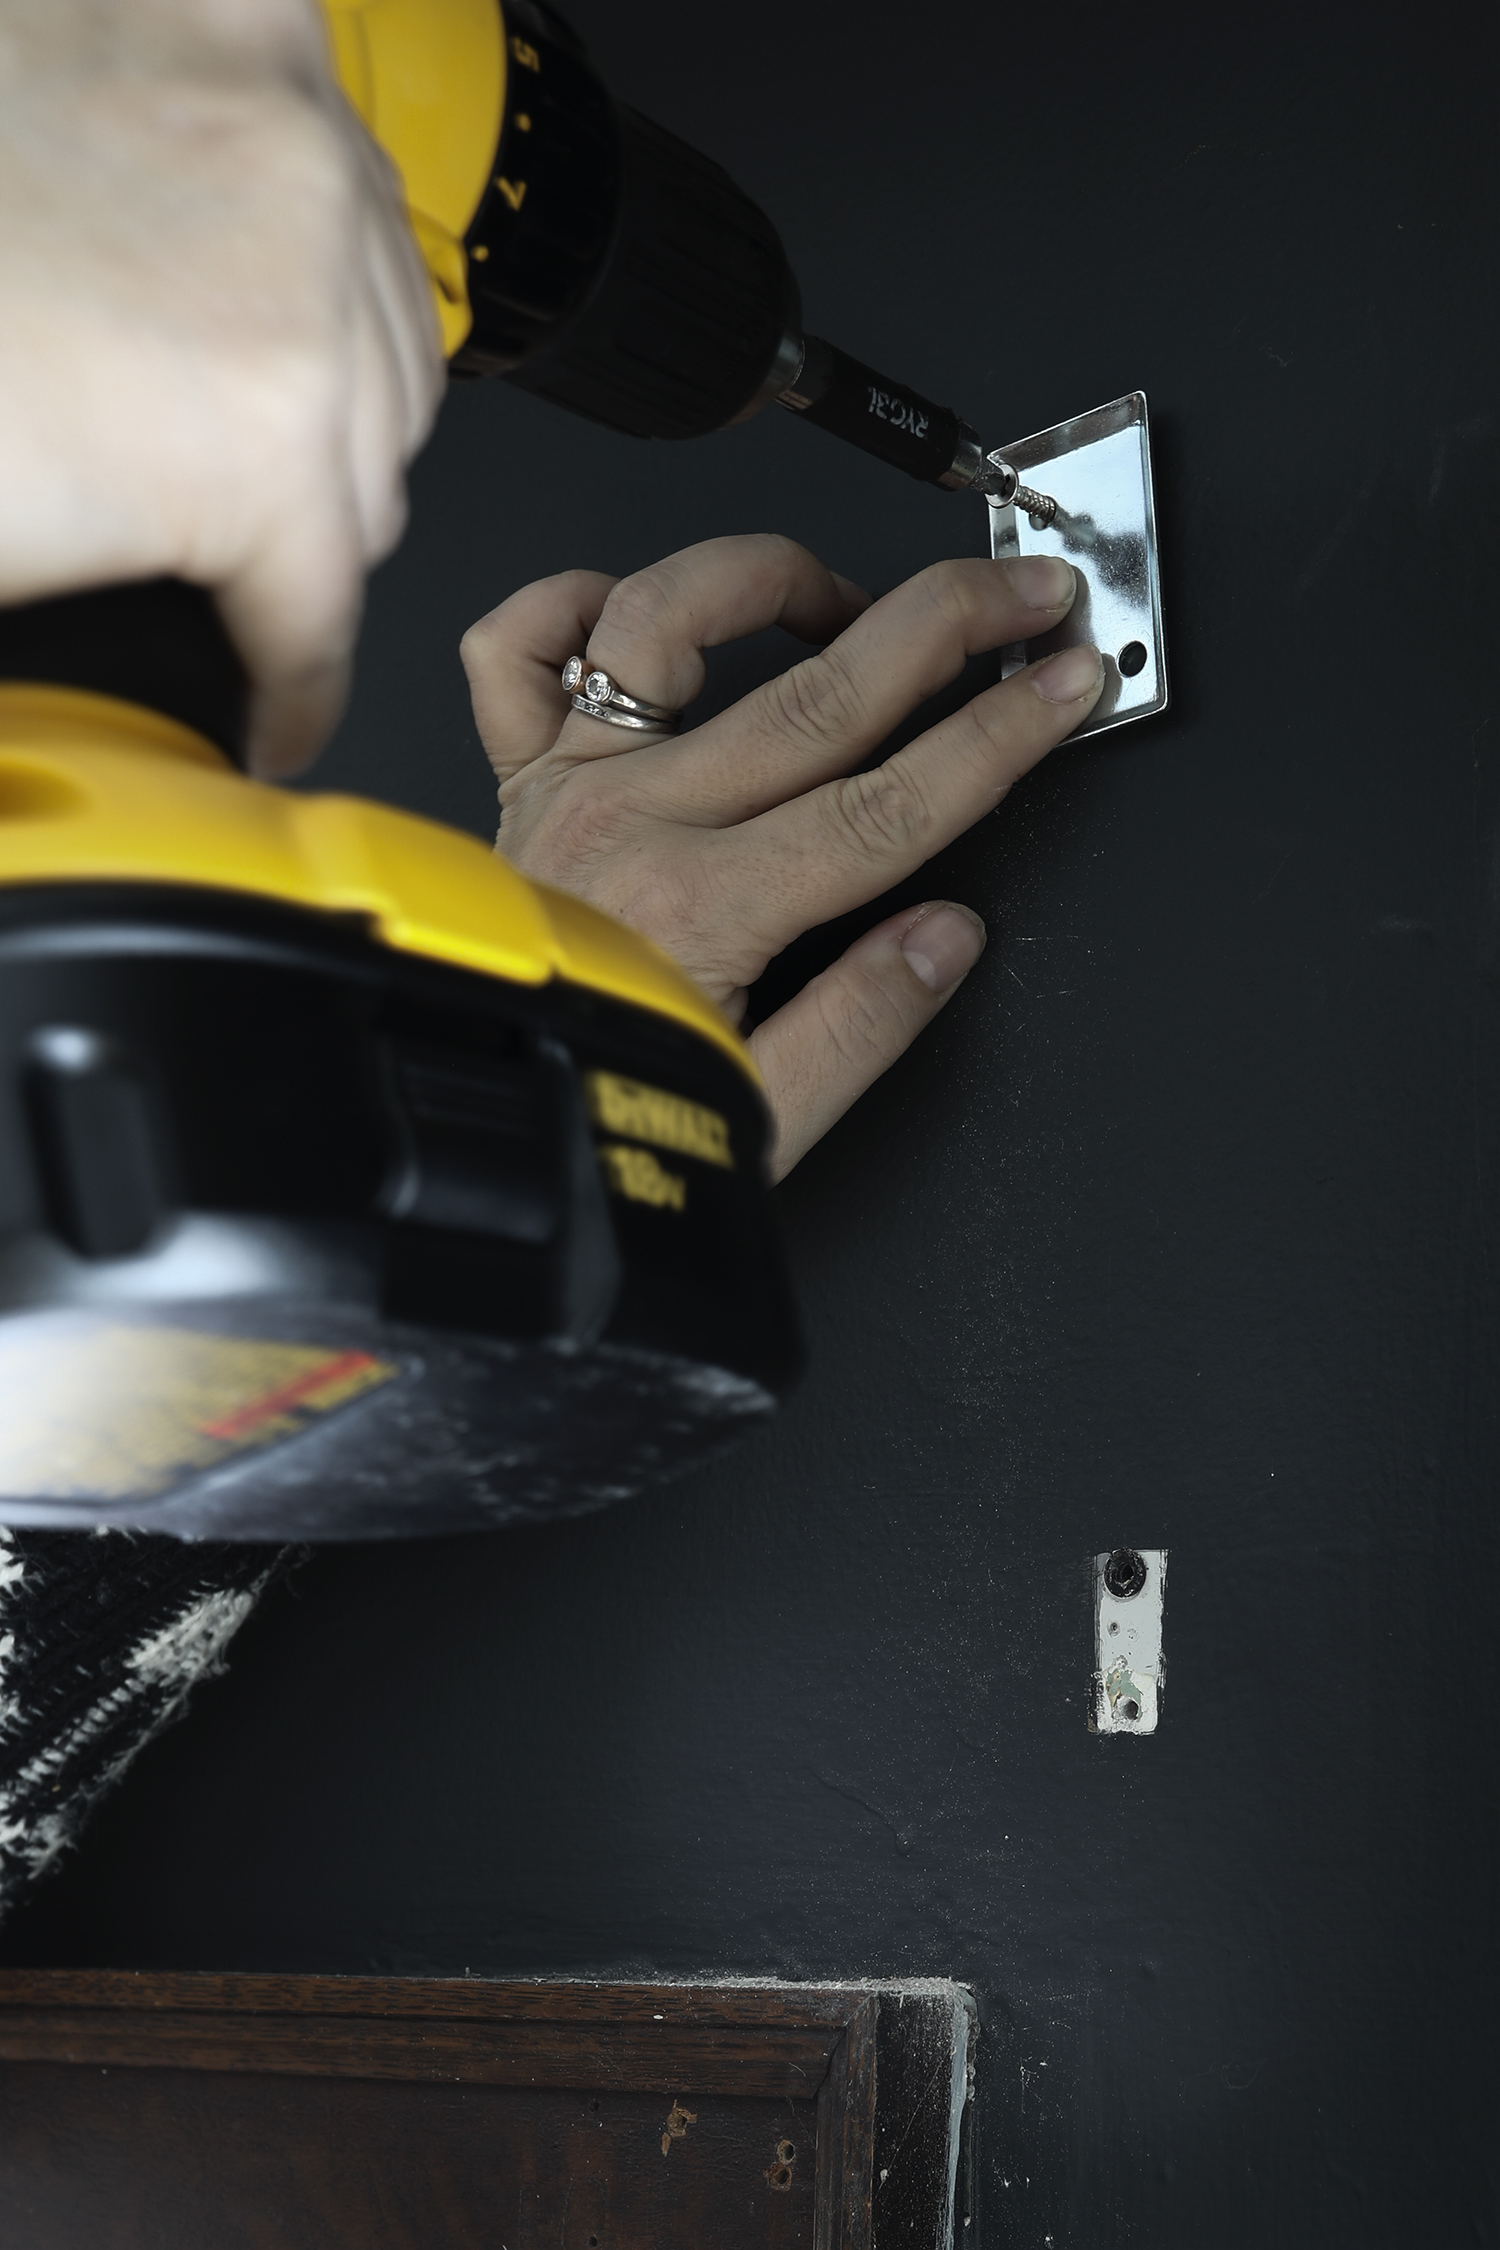
Slip the bracket onto the cleat and tighten with an allen wrench.
Make sure to keep the side of the bracket ring with the small hole facing down. This will come in handy later if you need to use the screw to tweak the level of the rod. I’m not sure if that is what it’s technically for, but that’s what I have been known to use it for.
I can’t wait to share more about this Ventu table and Kissa chair set from Article. That story is coming soon…
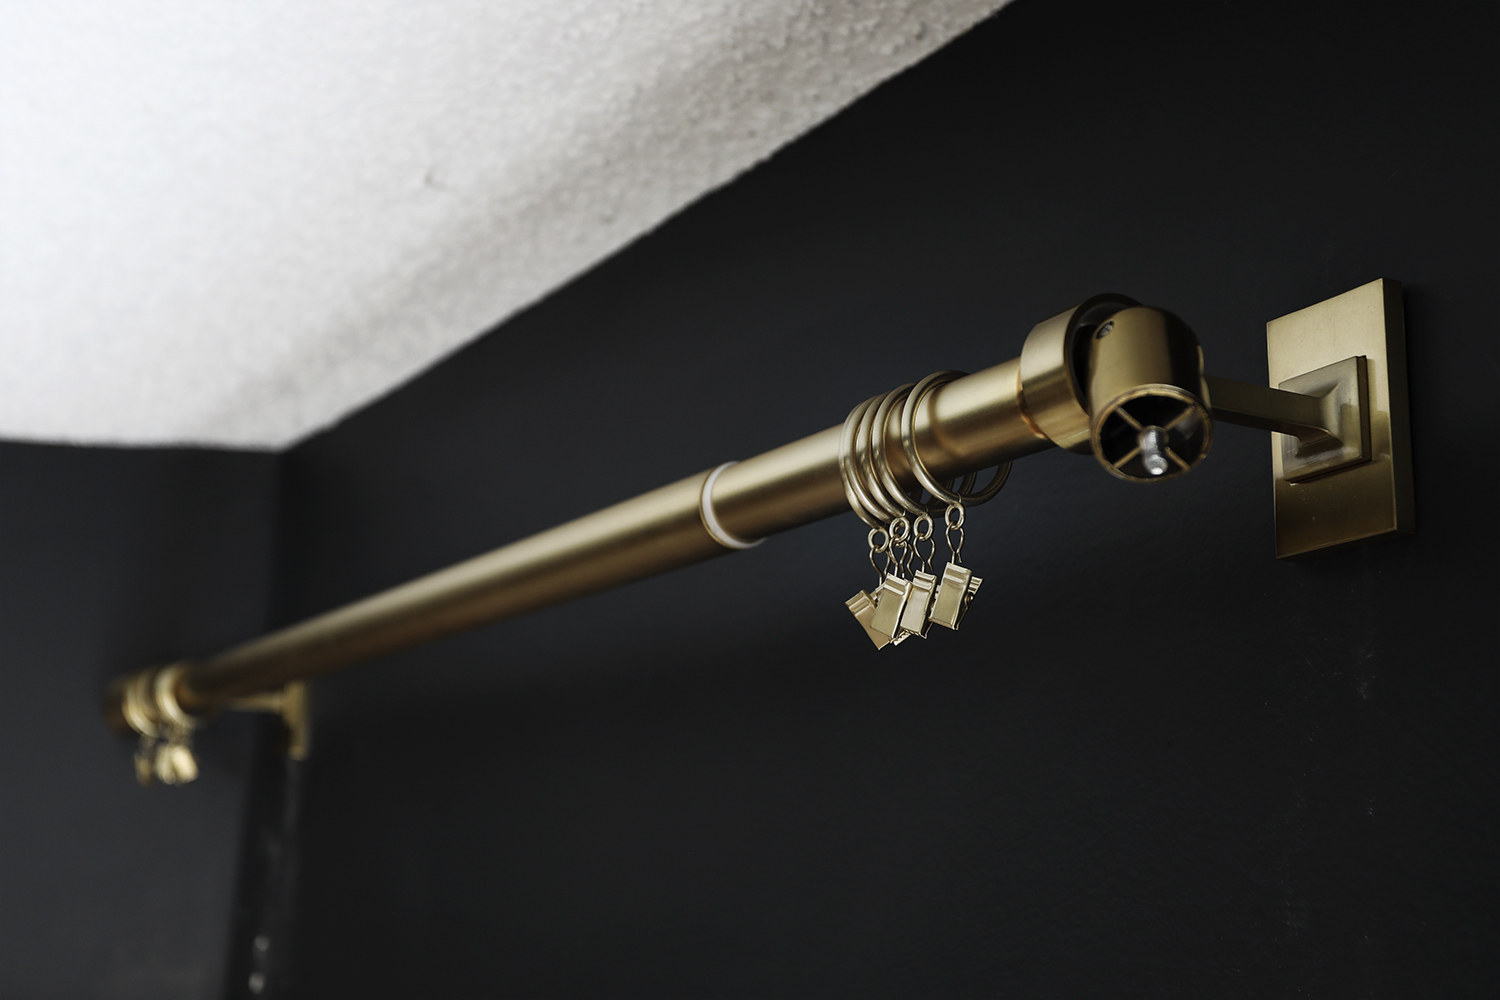
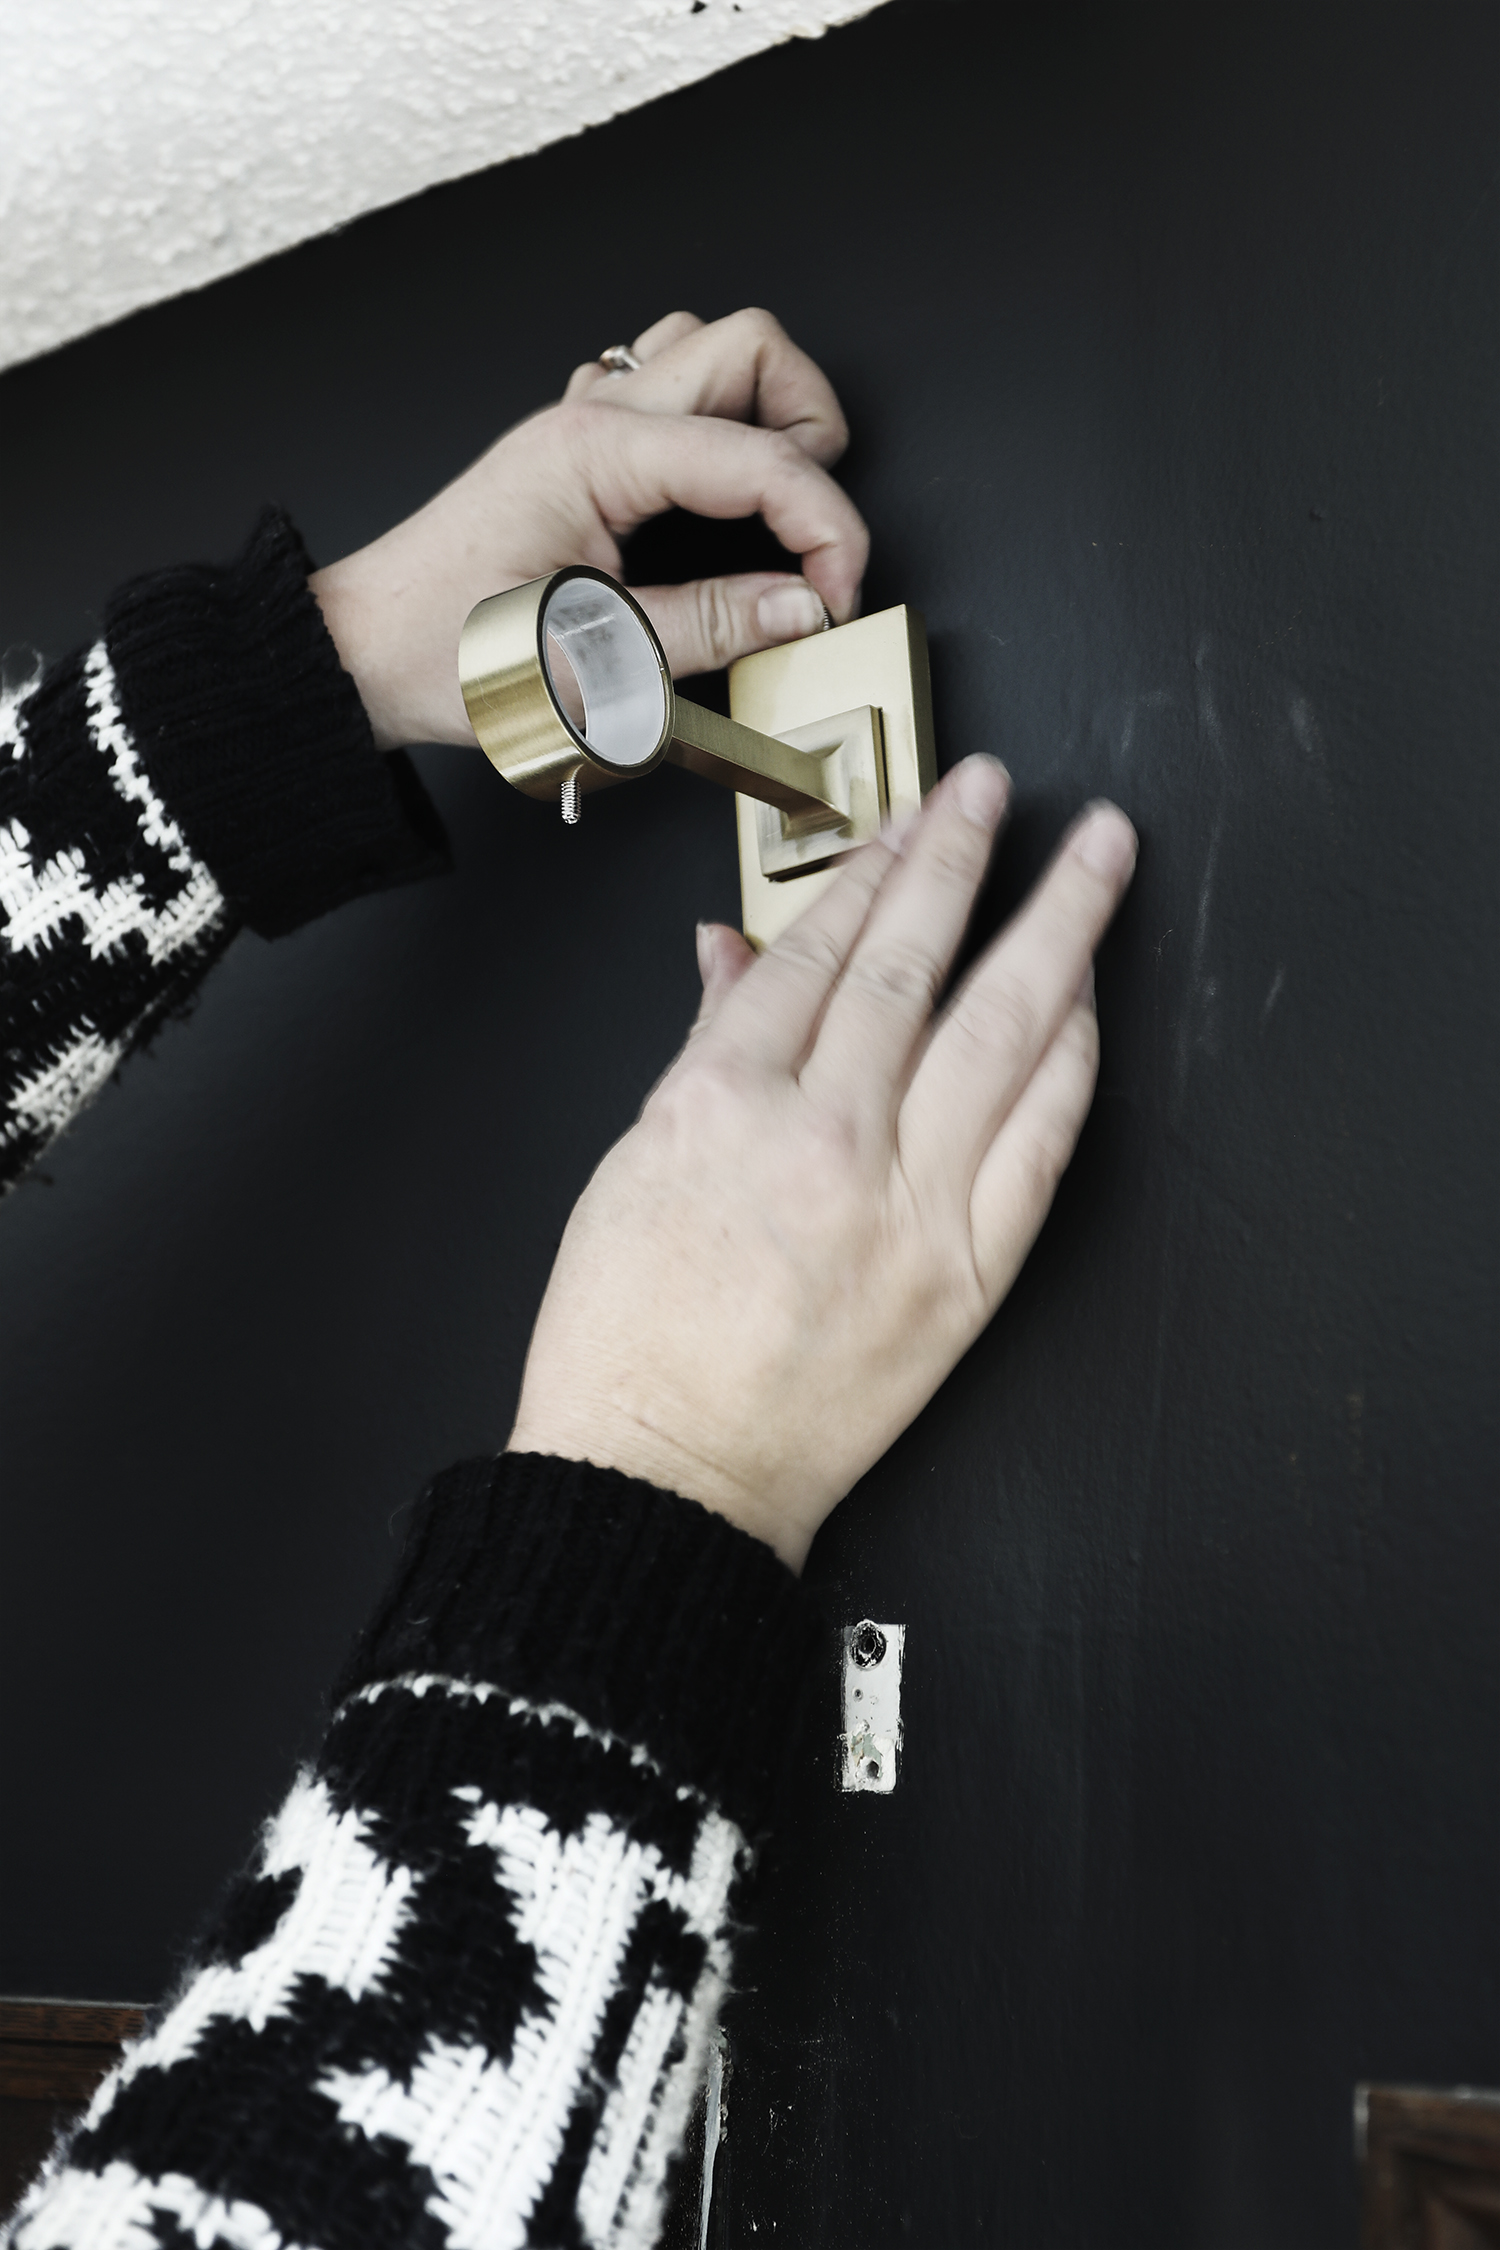
Install your rod. Minimize the length of your rod and then extend it to fit between the two bracket holes. If you’ll be using curtain rings, I would recommend slipping them onto your rods now as it will get tricky to do so after the rods are installed. Attach the finial and corner connecter to the rod.
Repeat these steps with both the middle section and right window.
I think I have my own way of pleating curtains, it’s a casual pleat with a little bit of elegance and I do it by ironing and clipping pleats in place. I do love a good pleat, but here in the living room, I like to juxtapose casual and modern elements with more formal ones. Curtains naturally come with an air of formality, and I didn’t want it to be too stuffy. So, made-up-laid-back-pleats it is! (these measurements are for Ikea curtain, 57″ width)
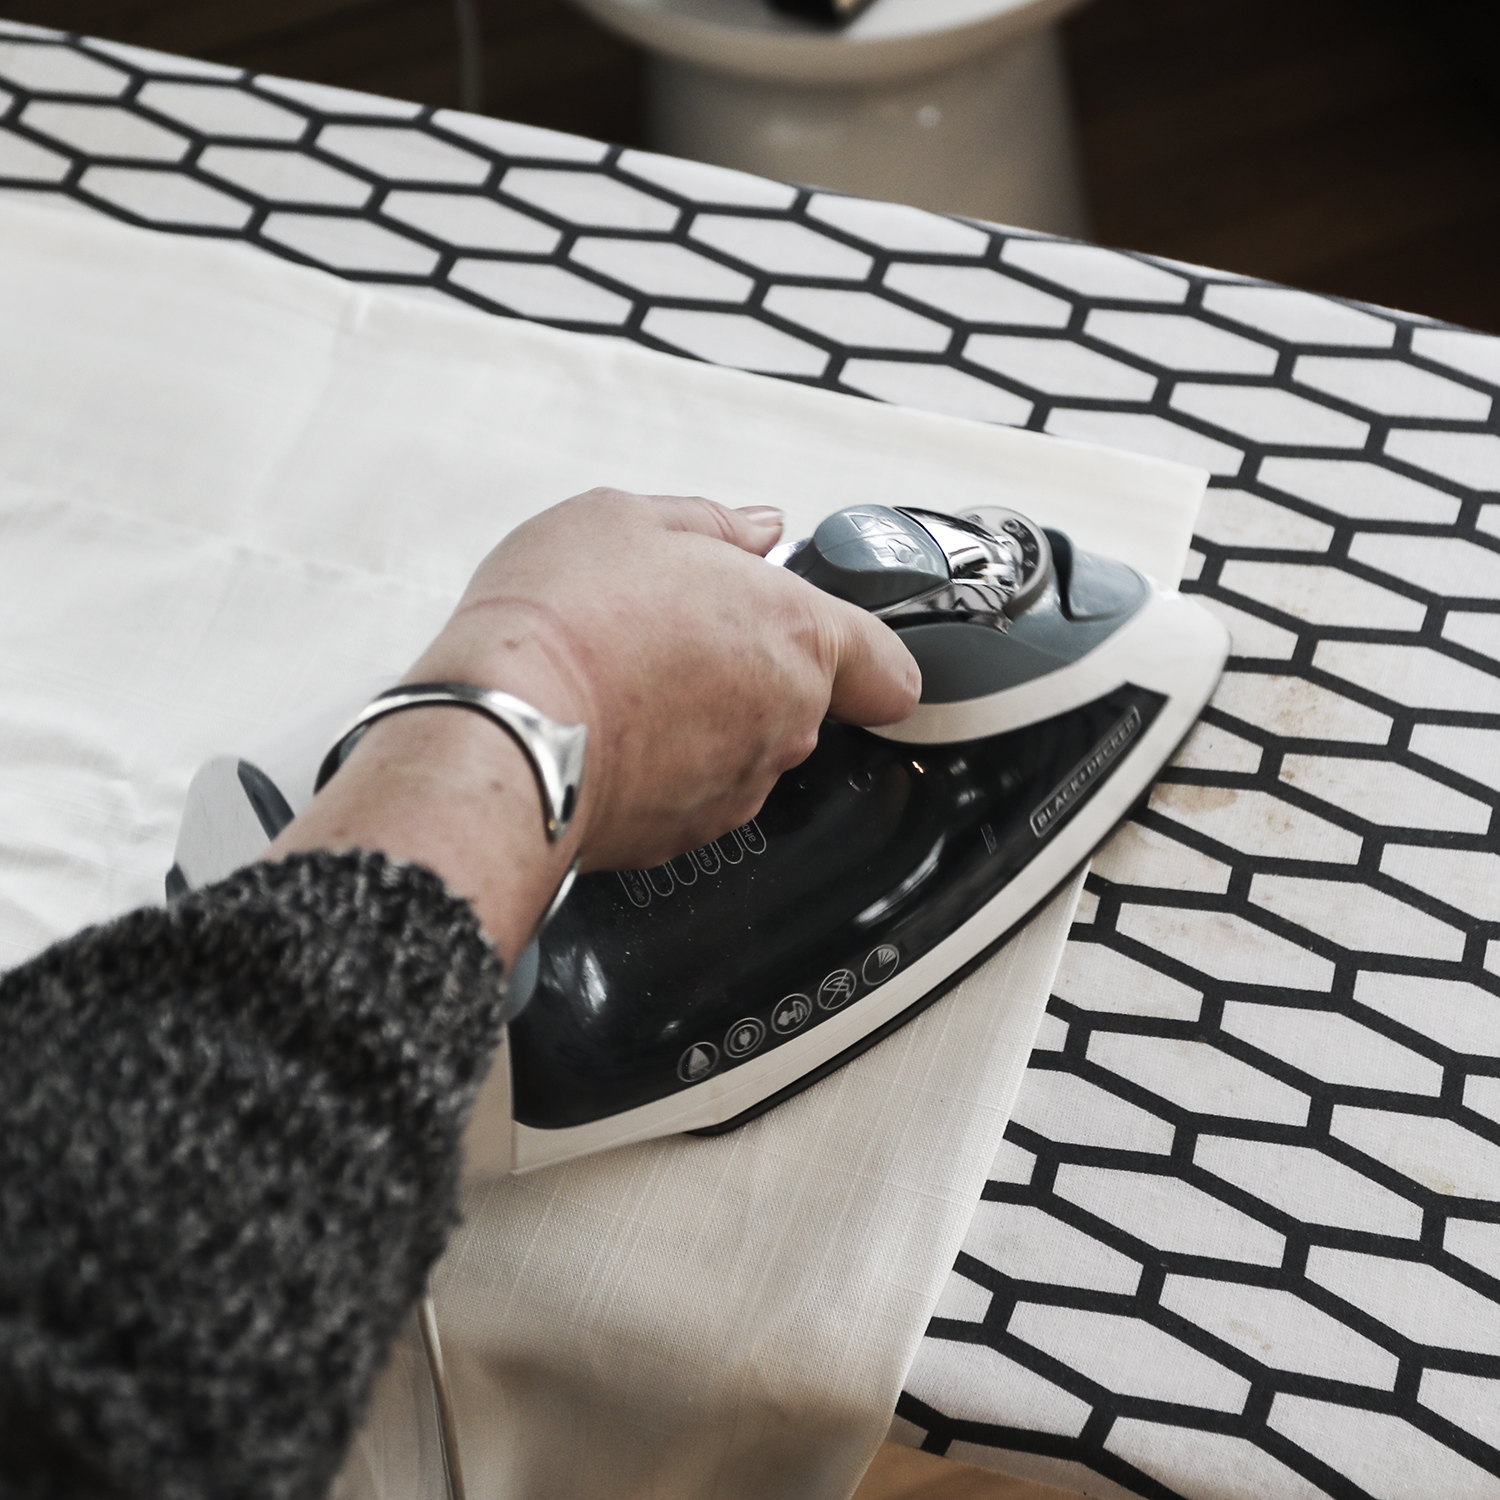
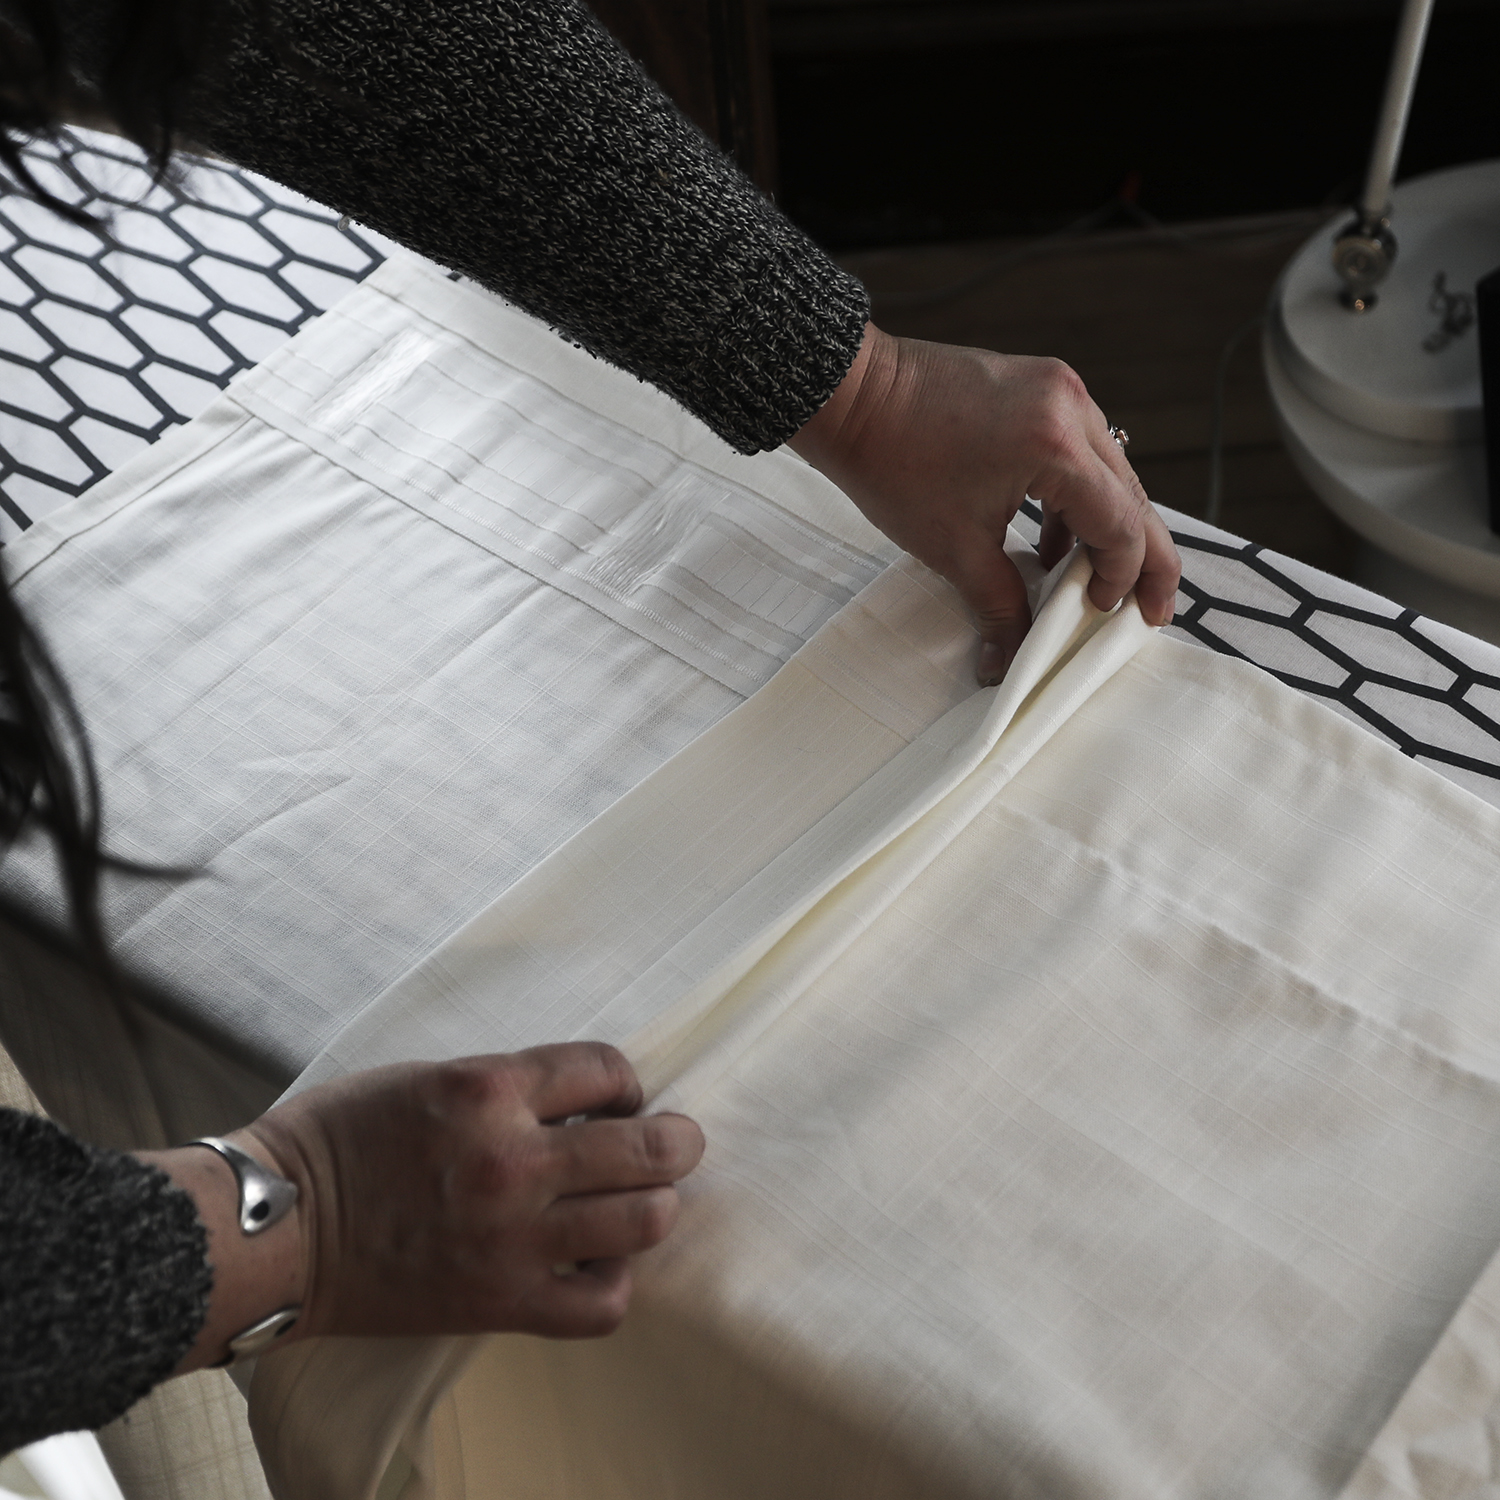
Start by folding your curtain in half and pressing the fold. You’ll work one half of the curtain and then switch to the other, otherwise it becomes too much fabric to control. This will be your middle pleat.
*Note: Press pleats about a foot from the top of the curtain, from there they will hang loosely on their own
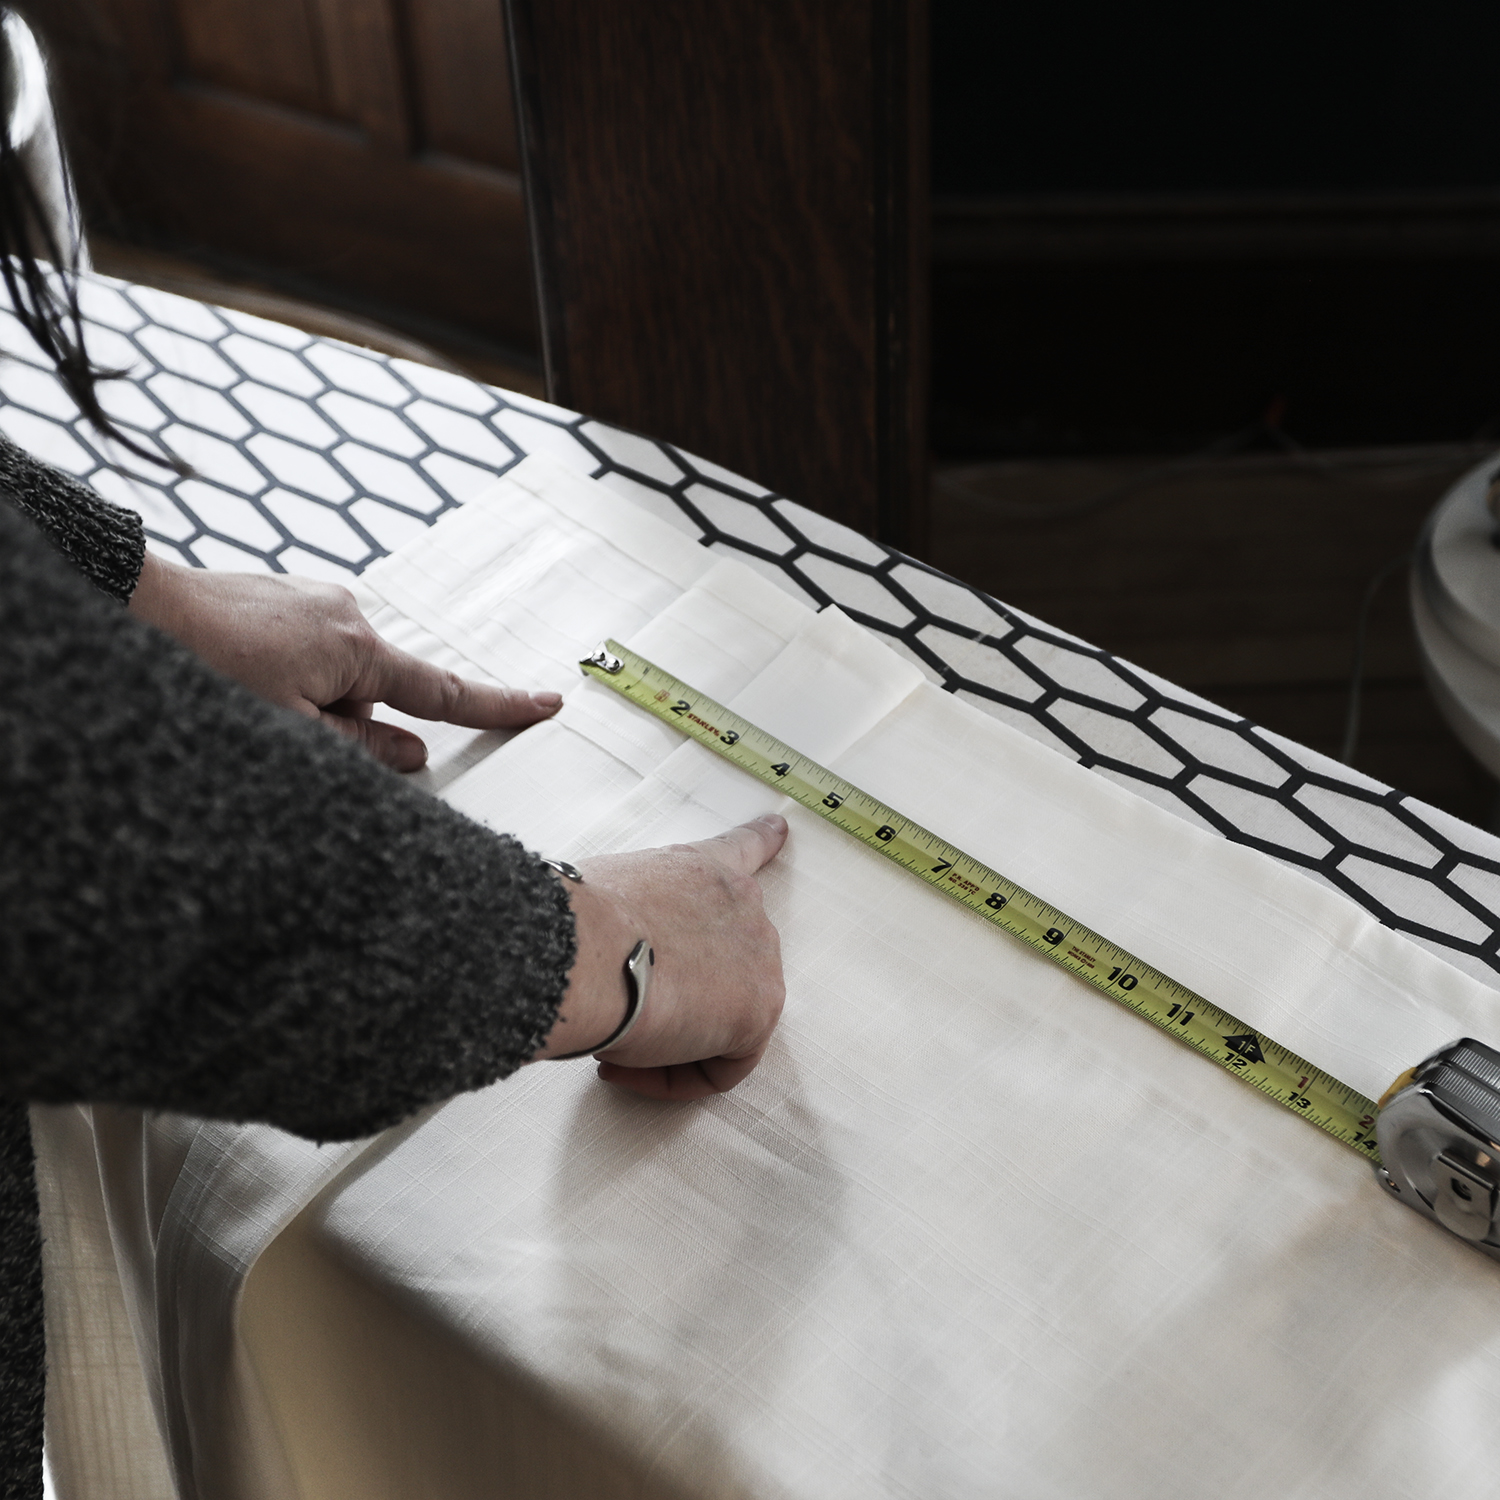
Work from the outside of the first half and work inwards to the middle crease. Start the first pleat by folding back the edge of the curtain 2″ and then pressing the top of the pleat.
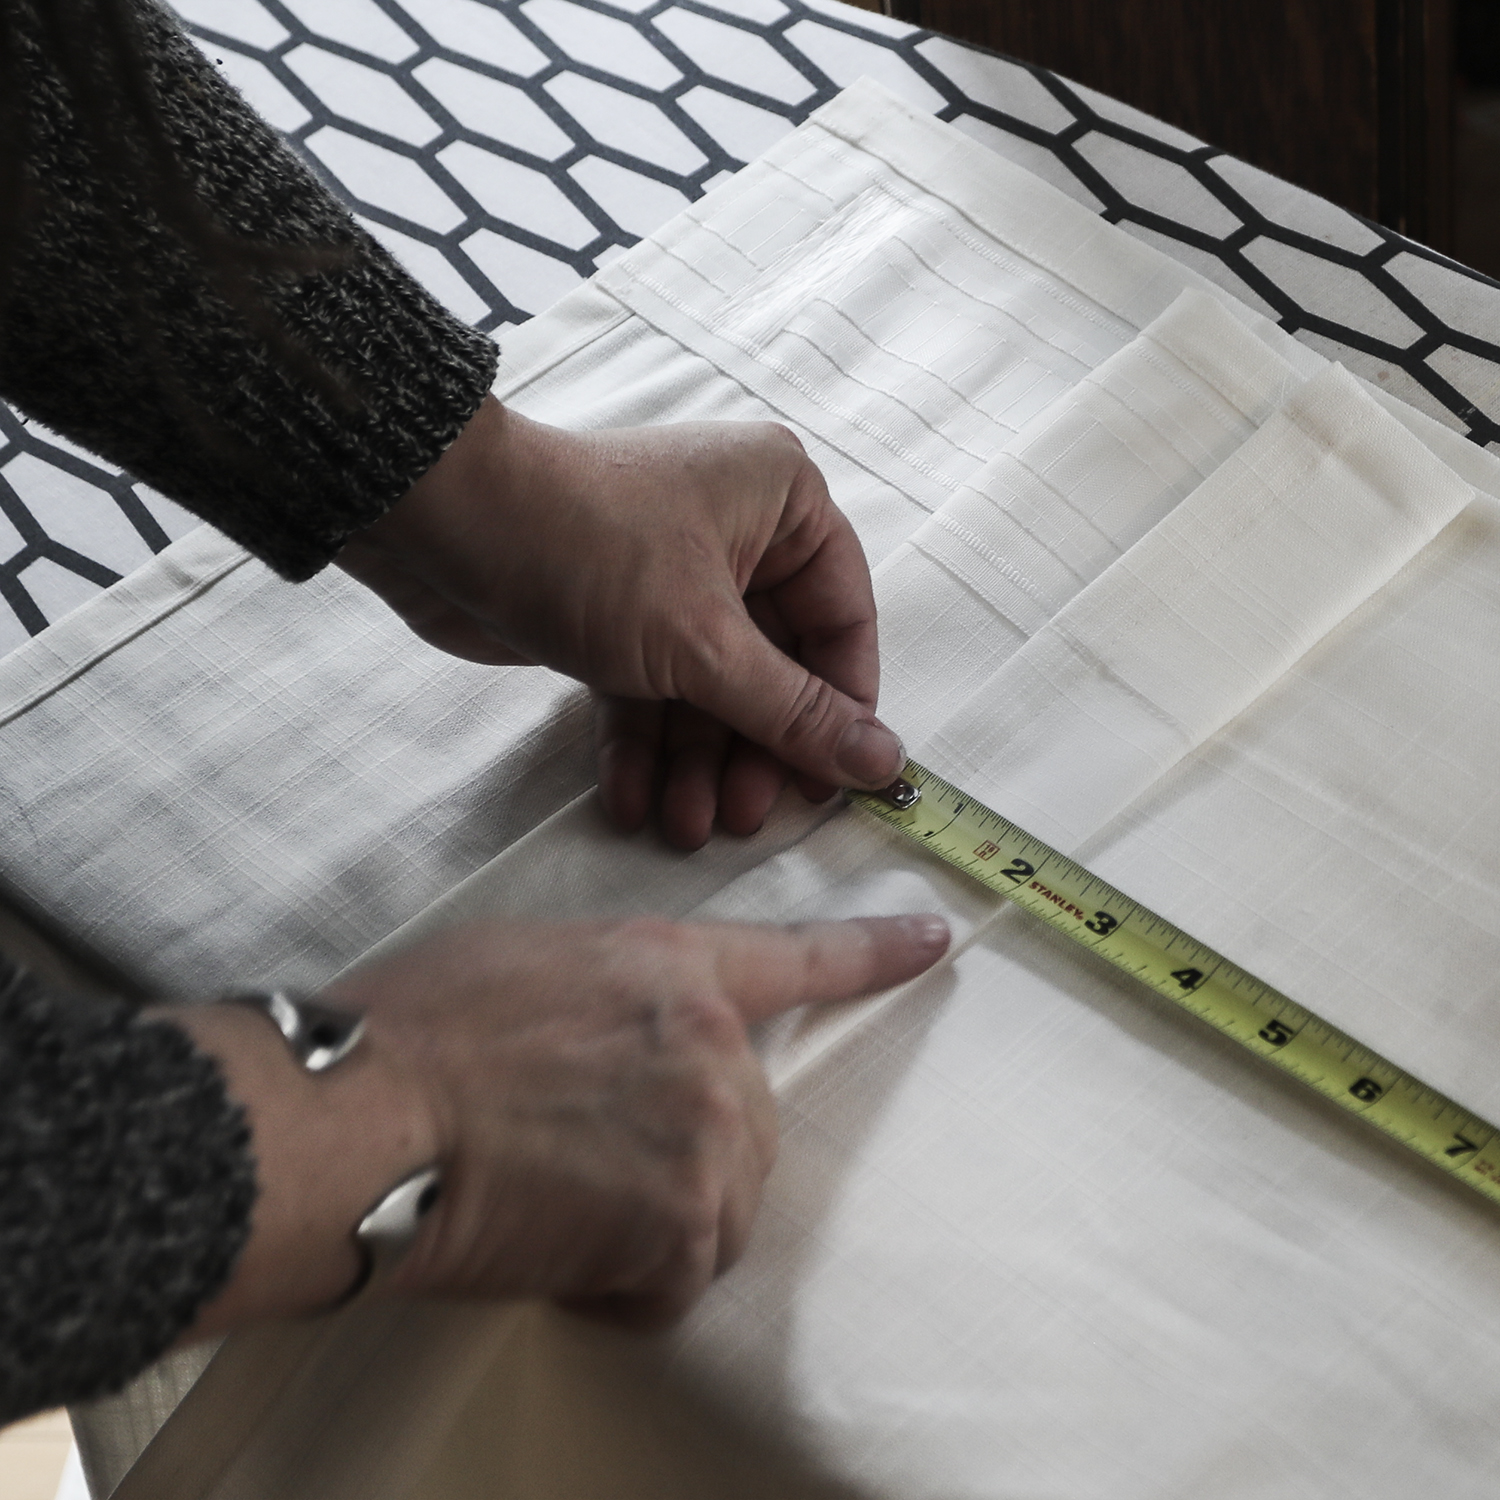
In an accordion style, fold back the next pleat. The width of the pleat will be 4 1/4″. Press the pleat with your iron on high.
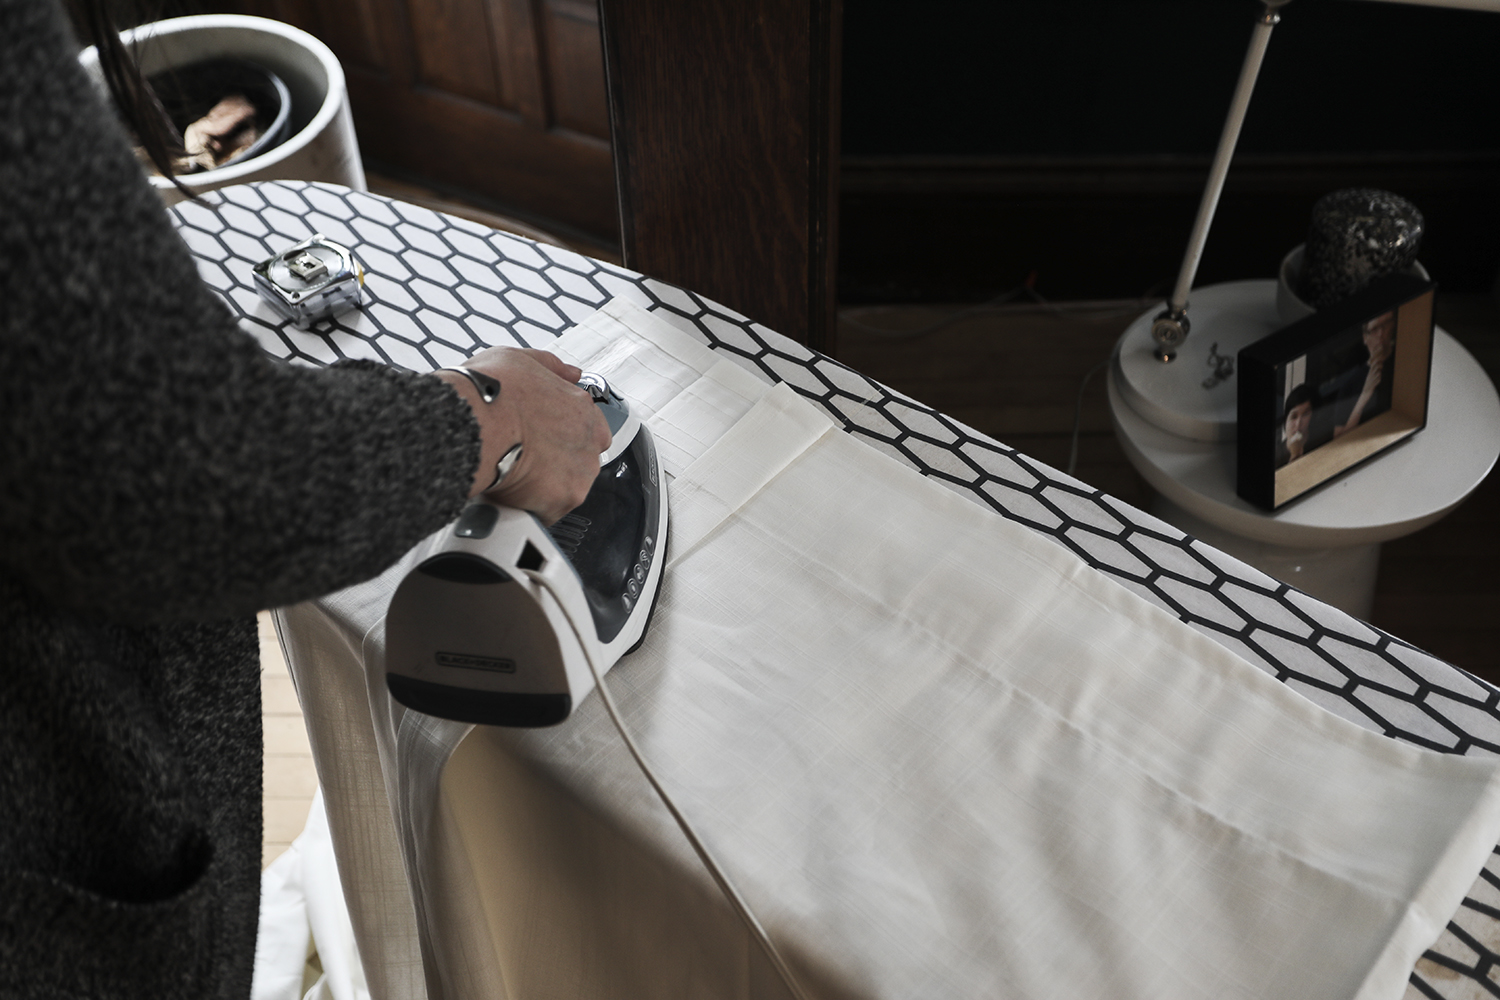
For Ikea curtains I press only the top 12″ or so of the pleat. I use the high setting on my iron and a lot of steam.
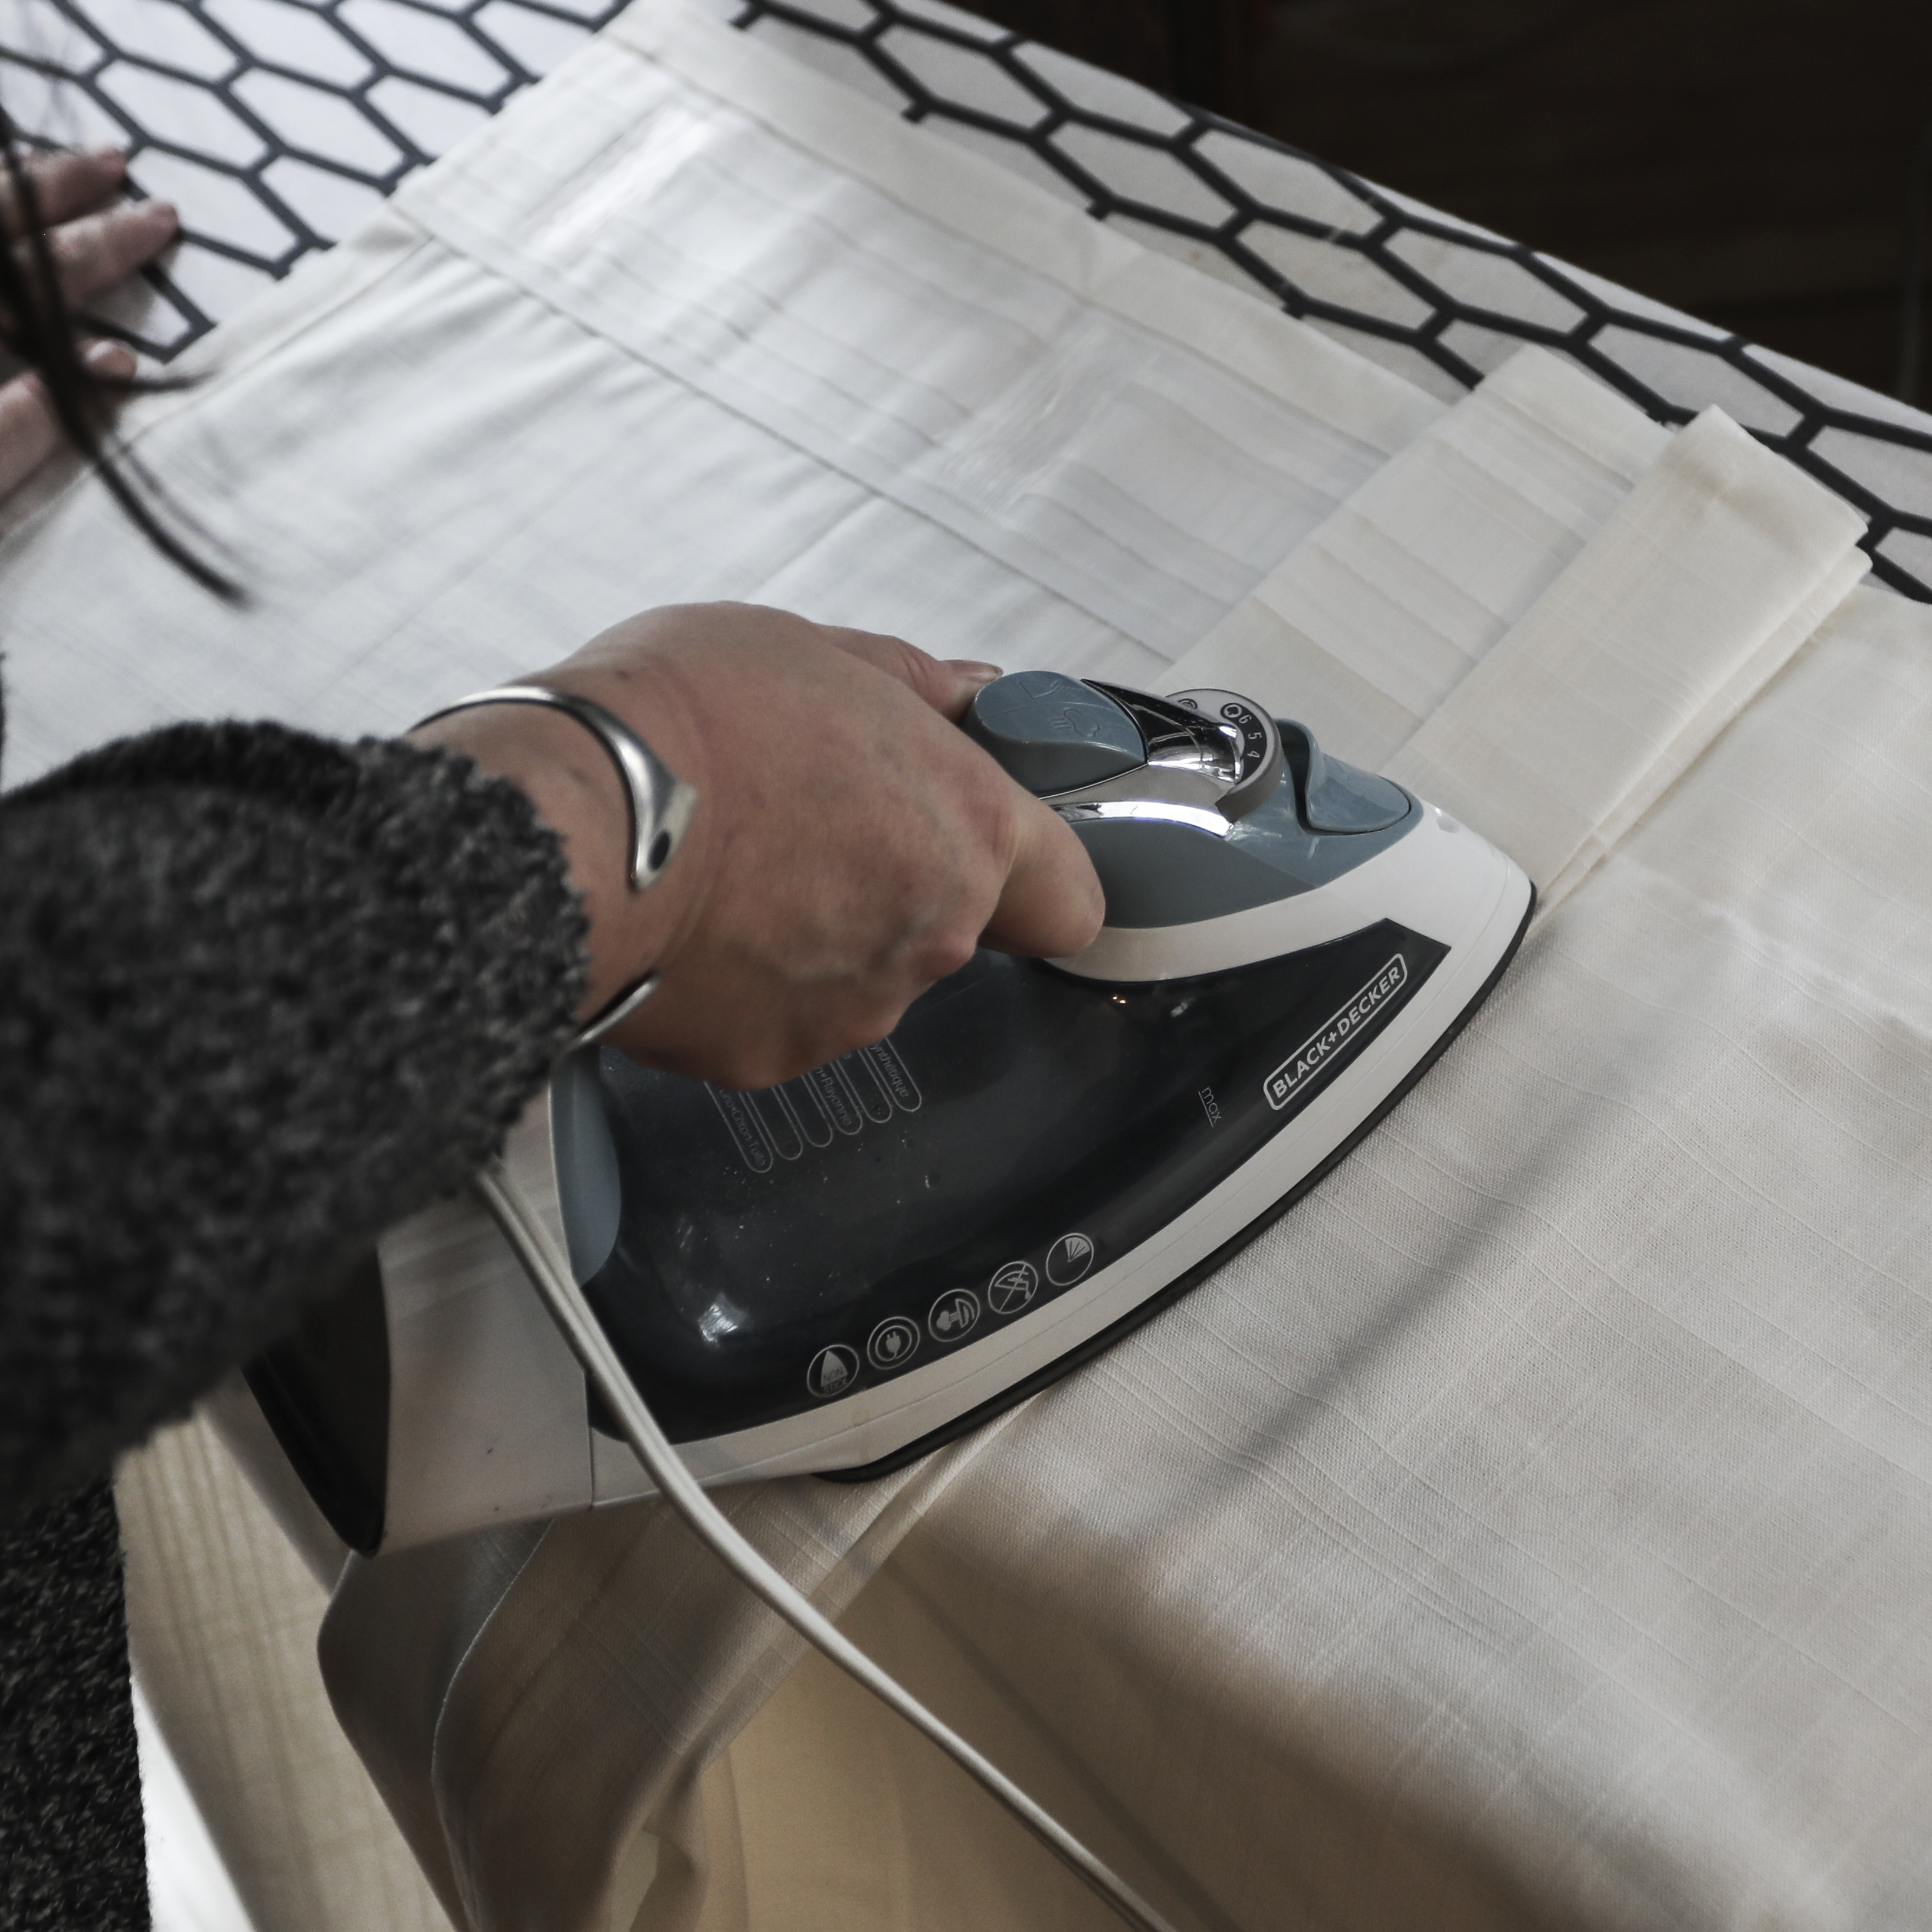
Continue working the pleats back in fourth in an accordion or fan pattern every 4 1/4″ until you reach the center pleat. Press the pleats on each fold.
Once you have completed pressing the first half of the curtain, begin doing the same steps on the other side. Starting with the initial 2″ pleat and then continuing every 4 1/4″. When you have completed the pressing you should be left with 7 pleats.
Hem pleats to your desired length – I like to leave mine an inch longer than the length from the bottom of the clips to the floor.
Hang your curtains from the clips (previously attached to the curtain rods). I take care to clip all of the pleats the same direction. You will see that there is a front twist, and a back twist to the clips. Either is fine, as long as you stay consistent with the direction you have chosen. Clip the curtains on the front facing pleat, and let the rear pleat hang loosely. Gather your curtains at the bottom and recreate a loose version of the accordion pattern you were making when you pressed the pleats. Let the curtains rest on the floor and straighten to your desired preference. I used a hand steamer to let out any remaining wrinkles in the fabric.

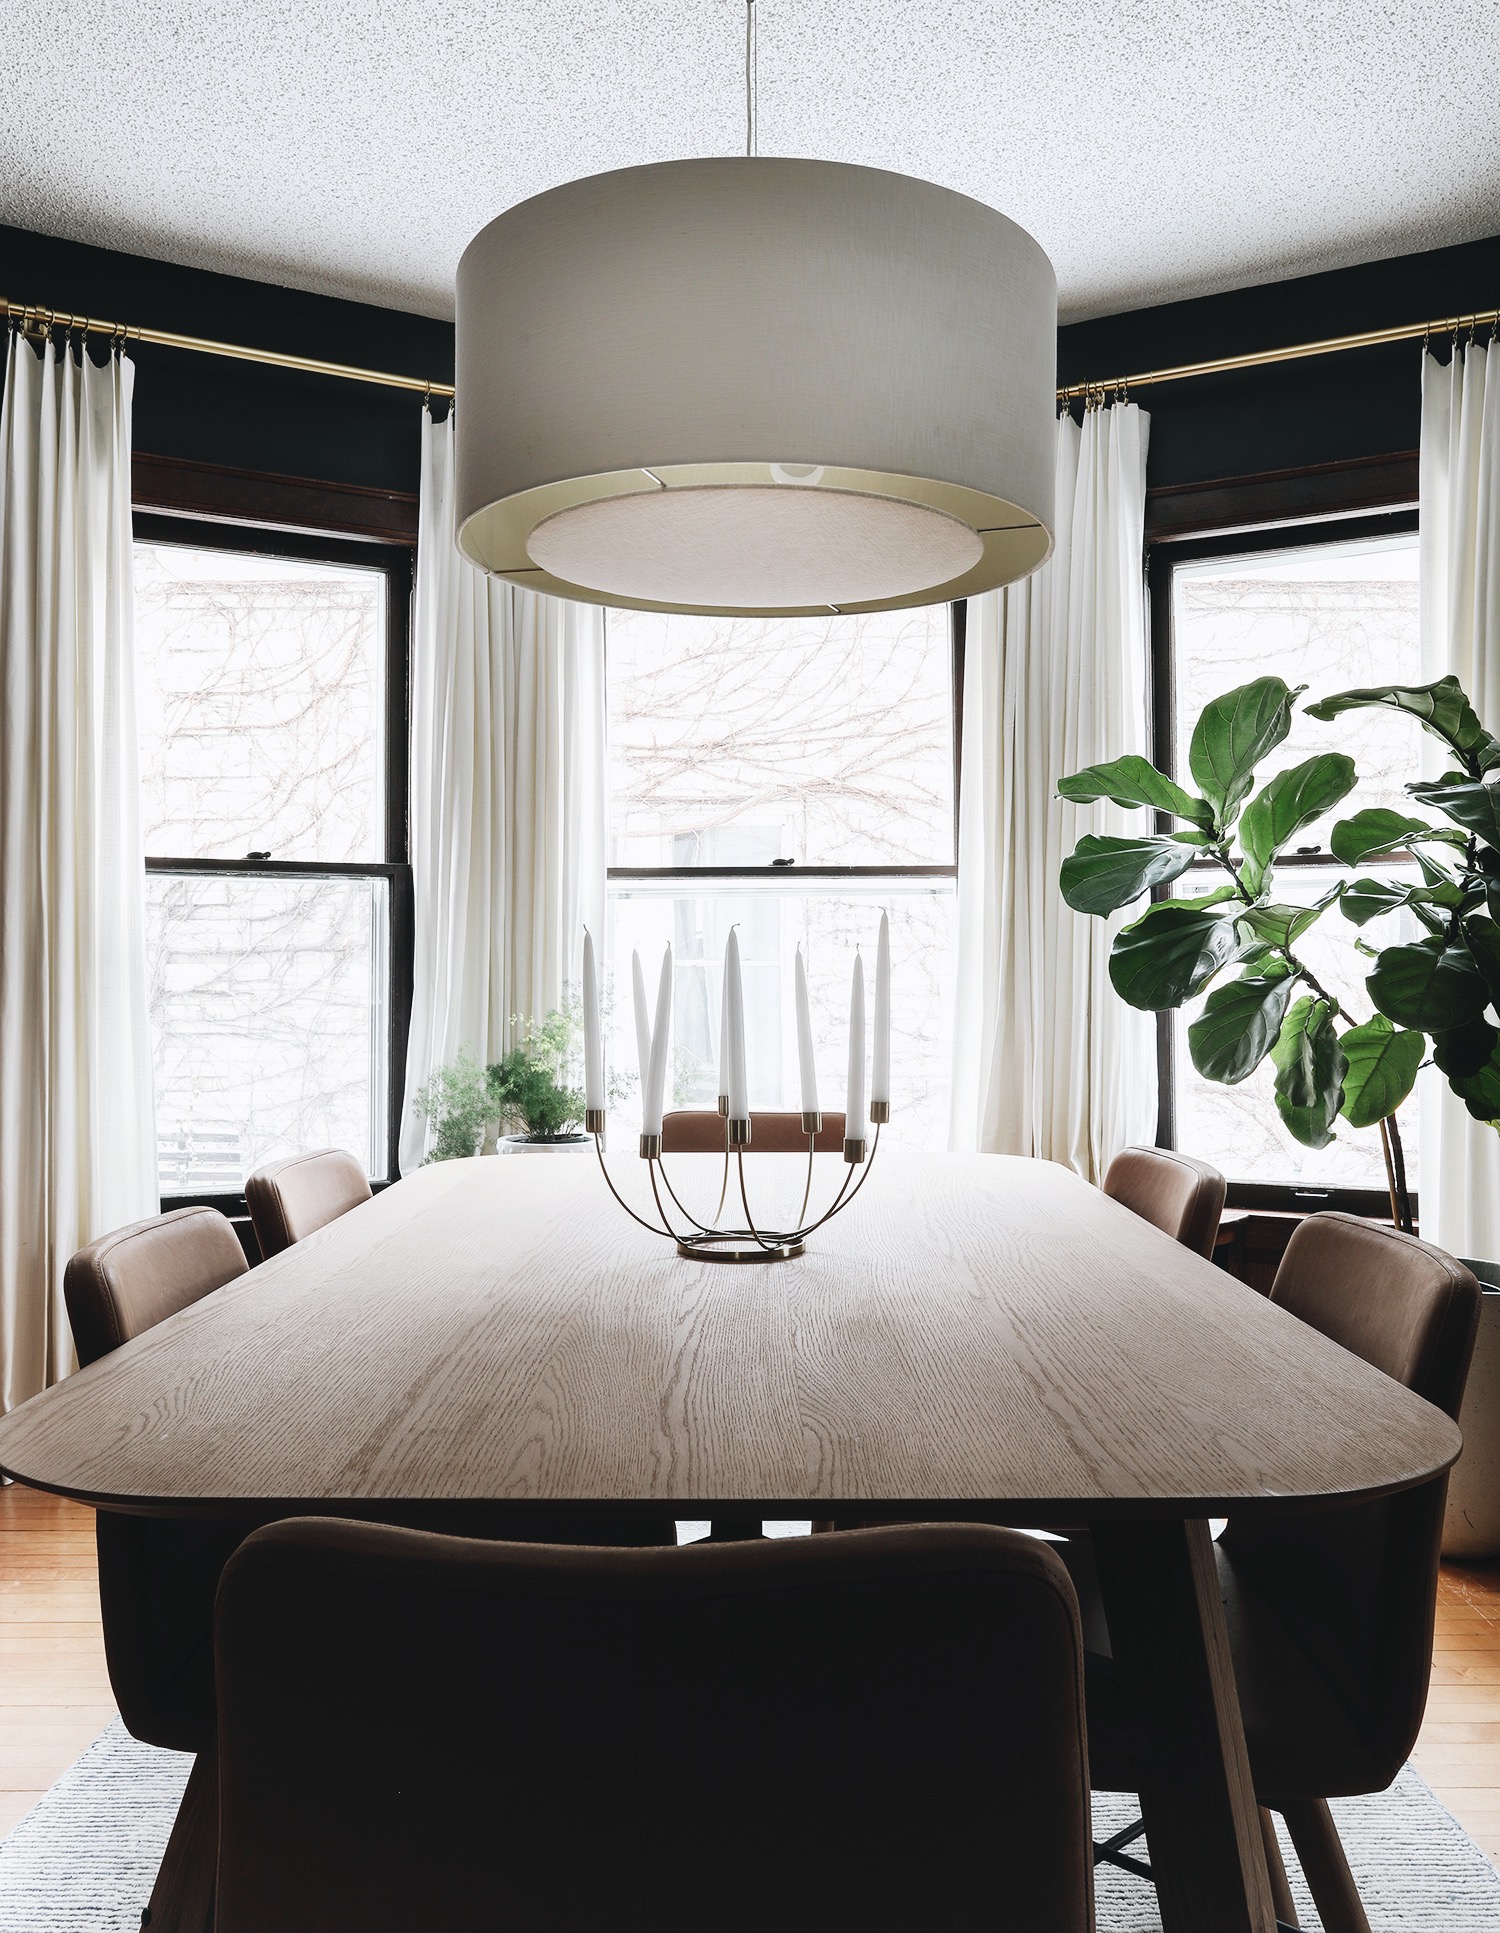
Yeah! It’s feeling good to spend some time in the dining room. I haven’t touched it in a few years and it is really ready for a little facelift. I’ll be hanging a new chandelier this week, and then I’ll be ready to share the whole enchilada, table, chairs and all!

Tutorial : Installing a Ceiling Medallion
A Dining Room Refresh with Article
Truth : Dark Walls Luv Unpainted Woodwork
Thinking About : My Dining Room


Hi!
I have a major crush on your home – it’s amazing! I just bought a 100 year old American four square and am beginning my journey with this home. I essentially want to recreate your house :). Unfortunately, I am such a visual learner. Would you ever consider creating a video on how you pleat your curtains? Also, we’re you able to buy the shorter length curtains through IKEA for your bay window or did you buy the longer ones and then trim/hem them? Thank you for sharing your home! I can’t wait for new posts.
-Kim
Thank you so much for this tutorial! We are following your instructions for our bay window, which has had us stumped until now! One question, did you pre-wash the Ritva curtains prior to pleating/hemming them? I have seen conflicting advice online about them shrinking and the quality changing. Is this step necessary?
I would like to have installation & measure for pully tack.
The curtain we have total weight 30kg