


 Hello! The kids are back in school, everything is awesome. Even though my kids operate themselves for the most part these days, they still interrupt my mental focus just enough to always feel like I’m never getting anything done. Look at me now, two days into school, I am at home, beds are made, messes cease being created, and I have time to share what’s been slowly happening on the kitchen and addition over the summer.
The last time I was on the blog we had just started breaking ground on the new small addition on the back of the house. To catch you and or remind you, this addition will soon be our new mudroom, a half bath and a main floor utility closet. At the same time we are taking the space that use to be our kitchen, pantry and mudroom and replacing that with a larger way more efficient working kitchen!
Let’s begin the tour shall we?
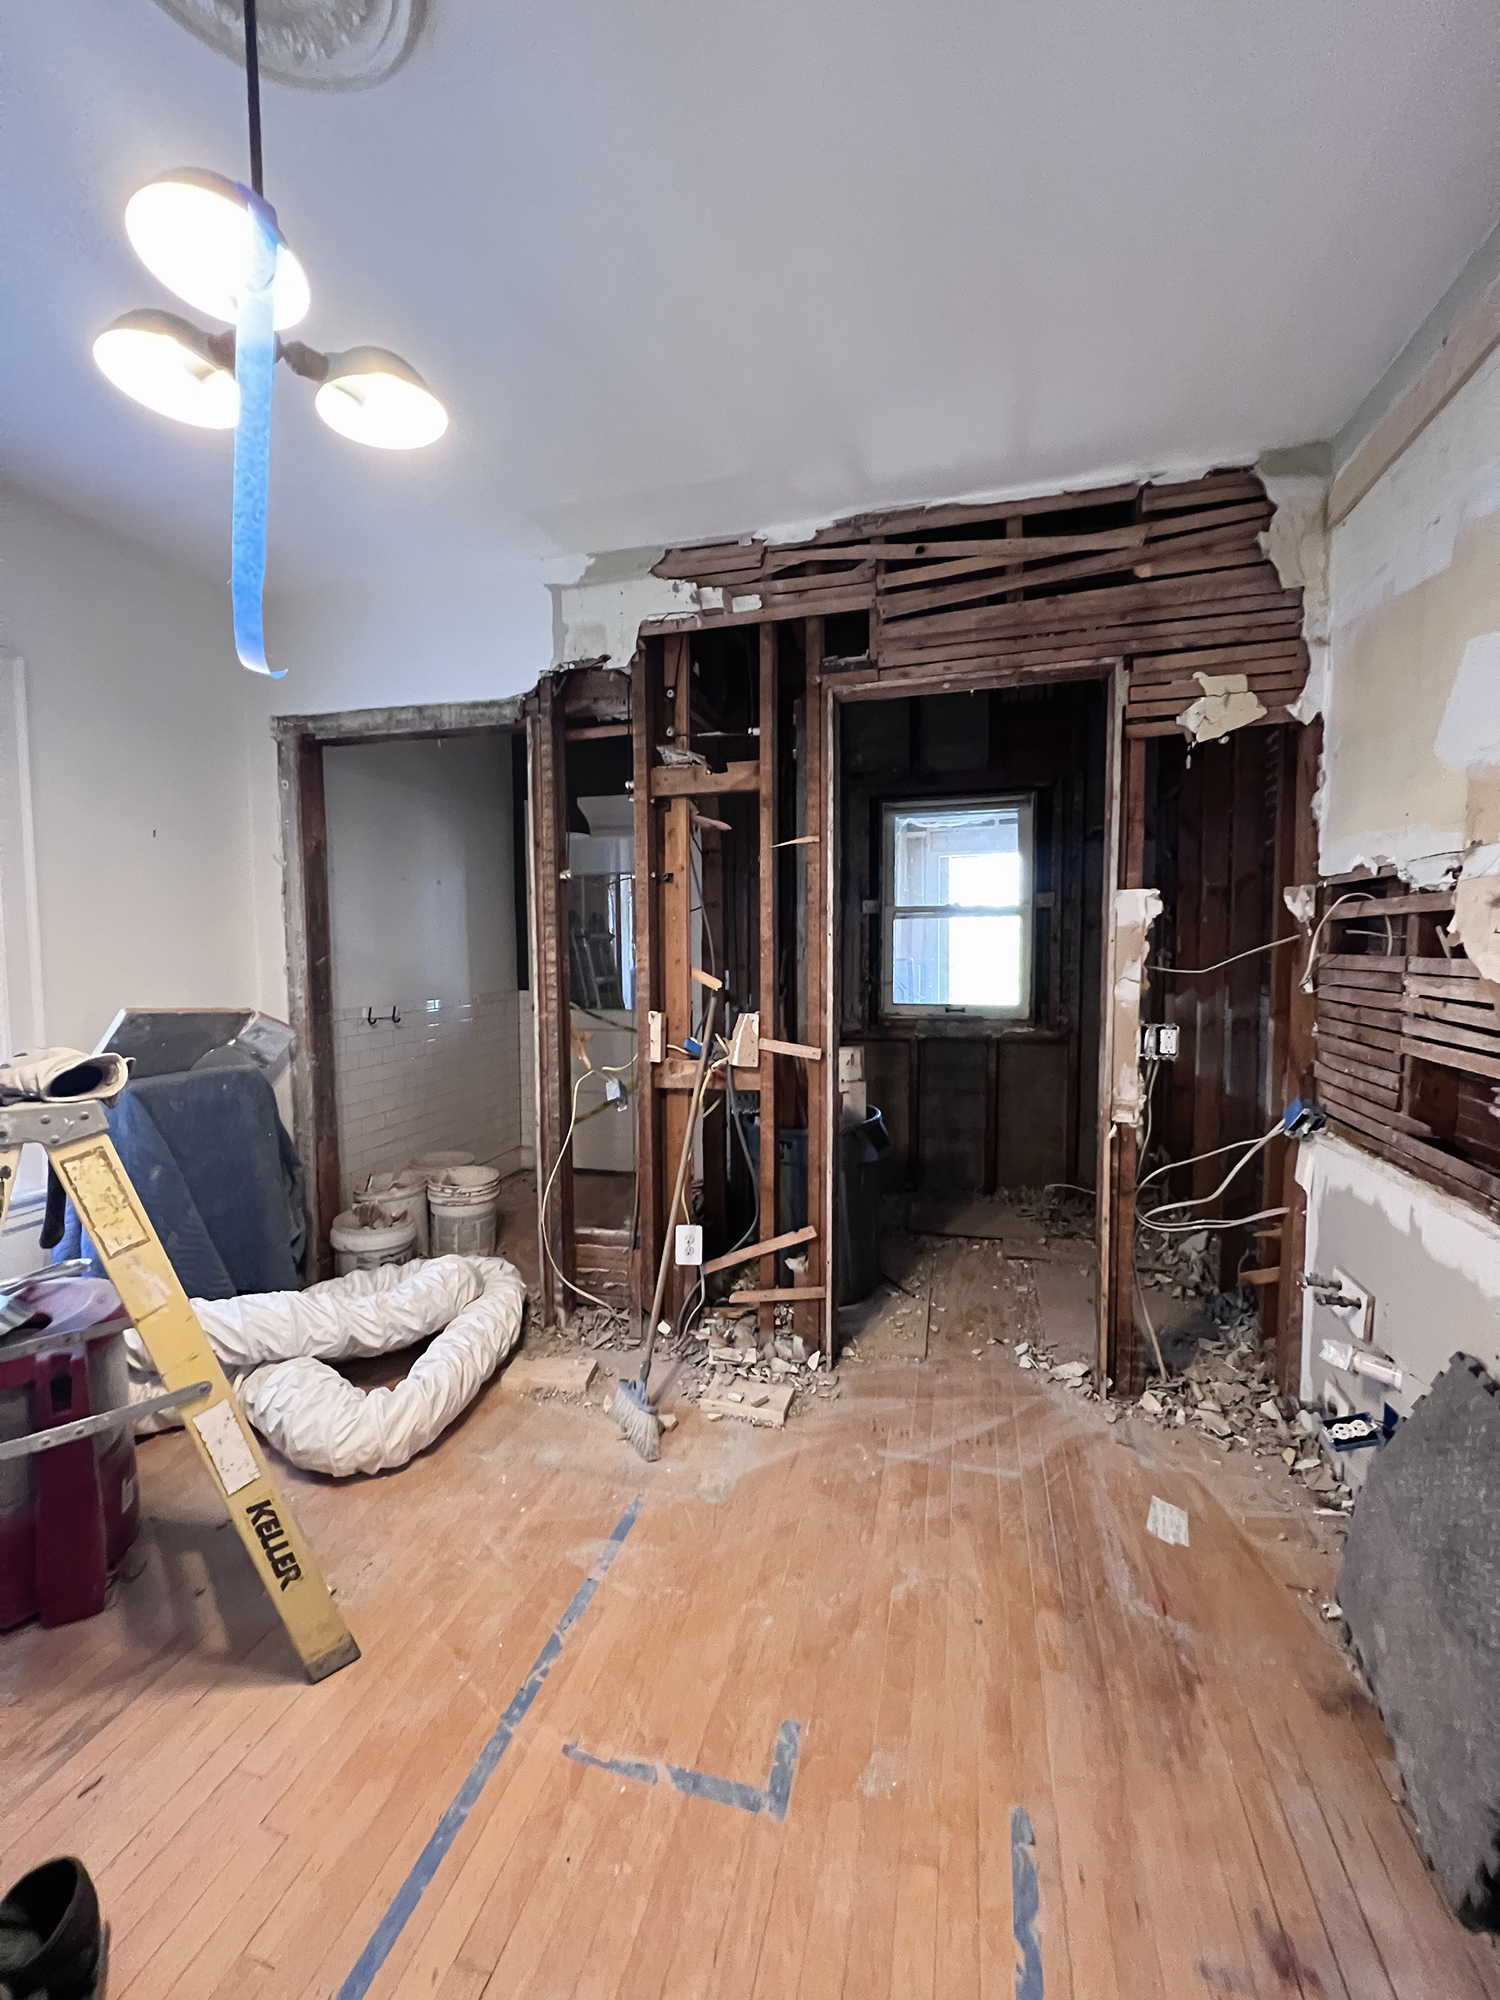
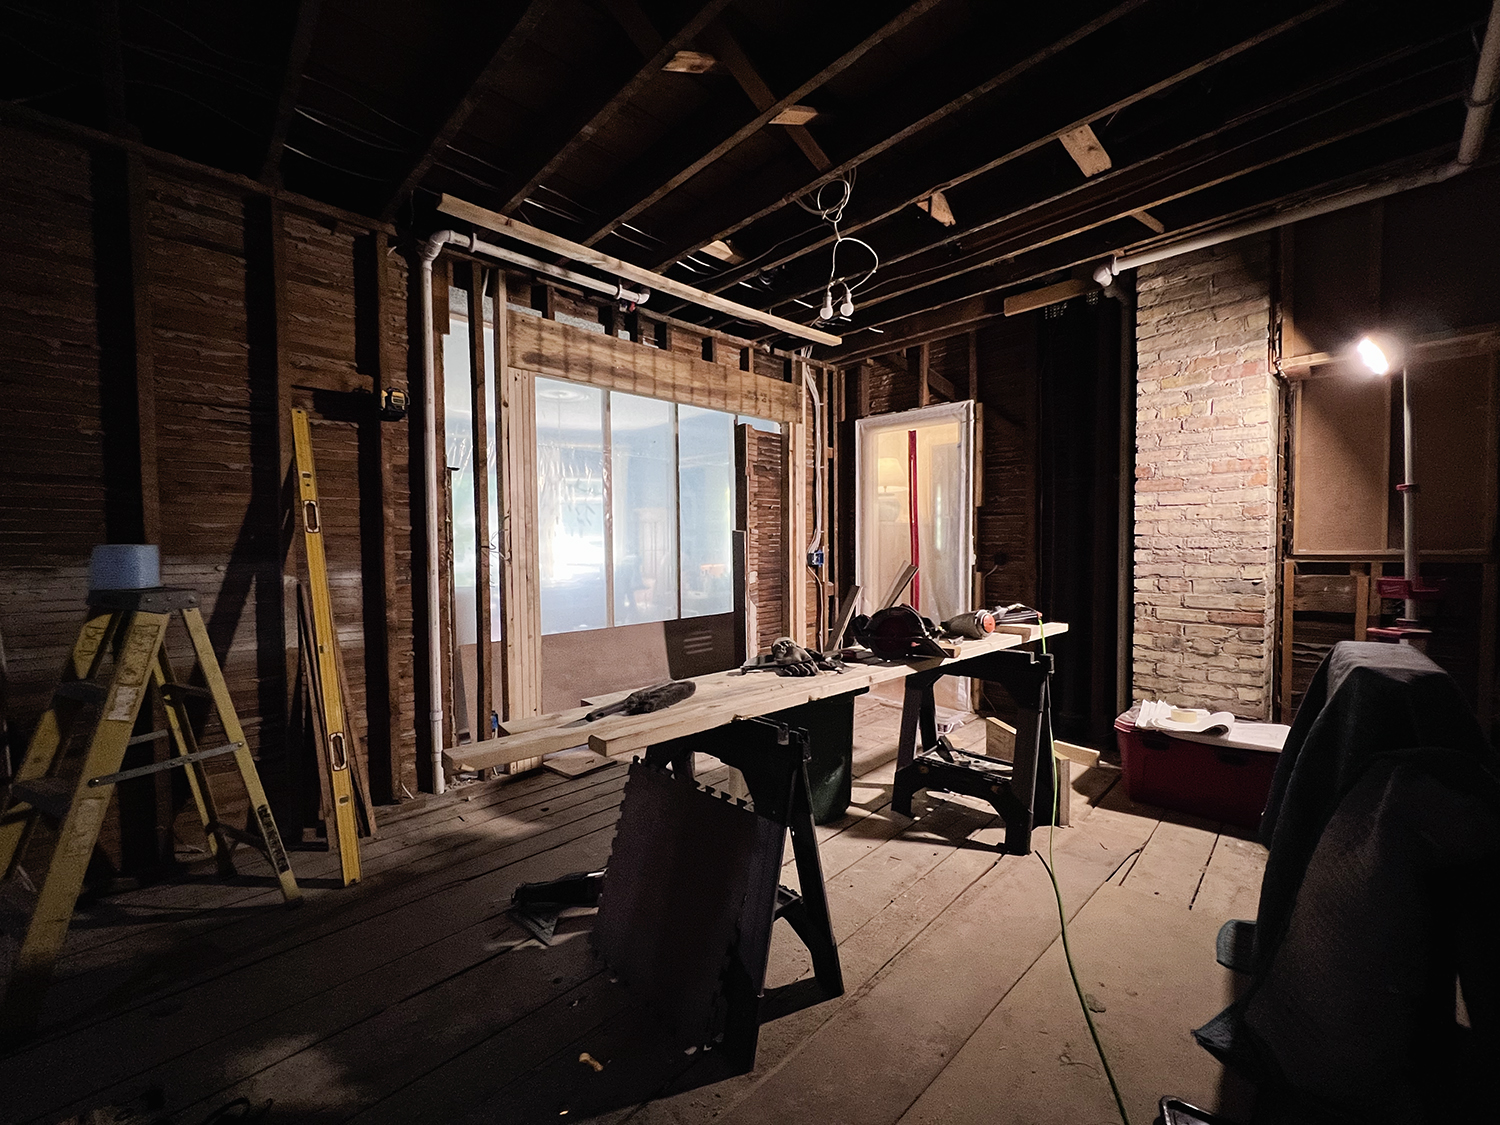
It was an exciting day when the back wall of the house was torn down to reveal the new flow from kitchen to mudroom. Our carpenter Ben, spent nearly a week doing demo on the space before he could begin to put it back together. I have so much admiration for Ben, he has created this whole space nearly single handedly and it’s super impressive to see. I feel for him that he has to kill himself in the heat of the summer, but I hope that he feels like he has created something that will be loved for a long time.
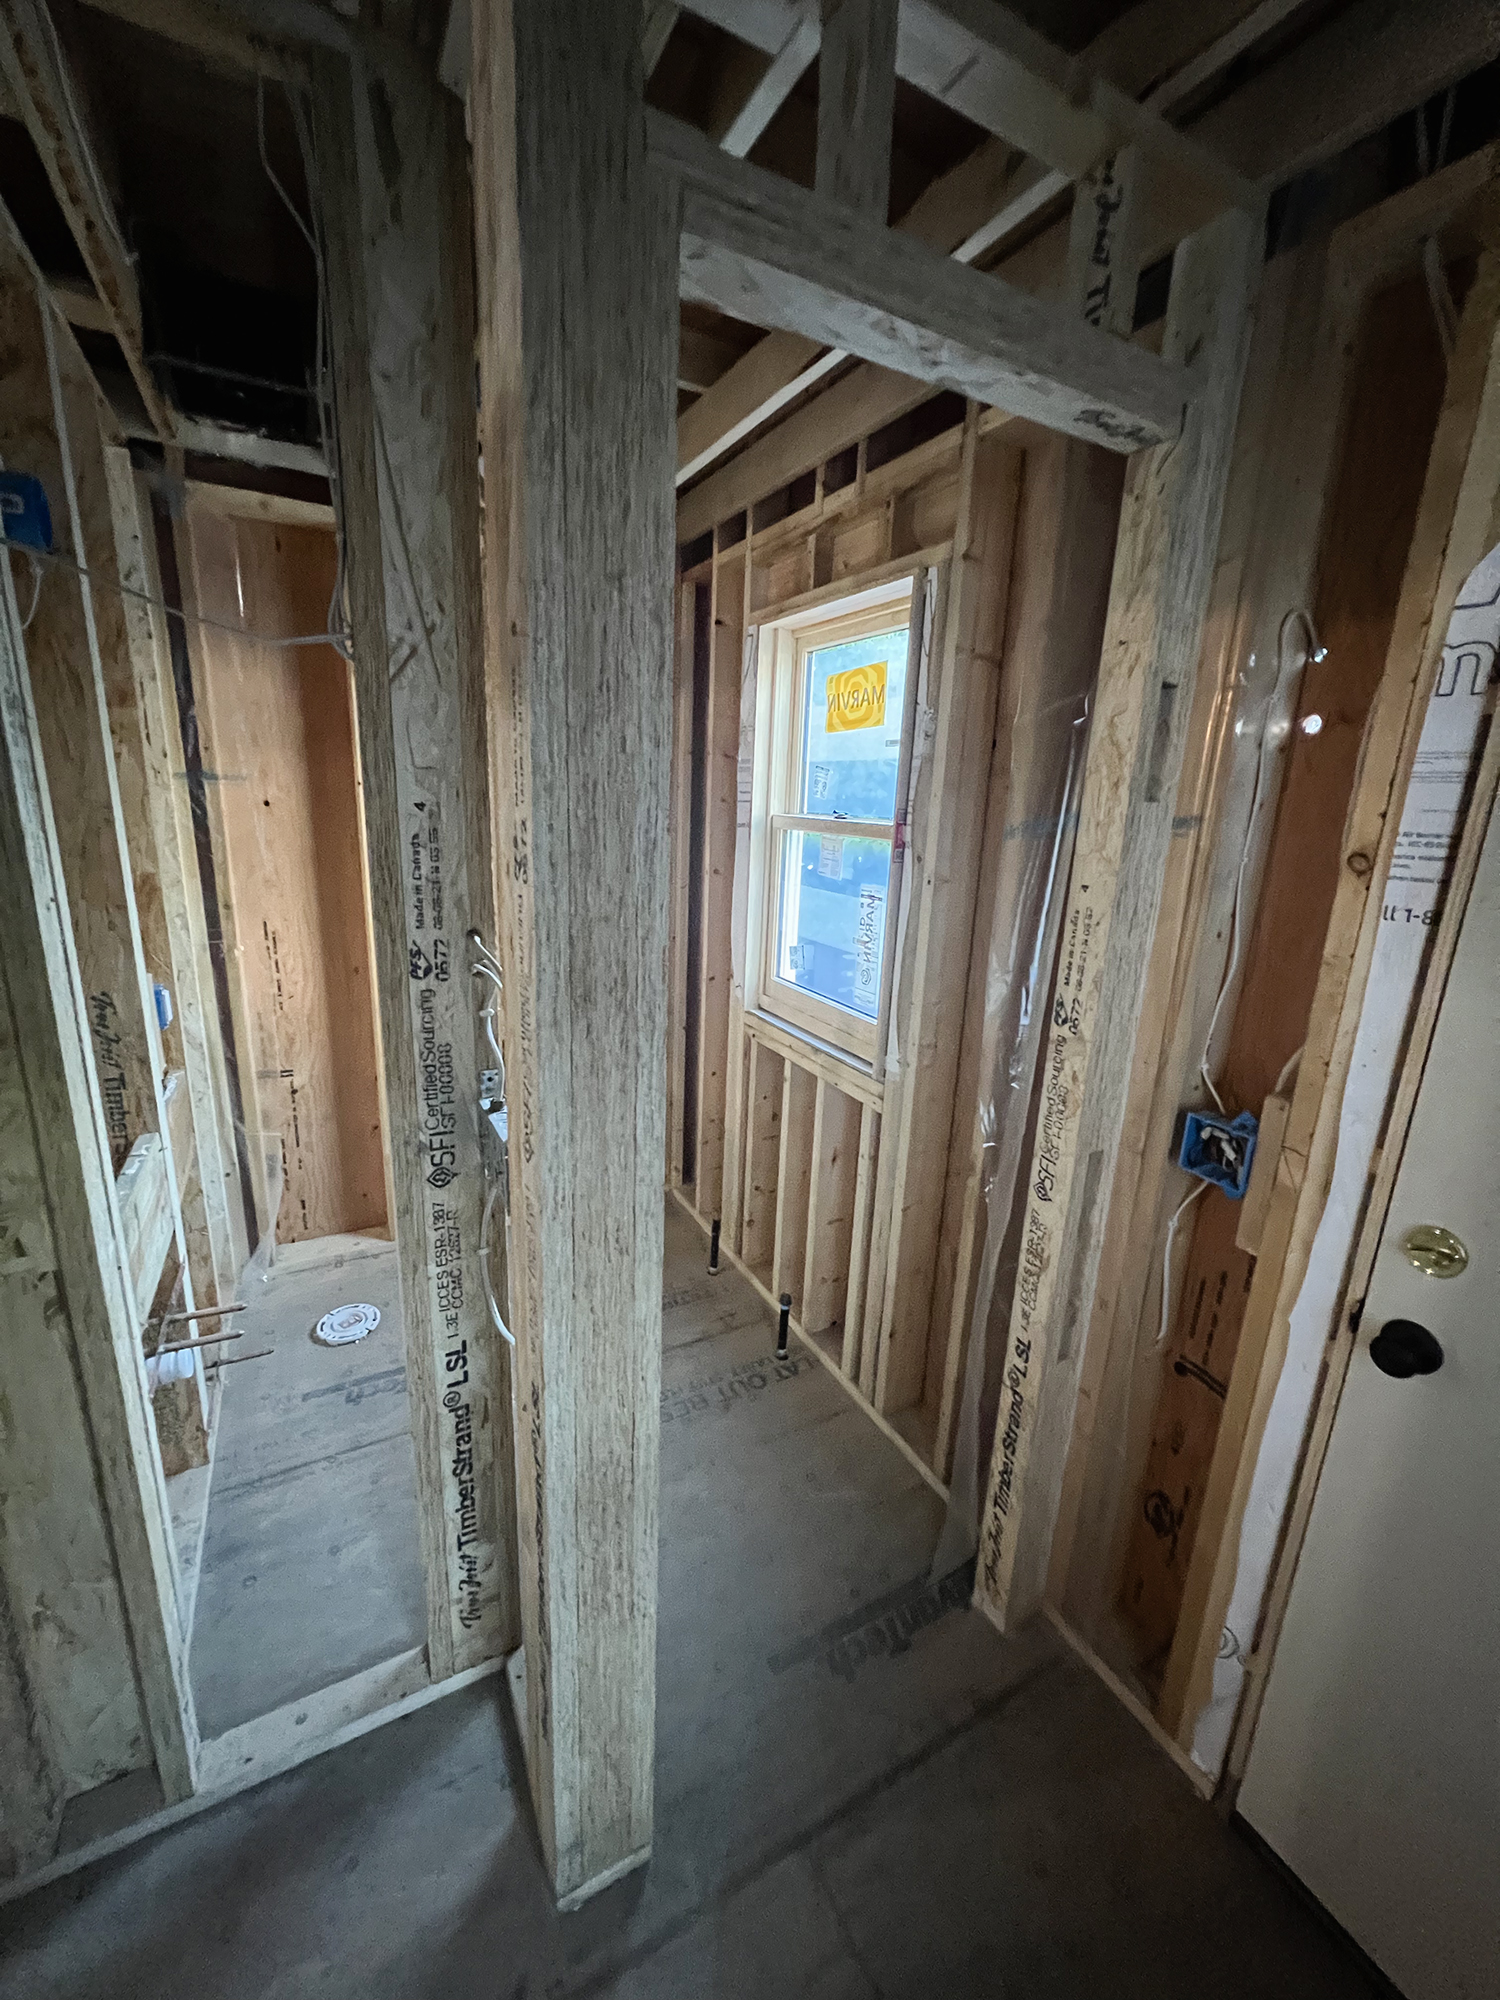
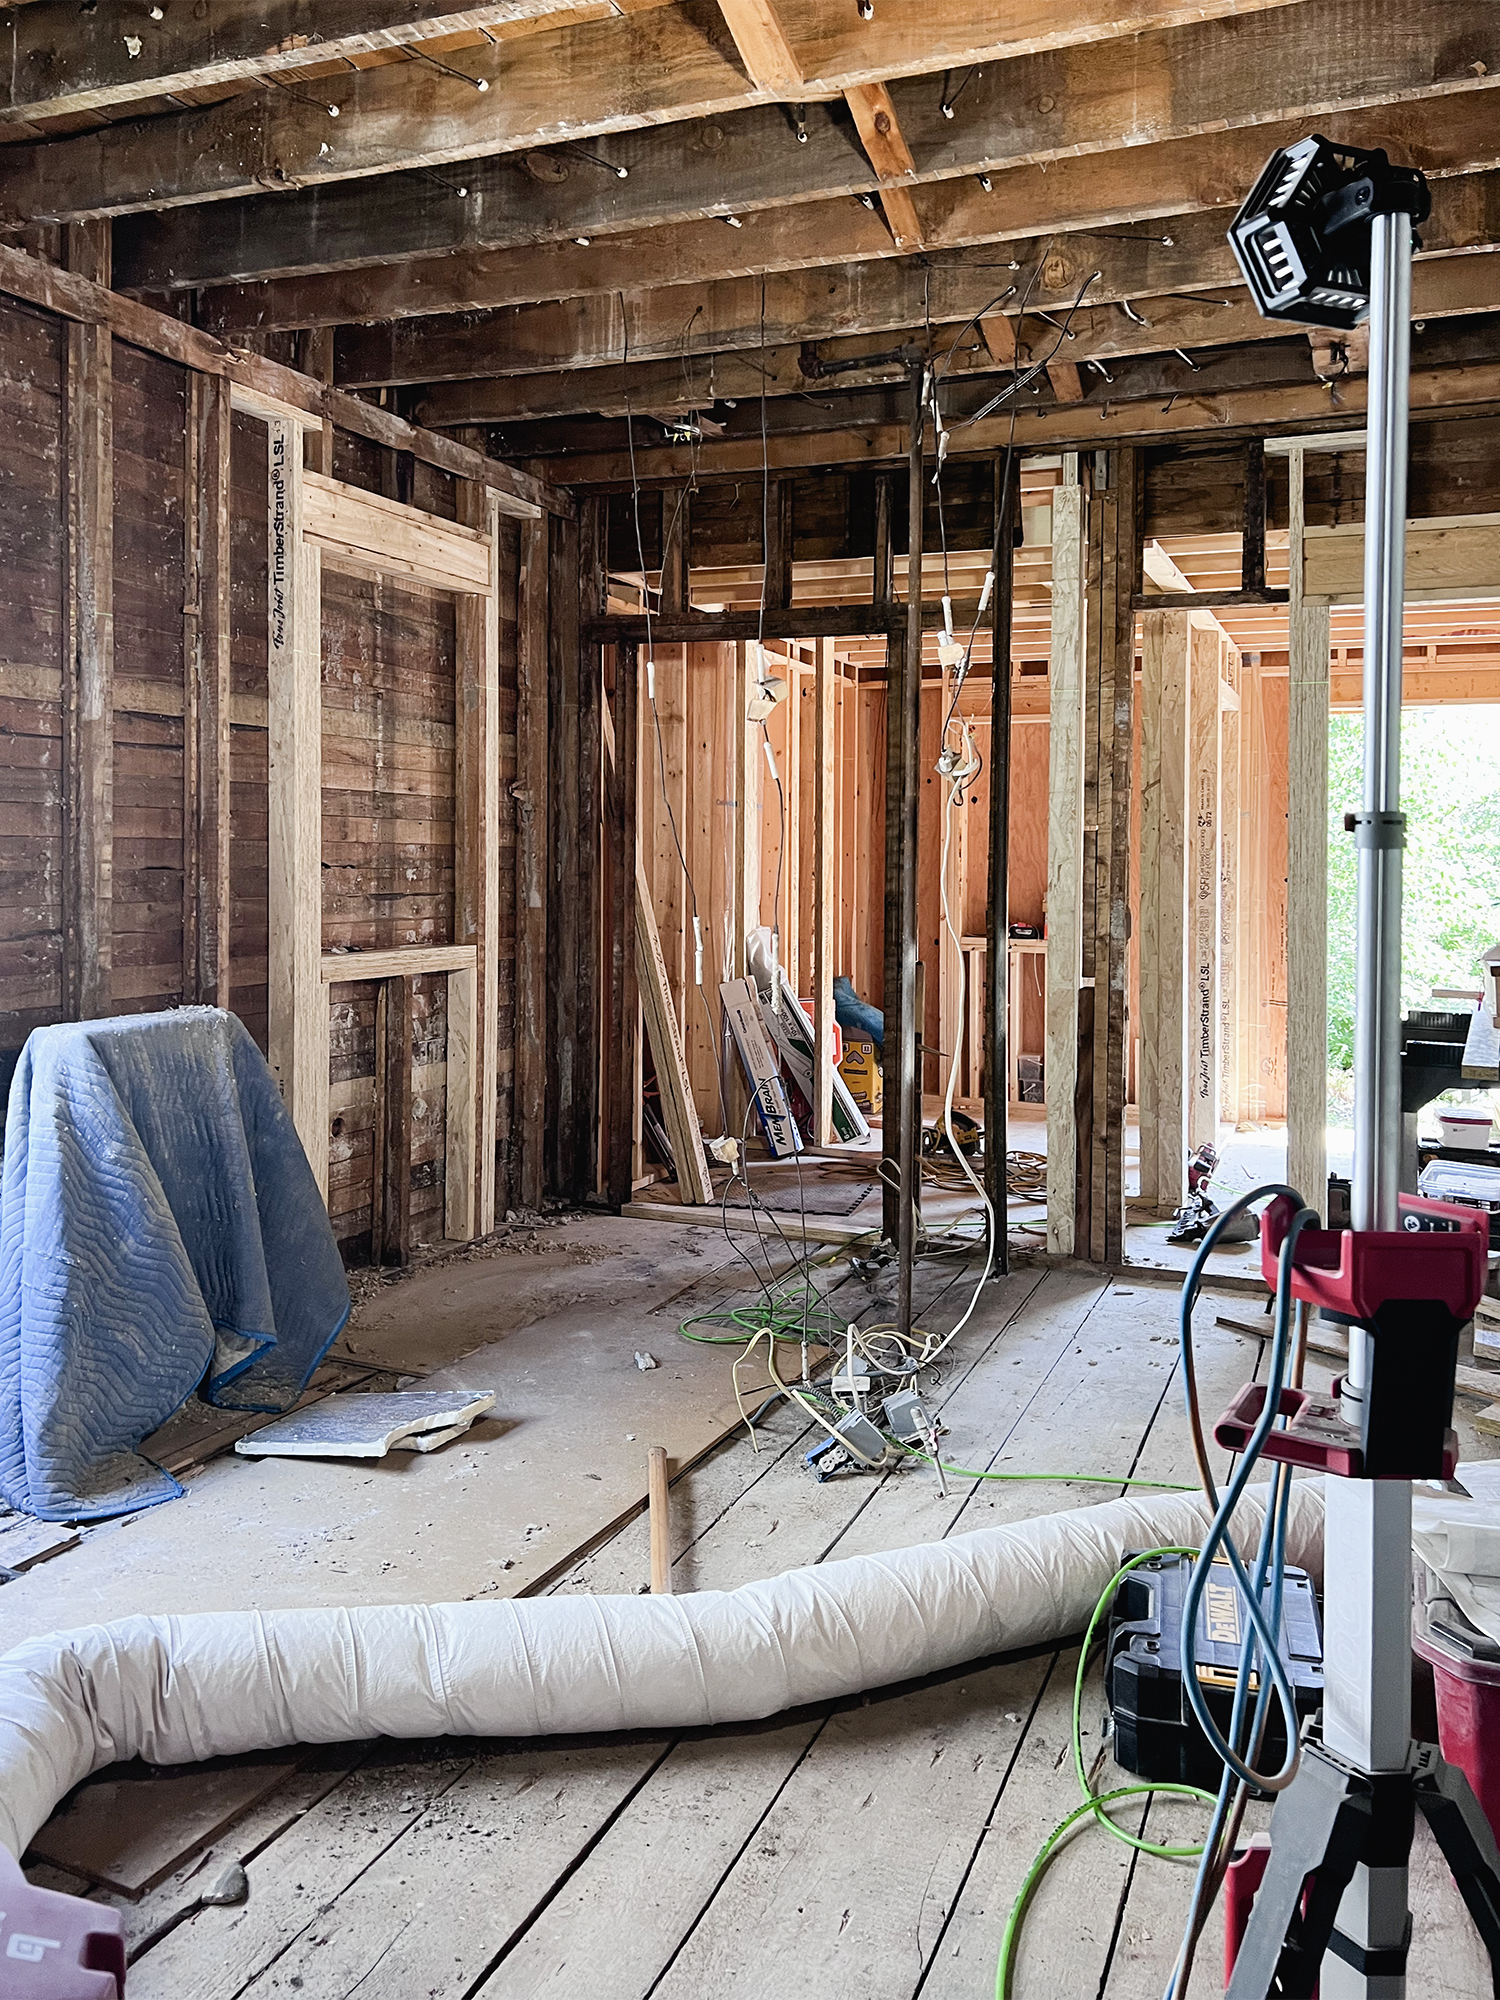 This is the interior framing getting close to completion. We removed a set of side of side-by-side windows in the kitchen and replaced them with new wood windows. The old windows were not the right size for the space, they were too tall and wouldn’t have worked. We opted for wood windows by Marvin and they will be stained to match the windows in our living and dining rooms. In this photo you can see the framing of the addition, and windows are beginning to be framed in the kitchen. Scroll to the next photo to see a 3-D rendering of this same view.
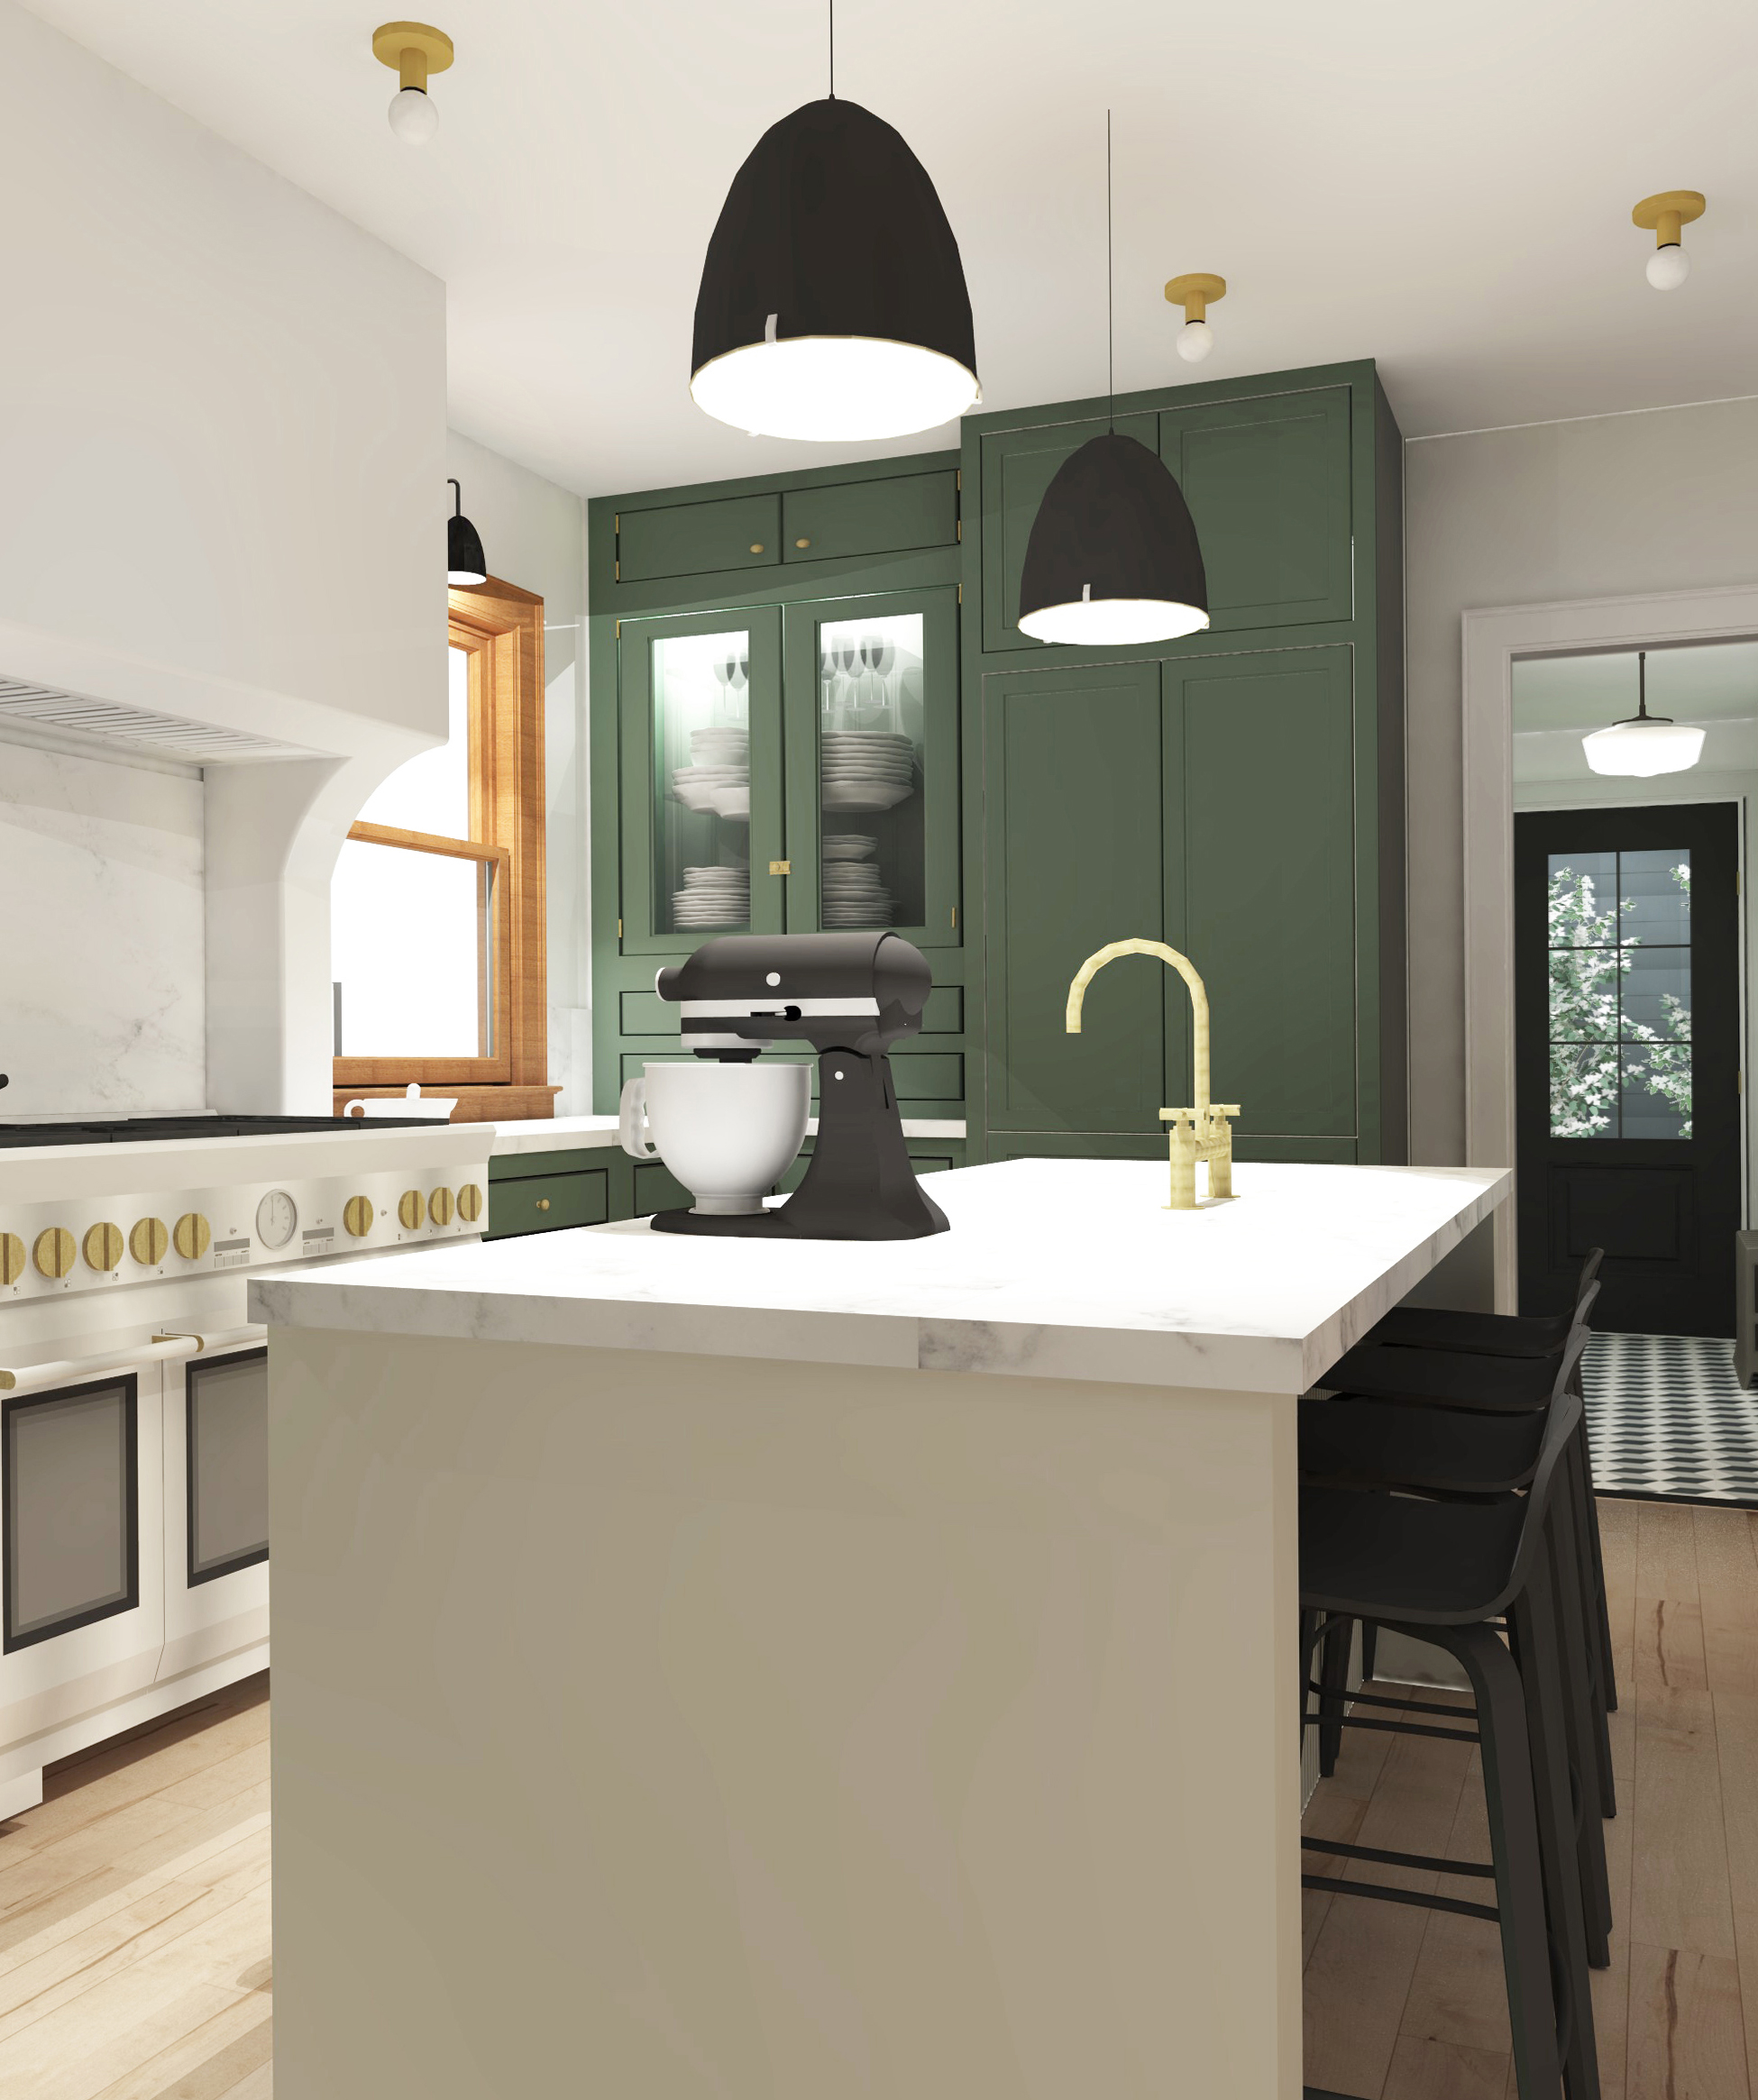 This is the same view as the raw space above.
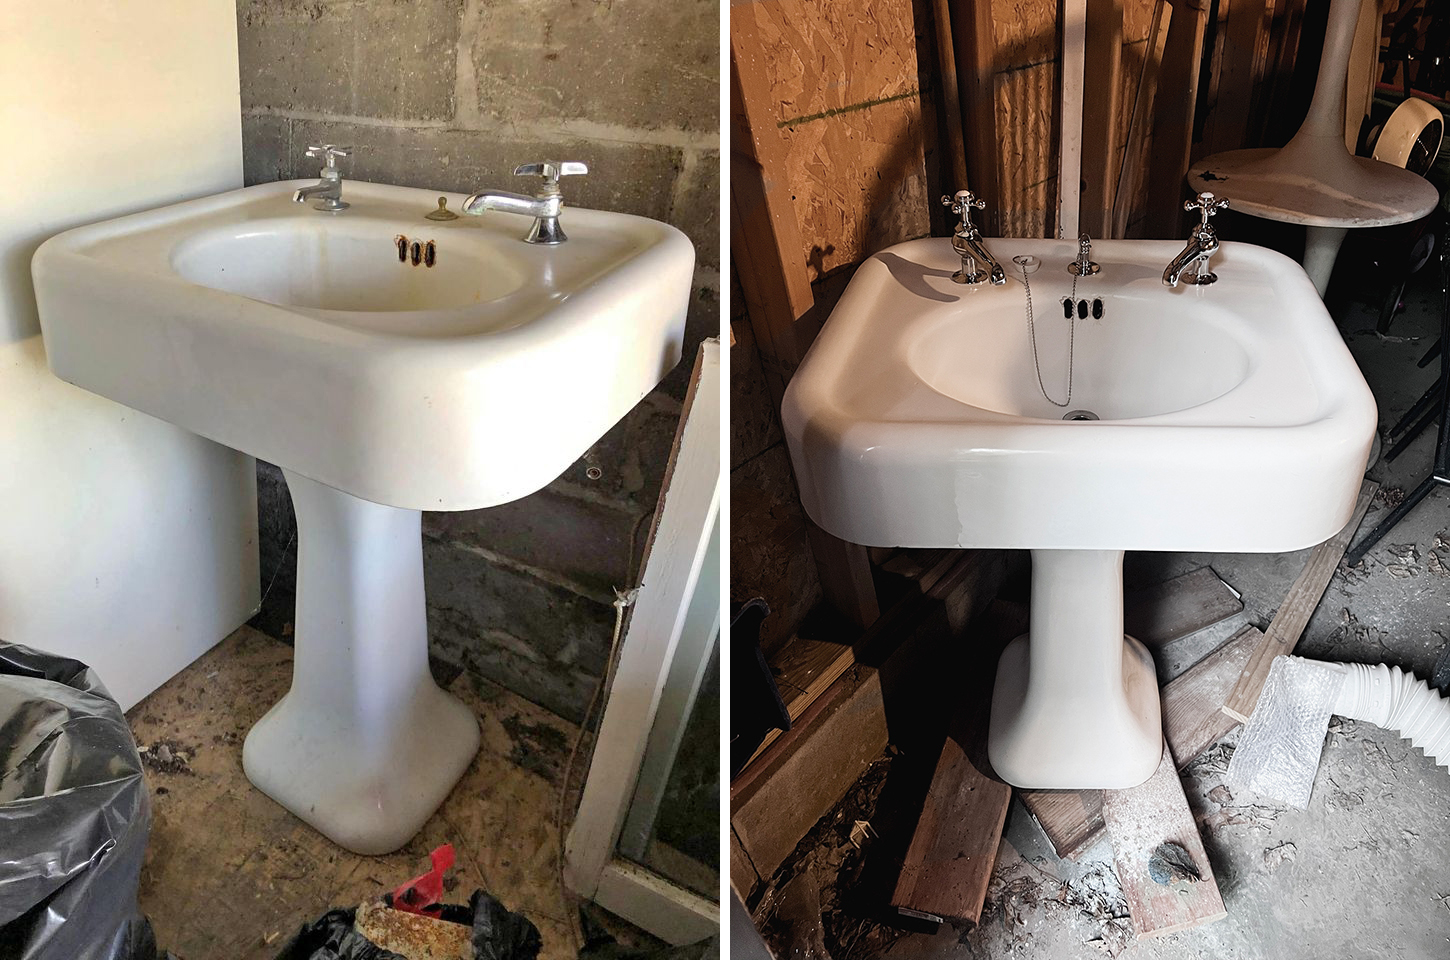 While all of this building was happening I had some projects of my own to work on. I had rescued this sink from FB Marketplace over two years ago as away of proclaiming my intentions to do this project. I knew that I wanted to add vintage utility items like plumbing to the addition to make the space cohesive with the kitchen and the rest of the house. This sink was the perfect size and I loved the look of the flat rounded basin. It just needed some TLC. Unfortch, there was no magic solution for porcelain enamel cleaning. I think I tried every cleaner that was recommended by blogs and youtube too. From Magic Erasers, to Bar Keepers Friend, even CLR and Lime-Away, I tried all of it. I did come away with a tip or two, the first is have access to a hose and do this project outside. Because it was summer I was able to attack the gunky, disgusting, putrid overflow drain holes with a hose and spray nozzle. Whatever horrible shit gets into the back of those drain holes is beyond nasty, and I have a zero tolerance to gross when it comes to my hurl reflex. Second tip, I got a soft rubber bristle brush attachment for my drill, and that really helped with the elbow grease that was needed, it didn’t scratch the surface and was able to “quickly” get the surface to be clean and shiny. All in all, this project took the better half of a day. There is still chipped porcelain around the overflow drain holes, but the gross is gone, and that’s okay with me.
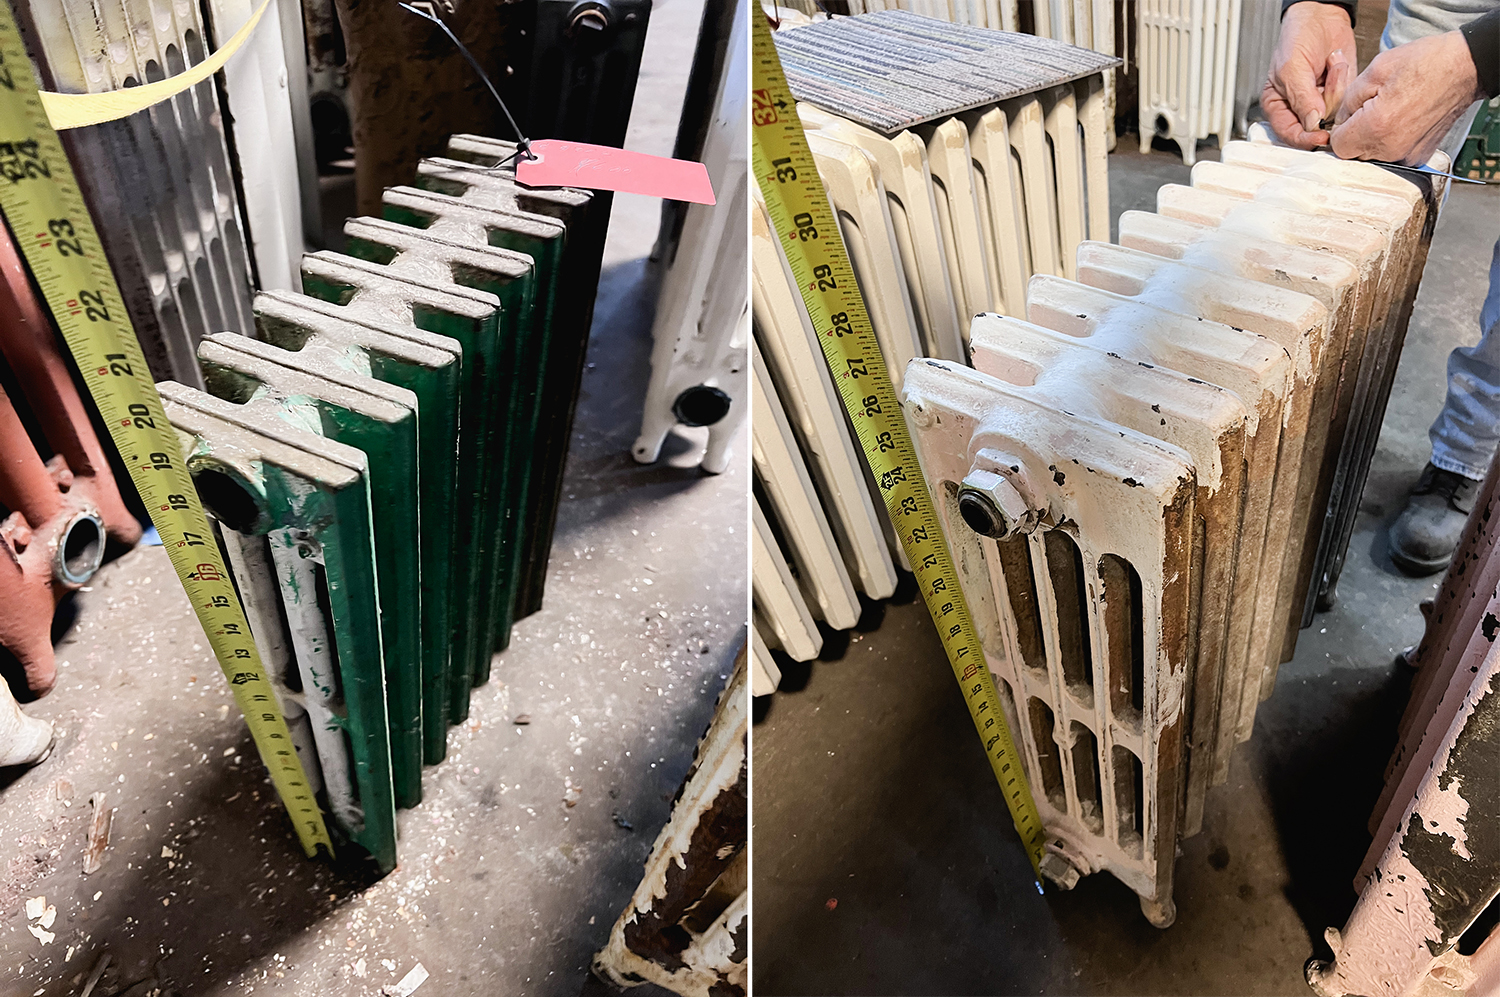 We are reusing our old beautiful cast iron radiator in the kitchen, and we decided to add vintage cast iron radiators to the addition as well for both the bathroom and mudroom. Buying old radiators involves a lot of hunting, and we had some specifics that made this hunt a little harder. We needed radiators of a rare height and size. If you ever decide to replace or add any radiator to your house, there is a certain ratio of cubic square feet to radiator depth, height, tubes and sections you need to consider so that you don’t over or under-heat your space. Since our addition in total is 135 sq feet, our radiators needed to be a very small and rare size. I’ve come to find out that typically, the smallest radiators are the first to go, they are hard to come by and people are always looking for them for bathroom renos. I went hunting for our radiators at Bauer Brothers Salvage in Minneapolis. If you know, you know. Bauer Bros has to be one of the best salvage shops in the midwest. I made good friends with the radiator guy, and we began scouring their 100(0)s of radiators. It took three visits to find radiators that were the right size and worked! I swear I knew every radiator in that place and Bauer Brothers should hire me if they ever need a new radiator guy.
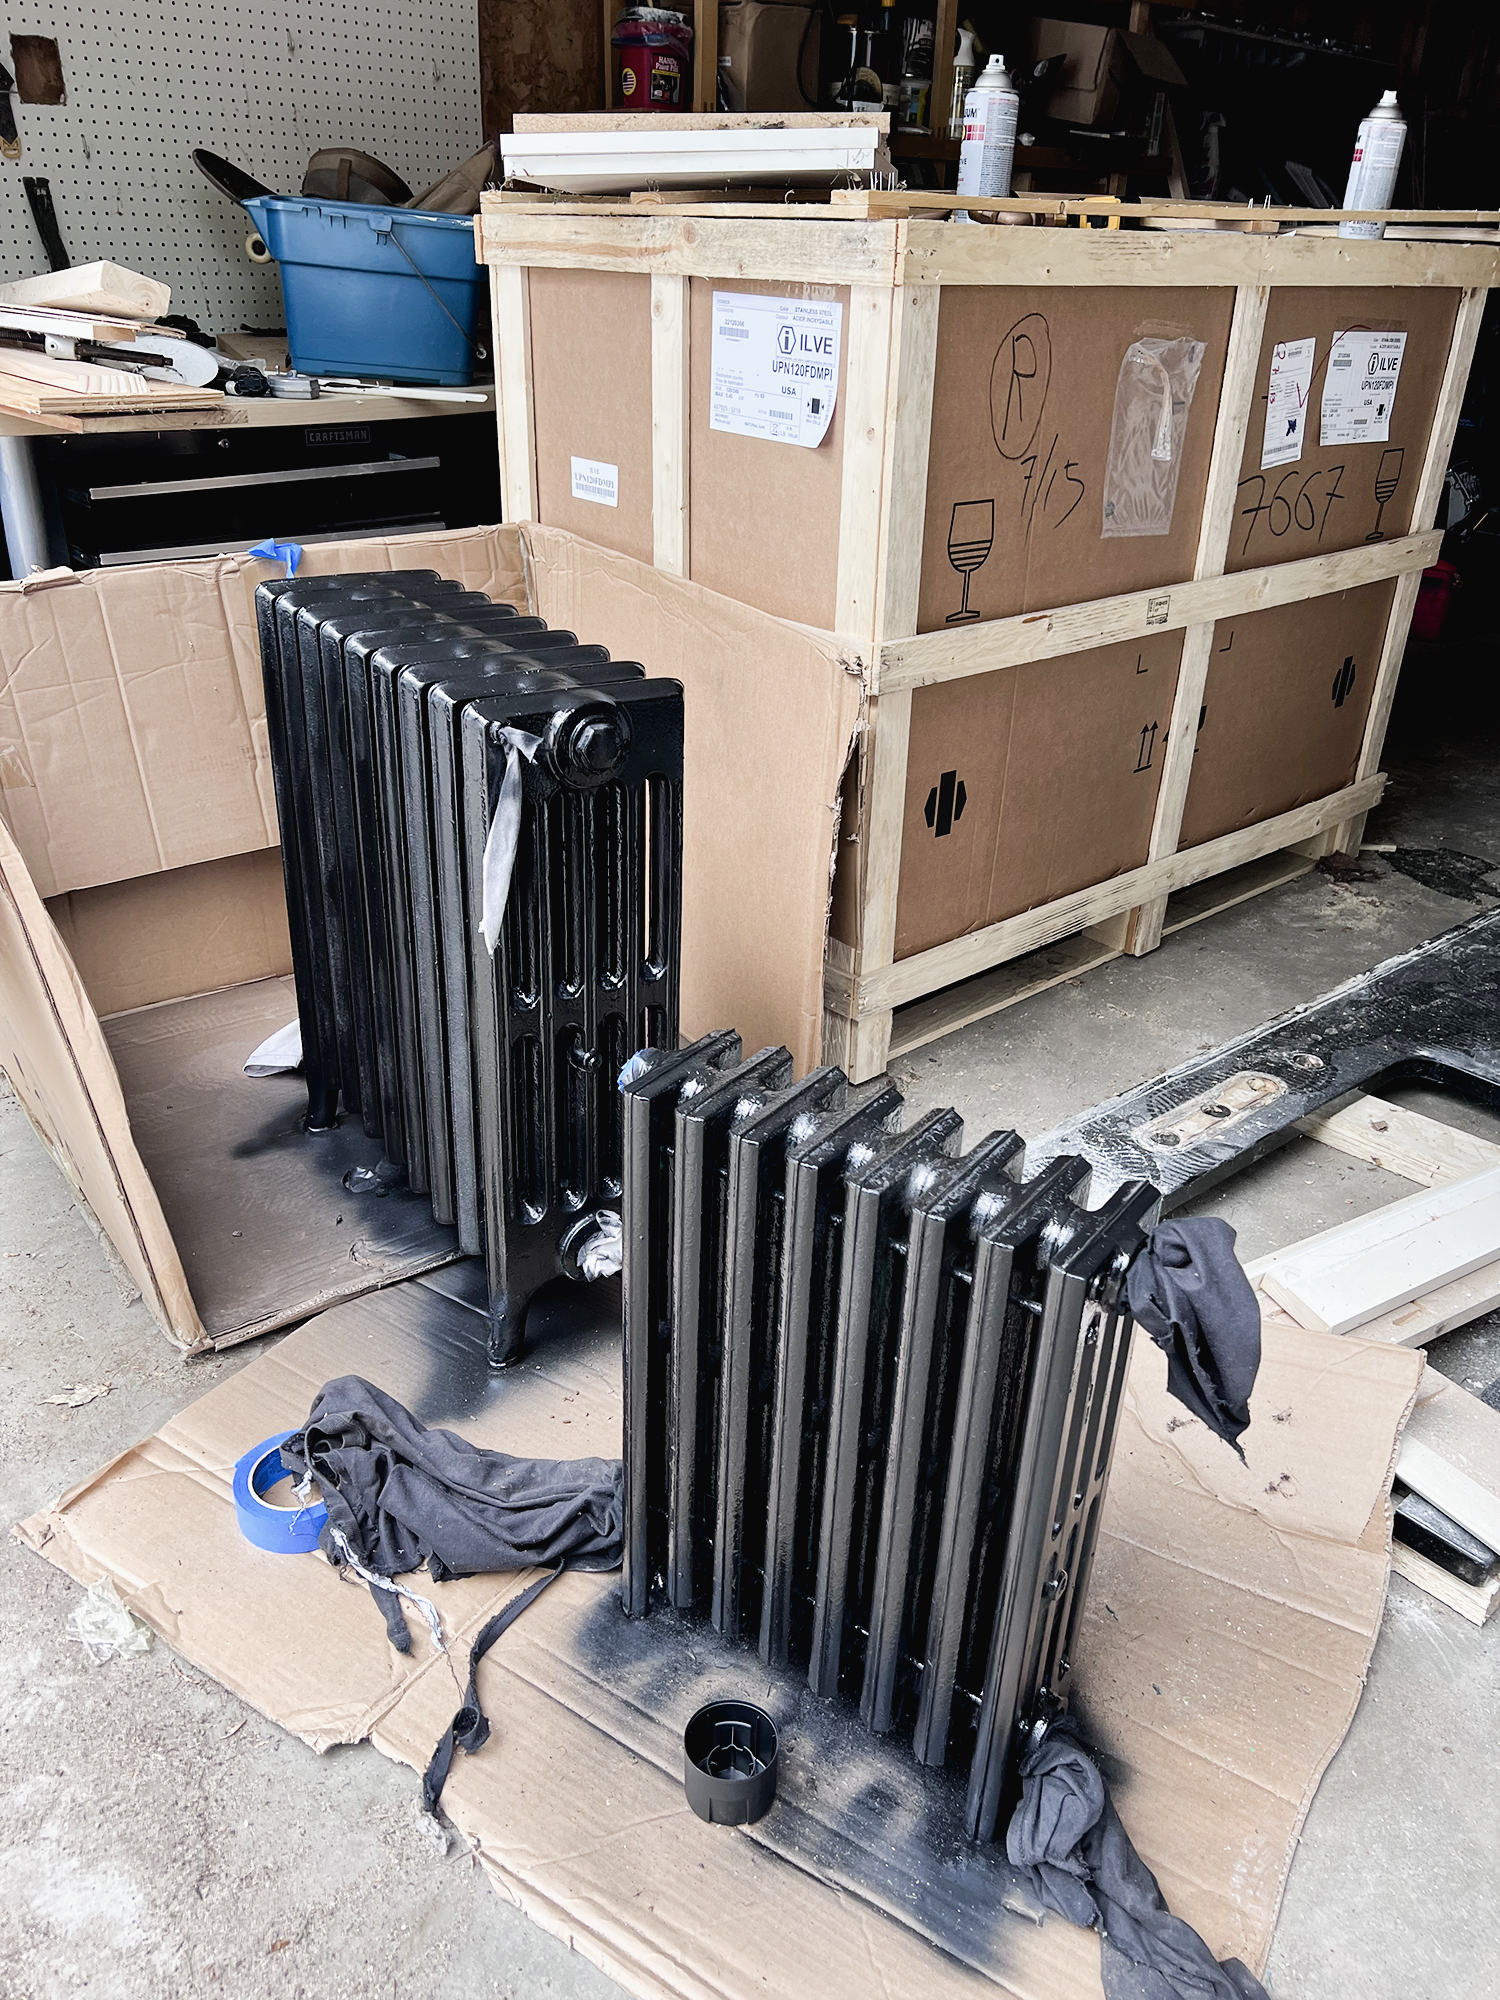 Here are the radiators all cleaned up and ready to be installed. I used a wire brush to knock down all the loose paint, which honestly didn’t take too much work. Both of these radiators only had 1-2 layers of paint and that made cleaning them up pretty easy. To get the years of dust from the inner sections, I used old t-shirts wrapped around coat hangers, this seemed to work better than even the vacuum. If I were to do it again I’d buy a swiffer duster at the store too, but I like my on the fly DIY hanger/t-shirt contraption too.
Something to note: I looked everywhere for fancy valves to dress these radiators up, but to no avail. There is a market for this people! Someone, learn how to manufacture pretty American radiator valves with wood handles. Please and Thank you.
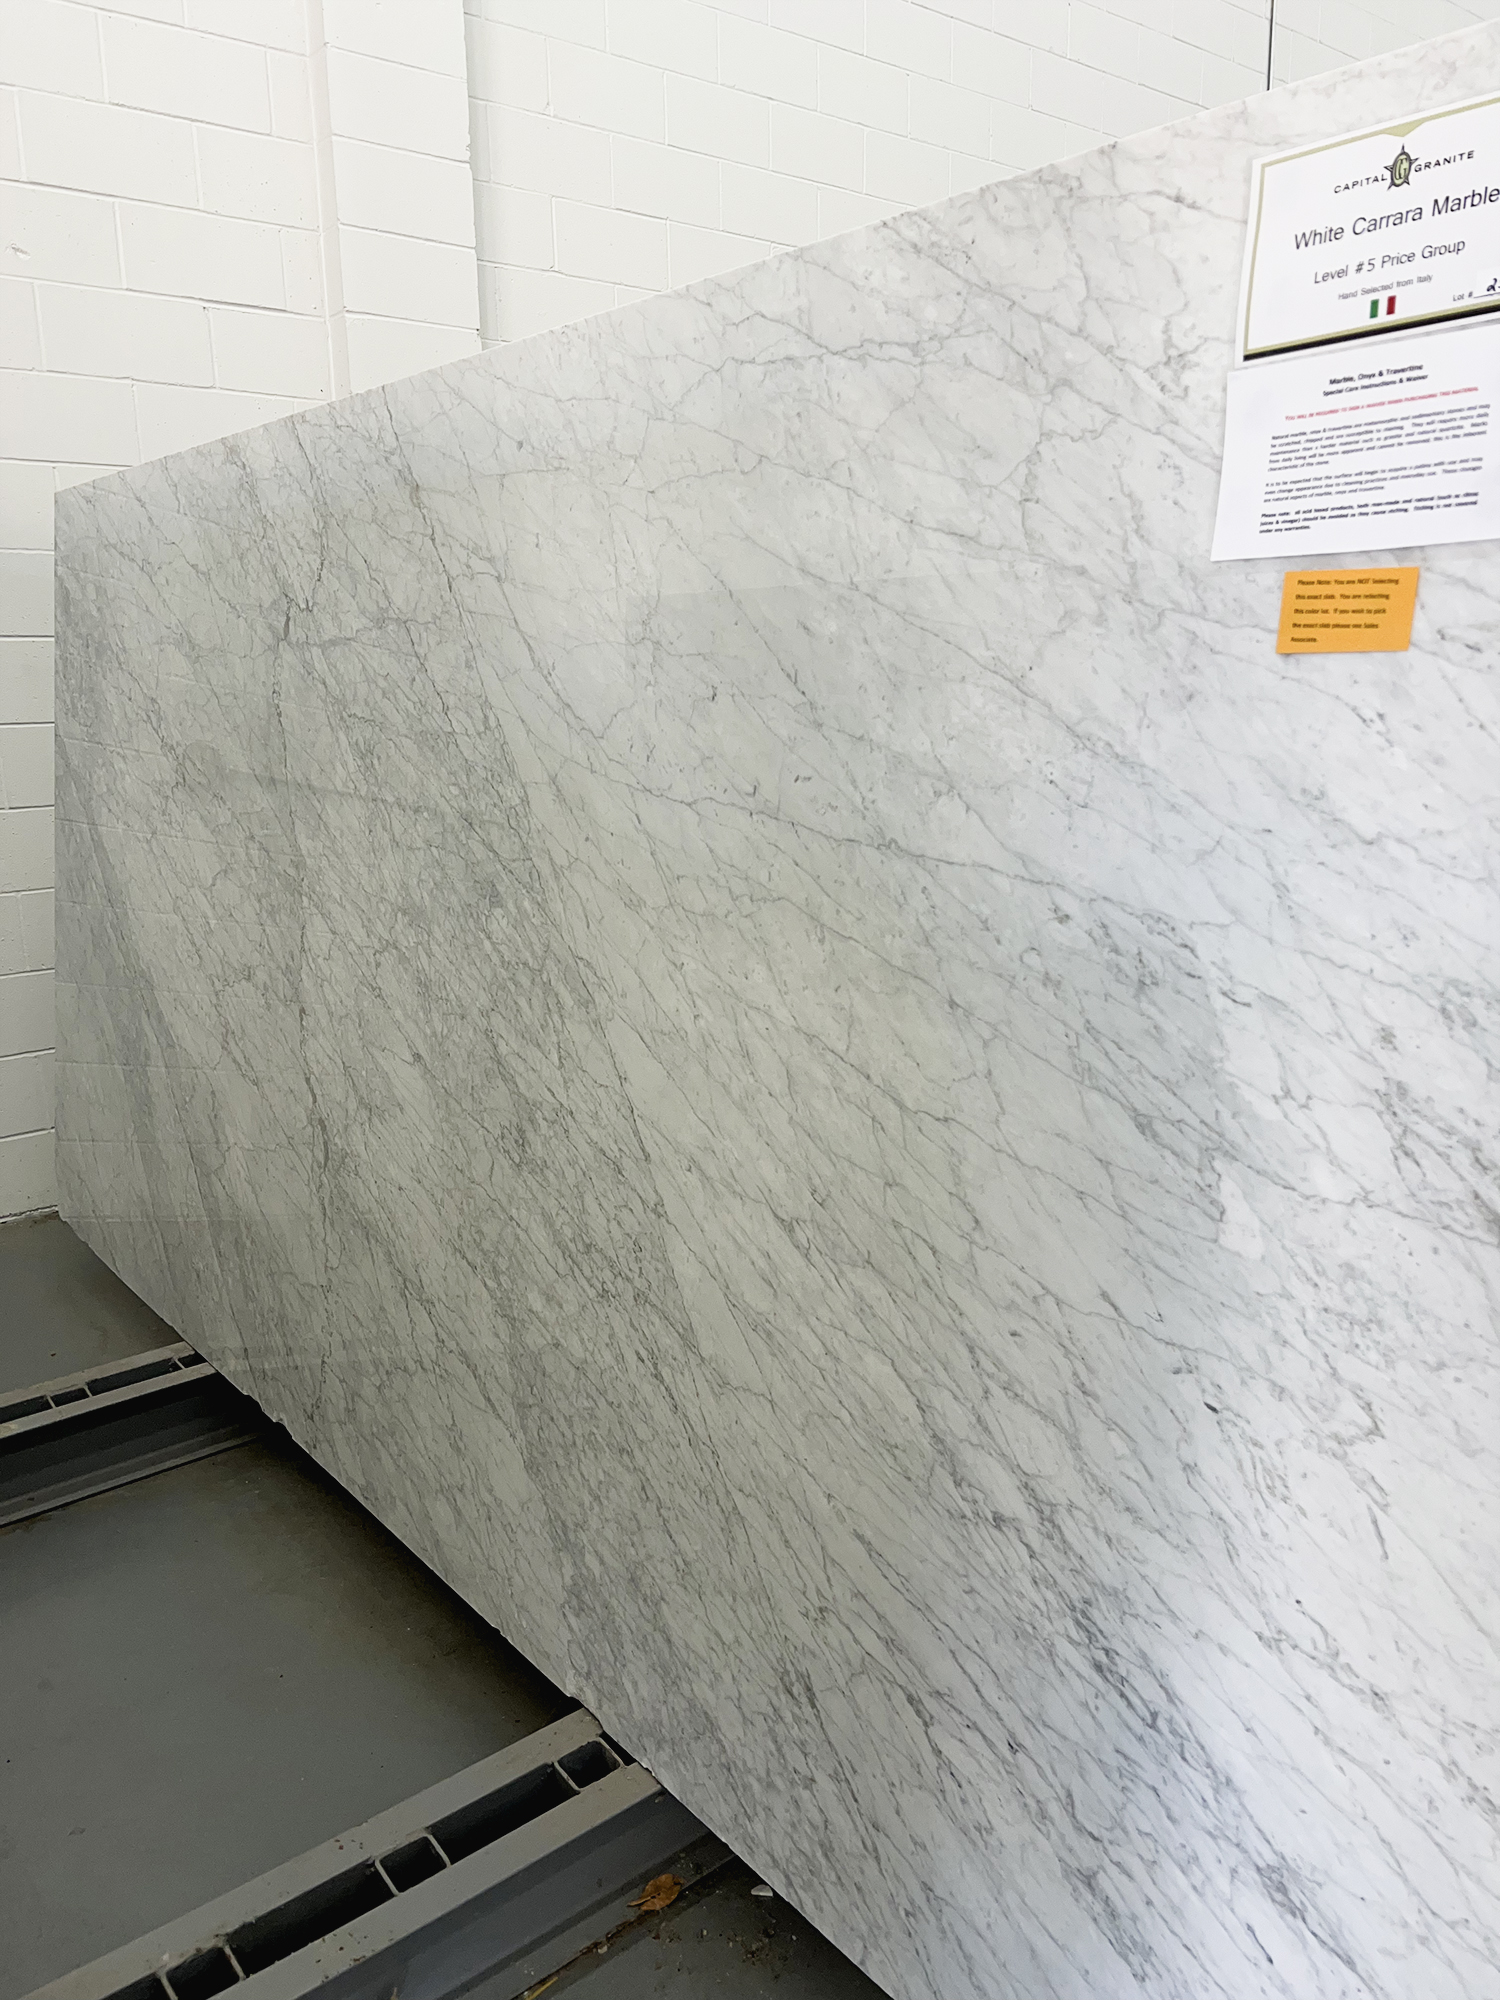 I went slab shopping. It was kind of disappointing TBH. I was hoping for it to be more exciting then it was. I wanted to have my very own experience of finding my dream slab just like they do on IG. Unfortunately the place recommended by our builder did not have slab upon slab to choose from in their showroom. They had a physical slab that was to represent the style and veining of a group of slabs. Once you decide on the style of slab you like THEN you choose from nearly identical slabs in a pre-photographed inventory they have in their showroom. So knowing that I wanted Carrara marble I choose my favorite slab off the tv screen. It’ll be great, I’m not worried about it. I only wish I could have hugged it before I ordered it.
 At this point we’re getting really close to being ready for drywall and floors. Sub contractors have come in and finished the rough in for plumbing, radiators and electrical. Drum roll please because you’re just about to experience the first big change to the space….
 We widened the opening from the kitchen to the dining room. I know this can be controversial in an old house, but I think that I can win over the haters by how we will execute this. There is definitely something to be said for the closed off layout of an old home, and honestly I’m all for that. However, it wasn’t going to work for us in this space, and here’s why. It was important to us to have an island so that we could spend tons of time there hanging with our friends. To give the island room to breathe we would need to remove part of the wall between the kitchen and dining room to make sure the space didn’t feel claustrophobic. Our house is not super big to begin with, the entire width of our house is 22′ from side to side, opening up the space made sense. In order to widen this space without making it feel like a 21st century open concept home we decided to truly pay homage to what the house has taught us. Both the living room and dining room have wide openings between them, and we used this sizing to determine the space of this opening. This makes it feel intentional and of the style. On the dining room side we needed to remove the beautiful oak paneling in order to widen the space. Ben painstakingly cut down the paneling, placed it back in its original place. Our builder had knives, mother fucking knives created from our millwork, this will make it possible to mill lumber and replicate the previous trim and casing exactly as it was. On the kitchen side, we will be adding the new paneling recreated to match the dining room by the cabinet maker. In the end, it will look like it was always supposed to be there and will function perfectly for us. This is some This Old House level shit, it’s gonna be good.
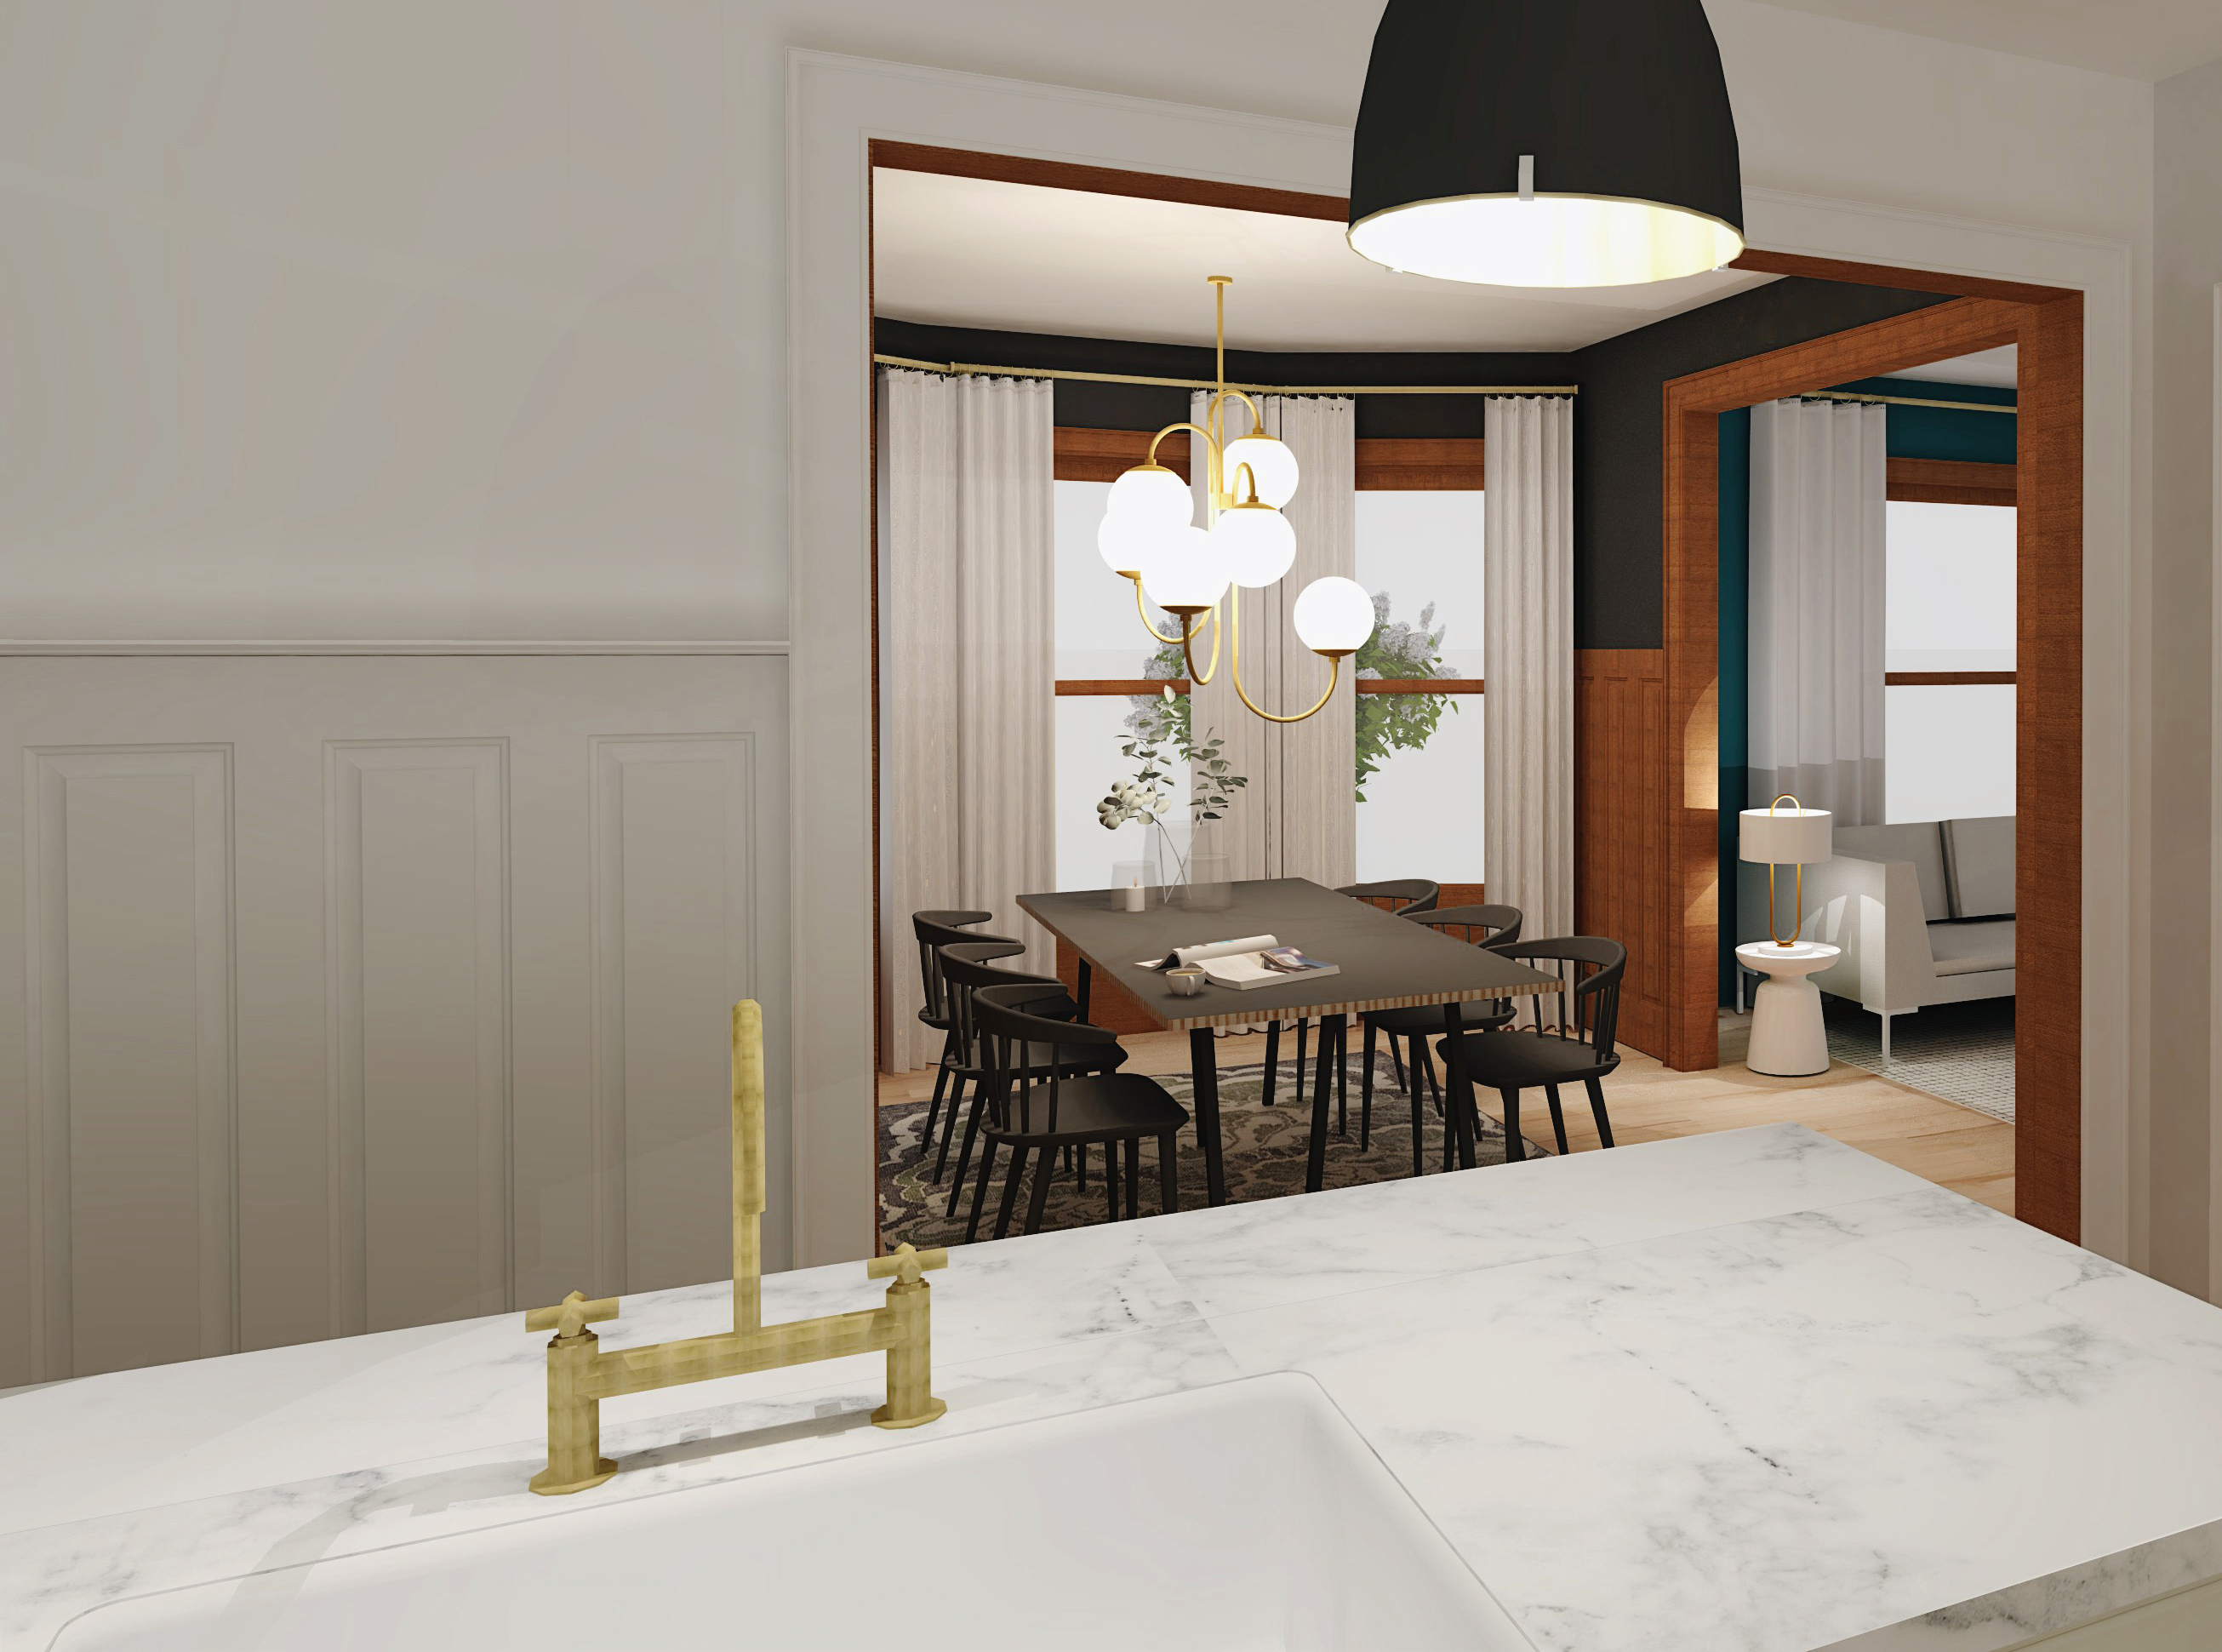
A rendering of what the kitchen will look like in relation to the dining room and living room as well as an example of how we are replicating paneling and door casings to make it feel as if it were always here.
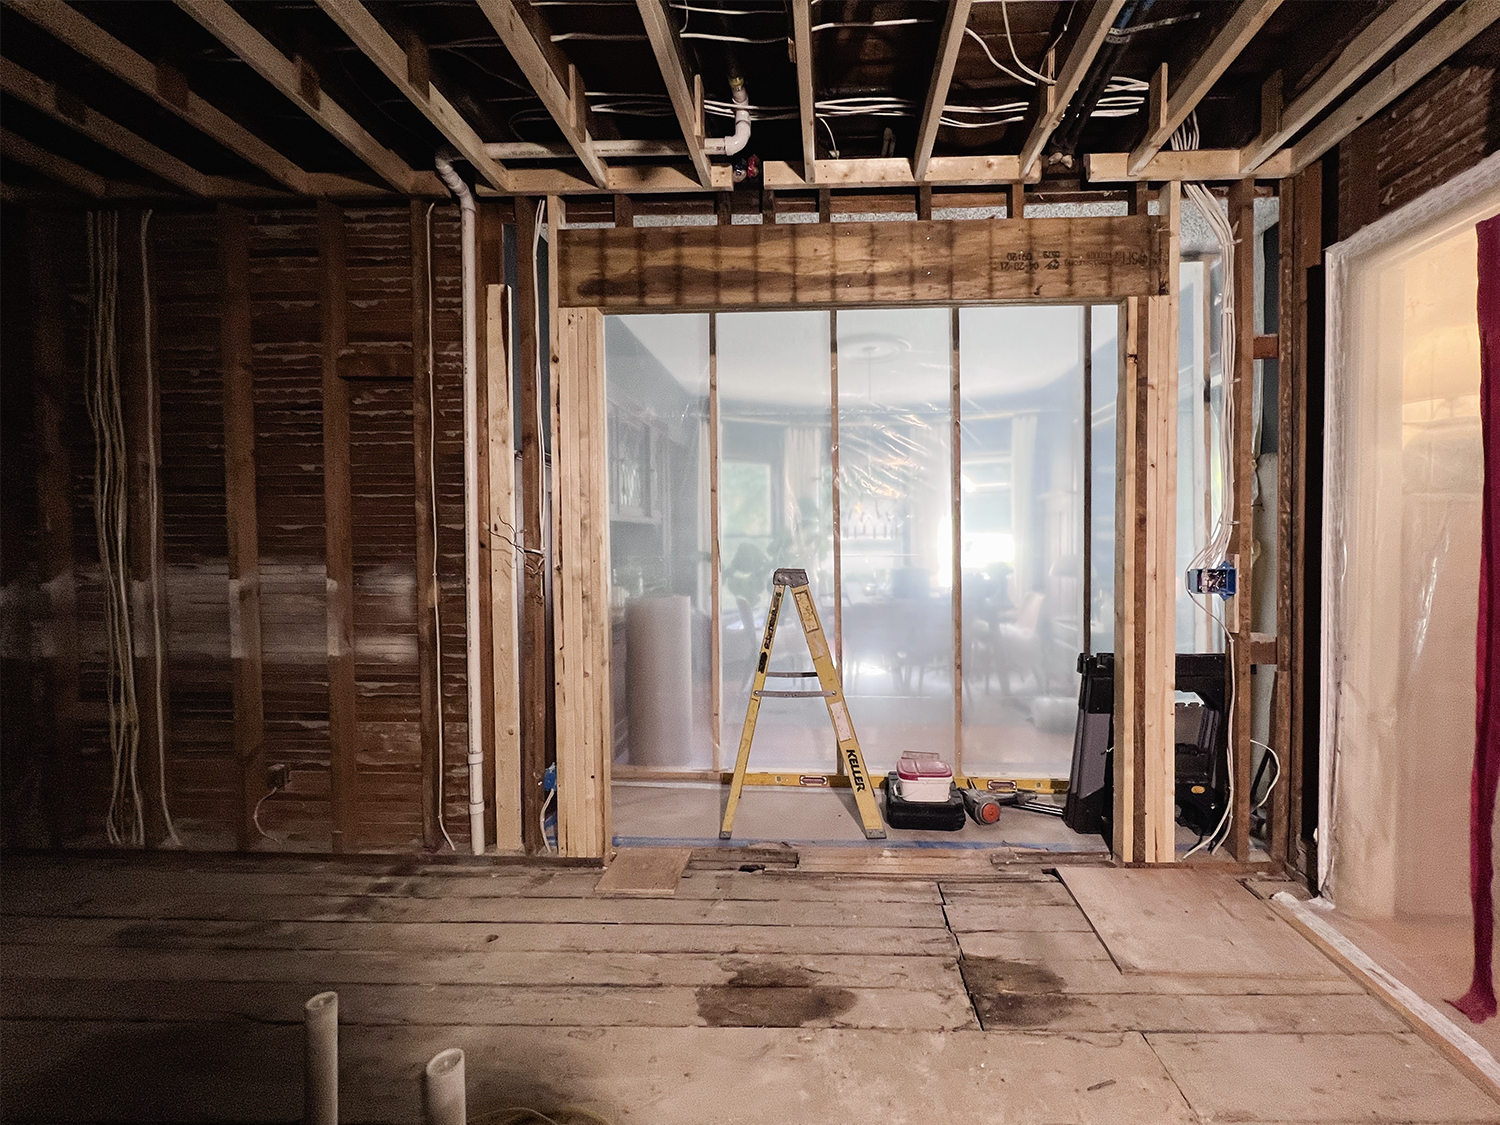 Another look into the dining room from the living room. I am loving how much light this opening will let light into our kitchen. I literally gasped when I saw this view for the first time. Just a note on framing, our ceiling did need to be dropped a few inches to allow for plumbing to be hidden and to straighten out the uneven joists in the ceiling.
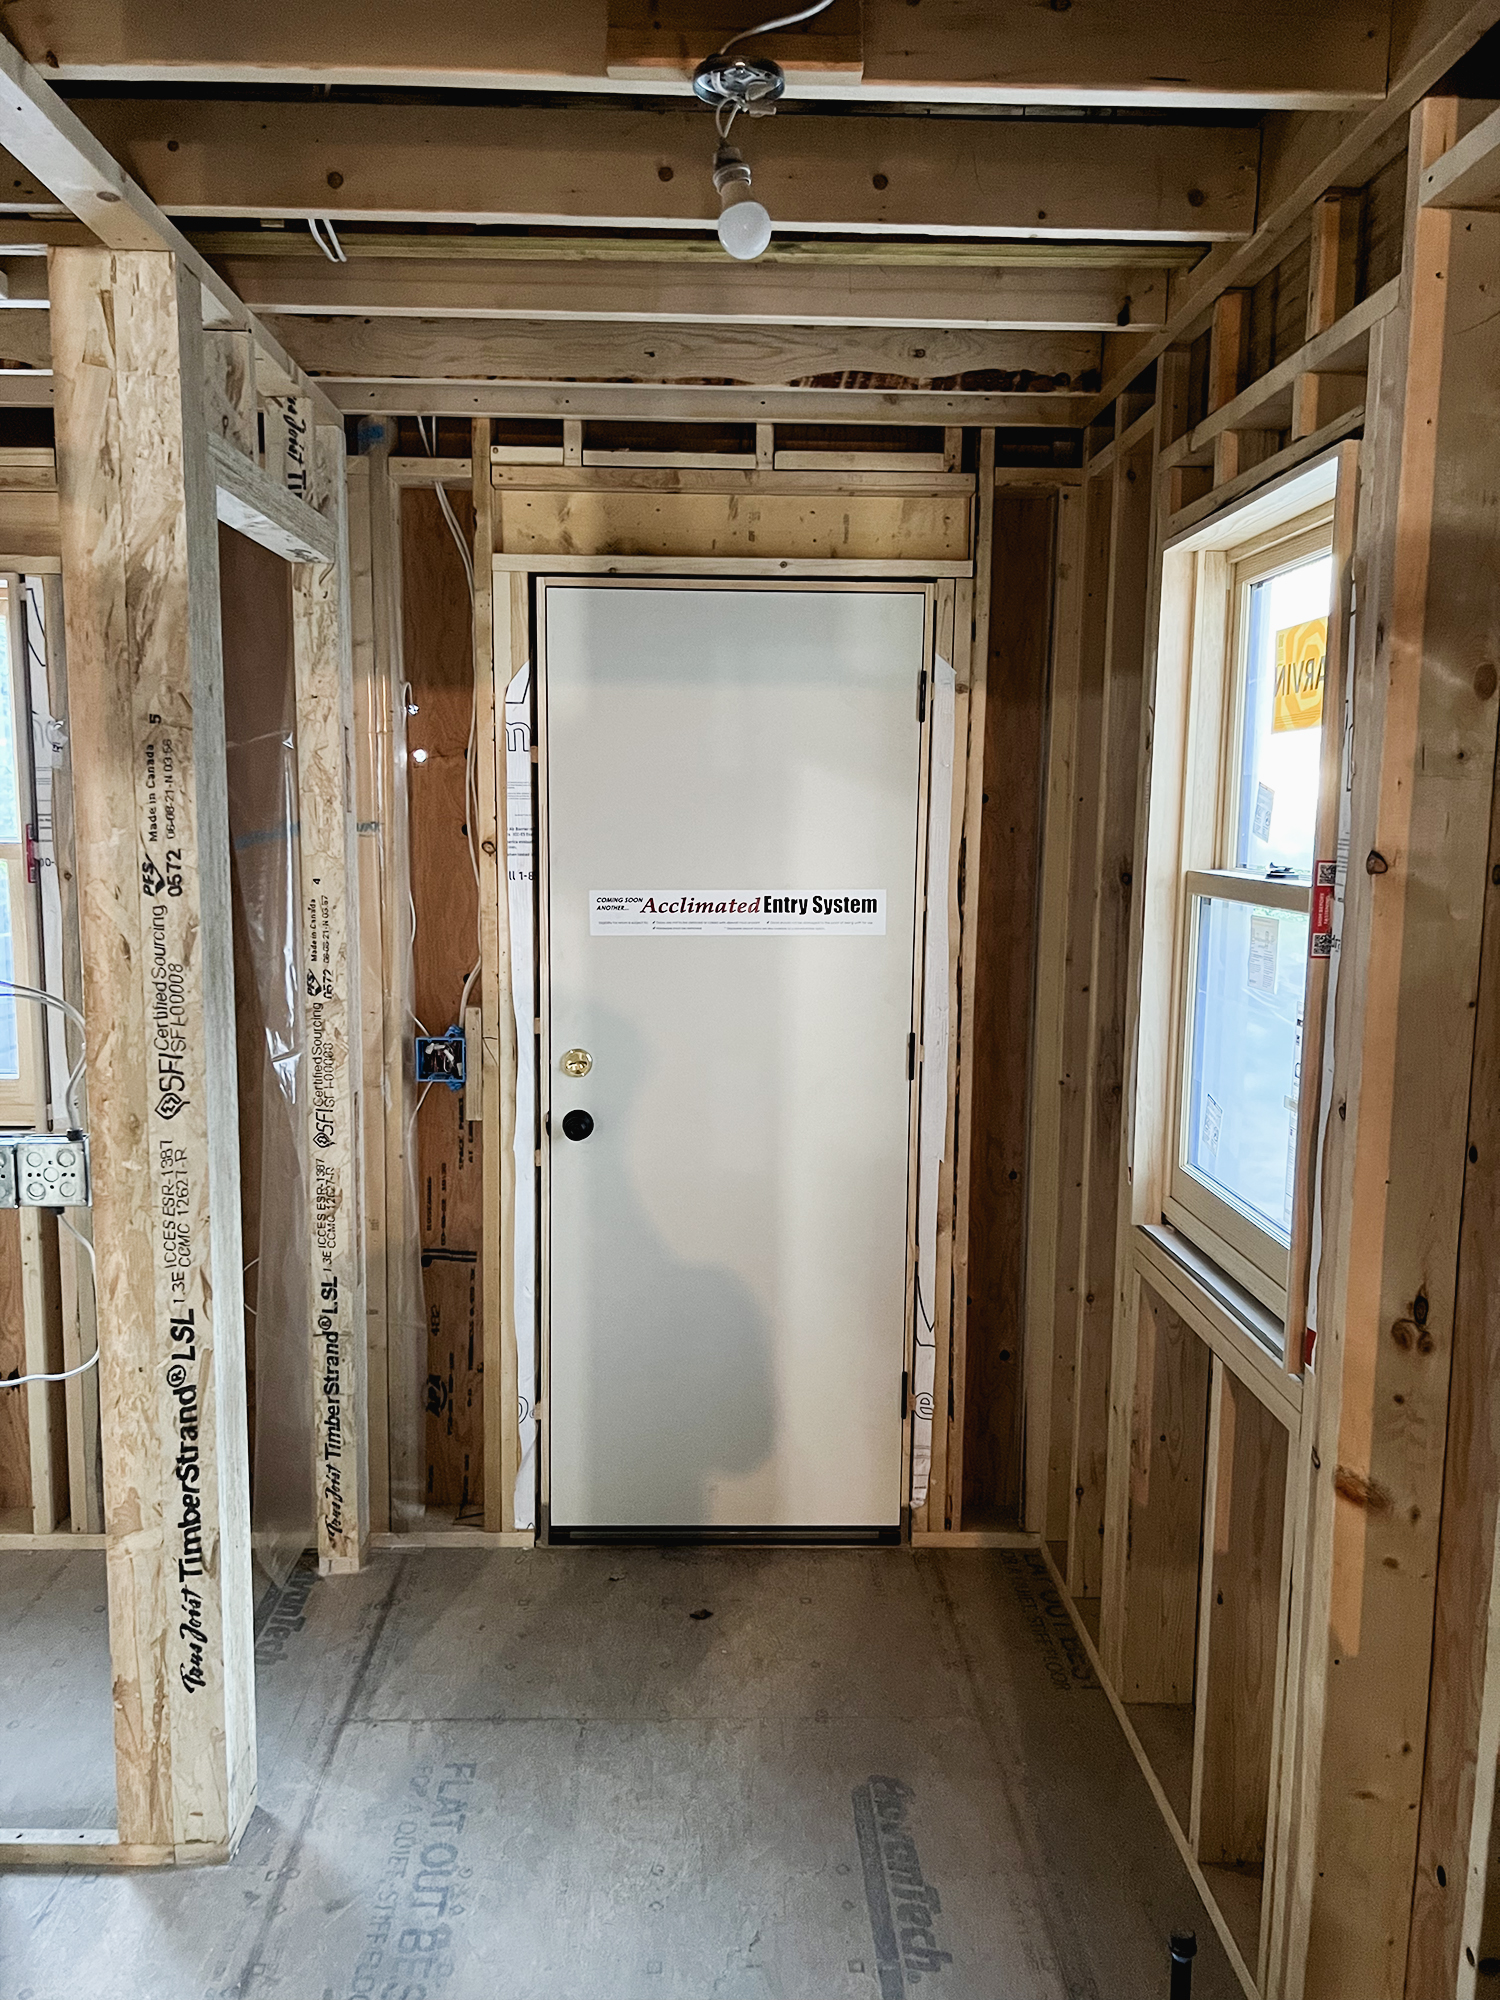 Windows and doors were installed. This is just a temporary door to be used while building is in process. The windows are now installed and the light is really starting to flow into the addition.
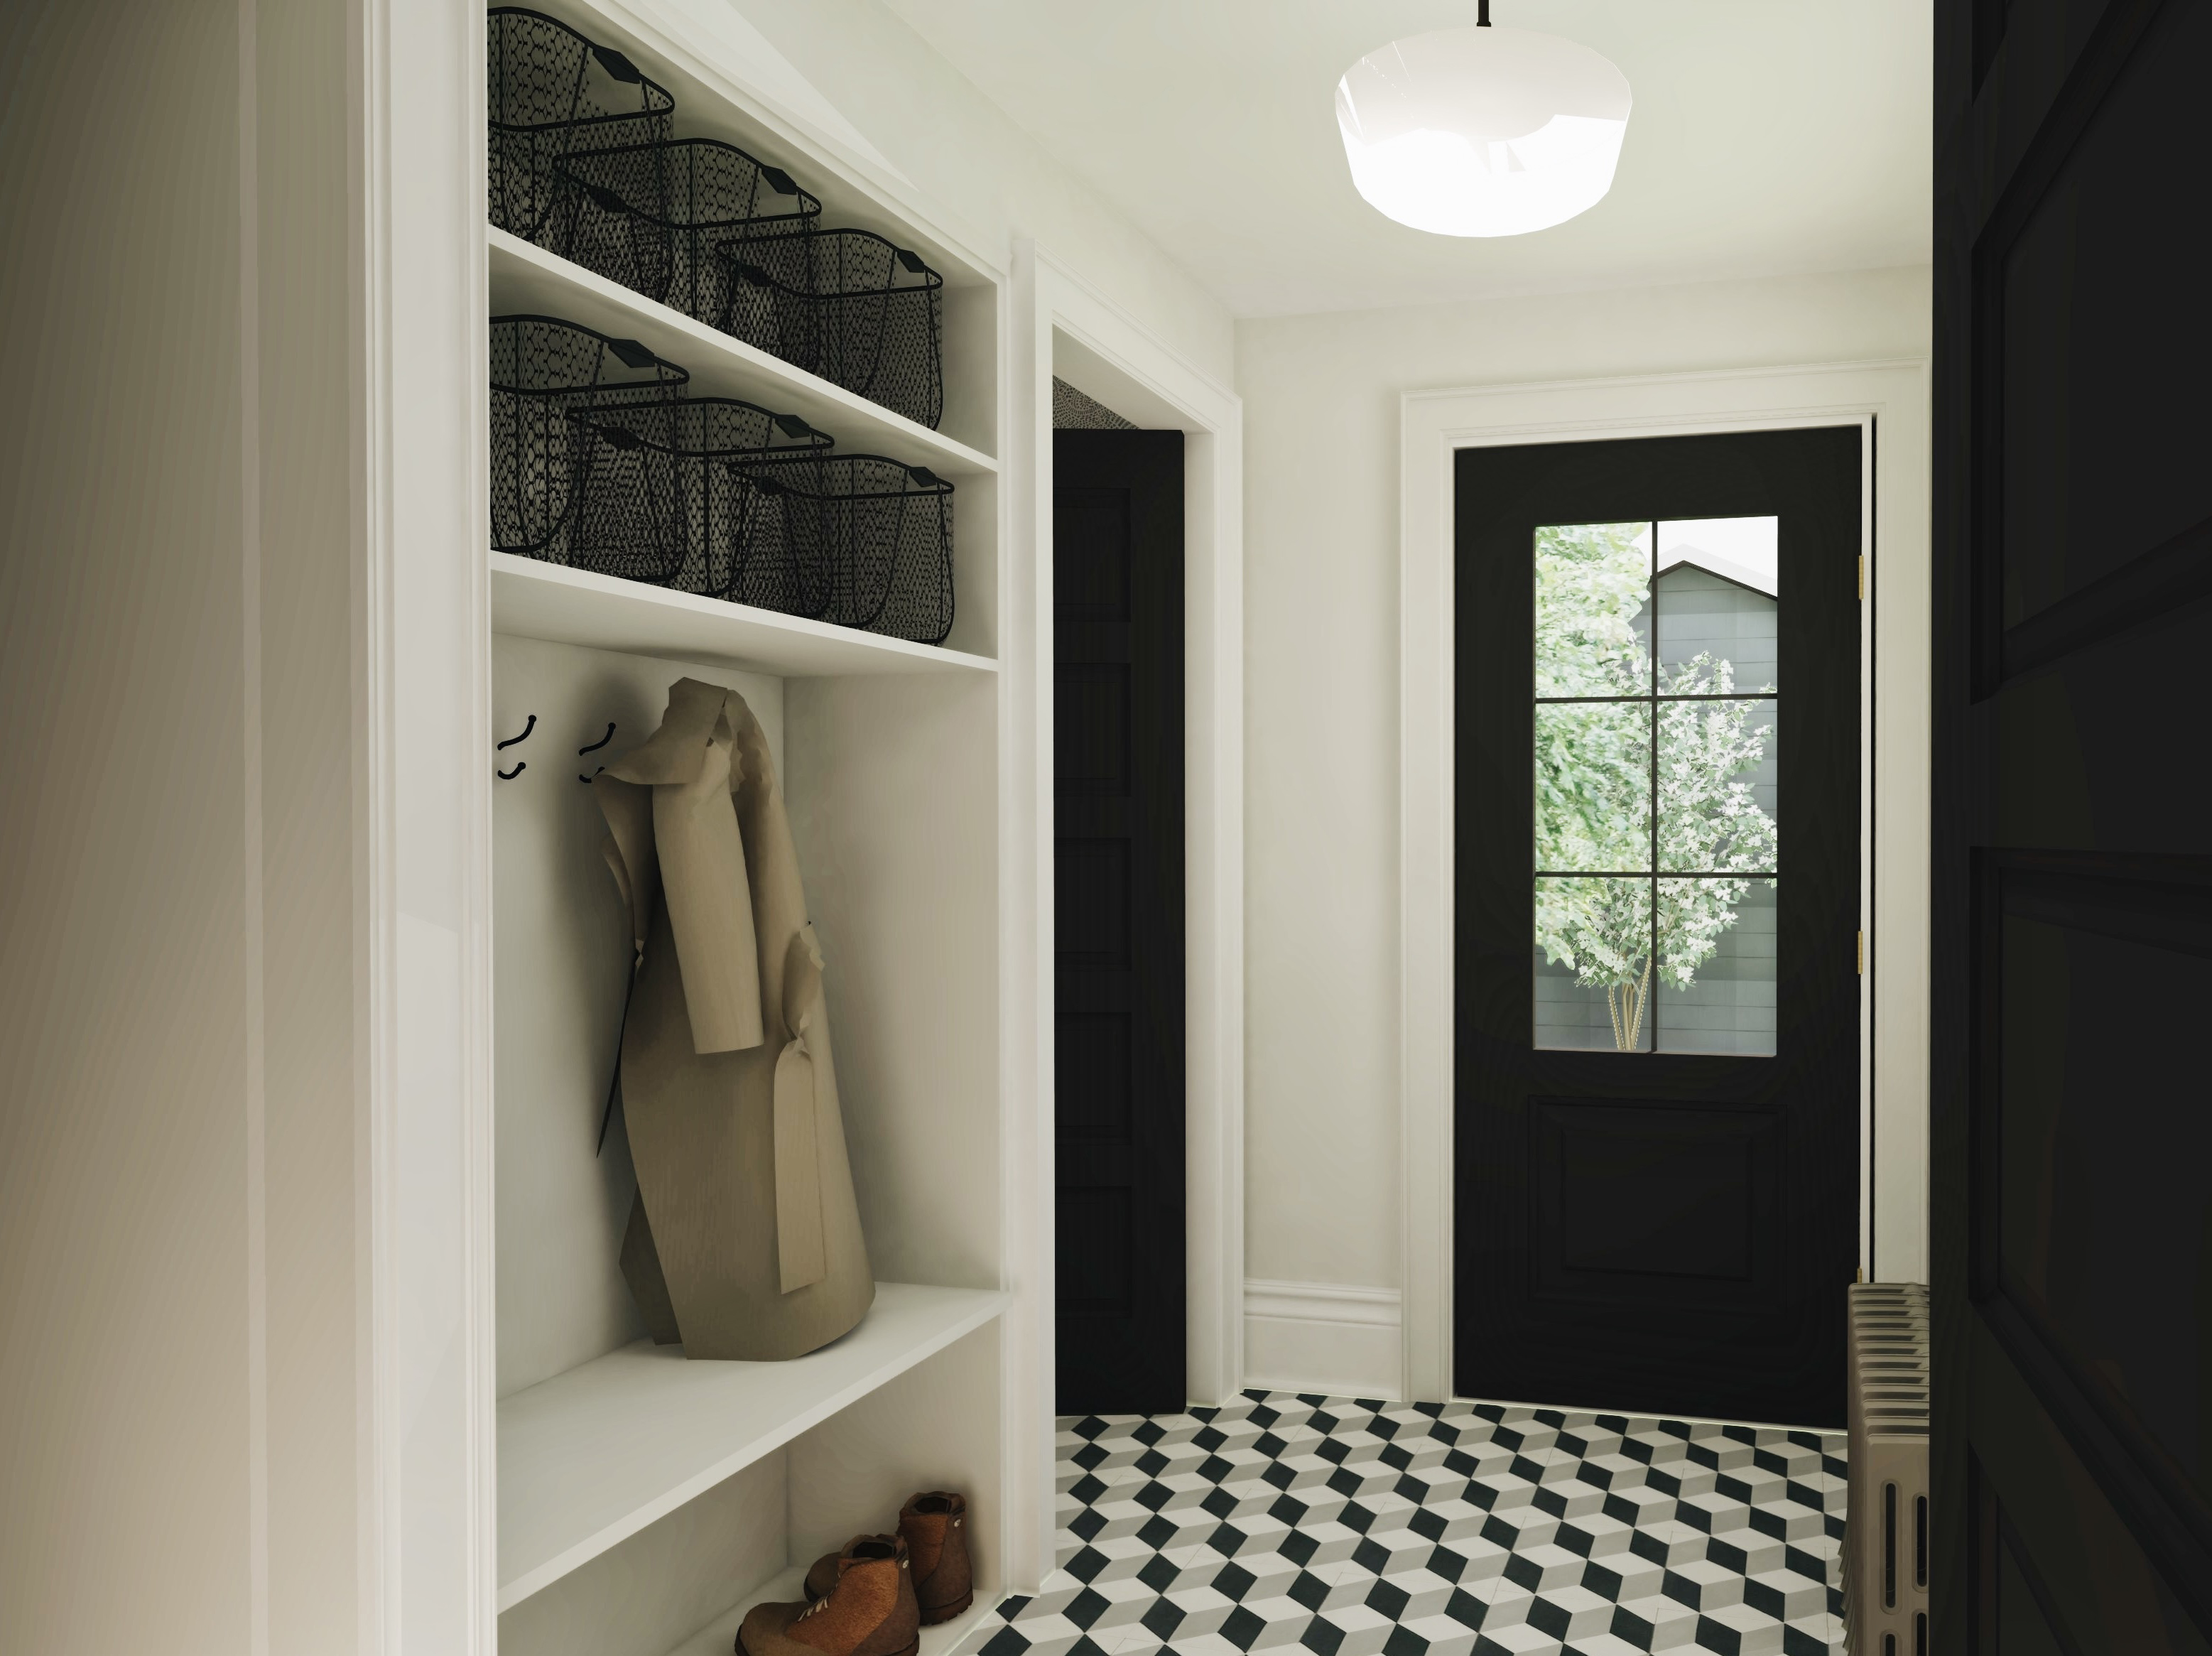
The mudroom and back door rendering. I can’t wait to see this space with the exterior door installed as well.
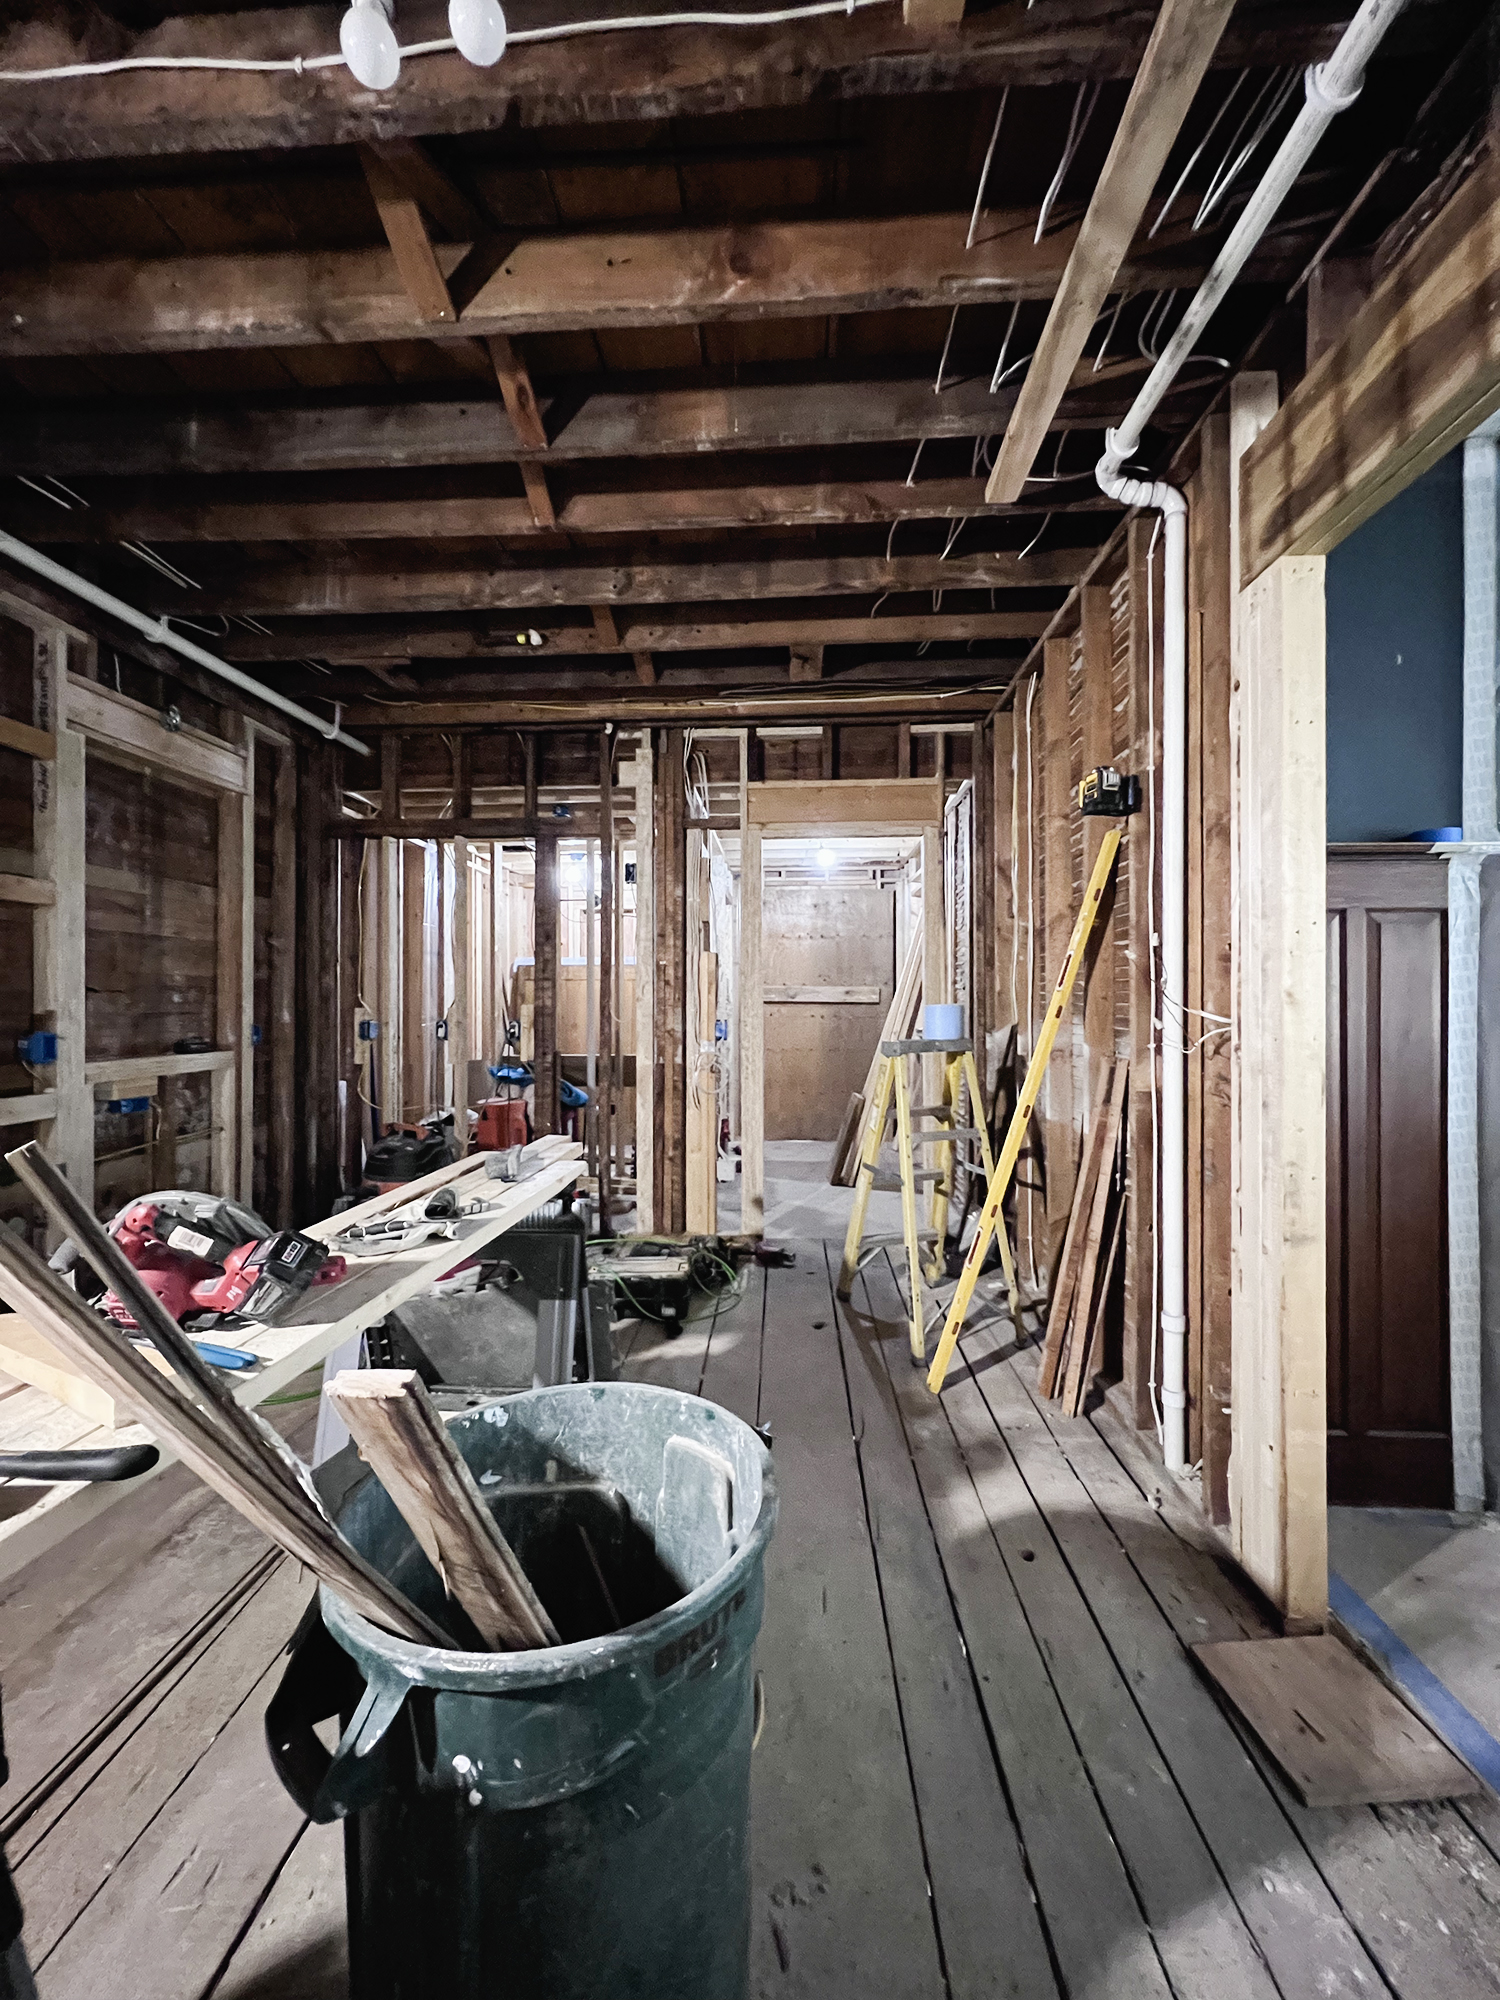
 I asked Jeff to snap me some progress pics while I was quarantining at the cabin with Covid. This is the image I got. This is looking towards our new bathroom. A built in mudroom cabinet will be to the left.
So that’s the update. Hopefully I’ll have the next one before too long. A lot has happened in the last few weeks. Thanks for following along!


“My kids mostly operate themselves…” ❤️ Thanks for the progress update!
Of course!
SUPER exciting. It’s going to be beautiful. Thanks for sharing an update!
It’s exciting to have time to share, glad to see you still check in :)
This is going to be amazing! Thank you for sharing. We have an old house, too, and would love to redo the kitchen. It’s tricky. Really appreciate your thought process and ideas, helps as we weigh different decisions .
It is tricky! You want to do right by the old house but you also want to add modern function to it. Good luck!
Thanks for the update! Looking forward to seeing your finished kitchen!
Me too! We are so excited, and can barely stand the wait.
If it’s not too late, go to the Capital Granite up in St. Cloud. That’s where they warehouse all the slabs and they had A LOT that they didn’t even show in the metro showrooms.
Hey Rhea, thanks for this. I think in hindsight I would have done this, but I’m happy with what we have choose. No need to second guess it at this point ;).
Wow, it’s looking amazing! I can’t wait to see how it all turns out.
Weird question: what kind of drywall are you going to use? Since the rest of the house is plaster, are you going to use a thicker drywall so it sounds similar to the original plaster? I ask because this one of my few criticisms of our new house (built in 2003), it has thinner drywall that doesn’t block sound and feels….cheap. Just curious if it’s something you’ve thought about!
Hey Stacey, I appreciate this questions. I guess I didn’t think about how that would affect the sound of the house. It’s either 1/2″ or 3/4″ I’ll have to check. Now I’m so curious!
Thanks for the update! It’s all about the details and you’ve spent so much time thinking about every last one!
Thanks, Brenda! I had a lot of time to think about the details. It’s been five years since I first started dreaming and thanks to SketchUp I’ve done so many iterations. It was a really helpful tool to figure it all out and get it right (hopefully)!
Such a good update! It looks amazing already I can’t wait for the rest. I love that you’re making this cohesive with the age of the house (your house is a dream to me and there’s just not enough well taken care of houses like this here so I live vicariously through you!).
Thanks, C.B. that’s really nice of you to say. We are really going all in on the details and it’s not just for us, it’s for the house. I couldn’t do her wrong.
Just curious, where did you end up sourcing the back door from? We’re searching for a front door with similar divisions and half-lites.
Love the progress – Congrats on finding the perfect radiator!
Scoops, I always enjoy your writing. Excited to see you on the other side of this addition, as you bring the space to life and redo your back yard. For me, so fun to watch. Thanks for taking us on the ride. Love it. -Amy G
it`s so exciting to see your kitchen update and to hear from you again!
can’t wait to see the finished space.
We’re local and looking for a contractor. Do you mind sharing a recommendation?
v5ilui
kasc1p