


This post is in partnership with Beddy’s
Hey Guyses! Hope all is well in the new year! Things are starting off with a bang around here, and I’m ready to hit the ground running! I’ll fill you in on my next post, but I’m ready to get back at a more reg blogging schedule. More on that soon :)
Last week, I ran up to the cabin for an overnight for the soul purpose of taking photos to share with yas. I almost always try to take photographs when I’m there. I have a laundry basket containing a tripod, a camera, all my lenses, a computer and I devoutly haul this thing back and forth EVERY.TIME.WE.GO. Once at the cab, time is usually too short and we are often so busy doing nothing (or everything depending on the weekend), that I’d hate to interrupt the chill/busy vibe to snap a pic. The aforementioned solo adventure to the cabin allowed me the time and freedom to take a lot of photos, and I’m stoked to start sharing ’em with you babes and bros. We’re nearing the six month mark now, so much has changed, and the list of future improvements is constantly growing. It felt like a good time to document where we’re at.
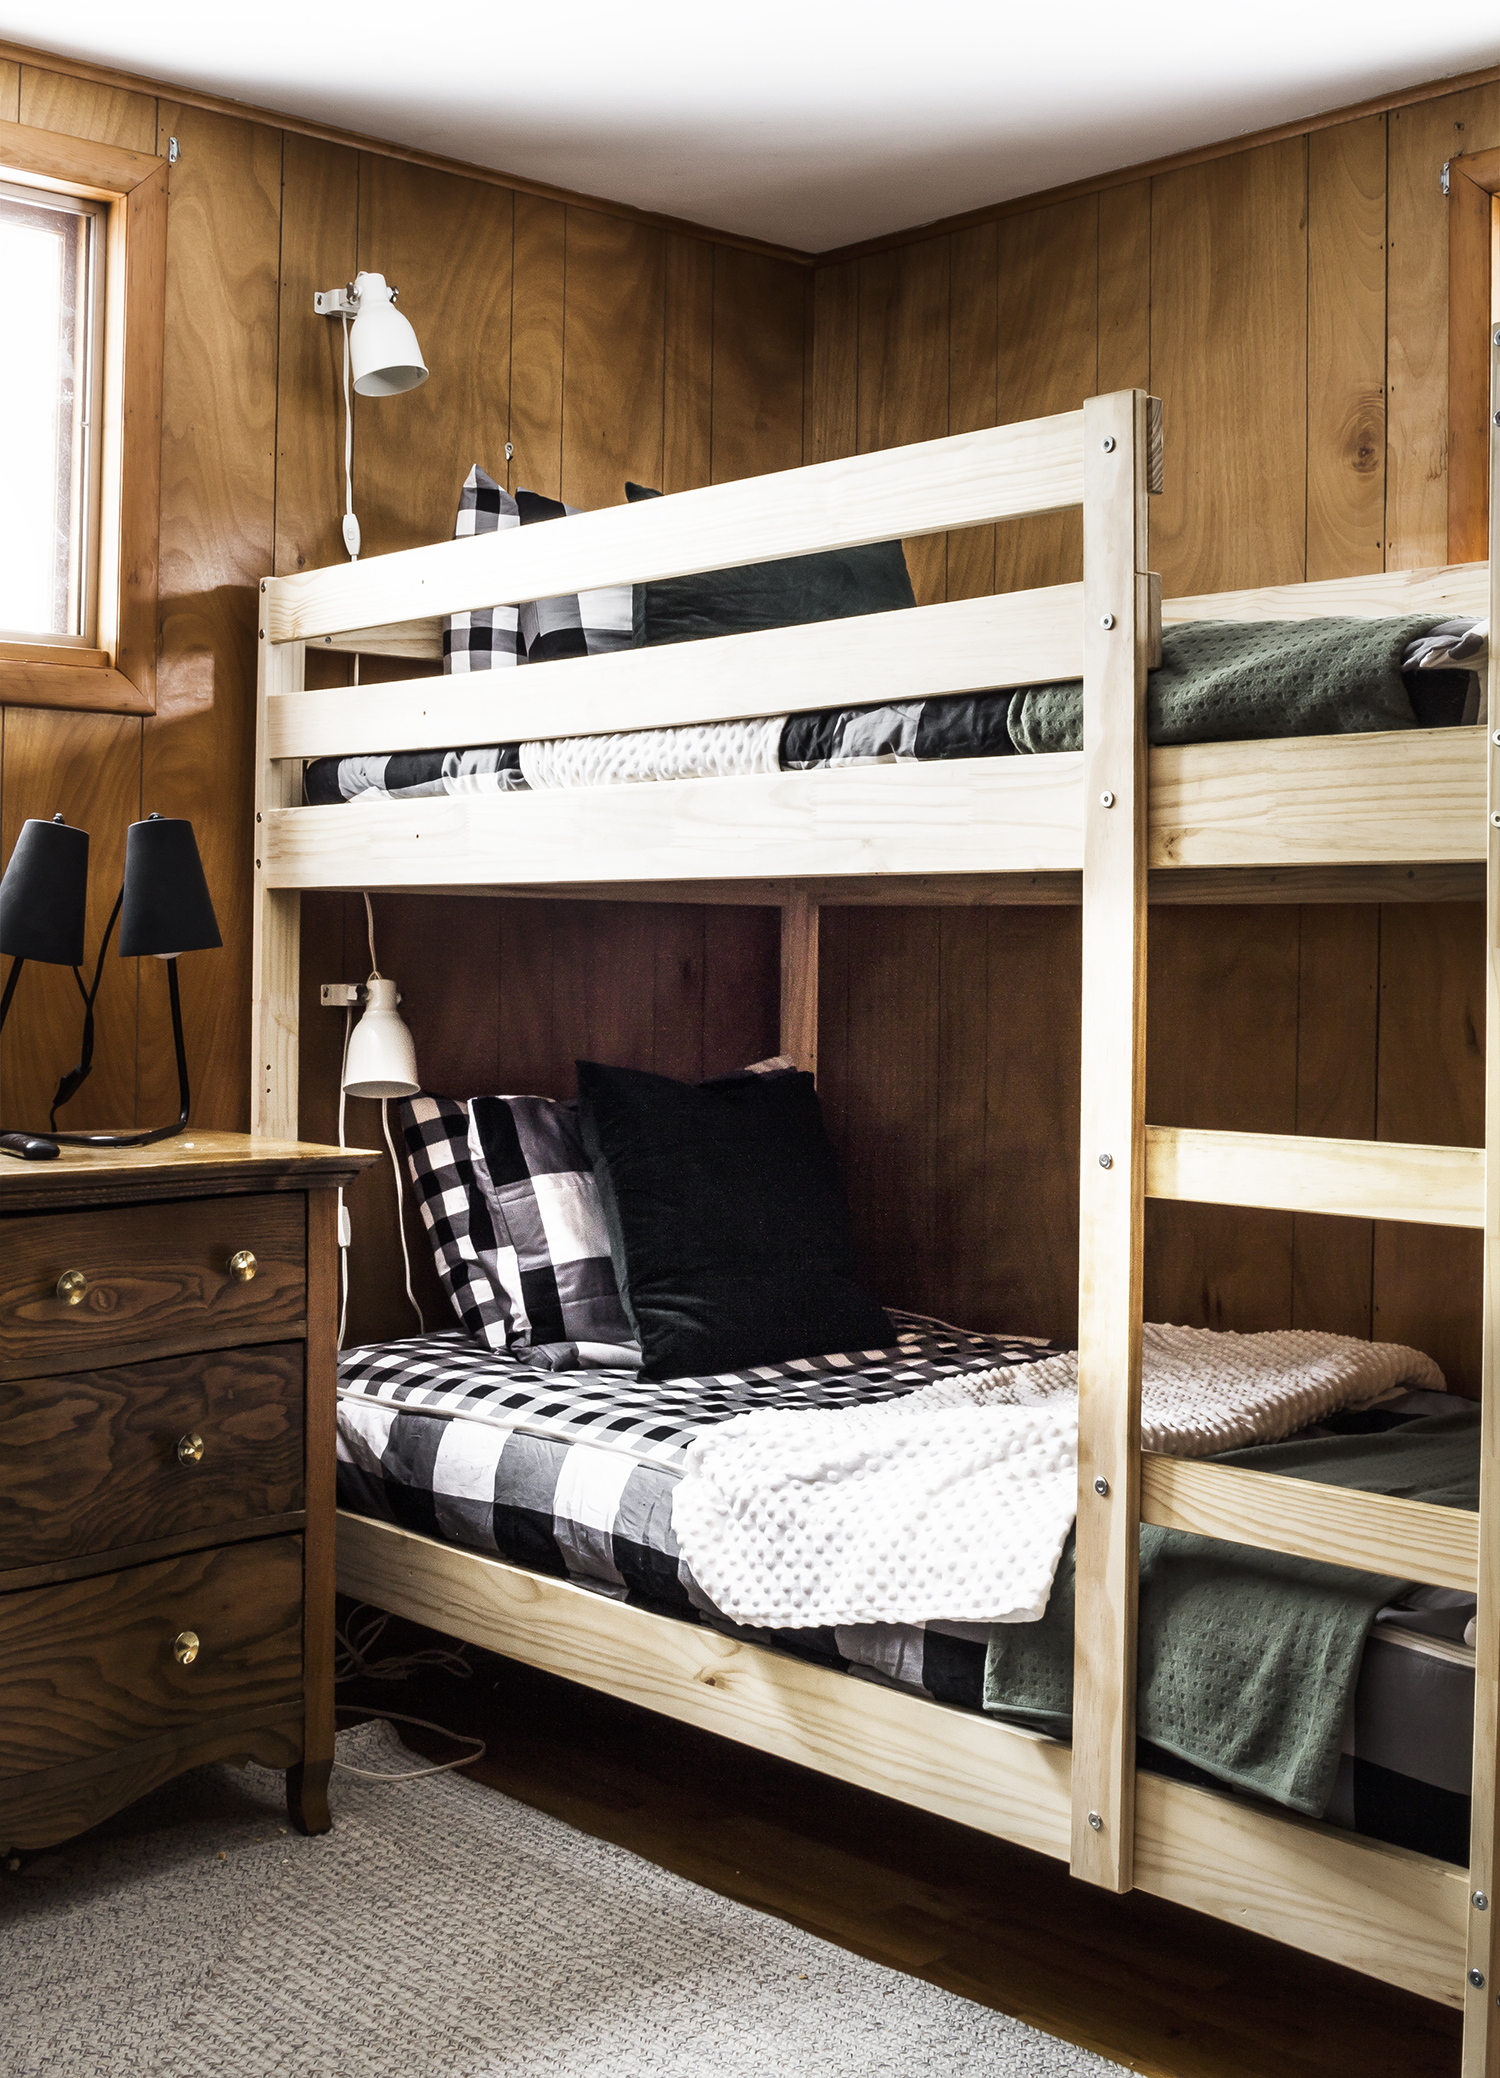
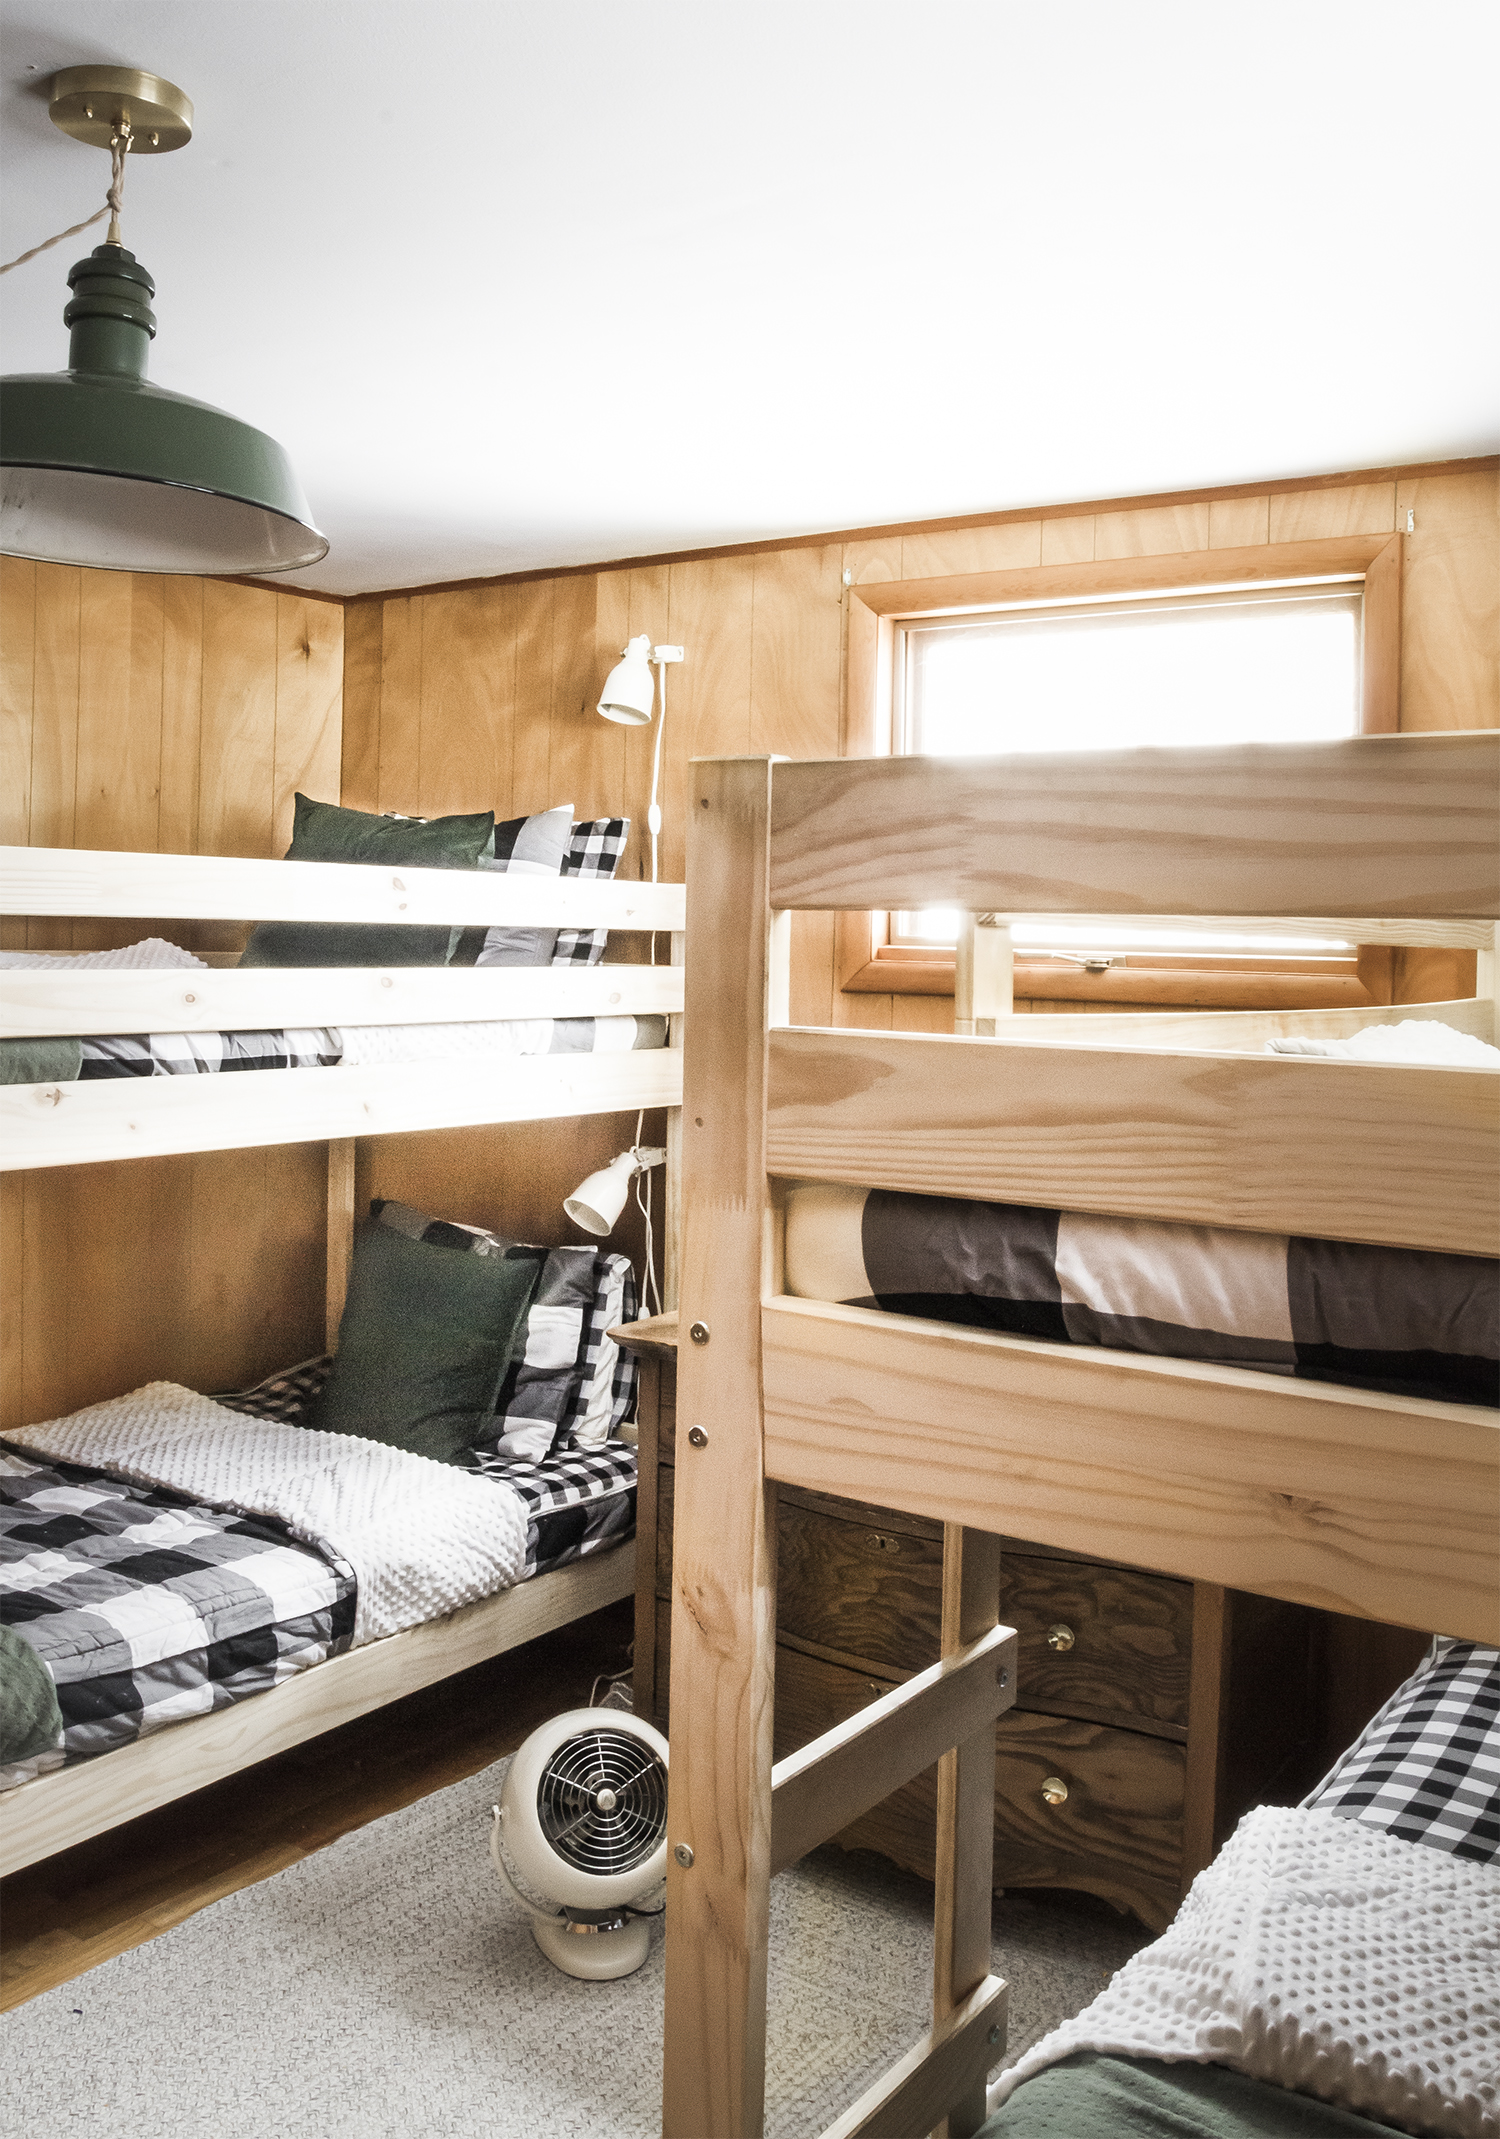
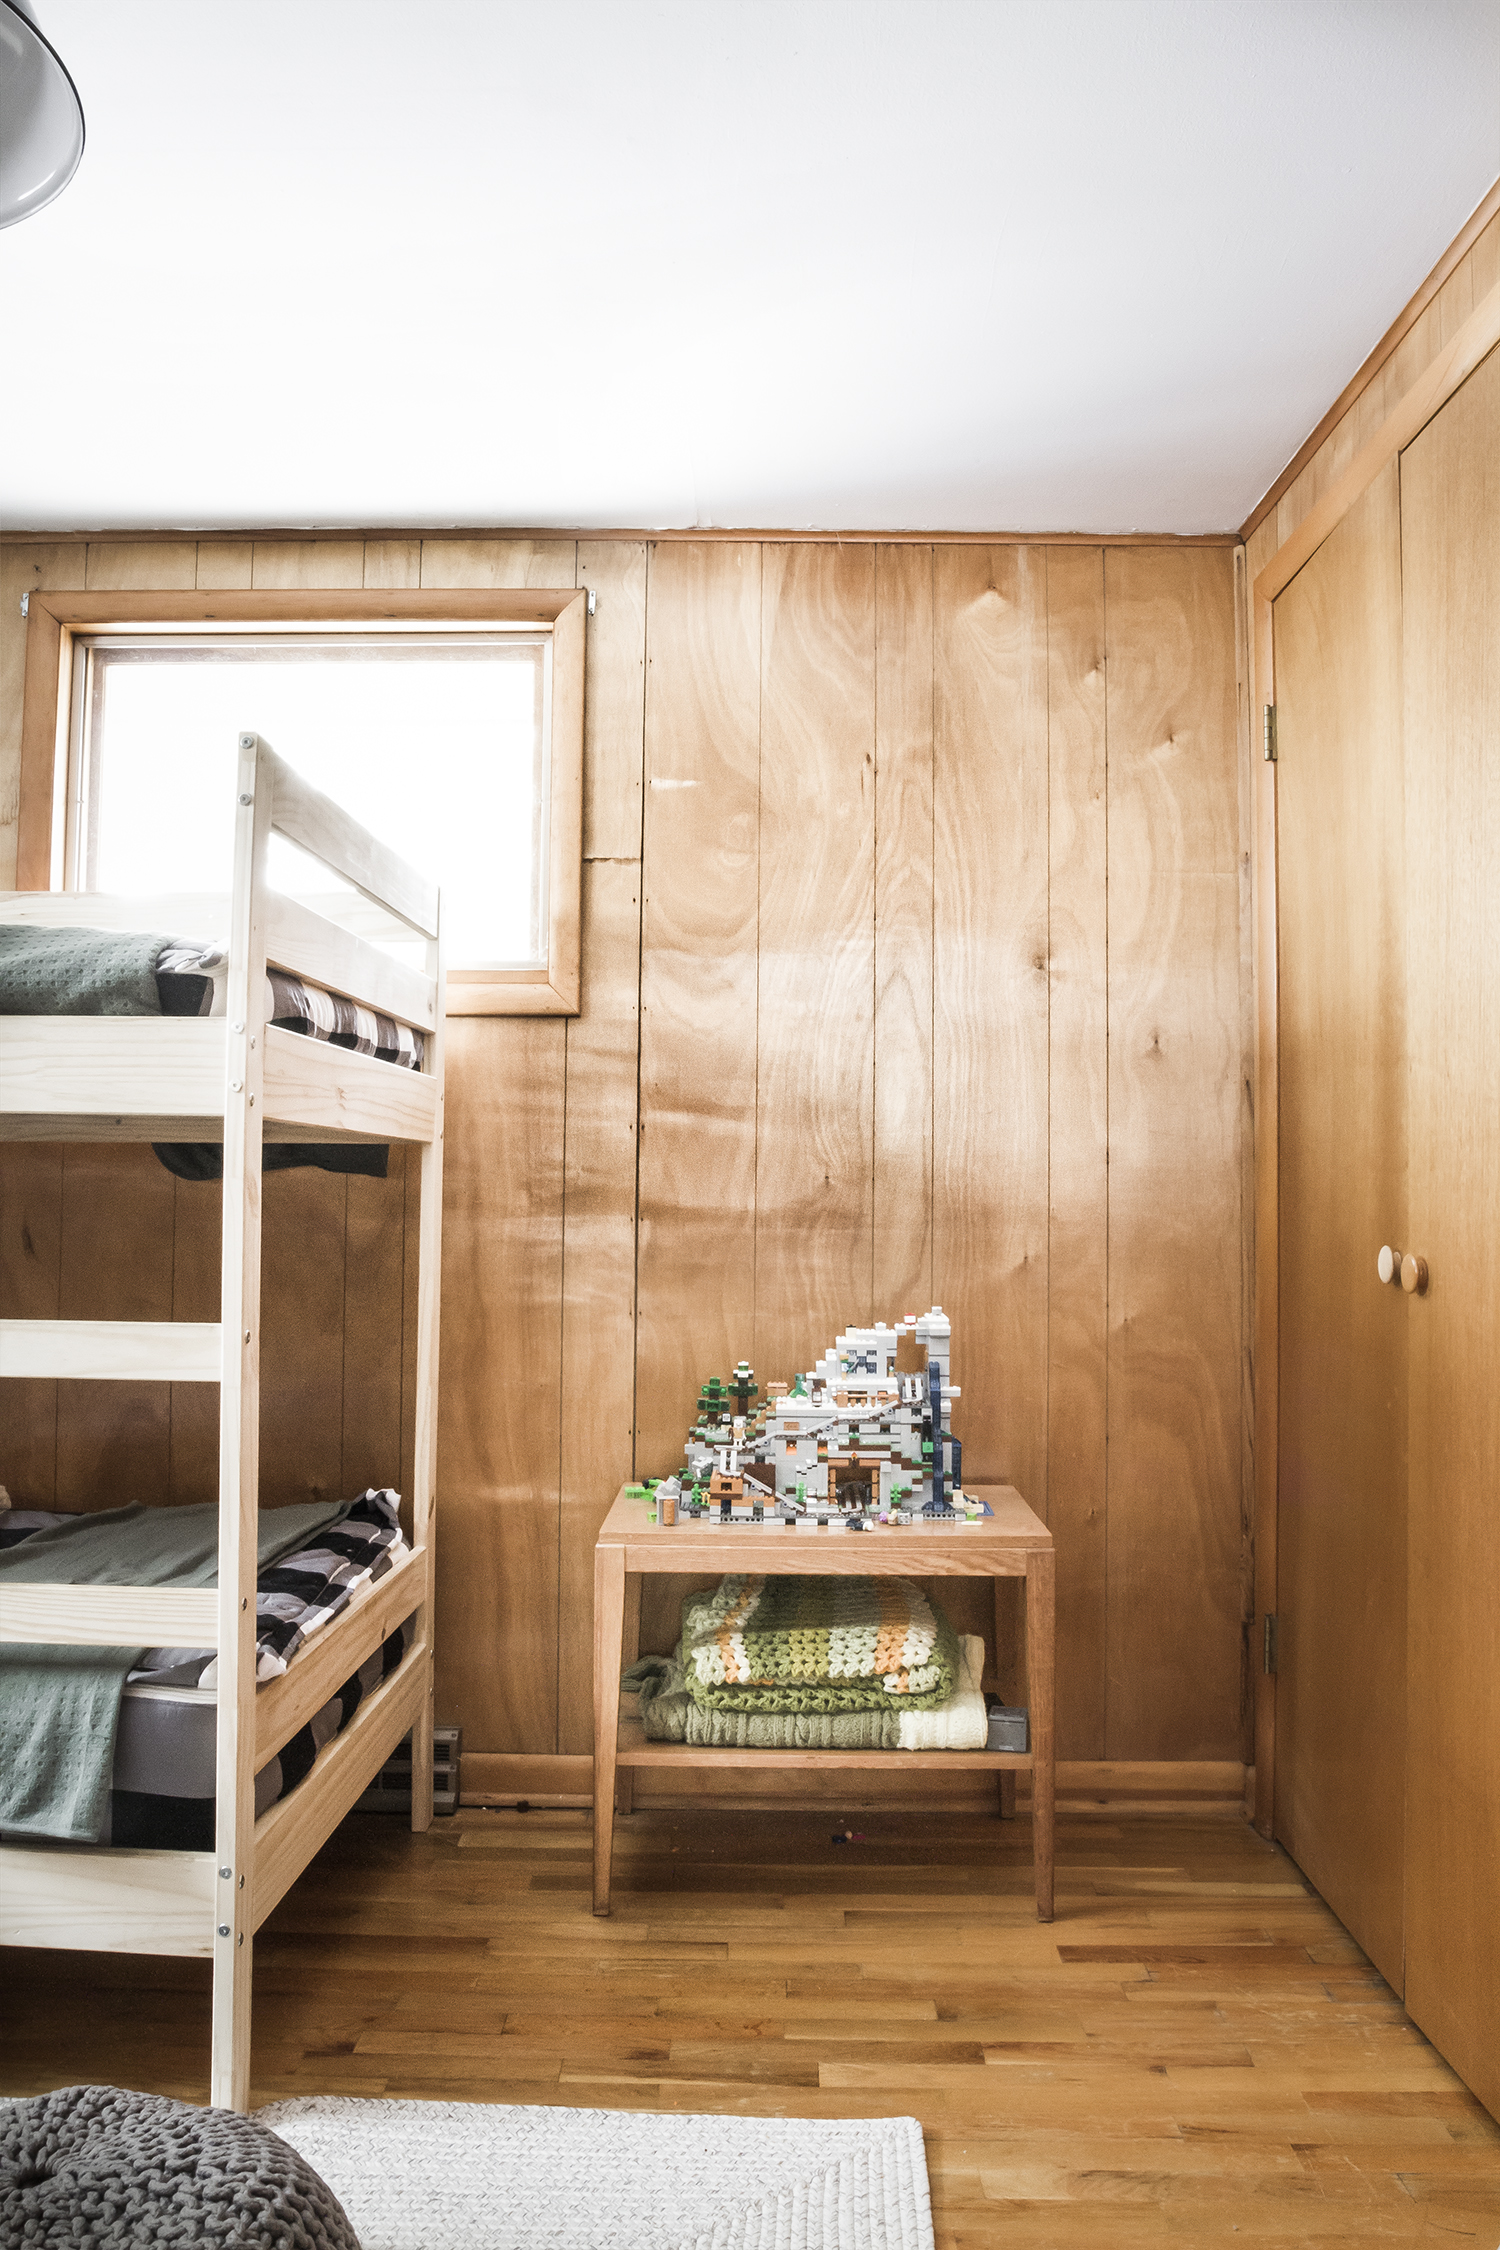
Let’s start with a room you guys have rarely seen – the bunk room. In the last post I formally introduced the bunk room for the first time, outlining a game plan for the space – I like to think of it as the basics, ya know, the first layer. My goal is to make it as cute and functional as possible while not spending tons of money or time right now. Most importantly, we need to find the best furniture layout for the space, and then decorate it in a way that would fit the vibe of the cabin.
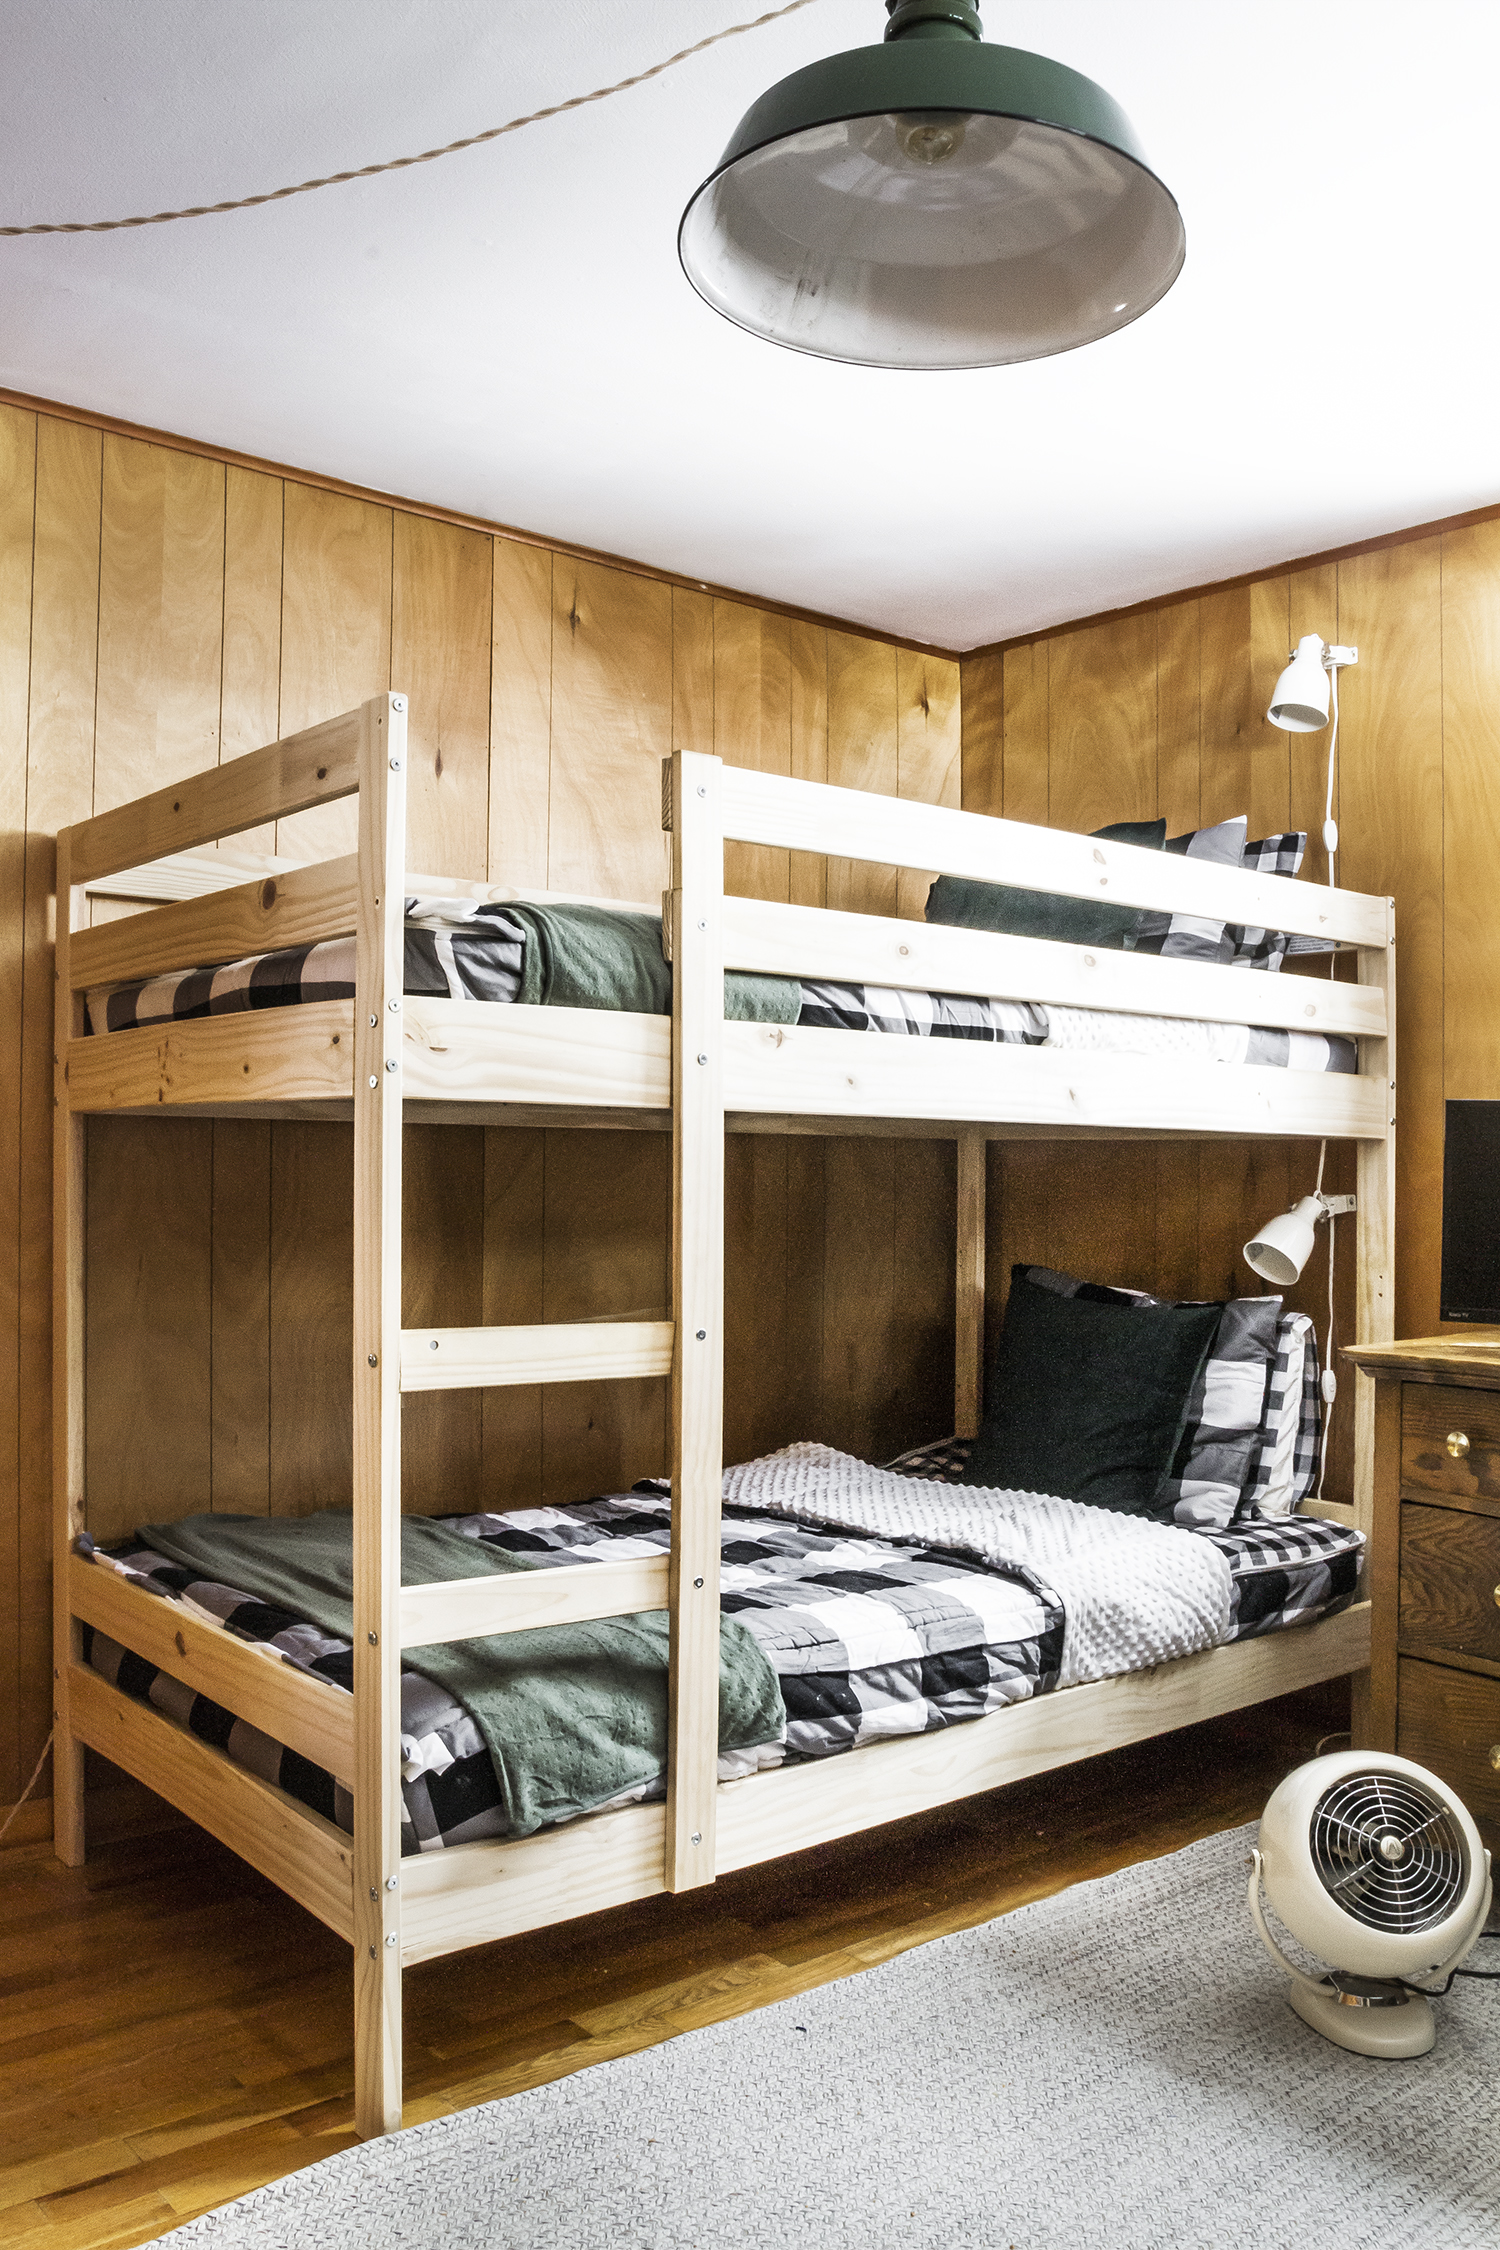
The bedroom is not huge (roughly 12 x 10), but it is the largest bedroom in the cabin, so obvs we knew it had to be the room we used for the bunk room. Budget was a big concern going into this, since we were trying to furnish the whole cabin. A big money saver was choosing some of the least inexpensive bunk beds out there – god bless Ikea. We bought two of the Mydal bunks, my thought being to just get the beds in there, and then later I could figure out a way to customize, or hack them to make dem utilitarian beds more special and unique in the space. Those ideas are still percolating.
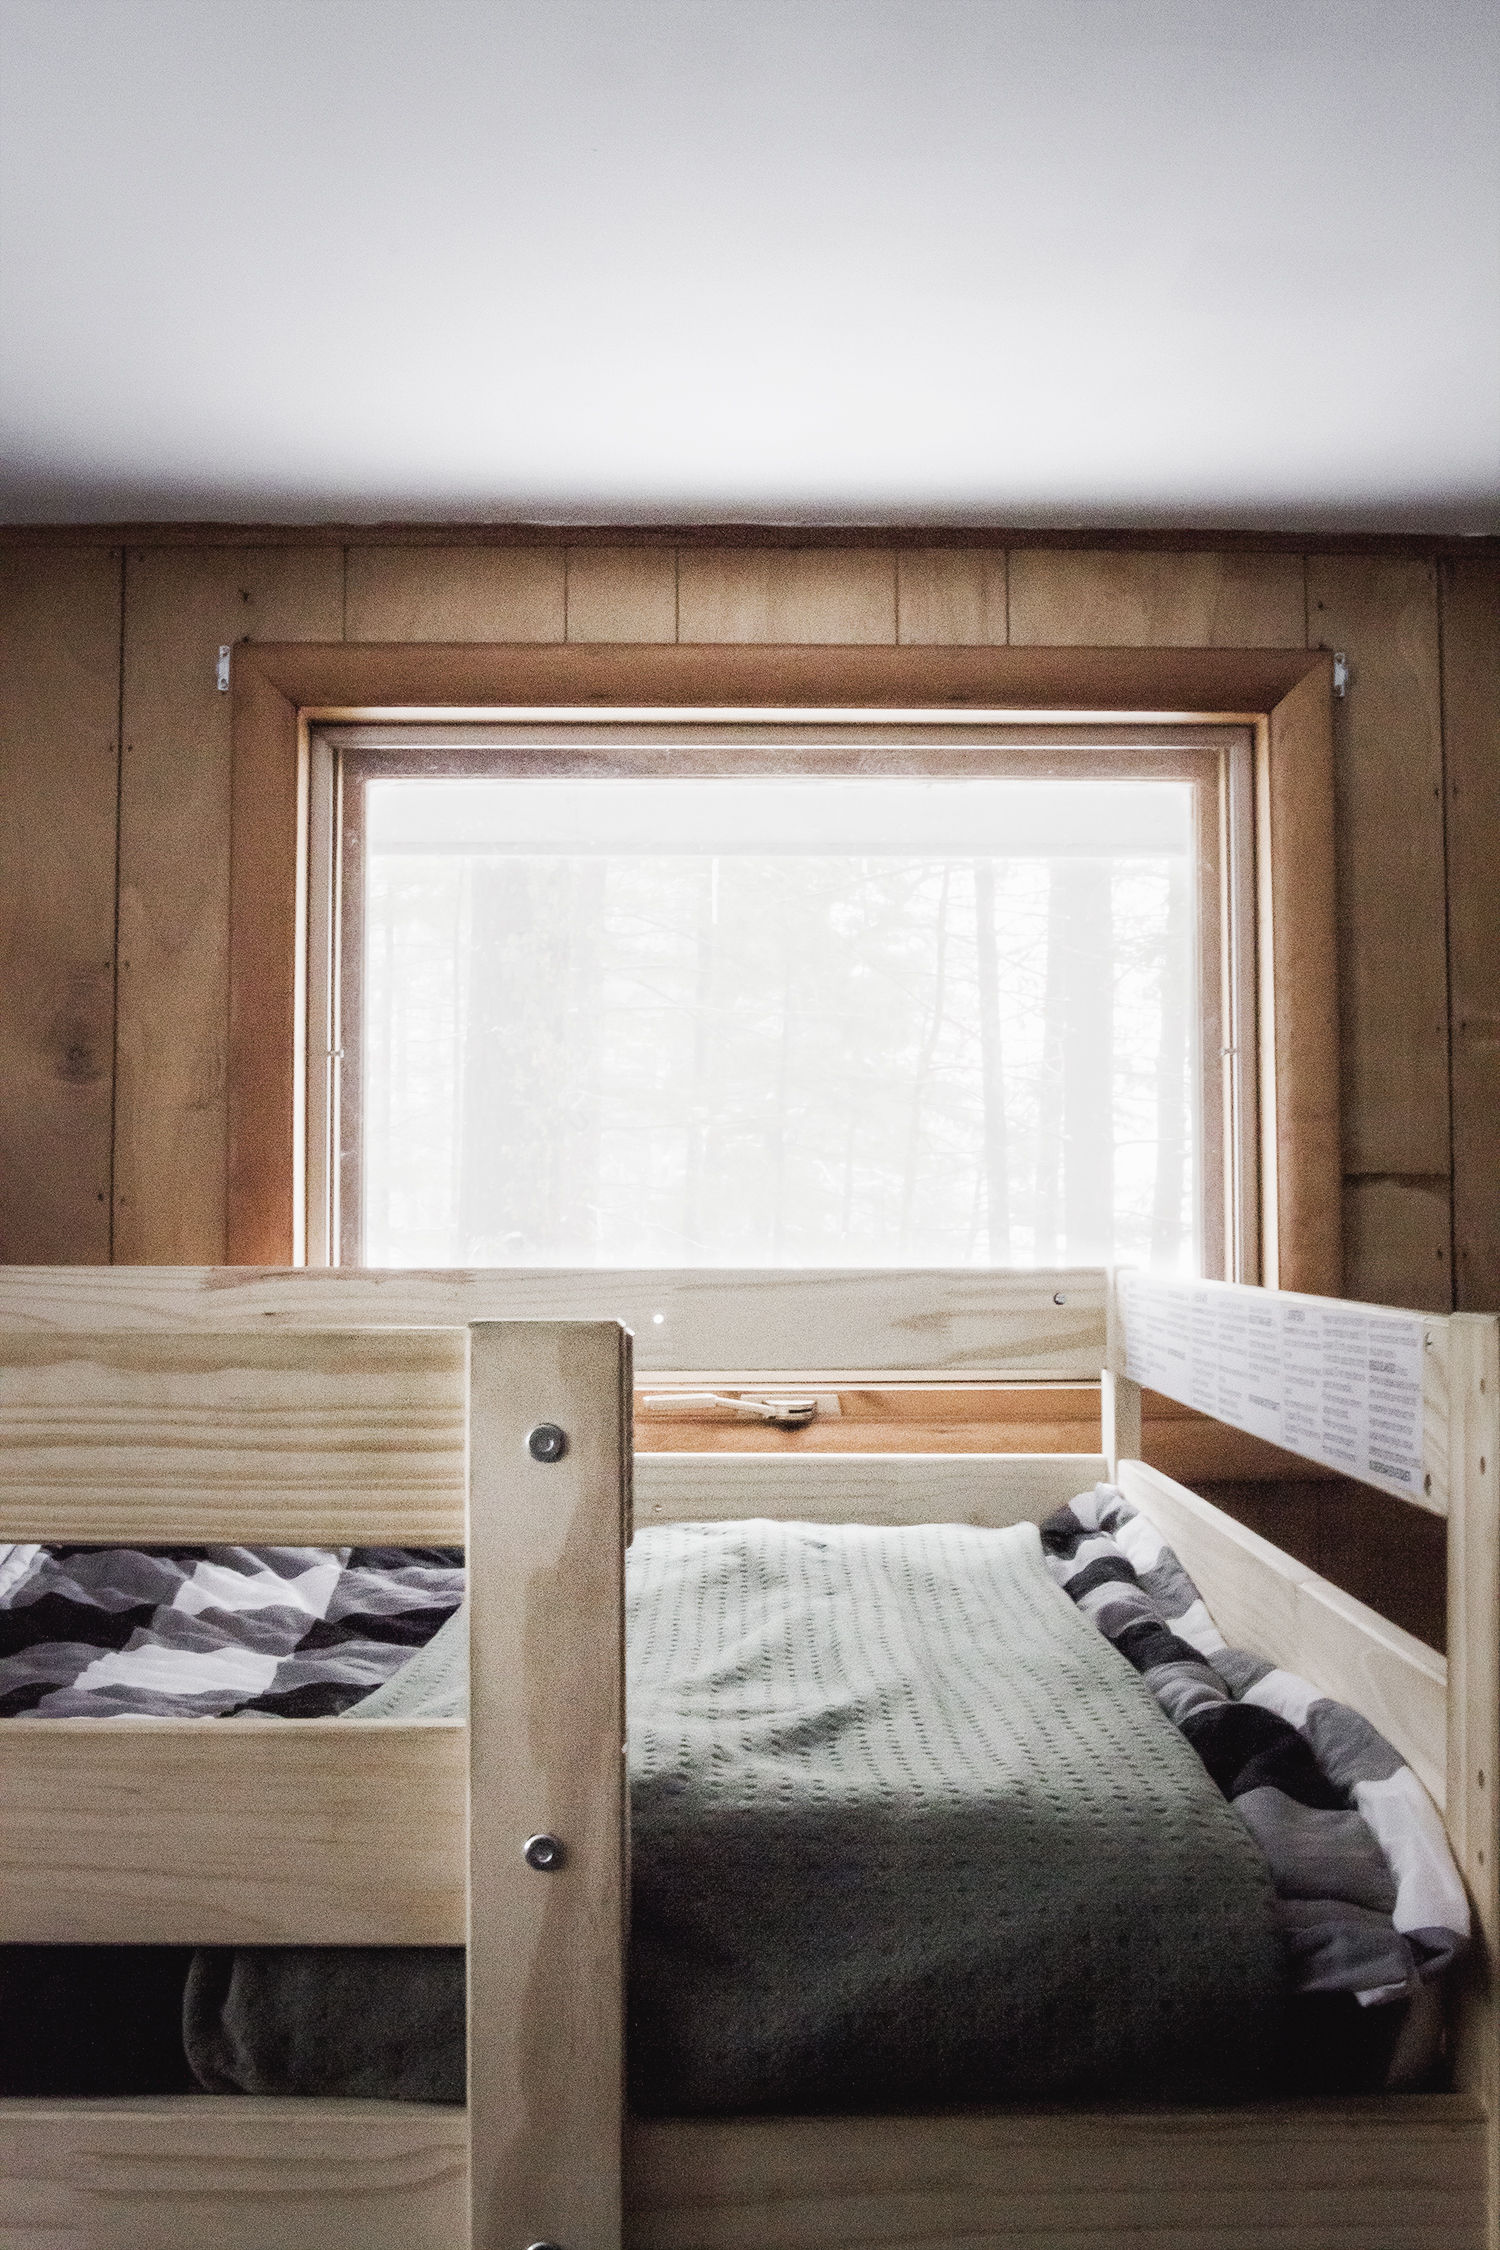
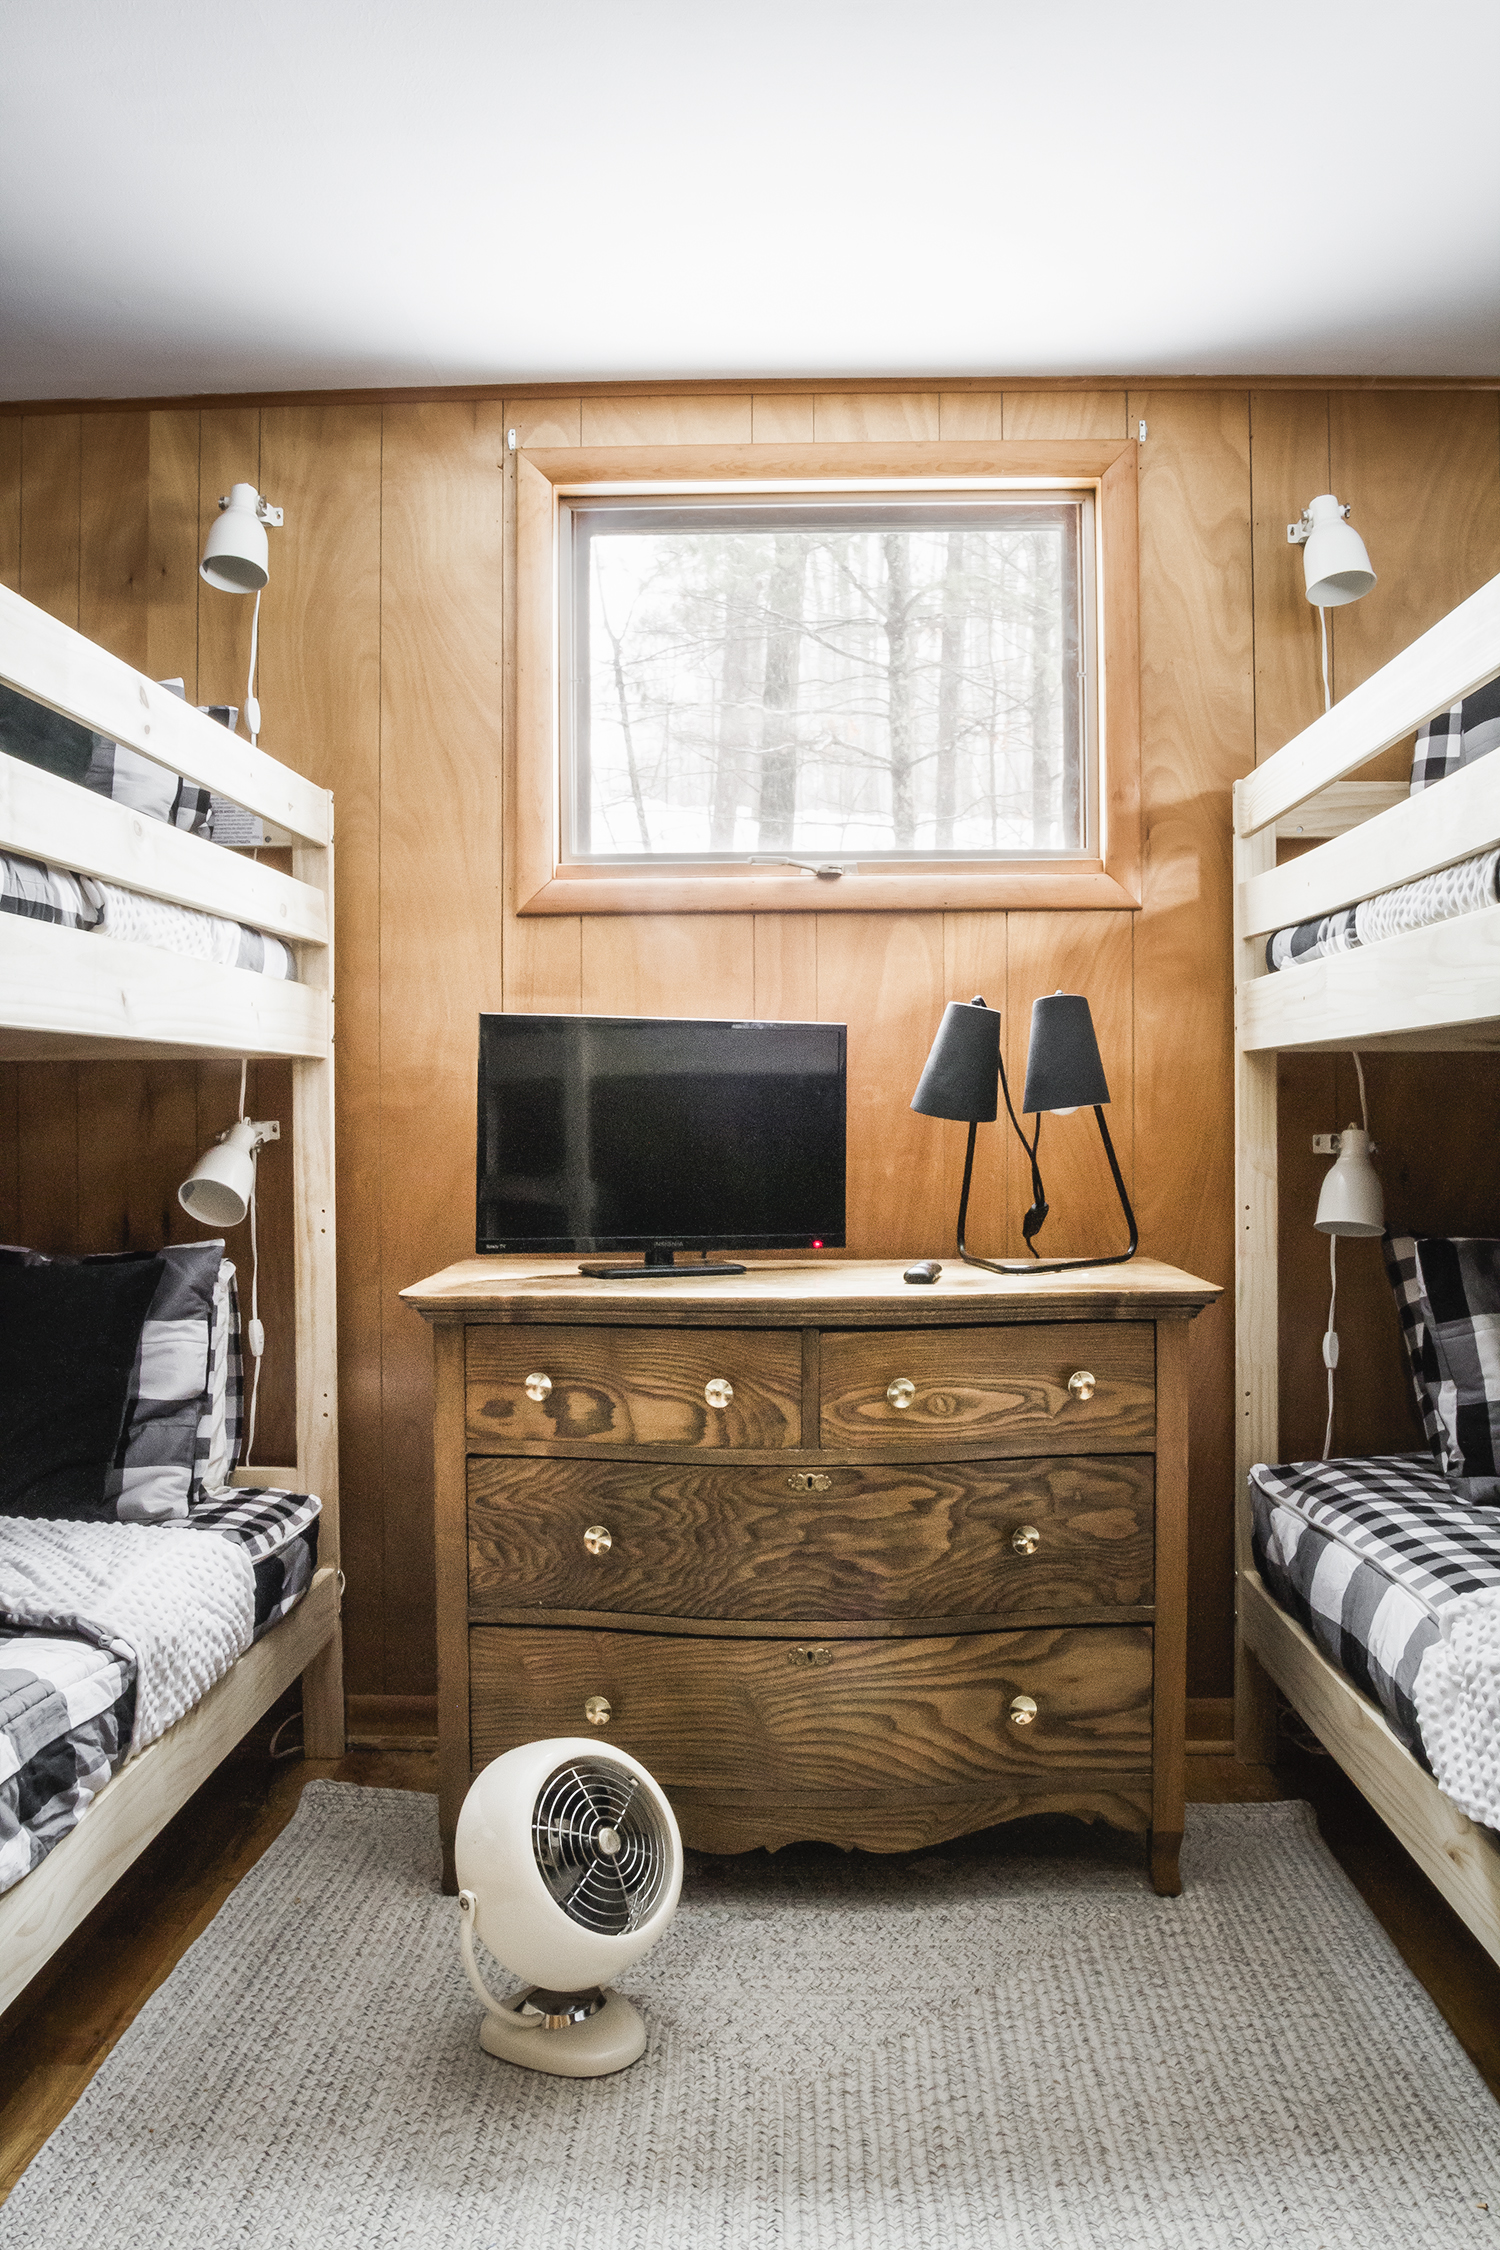
We recently repositioned the beds as well. After we moved in, we had originally shoved the beds in the corner, one bed on each wall. The reason for this was because the room has two very oddly placed windows, both windows are high on the walls and neither is proportionally spaced in the room. This is actually true for most of the house, it seems like symmetry or balance was not something one considered when installing windows in this shack. I mean, god forbid you’d want to add another 2×4 to the framing just so that the window would be centered on the wall! Details are hard for some folks. Not only are the windows uncentered, but they are also placed up high (I’m guessing for privacy, but not for fires or burning alive). Anyways, I think that’s what they call charm. Now you understand where some of my design frustration and confusion has come from. Me being one of those people that’s always been really into forts and cool tiny kid stuff, thought that it could be really cool for the kids to have each bunk was placed under a window. That’s how we got to, “Just shove them babies in the corner”. Fun for the kids on the top who had windows, but poor souls on the lower bunks were sequestered to their own dark dens and it just didn’t seem fair. Plus the room wasn’t welcoming and the beds interrupted the little light there was from the windows. A few weeks back we moved the beds so that each sat on its own wall, and that helped to make the space feel way more centered, bright, inviting and allowed the kids more space to hang.
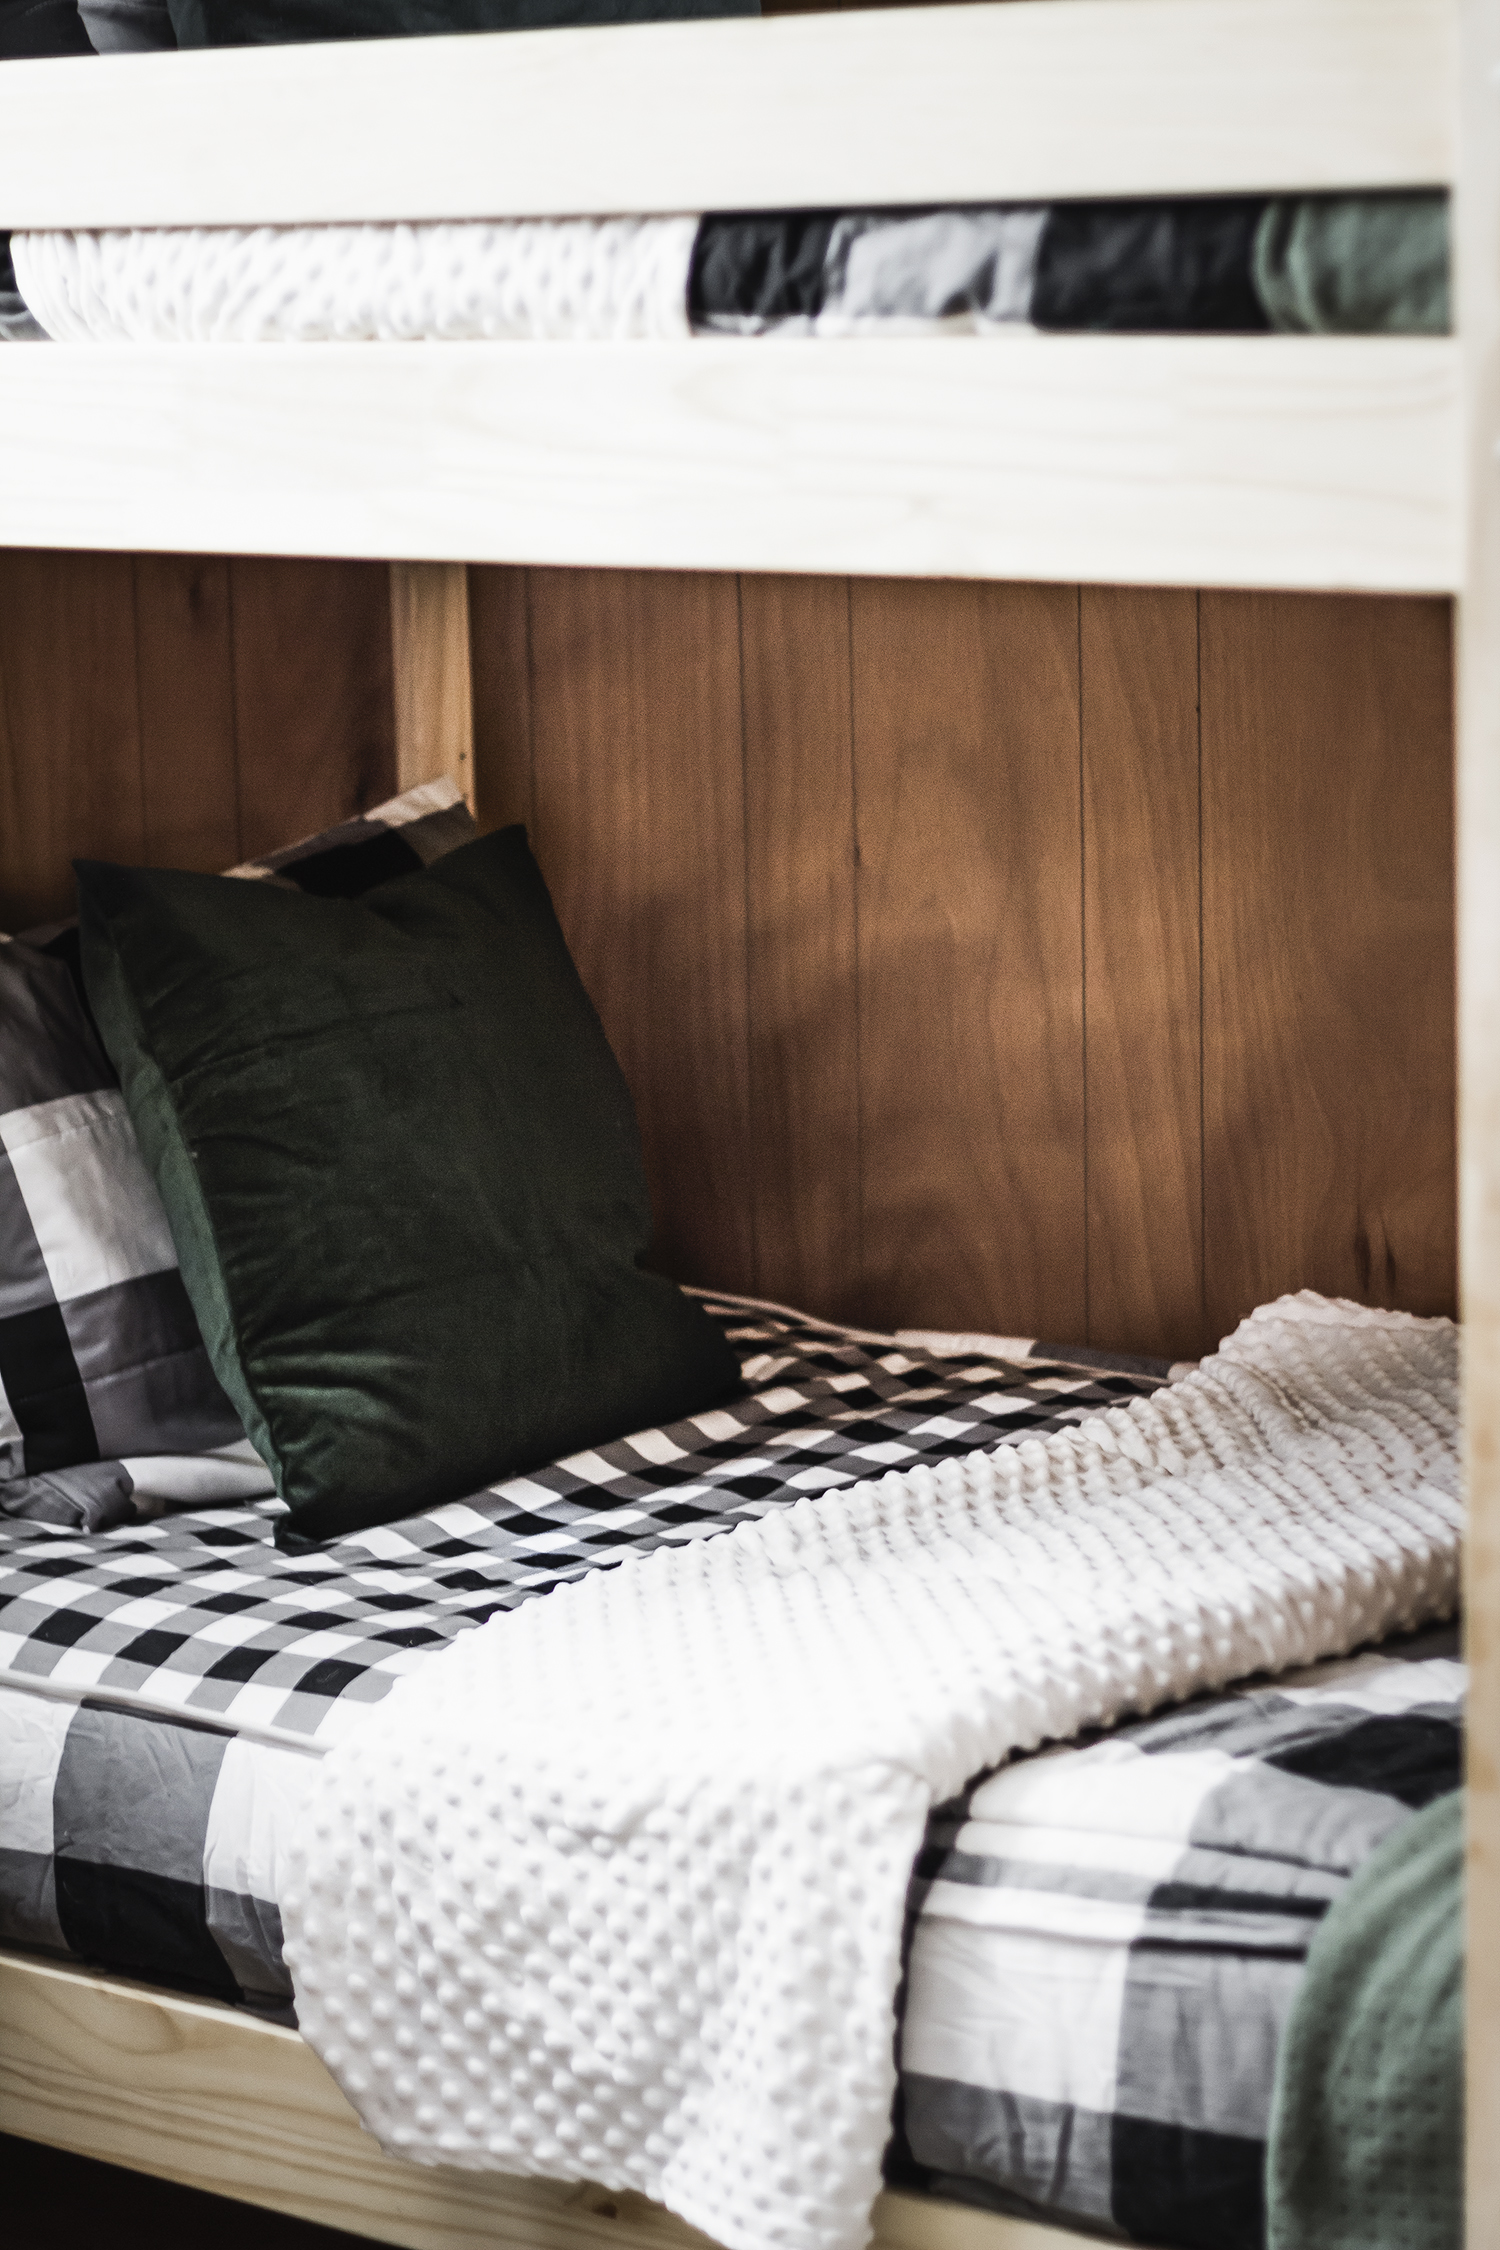
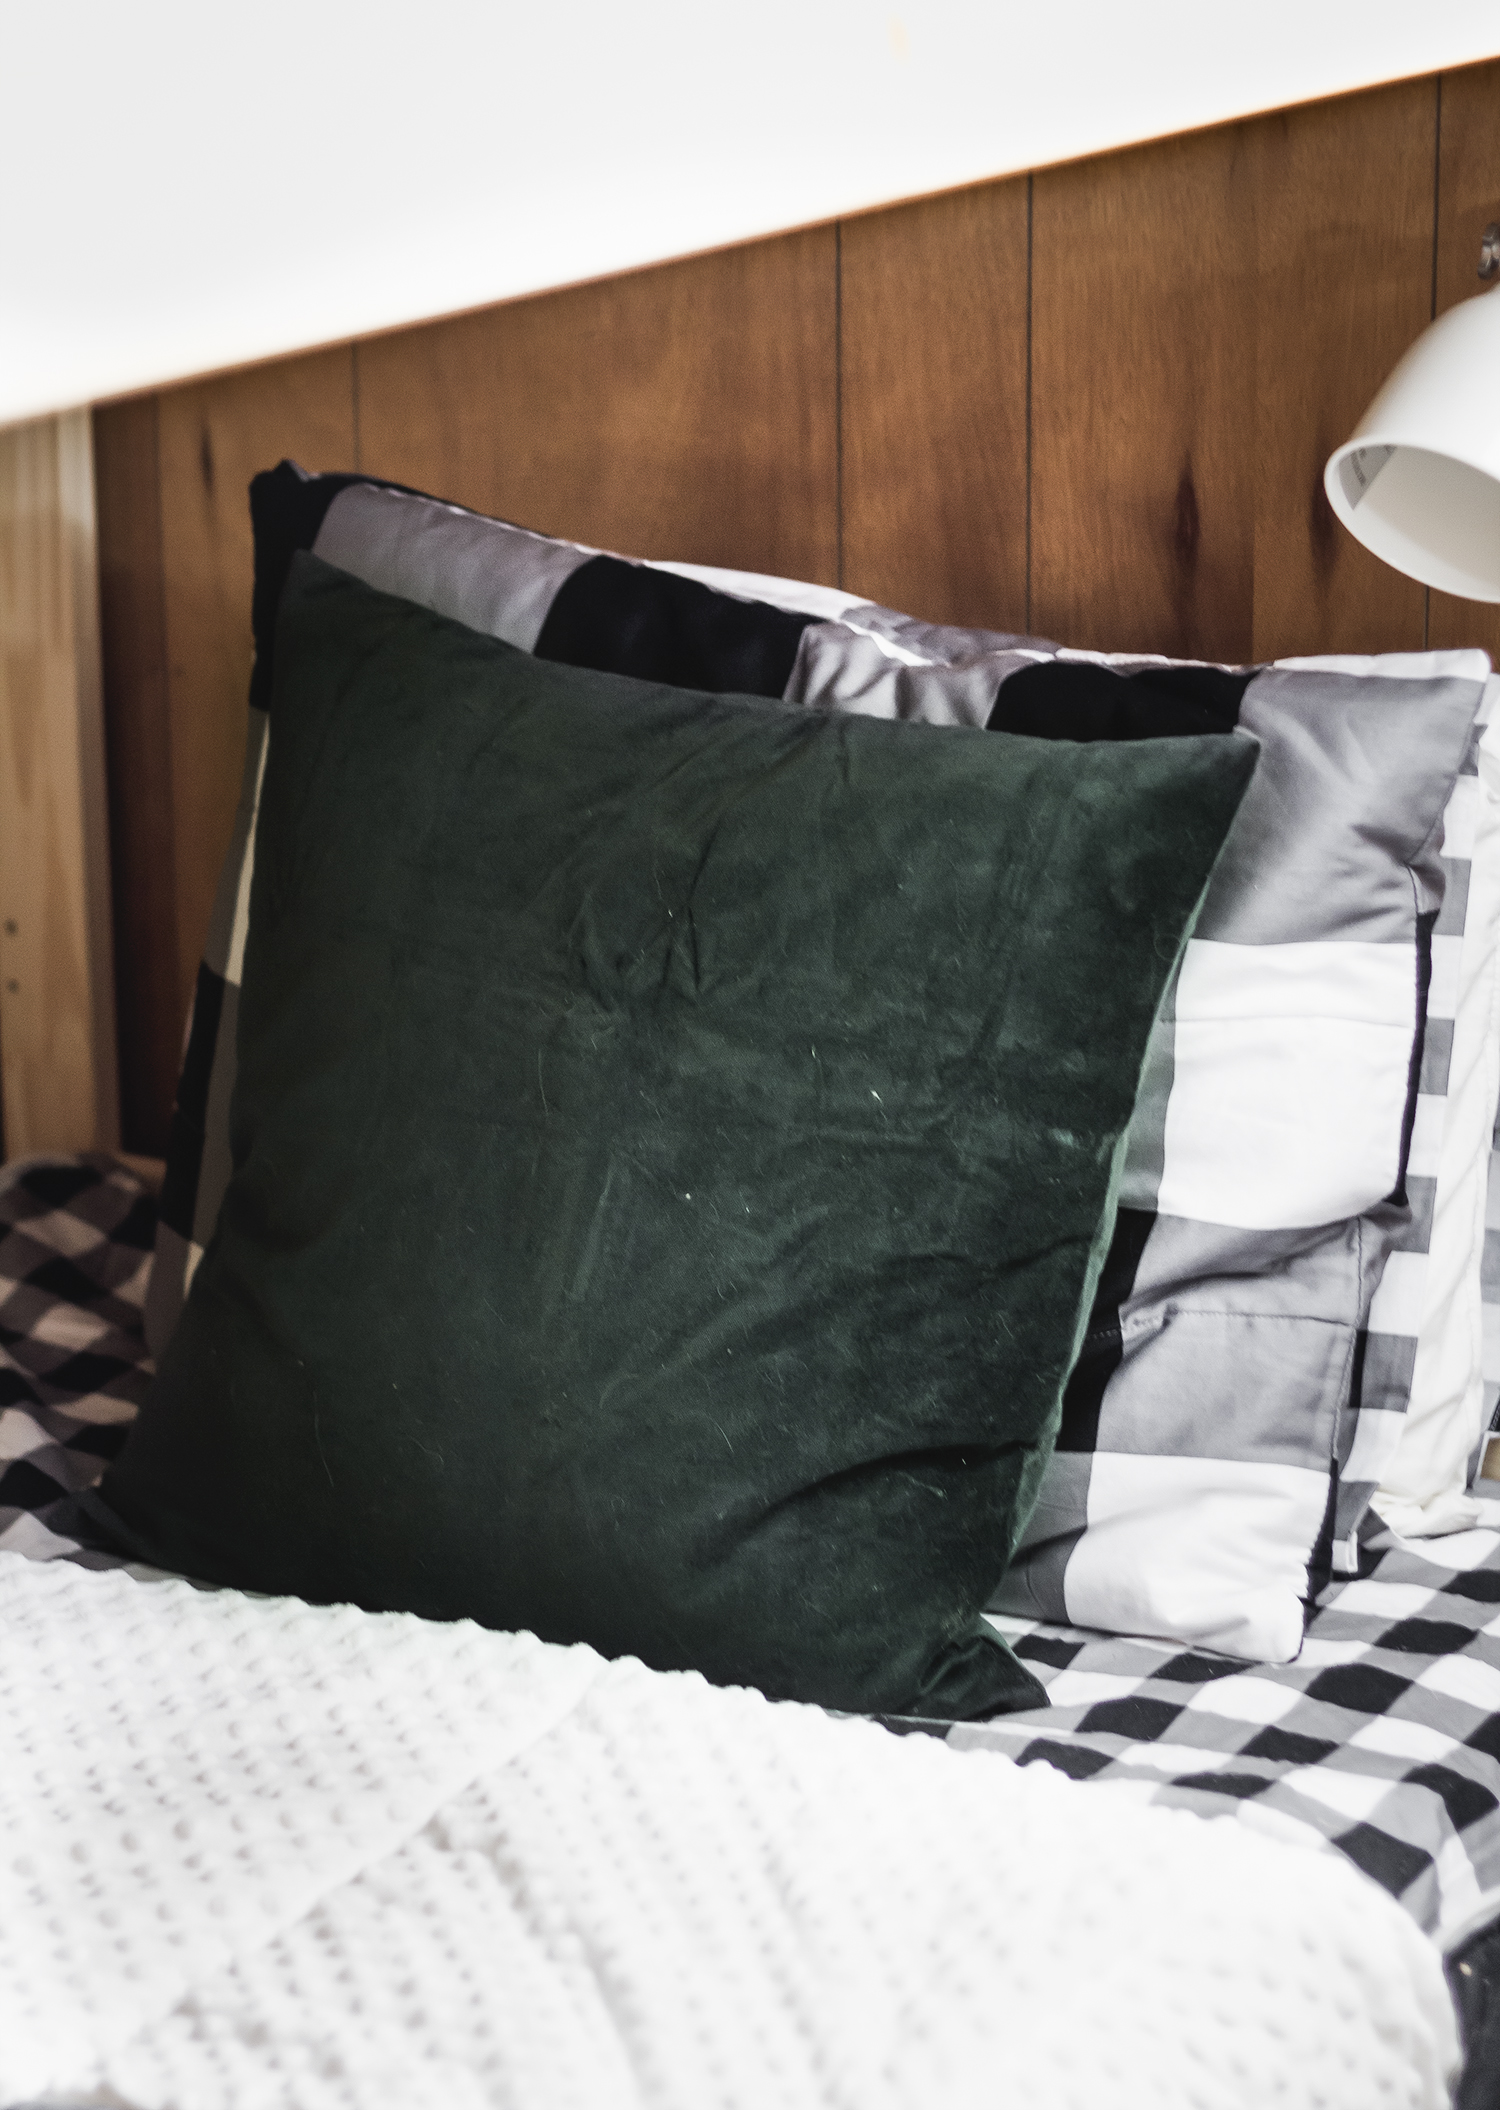
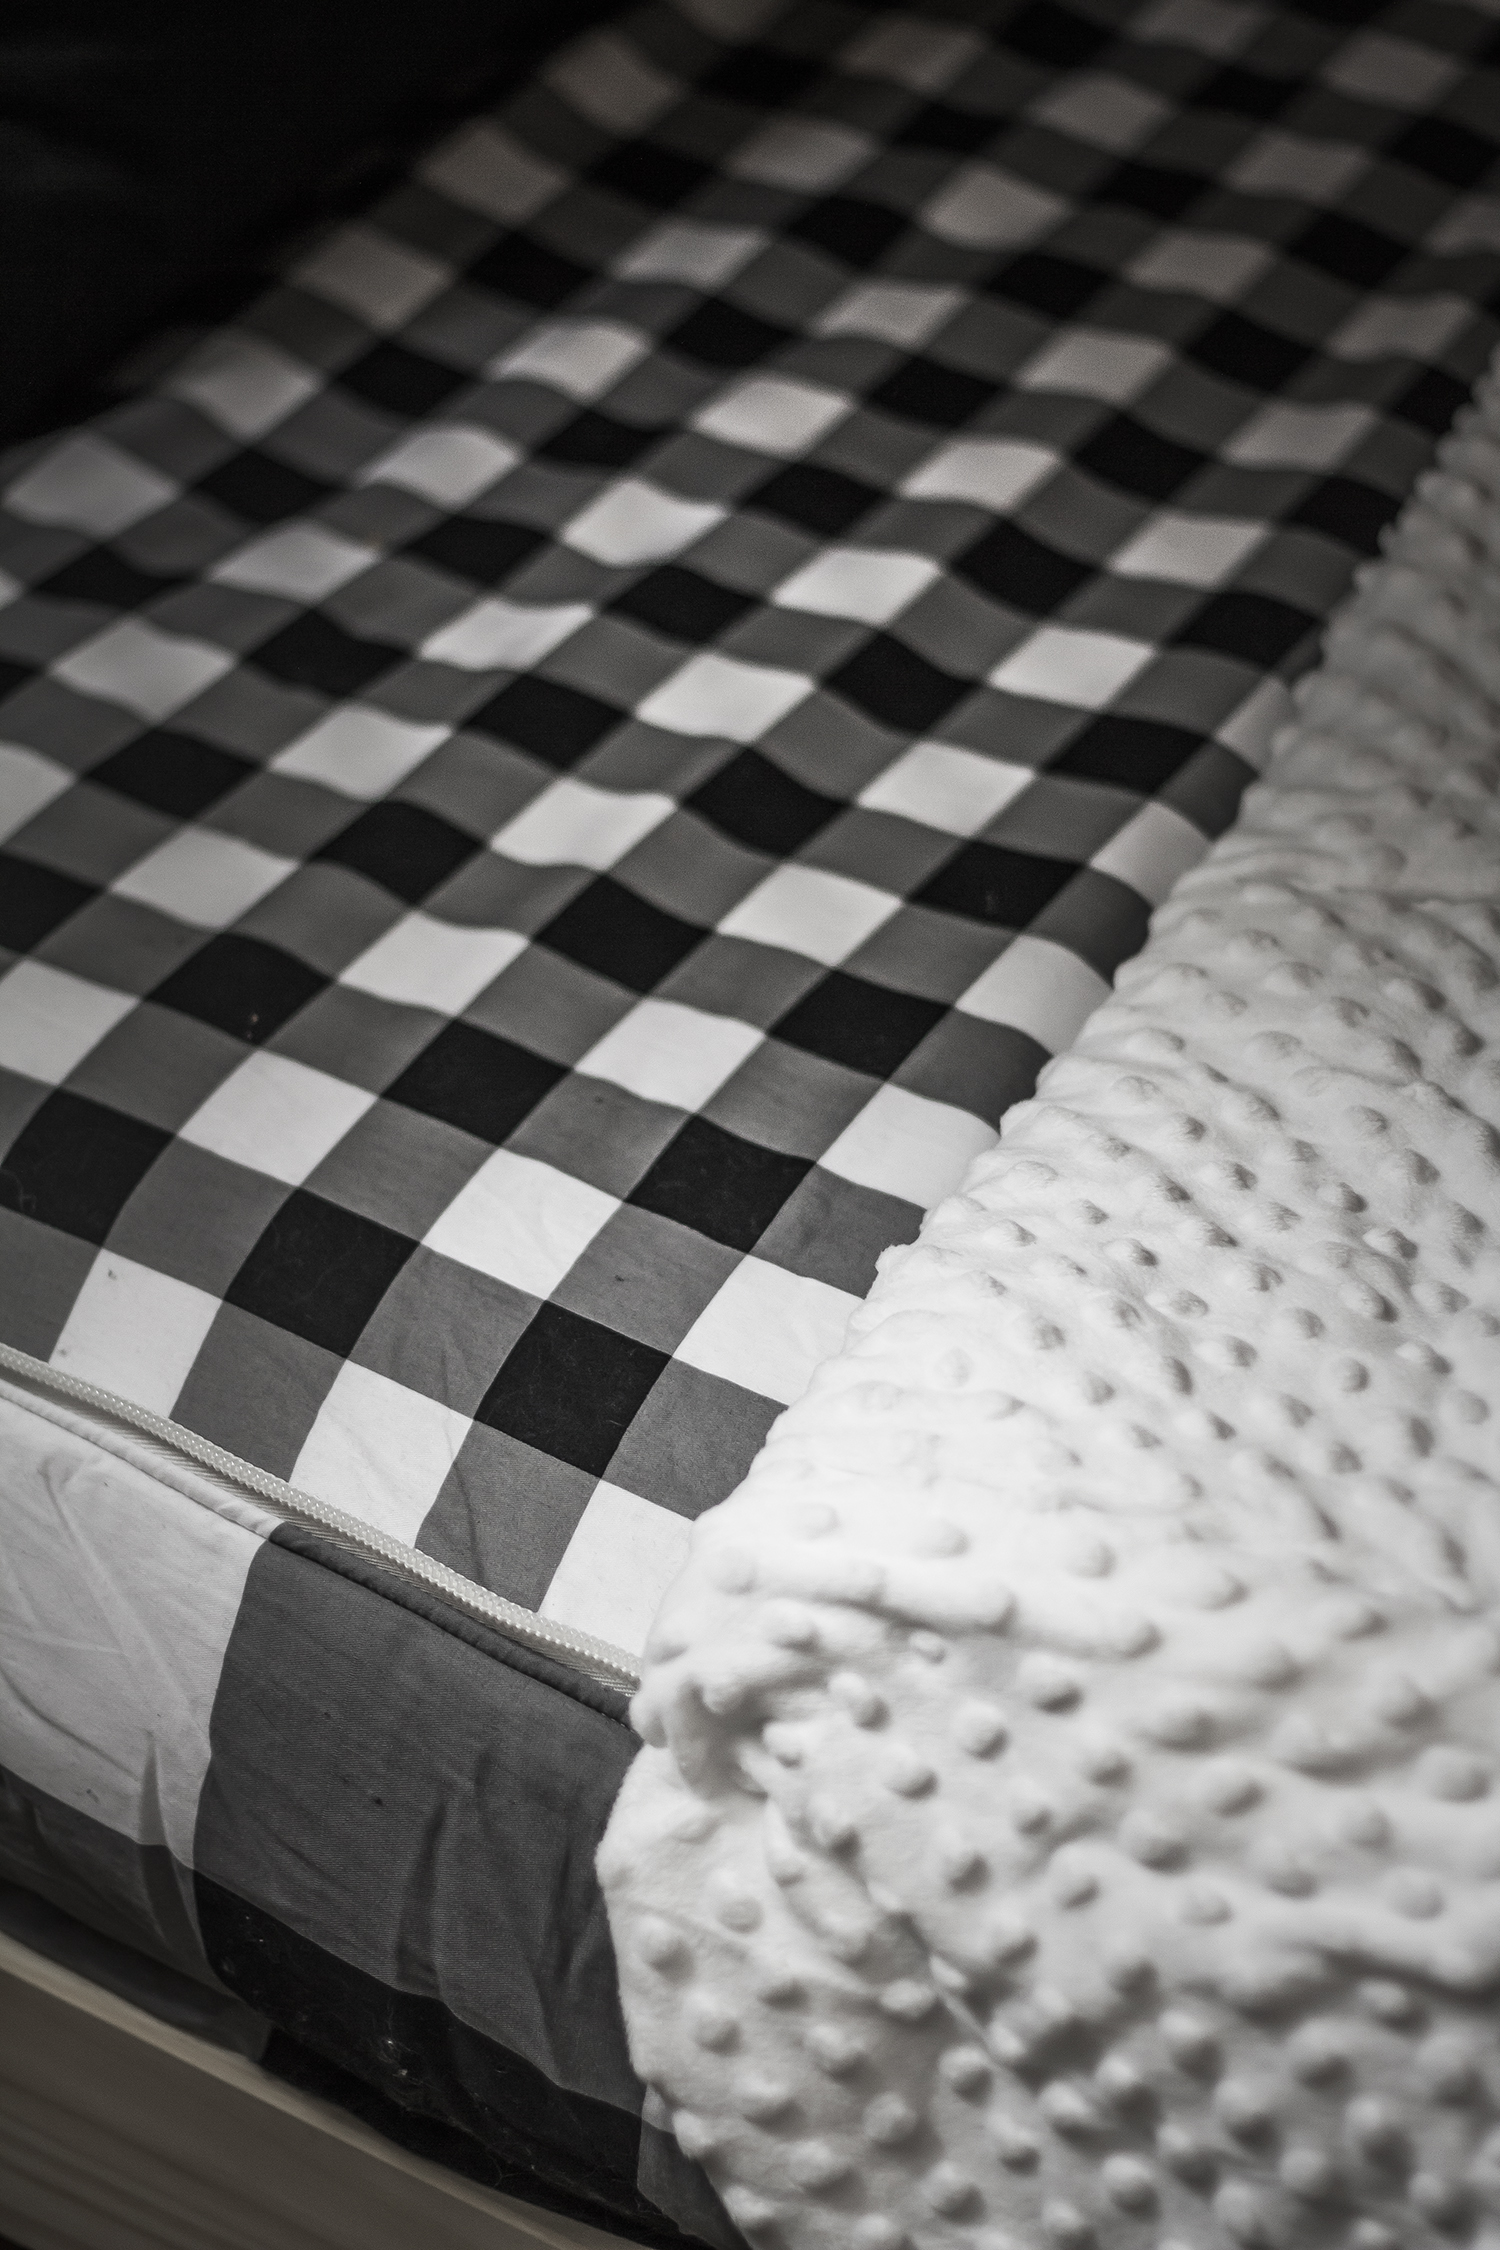
Guys, I’m very excited about the bedding for this room. It’s amazing and it’s called Beddy’s. Listen up! If you have ever had to deal with making bunkbeds, or any kids’ bed for that matter, you know what a pain in the ass it is! Trying to heave up a heavy mattress on your shoulder while at the same time forcing a fitted sheet over the corner, tucking in comforters and ending up with bloody knuckles, only to see it all come undone in an instant by your kids who happen to give zero effs. Right?! You know what I’m talking about! So if it wasn’t already obvious, I’m smitten by this bedding because A) buffalo checks – I’m such a sucker, all I need to be happy is a black line overlapping a transparent grey line and B) THESE BEDS CAN BE MADE IN 30 SECONDS FLAT!
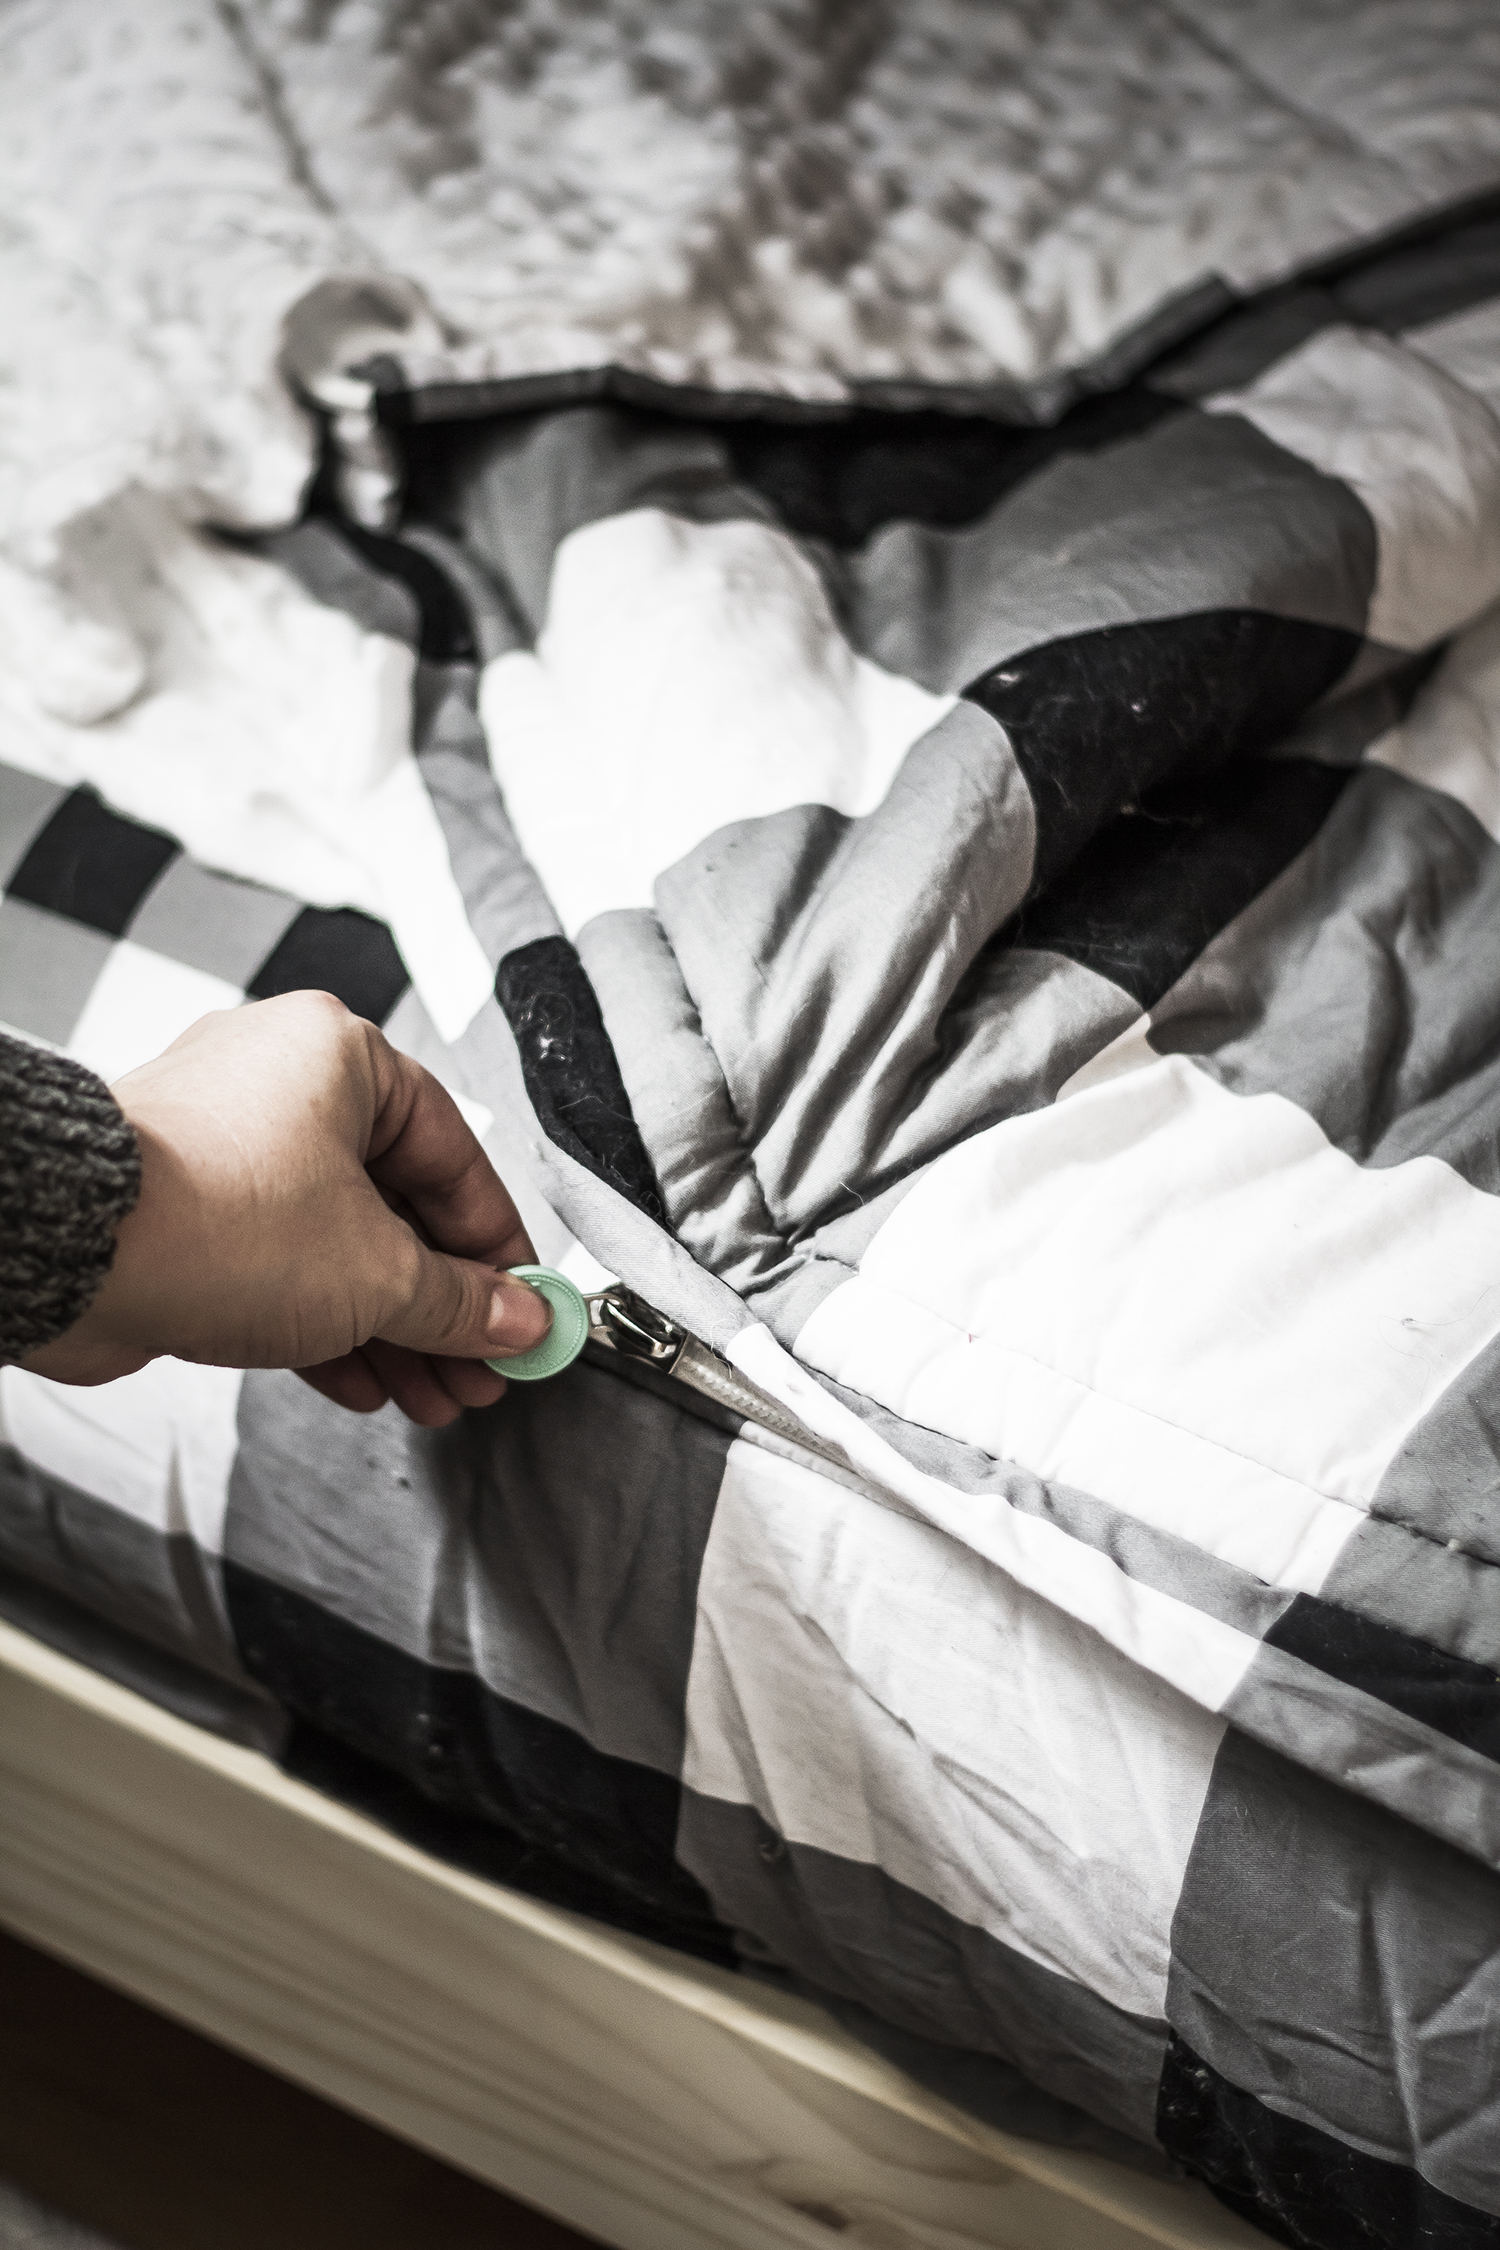
Yes, you read it right, 30 seconds flat. This is not your typical bedding. It’s a all in one unit! The comforter and sheet are sewn together – think sleeping bag – the whole shebang then attaches to the bed in the same way a fitted sheet would. Still confused, check this vid. Once the bedding is on the mattress, all you have to do (or a kid has to do for that matter), is zip up the sides of the beddy and BLAO! Instant made bed. The inside of the Beddy’s are lined with a plush sheet set, and it comes with two standard size pillow covers in patterns that compliment one another. I still haven’t washed mine yet as they are used less frequently then bedding at home, but it’s supposed to be as easy as stripping the bed and washing it on a cold cycle and then tumble dry on low. You don’t have to tell me twice. One other thing and then I’ll shut up about ’em, I have different height mattresses on each bunk, we inherited two twin size mattresses with the house and we purchased two low profile mattresses from Ikea. The Beddy’s snuggly fits all of our twin mattresses, even though the mattresses are different heights – a bonus for us because our mis-matched mattresses now look uniform!
I’ve been eyeing Beddy’s for ahwile now, and I’ll be the first to admit that they are pricey BUT they often go on sale – for instance, you can shave 10% off the reg price by signing up for their email address, and right now they are having a winter sale, use the code WINTER50 and save $50 on each bedding set at check out. For us, the time it saved making the beds at the end of a weekend was worth the investment.
I also updated the lighting in the bedroom. There is no overhead electric box, and until we get one, I re-wired a vintage porcelain barn light (in green of course). I found the barn light for $75 bucks at a Bauer Brothers salvage here in Minneapolis, and then ordered all the parts to re-wire it from grandbrass.com. Having a bright overhead light really helps make the space feel warm and cozy in the evenings! If we ever get around to hiring an actual electrician, we will be sure to have she/he add a box to the ceiling in the bunkroom. Although the lamp is currently not hardwired, it is connected to an outlet that is controlled by a switch – so that rules.
The rug budget continues to dwindle. We’ve invested in a rectangular braided rug on the floor and I think it was well worth the $97 bucks (on sale) we spent. I love the cozy vibez it adds to the space, and it invites the kids to play on the floor. When we re-line our coffers, I’ll be chomping at the bit to get one or two of these super cute bean bag chairs, that is if we have enough in the bean bag chair budget. It’s fun being married to a guy who likes spreadsheets!
And just because I always like thinking way too much about things, I’m still trying to figure out if there’s some sort of amazing solution to bunk beds, and bunk bed lighting that I’m not thinking of. Is there a way I can make these bunkbeds feel more built-in and custom without actually having them be built in? You know there is, I’ll figure it out. This is the only room that I’ve really considered painting the paneling white in. It’s just so dark back here, and I’d love for their to be more light in the space. I also love the paneling, it’s really grown on me and I don’t know if I’d want to cover it up. Also, kids + bunk beds + white walls = eew. But is there a better solution?
I hope you guys don’t mind that I just update you on the little things. I think they matter too, and it’s the way I blog best. Anyways, hope you’re all well and happy in the New Year. I’ll be back next week to share some goals and projects that I have for 2018. I have until January 31st to do that, right?


What if you installed wainscoting and just painted the bottom part of the wall white? Then you could have both wood paneling and white painted walls.
Mimi! Not a bad thought at all! I’ll have to ponder that idea and see where it takes me :)
Always love your cabin updates! Your boys will make such great memories in this room.
Thanks, Anna! I’m glad to be able to provide the boys a place where they can host their friends.
Love how it’s coming together! What if you stapled white Xmas lights or a LED strip around the inside of the bottom of the top bunk? You’d have some more invisible ambient lighting in there where it gets darkest. I guess the # of outlets might be a problem with that solution, though.
That’s a great suggestion Lori, however we are limited by outlets, there are only two in the room – so it makes all lighting hard. I’ll mull this over – I like the idea of having it be illuminated, but also want to provide the same lighting in each of the four bunks.
I looooove this room. It’s perfectly retro-cabin-cozy. As far as the darkness is concerned, perhaps using lighting with traditional shades would throw light around better. I’ve noticed every light in there now has a metal shade and they’re all pointing down, which is good for directing light to a specific place, but it’s not so great for bouncing light around. Throw some light at that white ceiling and I think the whole room will feel brighter.
Hey, Thanks Kelly! Great suggestion! Sometimes I go overboard on metal shades, it never even occurred to me that using a different shade could help with my predicament (duh). I’ll keep my eyes peeled for a more traditional cloth shade that I can put on the dresser. Thanks for the help!
I heart your approach to decor/humour/blogging/not-sarcastic-hearts-for-husbands
Ha, thanks! I try.
thanks for sharing the progress. I know you will think of some project to improve the room although I think it looks very cozy as is.
Oh it will be a process, that’s for sure! I think it’s a good first layer (could even be considered second layer at this point). I can’t tell if people still enjoy reading about the process anymore, or if they just like skipping to the end.
I do enjoy reading about the process. Would even say it’s the best!
Its looking great! I love the bits of green throughout the room. I feel like the white walls will get kinda icky, but it would definitely help brighten the room… its a tough call!
It is a tough call! I get so emotional about it since once you cover the wood you can’t go back. I know it’s just generic 60s paneling but I don’t want to give up on it yet. I think it could be such a great element in the space if approached the right way.
Maybe replace the trim around the windows and ceiling with something wider and white?
I definitely think adding more white finishes will help!
I like how you wrote that it was your “soul purpose” to take photos on this trip :-) Based on the passion you’ve expressed for making the details fit together, and sharing them with your readers, I know you really meant it!
Did you read House Tweaking? I remember Dana made her boys bunk beds look more custom by hanging floor to ceiling curtains around the bed. You could do something similar here with curtains made from drop cloth with big grommets and rods built from pipes for a more industrial/camp vibe. They could even be that olive green color instead of white so it’d be safer to have in a kids room. I really love the Beddy’s. We’re getting ready to put a loft bed in my 9 year olds room and I have been dreading changing his sheets. Maybe I’ll buy one of those instead! The room is progressing nicely!
Love the whole cabin!
Where are the green throws from?