


Here it is: the Sash Cord Replacement How-To, only two years in the making.
I don’t think I’ve ever mentioned on the blog how badly I’ve wanted to repair two windows on the main floor of our house. The first spring we lived here we realized there were two windows without sash cords. I suppose it could be worse considering the age of the house but, unfortunately for us, they are our two largest windows in the house and having them open would really help with the airflow. Oh did I forget to mention not only are they missing sash cords, they don’t open at all? Yep, they are painted shut from the outside. Blargh. This project has been on my to-do list since the day we moved in.
…Then I got pregnant, and my huge belly and chronic pain got in the way of any home repairs.
Now it’s spring time again, I’m not pregnant, and I can finally take on this project!
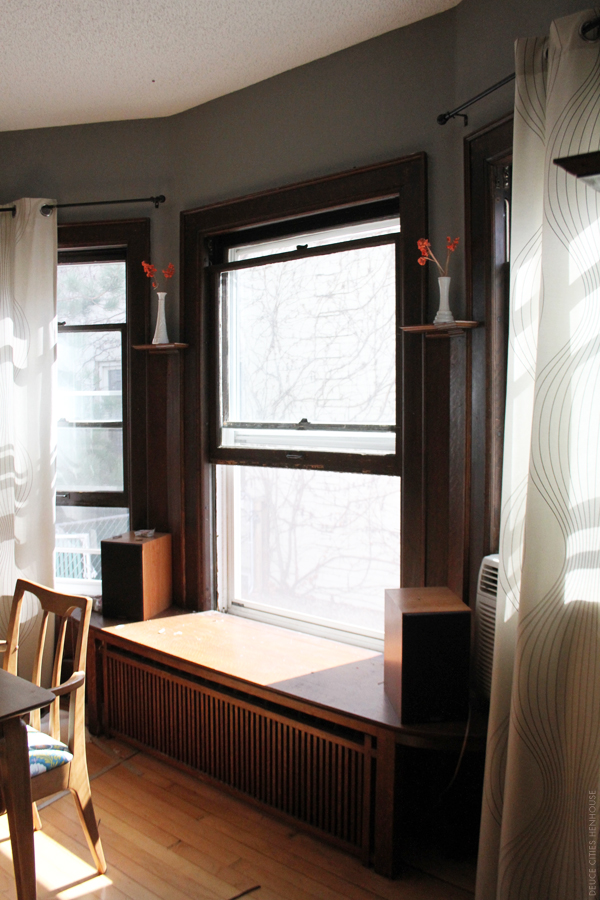
*Spoiler alert brahs: The above photo is my dining room window after I fixed it.
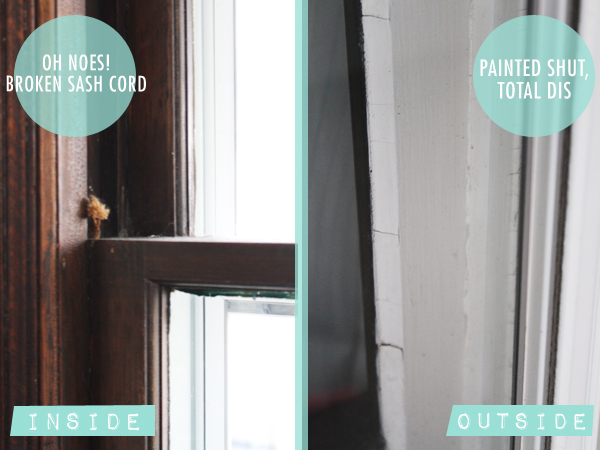
Look at those old crusty broken sash cords and—even worse—the layers of paint that seal these babies shut from the outside. I know not all of you live up here in the Nordic Tundra Land™ so let me explain why this sucks and is so much more complicated to repair. On a lot of old houses, owners have installed newer storm windows on the exterior to keep out the cold and retain the heat. My original windows were painted shut from the outside prior to the newer storm windows being installed, therefore leaving me no way to access the “painted-shut” areas. My windows were being held hostage. But don’t worry, cool old windows. Scoops is here to save the day.

First I got Finn to show me a thing or too. He’s really good with his tools.
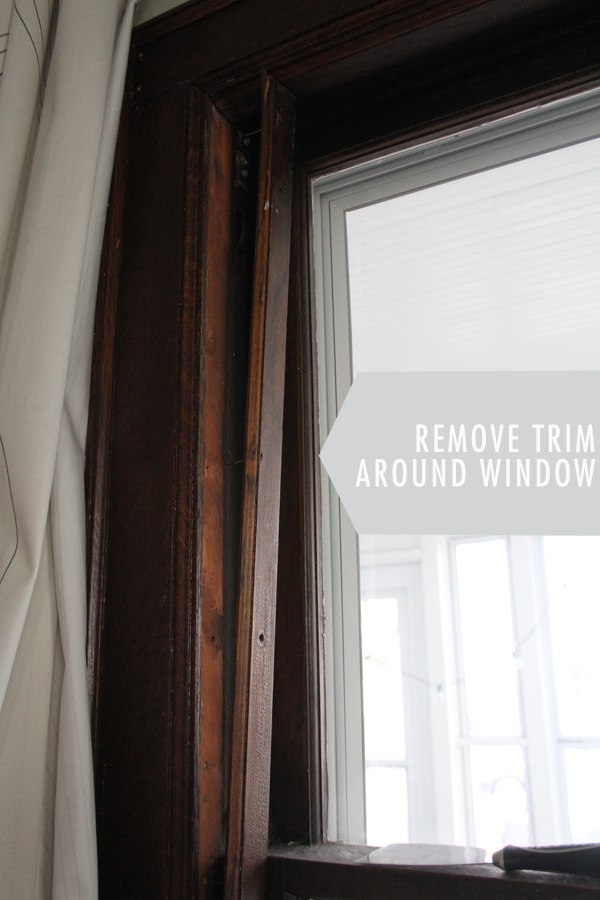
Then I remove the interior trim work. This was pretty easy for us because the trim was screwed in as opposed to nailed, so I just removed the screws and—pop—out they came. The easiest step by far.
Next we remove the lower sash and break the paint seal. This is where it gets real tricky. Our windows have really old metal weather stripping, and I had no idea how to remove it. So I pried loose the weather stripping with a small pry bar. This weather stripping was held in place by two small nails, one on the lower section and one on the upper. Then I used the pry bar to very gently and carefully break the seal on the paint between the upper and lower sashes, then work my way down to separate the paint between the lower sash and exterior trim. Are you still with me?
Finally after about a half an hour of careful prying the sash is free, and the paint seal is broken, Hooray!
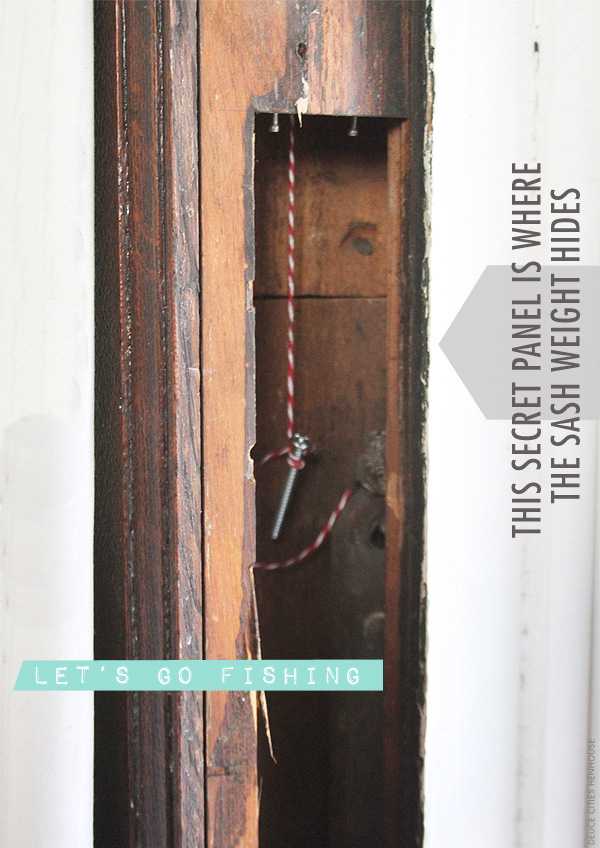
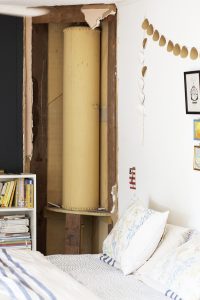
Next, we open the secret panel. Every window that uses sash cords has a secret panel. Isn’t that cool? We just remove one screw and out it comes. What’s revealed to us inside are some humungous sash weights.
This is also the portion of the how-to where I start taking less and less photos because I need both of my hands to get this project done. I apologize in advance, but I’m hoping my 11th grade technical writing skills will come in handy right about now…
Pictured above is how we go fishing for the new sash cord. We use some bakers twine because, duh, we don’t have actual string up in here, and weigh it down with a screw. Finn thought this was the coolest part. I lowered down the screw and then he would tell me when he spotted it.
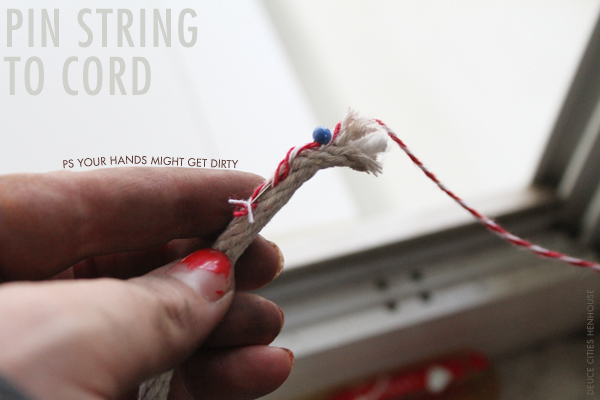
After our pretty little baker’s twine comes through we attach it to the new sash cord with a pin, because I sew and I don’t have an actually fishing hook. We hoist our new sash cord up and out it comes at the top.
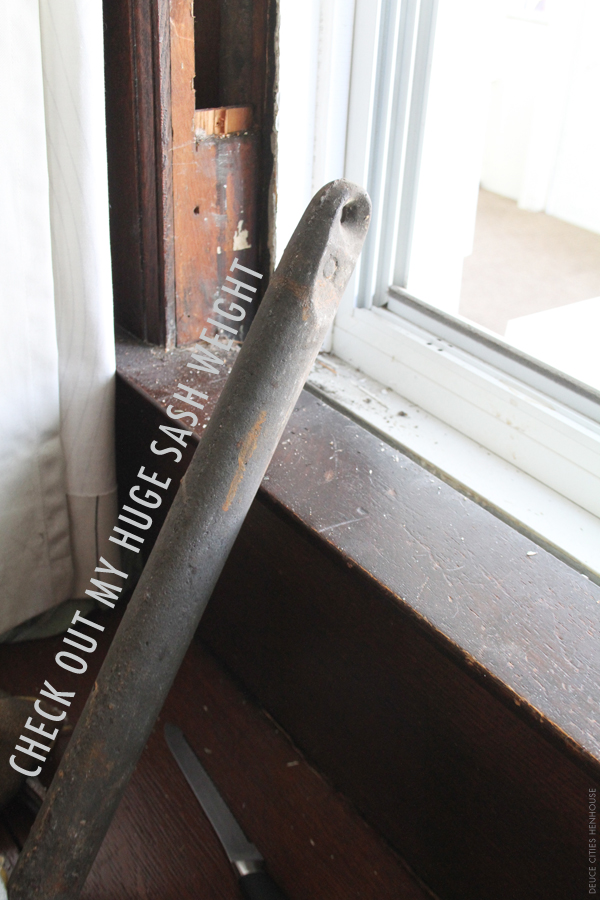
I had no ideas these things were so huge and heavy, but I suppose if you have a huge window you need a huge weight.
We attach the cord to the weight with an overhand knot. Wait, you aren’t a sailor and you don’t know how to tie knots. Here is a link to a nice little image that will help you figure it out.
We are photo-free from this point on so bare with me.
This is the part where we measure the length of the sash cord, tie another knot and attach it to the lower sash. This will be easy for you, but was hard for me because we have that dumb weather stripping I mentioned earlier. It was a two person, four handed job, so make sure you got a buddy.
This Old House has a great video on how to do this whole process. I watched it about a dozen times before I dove in. You should check it too.
After all that hubbub you will have a new functioning awesome window to enjoy. Yeaya!


I stumbled onto your site here a couple of weeks ago… and I love it! You’ve done so much with your home already and it looks awesome so far. The colors in the first photo of this post, the vases on the ledges, the sunlight… Good god, I’m envious. And I’m looking forward to reading more!
Thanks so much. Your compliments made my day.
I’m glad you found the blog, hope to see you around again!
This now being the second juicy before/after in sash cord repairland that I’ve seen, the first being from Anna (http://www.doorsixteen.com/2011/02/25/five-years-ago-part-four/), I now have even more desire to replace the broken one in our dining room. We’re not so bad off, though… only the left cord is missing and a rolling pin does the trick to hold the window up when necessary. What would you say to a renter interested in undertaking this project to either a) encourage or b) talk her down?
I would say that you could easily tackle this, but I wouldn’t encourage it if the trim around the sash was covered in layers and layers of paint – you wouldn’t want to pry the trim out and then later have it marred up, it just seems like more work than it’s worth for a tenant.
But if you envision the trim being easy to remove then I would say go for it, then you can use that rolling pin for making pies. After you remove the trim the rest is really quite easy, mine was just such a pain because of the weather stripping.
I’ve seen Anna’s post before, I’ll have to go read it again, I can’t quite remember how she approached it.
Hope that helps, and good luck!
So, one of the two original windows in my apartment is a sash window, and I have been OBSESSED recently with repairing it (no sash cords, layers and layers of paint preventing it from opening, etc. etc.) and have been reading I think every instructional the internet has to offer while waiting until I have time to really tackle it. And then here you go, doing an awesome job and making me itchy to just start prying trim and seeing what I can do for it. Thanks for the step-by-step, you did a great job!
You should do it! I think it took me so long because I was just building up the nerve to tackle it. You know, I didn’t want to go an destroy my window. That is always my fear that whatever I touch I will accidentally ruin and I won’t know how to make it better again.
Really though, it’s not bad. There is a few you tube videos that I watched too. I’m guessing you’ve probably run across them already, but just in case you haven’t here they are:
This crazy old dude:
http://www.youtube.com/watch?v=DsvwtWZR-R4
This fast talking midwestern mumbler (cool clarinet sound track too):
http://www.youtube.com/watch?v=yviFClpnJwg
And of course the This Old House link I mentioned in the post.
Hahahaha “fast talking midwestern mumbler.” I hadn’t seen that one!
Yeah, I’m not *too* afraid, I just want to make sure I have enough time for so we don’t have a missing bathroom window for like 3 weeks. Both the top and bottom sash are going to need a LOT of work and repair (top window glass is completely painted over and will need to be stripped, both windows and frame are all goopy with old paint and don’t open, etc. etc. etc.). Added to that is that the room was renovated probably in the 90s, and the new drywall is flush with the old trim pieces, so removing the front trim is going to be…tricky. The whole set-up is in such terrible condition, I really hope I can make it right!
At least we have a window, though. My downstairs neighbors with the same apt layout have had a piece of plywood since theirs broke and the landlords still haven’t fixed it! The old tenants broke it. They moved out 6 years ago…
I knew you couldn’t possibly be afraid.
It’s so crazy how different New York landlords are verses other places. If you were to try and fix something in Minneapolis without a landlords permission you’d probably lose some of your deposit, even if it made it awesomer in the long term.
You will totally make it right, and better. You are such a pro.
One of the first things I did when I moved in to my house 2.5 years ago was unscrew the screws that hold the trim on the window over the sash cord, which was rotten and broken, and looked just like yours. Then I discovered that the trim was VERY painted on, and would create a big mess to pry it off. So, the cord is still broken, and I have since lost the screws. It is like people’s hobby 30 years ago was painting things shut or something. What the heck people?!
So true, totally Lol’d at the hobby comment.
I’m sure I would’ve waited another two years if the trim was painted shut on the inside. That old paint is like glue.
I just found one of those weights in my basement and didn’t know what it was so I got rid of it. Oops…
Oh no Cam! I bet that is the sort of thing you could find at the Reuse center if you ever needed a new one. They do look kind of strange though.
It is very graceful. I am impressed with your experience. You shared a very good post.