


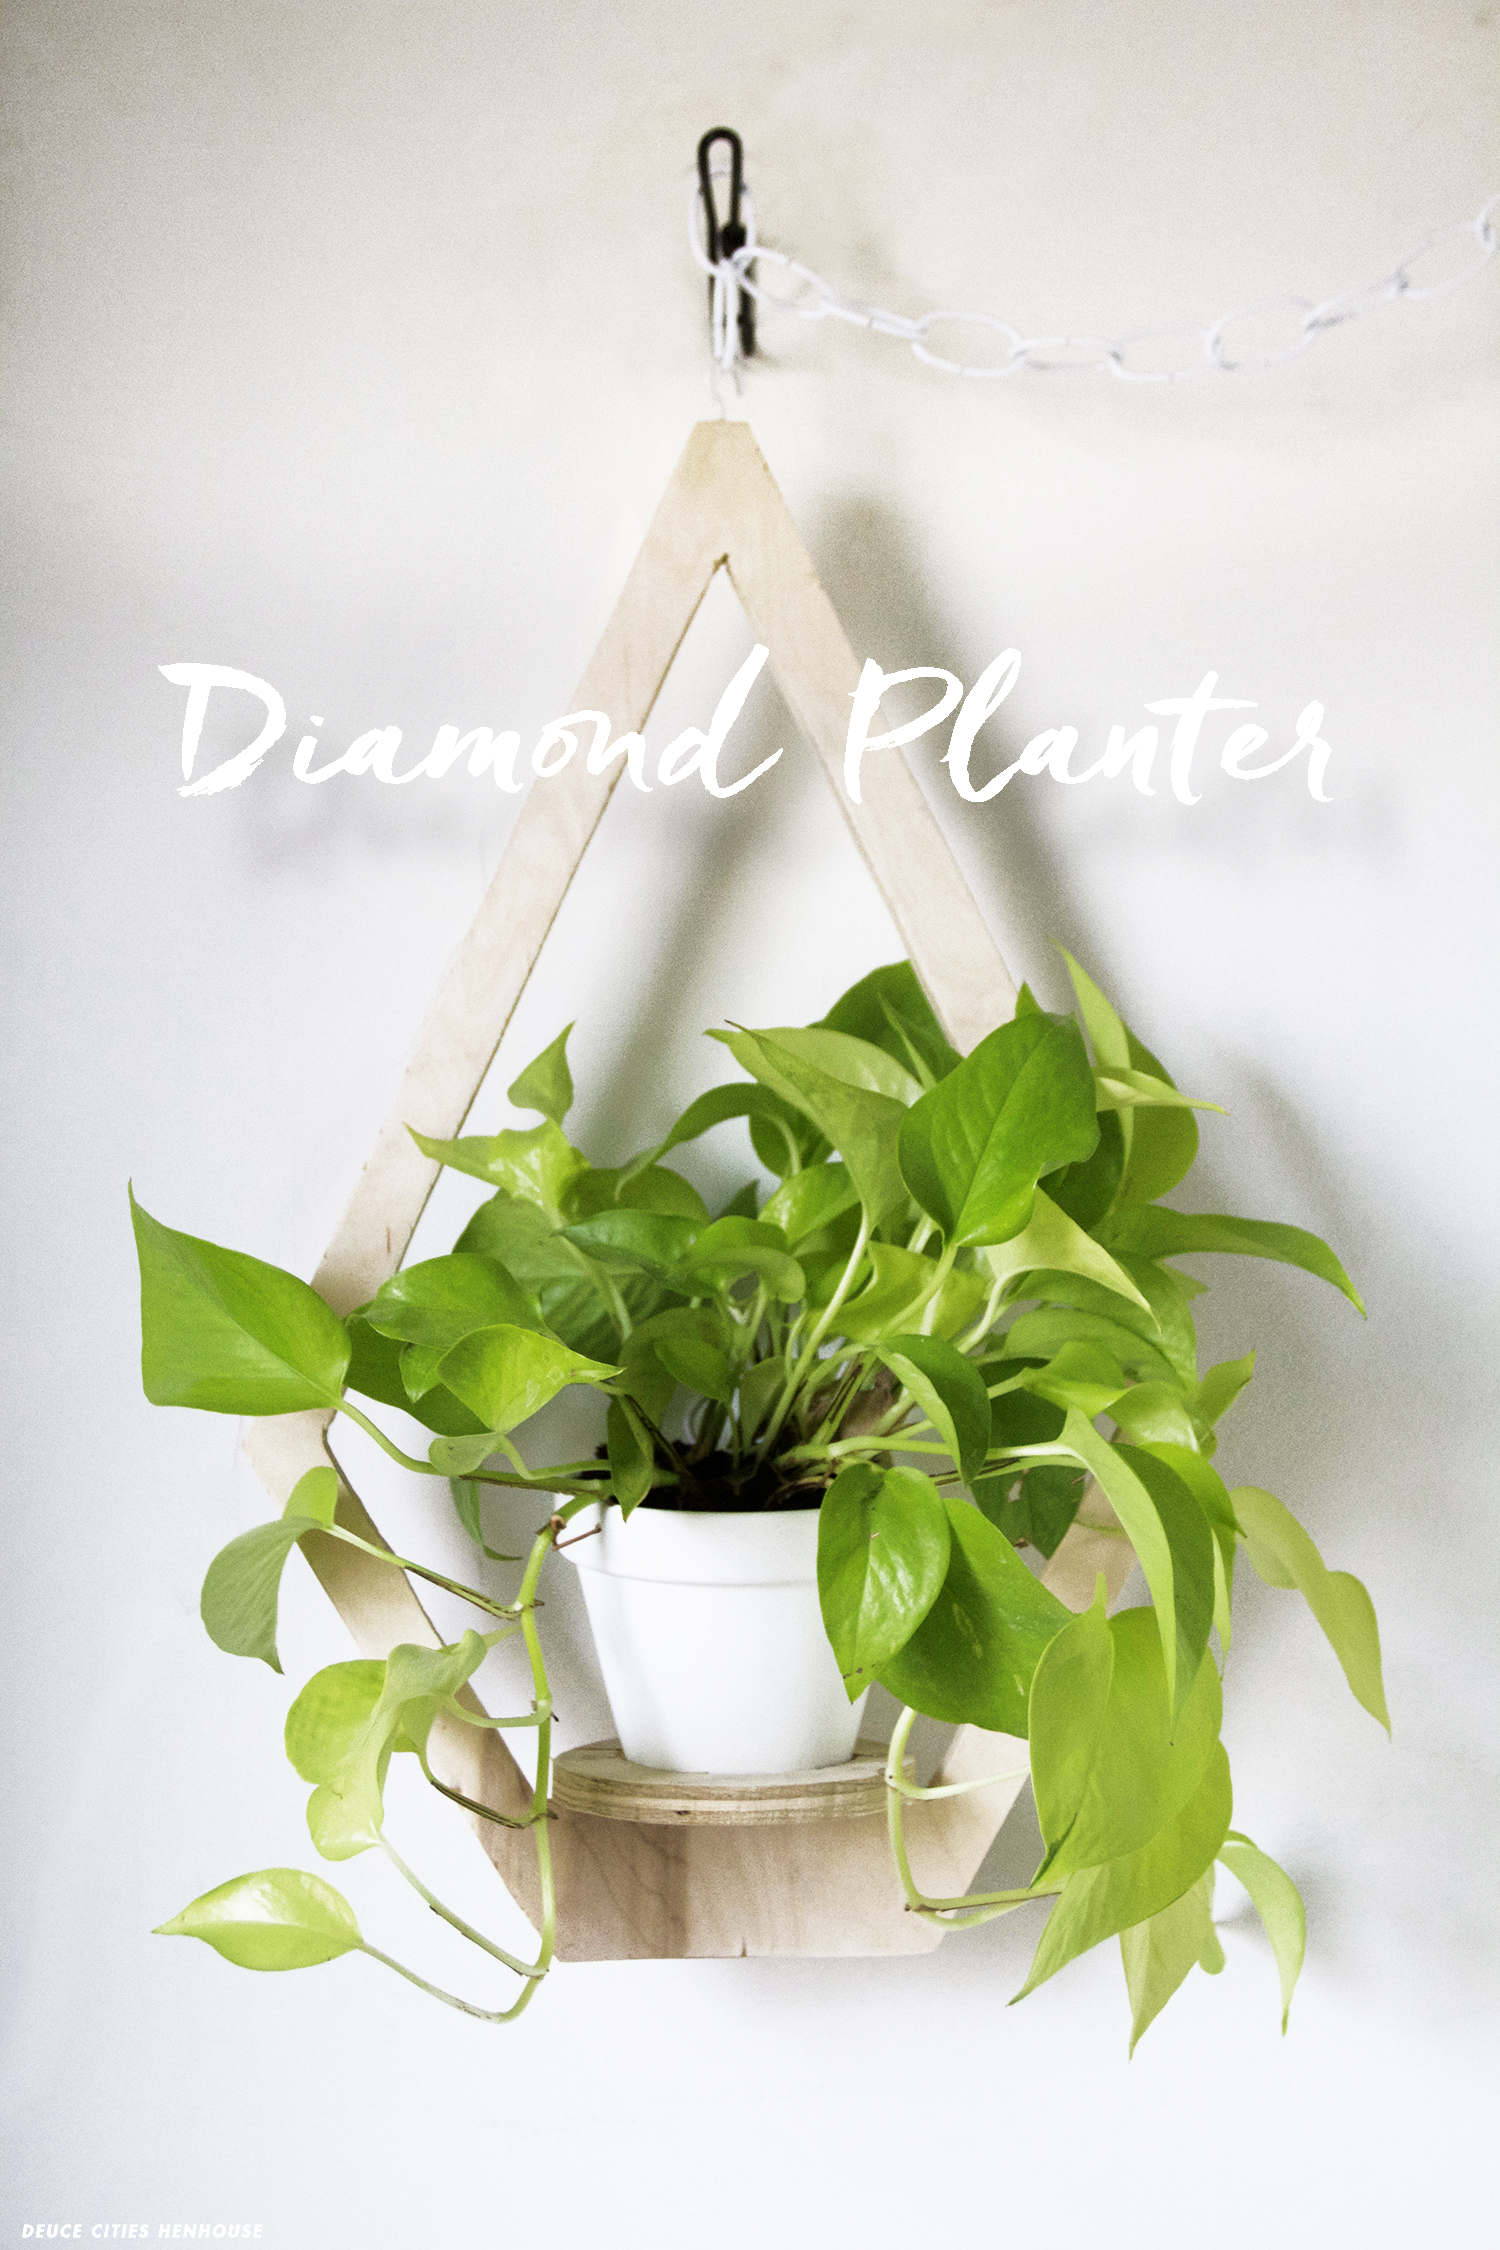
Hey Guys! I found myself getting uncharacteristically crafty this week when I was coming up with low cost ways to add some hanging planters to the front porch. Last summer I made a few macrame hanging baskets for the space (which I still love) but I wanted something for the other end of the porch because of my plant hoarding problem and all. Also, I think I’m finally recovering from the crazy amount of work I had to do in the basement and am feeling very, very ready to take on small easy projects that require using tools, but don’t demand endless days to work on them. I was inspired by a mashup of this hanging planter from West Elm and this other one I found in the internet, and I decided to come up with my own version.
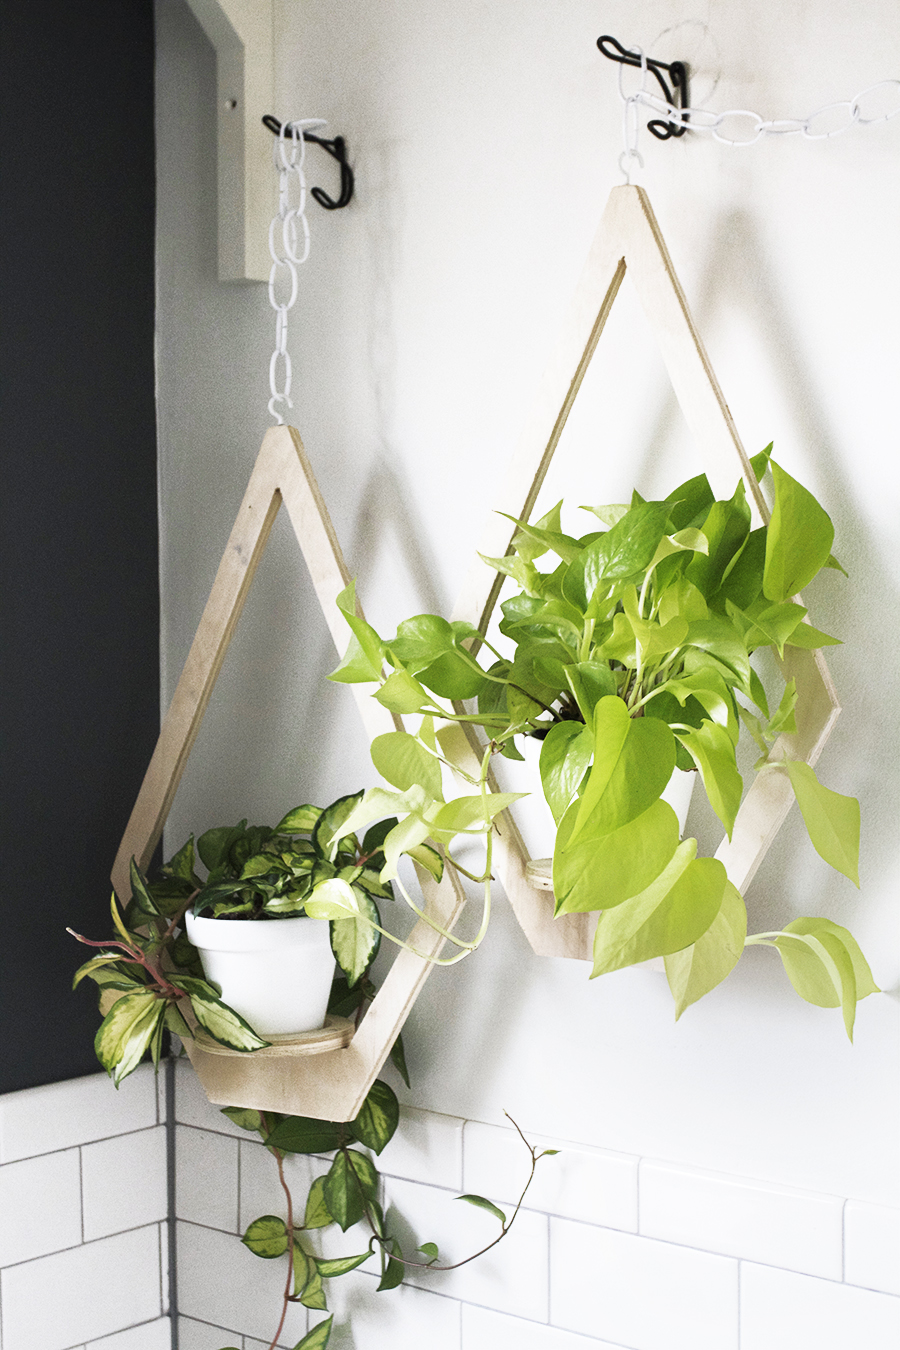
I’ve added some bentwood lamps to the porch recently (which I Target hacked and I’ll be sharing real soon), and I thought these simple, scandinavian inspired geometric planters would fit right in with the overall vibe. Not to toot my own horn or anything, but I think these planters look pretty awesome. They can easily be hung at different heights and the angles will stay parallel, which the obsessive crazy in me really appreciates.
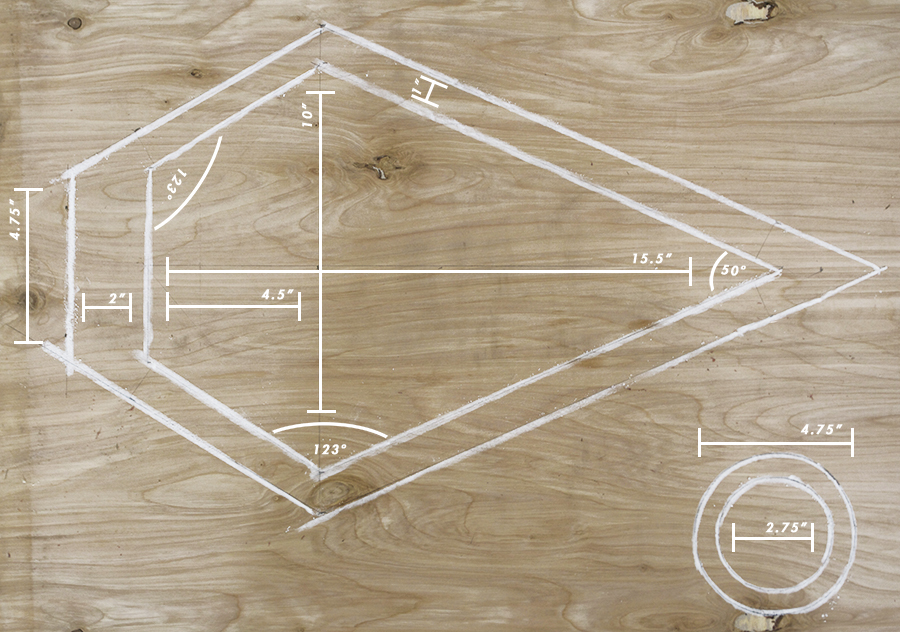
Assuming you have the basic supplies, you should be crank out three of these planters in less than three hours and for less than $38 bucks. Figuring out the basic pattern was probably the hardest part, but do you know what, I did that for you. You’re welcome. All the dimensions and angles are listed above.
Dudes, use the carpenter square to make precise angles and lines for the planter, and make sure to use the compass when tracing your circular base.
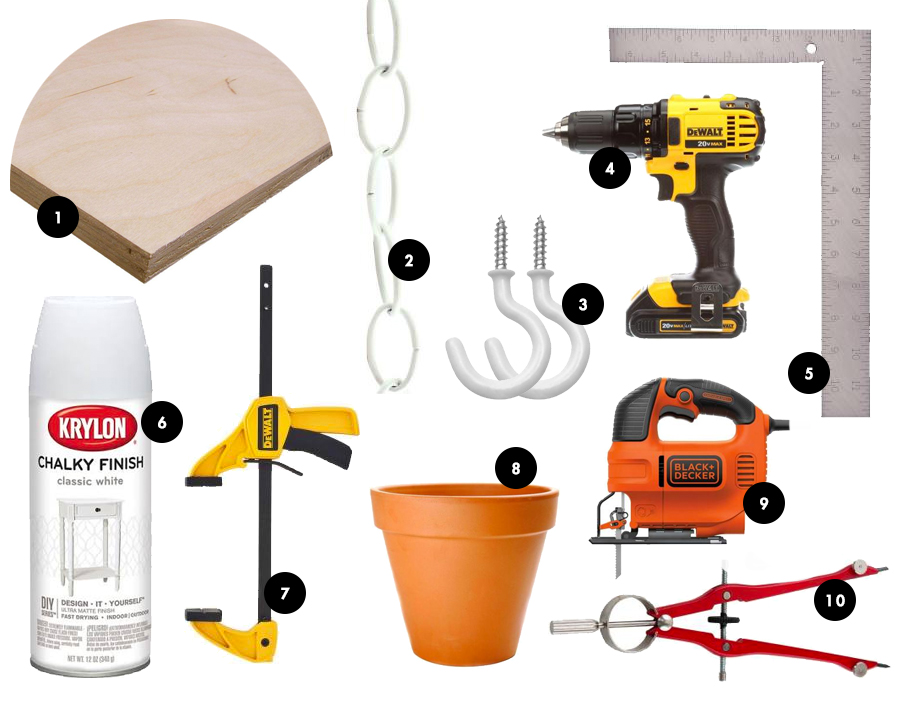
Supply List
|
1 |
6 |
|
2 |
7 |
|
3 |
8 |
|
4 |
9 |
|
5 |
10 |
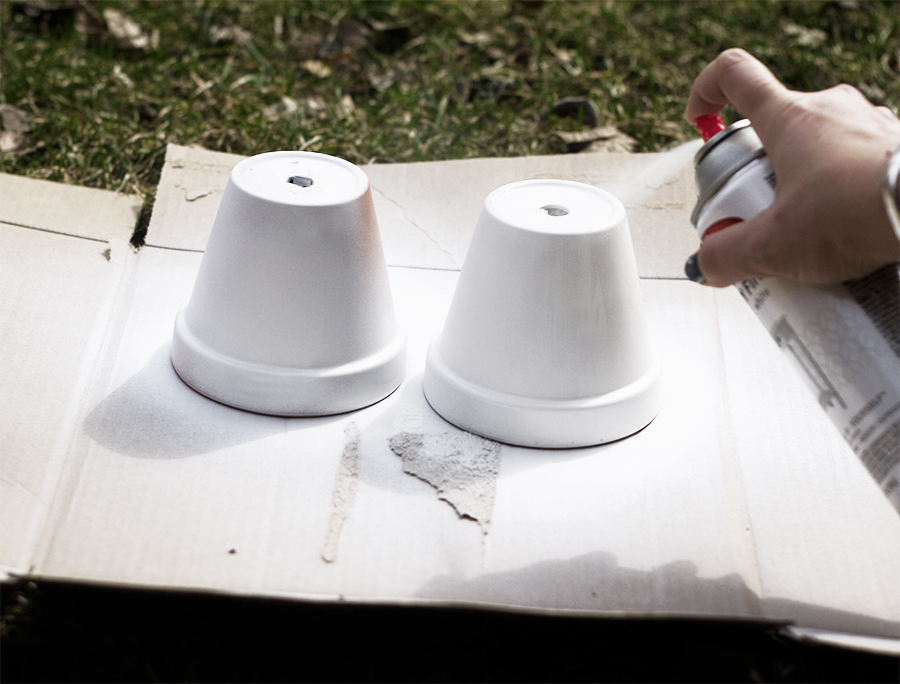
As all good bloggers do, I love spray paint. Digging through the recycling bin for the perfect sized cardboard just makes me so happy, cuz duh, that means the winter is over! I picked up this Krylon chalky paint in white and I really like it. The finish turned out really nice and perfectly matte. I will be buying it by the case fer sure.
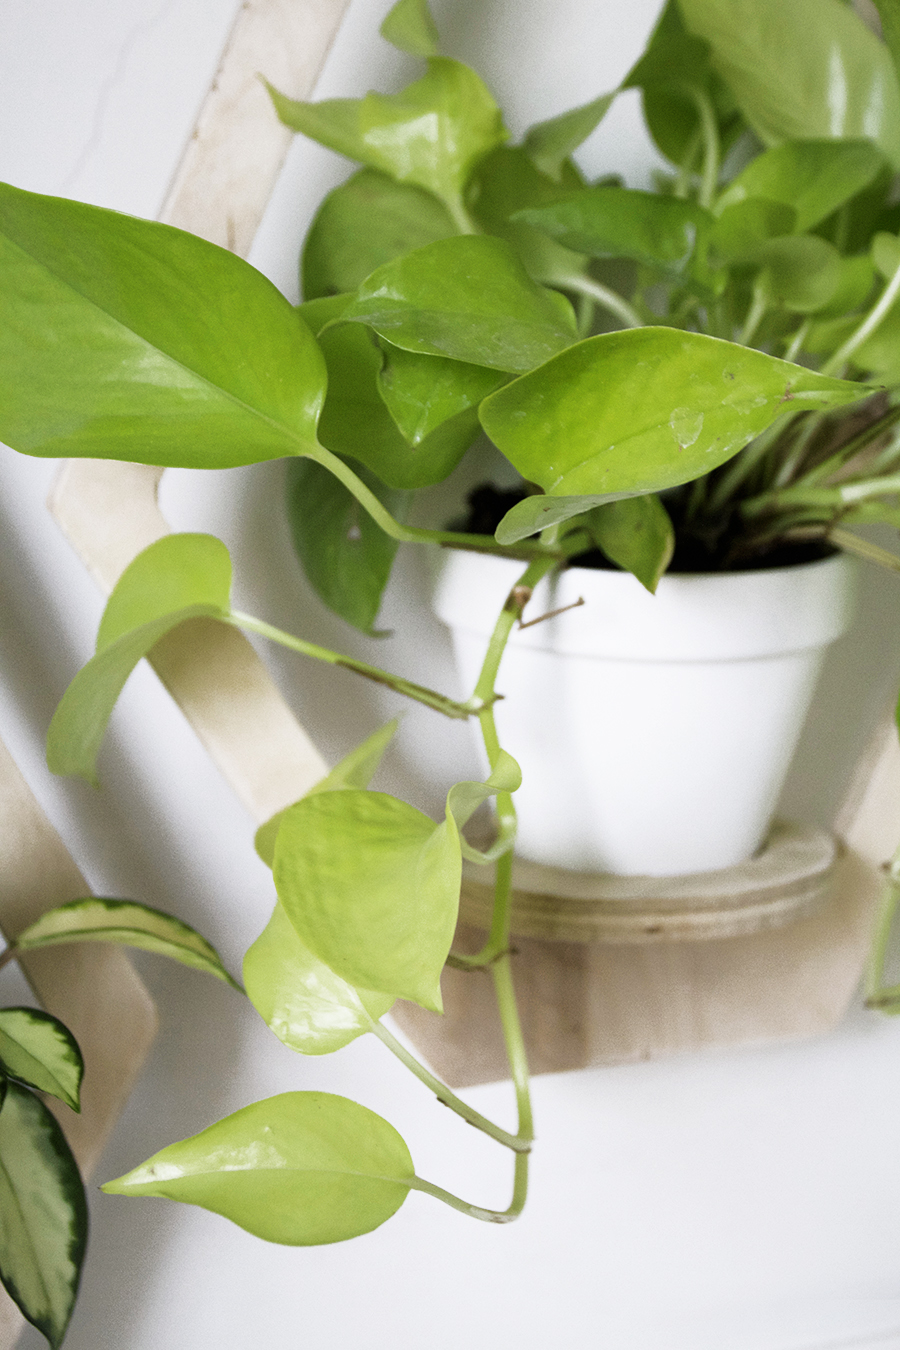
Anyways, spray paint your 4″ clay pots first, this will they’ll be dry when it comes time to stick them in your planter.
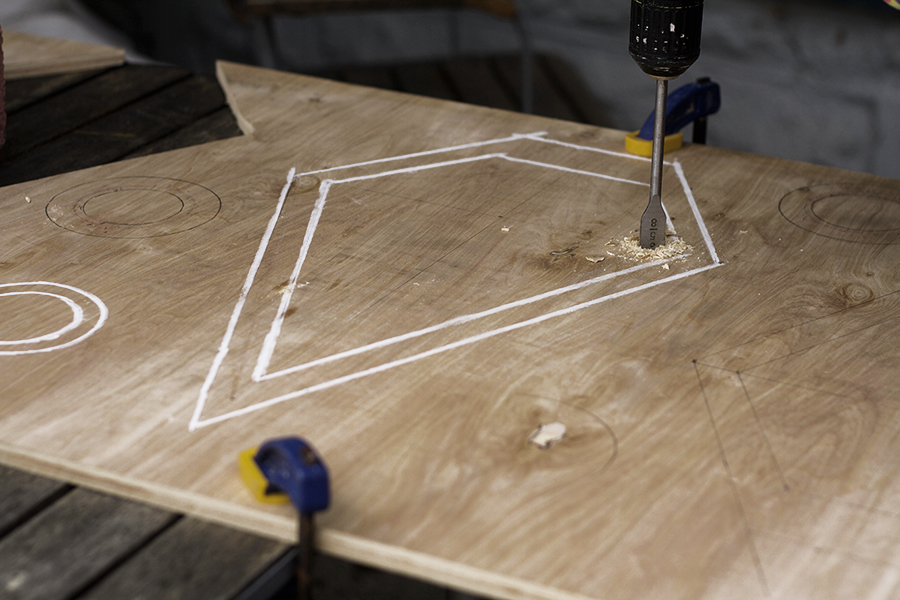
After you have the template all mapped out on your birch plywood, start with making a large pilot hole in the center of the planter design so that you can have a starting point for your jigsaw blade. I used a 5/8″ drill bit and it was slick.
Also, use clamps to hold down the plywood while you work, I attached mine to a large work table. Geez, I’m just brimming with good tips today,
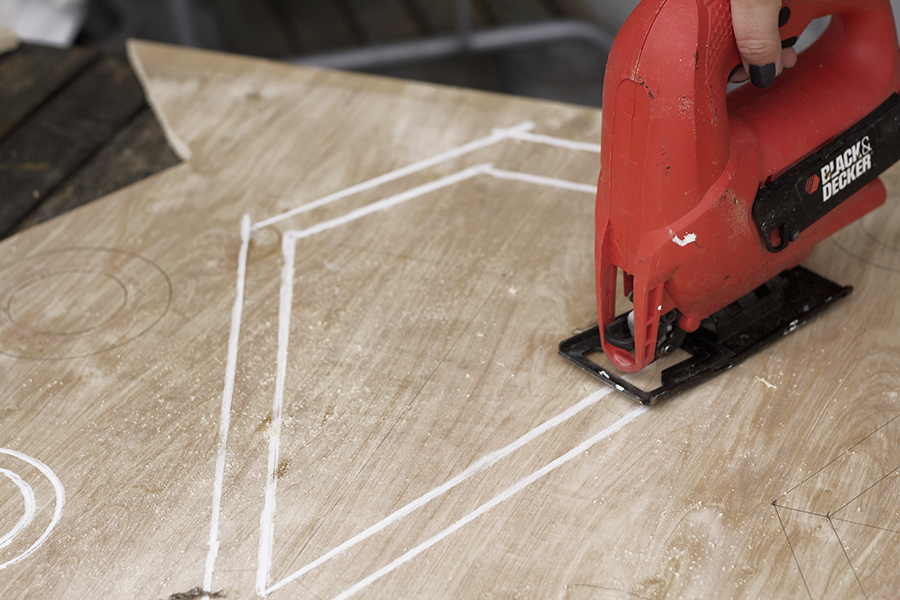
Work your way around the center of the diamond. I would recommend arcing around each corner and then come back and finish off the corners after the bulk of the center is cut out. I took a piece of 100 grit sandpaper and rounded the edges after everything was cut out.
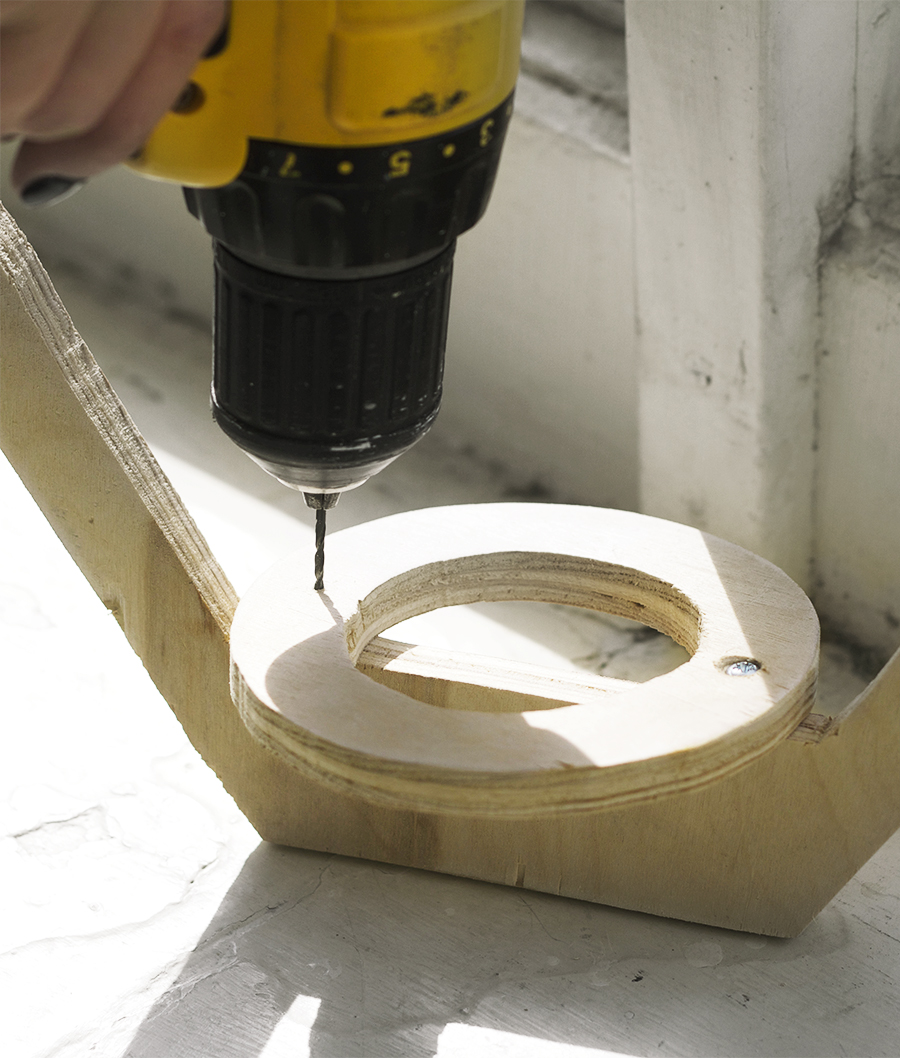
After both the planter and the circular base are cut out using the jigsaw, drill two small pilot holes on either side of the circular base and attach to the planter with two screws.
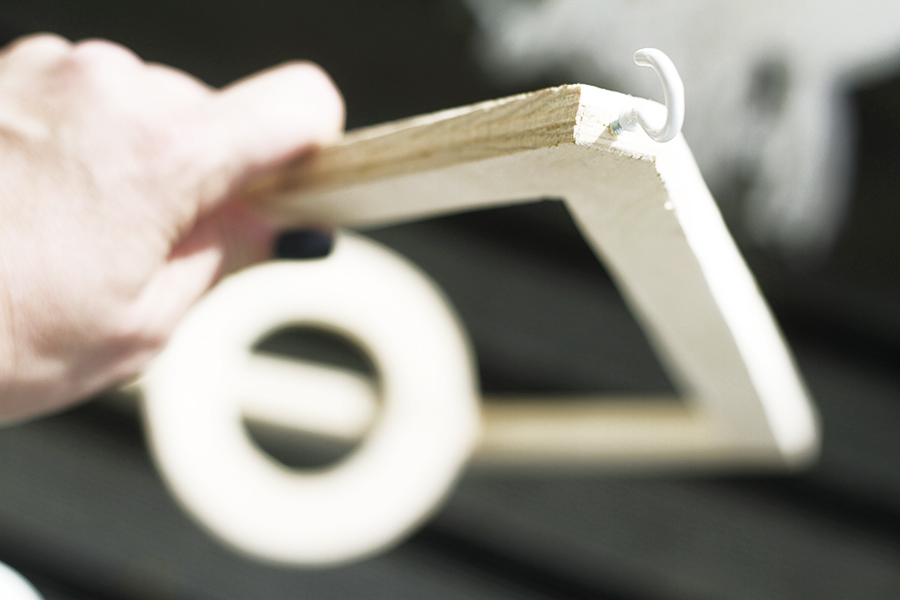
Lastly, drill a pilot hole at the top of the planter (this is especially important as the plywood can split easily. Attach the hook and chain.
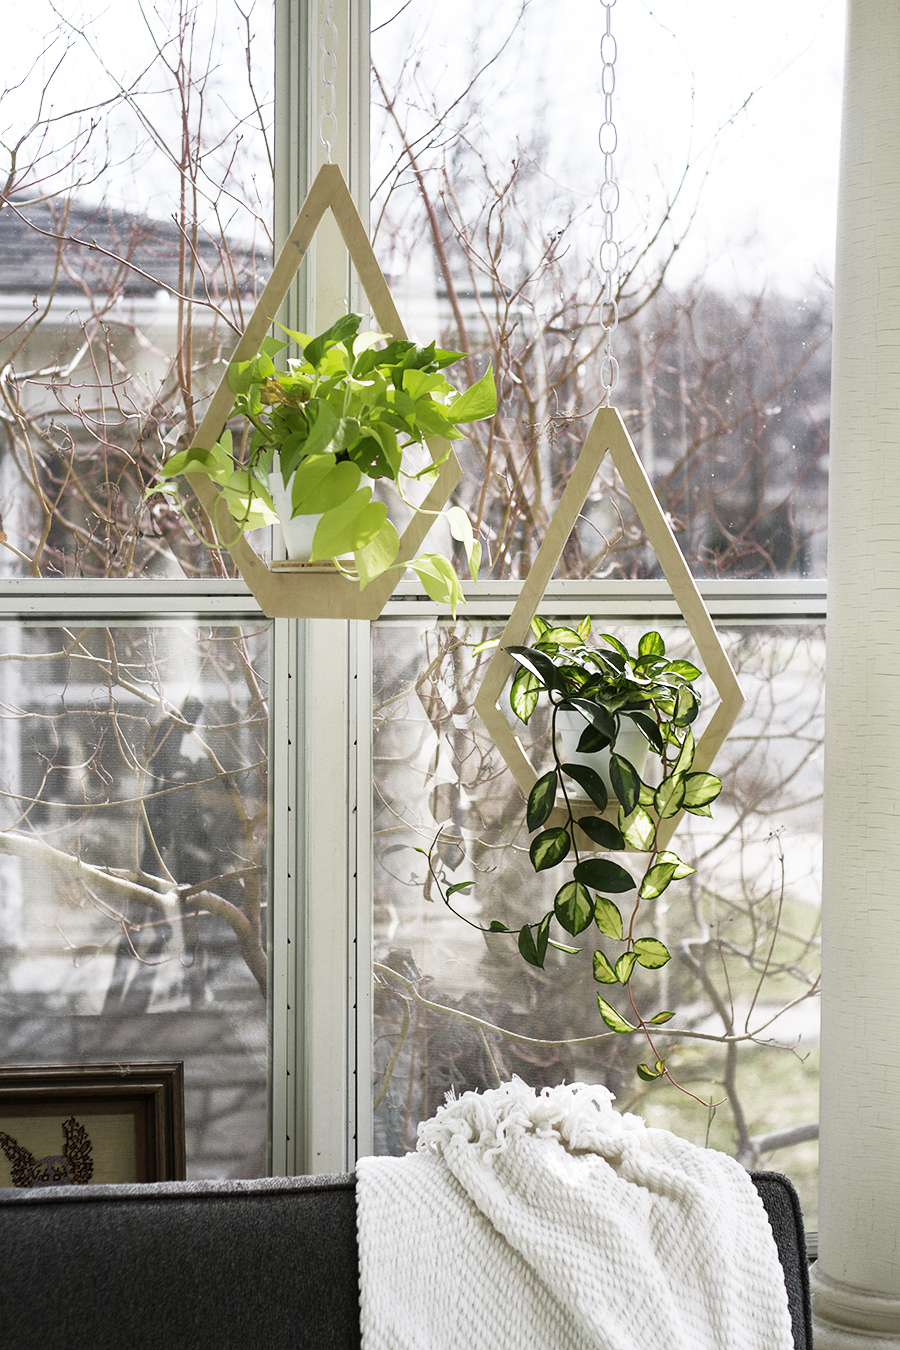
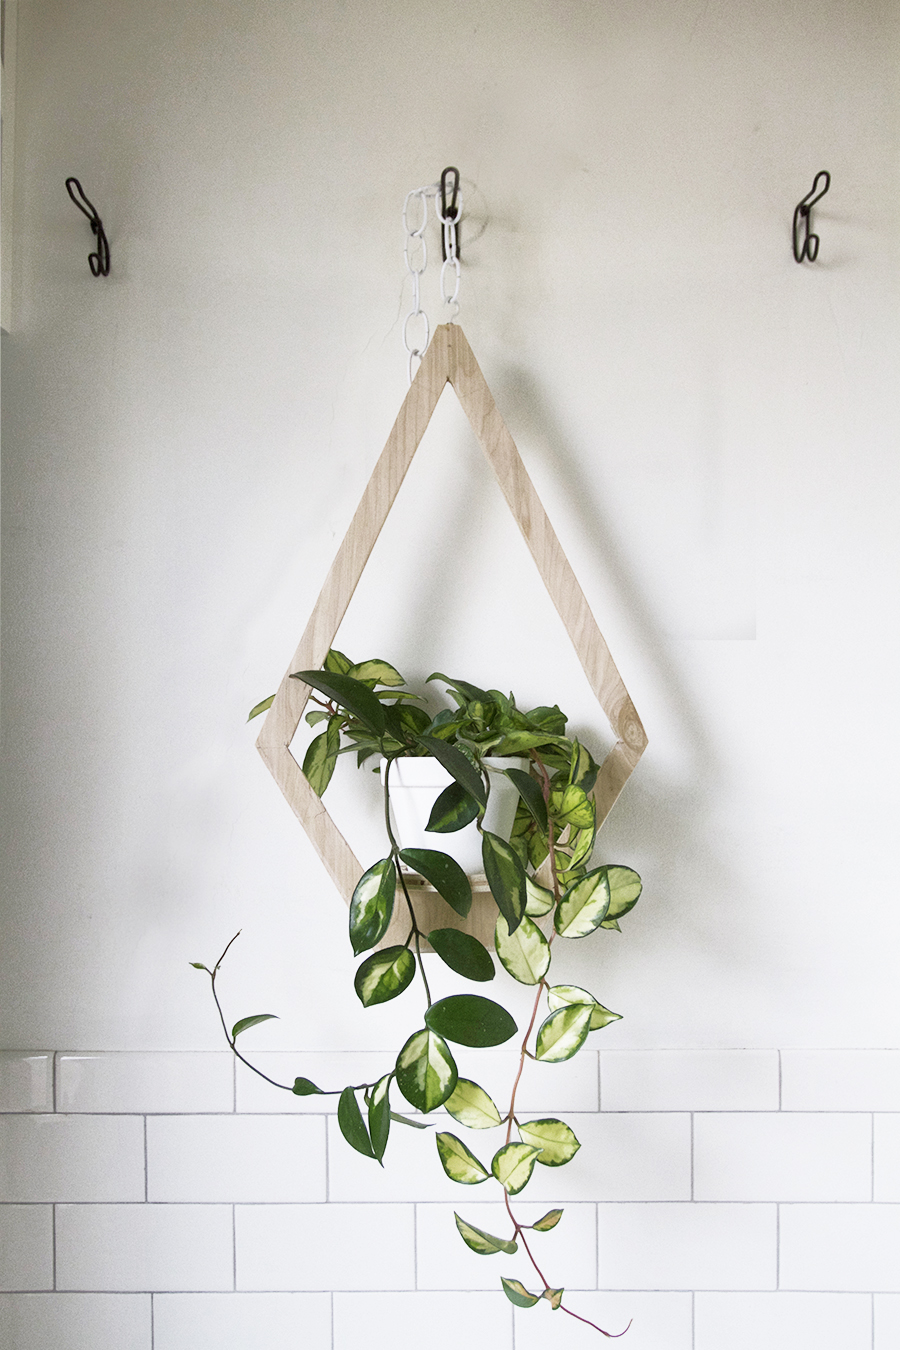
This isn’t the after picture I prefer, since my porch is barren of all real spring feelings until the weather changes and there is robins and green stuff outside, but you get the idea.


These are really cute!
Thanks, Lizzie!
These are too good! I love it and I want to make it!!! You are so good at this stuff!!! Want and do though are so far apart for me.
You should get the similar looking one from West Elm ;)
Those look so rad!
Thanks, Marti!
Those are the bomb-diggity. Totally something I would buy, or make.
Thanks, Melissa!
Your auntie wishes she was rich instead of beautiful. I will save this for brighter days because I love the design, affordability, and so clever. I think youall have the Midas t ouch. Keep up the good work. I am proud by proxy!
Hi
Do you sell these st all
Thanks
Lue