


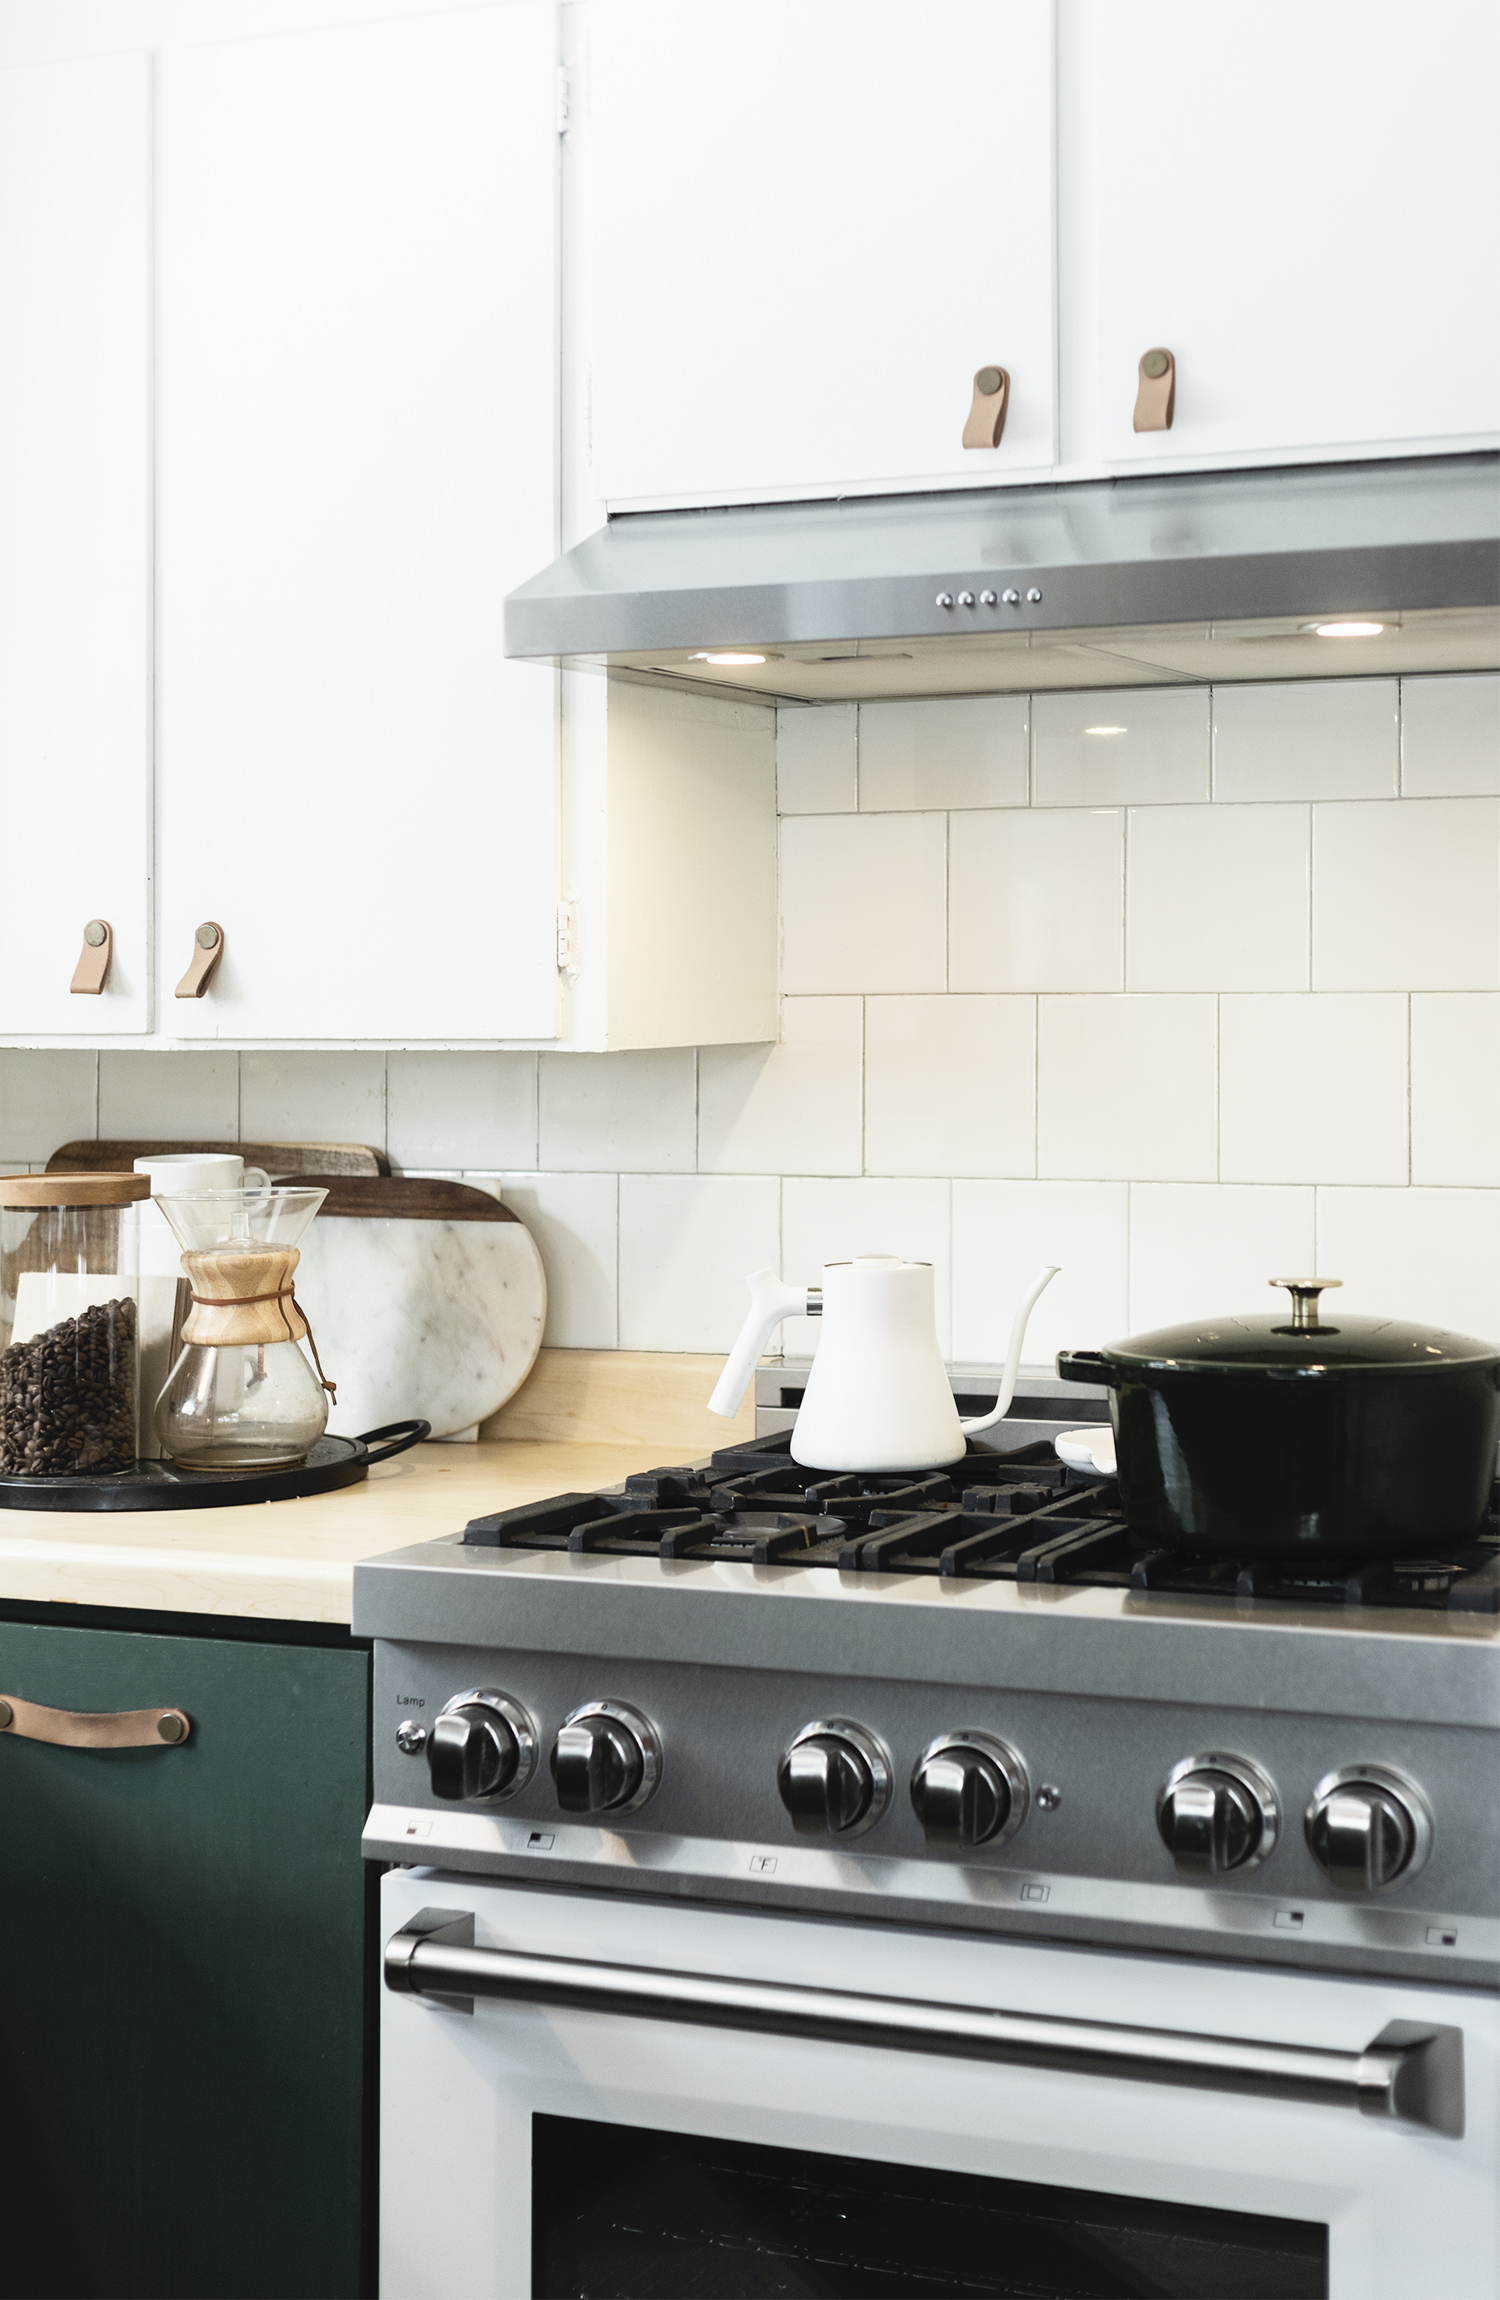
We’ve been so happy with our new range and range hood at the cabin. It looks great in the space, except for the patch tile patch job that needed to be done. Perhaps this has happened to you? Maybe you needed to remove an over the range microwave or hood vent and realized the new replacement didn’t fit quite the same way as the old and your easy update has turned into a can of worms, because now you have to tile to patch. Whatever your situation may be, patching tile is way less intimidating than you might think.
I always save extra of any and all projects I take around the house. Whether it’s paint, tile or flooring. I always have extra on hand, and I recommend you should too!
a chisel
hammer
small crowbar
mastic (or thinset depending on your application)
notched trowel
sponge
grout
bucket to mix grout
multi-purpose tool
a grout float or putty knife
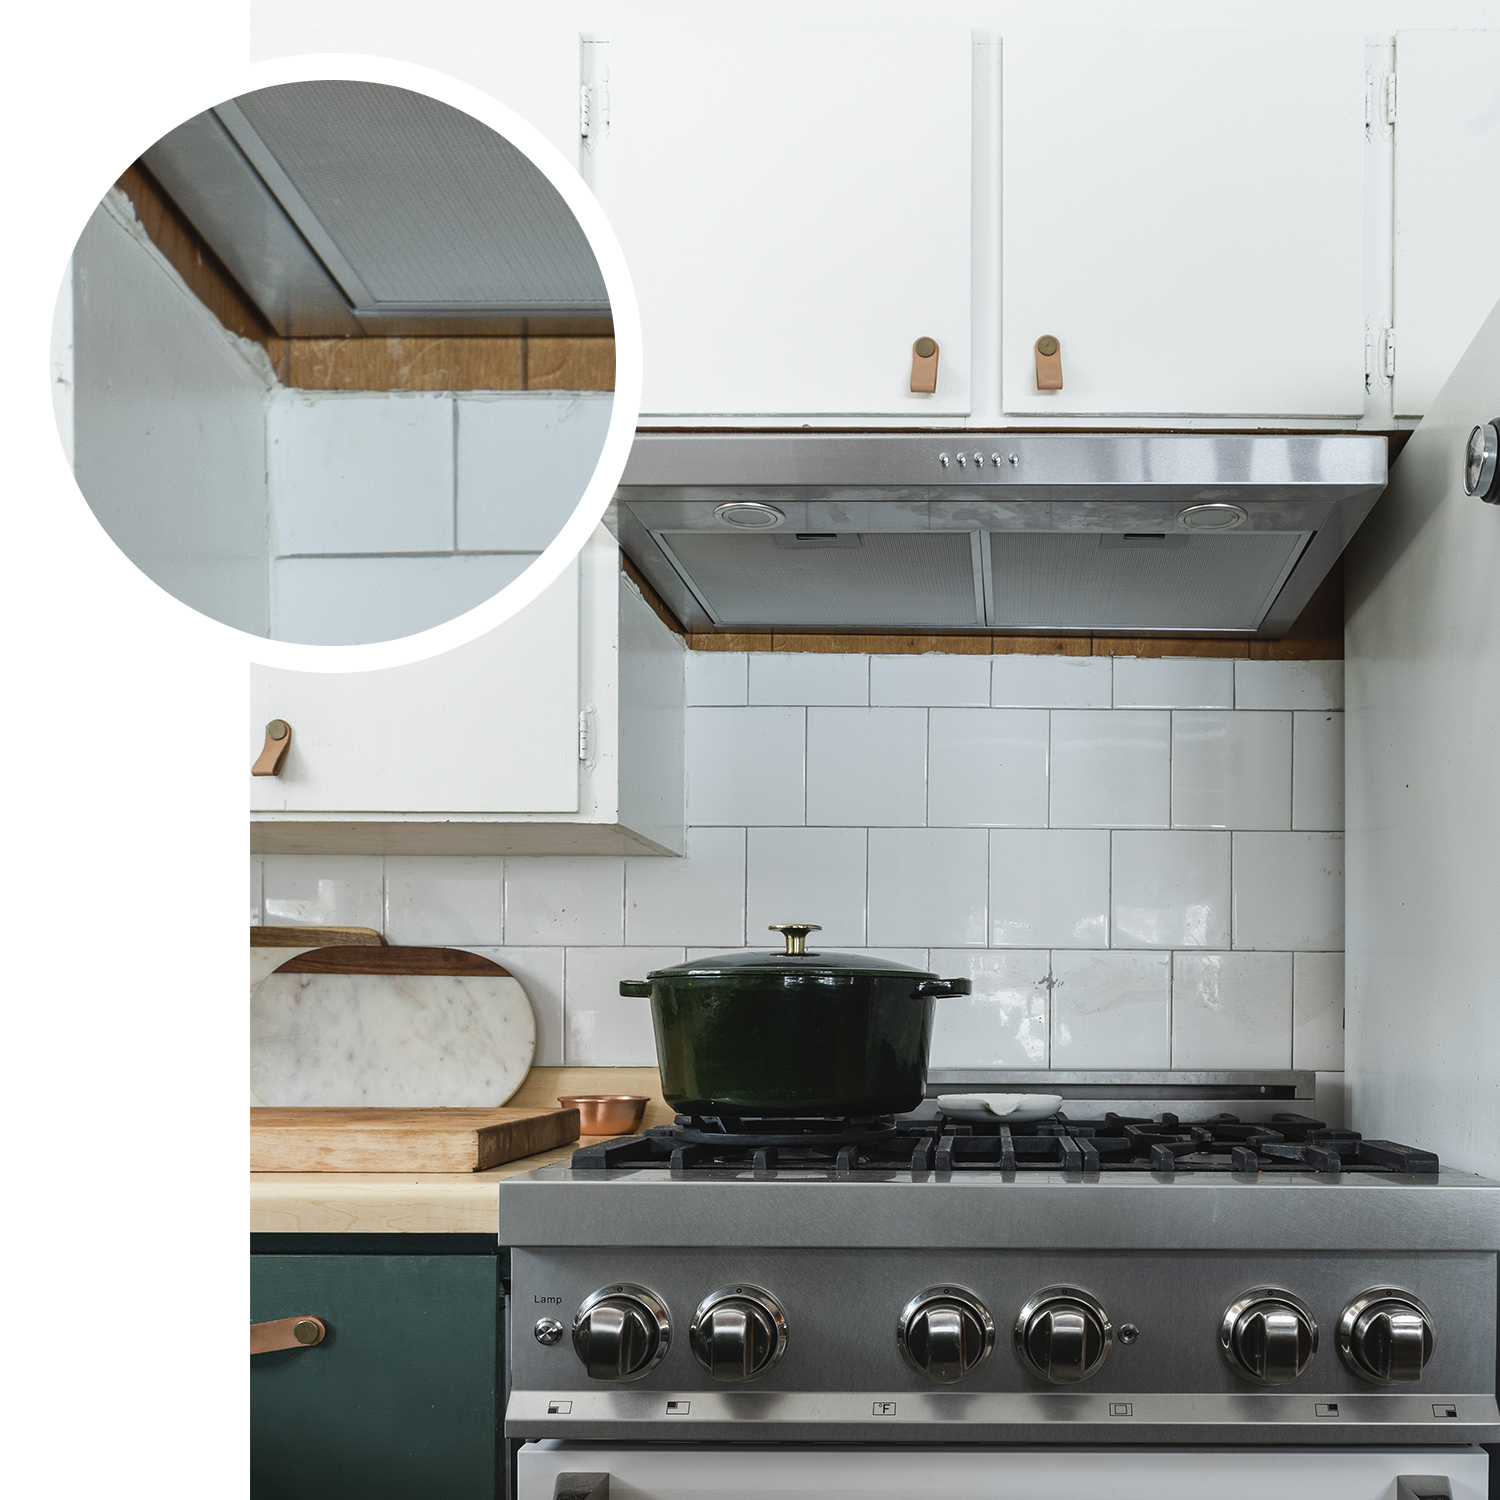
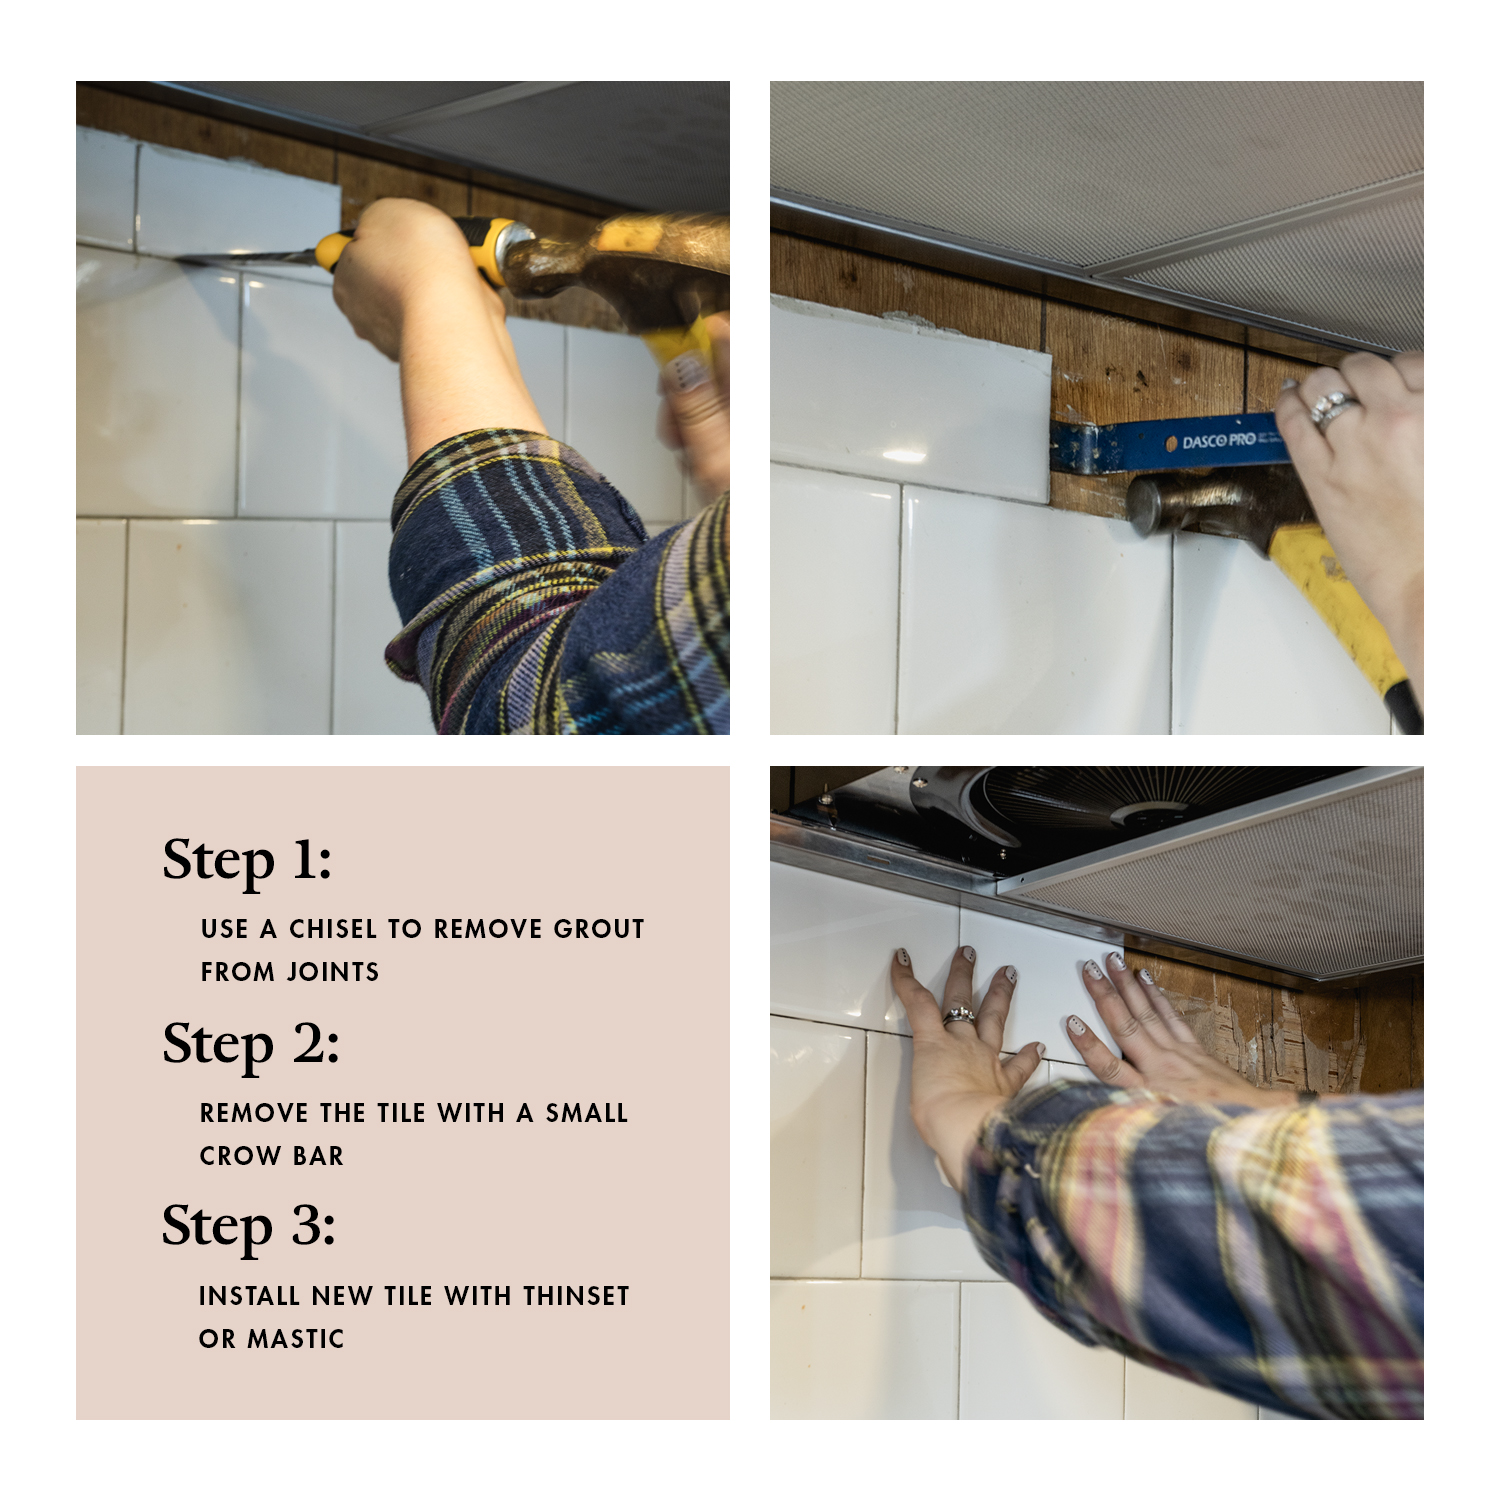
To start, you may have to remove some tiles in order to get a fresh row of tile. As you can see, I had made previously needed custom cuts for this top row of tile to fit around the old range hood. Once the range hood was replaced, it revealed un-tiled substrate, and it needed to be patched. To start, I began by using a hammer and chisel to remove and loosen the grout in between the tile joints. I didn’t need to remove all of the grout, I just wanted to loosen it up so that when it came time to remove the tile it didn’t take any finished tile with hit.
I followed up by tapping the face of the tile I wanted to remove with a hammer. Then I took a small crowbar and used it to pry off the tile. Because I tapped it with the hammer it would usually come off in a few pieces. Once the entire tile was removed, I took some time to use the chisel to remove the remaining thinset and clean up and remove any remaining grout on the grout lines.
Lastly, I back buttered the replacement tile with thinset and installed the new tile to fit the space. I have a tile saw, but for this project I was able to use a manual tile snap cutter for all of my cuts.
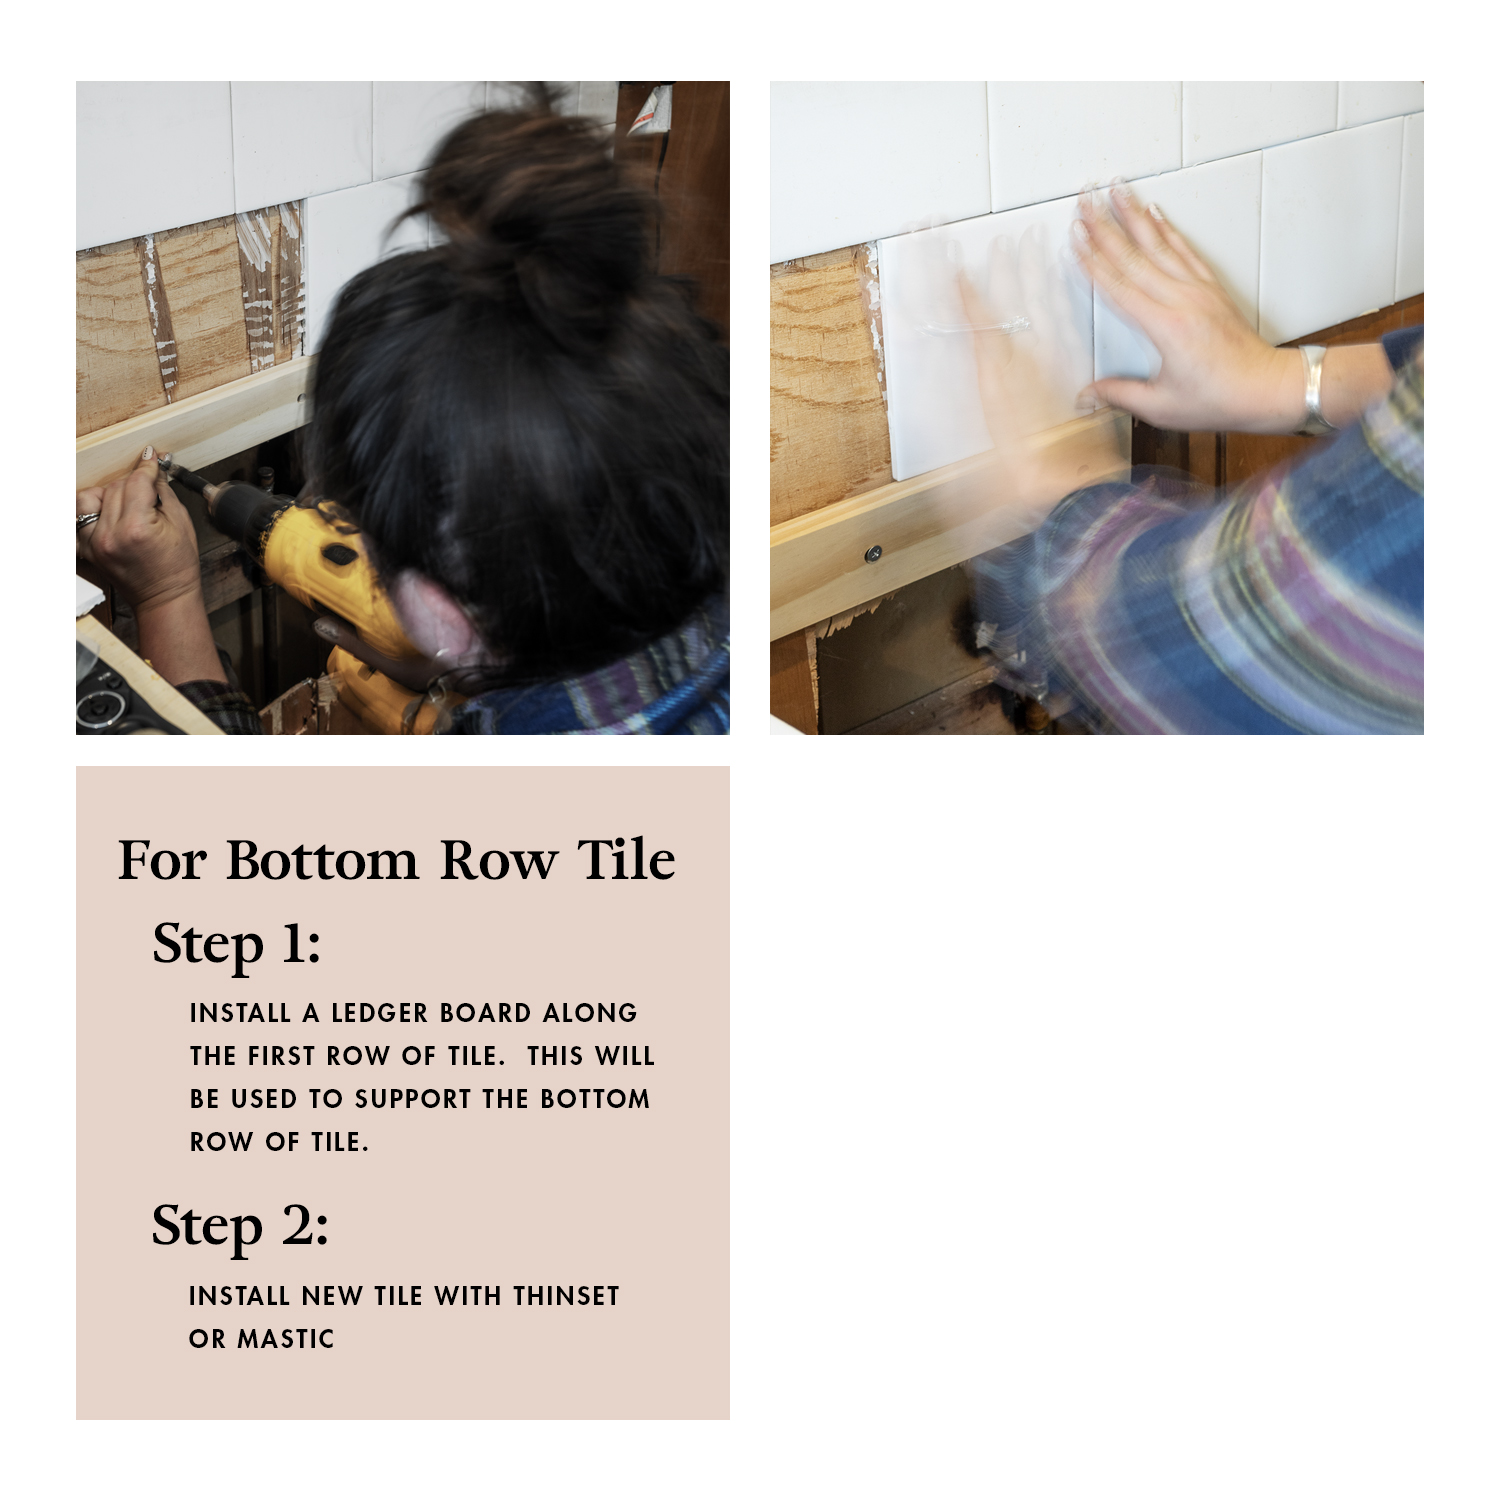
You may have tile that needs to be repaired on your first row of tile. I had a repair made to the plumbing on the wall behind the stove and the bottom row of tile needed to be removed. To replace this tile I installed a level ledger board to give the replacement tile support while the mastic dried.
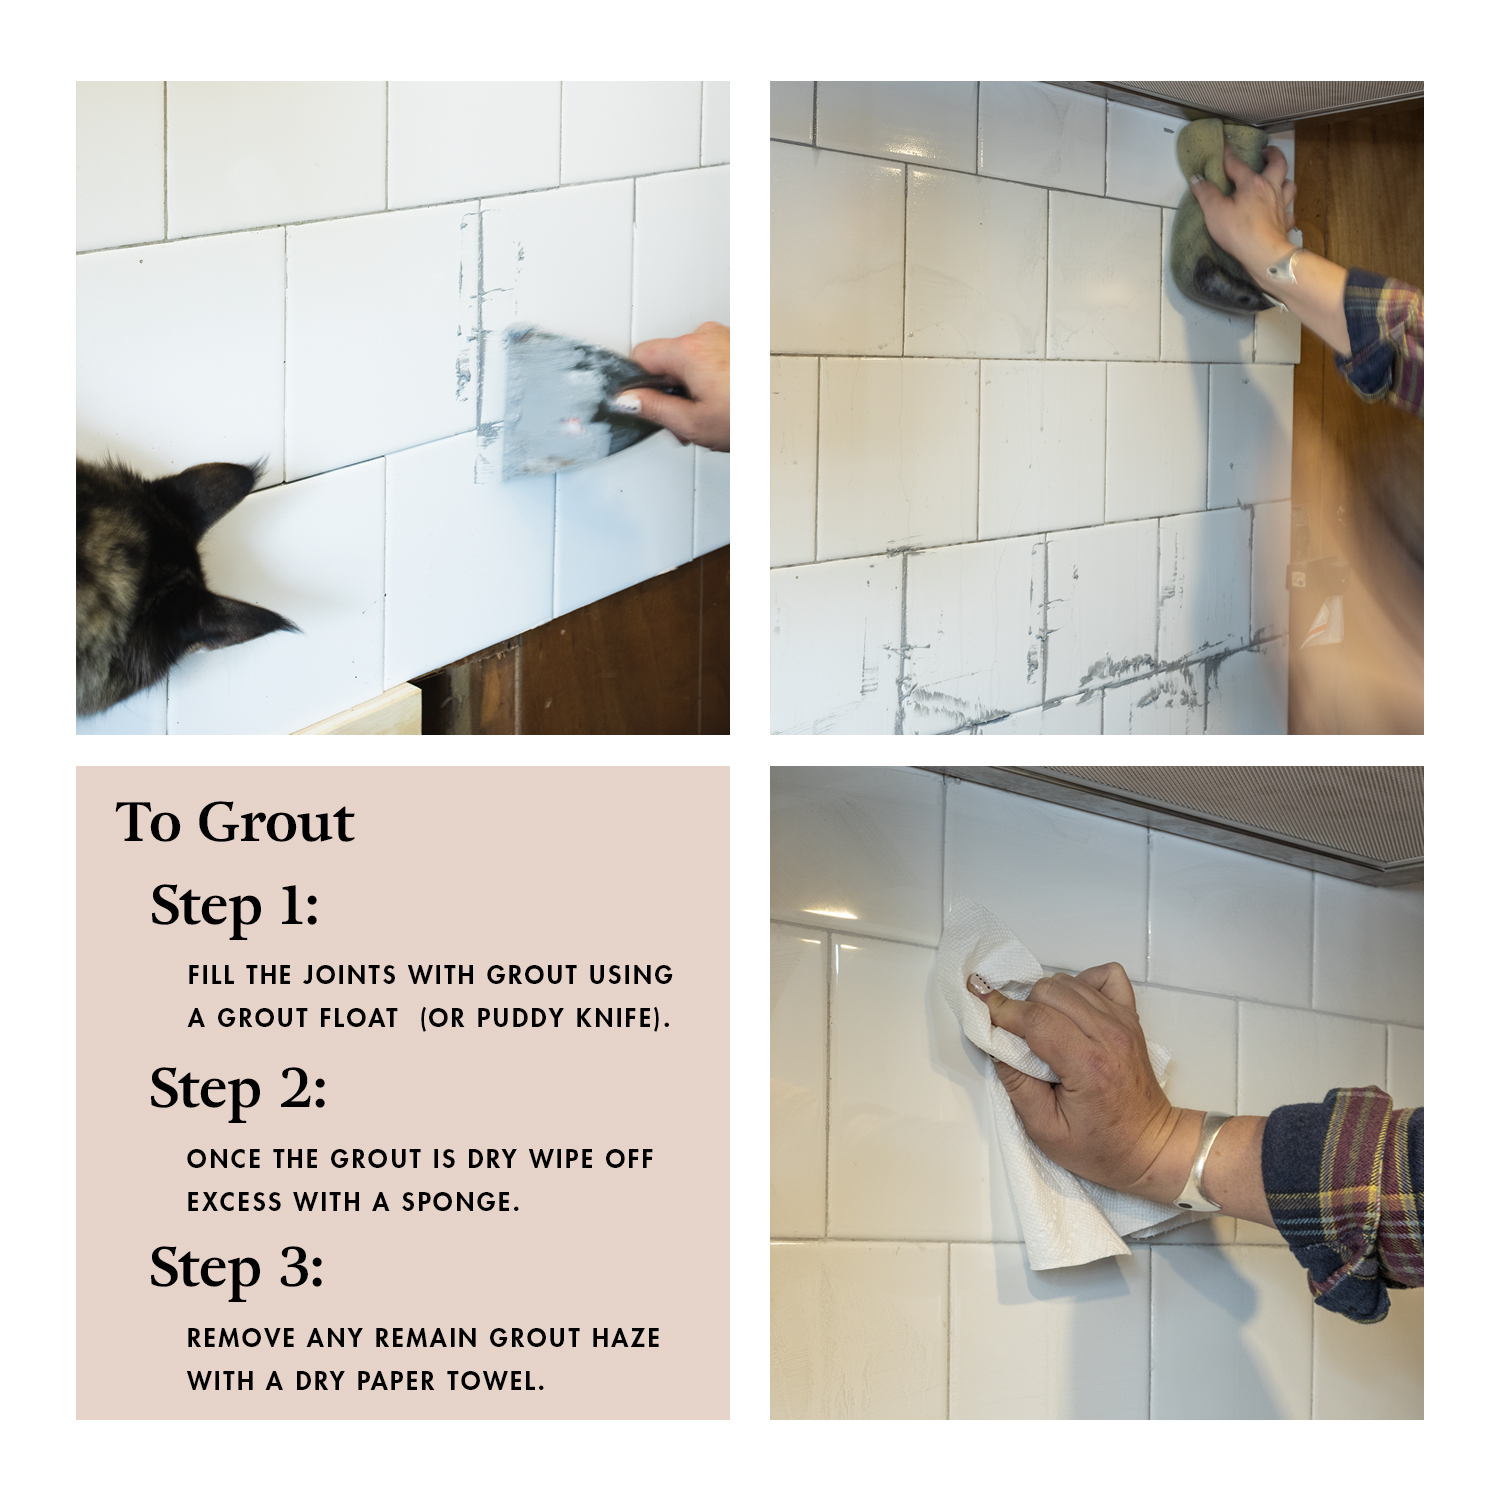
Lastly, you’ll need to grout the joints. I had extra grout on hand and mixed up a small batch in a bucket. Typically you’d want to apply the grout with a grout float, but I was straight out of grout floats. Instead I used a 3″ puddy knife to push the grout into the joints.
Once the grout is dry (per your products instructions). Remove the excess grout with a sponge and the remaining grout haze with a dry paper towel. Buff to a shine!


We had to do a major patch job after pulling off the old tile behind our range. Apparently over the years heat can kill the drywall too. Woo! Sucked, raised budget, but once you’re in there you’re committed!
Oh no, that stinks. I’m always fearing that can of worms.