


Aaron and I have been picking away at finishing our basement over the past year. We are slowly but surely starting to see the light at the end of the tunnel and I am now able to start putting the finishing touches on a few things.
For the past 3 years the stairwell to the basement has been the hugest eyesore to me. I have two words for you when describing it; splatter paint. This is not boss.
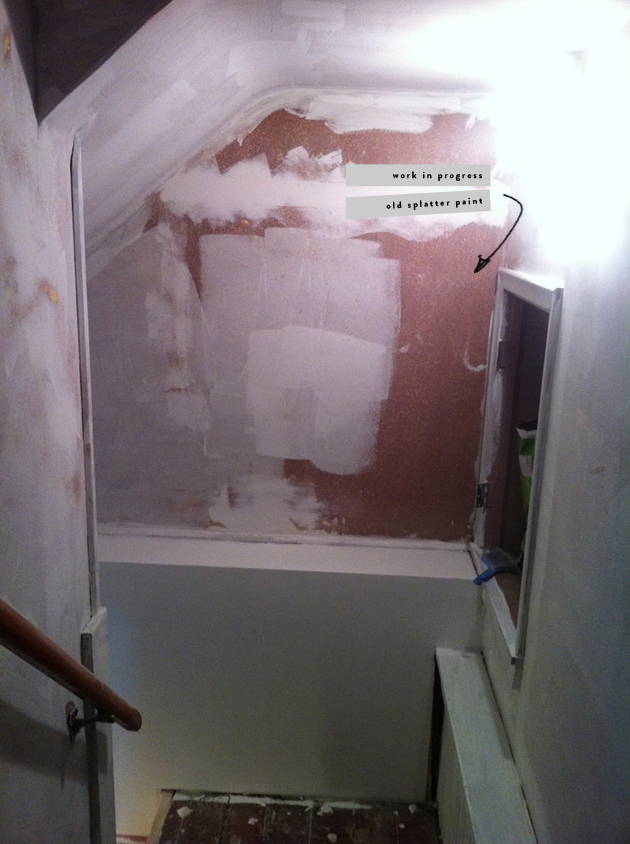
After a few painful years of starring at a purple and skin colored splatter paint job I decided things needed some serious freshening up. Inspired by a friend who recently painted her kitchen wall with a grey and white chevron pattern, I decided to have a go at my own subtle version of a chevron wall and started planning in a major way.
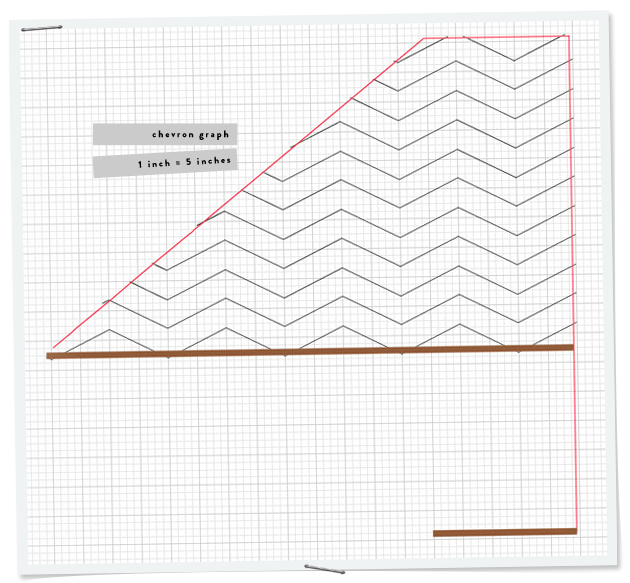
Because I wanted to figure out the scale of my chevron in comparison to the size of the wall, I grabbed a measuring tape and my computer and got to mapping this thing out. I chose to map this all out using Adobe Illustrator, but you could do the same thing on a piece of graph paper. To make this all fit on one page, my ratio was 1 inch = 5 inches. This particular pattern measures 10 inches from ‘valley’ to ‘peak’ and the stripes are each 5 inches wide.
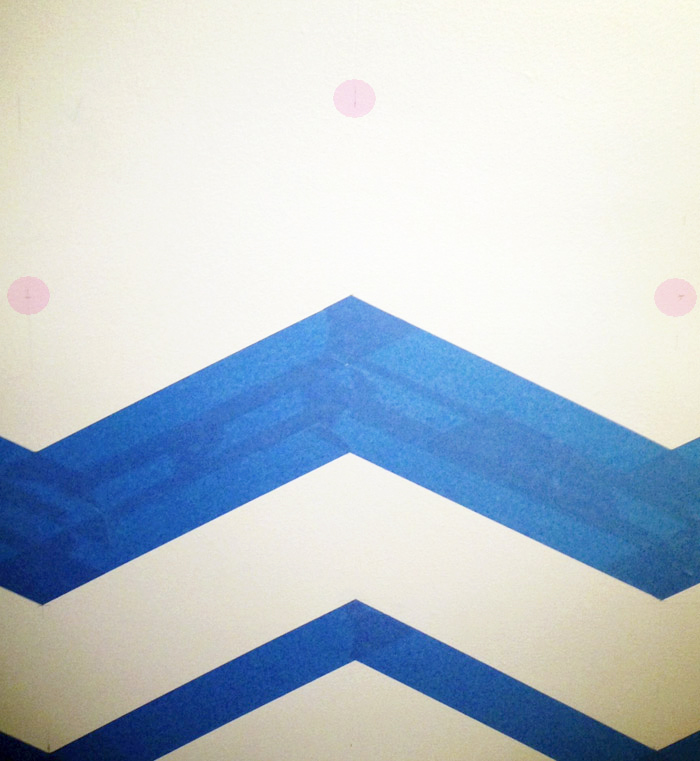
Once you have this all worked out you’ll need to transfer your map to the wall. I grabbed my laser level and my ruler and started marking out a grid on my wall. I would not recommend drawing a literal grid on your wall. You’ll have a lot of erasing to do if you go that route and that may not make for the cleanest looking wall when you are all done. I found it easiest to measure where each ‘peak’ and each ‘valley’ would sit on my laser line and marked it with a little cross. Once all the little crosses were in place I started connecting them with painters tape. As I would finish each point I would take a ruler and a razor blade and cut the tape into a nice point. Make sure you have plenty of sharp blades to cut nice crisp points.
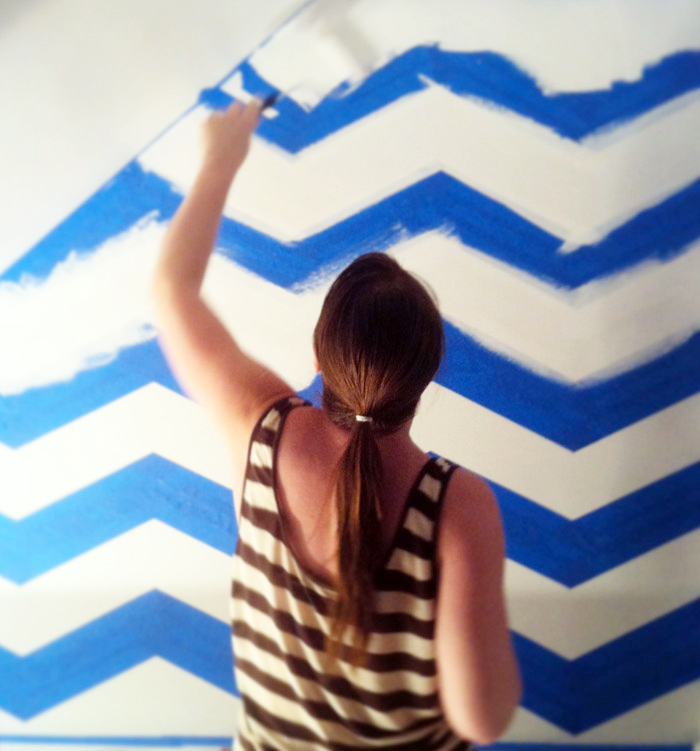
Now that you have your tape up you will want to start painting. Don’t. First, grab your eraser and get rid of any visible pencil marks. If you’re painting white on white you may see these marks through your paint so it’s best to just get rid of them right away. Another important step, not to be missed, is to make sure you are going to get a nice clean line. Back when I was updating Elsa’s bedroom a clean line was also important. I go over the basics here. Don’t skip this step!!!!! Once you have done a quick brush down of paint on all of your tape edges, grab a 3 inch roller and get to painting! If you do decide to use white on white, I still recommend two coats of paint. Now, go ahead and rip that tape down. At this point you may need to go back in with a chisel tip foam brush and touch up where the tape may have pulled some paint off. No big deal.
Here’s a list of things that you’ll need to get this thing done:
|
Supply List Pencil Laser Level Ruler Tape Measure 2 inch painters tape Sharp Razor Blades or Exacto Blades White Eraser 3 inch Roller Paint Brush Chisel Tip Foam Brush Paint – On my wall I used “Decorators White” in eggshell and “Super White” in glossy. Both by Benjamin Moore. |

Contributor in Crime / Colz Nicole Ripplinger (aka Colz) co-founded Deuce Cities Henhouse with Alison in 2009. These days she’s better known as the “#1 Contributor in Crime”. She makes her home in South Minneapolis with her husband, Aaron, and their two girls, Elsa & Faye. |


Colz! I think this looks so fab! Job well done buddy!
I love this! Now I’m wondering how I work up the patience to pull this off in my own home :)
LOVE this. I must try this… Somewhere in my house.