


Hey guys! I wanted to share this easy DIY cutting board post with you!
I happened to have extra butcher block left over from my cabinet install that I did last week. It was obvious that I could make some pretty tyte cutting boards with the scraps and I quickly went to town. After making my first cutting board, I thought, this could be a really easy holiday gift for any of you out there, to make for all your buds. I’m making a few for mine, but shhh, don’t tell ’em. Anyway, I thought I’d share with you my technique for this really easy project.
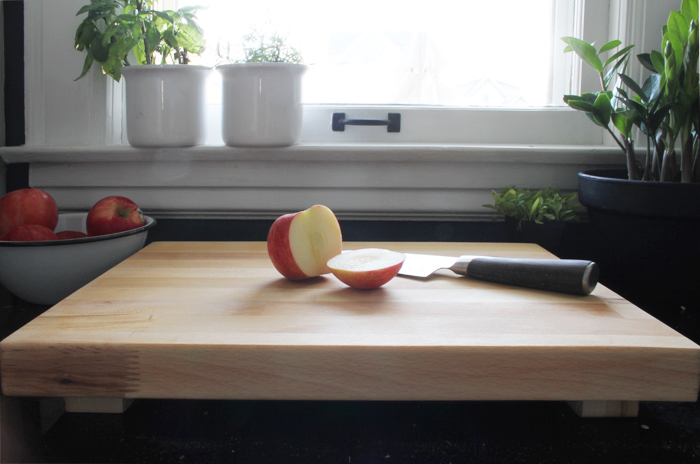
The cutting board turned out really nice, and adds a lot of natural texture to my kitchen. I’ve been using it all the time, and now I have a dedicated chopping area. The awesome thing is, it only took me half an hour to construct, and it looks super nice, I might even dare to say… store bought.
Like I said, I had extra butcher block laying around, but if you don’t just happen to be in the midst of a kitchen reno project, you could easily pick some up at Ikea. I did the math, and if you were to chop down a standard Ikea butcher block countertop you’d have yourself at least 5 footed cutting boards, for less than a $100 buckaroos. That’s $20 a board you guys, and the best part is, you made it yourself.
|
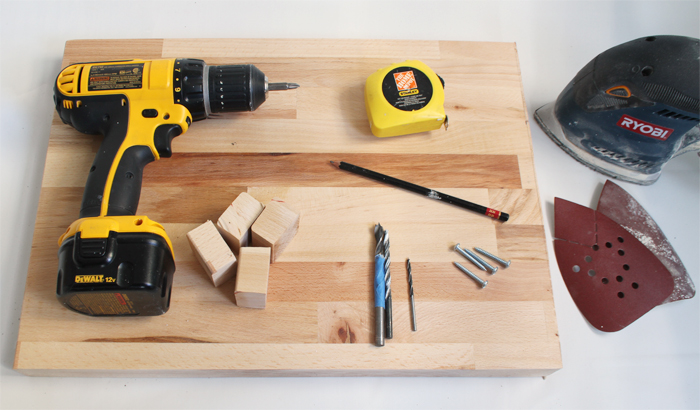
Supply List Pencil Tape Measure or Ruler Drill bits in 1/8, 3/16 & 5/16 sizes Screws – I used #8 1.25″ screws Sander 100 and 220 grit sand paper Butcher Block oil such as Linseed Butcher block cut to 13″ x 18″ 4 Feet measuring h: 1.5″ d: 1.5″ w: 1.75″ Foam Brush Rag |
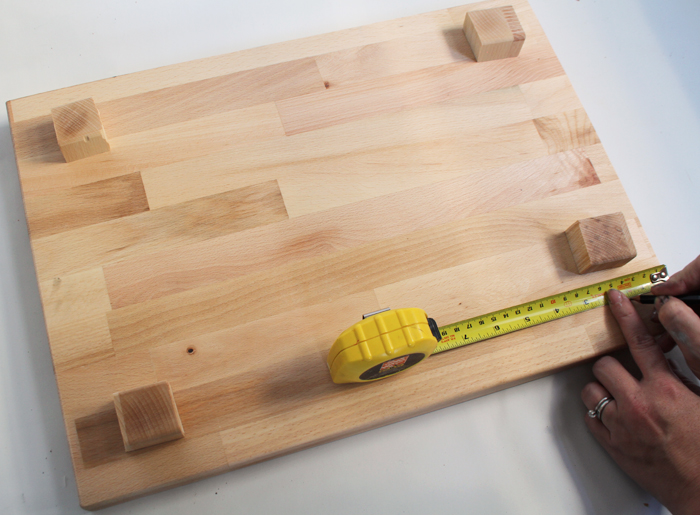
Measure out the placement of your feet, I choose to put my legs 1.5″ in from the side and 1.25″ from the bottom.
Any dummy can go out to there garage and cut a piece of board down to 13″ x 18″. The key to making this cutting board look nice is all in the legs. I wanted to countersink the screws I used to attach the legs to the butcher block, so it all looked fancy, and neat, and not homemade.
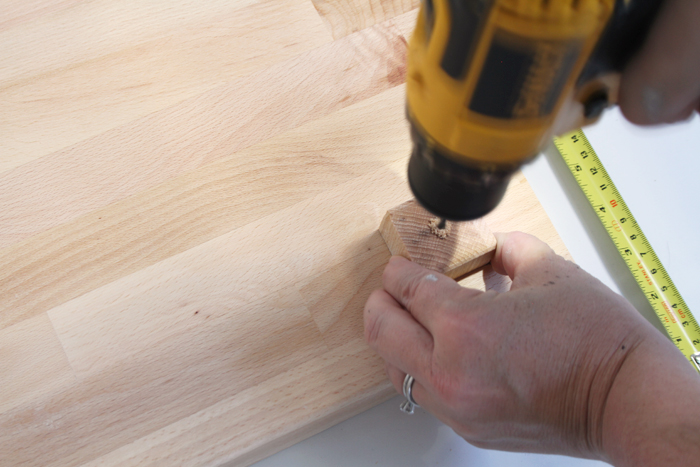
There are three steps to take when it comes to countersinking your screws. First you need to spend some time with your drill bits. Lining your foot up with the marks you made in the previous step, center your bit, and drill through the middle using a 1/8′ drill bit. Drill all the way through the leg and go about 3/4 of an inch into the butcher block below. This will allow your holes to match up perfectly.
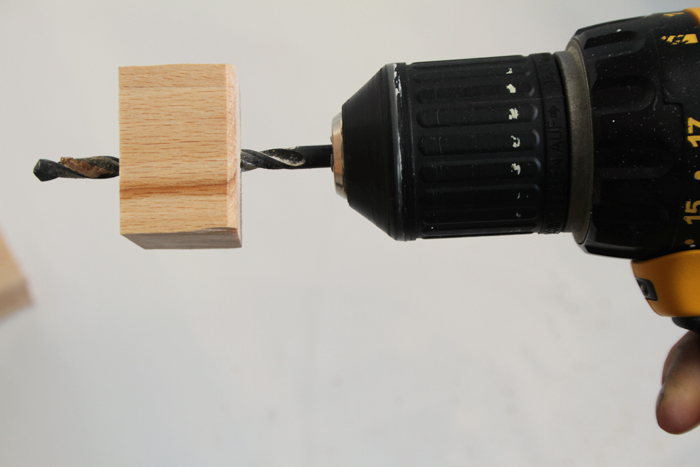
Now using a 3/16″ bit, drill all the way through your leg (not your real leg, duh) using the hole you drilled in the previous step as your guide. You do not want to drill into the butcher block, only through the leg. This will allow the screw to fit easily into the leg without splintering it.
I used a 5/16″ drill bit and taped it off 3/4 of the way up the shaft. This way I could visually have a marker to make sure I didn’t drill too far into the leg. You do not want to drill all the way through the leg! If you do, your screw will just fall through. Drilling only partially into the wood so that your screw head is not visible is called countersinking, guys. They do make a drill bit for this process, but since my screws were only 1.25″ long, I wanted them to be buried in the leg, and not sit close to the surface which is what the countersink bit would allow for.
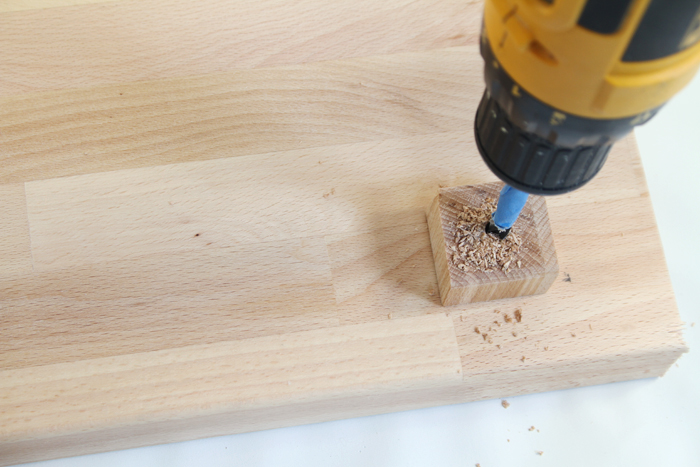
Now you can screw your leg to the butcher block and repeat this process with the other 3 legs.
Once you have all your legs attached, sand down your butcher block going with the grain using a 100 grit sandpaper. Round the edges a little bit so everything is nice and smooth, and finished looking.
Repeat the last step with 220 grit sandpaper.
Wipe away dust with a damp rag and allow the butcher block to dry.
Apply multiple coats of oil according to the manufactures instructions. For my butcher block I used the Behandla oil from Ikea.
I hope that this inspires you guys to make some cool gifts for your friends and family this holiday season! Handmade gifts are the best gifts.


This looks great. Glad I found your site. I have been working my way through your posts. What a great blog!