


I’m so proud of this post, you guys! Look what I did! I made our kitchen so much better than it was before, and I love it!
Heads up – I’m gonna be talking about myself like I rule the world for the rest of this post, I’m just so into how I slayed this kitchen beast!
Remember when you guys gave me tons of feedback when I posted about the dilemmas I was having with this sad, lonely, confused side of the kitchen. I was keeping myself awake at night (many, many nights) trying to figure out how I was going to make this one wall look like it belonged in the kitchen. The layout was so strange; I was dealing with two entry ways, a huge refrigerator, a chimney, a weird cove (where a stairway used to be), and a window that was sitting next to the eat-in table. What is a girl to do? Fer real, it was a mystery, and I did not know what to do.
What I did know was that I had to do something that would unify the space, and would embrace the differences. Remember, this wasn’t an expensive gut job, this was a coming-up-with-the-best-solution-on-a-limited budget job.
I couldn’t get shelves out of my head, I knew it would help. Adding horizontal lines would bring the huge fridge, quirky old chimney and cove together and help them function as one. But no matter how much sense adding shelves made, I couldn’t shake the feeling that there had to be a better way.
I was starting to get stressed out. I had painted and restored cabinets, tiled walls, and painted the entire kitchen, there was only one thing left to be done, tackle that weird-side-of-the-kitchen-beast. It was coming down to go time, I had scheduled this past weekend to install shelves, but I just wasn’t sure that it was the right thing to do. I continued to look for the solution and I was full of self doubt, and then it dawned on me, duh, add cabinets dummy!
I thought of this genius idea on Friday, like as in 4 days ago Friday. If this were some sort of sports game, there would be seconds on the clock, and then I would come and make/dunk/hit/throw the most winningest goal/point/score/basket/homerun/touchdown you have ever seen. My brain got smart and just figured it out – cabinets were gonna rule.
Of course I’d thought of this before, but had moved it to the “bad idea” pile of my mind, because I already had two different types of cabinets in my kitchen. In the pantry we have the 100 year old original cabinets, and in the main part of the kitchen we have the new old-style cabinets modeled after the pantry cabinets (thankfully). I thought it would be stupid, and look incredibly mismatched to go add a third set of cabinets.
So when it occurred to me to add cabinets, it was only going to work if specific design expectations where met, there were also some logistical problems.
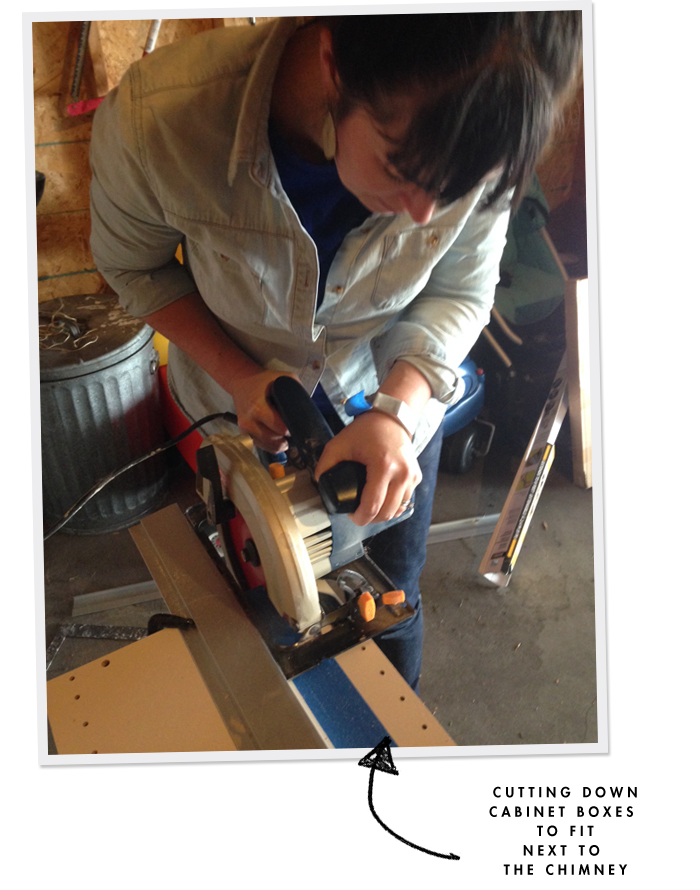
Firstly, a 24″ deep cabinet would easily fit in the “cove” space, but I would have to cut down a cabinet box to have it fit in the space where the chimney is. This was a scary prospect for me, and is not something I have any experience doing.
Secondly, I would have to find cabinets that were similar enough to the cabinet style we currently have, that the average joe wouldn’t be able to notice the difference.
Thirdly, the cabinets would have to be painted to match all of the other cabinets that I just finished painting, so they wouldn’t look out of place. Blech, after all the other cabinet painting, I never want to paint one again.
Fourthly, it would have to be on the reasonable end of the price spectrum, I am still trying to get out on the cheap on this whole kitchen thing.
Fifthly, it would have to look nice, meaning, I would have to pull off a decent install job. This was also a bit unknown for me, I’ve never installed cabinets, made them level or square, attached them to walls, let alone brick walls. Plus I’d have to measure, do math, add spacers, and do all that other hard stuff. I couldn’t half ass it, I would hate myself forever if the execution of this master plan sucked.
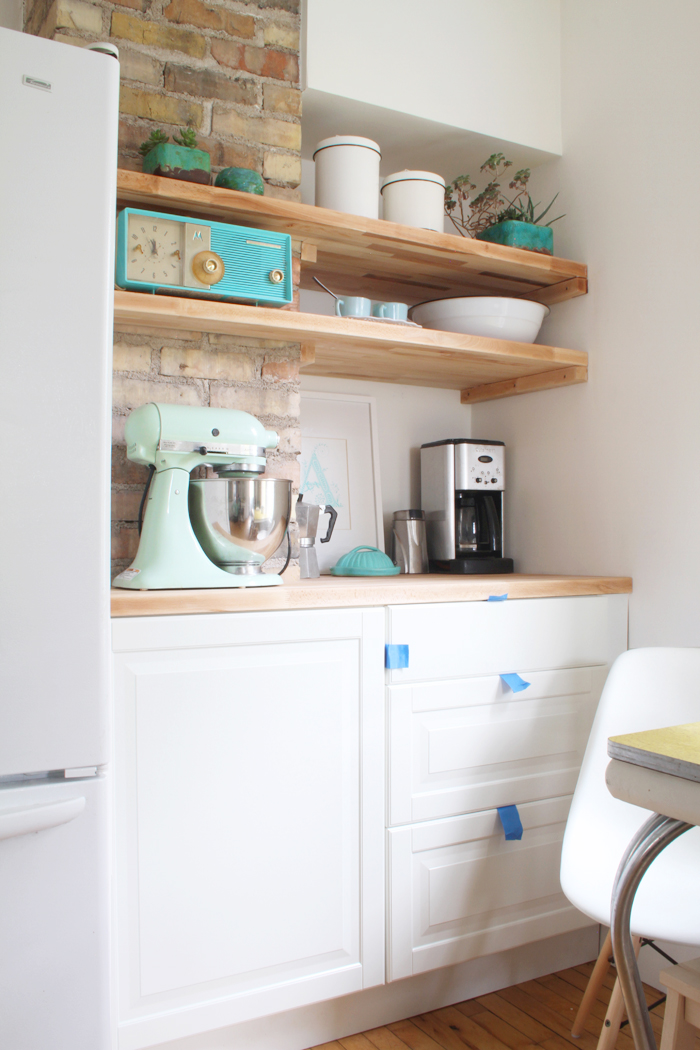
You had to know that Ikea was gonna save my butt on this one. How did I not put all the pieces together before? Lidingö style doors and drawers were the solution. The raised panel on the Lidingö is almost the exact same as what we have going on in the rest of the kitchen! The doors themselves don’t really look like my cabinets, because all of my doors have multiple panels, and the Lidingö doors are big rectangles. However, the beveled edges on the sides of the door panels match, and that’s good enough for me. Get this though, if you get a cabinet with 3 drawers stacked up, as opposed to a single cabinet door, the drawer fronts stacked, look just like my 100 year old pantry cabinet doors!
I did have to compromise a bit… Because I was chopping down the cabinet box where the chimney was, I couldn’t use drawers because you can’t chop down the inner drawer hardware. In the end, I did have to have one cabinet door. The cabinet door is very similar to the cabinets under the kitchen sink, so it doesn’t stand out much. I think I would fool you guys if you came to my house.
Also, I ordered reproduction hardware in the same style as my bin pulls in the pantry, and knobs that are identical to what I just added to all my cabinet doors. It will look tyte you guys, and you won’t even notice the difference. I’m not even worried about it.
Also, have you ever lived in a place with a drawer-less kitchen? It’s not that cool, and definitely not practical. As of Saturday, our daily cutlery has lived in a drawer in the buffet of our dining room, and it was lame. With this new set up, my forks, knives and spoons can all hang out in the top drawer of my new cabinets, which is the best!
Okay, onto how I made this happen in 48 hours time.
On Saturday, Jeff went and grabbed everything on my list from Ikea. I got to work right away installing the cabinet boxes. I of course had to rip (that’s what ya say, right?) down the cabinet in front of the chimney, but it wasn’t too hard to do. I just screwed the pieces together, and since everything would be hidden under the countertop, it didn’t really matter to me that the screw heads were showing on the outside of the cabinet box. I also had to get fancy with my drill skills to retrofit the Ikea adjustable legs to fit this cabinet, which is sold as a wall cabinet and doesn’t have holes for legs. It was no biggie though, I totally did that, because I am awesome, and I rule!
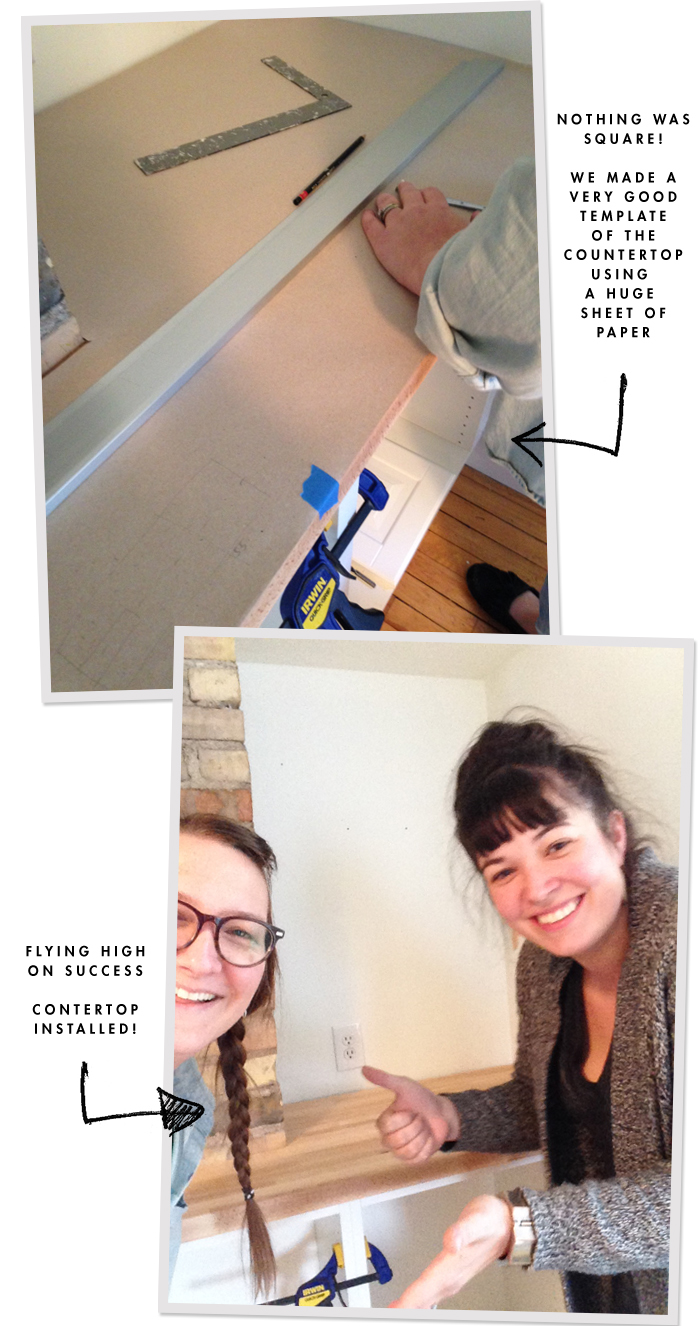
Sunday was countertop day, my worst nightmare. Why you ask? This is why: Nothing, not one single angle in this part of the kitchen is square. The walls are plaster, and they bow out, the floor is uneven, there are bricks with mortar billowing out between them. How does one go about installing countertops when they don’t have one square thing to go off of? I’m sure that there is some sneaky carpentry trick to figuring this whole mess out, but I couldn’t wrap my head around it. It was my worst nightmare because butcher block isn’t cheap, and I tend to make knee jerk and often impatient decisions when it comes to stuff like this. I was super scared that I would mess up the cuts, or the measurements. This is what kept me up at night for the last 10 weeks.
So like all good lady bloggers do, I called up my good girlfriend Nicole, and got her over to my place stat, to help me out with the thinking. Jeff was a cool dad and watched all of our kids all morning long, and we did construction in our slippers, not kidding.
Nicole and I work very well together, we have a shared language when it comes to rationalizing and problem solving, and this was very helpful when it was time to execute our plan. Our task seemed impossible, but after a cup of coffee, we decided to gather all of our measurements, and map our findings out on a big sheet of paper. I bought a roll of construction paper so that I wouldn’t get thinset and paint everywhere during the first 9 weeks of the project. We just used that big roll of paper for our template and it was perfect because it was thick, and didn’t tear easily.
We mapped out our plan, cut it out, laid it on our cabinets, and of course laughed when it didn’t fit. We then carefully removed the overlapping parts of the template with our x-acto knife, and replaced what was had been cut away with painters tape. We retraced the template with our new very analog and very unsophisticated edits, cut out a new template from our paper roll, and to our surprise.. it fit. Yeah it fit good.
Then we took our template out to the garage and got brave.
I’m not going to lie, cutting these counters out with a circular saw was really, really scary for me, but we did it. Some of the cuts were kind of precarious and a little dangerous, but it had to be done. It all worked though, and the plan came together, and I totally love it.
This space changes everything! In theory you might think it would make everything feel smaller and closed in, but it doesn’t. The room feels twice as wide and looks 100 times as pretty. I’m so into it.
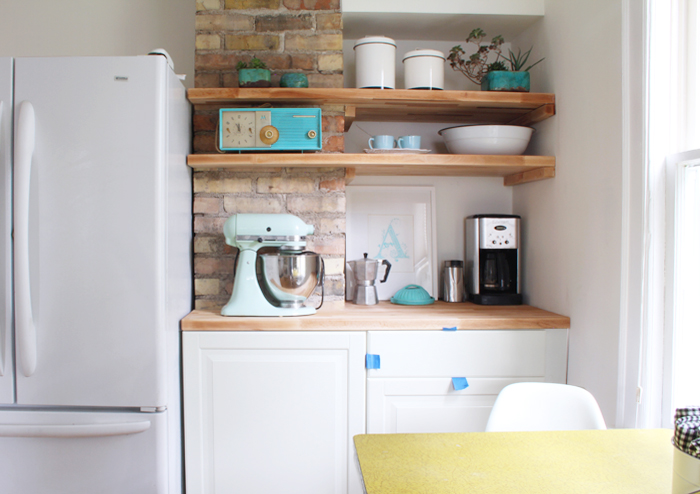
Here’s one more pic, because I’m so GD proud.
Guys! This is the last installment of the kitchen progress posts, next up the big reveal, so stay tuned!
Previous Kitchen Updates:
▼ Kitchen Plans
▼ Kitchen : Week 2 Progress Report
▼ Kitchen : Week 4 Progress Report
▼ Kitchen : Week 6 Progress Report
▼ Kitchen : Week 8 Progress Report


It. Looks. AMAZING.
How did you mount into the bricks? Special drill bit? Hammer drill?
Hey Laura, it was easier than I thought. I just bought a masonry bit to drill the holes. It was as easy as drilling into a stud. Then I used an anchor and screw to mount the cabinets.
Brilliant! And the execution is fabulous. You deserve to be proud!
Thanks Kathy!
That looks awesome! Totally pulls that side of the room together.
Thanks! It totally does, I am so happy!
It looks GD amazing!!
Thanks Courtney!
It looks fantastic! And I love hearing you talk about being nervous about executing these plans, only to have them turn out so great. It makes me feel better about just going for it with DIY stuff.
I know! I think so much of it seems harder than it actually is. So far, everything has been able to be put back together. I think this will give me confidence for more home DIY projects down the road!
You are amazing! What an incredible job. It looks so great!!
Thanks Anne! I’m really happy with it so far, now I have to tie up all the loose ends, which is no fun.
I remember you were originally thinking of putting a bar/seating area there…but this works sooo well. You should be so GD proud, it looks amazing.
Yeah, I was thinking of just putting a stool there, but that wouldn’t have been super functional since the kitchen table is right there too. I think this was for the best, no regrets!
That does look really, really nice. Congrats!
Thanks Shannon!
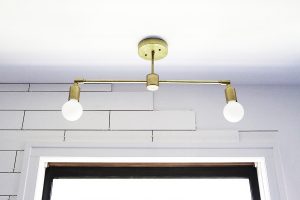
If there’s one thing I know about home improvement, it’s that enough stuff goings wrong that you absolutely deserve to take a moment — or two or ten — to pat yourself on the back when something goes right. I still brag about the daring, acrobatic feats that were required to install a ceiling light three years ago!
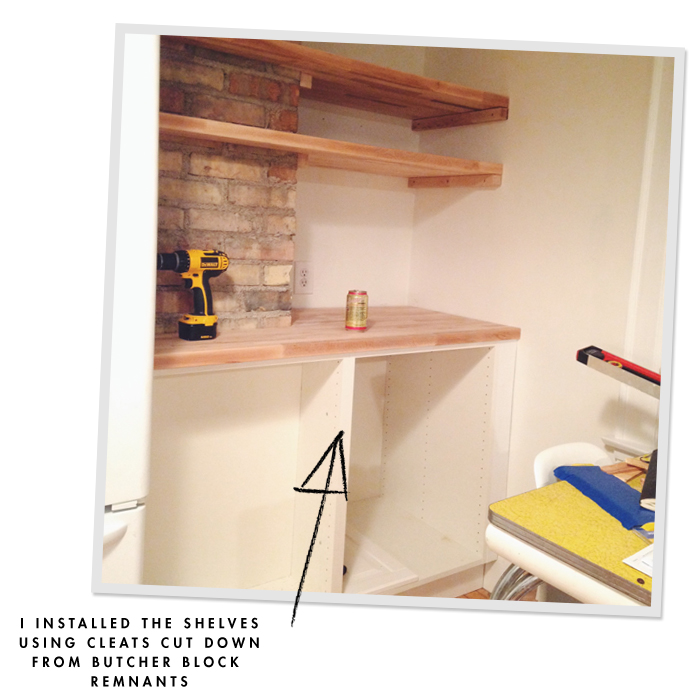
I may have missed this in the post, but are the upper shelves butcher block? I have a similar nook that needs shelves and love the chunky look, but am curious about the weight?
Hey Callie!
Yes, we all deserve a pat on the back for doing this stuff. It is all so worth it in the end, your home should be a place that makes you happy and I think it’s great that some of us are brave enough to do whatever it takes ;)
Yes the upper shelves are butcher block. They are heavy, but not too heavy. Since the chimney section was cut out there are really just the shape of Oklahoma, and don’t weigh as much as you would think. I did anchor the cleats really well, and I hope everything stays up there. I also cut extra cleats if need be for under the back of the “cove” area and the chimney. I was going for aesthetics first, and if the shelves start to sag or need more support, I’ll go ahead and add more with my back up cleats.
Looks amazing! A stroke of genius! You are one hard working and talented lady.
Thanks Jessica!
Holy goodness! It looks incredible! Positively perfect in that space (and I like how you styled it!)
Thanks Kristen! I’m always unsure of my styling abilities.
Discovered your blog via DesignSponge and am so happy I did! Working my way through your old posts now. This corner is definitely the most game-changing kitchen improvement – such a creative solution and very well executed.
Are you for real? Great, great , great job you did. I don’t know what I admire the most, if the job with this assimetrical and odd corner or the job with the 100 years cabinets that look so good now in the pictures.
I bought an apartment a year ago with only 5 years old and since then I am driving nuts wondering what to do with a corner in my kitchen, I cannot count the ideas that I had already and never getting to a conclusion. Seeing this project of yours, doing so much with such a tight budget and getting so great results inspired me so so much.
I just need to say: congratulations for such an awesome job.
Thanks so much Rita! Oh, I feel your pain about that strange space. It really took me so much thinking to come up with a conclusion on our weird kitchen corner – it was one of those things that would keep me awake at night, but then the solution just hit me like a ton of bricks. I hope the answer for your awkward space makes it self clear for you too (and hopefully soon). Good luck!
I have a chimney in my kitchen, and thanks to your post I finally know how to make it work! One question: can you tell me where you got your butcher block counter tops, or what kind of wood they are? They’re just gorgeous.
Hey Catherine, Sorry for the delay in response. I got the butcher block at Ikea, it’s probably the best price around. Thank You!