


It’s a rule of thumb around our house that there is always a hidden cost to hosting a party, one that you won’t discover until sometime late in the evening, usually when one of your over imbibed friends is stumbling around telling you how much they love you. Last week, when we hosted our big holiday party “Friend Feast”, my beloved Eames chair was the unknowing price of admission to this par-tay.
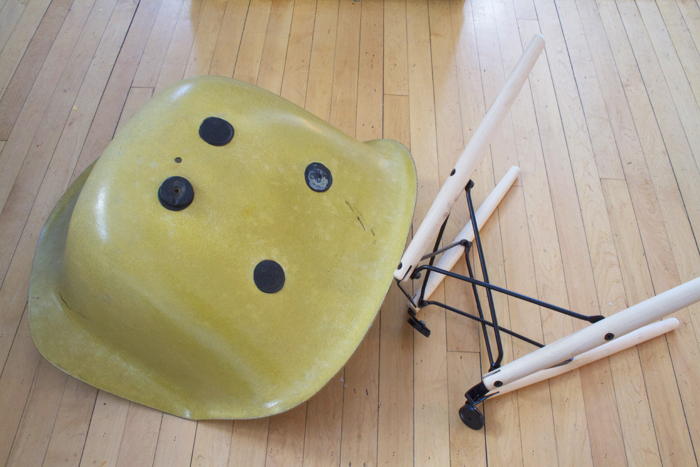
The chair is a vintage Eames and the shock mounts are old and brittle. It was bound to happen at some point – maybe not as dramatically as it did happen, but the mounts were destined to break eventually.
I didn’t know at first how exactly I was going to repair the chair, for a day or two I was convinced it was a goner, and I was mourning it’s loss as it was one of a pair of chairs. Then by some miracle, I found this little shop on ebay, Special K Products, that make replacement shock mounts. Blamo, I was in business. For less than $35 I had ordered myself up 4 mounts and an epoxy kit. I was able to find a few more references (here & here) on the big old web and in to time I was ready to fix this chair and get it ready for its next encounter with a drunken friend.
Unfortunately, when the party pal fell out of the chair, the dowel frame base was bent too. I was worried that this was not going to be as cheap as a fix, I almost purchased a new base, when I decided to give it the old college try and bend it back. The worst that could happen was that I break the dowels, and then I’d be replacing it anyways. With some careful pliers work, I was able to bend the metal fittings on the dowel base back into shape.
Now to tackle those shock mounts!
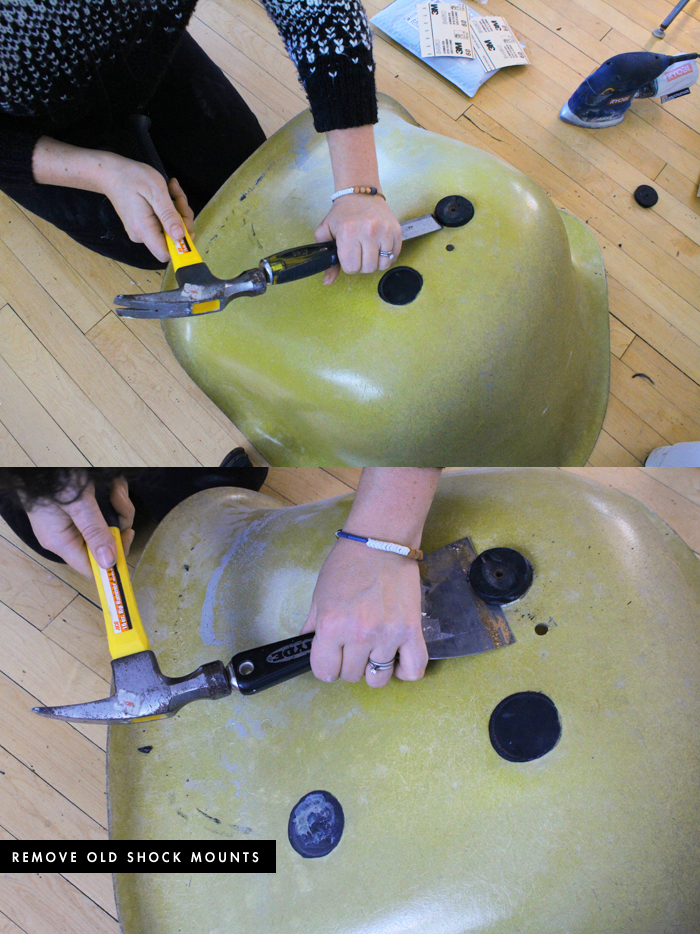
First you have to remove any remaining shock mounts as well as the old brittle epoxy adhesive that kept the mounts attached to the base for so many years. I found a combination of a sharp chisel and a putty knife worked well. I would advise you not to use either as a pry tool, as you want to be careful not to harm the fiberglass shell.
Psst, that hole you see on the bottom of my chair, someone put it there a long time ago, I imagine for drainage as it was probably an outdoor chair. Crazy, huh?
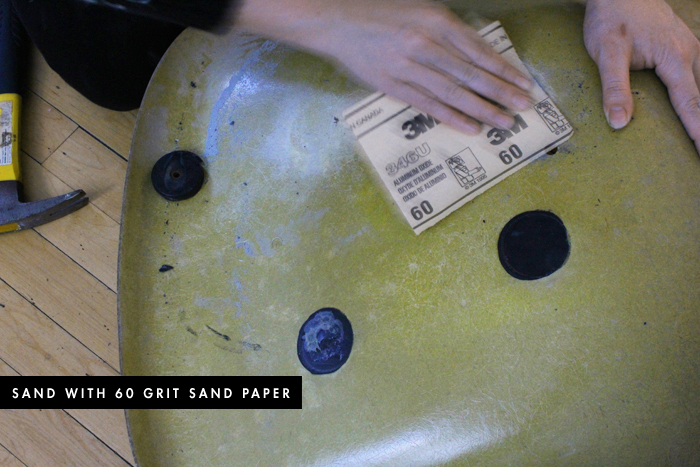
Get ready for a cool bicep workout. I was out of 60 grit sand paper for my electric mouse sander, so I had to sand by hand, and it took forever to get through that epoxy. After about an hour I was able to remove all four mounts and epoxy completely. Woof.
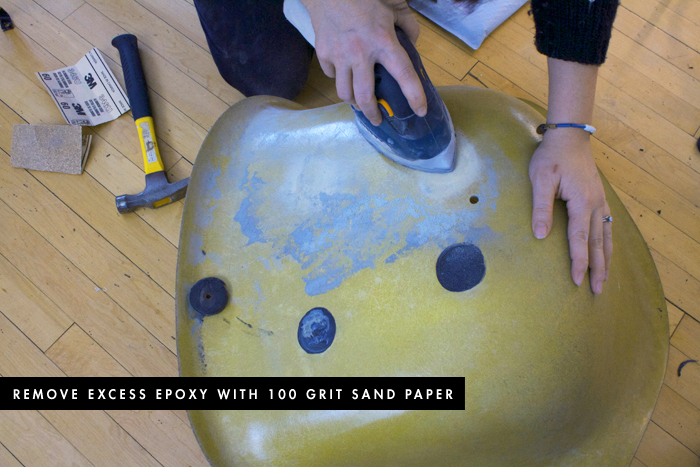
Finish your sanding by going over the four mount areas with 100 grit sandpaper – I had this in stock.

This is how your favorite Eames chair will look after you sand down the epoxy, already looking better, don’t you think?
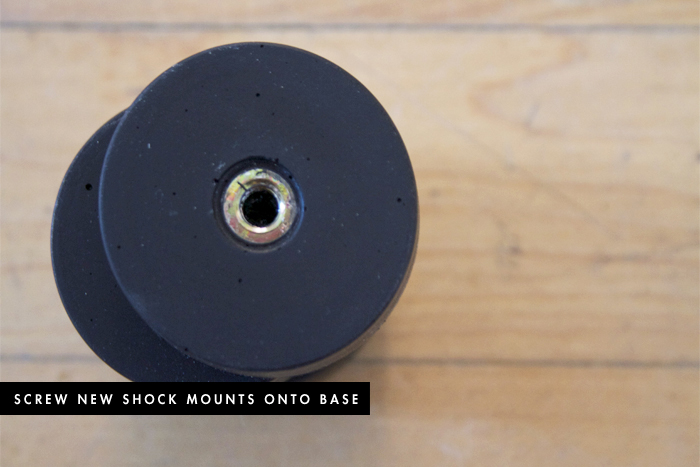
So this is where I went down to the basement-storage-dungeon and dug out my old “H” base frame – the frame the chair originally came with. I didn’t want to use the dowel base as a template because I had bent the brackets back into place (mentioned above), and I wasn’t sure if they were exactly standard base dimensions after my little fix. Plus the holes on the bottom of the dowel base allow for the screws to slide back and forth, I needed something more precise then this. The “H” frame has four fixed hole and would be an exact template for the new shock mounts. I attached all four shock mounts tightly to my “H” frame with four screws provided in the kit.
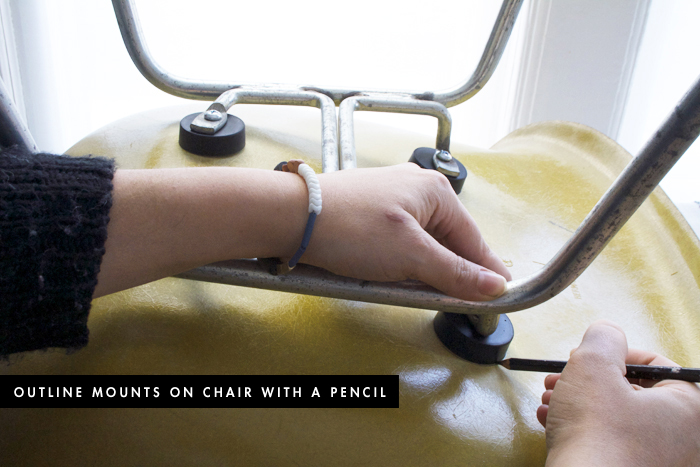
Place the base with attached mounts on the chair, approximately in the same location as the old shock mounts. On my chair I could see little outlines of where the old mounts once sat (you can even see this in the previous photo of the bottom of the chair after it was sanded), so it was easy to figure out exactly where I should place the new mounts. Once you have your base and mounts in place, outline the new mounts with a pencil.
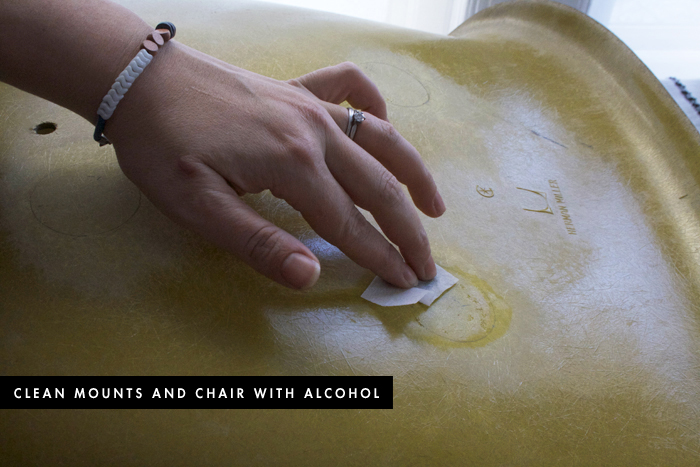
Make sure you have a clean surface for adhesion. I cleaned off all four mounts as well as the chair before mixing the epoxy, which is the next step.
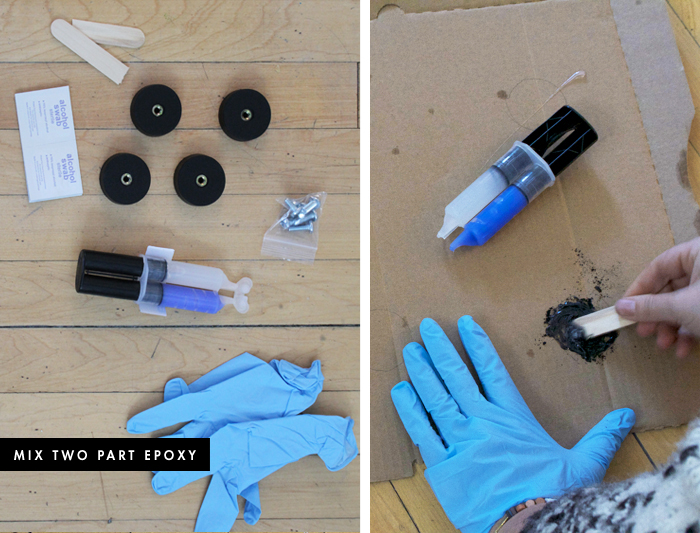
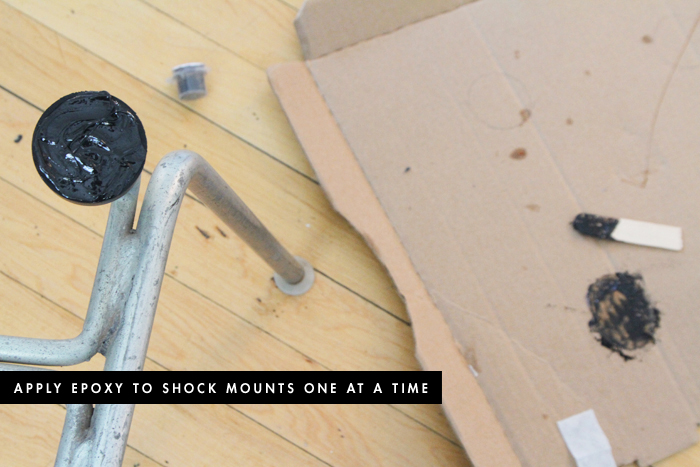
The two part epoxy adhesive kit is really easy to use. It comes in two separate tubes, you spread out two beads (one of each part) of epoxy the width of the shock mount. I circled four mount outlines on an old pizza box so I could make sure to spread out the right amount of adhesive. The instructions recommend to apply one mount at a time, and that’s what I did. I could see how you might want to get all crazy and just do four mounts at the same time, don’t do it. The one-at-a-time method worked great, and helped to ensure that I wouldn’t mess this project up.
Also, there are different colors you can dye the epoxy, I choose black to match the mounts.
After mixing the epoxy for 15 seconds you can smear it across the top of your first shock mount. You don’t need a ton of epoxy, it shouldn’t be more than an 1/8 of an inch thick on your mount, and make sure it’s spread out evenly.
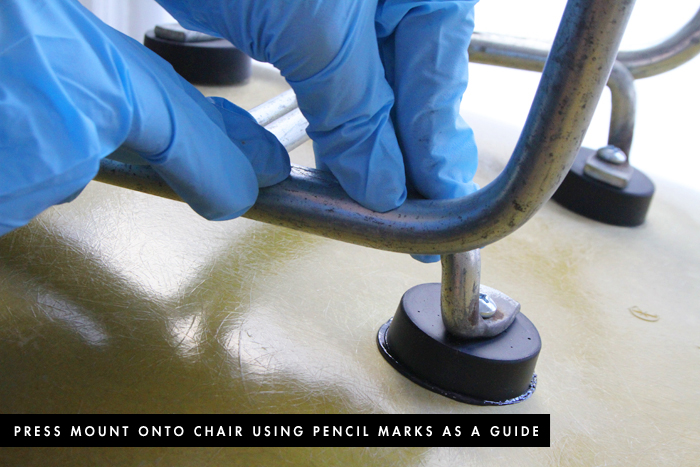
Line up your mounts with the pencil marks your drew before. Press down on the shock mount until the epoxy squeezes out from under the mount. I pressed down hard on the mount for 2 minutes. I then let the mount sit for 15 minutes (with base attached) before removing the screw (and thus the base) and repeating the previous two steps individually on each remaining shock mount.
Guys, this epoxy needs to cure for at least 12 hours before it’s ready to be used.

Pro tips: This project was pretty easy, and the results are fantastic. I’m so happy to have my old chair back! Be on the look out, if you happen to find an old beat up Eames shell chair that’s missing, or has broken mounts it’s not a goner. Take it home and fix it up! Also, hide all your favorite things when your friends come over :)


you just saved the life of another eames with this post. thank you!
So good to hear!
OMG – I just saw your kitchen on Design Sponge! Woot woot and congrats my dear!!!
And your blog is lookin super spiffy all over the place.
Thanks Mari! Hope you and the fam are all doing well this New Year! Best of luck to you on your speaking gig at Alt Summit, and thanks for linking back to me in your post today!
Aw, thanks! The New Year will feel even better now that it’s warming up, right? LOL.
Hi, we have 4(!) bent dowel frame bases, and I was wondering how did you manage to bend the base back so that it sits nicely on the new shockmounts? We also ordered our shockmounts from the Special K Products :)
I used a pliers very carefully using the ground for leverage. Be very careful – you don’t want the wood to split. You could always take the little metal brackets off and try and bang them back into shape with a mallet too.