


Hey team! Hope all is well with all yas out there in the world. You might remember, last year I installed a patio on top of a concrete parking pad in our backyard? Or maybe you don’t, in that case, I’ll supply you with this convenient link for you to click on. The patio turned out better than I could have imagined, and I can’t wait to start enjoying it again this spring!
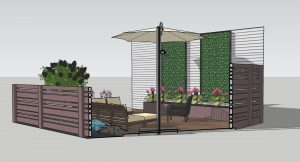
Transforming the patio involved lots of little projects. So many projects that I didn’t get around to sharing them all last summer. That wasn’t the only reason that I was too busy to share, there was that one big other thing that happened – you know, the time that we bought a cabin – that cabin is such a jerk, you guys. Now I’m just eagerly awaiting spring, and I wanted to share some of the projects I built in case any of you guys are interested in trying to do the same thing, or something similar. The timing for this post probably works out better for you guyses building schedj anyways. No one wants to build a planter box at the end of the summer. Imma break it down into three posts with diagrams for the planter box, the trellis, and the table.
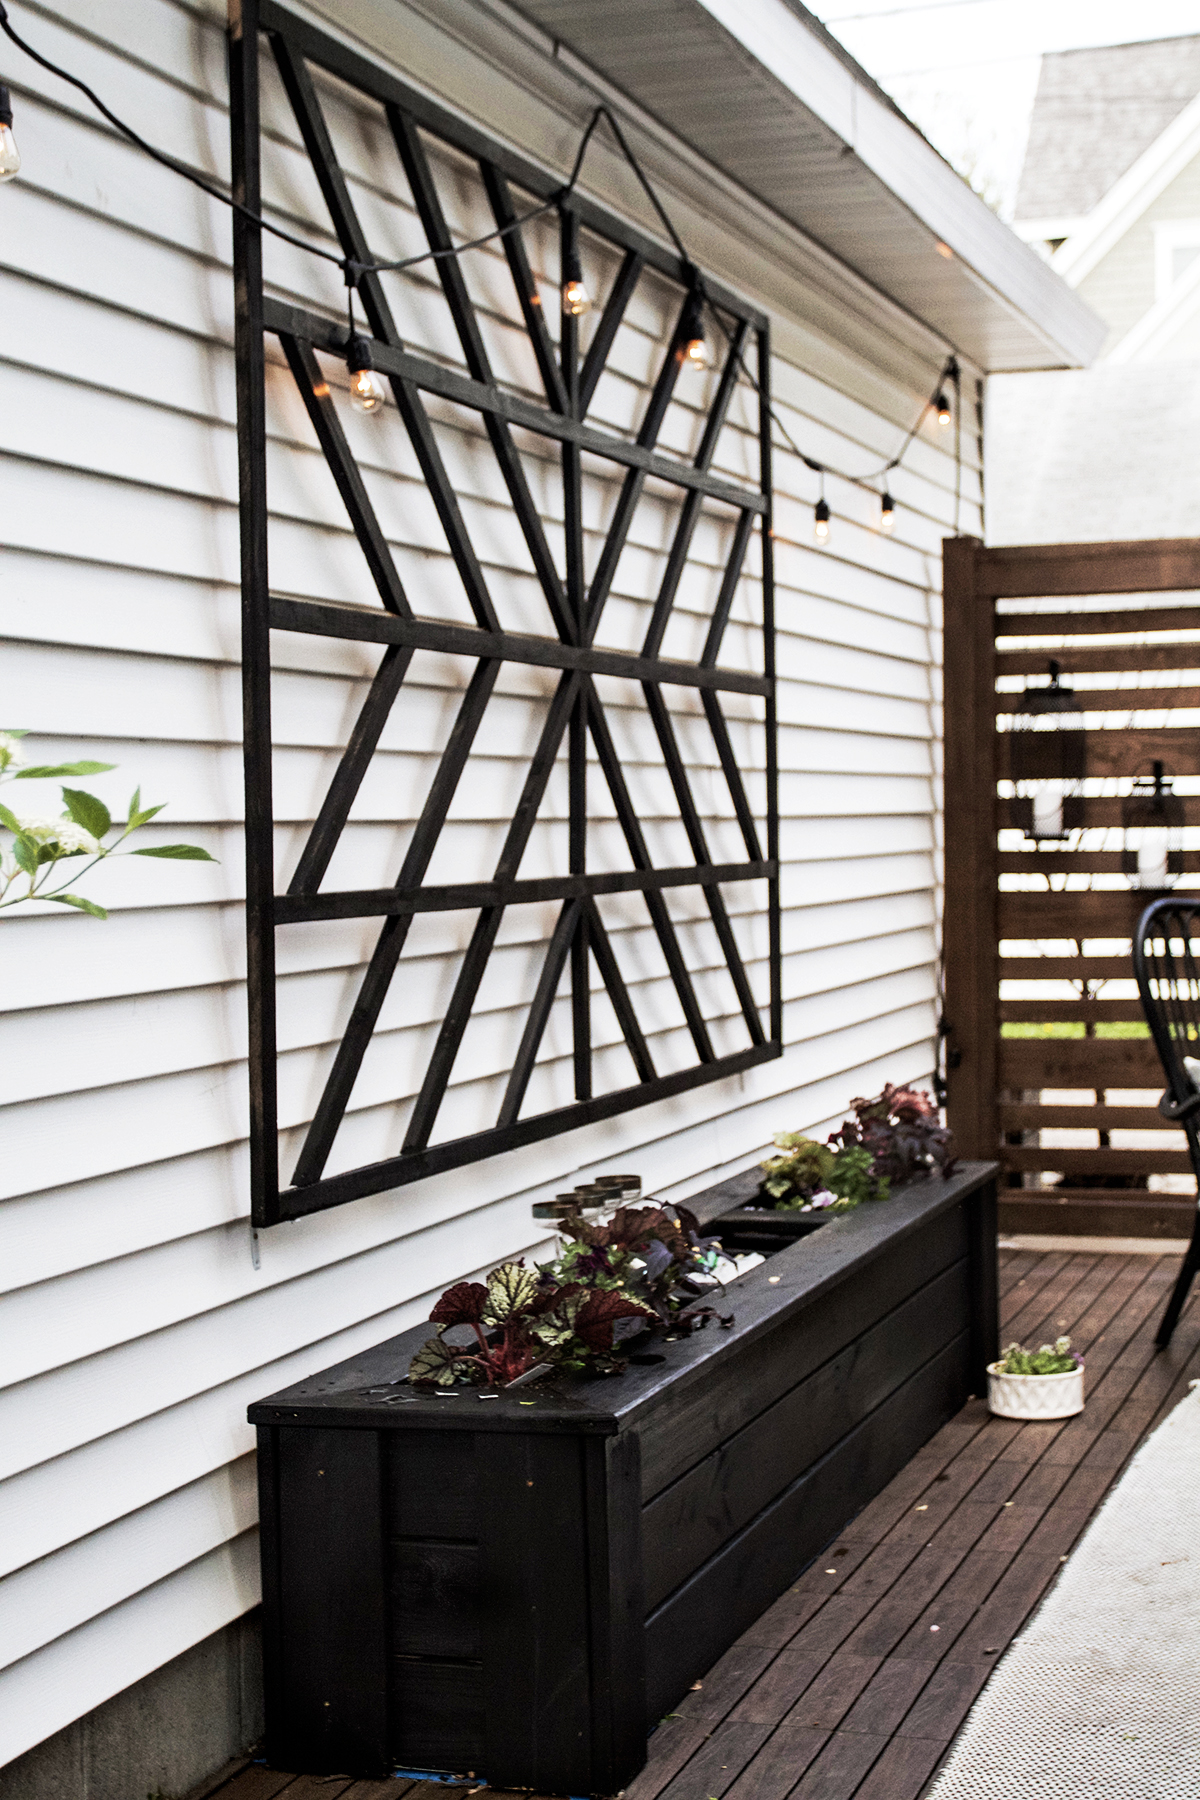
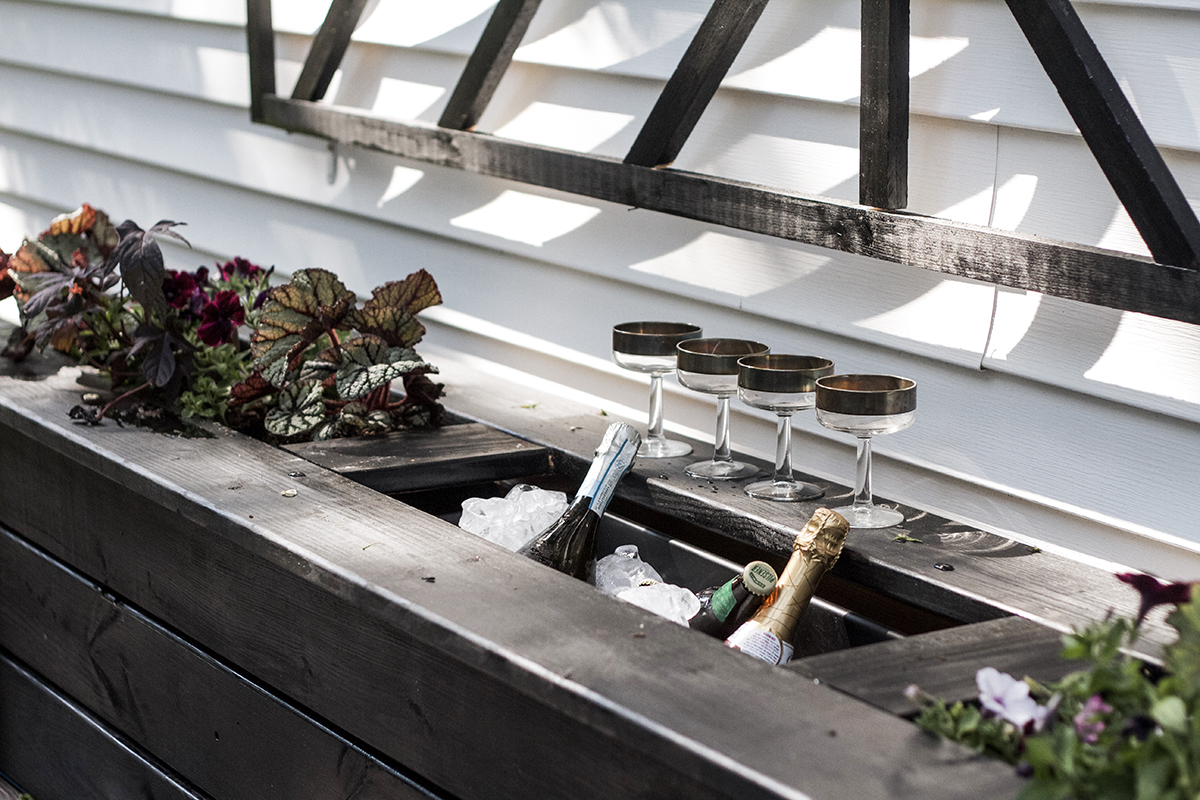
Let’s start with the very large planter/champ/beer/la croix/whatever-you’re-into cooler!
The video below illustrates the steps used in building the planter box. I could’ve literally spelled it out for you guys, but this is all pretty straight forward and a video diagram seems to better illustrate the process. I started at the base of the planter box and worked my way up. The box is just a pretty facade for the 3 – 26″ plastic planters that do the legit work of maintaining plant life and holding ice. The rest is just show. The left and right planter are intended for flowers and vines, and the middle planter is used for ice to cool yer beverages (aka lots and lots of champ).


|
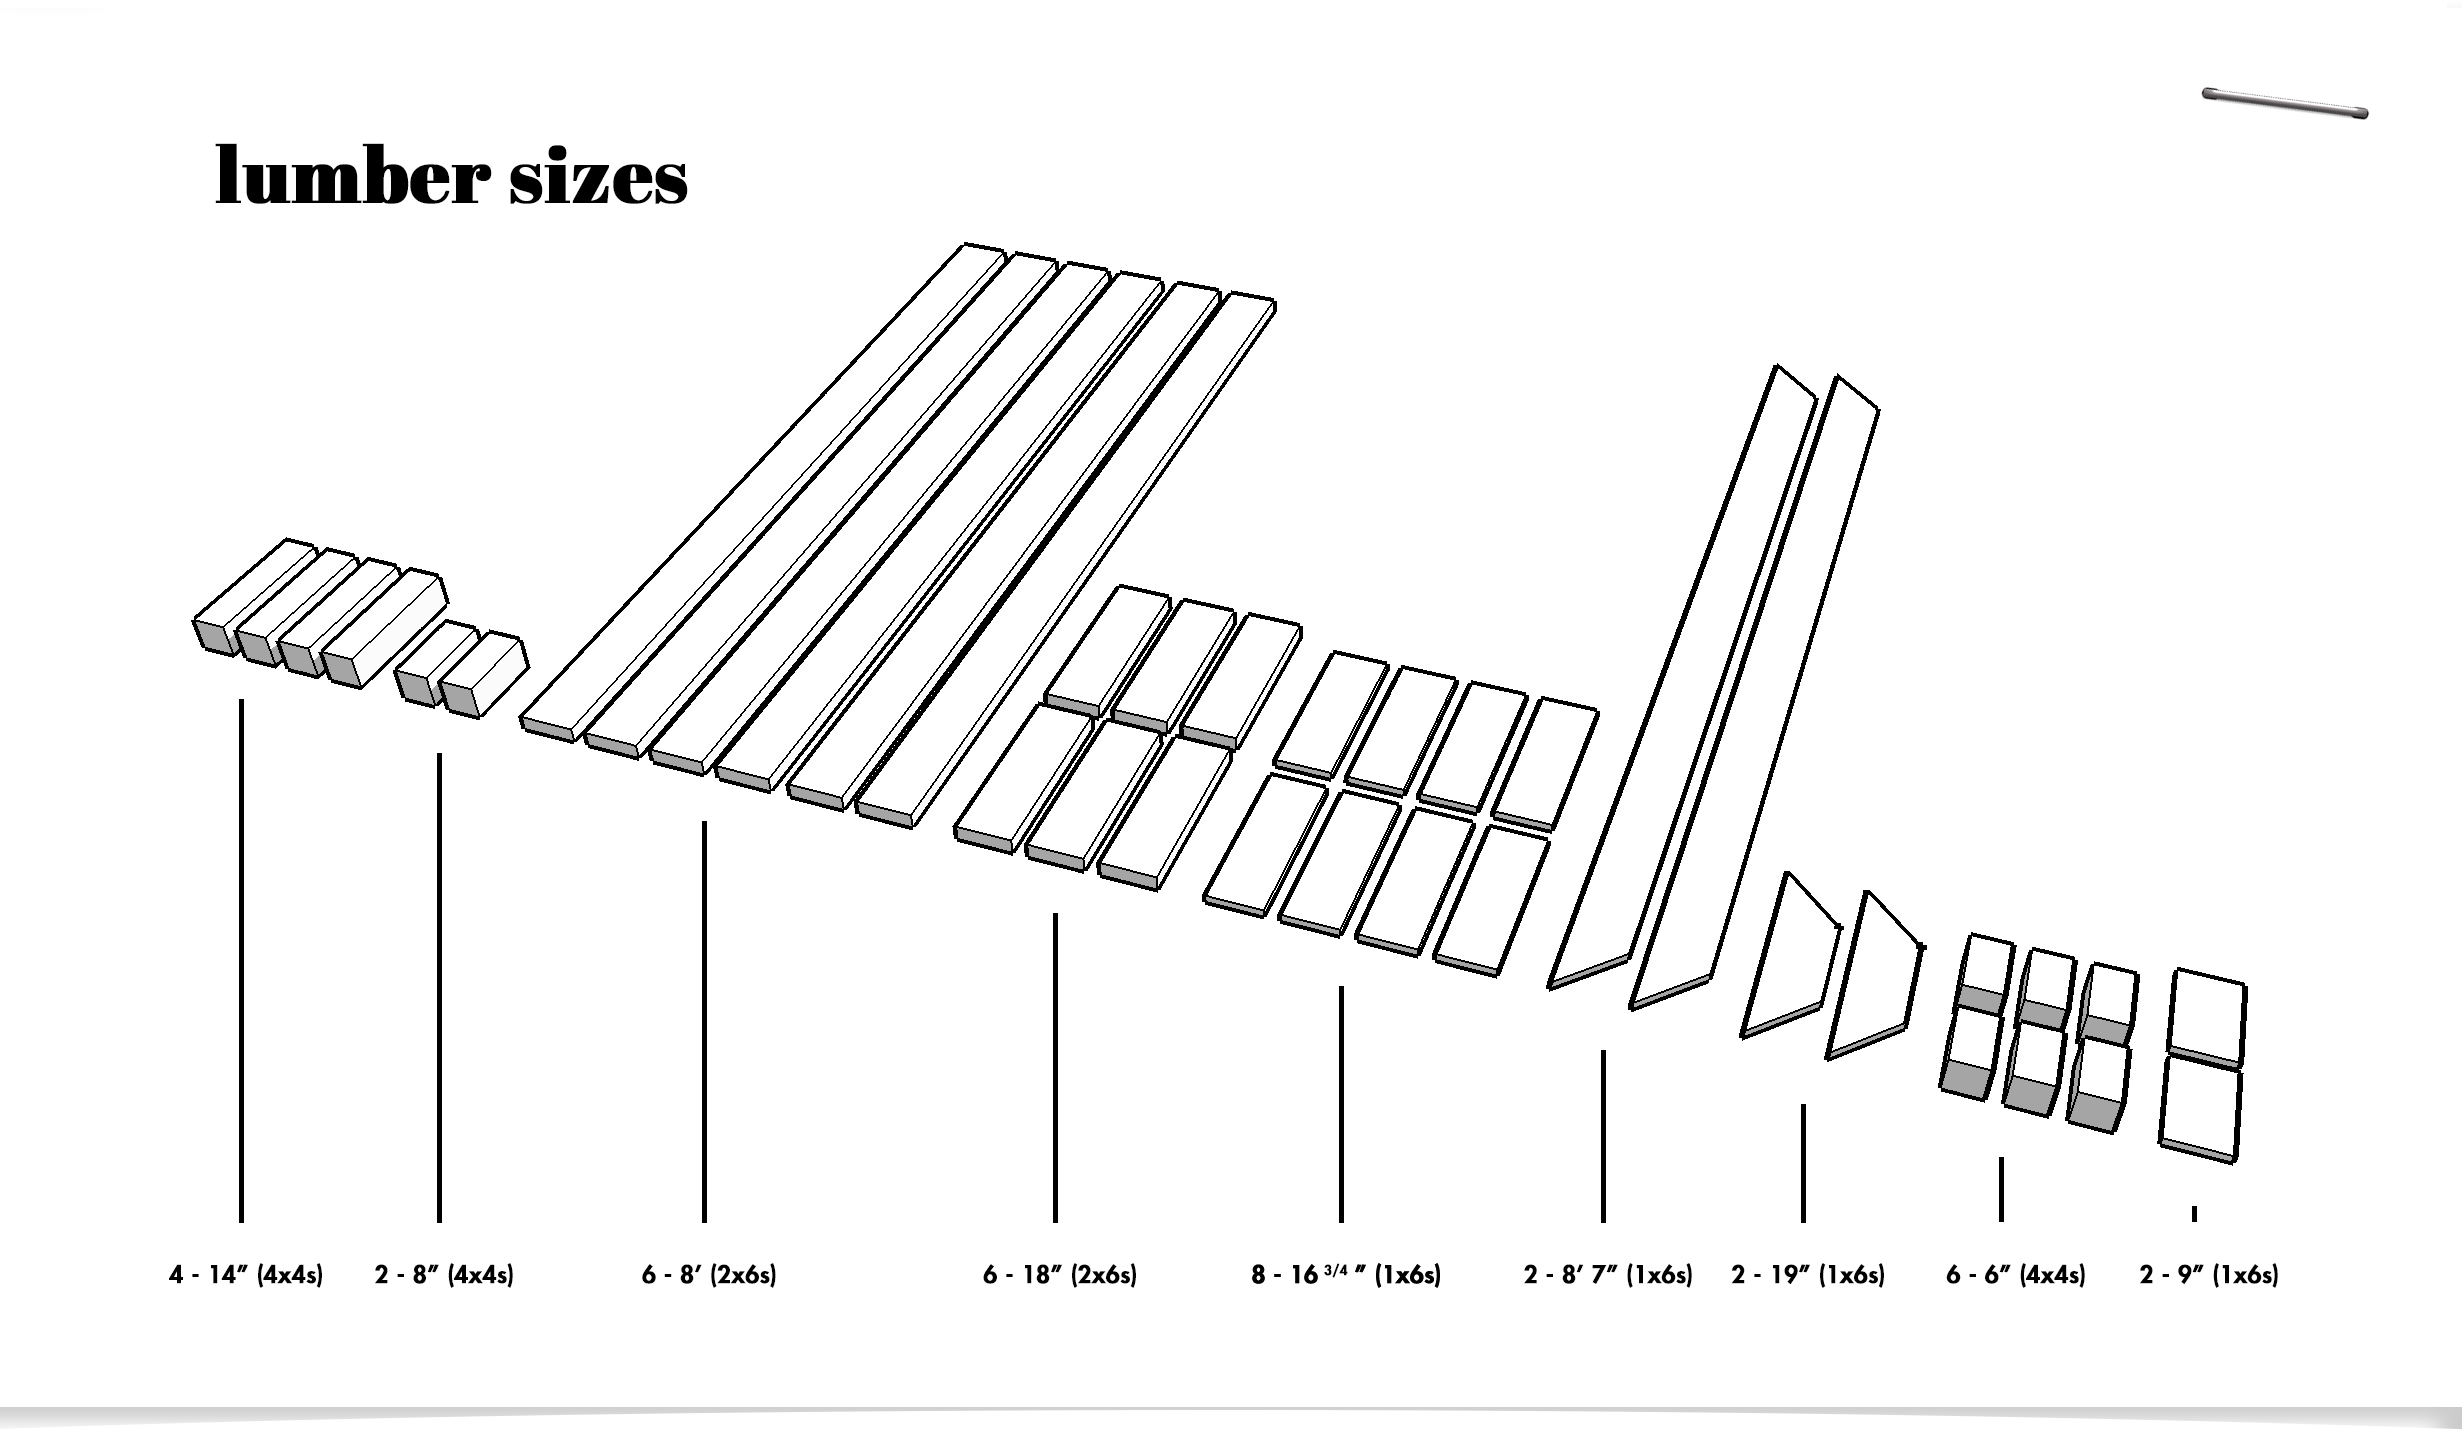
8 8′ (2x6s) 2 6′ (4x4s) 2 10′ (1x6s) 2 8′ (2x6s) 3 1 4 90º corner brace 1 1 |
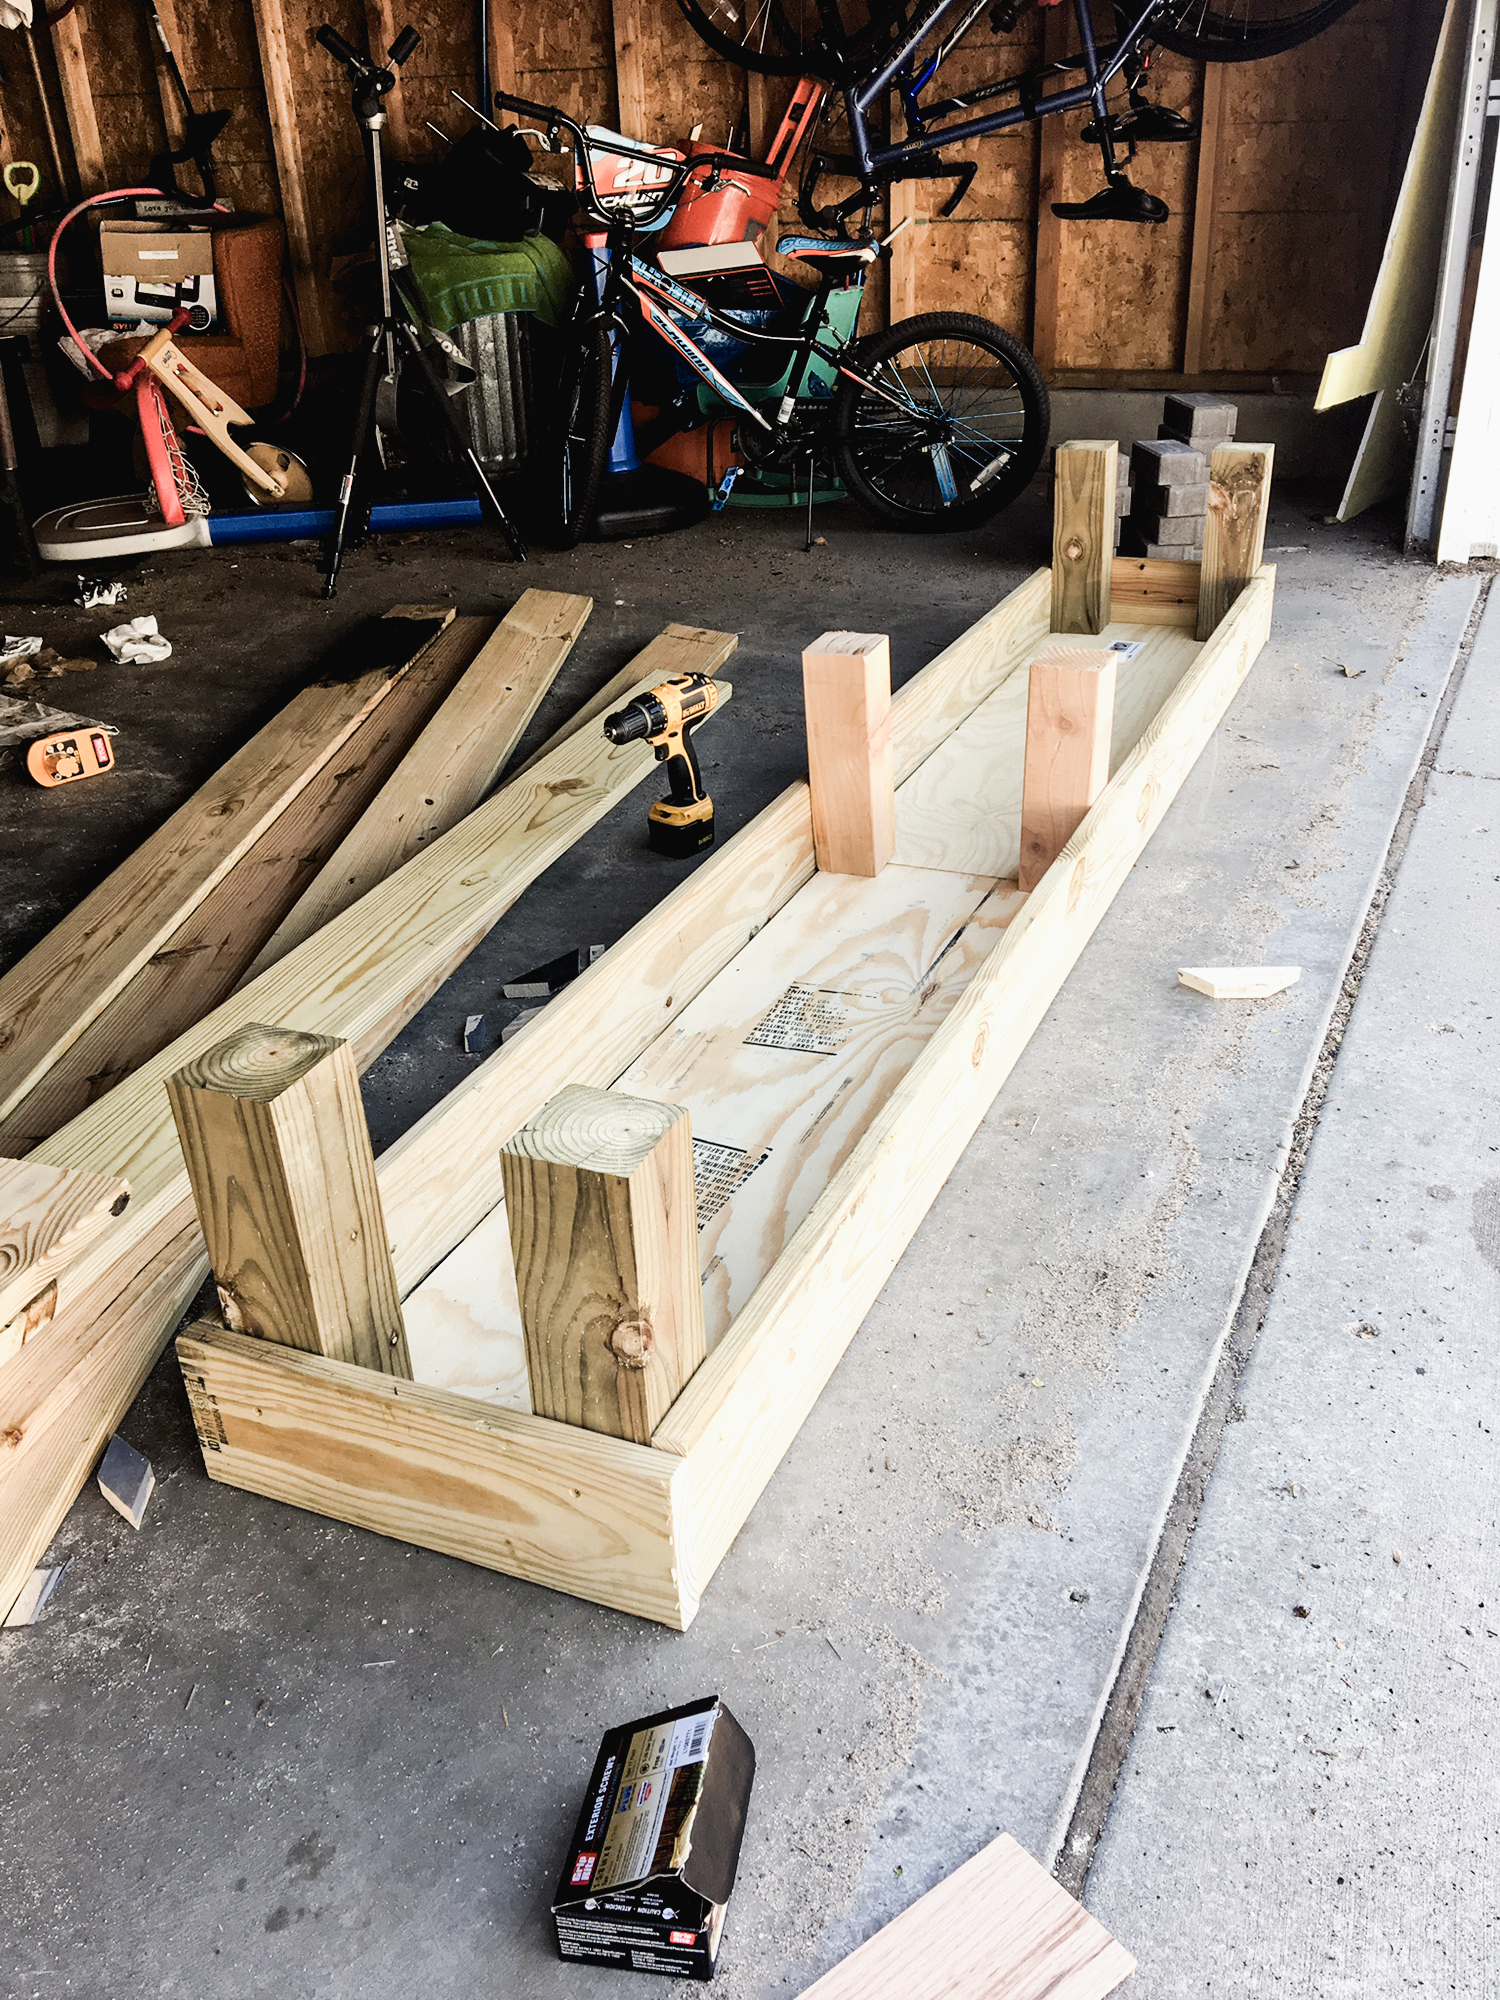
To start the project, I used some plywood remnants to make a template for where to place the 4×4 posts when assembling the box. The plywood pieces were cut to 8′ x 15″, and when the box was finished the plywood was removed. The planters need to drain and I didn’t want a plywood bottom to get all gross and rotten!
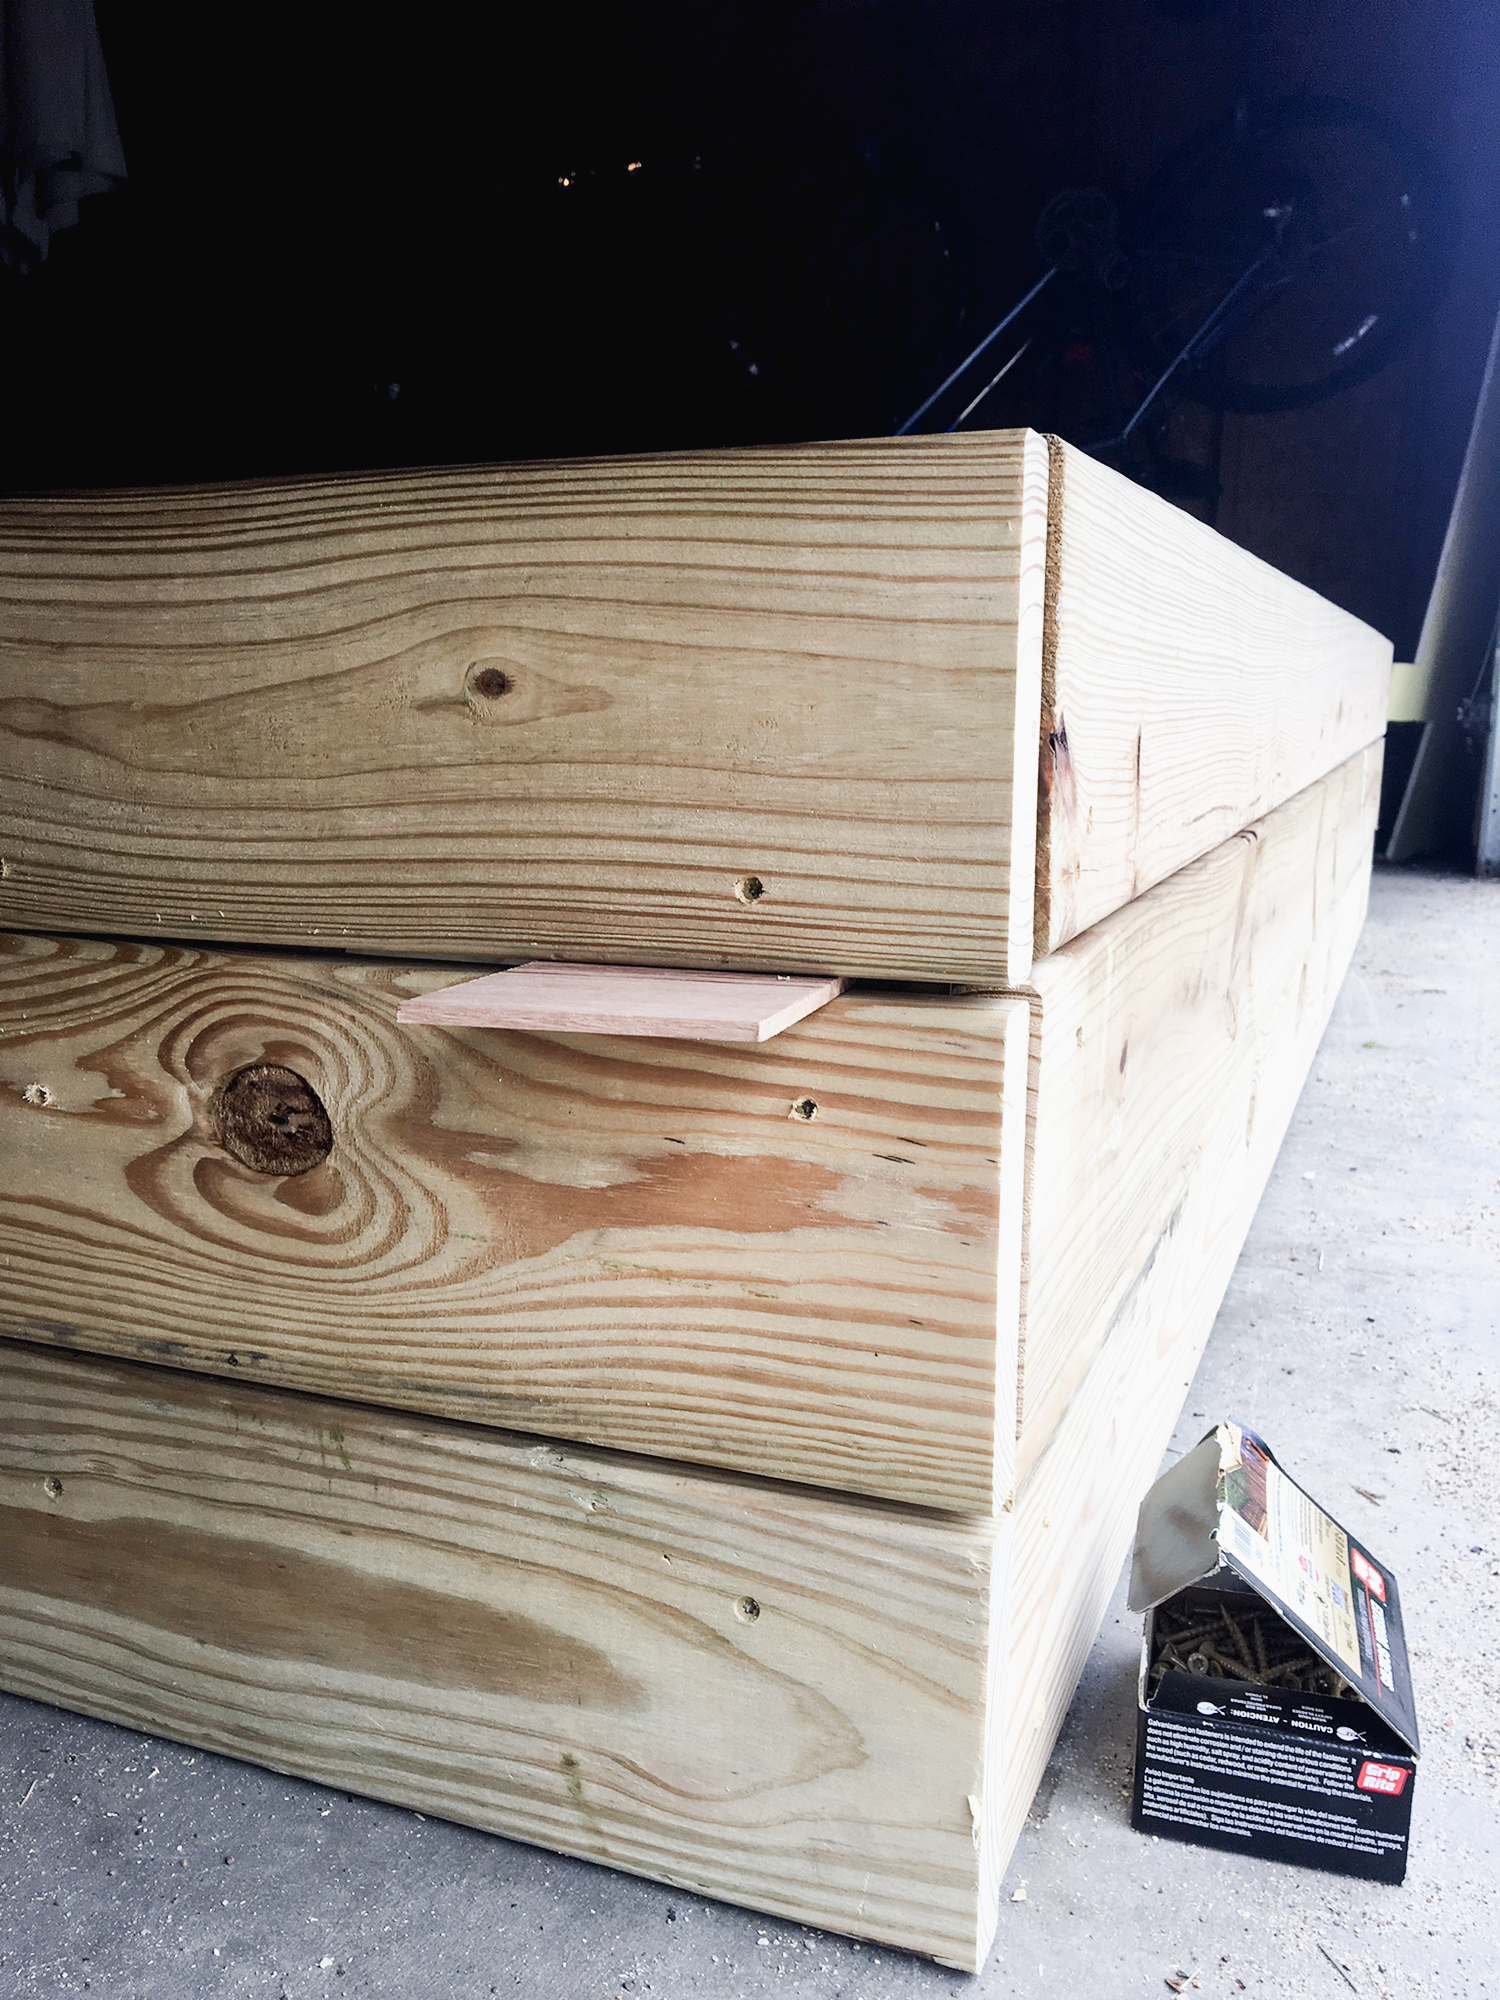
I used 1/8″ shims as I constructed the box. I liked the look of a small space between each board.
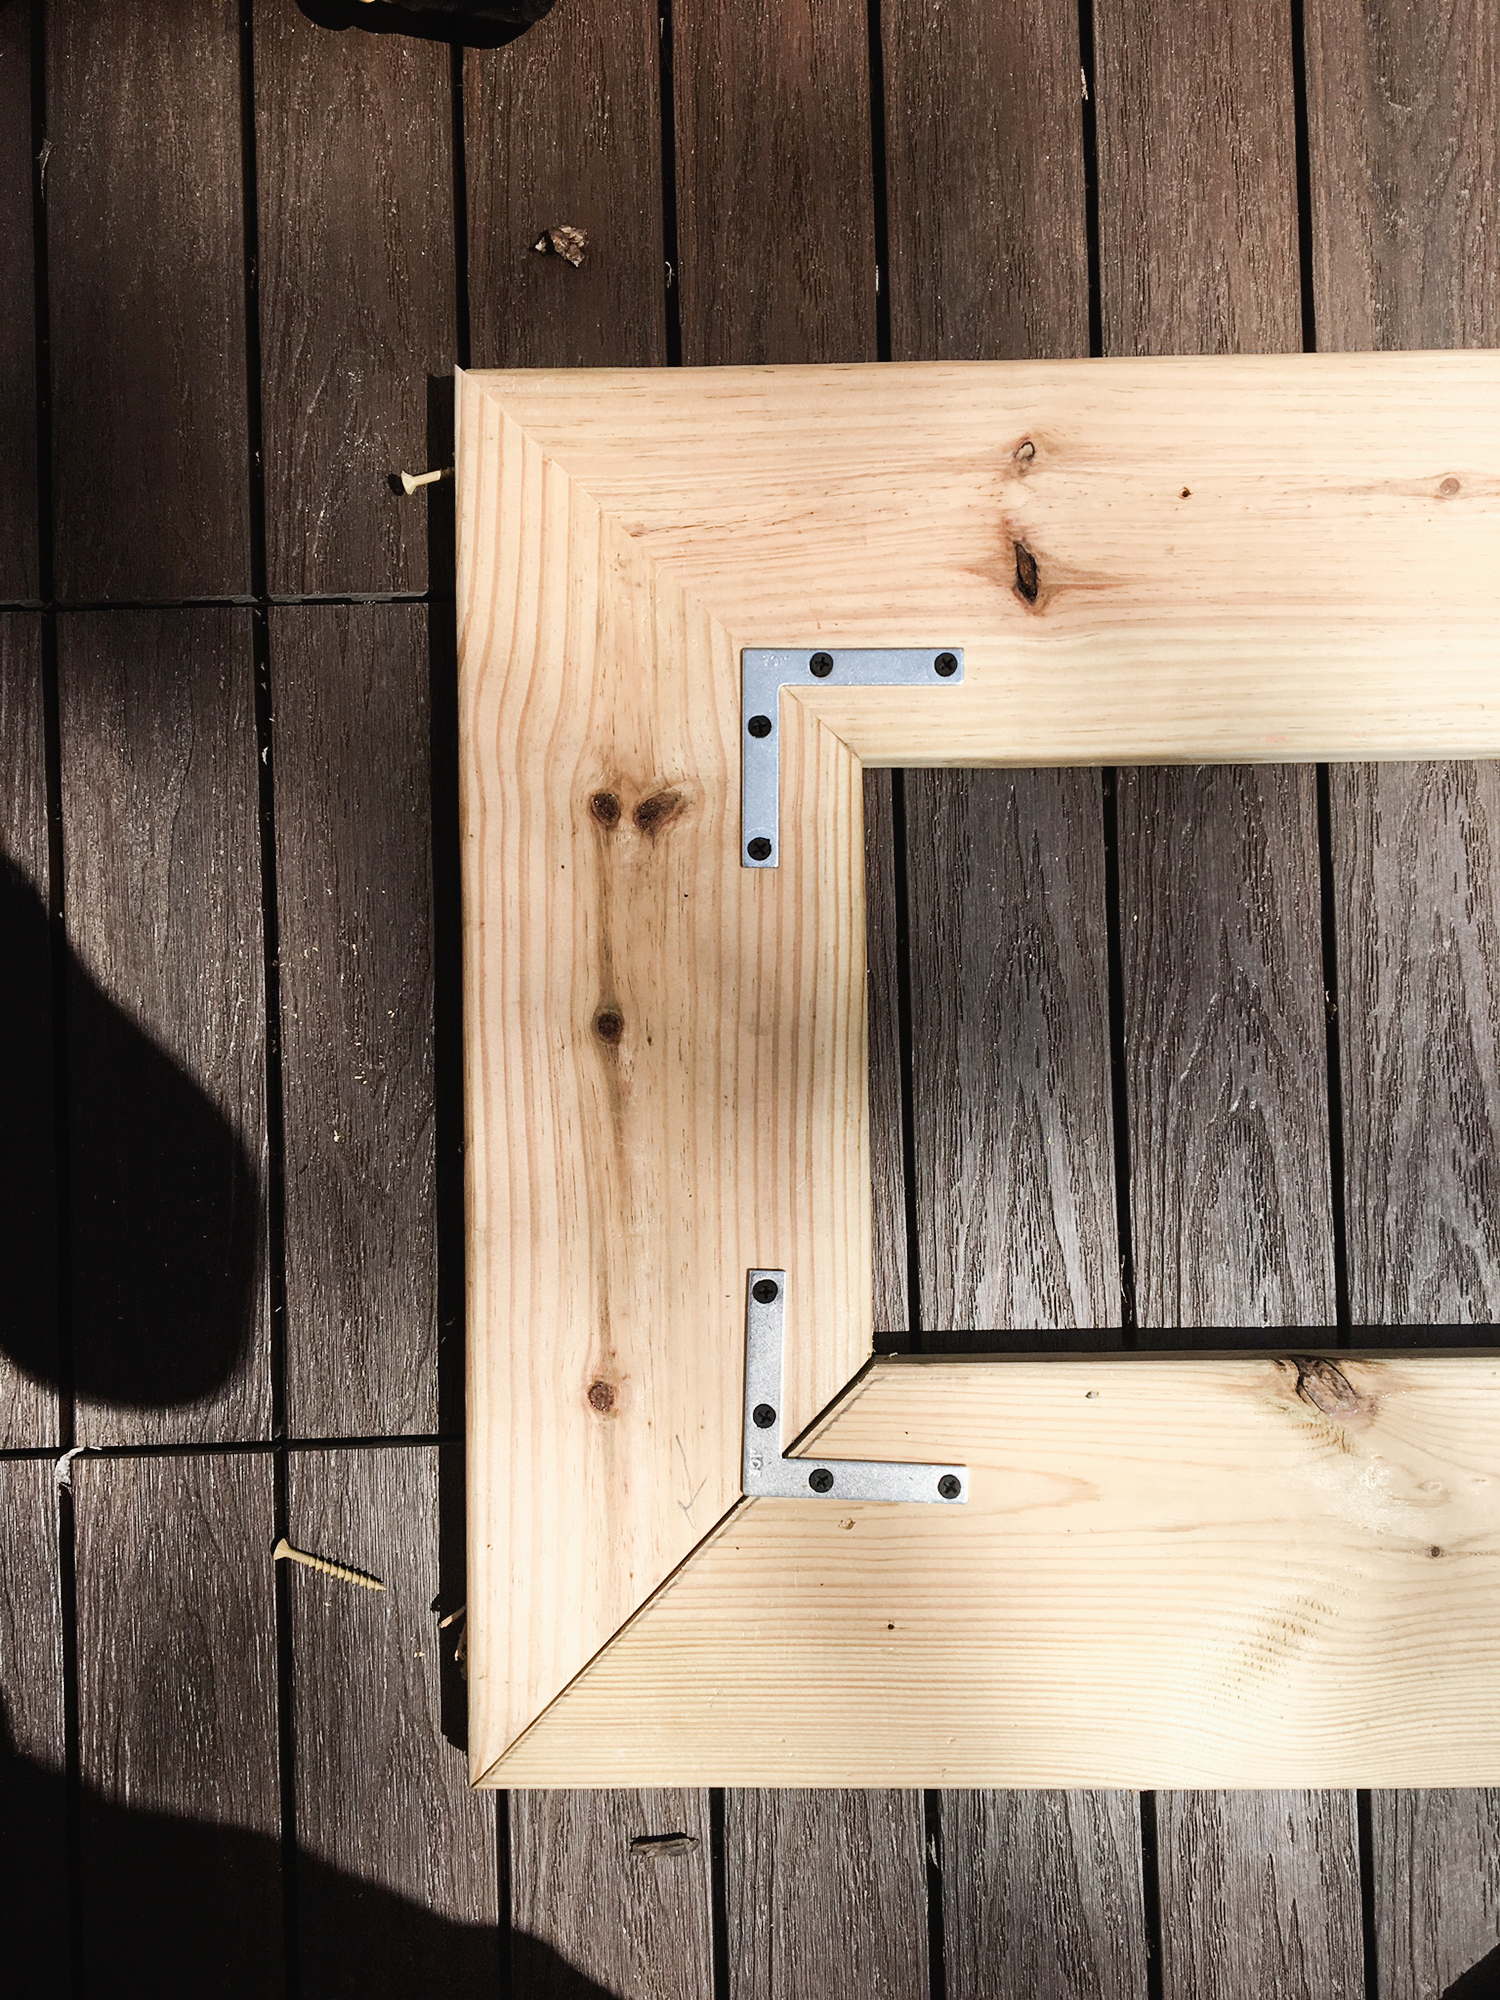
For the top of the planter box, I attached 90º corner supports to the underside of the frame to give extra support.
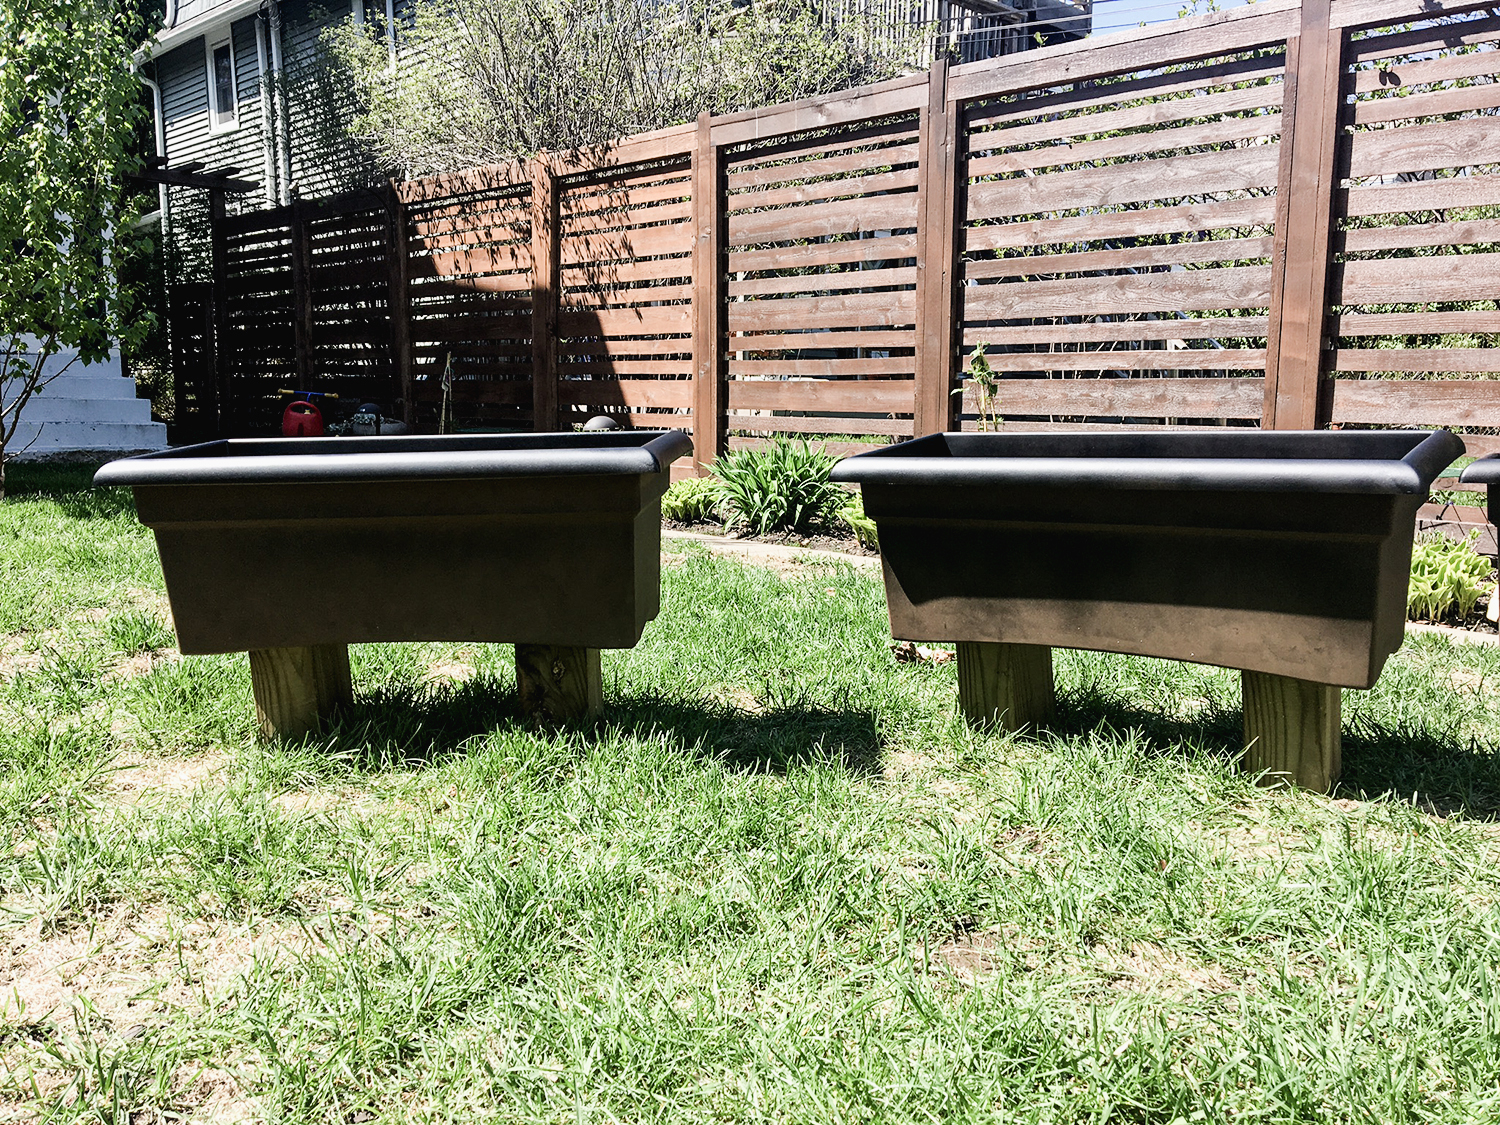
Lastly, the secret to this whole contraption! Inside the wooden shell are 3 – 26″ planters. I choose these ones, because not only were they long, they were also deep, and wide – that’s surprisingly hard to come by in the world of inexpensive plastic planters. To add the height the planters needed in order to sit flush in the box (the under-mount sink), I attached 2- 6″ 4×4 stilts to the bottom of each planter. Also, I wanted black planters and these only come in colors described as “peppercorn” or “chocolate”. Not happening! Black is where it’s at – thank god for spray paint. I Make sure to take drill holes with a large bit to ensure proper drainage, folks. Use mesh or rocks on top of the wholes so they don’t get clogged with debris cuz that will happen:)
Don’t forget to stain it if that’s the sort of thing you’re into! I went with a black ebony stain, fyi.
Alright dudes! There you have it. Let me know if you have questions. This was a super easy project and would be fairly easy for any beginner handy person.


I’ll take 8 of these! Is this what we will spend all of our time doing when you visit in May?
I think so.
Yes, let’s do it. I’m excited to check out your desert landscaping situation.
Duuuude, thanks for the link back to your sweet patio. I forgot it was composite. We want to re-do our patio this year (it is currently constructed with sad, uneven pavers) and NewTech might be perfect if I can get my husband on board.
Yeah, you should consider it. I do have to say, we had one seam in our concrete, and it’s visible on the running vertical pattern of the slats. If I had something uneven I might alternate each tile 90º so it wouldn’t be so noticeable. Besides that, it’s been great to have, transformed our space, and given us one more place to hang out in.
We are re-doing our patio this spring, so I think I am going to attempt this! Question – do you have trouble getting the ice out of the cooler part when you are done using it? Or is it not a problem to just let the ice melt and drain out the bottom of the planter?
Not at all, I drilled holes in the flower boxes as well as the beverage cooler so that they will drain. It’s not a problem at all. If you do attempt a this box or something similar, I’d love to see it :)
You and Gold Hive Ashley are really next-leveling with the animated illustrations this week! Nice work.
Ha! She did pretty great with her floor plan rendering. They’ll be more to come in the upcoming tutorials!
Nice! I’ll have to share this with my SO as we’re planning a new deck. Thanks for the inspiration!
For sure! Let me know if you end up using any of the designs, I’d love to see :)
Looks fantastic; I love plans, diagrams, and tutorials.
One thing: I don’t get the two eight-inch-long 4x4s — seem short for those middle legs.
I know it seems weird. Those posts are shorter because they need to be in order for the middle planter to recess completely into the box. I could’ve done away with them completely, but I wanted to have some support there though, so that’s why included them. Good question!
D’oh! I should have figured that out. Good one. You smaht.
My back deck is in desperate need of a transformation! If I decide to try this I’ll shoot you a photo. Thanks for sharing your idea!