


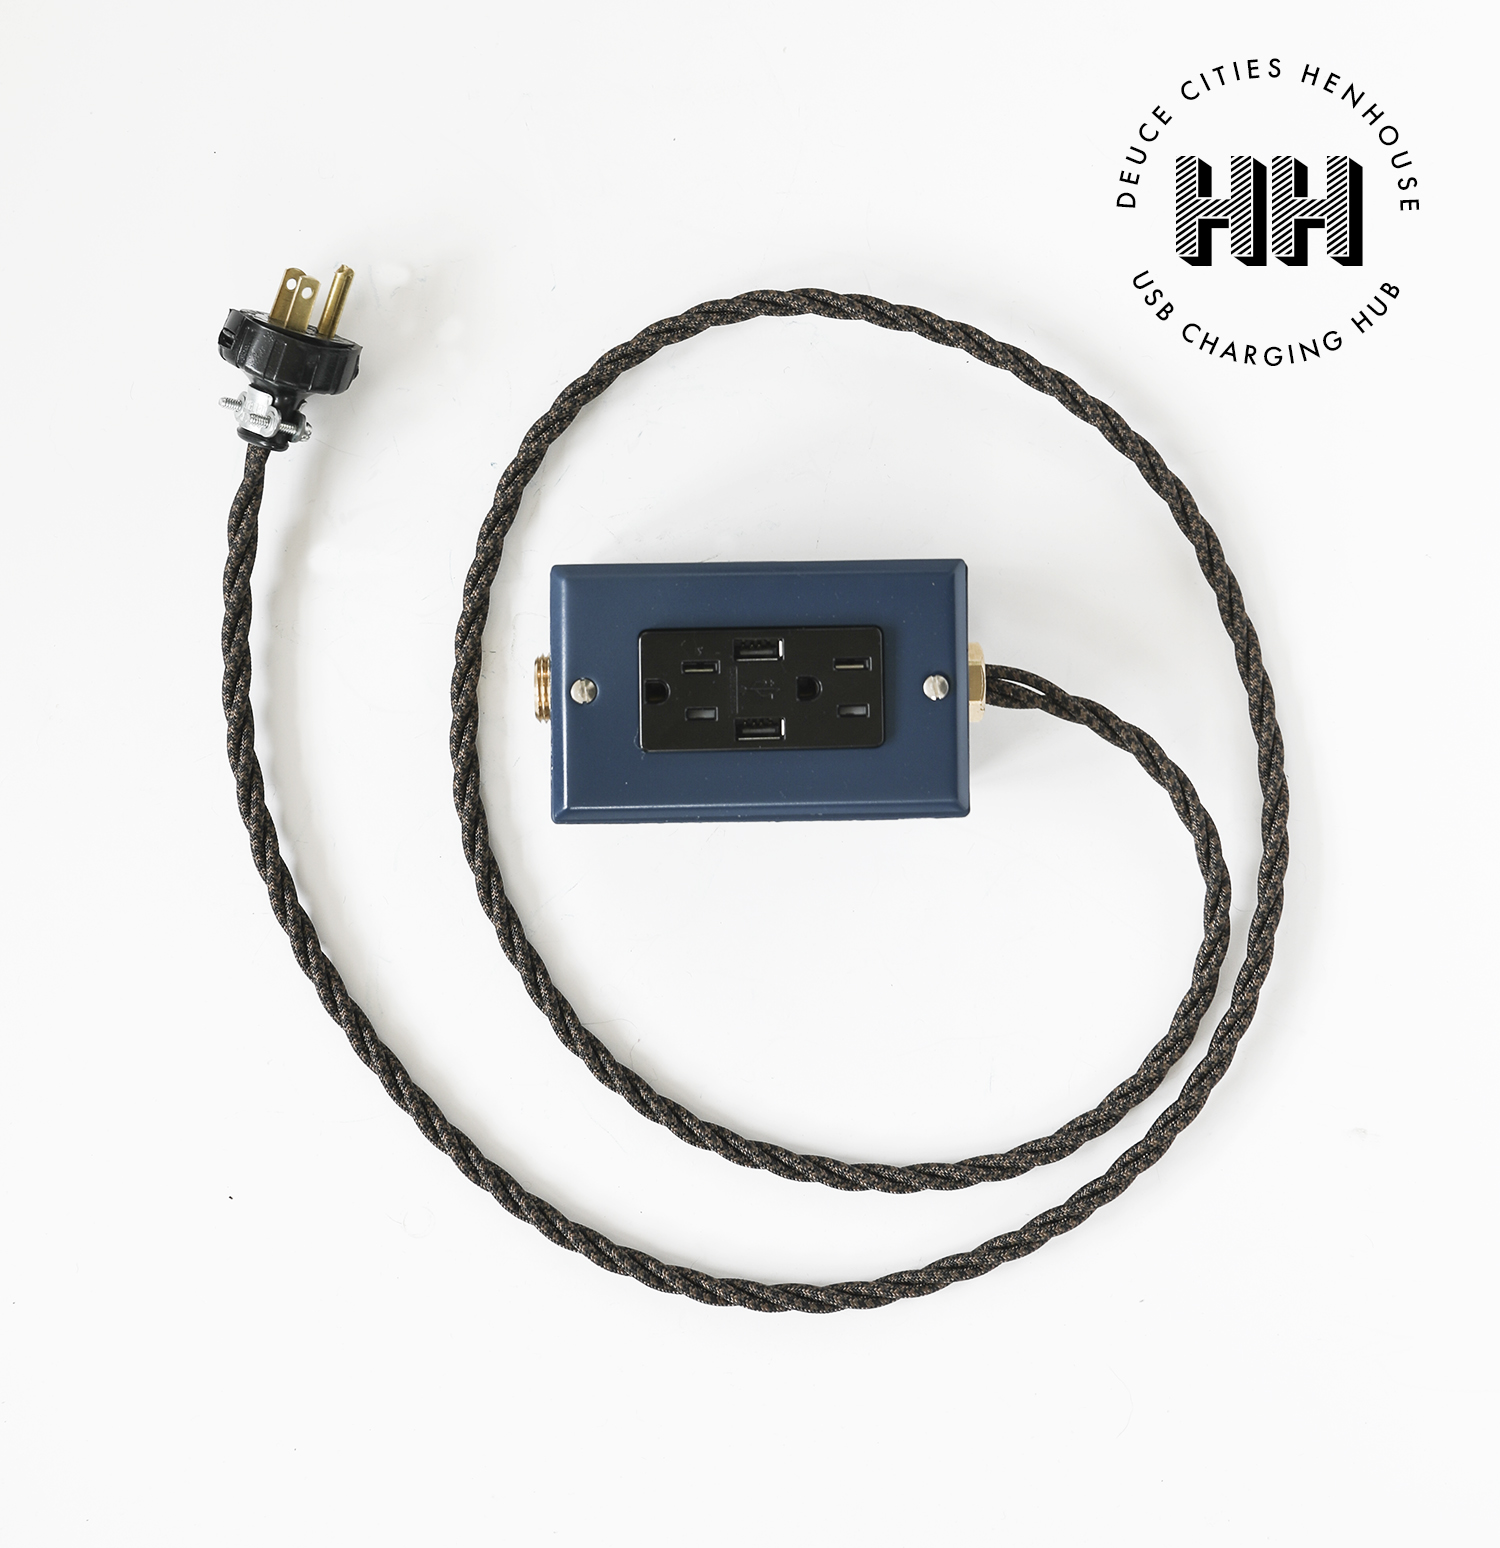
Hey budz! I’ve been busy reorganizing the DCHH headquarters (aka as my sunroom office). I’m obsessed with cord coralling and maintenance because it can have such a big impact on a space. Cords just look bad, there’s no two ways about it. To combat ugly cord scenes that we all live with on the daily, I devised a plan to make myself (and now all of us) a pretty USB charging hub. I have made three of these USB outlets in my lifetime. I have two set out at the cabin, and now one in my office – so I think at this point, I can pretty much call myself an expert. If you’ve ever looked into purchasing something similar, you may have noticed that they cost up words of $150 bucks!. Screw that malarky! How about a down and dirty DIY for a fraction of the cost? I’m in, you in? Alright, here goes nothing.
Shopping List
Suggested Tools
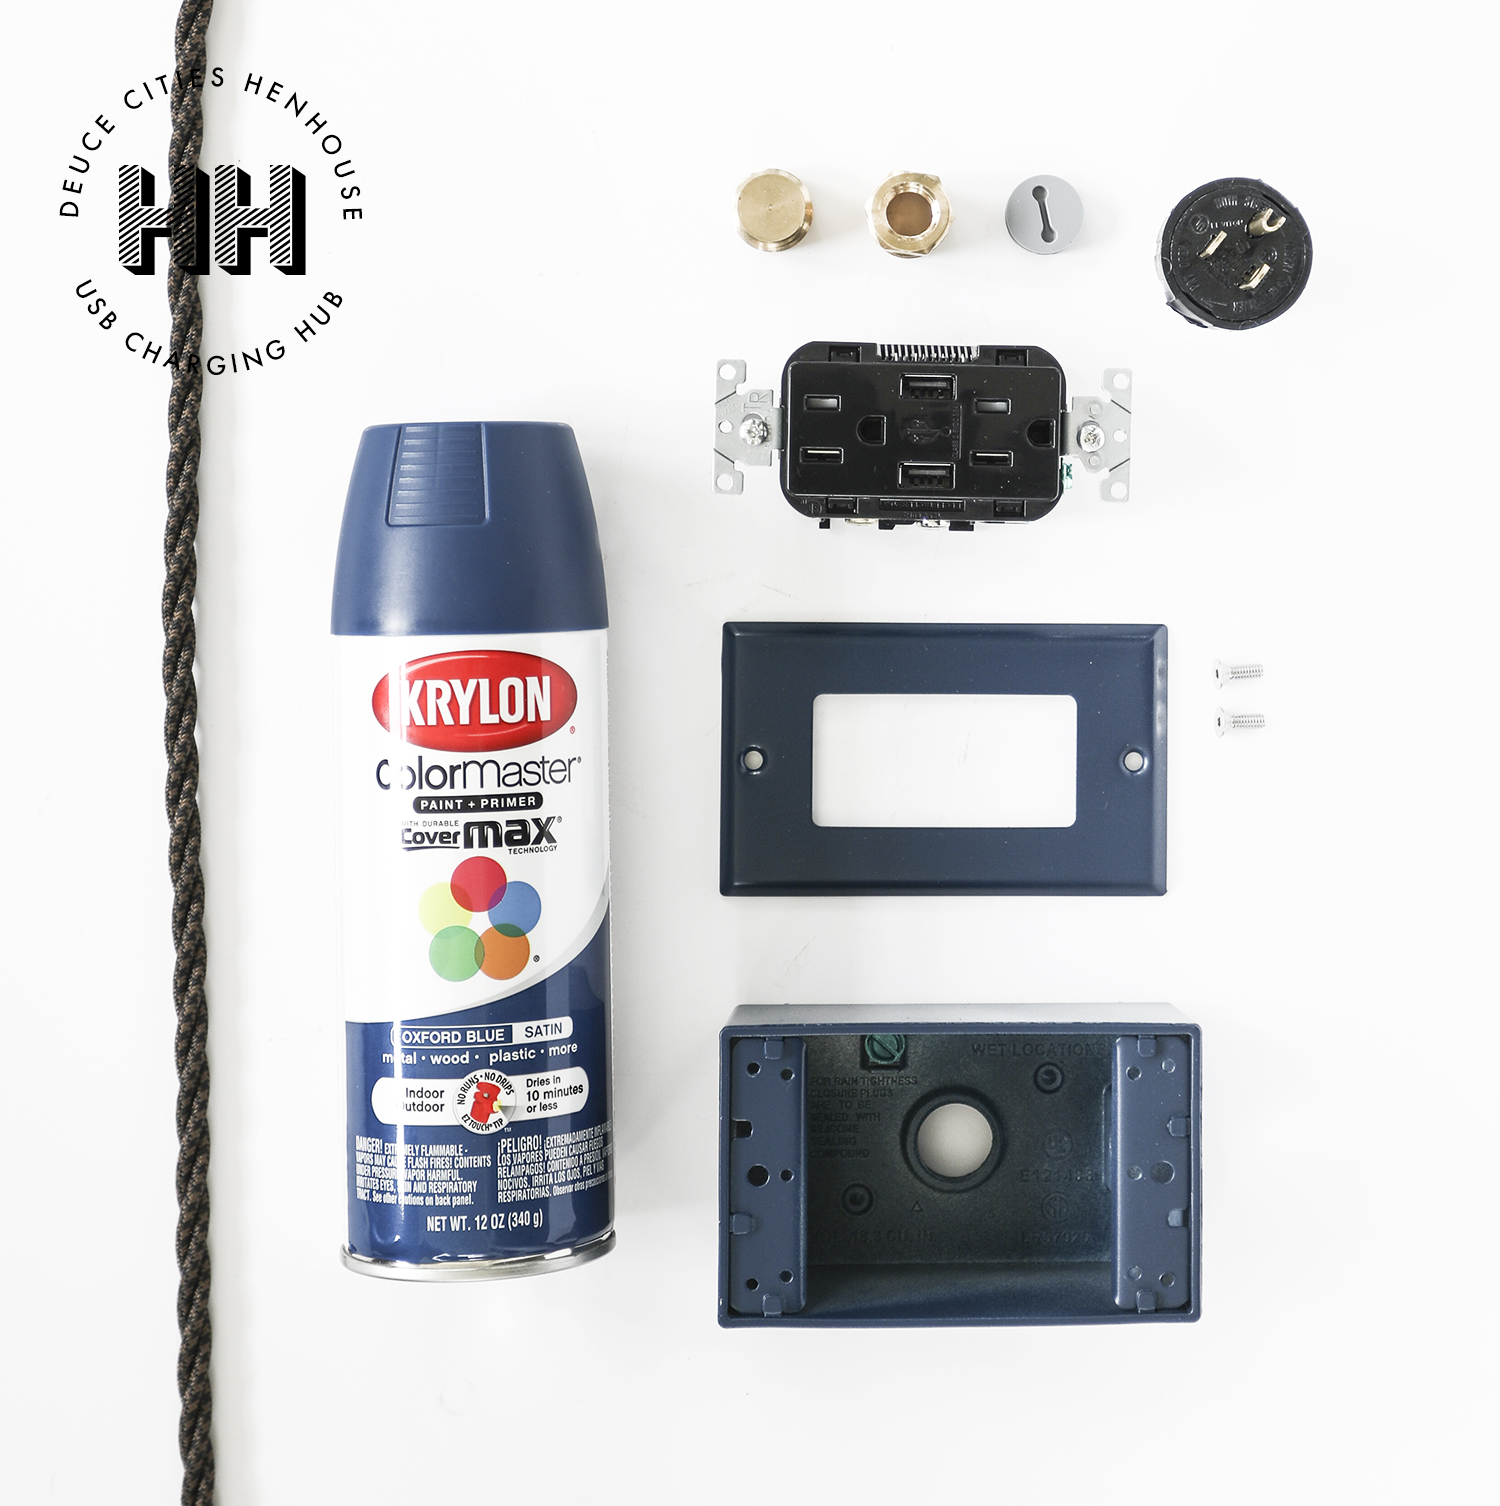
USB Charging Hub Parts

|
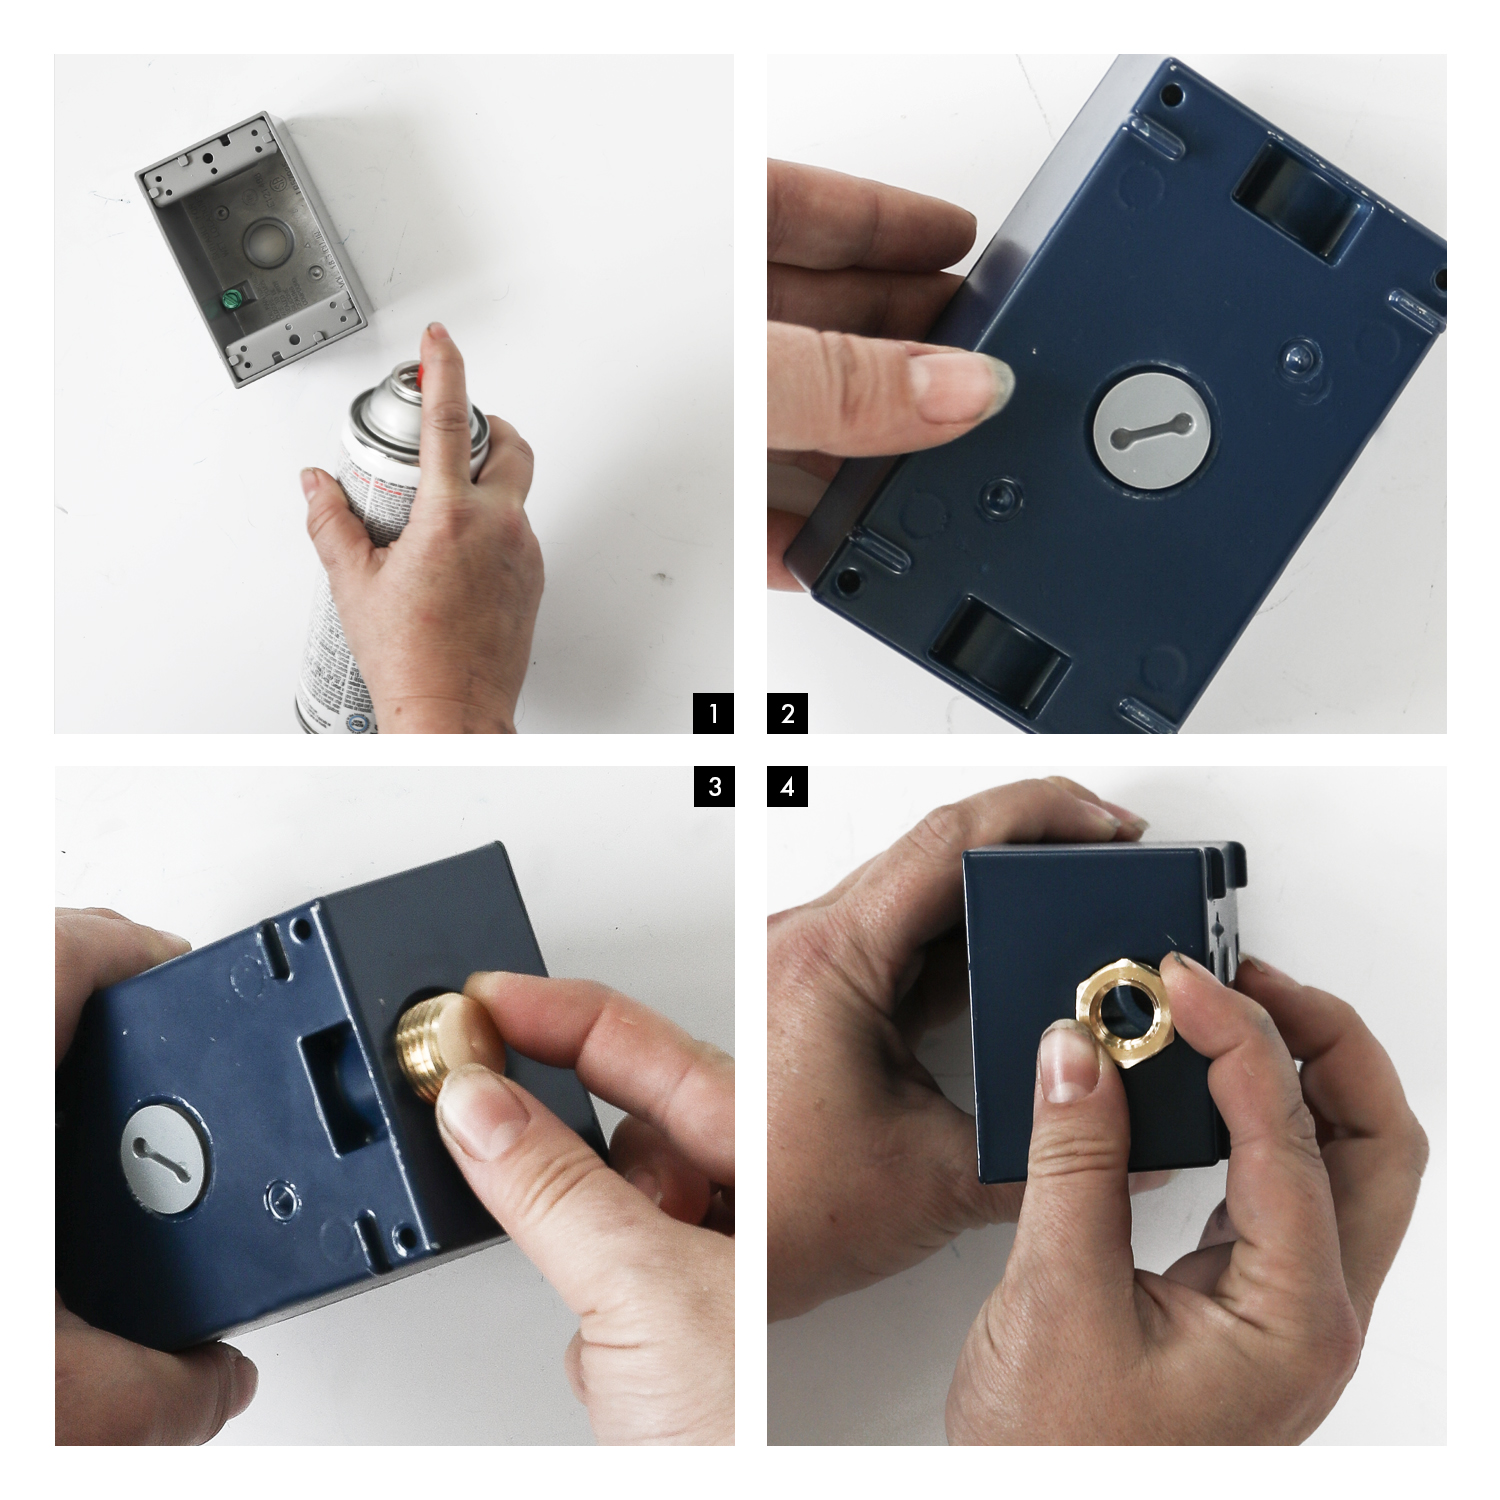
1 Paint the Outlet box and Cover Tips for spray painting: use brief bursts of paint, do multiple thin layers and give it adequate time to dry between layers. 2 Plug Bottom Hole Plug the hole of the bottom of the outlet box with the grey plastic plug – feel free to paint this plug if you prefer. 3 Screw in Brass Plug On one side of the outlet box insert the brass plug until it’s tight. 4 Screw in Hex Nozzle On the opposite side of the outlet box screw in the brass hex nozzle. |
|
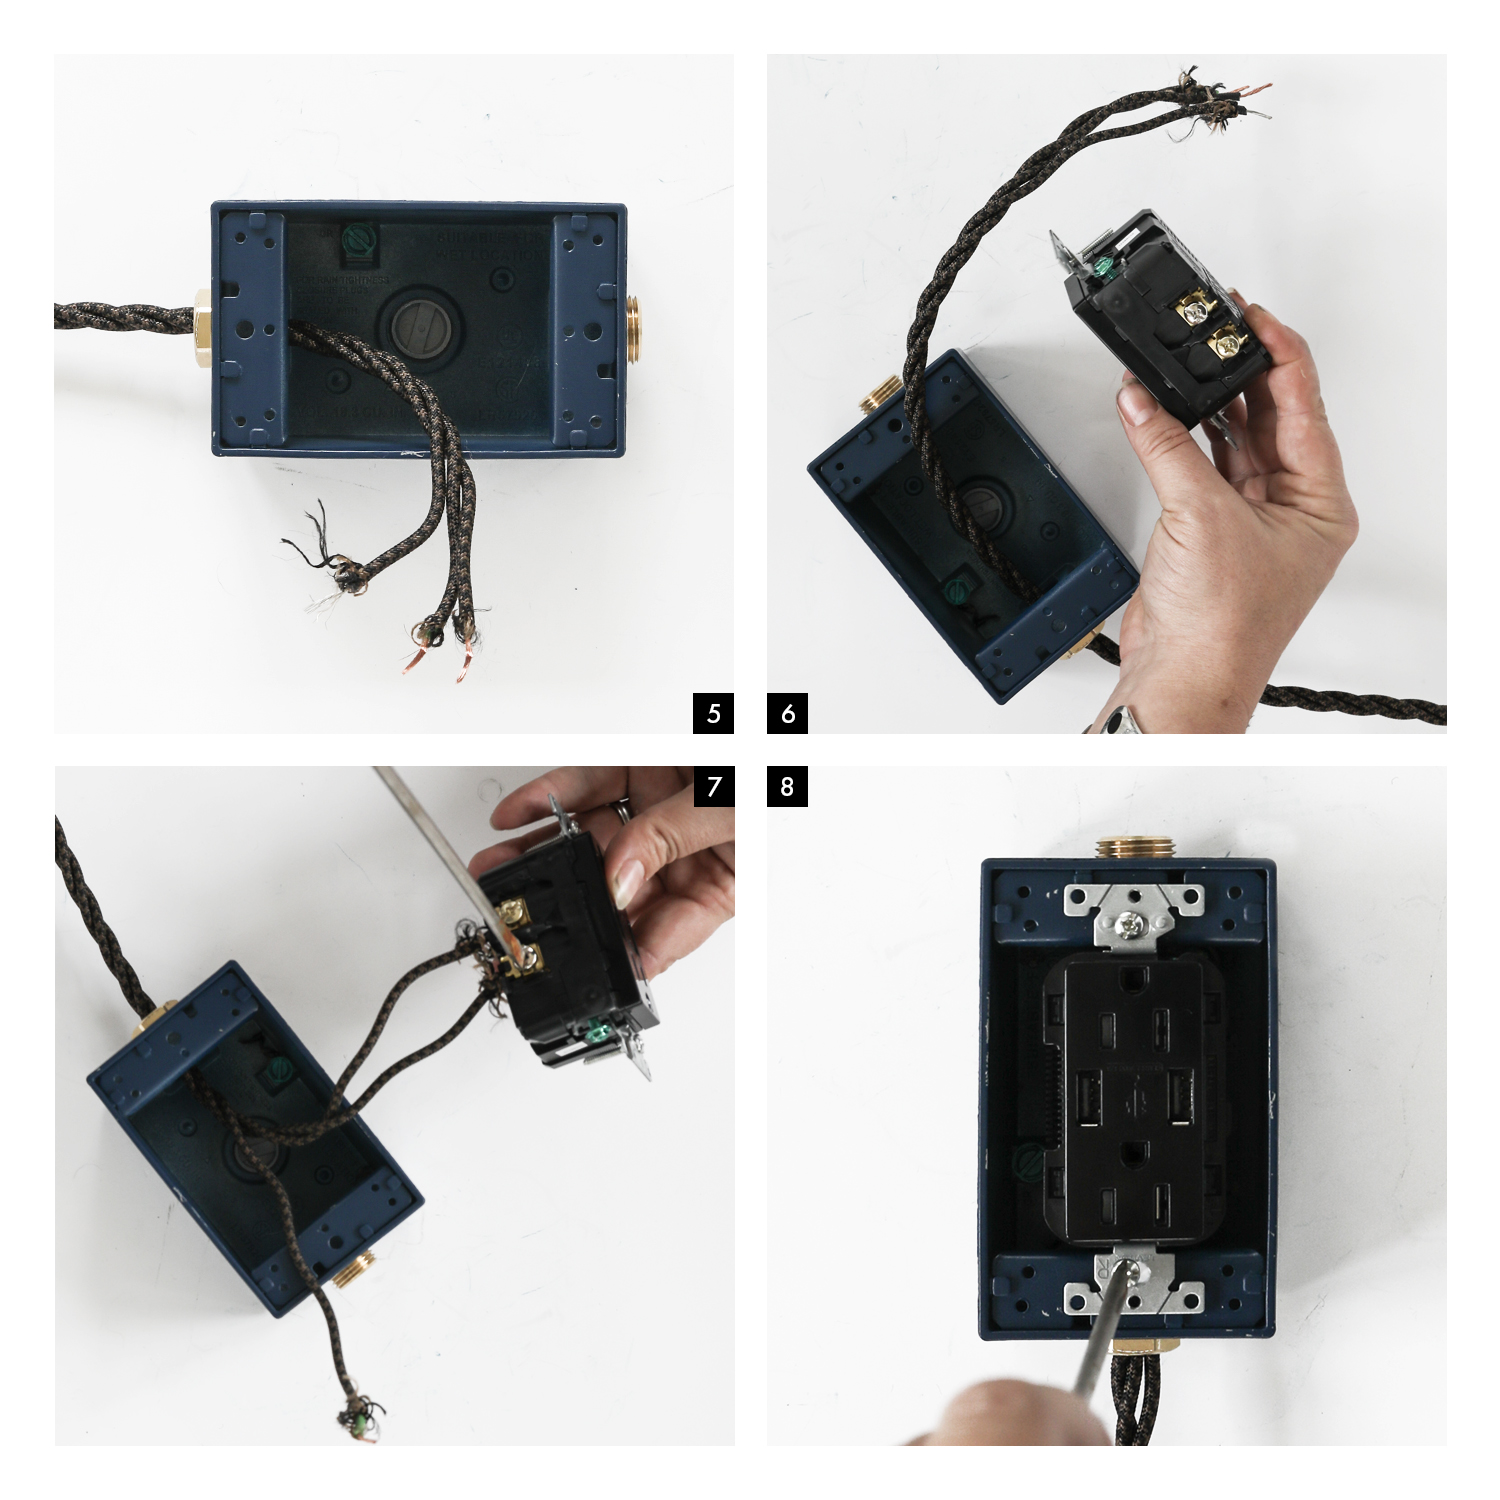
5 Thread the wire Thread one end of the braided cord through the hex-nozzle at the end of the outlet box. Strip 5/8″ of the end of each wire (black, white & green) using a wire stripper. The green casing with the copper wire is the GROUND wire. The wire inside the white casing is the NEUTRAL wire. The wire inside the black plastic casing is HOT. 6 *Please Note* On the USB outlet, the Green screw is for the GROUND wire, the silver screw is for the white NEUTRAL wire and the gold screw is for the black HOT wire. 7 Attach the Wires to the Outlet Attach the Ground, Neutral and Hot wires to the USB outlet screws. To attach the wires loosen the screw on the USB, slip the end of the copper wire into the terminal below each screw, and then complete the connection by tightening the screws. 8 Attach the outlet to the box Gently tuck the wires inside the box, below the USB outlet. Attach the USB outlet to the painted electric box using the two screws (attached to the USB outlet). |

|
9 Attach the Cover Attach the outlet cover the outlet box using the two screws that were included with the electric box. 10 Remove Clamp from Plug Move on to the Plug. Using a screwdriver remove the metal clamp from the rubber plug. 11 Pry Off the Plug Cover Using a flathead screwdriver gently use the screwdriver to pry back the sheath of the plug. On the plug you will find two thin slots to insert the flathead of the screwdriver. You can be a little aggressive here, the cover is made of rubber, and will easily reshape after it’s removed from the plug. 12 Thread the Corded Wire through the Plug Sheath Take the end of the braided wire (the end not attached to the outlet) and thread the wire through the plugs outer shell (as seen above). Use a wire stripper to remove 5/8″ at the end of each wire. Reshape the exposed wire into a half-moon hook.` |
|
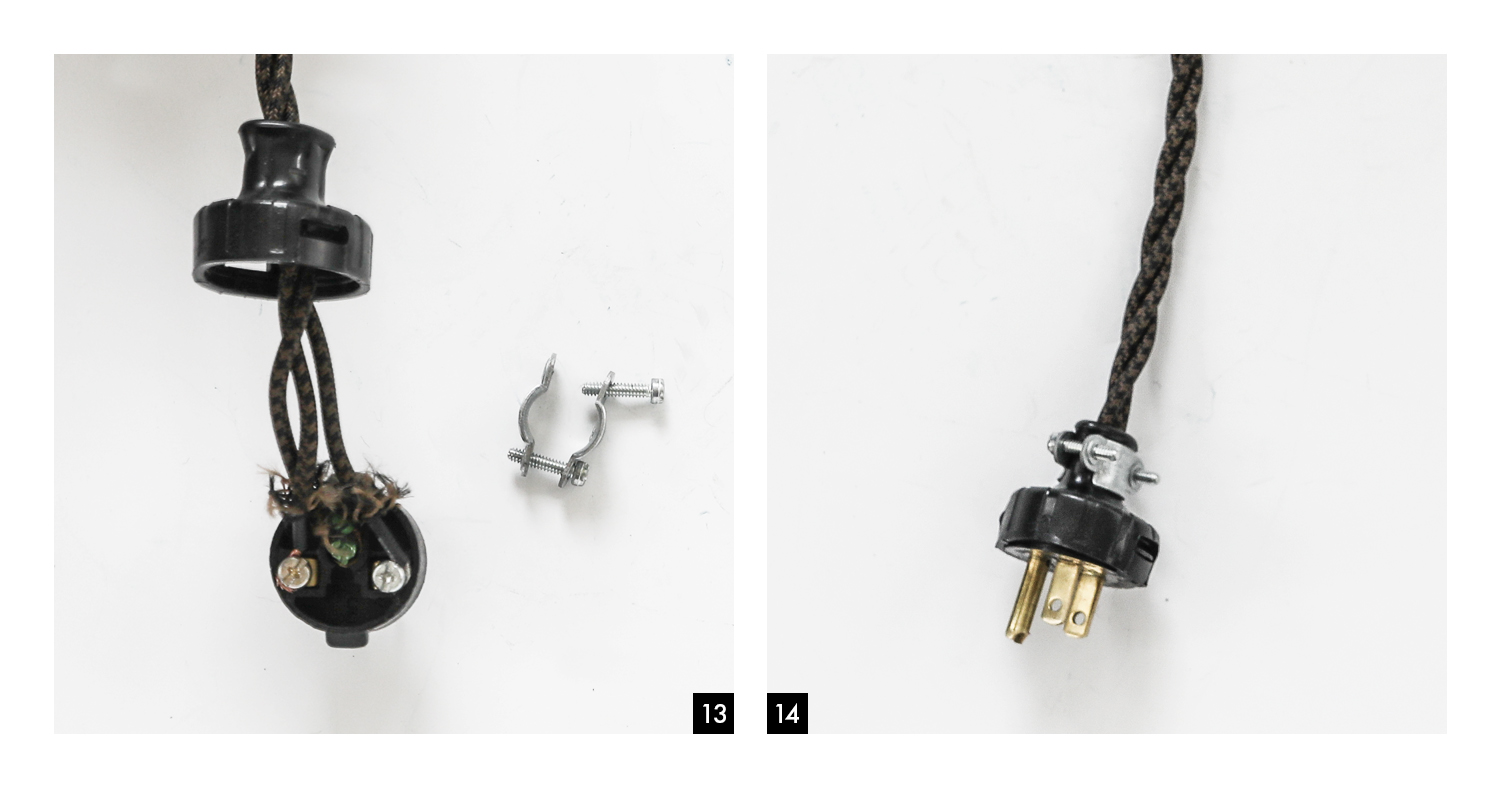
13 Attach the Wires to the plug Loosen all three screws on the plug. Identify the: Green Casing – Grounded Wire, Black Casing – Hot Wire and White Casing – Neutral Wire. Hook the ends of each wire around the corresponding screw as describe in step 6. 14 Reset the Rubber Plug Cover Recover the plug with the rubber shell. You may need to use the flathead screwdriver to shimmy the shell into place. Once you have completed resetting the cover you can go ahead and attach the metal clamp that you removed in step 10. |
DIY Lighting Posts

DIY Light Fixture : Woodsy & Brass Sconce
↑ drag cursor over image ↑ Wazzup team? I wanted to share instructions for these two plug-in sconces that I recently made for our bedroom at the cabin. I wanted to design something that had retro feel to reference the age of the cabin (circa 1968) but I wanted it to be a little sophisticated as well, so I went ...
DIY Light Fixture : Globe Pendant
I know quite a few of you were interested in how I made the pendant light fixtures from our downstairs bathroom. Because I am probably one of your most favorite DIY bloggers, I wanted to share with you a detailed parts list, with instructions! Please note, that a lot of these parts come as straight brass or steel and you'll ...
DIY Light Fixture : Double Brass Flush Mount
Guys! I'm back with the final installment of the girl-party-make-a-light-fixture post! My pal Nicole (aka Colz) needed a new light fixture for over her new black sink -- yep that one pictured above -- which makes its home in her incredibly awesome new kitchen! We made this brass beauty for her, and it looks amazing - I liked it so ...
DIY Light Fixture : Brass & Black Globe Sconce
Okay, guys, I've been wanting to share with you some light fixtures I made with my girl gang (aka The She'Vaughns) earlier this summer. Both of my girls wanted new light fixtures for their homes, and both had been drooling over stuff they had been seeing on their internets. After my recent exploration into DIY lighting I had to intervene ...


I remember you did a lamp tutorial where you were adamant about strain relief where the cord exits the fixture, so I was interested to see how you handled the strain/tugging that can happen with this kind of thing. I know they’re usually for 2 piece (no neutral) lamp cords, but maybe something like an underwriter’s knot would work, or do you think it would be too bulky in the box?
Ulla, Good call! Thanks for thinking of it. I didn’t even consider finding strain relief when assembling this charging station because the areas i envisioned using it in weren’t getting tons of daily use. The first charger I built was for our turntable shelf at the cabin – it just sits on top of the cabinet, it never moves! When I make sconces, I always think of the day-to-day wear and tear. The light and cord would be constantly pulled on in that situation and a strain relief would be a must have.
I found a brass strain relief that fits the look of this design and would be the right move for anyone using this outlet in a space where the cord might get pulled on. Here’s the Link Thanks!