


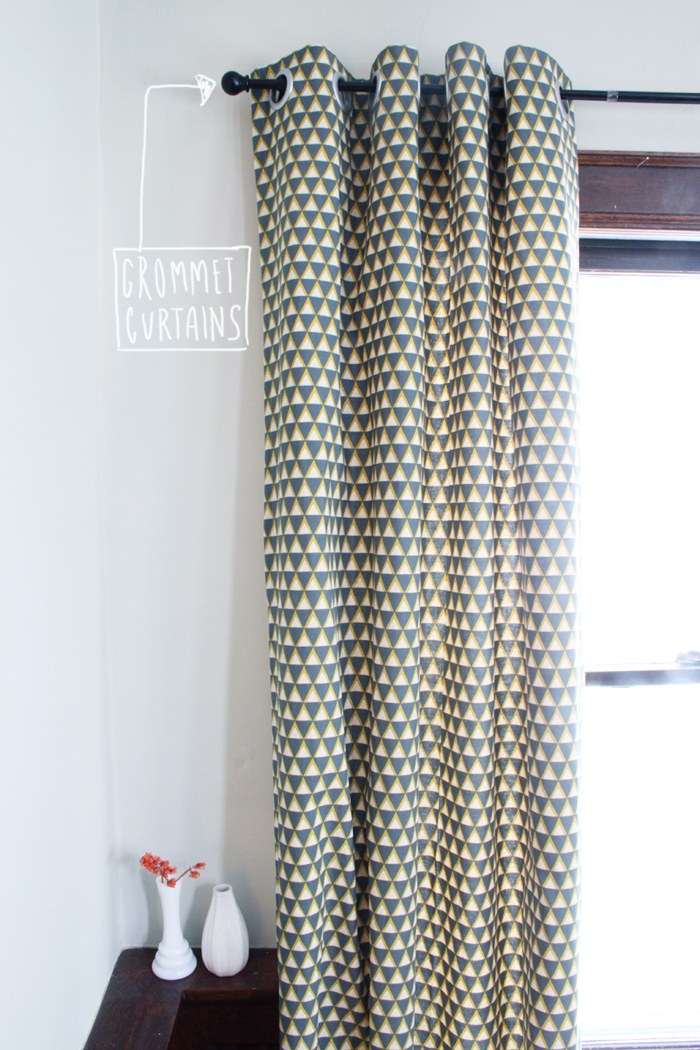
Hello friends! I know in the past I’ve shown you how to make Ikea curtain panels into grommet top curtains, and I shared with you the curtains I made for Gus’ nursery, but I never got down to business and showed you how to make your own grommet curtain panels. I was in the market for a new curtain panel for the window at the top of my staircase, and I wanted to make it from this awesome triangle fabric (Stamped By Ellen Luckett) I picked up at the fabric store a few weeks ago. I figured “what they hey, man” this would be a good opportunity to put together a tutorial for anyone out there who is considering trying the same.
I don’t do a ton about sewing, but I know my basics, and I can find my way around a sewing machine. I also know enough about making curtain panels to offer a few pointers from what I’ve learned in the past.
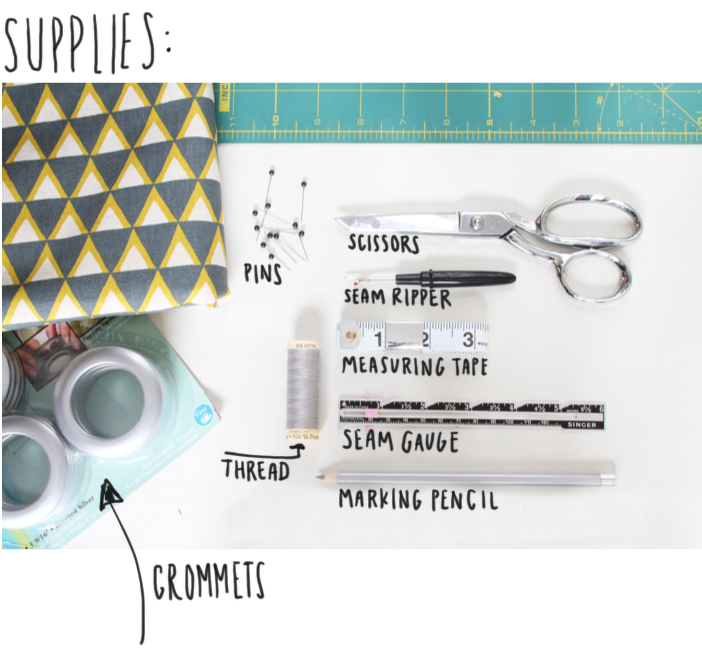
First things first, you need to get your shiz together! Let’s start with your supply list:
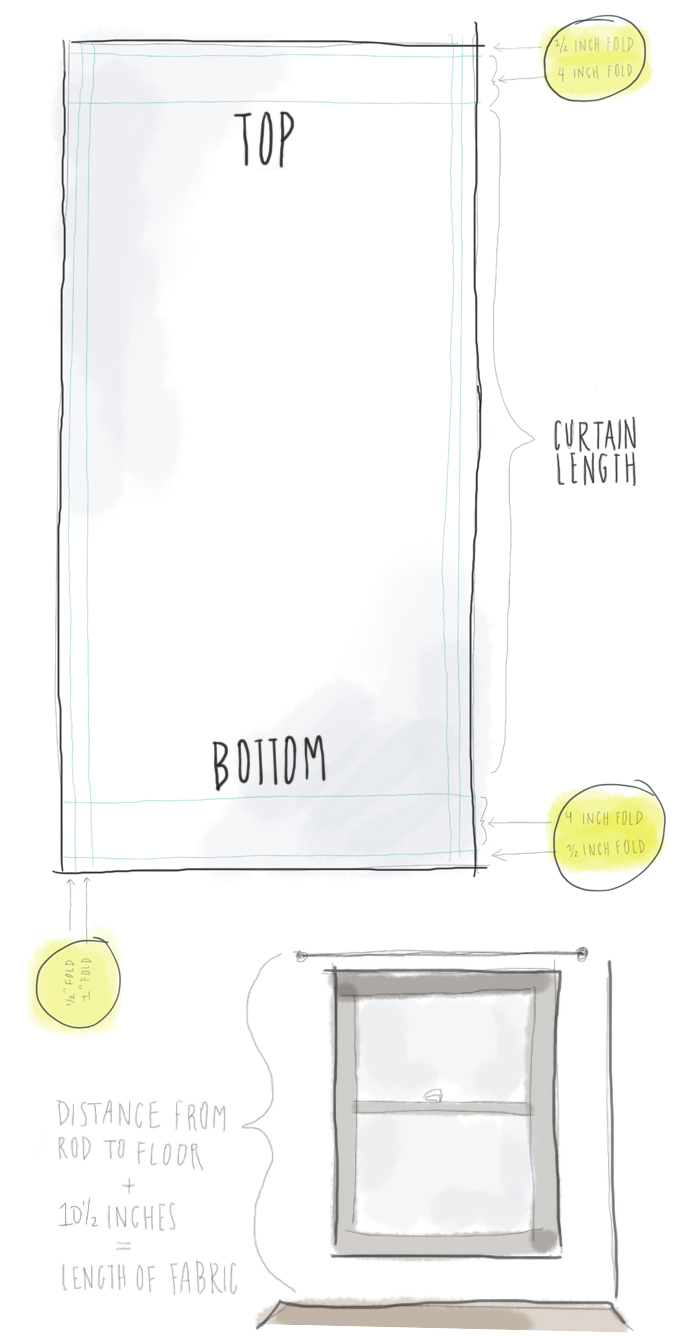
Next let’s talk logistics. The thing you need to know is the distance between your curtain rod and how long you would like the curtain to hang. I needed my curtains to hang 90″ from the curtain rood to the floor. I’ve already done the math for you figuring in seams and allowance for the fabric above the grommets. Add 10.5″ to your total and you have your curtain length.
DISTANCE FROM ROD TO FLOOR + 10.5 = TOTAL AMOUNT OF FABRIC
Curtain width isn’t as important. Most standard fabrics come between widths of 44″ and 56″. Any width of fabric within this range will work just fine with the style of grommets we are using.
The tutorial continues after the jump, click on “read more” for the whole enchilada!
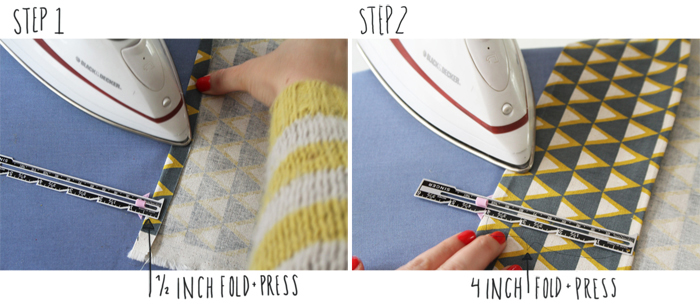
Step 1:
Now you’ve cut your fabric and you’re ready to start the real deal serious stuff. Okay you ready? Let’s measure fold and iron, over and over again. So tough, right? Nah, this is easy.
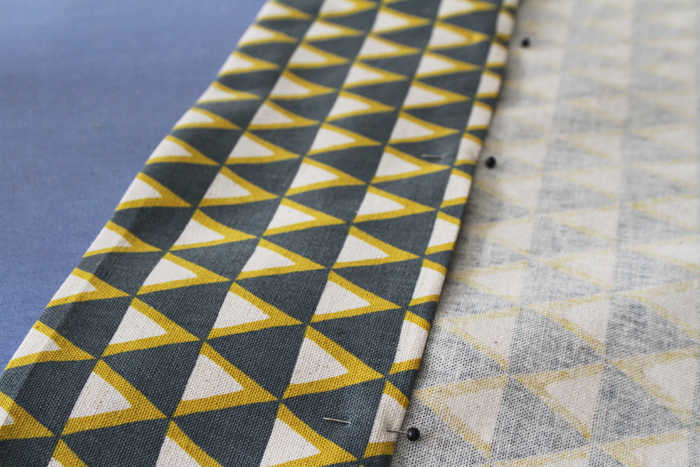
At the top of your curtain panel (the part of your fabric that will hang from the rod), use your seam gauge to measure a 1/2″, fold over and press. You did it!
It should be noted, I’m just making one panel, because that’s all I need for my small window. If you’re making two panels, it’s important to do the same steps to both panels at the same time. That way you can lay them out next to each other and make sure that your folds are symmetrical and that your panels are the same length. I made sure to make the nursery curtains side by side, step after step. It was tedious but also super worth it to have curtains that hung perfectly, even the patterns matched up. Also, don’t forget to pick up two packs of grommets, for two panels, duh!
You may have noticed, my fabric has a geometric pattern, this makes it much easier to keep your fold straight and square. Try and make your folds as square as possible, it will make for pristine looking curtains in the end.
Psst: PLEASE VOTE FOR ME AT THE HOMIES IF YOU HAVEN’T ALREADY – THANKS!
Step 2:
On the same end of your fabric (the top side) fold your fabric over another 4″ and press again, use your seam gauge as a guide.
Step 3:
This is an easy step guys… Pin the top hem, spacing your pins about 5″ a part.
Step 4:
There’s no pics for this part, but that’s because step 4, 5 & 6 are identical to 1, 2 & 3, just on the bottom of your curtain. So, fold and press the bottom of your fabric a 1/2″ up.
Step 5:
Fold and press the bottom of your curtain at the 4″ mark, use your seam gauge! Remember to keep your folds straight and square!
Step 6:
Pin the bottom of your panel!, Yay!
Step 7:
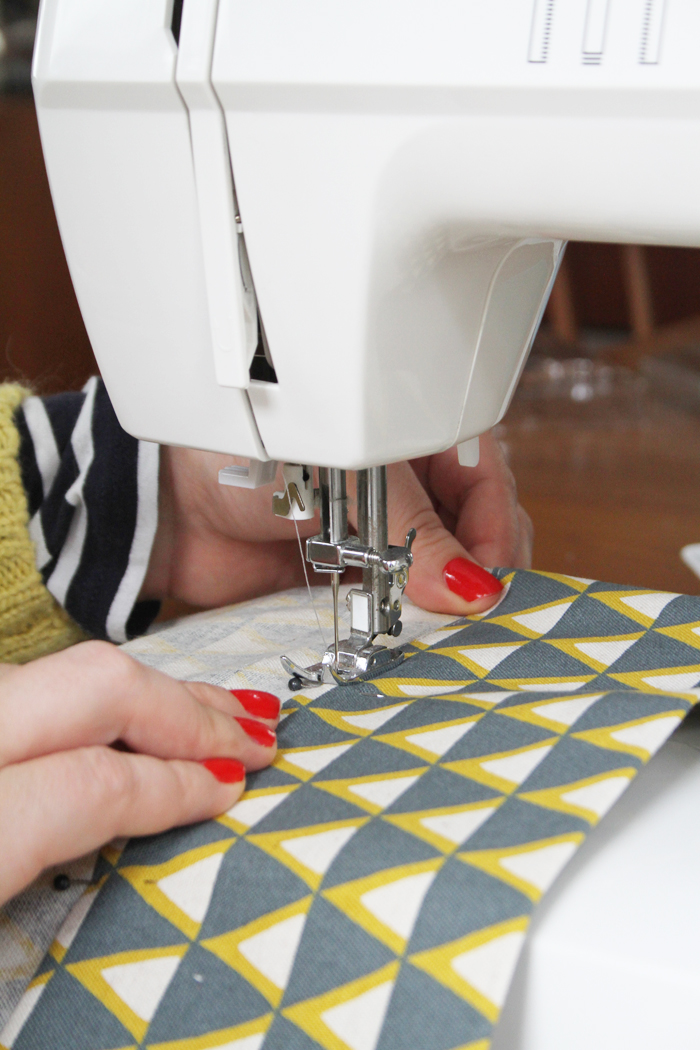
Okay now for the sewing, you ready for this? Alright, take the top of your fabric panel and sew a straight stitch as pictured above. Not too scary, right?
Step 8:
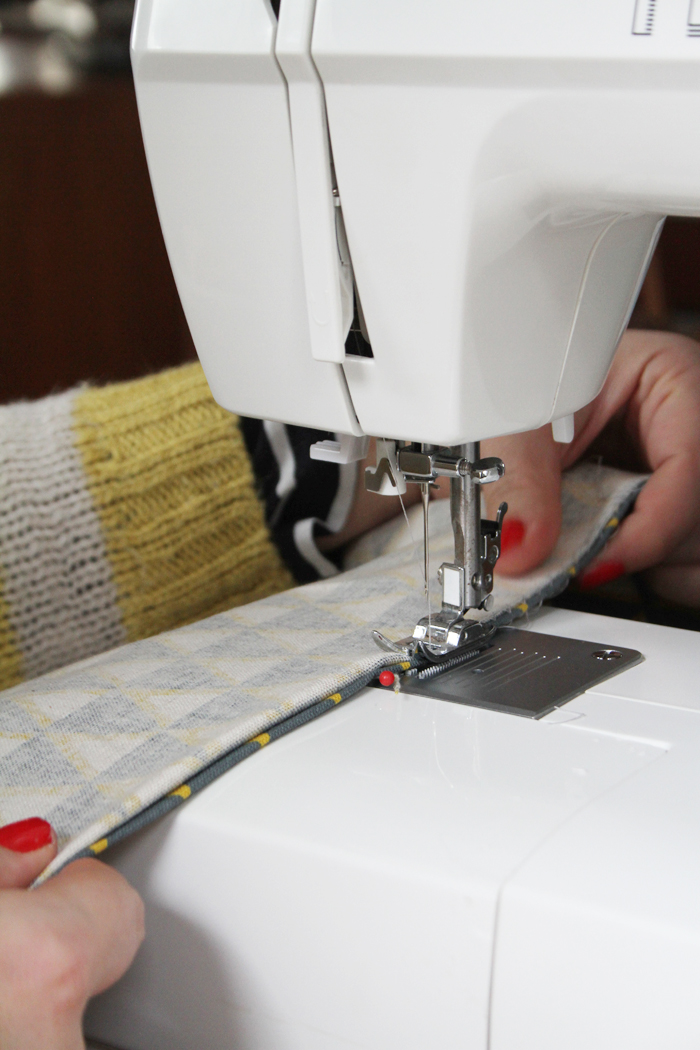
This is where it gets a little tricky, at least for me it does. I discovered when I made Gus’ Grommet curtains that using a “blind hem stitch” along the bottom hem of a curtain allows the curtain to hang so nicely. I’ve made curtains before with a straight stitch along the bottom hem and the curtains gets puckered and don’t lay straight. This is because a standard straight stich is too rigid and doesn’t allow the fabric to be flexible and drape properly. You can always say eff it and do a straight stich here, but I recommend trying this new fancy stitch out.
In case you’re scared there’s lots of good you tube vids on this. FYI: your sewing machine may, or may not come with a blind hem presser foot. I don’t have one for my sewing machine so I just use the zigzag setting and combo that with the longest stitch setting and it works with an almost identical result. Your user manual should have info to help you with this.
P.S. If you’re gonna try that blind hem stitch, check the photo above for how I have to fold the fabric over. They’ll teach you this on that you tube video too, so make sure to watch it if you don’t have any experience with the blind hem stitch.
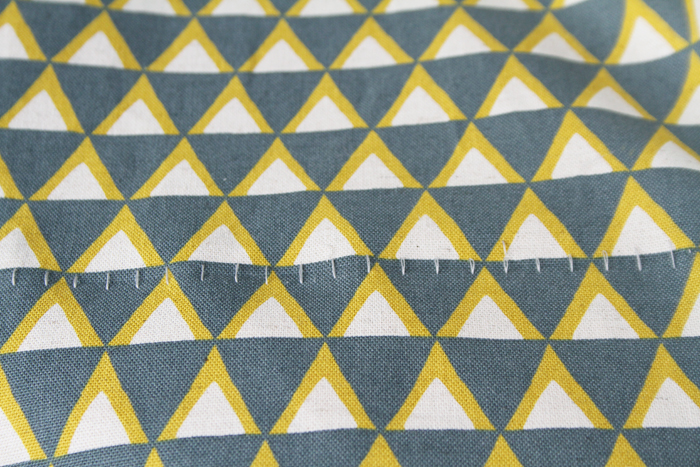
Here’s what that cool stitch looks like:
Step 9 – 13:
Well, you’ve done it, you’ve sewn the top and bottom hems of your curtain, yay you! Feel good about it.
Now that you’re done doing that, you need to do exactly what you did before; fold and press, and fold and press again. Do this on both sides of your panel folding over 1/2″ for the first fold and a 1″ for the second. If you get stuck use the diagram up top for help. Pin both sides once you’re done with all that folding and pressing. I could give you more instruction on this, but you’re a old pro at this game, so I’m not worried.
Step 14:
Using a straight stitch with the stitch length set to the longest setting, sew both sides of your panel just like you did to the top.
You done with that? You are so awesome! You now officially have a panel, this is great!
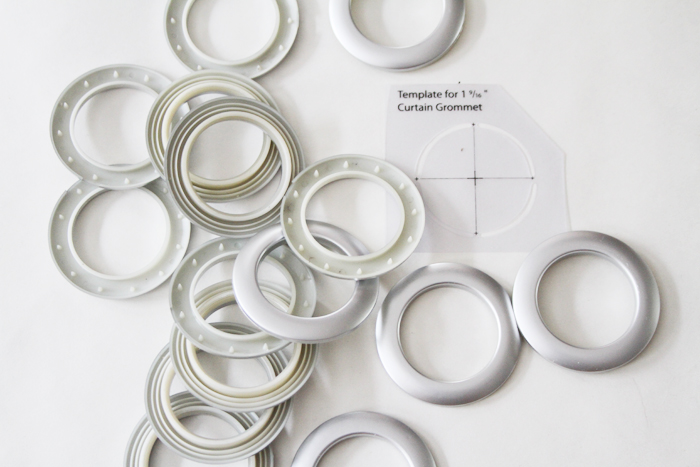
Guess what?? It’s grommet time! I’ve always used Dritz grommets and this is what they look like. I know they are plastic, and that is not fancy, but seriously, once they are 7+ feet in the air and hanging from a rod, you won’t be able to tell the difference. They come in different colors and finishes as well. I always go with the pewter, but that’s just because it’s what I always do. You do what you do.
As you can see, they have one side with a groove and another with some little pokey things, that is how they fit together. You don’t even need much pressure, they just snap. And in case you screw up they come apart easy too :)
So now you ask yourself, how do I get these GD plastic loops onto this beautiful panel that I have made? Well my friend, I will tell you…

Step 15:
This part involves a little math, something that’s not my strong suit, it might not be yours either, in that case I’ve figured it out for you.
Measure the width of your new curtain paenls.
((Curtain Width in Inches) – 5) / 7 = The Distance between each of your grommets.
For example this is what my math looked like: (40 – 5) / 7 = 5
Now this works only if you start the center of your first grommet 2.5″ from both sides. Then you space your grommets X inches apart measuring from the center of one, to the center of the next. I’ll give you a little tip here. You don’t need to be super duper precise on spacing, just very close. It’s more important to make sure that all your grommets are the same distance from the top of your panel.
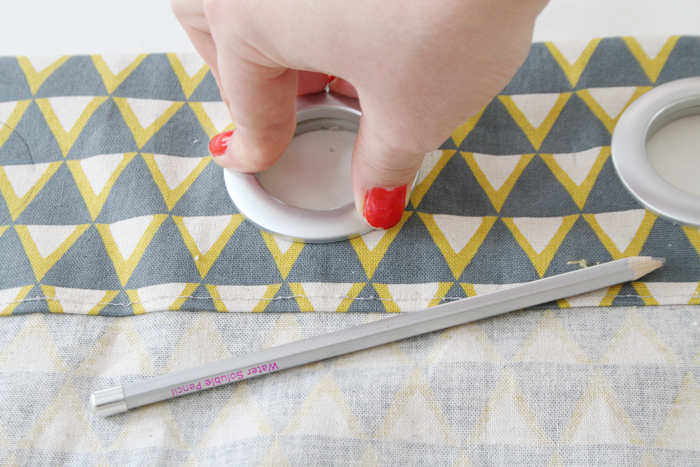
Now you might be asking yourself “but how far do I place the grommet template from the top of my panel,?” And the answer is 2″. Your top panel has a hem of 4″ on it and we want your grommets to fit perfectly in the center of that. Double check and make sure your grommets are all centered evenly 2″ from the top. You wouldn’t want to mis-measure one, then your curtains won’t hang flat. This is where a quilter’s ruler becomes a very useful tool. You can lay the ruler right over your panel helping to keep your grommets equal distances from the top.
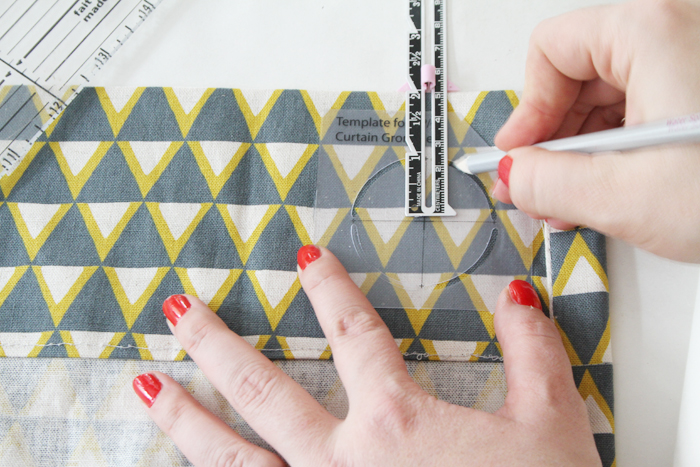
I recommend using a water soluble pencil for all your markings, if you’re anything like me, you’ll screw up a few times and having a pencil that erases with water comes in handy.
Step 16:
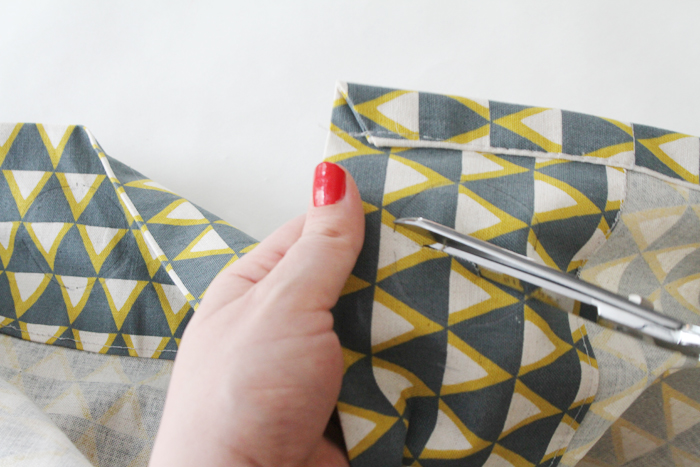
Yeah! You got all your grommets marked out and you’ve double checked? You my friend, are ready to start cutting holes in your beautiful panel. I know it’s a little scary, but you can do it!
Do you have a sharp scissors? If you don’t you should consider getting a pair, it makes cutting out these circles so much easier and will come in handy on your future sewing projects. Cut out all the circles you’ve marked, be careful to cut right on your markings and not to go over.
Step 17:
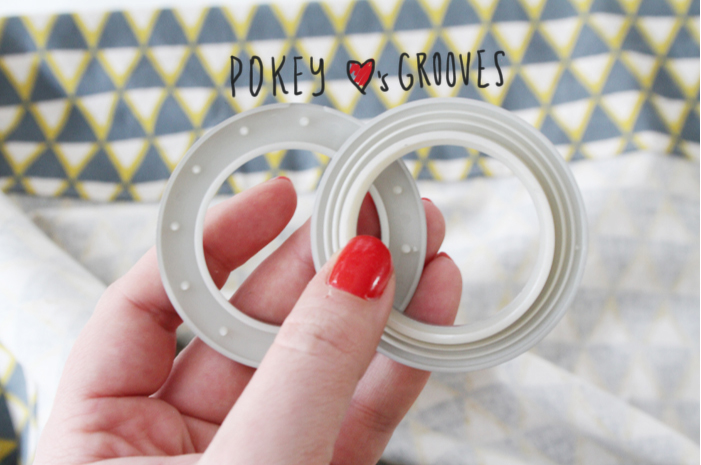
Almost done! It’s time to start joining up Mr & Mrs PokeyGrooves. Putting together the grommets is as easy as finding these two grommet mates and then putting one on either side of your hole.
Step 18:
I would recommend using a cutting board as something to press against when you’re joining your grommets. You wouldn’t want to leave marks in your work surface. Connect the remaining 7 of your grommets and you’re done! Can you believe it?
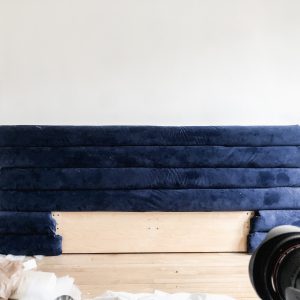
Hang that bad boy up and admire your handy work!
In case I totally forgot to mention something or made an egregious error, let me know. Hope this helps you on a future sewing project!
Love,
Scoops


what a great tutorial! I just discovered your blog this week–we live in the Twin Cities too (St Paul) look forward to reading more!
Hey Julia!
I hope to see you around! Thanks :)
Hi Alison,
Where did you get your grommets?
Thanks!
Alison
I picked them up at my local fabric store, you could probably find some at yours too, or purchase through amazon
What an amazing tutorial! I repinned this. Thanks so much for sharing all these details! What size grommets did you use for this?
Oh, Good question! I used the 1 9/16″ grommets from dritz. Thanks for pinning!
Thanks for this amazing tutorial! I am making curtains this weekend and really wanted grommets but I was afraid that I couldn’t do it myself. You make it look so easy!
Hi! Great tutorial! Thank you so much for sharing it. I’m hoping to use this to help make some curtains for my kitchen. I do have a question though. You said:
I just use the zigzag setting and combo that with the longest stitch setting and it works with an almost identical result.
Does this mean that you essentially just used a zig-zag stitch with the blind hem stitch in mind to accomplish the same result? I’m wondering because not only do I not have the proper foot, but I don’t have a blind hem stitch setting either :)
Hello Scoop, Thank you for this great tutorial. I have a huge dilemma.
My curtain material is patterned with 1 inch dots in even rows all over. I ripped the top edge to square the material and it is obvious the pattern is out by 1.5inches. So do I cut and sew according to the square of the material and an unmatching pattern which slopes at the hem and when joined. Or, do I have a matching pattern but with the curtains not falling straight. They are floor length and inch pleated.
I’d like them to be perfect because I’m making them for someone special.
Thanks for your help.
Hey Wendy,
This is a tough question, but if it was me, I would probably go with matching the pattern. It would be immediately obvious if the pattern didn’t match, but maybe not as glaringly obvious to have the curtains not fall straight.
Good luck!
Excellent tutorial! So often it doesn’t even occur that you can create your own window treatments. No only is buying them retail is expensive but you can’t always have the customized touches which accent them room.
Recently my wife created DIY grommet black-out curtains for our 3yr old son’s room complete with baseballs, footballs etc stitched onto them because she simply couldn’t find them at any stored and to pay someone to make them would be way too expensive.
Love your tutorial but am stuck in the grommet measurement :(. My husband and I are both stumped, and we both cant blame baby brain! 84 inches of material (half of the curtain, a massive window) we figure 8 or ten grommets, but cants for the life of us figure out how to space them, even using your formula. Any help? 2 inch grommets…
Hey Deb, I’d be happy to help, is your curtain panel 84″ wide, or long? Are you cutting the fabric in half, I’m a little confused.
If you were using just one panel that was 84″ wide you would figure it like this: 84″ – 5″ = 79″ Then you would divide 79″ (by 7 if you are using 8 grommets, by 9 for 10 grommets) I will use 7, because 8 grommets is standard. 79 divided by 7 is 11.28 (apprs 11.25″) between the center of each grommet. That is one wide piece of material, good luck!
This is a great post! Thank you! I will be trying this soon and came across your tutorial.
Are the grommets shown here the Dritz Pewter or Brushed Silver?
thank you!
Thanks for the help. I have really wide windows. The one I am working on is 87 wide. I know when I gather on a rod I use fabric 2 1/2 to 3 times the width. What would you suggest for grommet drapes? I know the fabric might not be that wide so I can seam.
Great tutorial, thanks! What types of fabric/s do you recommend using? I’ve made many tab top curtains out of quilt or batik fabric, would that work with the grommets? Would I need a reinforcer to support the grommets? (yay Mpls/St. Paul!)
I’m no sewing pro Ruthie, but I would recommend using a heavier fabric for curtains, or line your curtains if you are using lighter quilting material. I made lined grommet curtains once, and used this tutorial over here… Good luck.
Wish I were as enterprising as you! These look great, the fabric, the print, et al.
Love the tutorial and the humor. Thanks. <3
Make new grommets curtains drag on the rod. What can I lube the rod with to make them slide better
I’m having the same problem! Im using a wooden rod and it will not pull across. I’m assuming its the wood and the plastic grommet that aren’t working together.
Aerosol silicone
You might use floor wax…rub it on with a piece of terry cloth. (I use it for window tracks, to make the windows slide more easily.) Thanks for the thought–I’m making curtains and will know to do it to my own! :) (And though my sliding glass door has white vinyl, I’ve never noticed any coloration it causes…in case that’s a concern.) Try not to leave any excessive residue that would rub off if it came in contact with your curtain.
I cannot thank you enough for your thorough tutorial. Soooo lucky I found your site as you enabled me to finally muster the courage to make a pair of wool, grommet curtains for our front hall. Living in London (UK) made the grommet process a bit tough (we have no Dritz..or anything like Michaels, or HobbyLobby, or JoAnnes…the list goes on&on) but I tweaked things and used a grommet strip instead. Can’t wait to get these bad boys up!! Thank you Scoops!!
Hey Kerrie, I had no idea there was no Dritz in the UK, there should be! I’m glad you were able to come up with a solution. Thanks for letting me know that it worked out for you, I’m so glad this tutorial has been helpful for people!
Thanks so much. Great and easy to follow.
Lois – I’m so glad it worked well for you!
Absolutely LOVED this tutorial – thanks for posting! Made some great curtains for my nephew-to-be that my sister loves. It was great being able to adapt the measurements easily using your instructions because the floor is slightly slanted so one set needed to be just a little longer.
Hi Kate! That’s fantastic, so happy to hear the tutorial worked well for you! Thanks so much for taking the time to let me know!
Does it matter which side of the grommets go on which side of the panels?
Are you asking if you can connect them together with either side of the grommet facing? If so, yes, I think they can go either way.
Thank you for the wonderful tutorial. I read it several times over a few days and last night I finally mustered the courage to give it a go. Two and half hours later, I had a pretty darn near perfect curtain! Your instructions were right on and I even figured out how to do the blind hem stitch with the help of the YouTube video. My son’s nursery is looking awesome with his new mama-made curtain. Thanks again!
Amanda – That’s so great to hear that it went well for you. I think everything I have ever learned, I learned from youtube. I use it all the time as a reference for all sorts of DIY stuff.
Thanks for taking the time to let me know that my instructions worked well for you. Congrats on taking on a scary task, I know how that feels, but the reward is always worth it!
Hey, wonderful article on how to make curtains you have here. I loved the way you organized the steps, it was very easy to follow. Being a bit of a diy curtain fanatic I just cant get enough of this type of thing. Even with my experience, I learned a lot from this article on grommet curtains. Would love it if you stopped by my blog sometime and checked out some of my how to make curtain stuff. http://www.howtomakecurtainsfree.com/2014/02/23/how-to-make-lined-curtains/
Hi there! I’m so happy to have found this tutorial. Thanks for sharing! I’m trying to make striped grommet curtains from scratch and am having trouble figuring out the measurements. If I want each 6 horizontal stripes (each the same size) per panel – what do you recommend for measurements? I was trying to reference yours. Your sketch shows adding 4.5″ to the top and bottom (=9″) but you say to add 10.5 total. Is this to allow for fabric above the grommet? Thanks so much!
Yay, this tutorial has resulted in a pair of lovely curtains for my darling’s office! Up next: a pair for my office. Cheaper and so much more customizable than what’s sold online or in stores. Plus, I did my first blind hem and it went super smooth. Happy. Thanks, Scoops!
Has anyone mentioned that you should have an even number of grommets on your panel? That way your panel starts and ends in a complete U-wave and the seams curve towards the window instead of outwards.
Excellent suggestion!
Excellent, easy-to-understand directions! I finally have it figured out. Looking forward to making my grommet holes soon.
Sherri
Awesome, glad to hear it!
This was a great help. Only one thing I would add… You need to know how many grommets total you want to use. If you want 10 grommets instead of 8, the formula would be (width of fabric – 5″)/9. (the divisor is number of desired grommets – 1)
Thank you! That was fun reading. I am making curtains to hang on a 1 1/5 round pole and to be supported on deer horns for a cabin. Do you think 2 inch grommets are sufficient and if not, do I just make the folds at the top bigger? Thank you!!!!
This tutorial is fabulous! I just made my first curtain with grommets. You did the hard part. Thanks!!
Thank you for the tutorial !! its on my must try list :) … cant wait to try it… thank you again for sharing
Hi Scoops,
Thanks for this awesome tutorial. As noted above I think there is something wrong with the measurements. I think the hems should be folded by 4.5 inches or else just add 9 inches then it works out. I had to make an adjustment on mine but luckily I measured before I did the hem. Measure twice – sew once!
Hello. Love the curtains. What diameter grommets did you use and what diameter is the curtain rod? Thanks!
Hey Sccops,
Just wanted to thank you for this great tutorial. It was really well explained that i didn’t even made a mistake!
Thanks for sharing.
Cheers
Hi! Love the curtains. Do you know what size diameter curtain rod you used?
i loved how easy this was to follow. The only thing I missed was that you need an even number of grommets to make the curtain hang properly. Yes, may package came with an even number but it does not mention this. I also saw the number 7 so many times that i “assumed” that 7 grommets were used. My bad. Since I was only adding a 4″ border to the top of curtains I bought I only have to redo my 4″ border. This is an important thing to know especially if you are making curtains from scratch.
I was just looking for a tutorial on making grommet topped drapes – mostly because I didn’t want to sit an figure out how far apart the grommets are supposed to be. :) This tutorial is excellent. Just wanted to mention that the formula you have for determining the grommet placement determines the placement for an even number of grommets.
Many DIY curtains and tutorials don’t seem to realize that you need an even number of grommets so that the curtain returns to the wall on each side. Many tutorials that I have seen show the curtain returning to the wall on one side, then sticking out to the room on the other. Unfortunately, that problem is not all that uncommon in ready made grommet draperies as well.
Thanks so much.
It’s been a long time since I sewed something more difficult that reattaching a button on the zigzag switch and the feed dogs down. Any way I have to windows in the kitchen/dining room that I want to make valances for.two huge windows each measuring 51 1/4″ AND I want to do grommets instead of a pocket rod. How much fabric do I need to use across and do I still need a 4″ hem on the bottom. These valances will be going over lattice we are going to hang on hinges so we can lift and open and close the windows. TIA This video taught me not to be scared of those round thingies. Kudos
I got this web site from my friend who shared with me
about this site and now this time I am browsing
this website and reading very informative articles here.
I noticed in your instructions that you used “GD”. What does that mean? Does it mean what I think it means–God Damn. Not appropriate by my measure. Not professional!
They say there is no dumb question, but I can’t determine if you cut the hole for the grommet the size of the interior part of the circle so that the fabric is held in the grommet? If so, will thicker fabric cause the grommet to fail to attach to itself?
” A”, Maybe it’s a very appropriate “gosh darn.”
I was always under the impression that the side seam has to be sewn first. Why do you think that sewing the side seam after the top and bottom seams is better?
A note about how to calculate yardage; If you are using a print, you must take into account verticle pattern repeat, and if seaming partial width, also horizontal repeat
Placement of grommet tutorial is super easy! Thank you
Great tutorial! Have you washed any of the curtains, and do the grommets stay in when you do? I said I would never have curtains with grommets, but bought some recently to stage our house and they hang so much nicer than the clip on hooks. But these grommets are metal and heavy and doubt they can go in the washing machine. Not my problem, I’m leaving them with the house. lol But I’d like to make some with the plastic grommets for my next house IF they don’t come apart when washed.
Thank you so much for including the math I. This. I was searching websites all morning but none of them included the math for spacing. Thanks agin!!
I’m making curtains to go around a huge table my husband built for his model train. I’m guessing approx. 25 curtains of cotton ticking. Cutting out the fabric from the grommets seems daunting. Is there another way to cut besides a scissors? I’m also afraid of raveling. Thanks for ANY help you can give me! Great tutorial!