


Twelve years ago on a cold November night I lay slumbering peacefully in my twin bed in my tiny college bedroom (Jeff may have been there too, but don’t tell my folks). I had decorated my room after seeing an episode of Trading Spaces wherein Doug painted a room a shade of blue that was nearly grey and hung glass icicles around the top of a four-poster bed.
Side note – I tried to Google a picture of it to show you guys, but Trading Spaces was practically on TV before the internet even knew how to poop on the toilet. Get it? The internet was like slightly older than a baby. Anyway people didn’t put photos on the internet back then because it took up too many KB’s and whatever.
Trading Spaces inspired me to take my first decorating baby steps. I basically painted my room blue, had a vintage table as a desk and hung some bookshelves from my wall because I had no space to put books anywhere else – there was definitely no icicles.
Back to when I was sleeping. So, I was sleeping in my bed…and then I wasn’t, because all of the books and all of the boards and all of the brackets that I had expertly hung on my wall (without anchors, ha) came tumbling down on top of me (and Jeff) in the middle of the night. Who knew that I was supposed to use anchors? I mean who knew? I was like 19. 19 year olds don’t know that stuff.
However, twelve years later and I think I finally figured it out. Booyahchaweagle!
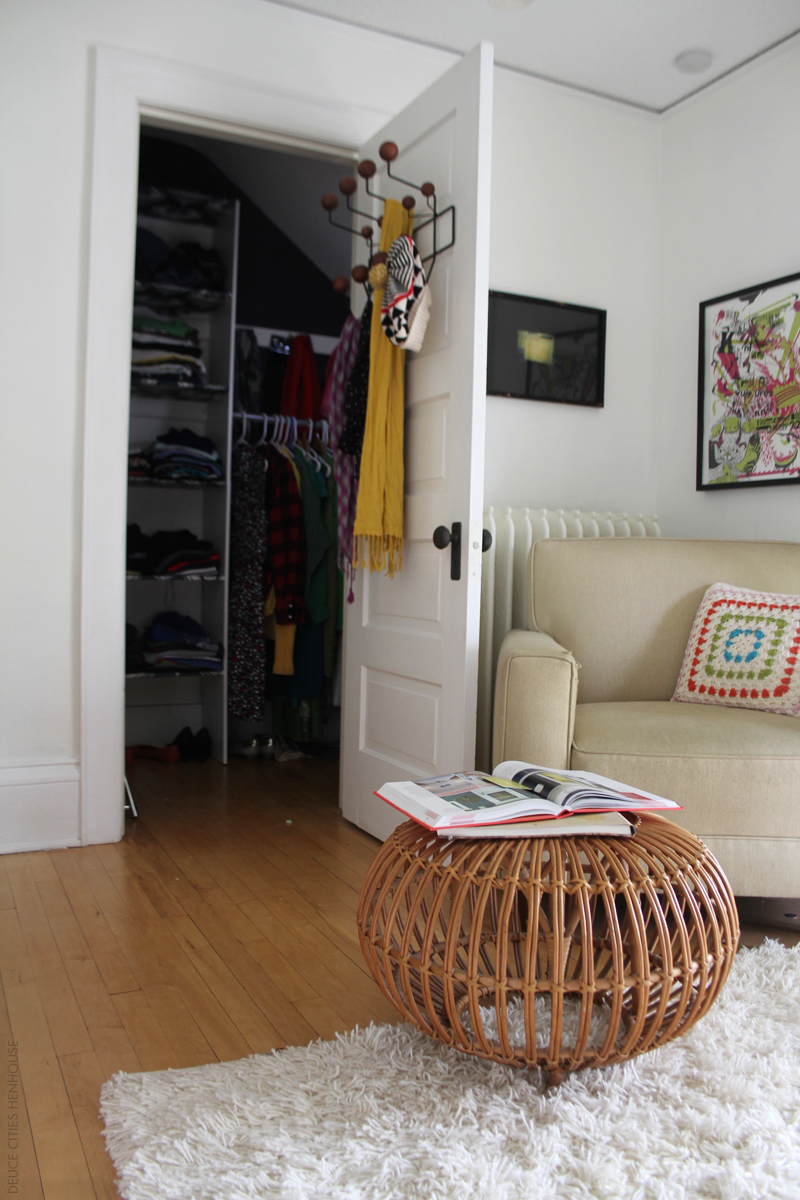
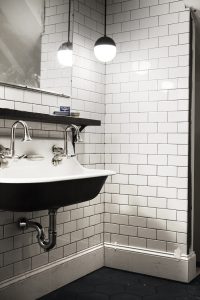
Here’s a before shot in case you didn’t remember what it used to look like just a few short months ago. This photo illustrates how bad that picture molding was and how much better it looks now with the strip of 1″ cove. More on that over here.
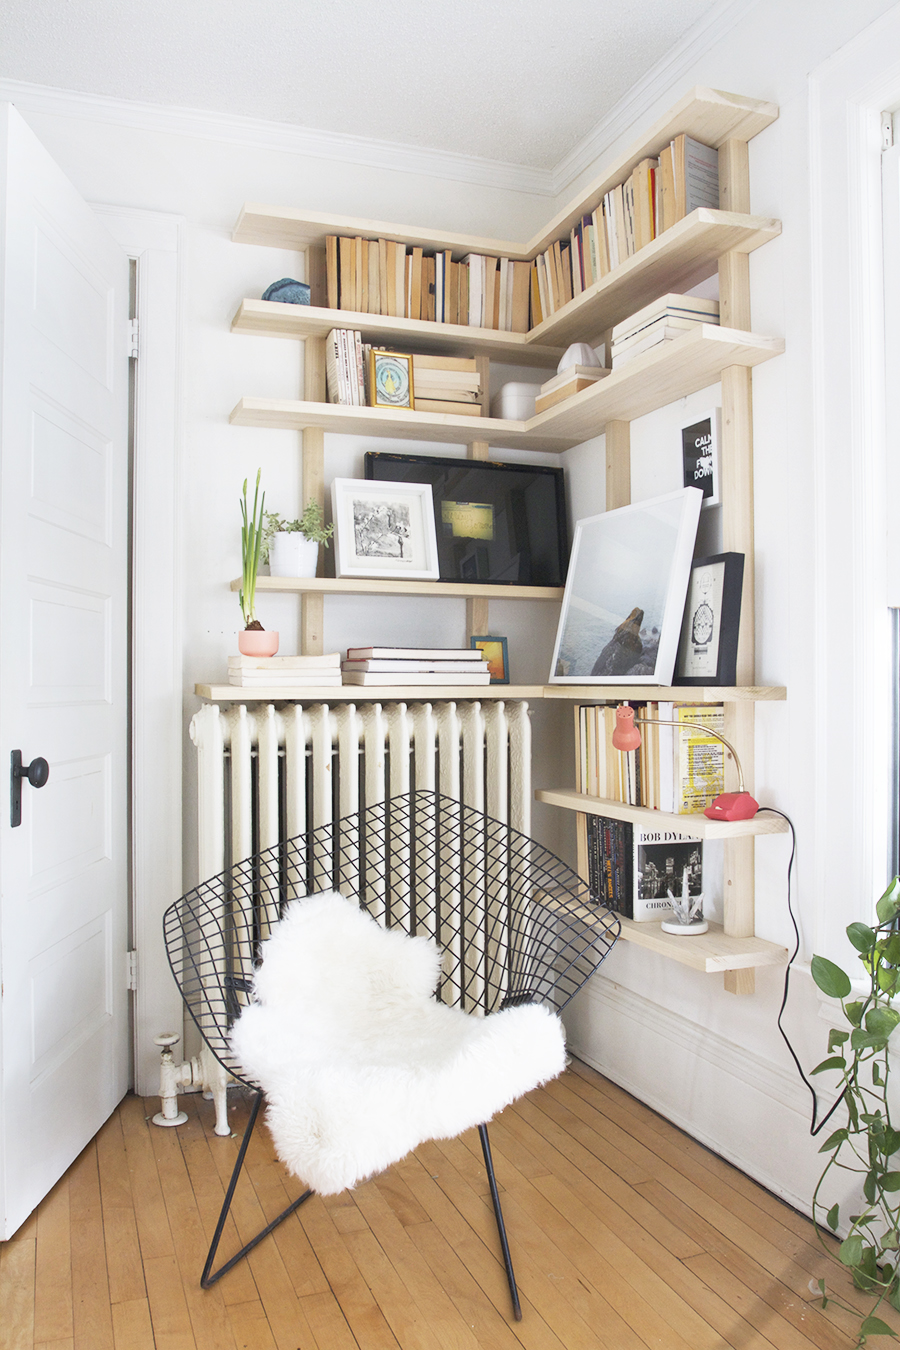
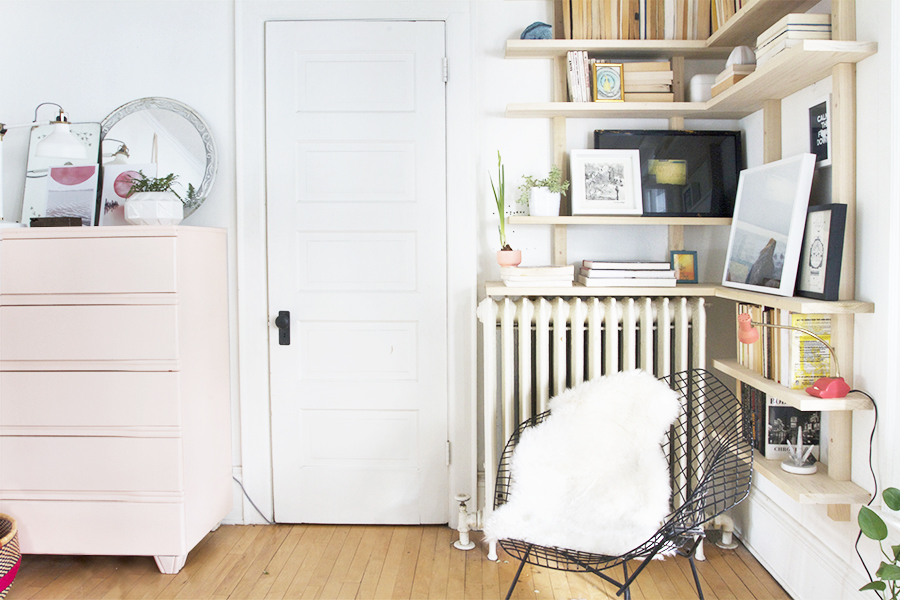
Somebody, please tell me – why does it feel like my head is going to explode? Holy balls! Everything is so crazy busy right now. For instance, I’ve been working on writing this blog post for a week, and these shelves have been built for nearly three. I have been super excited to share with you the new bookshelf I built and installed in the corner of the bedroom, like I was just bursting with pride and wanted to show off (I am a show off sometimes) my handy work, but I just didn’t have any time . Did you hear that, I built it – like from scratch, like from regular slabs of wood that sat in my garage. I laid out a plan, chopped that shit up, attached it to a wall, kept the whole thing level and plumb and did it in a way that looks good and most likely won’t fall of the wall like that one time.
If you’re a fan of Victoria’s blog you can probably see that I pulled a lot of inspiration from the bookshelf she had installed by Michael Woo around her window. I loved it at first sight. I loved the light wood, the design, and the airiness of it. When planning my corner shelving unit, I had originally explored installing an Elfa system or possibly Algot system from Ikea. I was almost about to push the ORDER button when I decided that was just not what I wanted. That’s when I started looking on the internet for cool looking bookshelves and then I remembered how much I loved Victoria’s.
I started planning, doing lots of sketches and measurements. I didn’t know how Victoria’s shelf was made, but she did make mention to it being somewhat modular – it wasn’t permanent to the space and she could take it with her when she went. I couldn’t figure out how she made hers without screw holes and in the end I figured that there was probably some mad carpentry skills at work. Each of the shelves probably wraps itself around the vertical pieces and nestles in – it probably easily comes apart when it’s time to move too, it’s probably really slick and great. Being that there was no way I had the skills to pull that off, I came up with a new system.
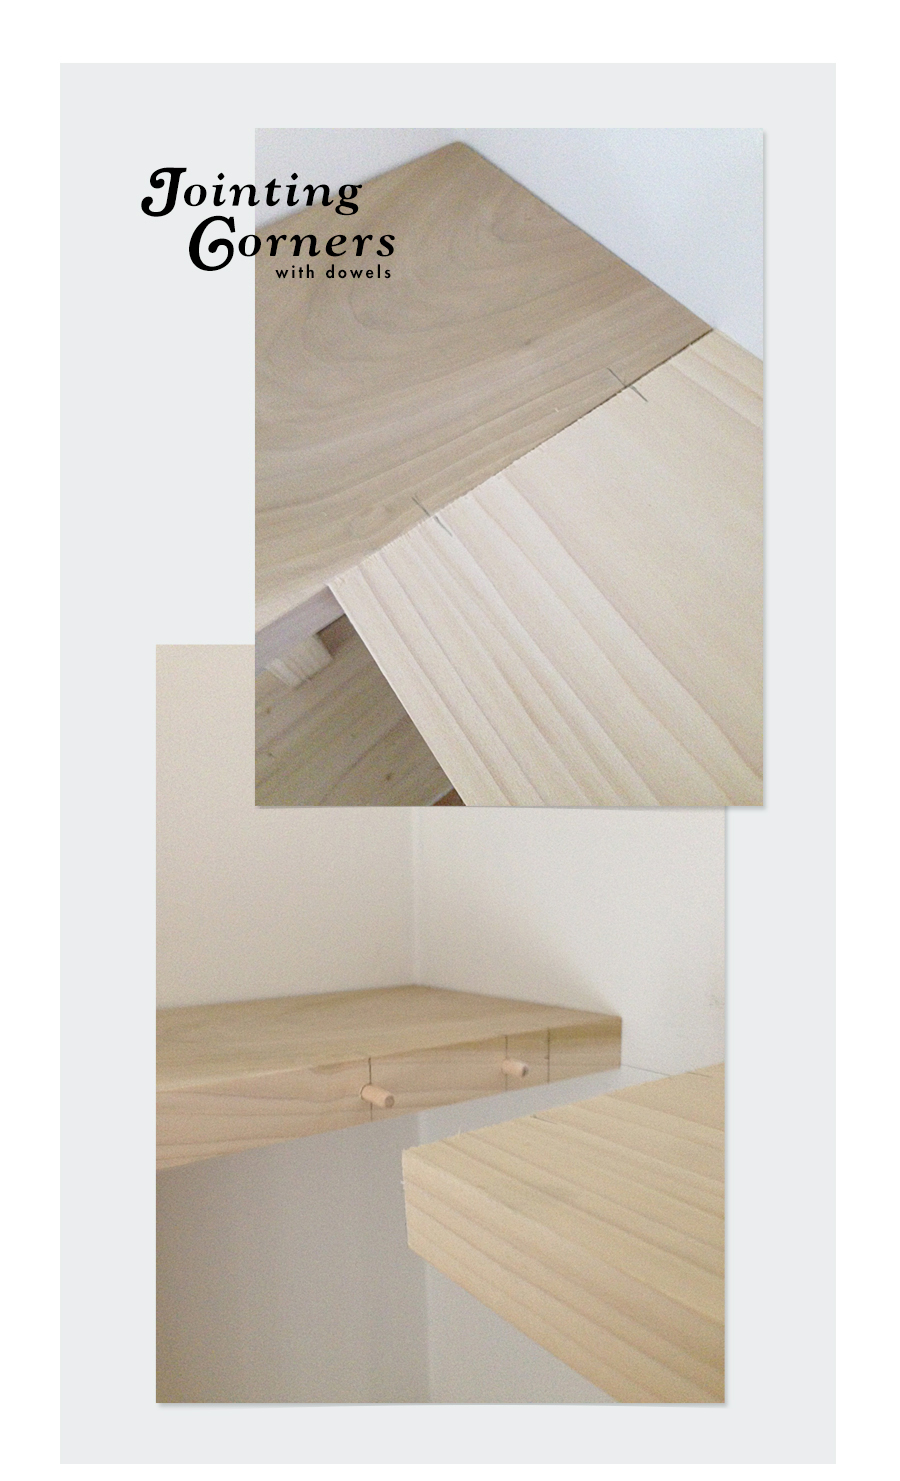
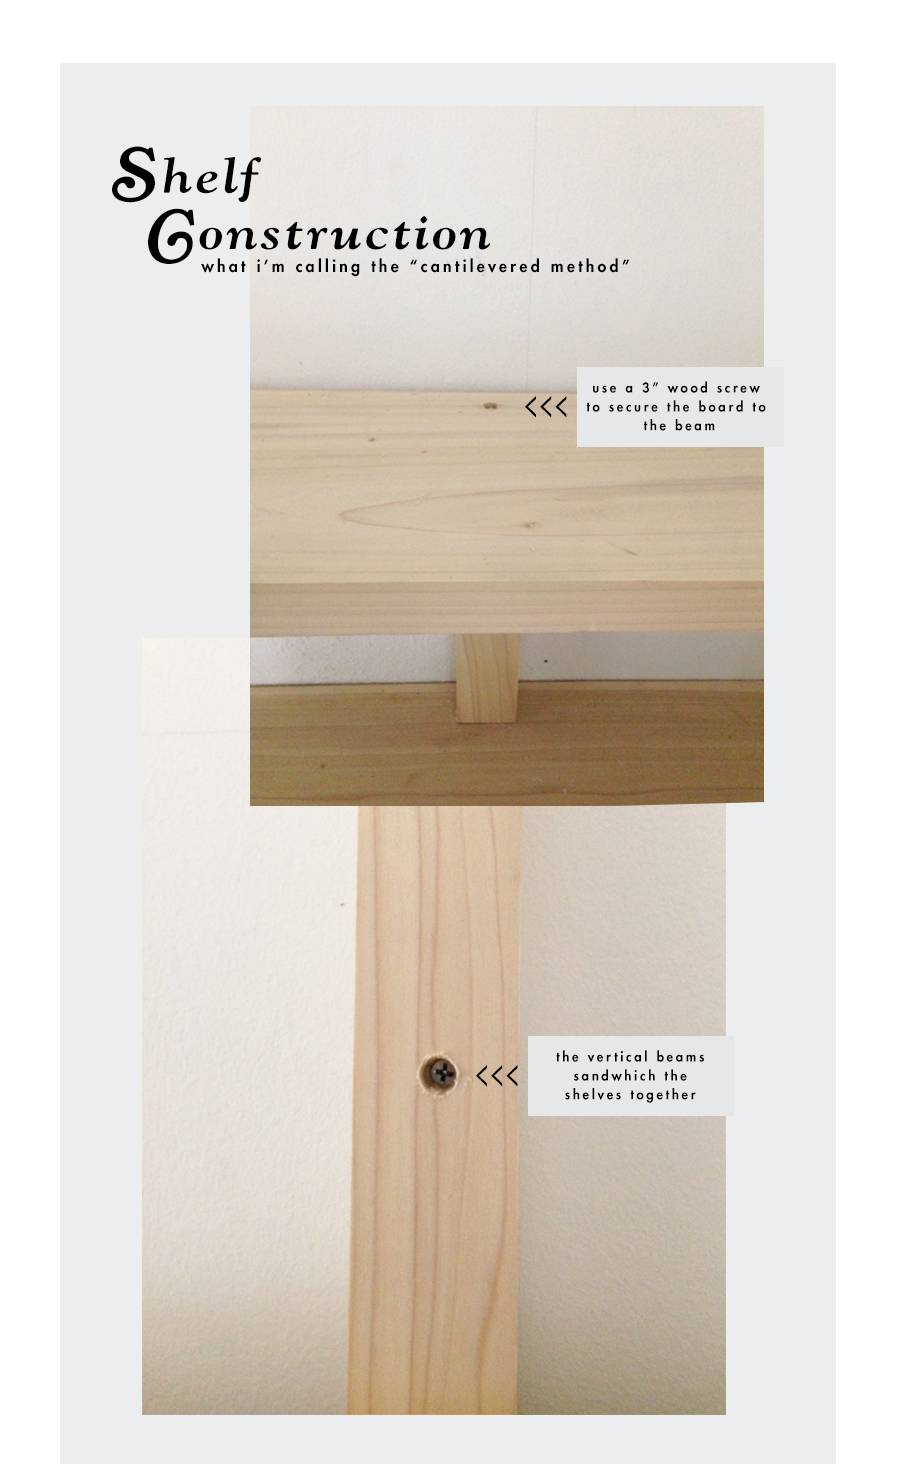
There would be screw holes (which I would expertly sync and fill in with wood plugs), and there would be what I’m referring to as “cantilevered boards” held in place with a screw boring into the vertical beam below while being sandwiched by the vertical beam from above. More on that below. The corner joints were connected with two wood dowels to ensure stability and limit sagging.
I did something kind of crazy and I purchased all of my lumber online. Yep, online. It’s mostly due to the fact that I had been feeling totally out of my league when I try and “talk the talk” to the pros at the retail stores. Even if those “pros” are just pimply faced teens at the Home Depot, they still act like I have no idea what I am talking about. I’m sure part of that has to do with being a woman and bros not taking me seriously when I show up looking for lumber or salvage or whatever, especially when I come in with two young kids in tow. I guess I could just not let it bother me, but it does and I’m not good at feeling uncomfortable with people. So I decide to do the brave thing and order anonymously on the old internet. And guess what? It worked like a charm.
Here’s what I ordered from Baird Brothers Lumber:
2 – 2×2 Poplar Length: 4 Foot Length
1 – 1-1/16″ x 7-1/2″ Poplar Length: 5 Foot Length
4 – 1-1/16″ x 7-1/2″ Poplar Length: 6 Foot Length
1 – 1-1/16″ x 11-1/2″ Poplar Length: 4 Foot Length
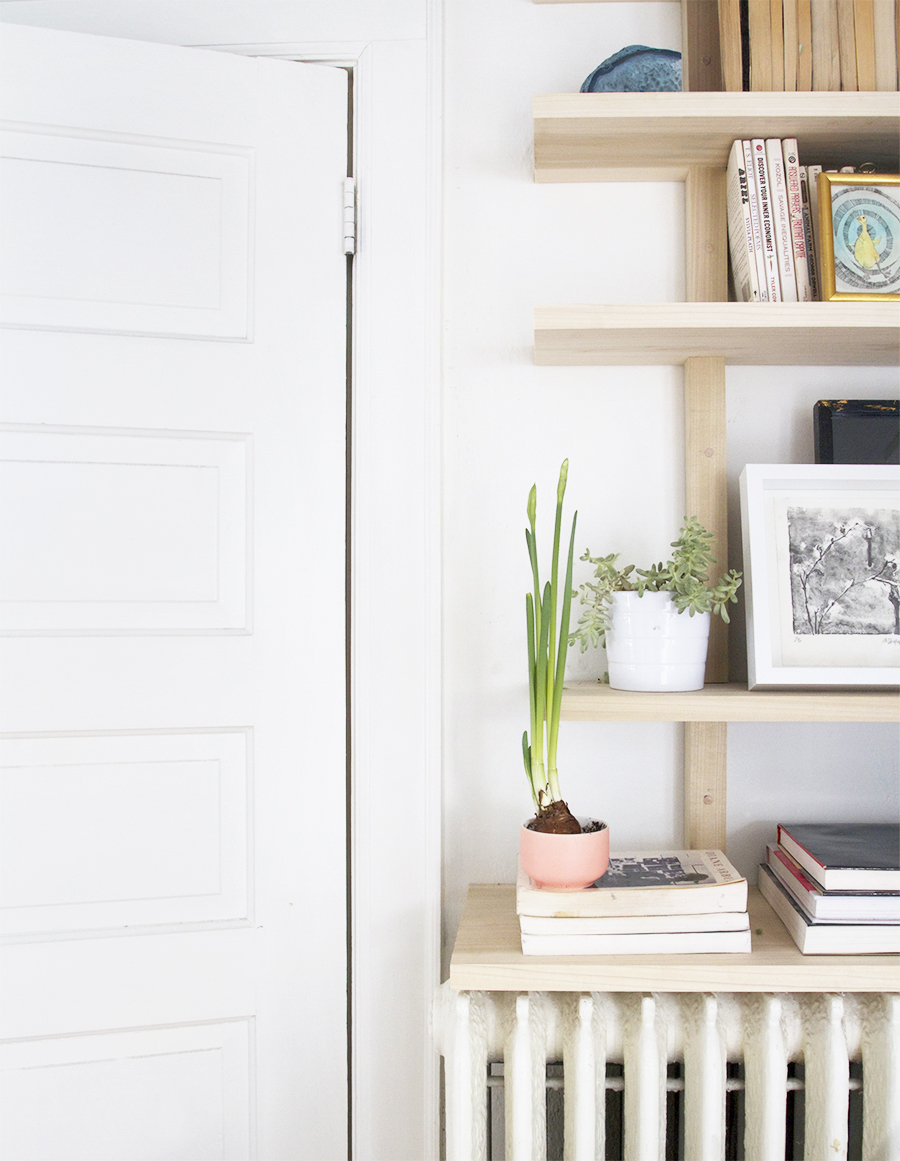
This photo makes it feel a tiny bit lop sided but that’s just because all of that stuff on top of my dresser hasn’t been hung on the wall and such. It will get more balanced soonish. Promise.
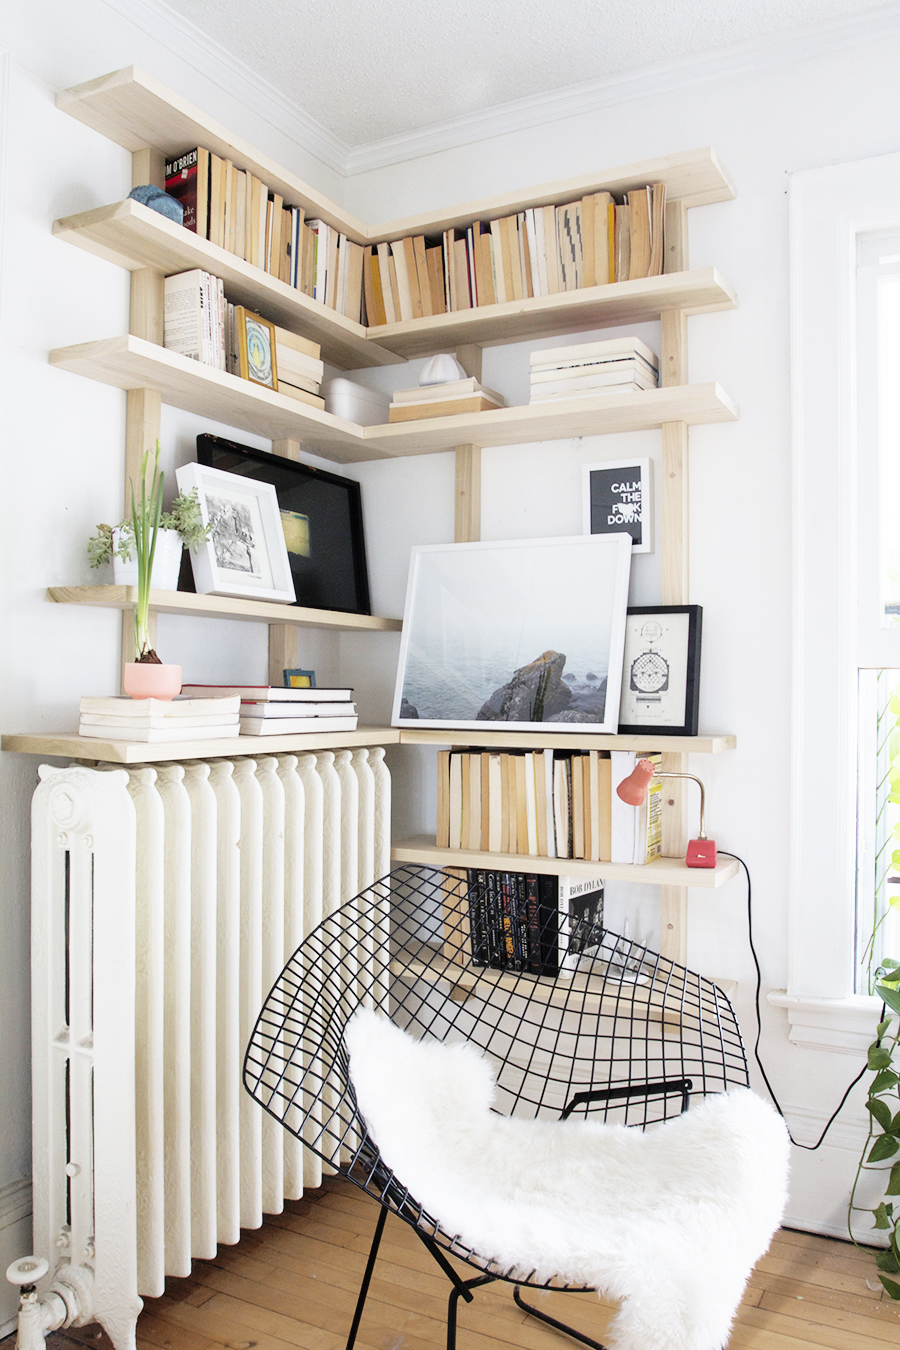
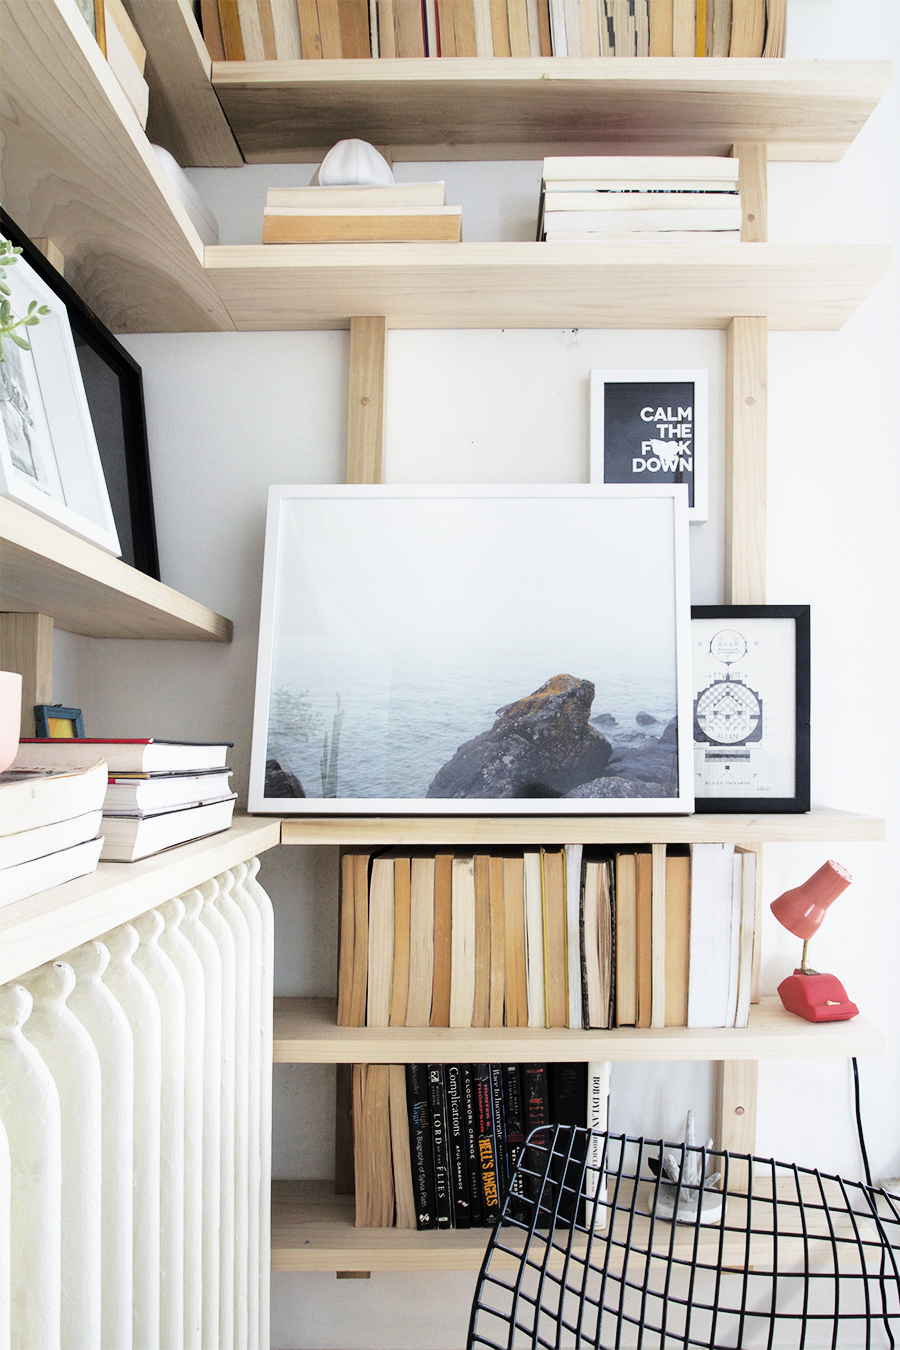
Like I mentioned in a post from last week, I wanted to go monochromatic in my shelf styling. I turned the spines of a lot of the books around so they butted up against the wall showing their yellowing aging pages. Part of my design included leaving the top two shelves for paper backs. I had envisioned these shelves full of books sitting vertically, all perfectly tucked in tight. The middle shelves were meant to showcase artwork and small vignettes of vessels, plants and horizontal larger books. The bottom shelves are slightly larger in height then the top shelves allowing for our larger hardcover and paperback books. Plans man, they work!
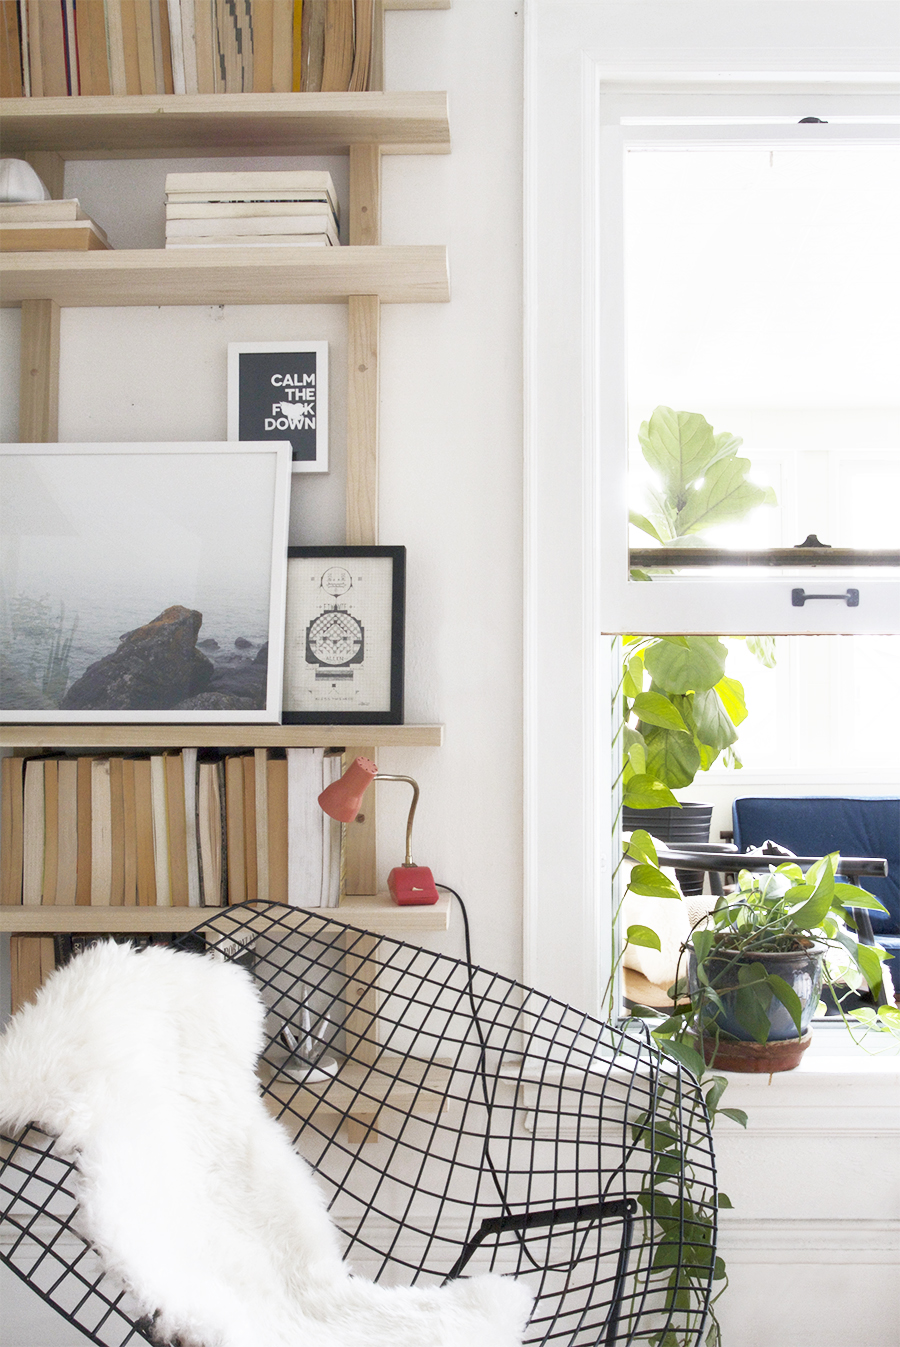
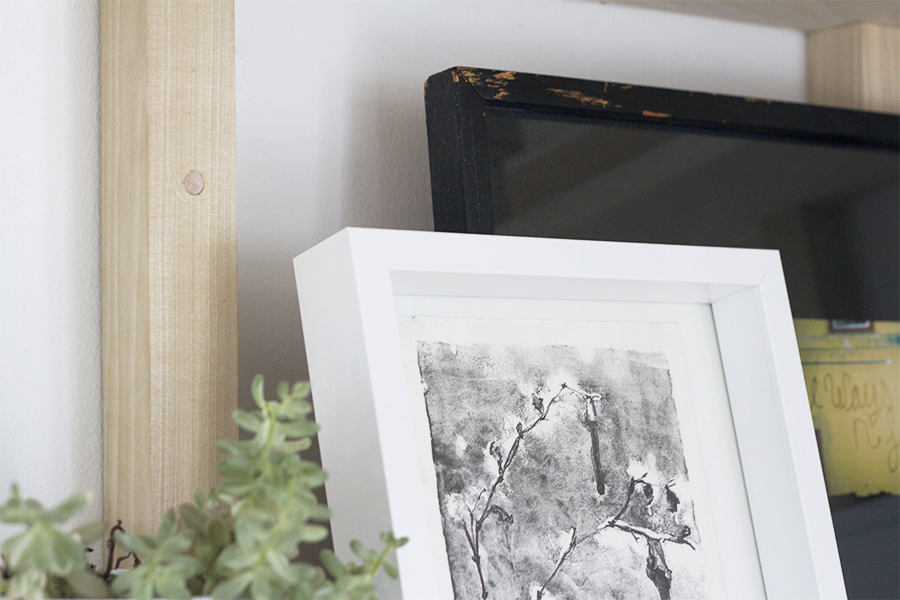
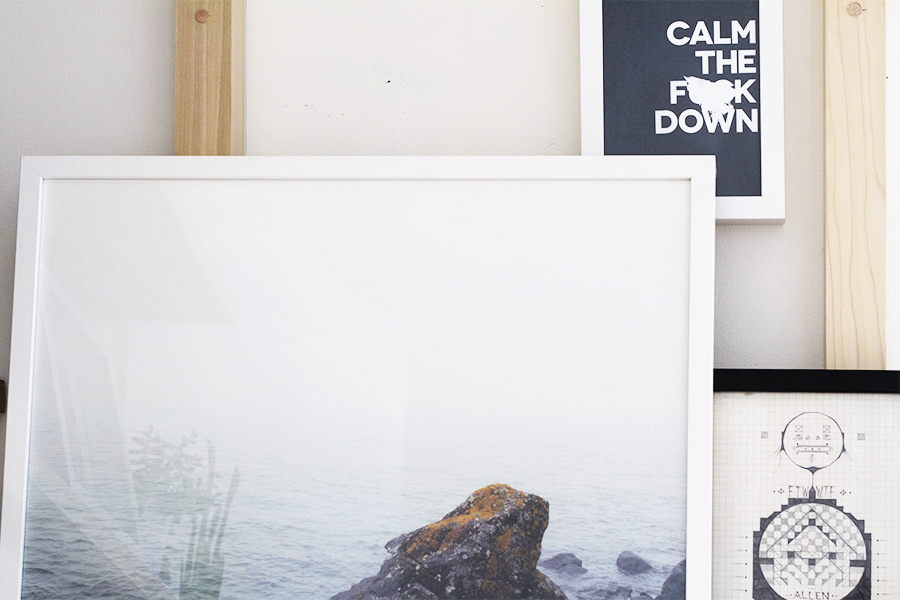
I included a framed photo made by my pal Aaron Anderson and a print made in college by my bff Matt Scharenbroich. Last weekend I grabbed this amazing photo from Courtney Reints at the MCAD art sale (represent!) and behind it I tucked in my 45 Wall Design inspirational tiny poster, also back there is our family crest, also lovingly made by Aaron Anderson.
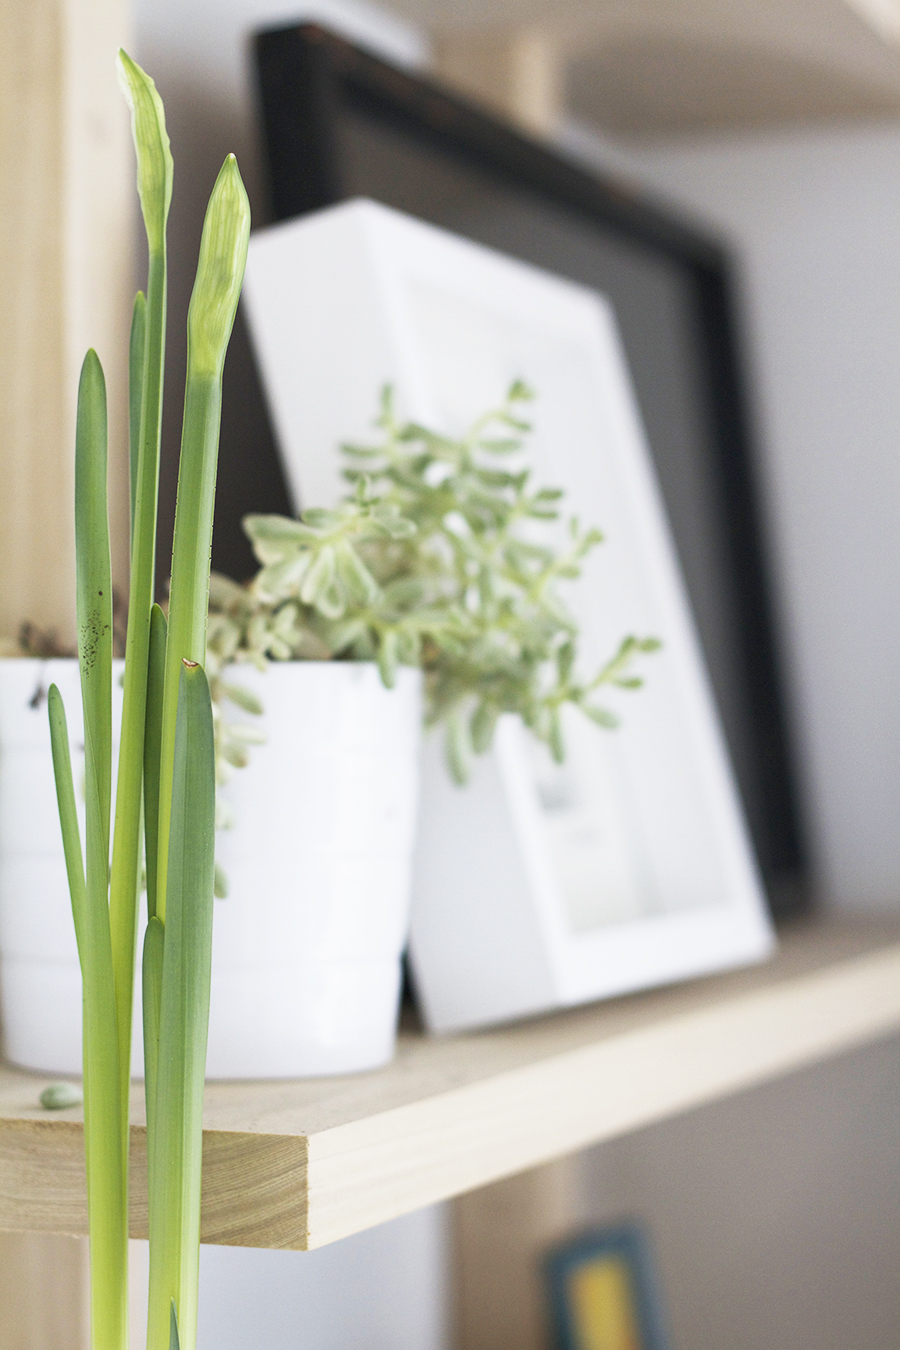
Here’s a funny joke for you guys, since I took these photos 10 days ago, that succulent has totally gone on to meet the big cacti in the sky. Why do succulents hate me?


magnifique et très belle et bonne idée !
Merci!
Cactus probably hate you because you expect them to live with no light and far from a window, when they require lots of direct sun from a West or Southern exposure (over 6 hrs a day). Treat them right with; a windowsill location, a southern or western facing window, warm dry house, cold nights but not freezing, and water once a month from Oct-Mar. It’s ok to treat house plants like cut flowers and send them to the big compost in the sky when they start to peter. Just be clear about your relationship, don’t get attached…
So impressed with your carpentry skills and shelves look sooo good! I especially love the shot with your plants in the background and blue sofa-gorgeous!
Thanks Wendy! Our sunroom is what you see in the background and I really like how it’s relating to our bedroom space now that everything is getting spiffed up!
I don’t think that the succulent hated you, I think it was just that succulent’s “time.” Nice shelves Scoops!
I agree! That succulent had it coming.
Long time reader (back from the kitchen reno) first time commenter! I have to admit I have been irrationally excited for this post, love the shelves, your inspiration, and your interpretation. And I could not wait to see how you did it. I am a wanna-be carpenter too, and I know exactly what you mean about trying to shop for wood. But honestly, if you watch “This Old House” you probably know more than they do, and they are just too dumb to comprehend sentences with more than 3 words in them. Anyway, awesome workaround! Did you have any issues with the quality of any of the wood?
Hey Helen, sorry it took me so long to respond. Yes, so glad to meet another carpenter wanna-be (and an TOH fan too)! I honestly think I would like to learn carpentry or some other trade after I get my kids all in school.
The lumber was all great, super pristine, nicely sanded and straight. I’d order online again in a heartbeat.
Great shelves and I love the styling too. You’re inspirational!
Awh, thank you so much Rosie!
These are pretty awesome shelves and I love your styling of them, too. I can hardly believe that’s the same space as before. I always appreciate how you work around and incorporate what’s already there (i.e. the heater). Great stuff.
Hey, thanks so much Jennifer. It always takes a bit of brainstorming but I’m a big believer in the work with what you’ve got method of living in an old house. It’s really nice to hear you think I was successful at it :)
The shelves look amazing, totally amazing. I feel the same way when purchasing lumber from big box stores, especially in work attire and heeled boots or what have you. And then I feel so silly if I have to ask a question about the best resin for a project, etc. Love your writing style!
Thanks so much Morgan, I don’t think of myself as a very grammatically correct writer and sometimes I’m not sure of my voice is coming through, it’s really nice to hear that you get it!
Yes!, I hate that I am self conscious of being a lady and asking questions at stores like the Home Depot and letting those “pros” get the best of me. I need to get over that. However, I really like my local hardware store – I shop there enough that the employees all know who I am, and that I capable – I only wish they sold lumber and tile too.
Love, love, love this. Utilizes ALL the extra space in a room and leaves more wall space towards the middle of rooms for pictures or whatever you choose. Awesome post and amazing work.
Cheers,
Victoria
Thanks so much Victoria!
Love the shelves, I have sent a link to my husband to see these and plan to copy them! We are working on our library/homeschool room and these are perfect for what we need. We have just recently torn down an old barn and plan to plane the wood to use in the room. The references to Trading Spaces made me smile, I was addicted to the show and still have all the books that they printed!
Hi! I love this design and have lots of questions because I would love to do something similar! 1. Did you put the vertical beams into studs in the wall or anchor? 2. Did you put the whole thing together first and then mount to the wall, or did you do layer by layer? 3. If you did layer by layer, did you have to put together the corner joints first and create and L-shaped shelf and then connect it all to the vertical beams? 4. Also, if you installed the shelves layer by layer, did you start at the top or bottom? 5. How deep are the shelves (7.5″ on one side and 115″ on the other?), and 6. How did you fill in the screw holes on the vertical beams?
Thank you!
Hey Laura, It’s been awhile, but I will try and answer all of your questions.
1 – I put some of the vertical pieces into the studs, and where it didn’t work I used metal wall anchors.
2 – I assembled and cut pieces layer by layer
3 & 4 – I started at the bottom, put a layer of vertical beams in and then fit the corner pieces.
5 – Yep!
6 – I used maple plug hole fillers. Use a countersink bit for the holes, this allows the screws to be recessed, then you can fill the holes with wooden plugs.
GREAT idea. I have been searching for weeks on how to add inexpensive (Baird’s NOT) shelves to my living space to hold books DVDs and electronics and doodads: a tall order which your system fills elegantly. I DID do some DIY woodworking when I was younger; I learned something new everyday,it never got old, and it was always rewarding, even when it degenerated into wood-butchery. There are doweling jigs – both cheap and expensive – that will help immensely with doweling. Doweling is way cool. I am going to do the shelves around an OUTSIDE corner, and this design is just what I need. I will probably use pine dimension lumber from HD and have them cut the shelf pieces for me – though I can’t really recommend this as the shelves will probably warp. Here is an idea for people who like to invent: use pocket-hole joinery to join the up-rights to studs and use plugs of contrasting color to create a design/decorative feature.?? Thanks again for a most useful (and entertaining) article. The photos are marvelously informative.
Thinking about doing shelves over a radiator heater just like you have done here, but have been concerned that it could be a fire hazard with wood directly over it. Curious if you’ve had any concerns about this too?
Late to the game on this one, but I love this design and am thinking about giving it a try myself. My one concern looking at it is that it seems like the vertical beam against the wall wouldn’t provide enough support to hold up an entire shelf of books! The horizontal shelves are not screwed into the wall or anything else, right? Am I completely wrong about the vertical supports not being enough?
Thank you!
This is so cool! And straight forward, I appreciate your humor too.
I like how adaptable the design is, I think I already have a few applications in mind for over the desk shelves and a floating nightstand alternative.
Thanks!
Also, is there a name for this style of shelf that has the verities logo supports like this?
Corner shelf ideas are really great!! We installed two of these shelves over a radiator heater and so far no problems. while reading some blogs I had found some tips to improve our indoors please have a look if interested : https://www.heatherhomes.in/tips-to-improve-indoor-air-quality-at-your-home/