


Hey Guys, I’m here to report back to you about the Trendig chair.
Before I dive into that though, I want to let you guys know that it has been a stressful few days of being a blog writer. It all started Sunday with a new site design update – something that should have only taken a few hours turned into a huge mess due to things that were out of my control. The whole ordeal left me with a sick stomach and few sleepless nights. Luckily, my wordpress theme (thesis) has a great support staff and they have been working tirelessly getting things back in order – it’s still not 100% but should be there soon. If you notice any downtime, this is why. Hopefully, once things are stable I can actually roll out the new site design.
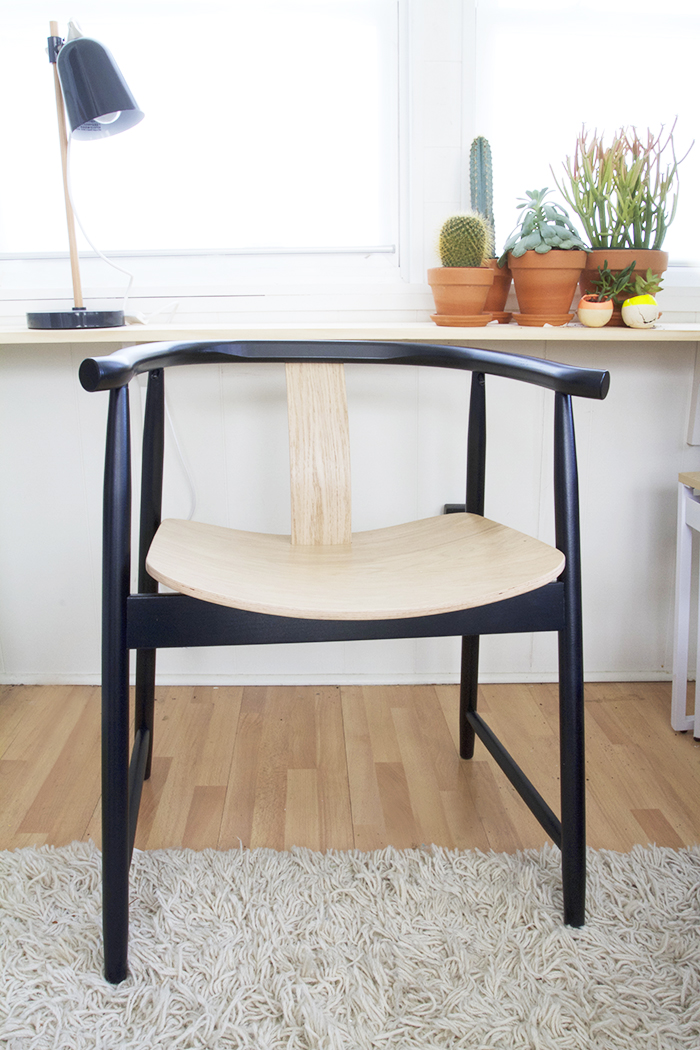
So you may remember that a few weeks ago I purchased the Trendig chair from Ikea for the sunroom. I am totally in love with the design. It’s very reminiscent of the Hans Wegner wishbone chair, a chair I have always admired. I love the curved arms and the bentwood back of the Trendig chair, and adore the combination of black painted arms and light wood (it also looks great in red and white too), but was so disappointed and frustrated when I started assembling it.
I would consider myself an Ikea aficionado. I can get in and out of that store in a matter of minutes, I know where everything is, and furniture assembly comes naturally. This chair was another story – it was by far the worst experience I have ever had assembling any flat packed item, ever. I can’t imagine putting together six chairs for a dining room table – it would be hell.

The first big problem I encountered was with the seat. The instructions required you to attach four screws to a bracket illustrating that they should only be sunk into the frame a few screw turns – I think the idea is to allow flexibility for attaching the seat. The next step was to use four small screws to attach the bentwood seat to the bracket. The seat came with threaded female couplers for easy assembly, but it is anything but easy. It was nearly impossible to get all four screws attached to the seat. If the screws had been 1/16 of an inch longer it would’ve helped immensely. Fourty-five minutes later, and a lot of really good swear word combinations, the seat was finally attached. Now I had to finish sinking the screws that I was instructed to only screw a few turns in the previous step to the underside of the chair. It was impossible. The holes for the screws were obviously only pre-drilled shallowly and after attaching the seat you couldn’t easily access the screws with a screwdriver because of the bentwood base obstruction access.
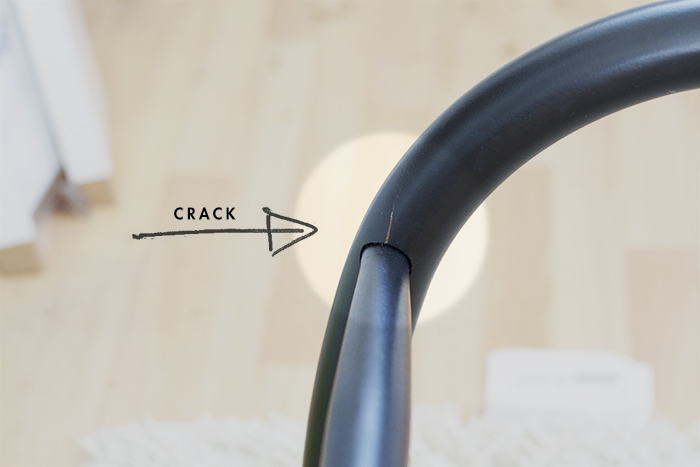
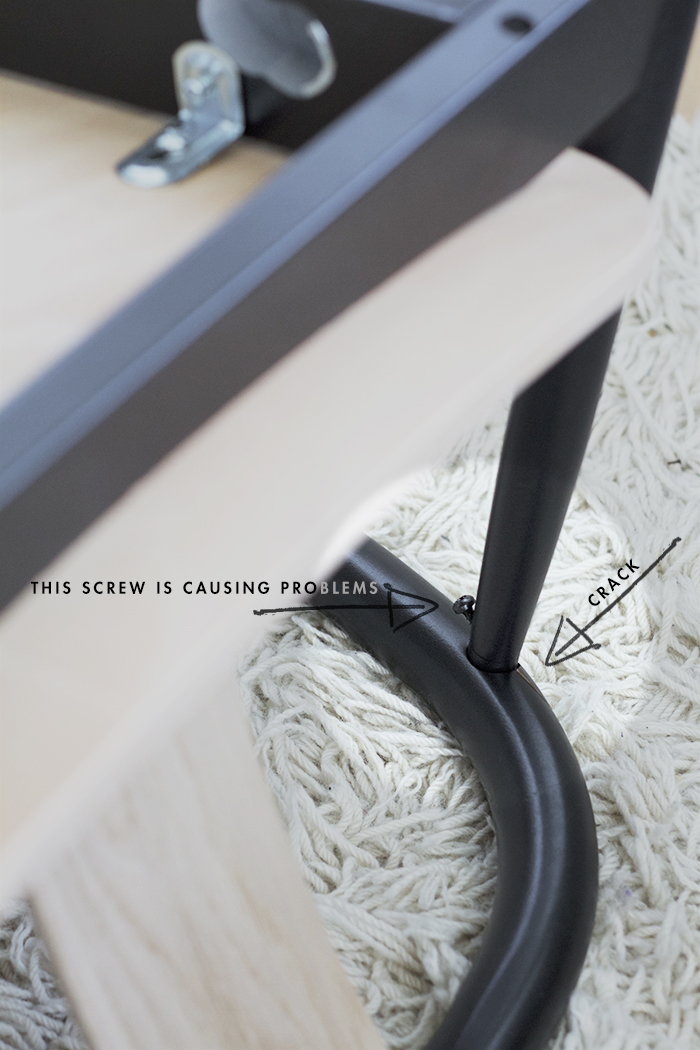
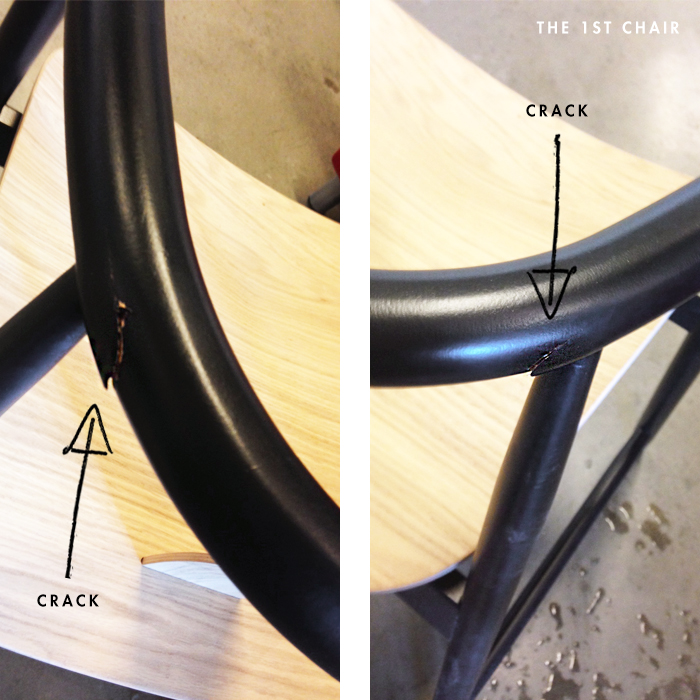
After taking a deep breath and feeling like I semi-succeeded with the chair seat, it came time to put the rest of the chair together. It was no biggie really, all the holes were predrilled and everything was going together easily. That is until I got to the final two screws that were to attach the curved arm rest to the rest of the chair. I made sure to line everything up properly, made sure that the predrilled holes were perfectly matched up, made sure to put of pressure on the chair as I drilled as per the instructions. I began to attach the chair together using the provided screws when CRACK, the wood split. I took a deep breath, backed the screw out and proceed with the final screw. CRACK, again the wood split – on both sides. Ugh, I could cry
I took the chair back to Ikea the next day to return it – I spoke with one of Ikeas builders, a guy who does this for a living, and he said I did everything exactly right, and couldn’t think of a reason why this chair gave me such a hard time. I decided to give it another go, because I did adore the look of it, the size of it, and I think it’s really comfortable.
So, I replaced the chair, brought the new one home and began assembly. Would you believe I ran into all the exact same problems again, even when being super aware of doing everything exactly by the book. The curved arms split again, only this time I stopped sinking the screw the second I heard the wood crack. I was going very slowly so it wasn’t a noticeable crack. I was confronted with a choice of “What would piss you off more” sinking the screws and cracking the arms, or letting the screws poke out a little bit? I didn’t want to take another trip back to Ikea so I decided to cover the screws with a sheepskin, but I am not happy about it. In the end, I decided to keep the chair, it looks good in the space, and I can’t do much better for the price.
On a side note, I ran through Ikea today to grab a few things and noticed four chairs in the as-is section. All had cracks in the arm, but $50 bucks a chair ain’t too bad a price.
Hope to see you guys on the flippity flop real soon. If posts are sparse it’s all because there is a lot of hard work being done to make this site run properly. I’ll be hoarding blog posts in the interim.


Oh, this is so disappointing! Such a beautiful chair, I’d had my eye on it too. Thanks for the update!
Hey Kimberly, It was disappointing – I wish there was some sort of trick, but I couldn’t figure it out.
So did you grab the as-is chairs? I could probably live with the cracks if the hassle of assembling the chair was already out of the way. Although, all the defects make me question how sturdy the chair is.
Hey Maeve,
No, I did not grab the as-is chairs. When I visited Ikea yesterday (when I wrote the post) I had already assembled the second chair, otherwise I would have. It still seems sturdy to me, but I don’t know how it would last as a dining room chair. We will only be sitting in ours once in awhile, not three times a day.
Holy. Moly. I would’ve cried. Sad but true. I applaud you for not crying. But if you did and didn’t tell us, I give you a virtual hug. Oh wait, virtual hugs regardless because chair stresses and blog stresses are no fun when this should all be fun anyways! Chin up buttercup!
Caroline, Just tonight my blog got fixed and I was able to update it with all the new design bells and whistles. Yes, I totally cried, and puked, I was just sick over it. I am beyond relieved that it is back, now I just have to hope that nothing else bad happens to it for at least a year. Fingers crossed.
Scoops, the site looks awesome! Loving the color scheme and the simple, yet elegant layout!
Thanks Roonz! I’m glad you think it looks cool, I’m loving too!
Scoops. You did it. The blog looks SO GOOD!!!! This chair sucks.
Colz! That chair is lame, but whatever. Thank you for your blog feedback while I was designing it, that helped a lot!
OMGosh, so it’s not just me. I just drew blood on my pinkie finger knuckle trying to get the chair’s seat to align to the horribly placed holes. I even had my 7 year old sitting on the seat trying to add pressure to get the holes to align. Alas, only 1 more screw to go. Wow, this is a lot of work for an awesome chair. Still not done but 3/4 of the way there. Wish me luck!
We are having very similar problems assembling our Trendig chair. Rather than sweat and swear for 45 minutes, I’m planning on buying longer screws from the hardware store and re-drilling the short holes.
That’s a pretty logical idea. I just battled it instead, I wish I would’ve been able to take a second and make that hardware trip. Good luck!