


Hey Guys! I’ve been drooling over the lamps at One Forty Three for what seems like years now, and every pic I see come through my pinterest feed featuring a swing arm lamp I automatically pin. I’ve just been waiting one to add one to the almost-finished-basement, and then I saw a recent ASK This Old House episode where they walk you through re-wiring an old lantern into a electrified lamp. Obviously, I wasn’t going to be electrifying any lanterns, but I realized that the basic technique could be applied to any lamp easily. All of a sudden electricity wasn’t so scary.
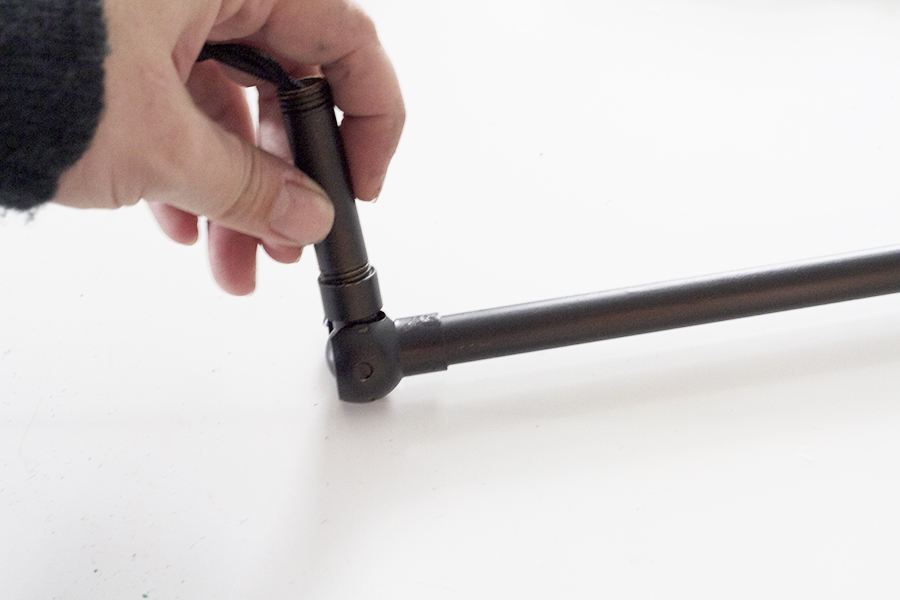
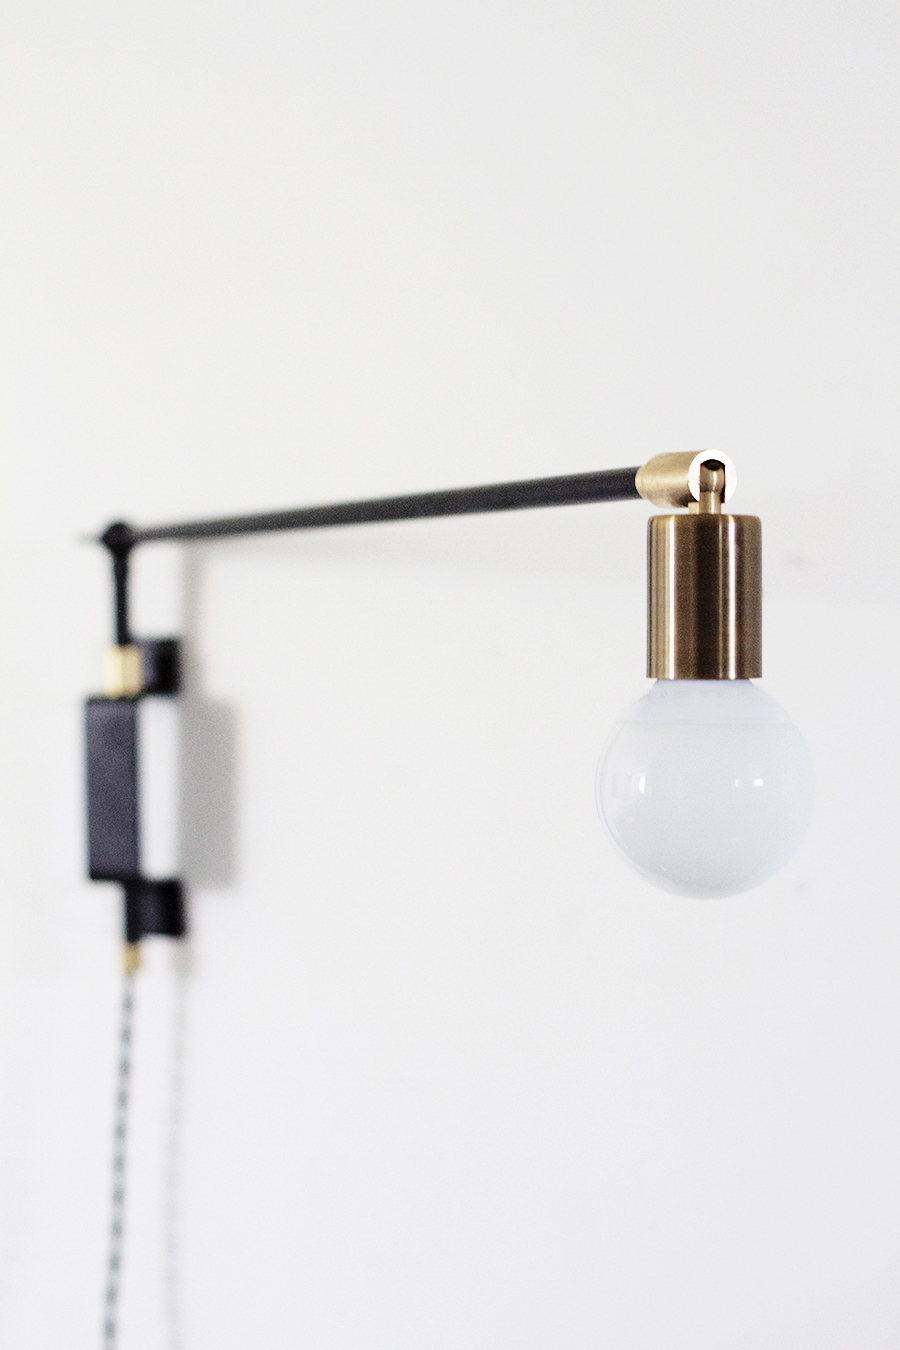
After snooping around the internet a little bit, I was able to find this site: Grand Brass Lamp Parts, the site looks like it was made in 1998, so I was a little hesitant, but I began looking around and quickly realized all the parts I needed to make a pretty cool looking swing arm lamp were right at my finger tips. Granted, the look I admire often features some bent tubing which really speaks to that clean, modern, look, I didn’t have a tube bender and I opted to use a simple wing nut toggle to achieve my angles. I actually really like the look, even though it would have not been my preferred method originally.
Anyway, I wanted to share this with you guys, because making a lamp is fun and it costs half the price of buying online. Plus, the possibilities seem endless. I can easily see adding a telescoping feature to a swing arm lamp, OR make a string of lights, OR creating a sweet pendant, OR making a bad ass ceiling fixture. Endless. Possibilites.

Total = $56.46

Tip: When painting tubing, use a 3″ screw drilled into a sturdy board (seen here). Sink the screw about 1/2″ deep and then rest the tubes on the screws. This way you don’t have to worry about the tubes rolling around and ruining the paint job.
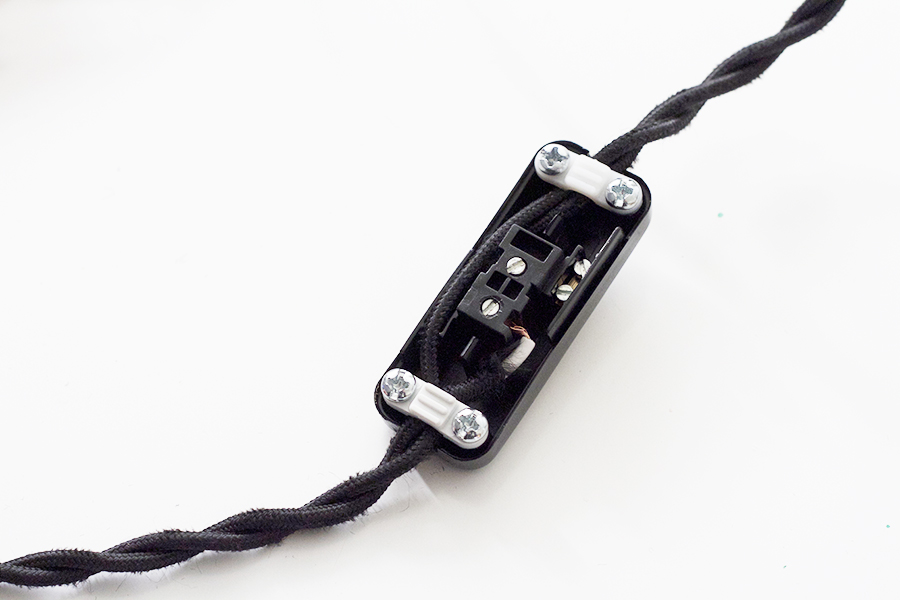
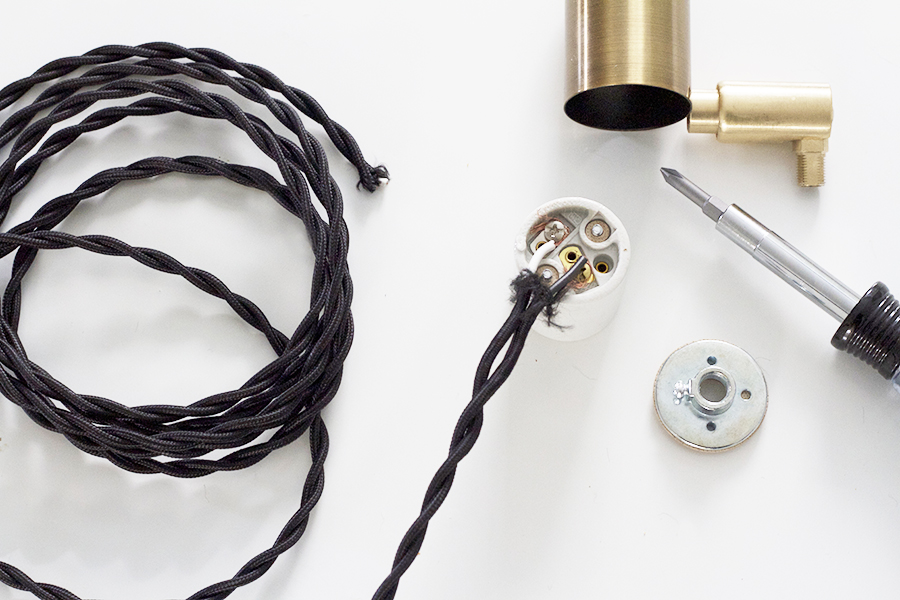
Now you’re ready to add the toggle switch. Cut one of the wires and lay it inside the toggle housing.
Tip: When drilling the bar (piece 5), use clamps to hold it down so it doesn’t jump around (seen here).
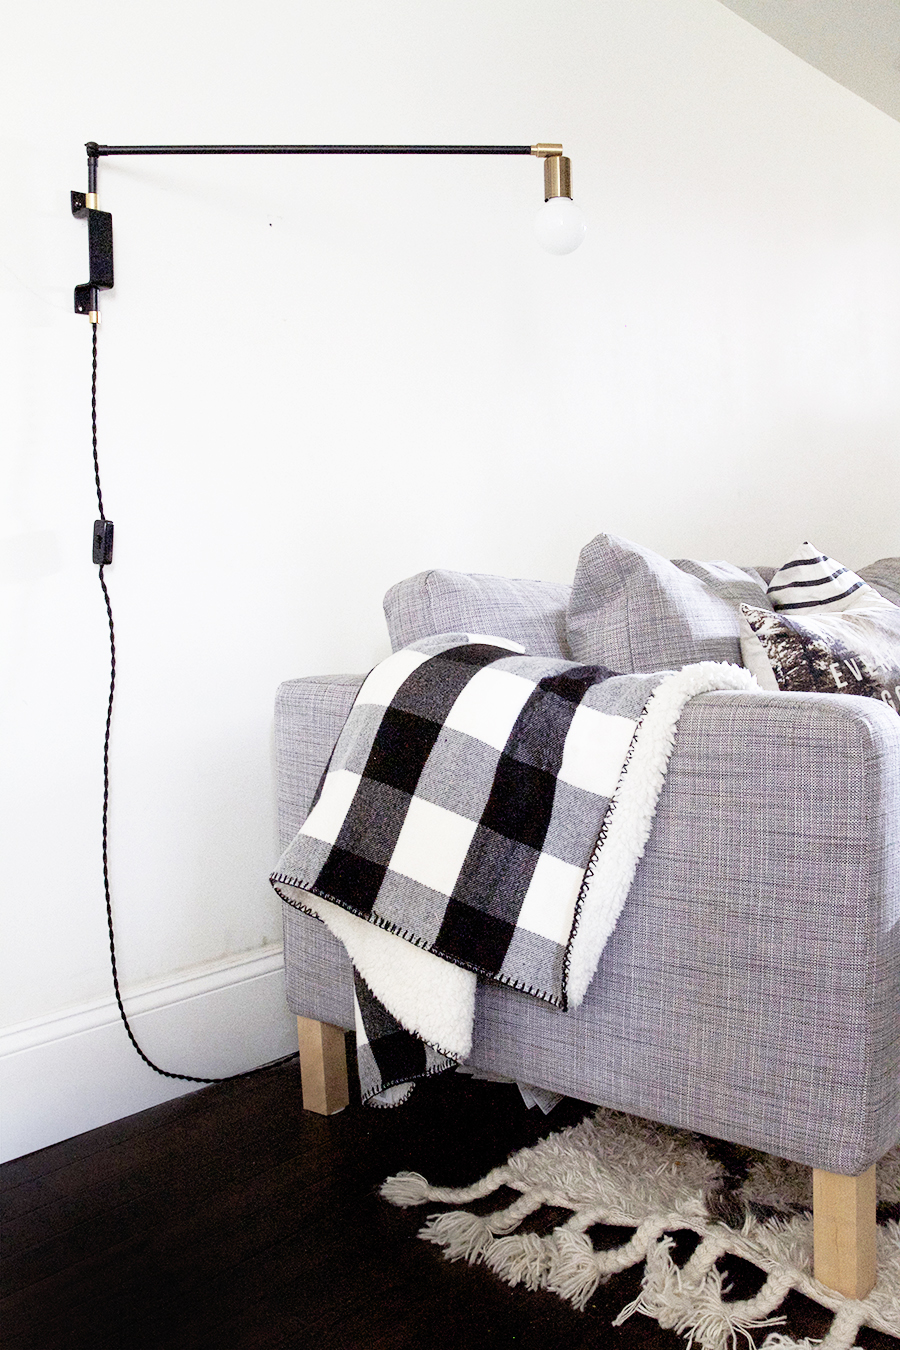
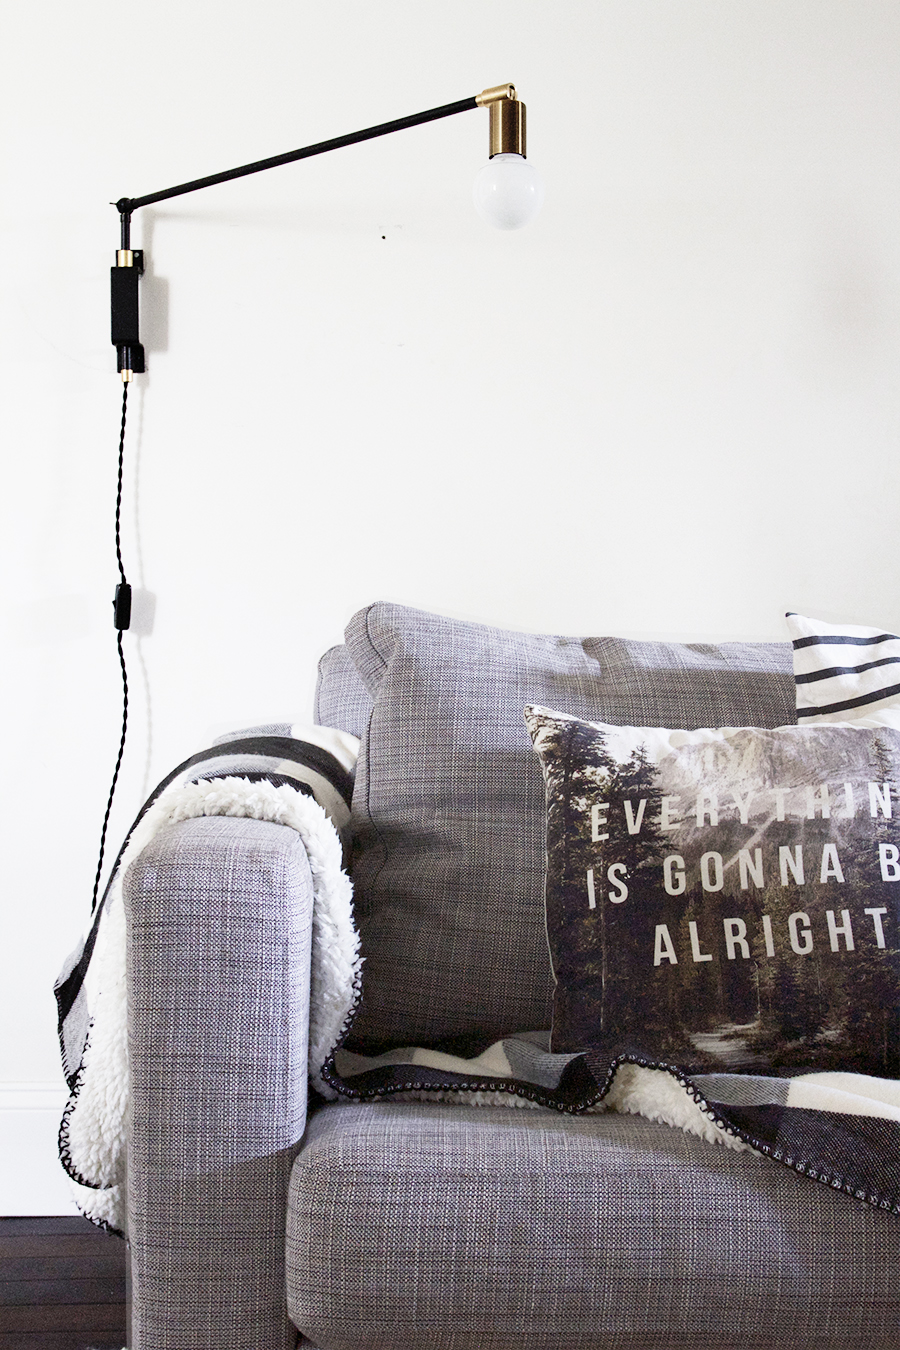
That’s it you guys. It’s so easy. I’m already scheming for my next lighting project. You know there will be more!


OMG you read my mind. I was just searching for new bedside lamps that don’t require a nightstand. Do you think the finished product could be adhered to an ikea malm bedframe with command strips or gorilla glue? Or is it very heavy?
I think it would be possible to attach it to the bed, but you would need something more heavy duty than gorrilla glue or command strips. The lamp weights a decent amount and is a bit top heavy. What if you used anchors and screws to attach it? I’ve used anchors with MDF Ikea furniture lots of times.
Yay, I found it! This is great! Thanks!
This is great! I just made a pendant lamp using a geometric metal decor piece that I attached a bulb to and it was surprisingly easy! This is a little more advanced but after doing the pendant lamp I am not so scared of lighting anymore!
Oh my gosh you are so awesome and such a stud (in a feminine way)! You just do things that I only think about but never actually do! Congrats on making that awesome lamp! PS – I have been eyeing that swing arm lamp from One Forty Three for a while now for my daughters room.
This is great. Let’s face it, all those bent tube ones are homages to Prouvé’s Potence light. Through necessity you’ve created something more original, and it doesn’t look like a hack at all… webshop? : )
Wow! You are such an inspiration! I’ve been coveting their string lights forever! It seems like string lights might be a little more overwhelming, though – I can’t get my head around how to get all those sockets on one cord. Maybe I’ll channel your can do attitude and figure it out! ;)
This is great! Where’d you source the two brass pieces (24″ tube & coupler) that aren’t linked above? Were they found locally in MSP? Thanks!
Hey Josh, just updated the post with links to those items. Don’t know how I happened to miss those, thanks for letting me know!
Rad, thanks!
You may want to mention something about the polarity. Unless you don’t care about safety and are fine with teaching people how to hurt themselves and loved ones. I’m CHAD Muh Muh Muh Muppet. CHAD CHAD CHAD!!!
Love these! Was there any issue with getting the spray paint on the threads? Just curious if you taped those off before painting.
Thanks!
I just went for it, the spray paint coats were light enough that it didn’t have an effect. Good luck, and let me know if you have any other questions.
Thanks so much for this post! This was super informative as a way to help my design clients same a little more (sometimes WAY more) money on nice lighting for their home.
Thanks so much for this post! This was super informative as a way to help my design clients same a little more (sometimes WAY more) money on nice lighting for their home.
Great post! Dumb question though, what mechanism is actually doing the swing action? Is the brass pipe just spinning within the close bar holder? Thanks!
OMG this looks amazing! Nice job! I was looking for a wall sconce idea and I think I can adapt this for a fun little sconce. Thanks!
This is amazing! I’m trying to make a DIY West Elm Orverarching Sconce – https://www.westelm.com/products/mid-century-overarching-wall-sconce-w933/
Do you think it would be possible to make the arm extendable? And to put a drum light on this?