


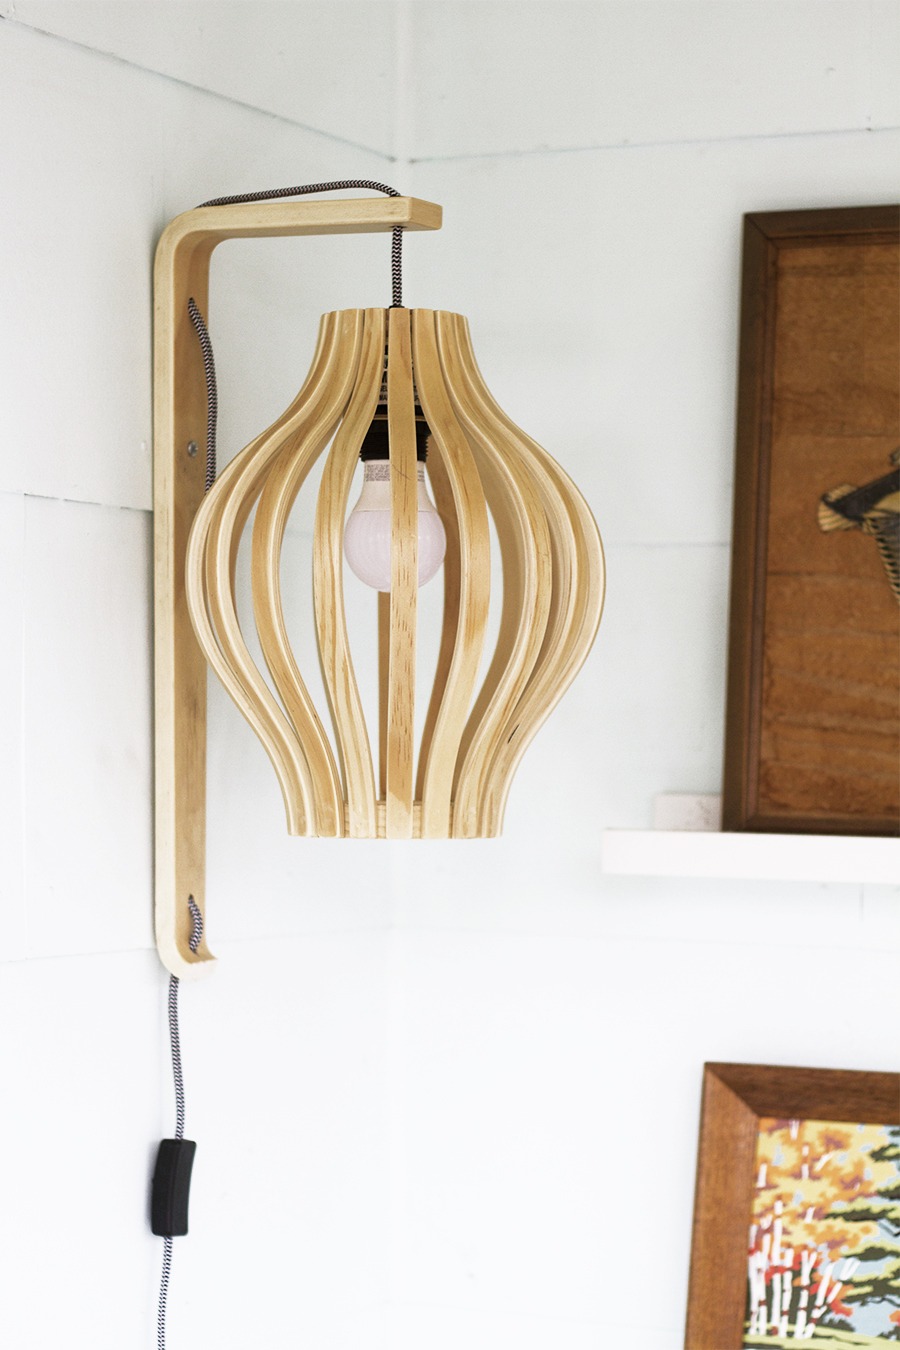
Dudez, ever since I made my first swing arm lamp last year I’ve been kind of obsessed with making my own lighting. I have now made three pieces for my home, and a few for some friends. Over the next couple-a-weeks, I wanted to share with you guys the light fixtures, including a parts list and some brief instructions. I have to say this because “DUR”, but electrify at your own risk, bros. If you don’t know lighting basics – STOP – don’t do this. Please, only use a licensed electrician. I’ve spent a lot of time getting myself familiar with the ins and outs of basic electrical, here are some resources that I referenced from the old innerwebz (I, II, III).
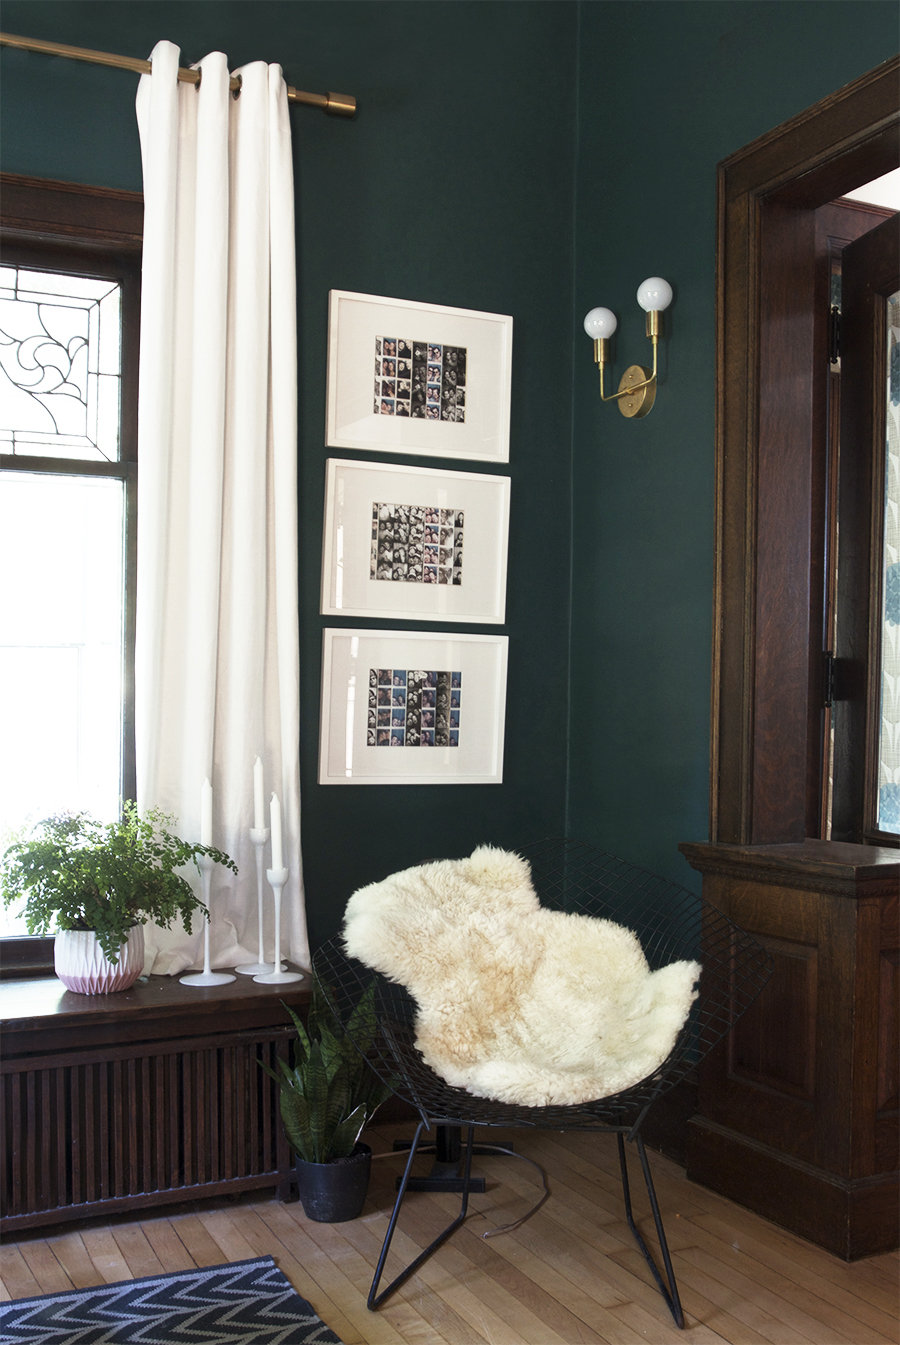
Anywho, let me show off this babe of a double brass sconces that I made for my living room. Psst, I made two of them to go on each side of the living room’s large entry way (!!!) My old sconce lights were dumb, they were the only ones at the store that I could find with an actual switch, which left me with no choice but to buy them and stick them on my walls. See, my house is not fancy and I can not just flip a wall switch to see things at night, I have to actually turn a switch on the sconce. The parts list below includes said switch, if you’re fancy and have a wall switch then you can skip purchasing those parts.
This baby cost me a whopping $45 bucks in supplies from grandbrass.com, pretty tryll wouldn’t you say? I’ll be sharing the other fixtures in the coming weeks, so stop by and see me every once in a while, k?
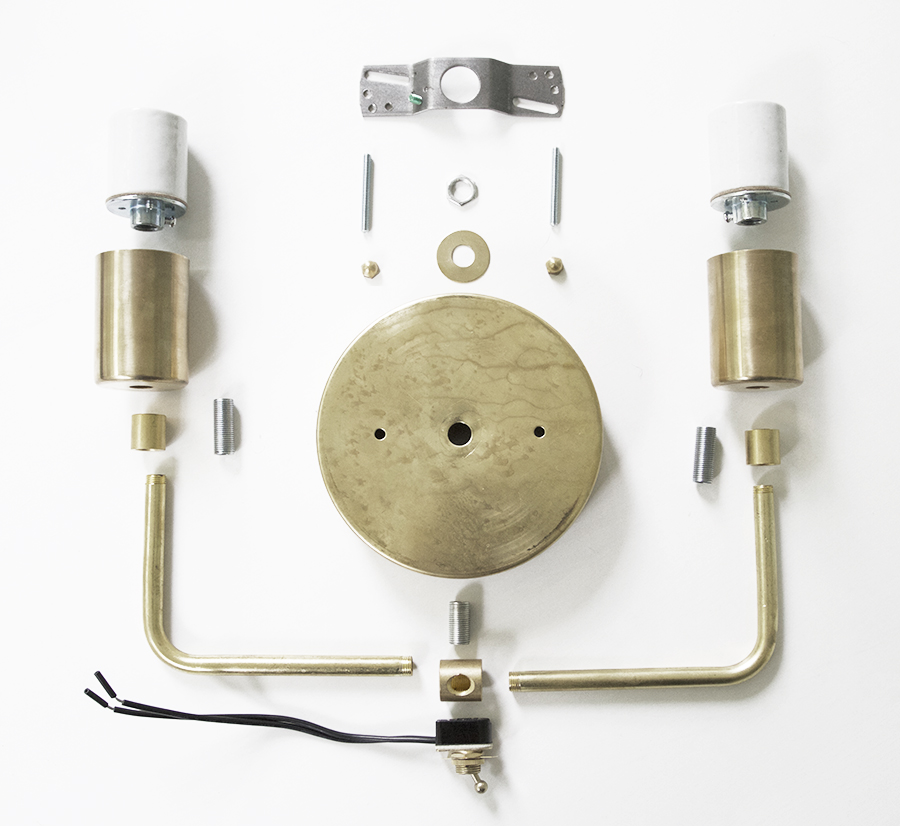
Straight Coupling (2)
Brass Socket Cup (2)
Acorn Cap Nut (2)
Brass Canopy (1)
90 Degree Arm (2)
Threaded Nipple (lolz) (3)
Armback ‘T’ (1)
Brass Washer (1)
Porcelain Socket (2)
Hex Head Nut (1)
Mounting Cross Bar (1)
Bulbs (2)
Toggle Switch (1)
Wire B & W (10 ft)
Ground Wire Strap (2)
- Disassemble the socket and attach the wires
- Reassemble the socket with the wires feeding out the end
- Slide 1 threaded nipple down the wire and attach to the top of the socket
- Slide the brass socket cup down the wire
- Slide 1 straight coupling down the wire — Thread one end of the coupling into the nipple now attached to the socket (sandwiching the cup)
- Carefully slide the 90 degree elbow onto the wire
- Thread the elbow onto the other end of the straight coupling
(repeat these steps for the the other arm)
- Slide the wire from one elbow through the armback ‘T’ and thread the elbow onto the ‘T’
- Repeat step 7 for the other elbow
- Slide a nipple through all 4 wires, thread the nipple onto the ‘T’
- Send the wires through the center hole on the canopy, slide on the grounding wire and attach to the nipple with a washer and hex nut
- Connect the wires from the sconce to the wires in the wall box. Again, if you’re not sure how to do this, contact an electrician
- Use the mounting bracket and acorn nuts to attach the fixture to the wall


looks great against the teal walls!
where did you get that amazing curtain rod? I looked through your archives and I can’t find it. Thanks!
Hey Gloria! You’re right, I never mentioned them. I purchased them over the winter at West Elm. They’re big and brassy ;)
What a beautiful sconce! I have an irrational love for that that little metal switch. (I know you have to cover yourself, but I was happy when I discovered that electrical wiring isn’t actually scary, as long as you remember the number one rule: TURN OFF THE BREAKER.)
Looking forward to seeing the other lights you made!
I know! Understanding basic circuits makes it a lot less intimidating. I still have an irrational fear that I won’t flip the right breaker off, so I always turn off all the power to the entire house.
Whoa, no wiring after dark, I guess. Do you have one of those little handheld no-contact voltage testers? I have one that an electrician recommended, by Klein Tools, that was $15. If the fear isn’t TOO irrational, it might mean less resetting of clocks.
I do have a tester, but part of the reason I just flip them all is because nothing is marked on the box :|
Ooh, yeah, we had that problem, with some labeled but others not. I’ve been marking them as I figure them out, especially since some of them are really unexpected, like, grouped with rooms that aren’t nearby and make no sense. Old house problems!
Beautiful! I wish I could do something like this, but changing lightbulbs is about as electricly advanced as I get.
Did you finish (burnish) the brass before you made this fixture? I’m just wondering what will happen to the unfinished brass over time. Thanks!
It will turn brown overtime. a clear urethane coating would preserve the current look from oxidization.
Where do you buy your parts?
My wife and I really dig the DIY lighting you’ve made. We’re looking to make our own options but I’m having issues accessing the specific parts from the links provided in the post. Any chance you could email the instructions/links to see if that works??
Really motivated to curate our next house in the coming months – your blog is a great inspiration to us. Thanks!!
Hey hey-
bought all the goods and started to assemble. not seeing where the toggle switch is installed, though… any input on the toggle? thanks!
Hi what color and brand is the teal paint?
Hi! The paint color is gorgeous! Do you know the name by chance?
Hi what is the name of this paint color?
Fourth person here, requesting paint color!! It’s gorgeous.
Hi there! Thank you for the cool tutorial. So I have a different set of brass lamp parts from grand brass but I’m considering switching to this one. Do you think you could hang this set up as a ceiling fixture and have the harms/bulbs point down, if that makes sense? I can’t tell from the picture if you could. Or maybe just swap out one piece so the bulbs could point down. Thank you.