


Okay, guys, I’ve been wanting to share with you some light fixtures I made with my girl gang (aka The She’Vaughns) earlier this summer. Both of my girls wanted new light fixtures for their homes, and both had been drooling over stuff they had been seeing on their internets. After my recent exploration into DIY lighting I had to intervene and stop them before they spent tons on fancy fixtures. I insisted we make our own! So, we spent a night designing and planning. We ordered parts from Grand Brass, waited a week and then spent another night assembling and wiring our new fixtures. Seriously, this is as close as I get to a craft party.
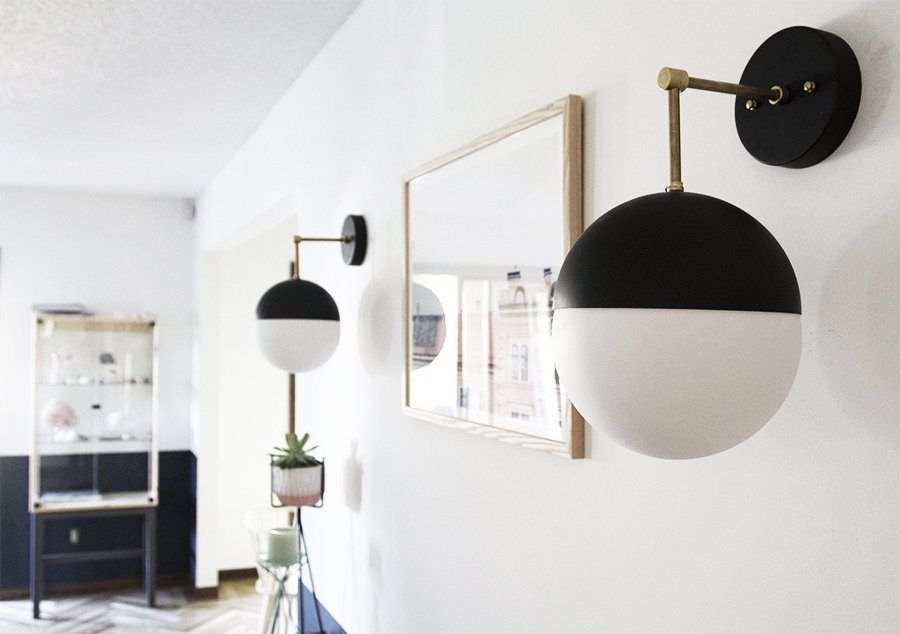
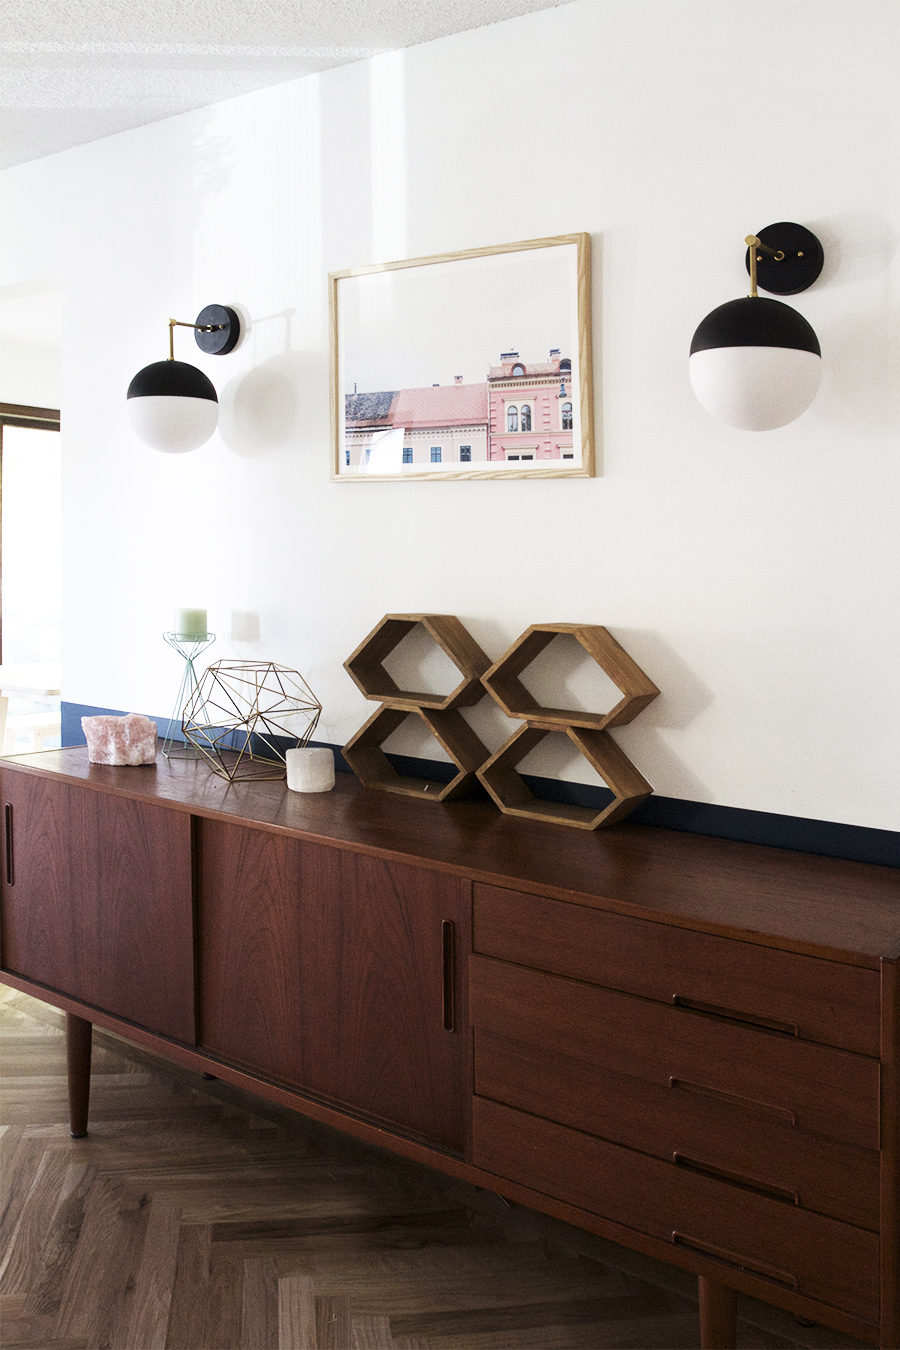
We made a pair of these really awesome black and brass sconces for my pal Cam. Her family had just purchased a new house earlier this spring, and they’ve been working like mad to turn their 70’s split level, into a Scandinavian-crystal-lovers paradise. Check out the below photos to see if you can spy the herringbone floors they had installed. Amazing, right? Someday I’m gonna share that whole space with you guys, you’ll love it.
Anyways, we made these really awesome black and brass sconces for her living room. I think they turned out pretty damn good, don’t you? I need an excuse to copy this design for my own space, I might modify it a bit and make a pendant for my upstairs hallway light. I think the contrast between the black and brass is pretty fantastic.
FYI: To paint the shade and canopy black we used Rustoleum flat black spray paint and left the rest untouched brass.
See below for instructions and a shopping list
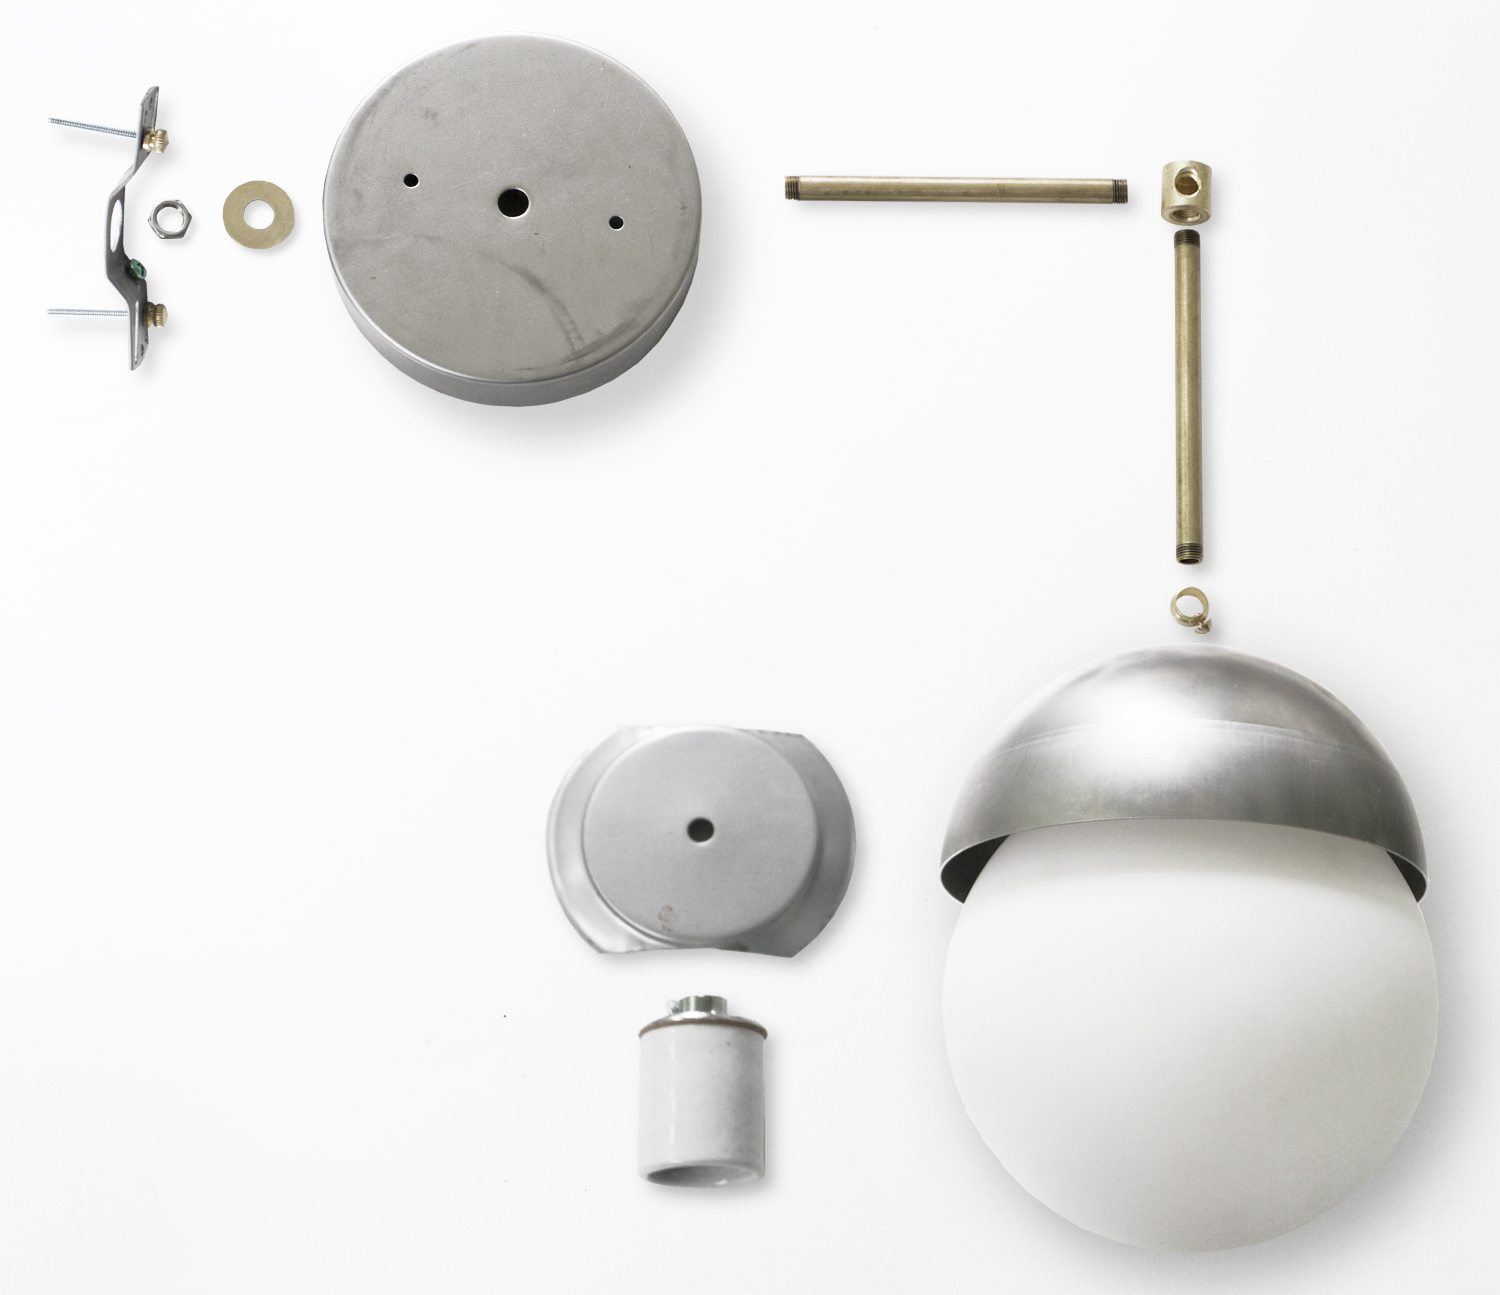
Copper Strap
Universal Mount
2 -Threaded Stud
2 – Wire Nuts
2 – 5″ Brass Pipe
2 – Acorn Nut
Slip Ring
Canopy
Modern Slip Ring
Washer
3′ Wire
Socket
Matte Globe
Neckless Holder
Hex Nut
Dome Shade
Straight Armback
- Disassemble the socket and attach the wires
- Reassemble the socket with the wires feeding out the end
- Thread the wire through the dome shade and neckless holder
- Thread the wire through a 5″ piece of brass tubing
- Sandwich the dome shade and neckless holder between the socket and brass pipe
- Screw the brass pipe into the top of the socket
- Slide the slip ring onto the brass pipe (leave it loose)
- Thread the wire through the armback
- Attach the armback to the brass pipe
- Thread the wire through the other piece of brass pipe
- Screw the brass pipe into the other end of the armback
- Slide the modern slip ring onto the brass pipe
- Send the wires through the center hole on the canopy, slide on the grounding wire and attach to the brass pipe with a washer and hex nut
- Tighten the modern slip ring while holding it firm to the canopy
- Connect the wires from the sconce to the wires in the wall box. Again, if you’re not sure how to do this, contact an electrician
- Use the mounting bracket and acorn nuts to attach the fixture to the wall
- Slide up the dome shade and attach the dome to the neckless holder
- Tighten slip ring firmly to the dome shade


I’m pretty sure we need a full tour!
Working on it ;)
Beautiful!!! How much did one end up costing you?
Before shipping the amount for one came out to $54 and change. I think that’s a steal!
Those are beautiful, and the price is perfecto.
The link for the dome shade takes you to a hex head nut.
Thanks for letting me know! I updated the link ;)
In the photo above, where did they get the plant stands? Those are cool. Thanks!
I will find out and let you know!
Where do you suggest we get the matter globe?
I linked to it in this post, is it not working for you: http://www.grandbrass.com/SearchShowItem.cfm?ItemNumber=GLGB08NLSO
After exploring a number of the blog posts on your blog, I seriously appreciate your way of writing a blog.
I saved it to my bookmark webpage list and will be checking back soon. Take
a look at my web site too and let me know how you feel. http://www.kudzu.com/m/Bobs-Bail-Bonds-15340747
Love this! Was hoping to knock it out over the holidays, but for some reason the parts links aren’t working for me, could you check them please?
IS there any way to list the sizes you used? Every time I click on something the website cannot be found.
Hey Alicia, Grandbrass.com updated their website since this post was originally published, unfortunately they didn’t use permalink when updating so now none of the links work :( You’ll have to look for parts by name using Grand Brass’s search function. I’m as bummed as you, as I needed the lists to order parts for myself. The next time I have a few spare minutes I’ll update with new links. Good luck.
Hey, I noticed that Grand Brass has the overall kit available as a DIY (https://www.grandbrass.com/item/fxk100/diy_lighting_kits/) and they even have a detailed parts list posted. It’s in a tiny little window that you need to zoom in on.
This really caught my eye, since I’m a glassblower that makes glass spheres like this – but with lots of color. I never had been able to figure out how to mount these on a fixture like this (with no visible opening).
Great idea! Thanks!
Bob
Hey Bob, Thanks for the link! I had no idea that grandbrass had done this. It’s nice they included a link back to my tutorial too! That should help anyone looking for parts from the broken links above. I really appreciate you sending this my way :) I checked out your site too, I’m sure you could figure out away to hide the opening on your opening with something like this too. Good luck!
Hey Scoops, love love your blog! Quick question – do you think these could be altered to be a bathroom sconce such that the globes are on the left and right? I’d figured it could but am not sure if the neckless holder will be able to hold the glass globe sideways (if that makes sense). What do you think?
Cheryl, Tell me more about what you mean by left and right,? Would they be flanking a mirror? Or do you mean being hung horizontally from a ‘T’? Tell me more about what you mean by sideways – sorry, I’m a little confused. I don’t think that these would hang well if you had them horizontally hung, howevs you could do something like what Mandy did over here with a different style of necklace holder. Lemme know!
Hey, yeah I was going to attempt to hang them horizontally with a T above the mirror but I’m afraid that the neckless holder won’t hold the globes well enough. Mandy’s chandelier looks awesome and I can see altering it into a horizontal sconce. Thanks for replying by the way!!
No Probs! Your making me want to build a new fixture! If only I had access to a parts store…
And good luck, it sounds like it will be a cool project!
Thank you! I’ll be sure to send a picture once I finish it! In the meantime, I hope you get bit by the light fixture bug soon cos trust me when I say we all LOVE reading about your DIY lights. Its totally addicting!