


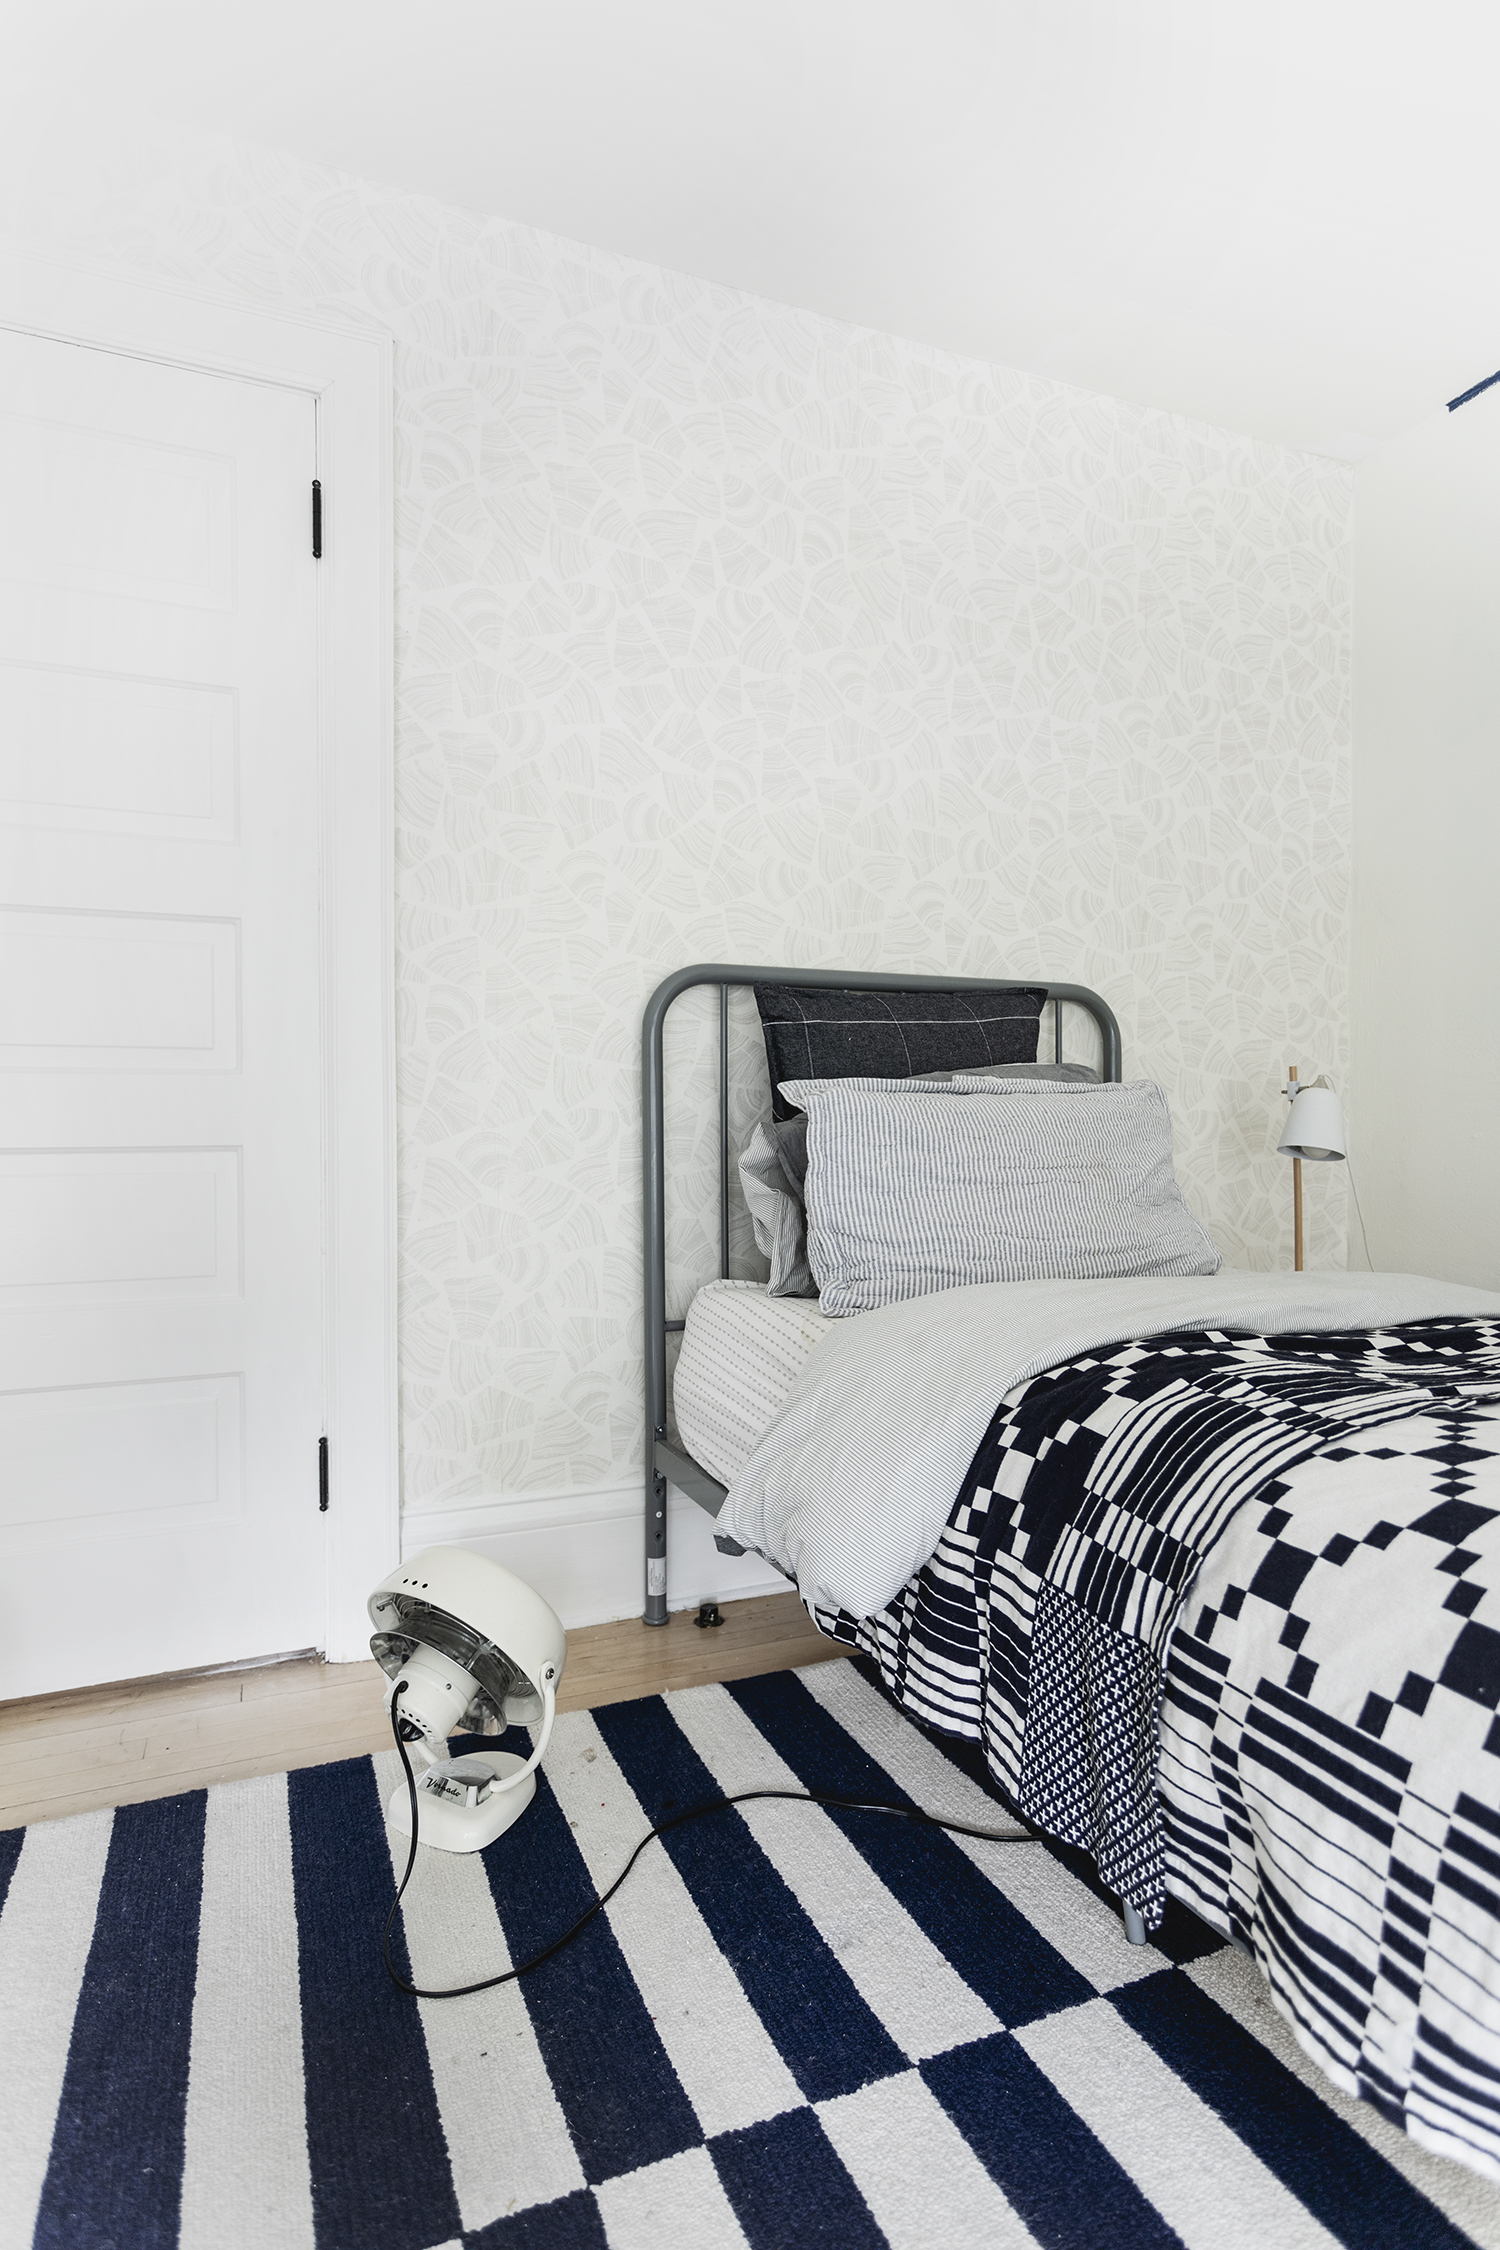
Guys! Today I am going to teach you how to install wallpaper on an accent wall. This is a job that is fairly easy, a tiny bit stressful, and 100 percent totally worth it. This my friends, is the fifth (!) time I have wallpapered, so I pretty much consider myself an expert. Stick with me and you’ll be alright.
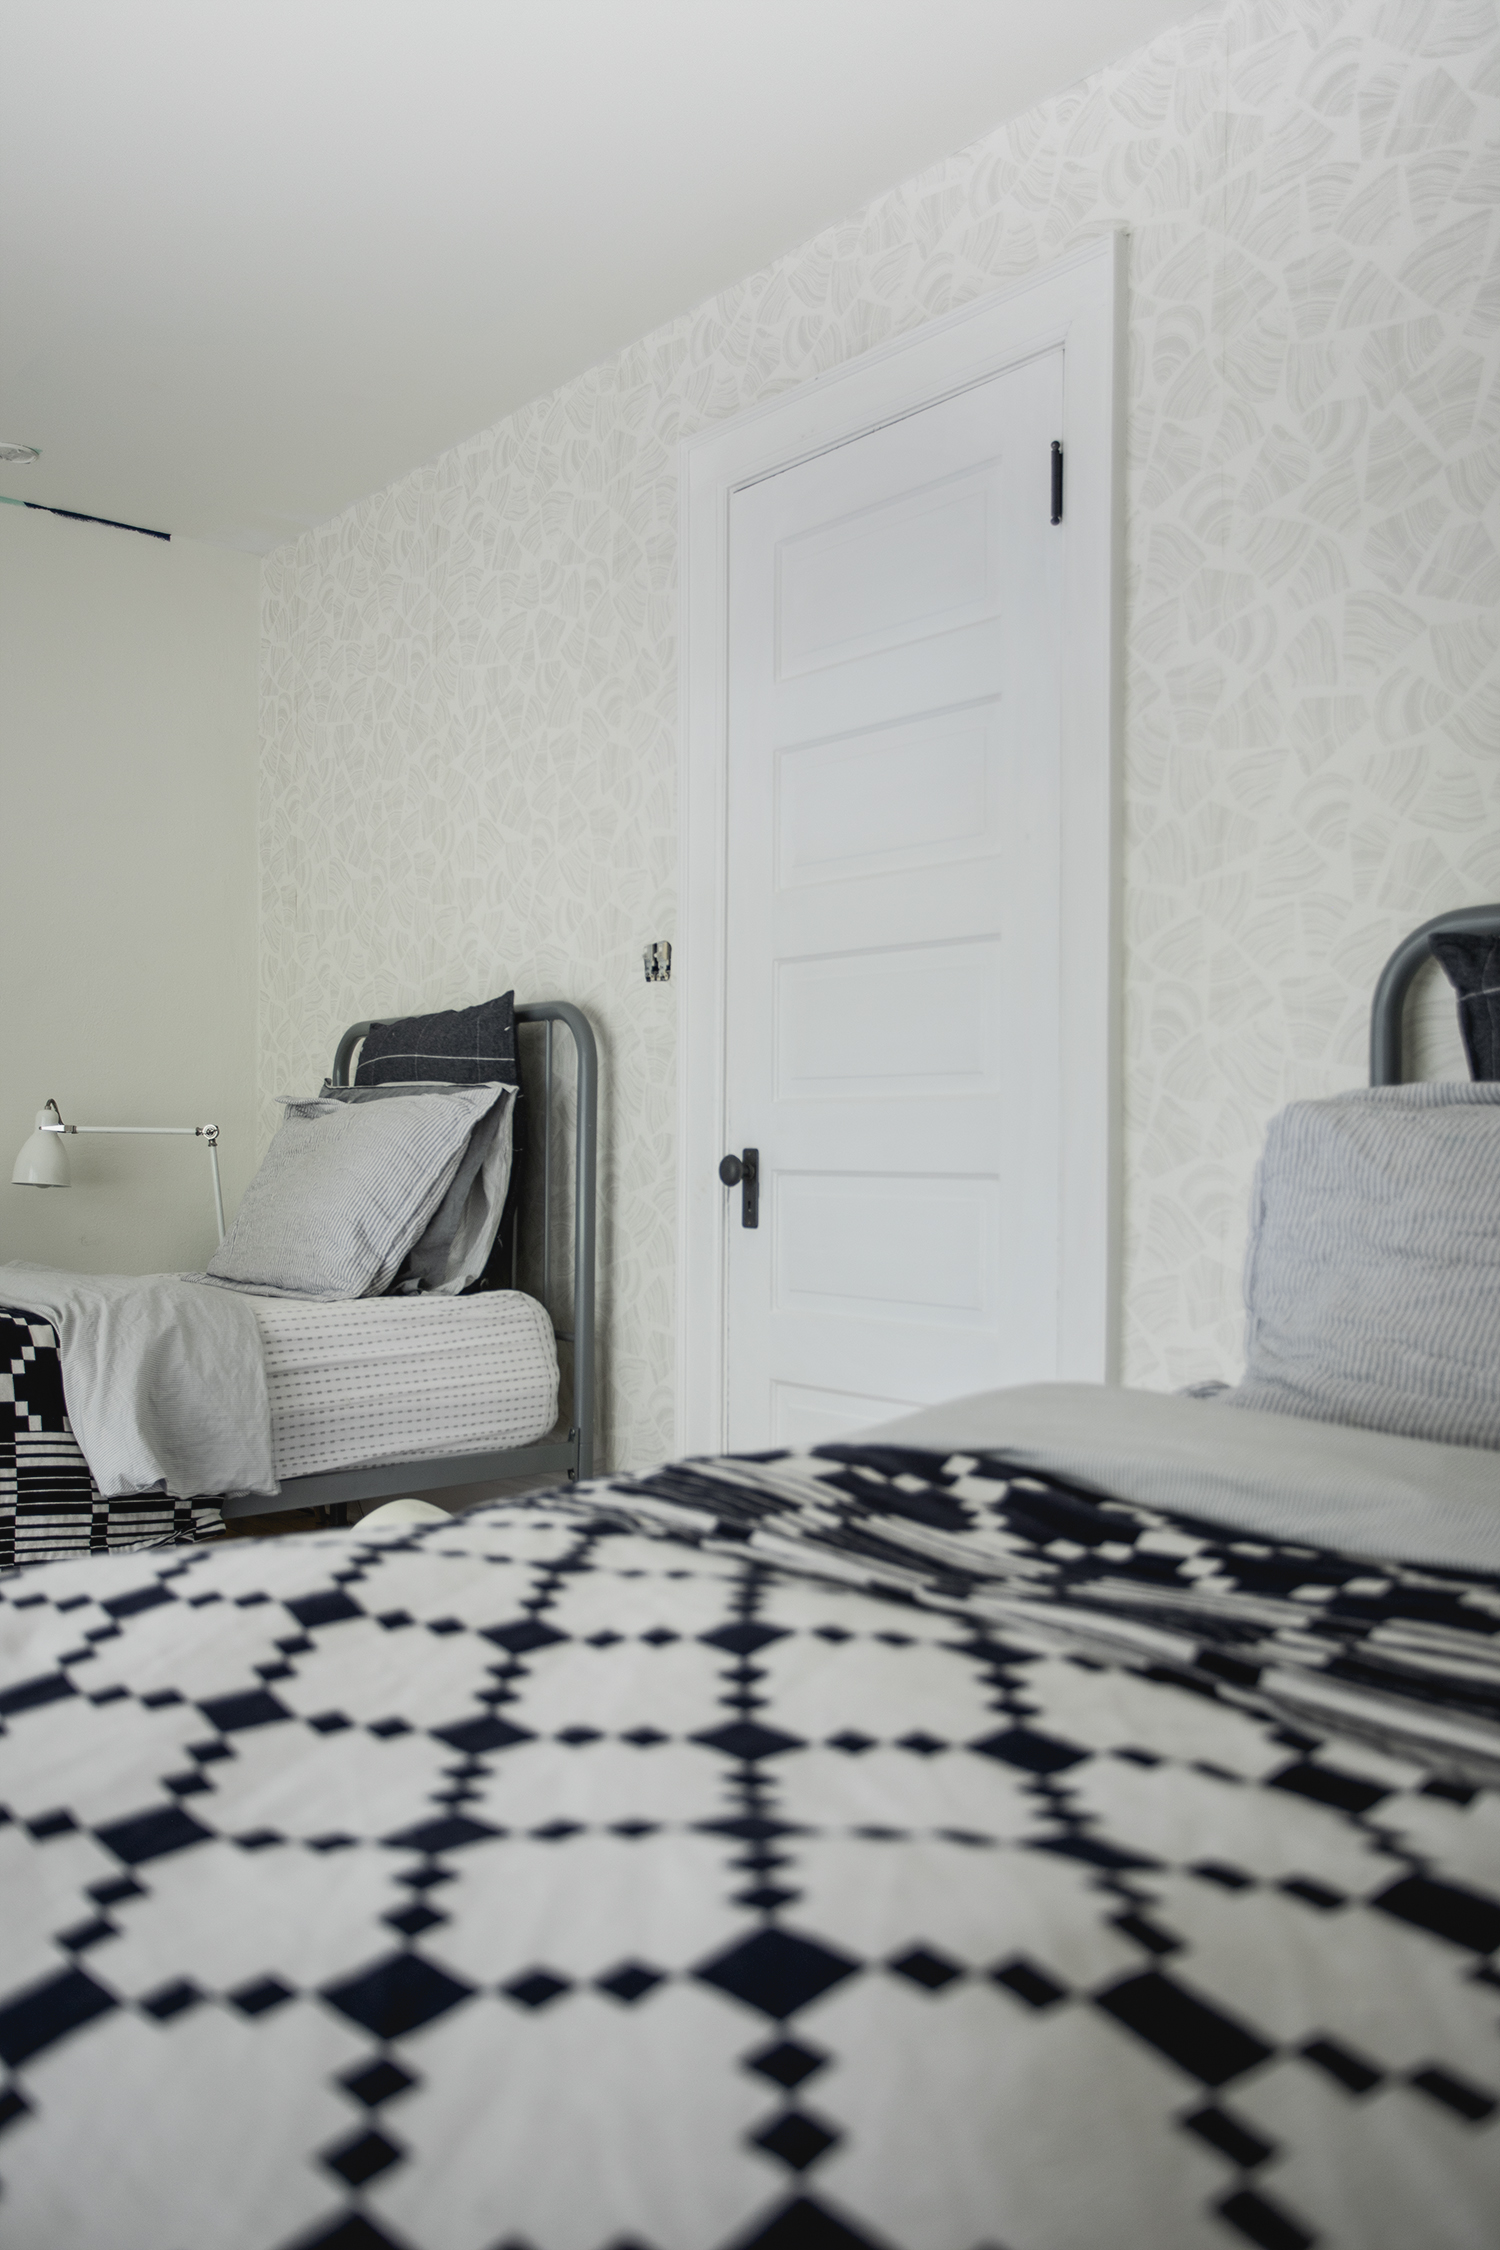
First of all, let me start by saying these times are crazy as we all know. Projects aren’t getting done in the order I envisioned them a few short months ago. Getting the boys’s bedroom spiffed up was going to be my early spring project. When school became a distance learning sitch, we headed to the cabin. We figured if we were going to have to hunker down the kids might at least be able to get outside and run around in the woods. The focus of my projects and my time have changed since March, as I’m sure all of ours have. I now spend half my day as a not-so-good teacher and the rest is all catch up. Anyways, that’s a lot of explanation to say that last week we went back home to Minneapolis and I got a chance to work on wallpapering in the boys room. Now I want to share with you my go-to method for wallpapering.
Wallpapering isn’t that scary, actually it’s pretty straight forward and makes a lot of sense. You are pretty much gluing paper to a wall, which isn’t that hard. A more complicated project might involve wallpapering around fancy moldings, corners, ceilings, or in a small room. I am not showing you how to do that stuff, I am simply sharing instructions with you on papering that all important “accent” wall. I am going to share with you the basic principles of wallpaper (aka wallpapering 101) like finding where to mark your plumb line, determining paper length, matching the pattern, hanging the paper, removing bubbles and trimming the edges. It’s not rocket science pals, but it works.
I’m not gonna lie to ya, there is always a stressful moment in wallpapering, you know, that serious “oh shit” moment. Anticipate that and you’ll do just fine.
|
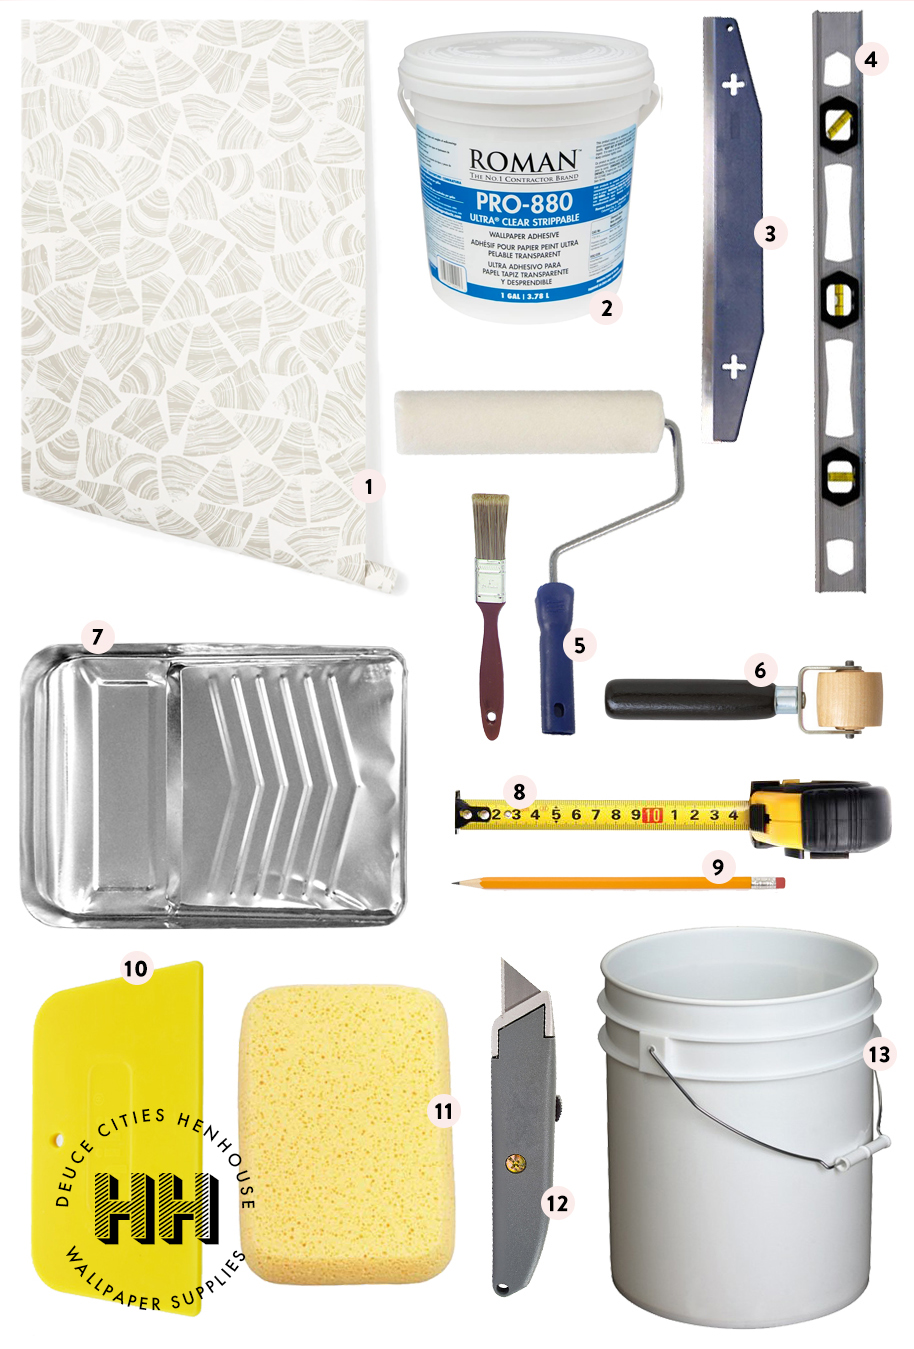
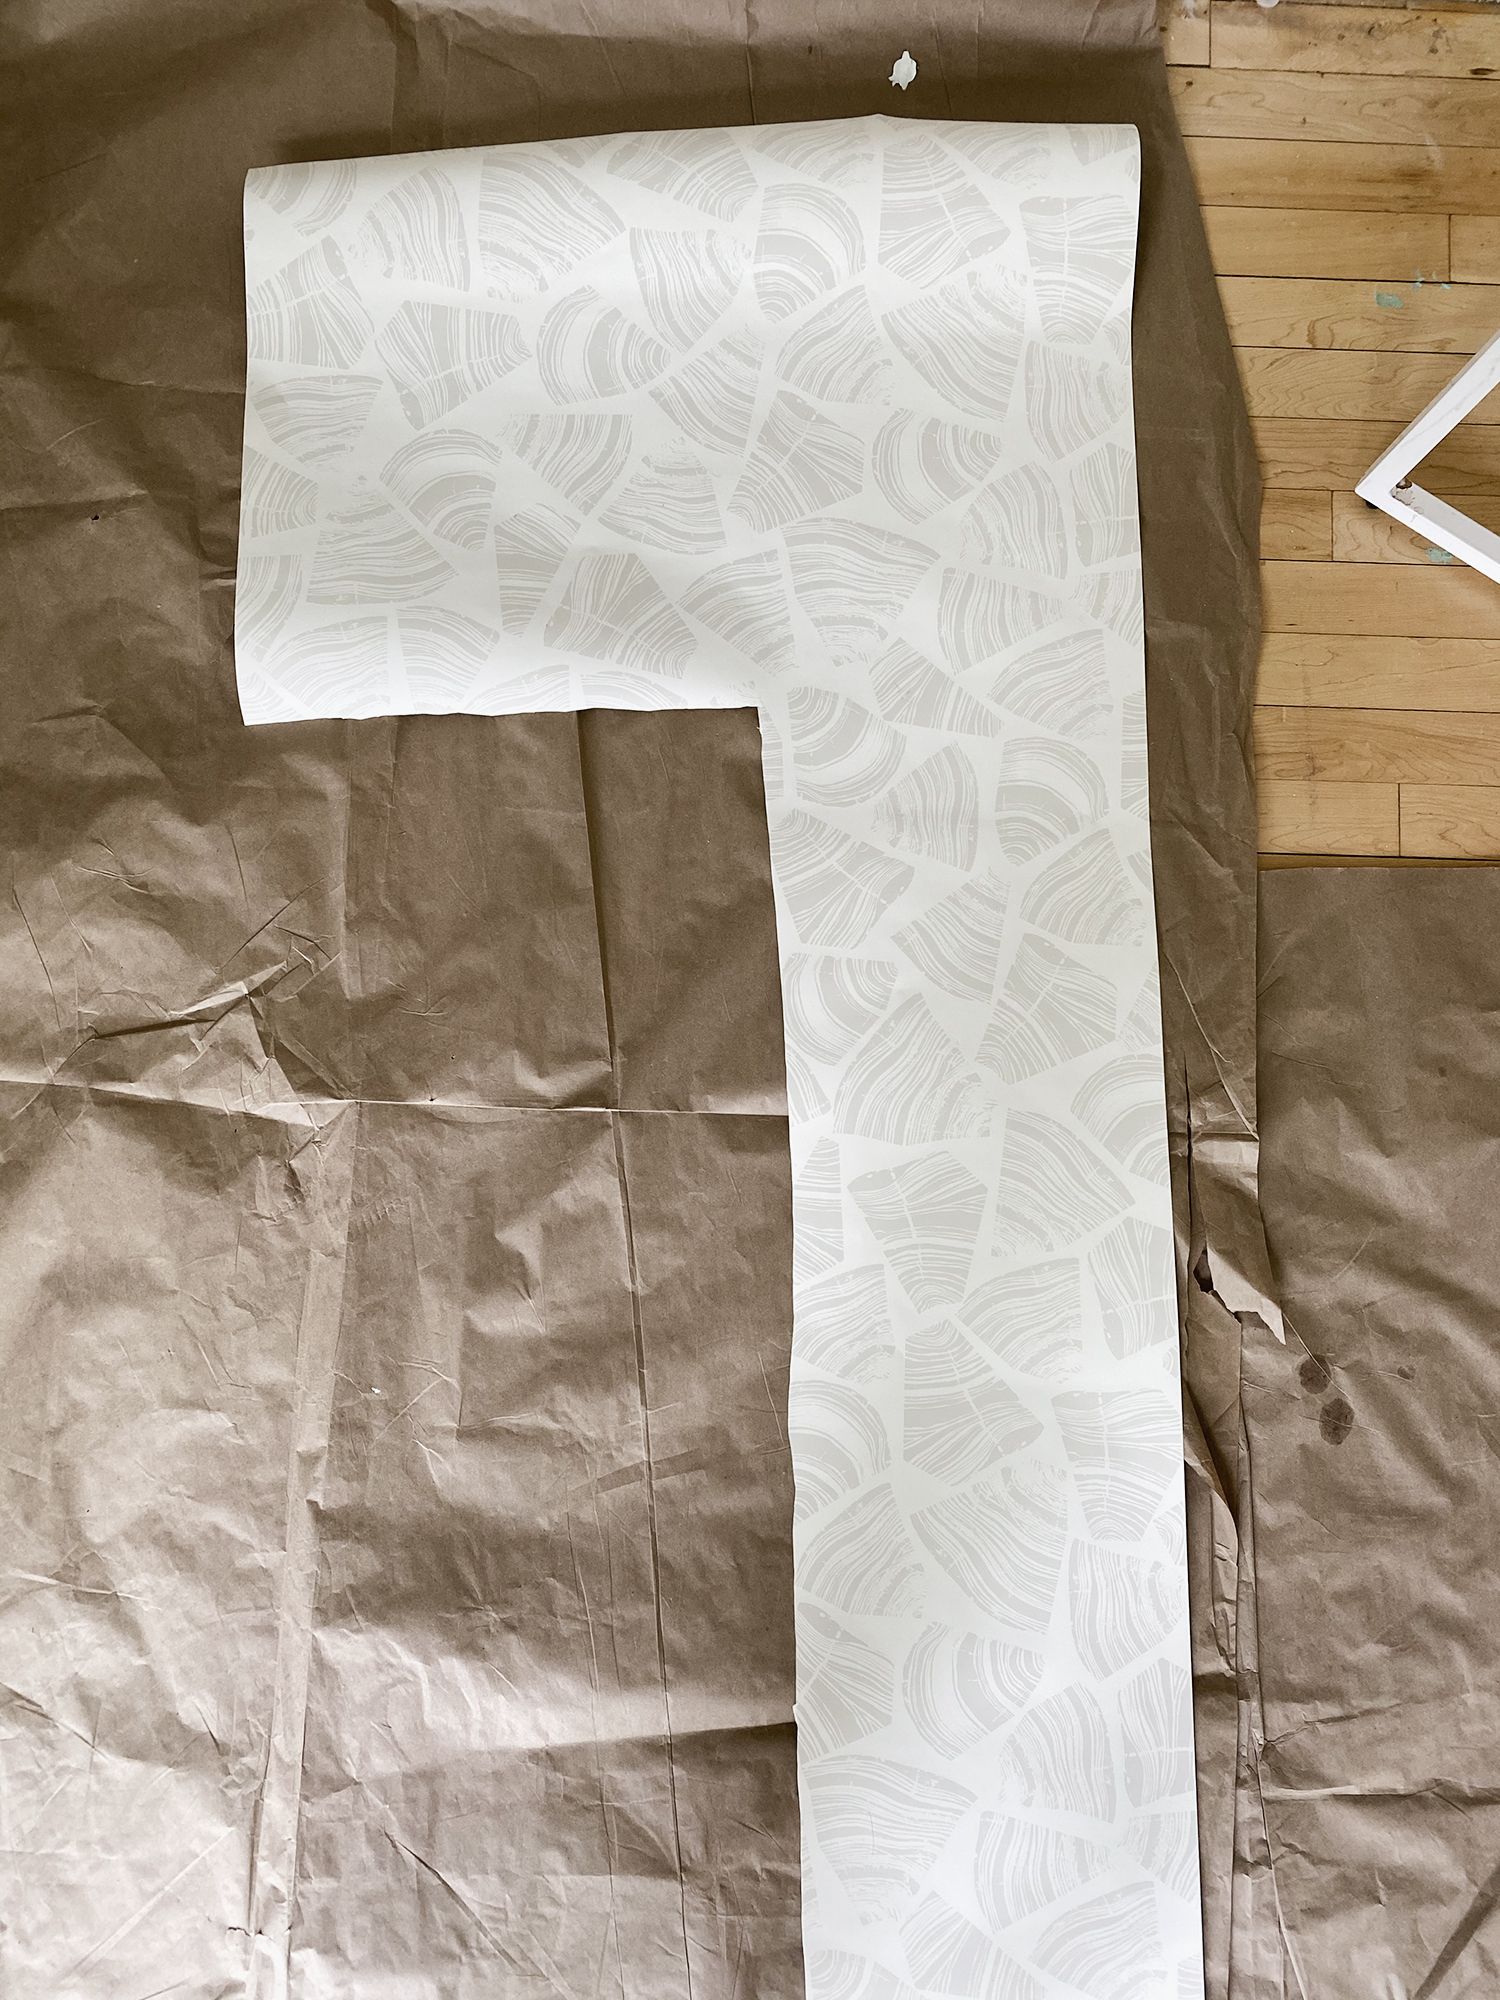
1 Wallpaper – Wood in Cream Colorway by Askov Finlayson for Hygge & West 2 3 4 5 6 7 8 9 Pencil 10 11 Sponge 12 13 Bucket or Pail |

Prepare Walls
Make sure to fill any holes in the wall with spackle and sand down any rough spots. Make sure to wash your wall with a damp sponge prior to starting your wallpapering project
Draw Plumb Line & Cut First Strip of Wallpaper
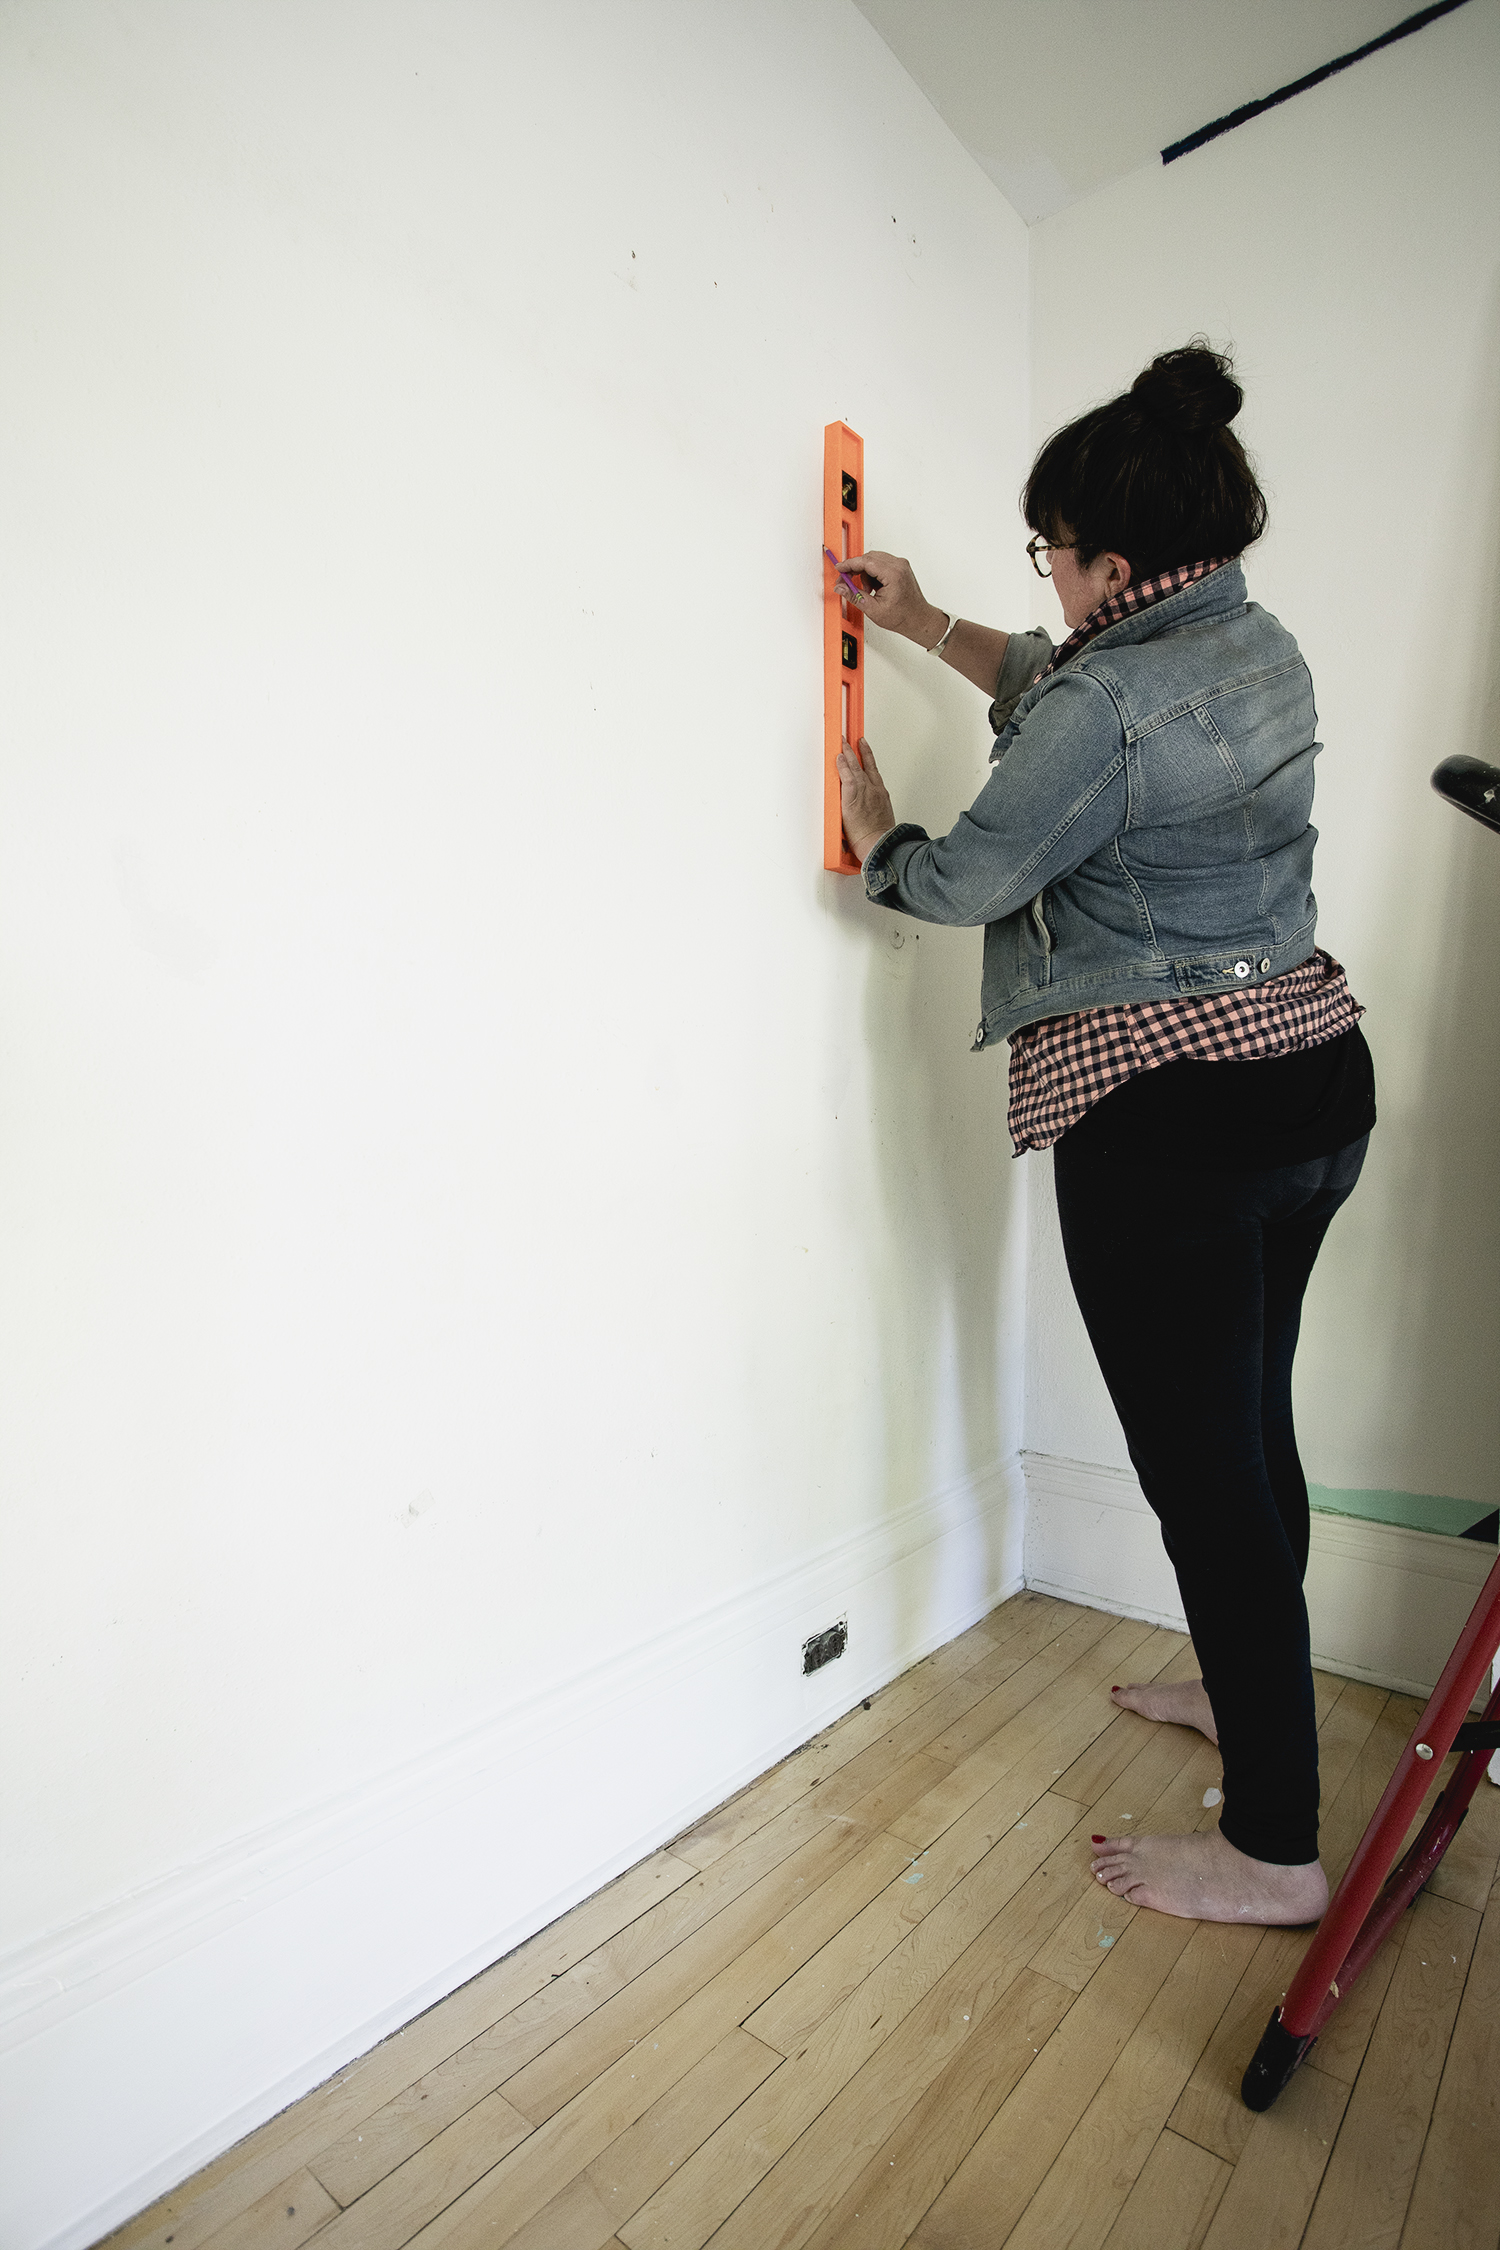
Measure the width of your wallpaper. Working horizontally out from the right corner of the wall, measure out the width of wallpaper minus two inches. Draw a vertical plumb line at this spot on your wall, using a pencil and a level.
Measure the vertical length of the wall.
Measure out your first strip of wallpaper, take the length of the wall and add five inches, (this will allow you to have a few extra inches of paper for both the top and bottom of the sheet). The excess paper will later be removed.
Match Repeat with Second Strip on the Floor
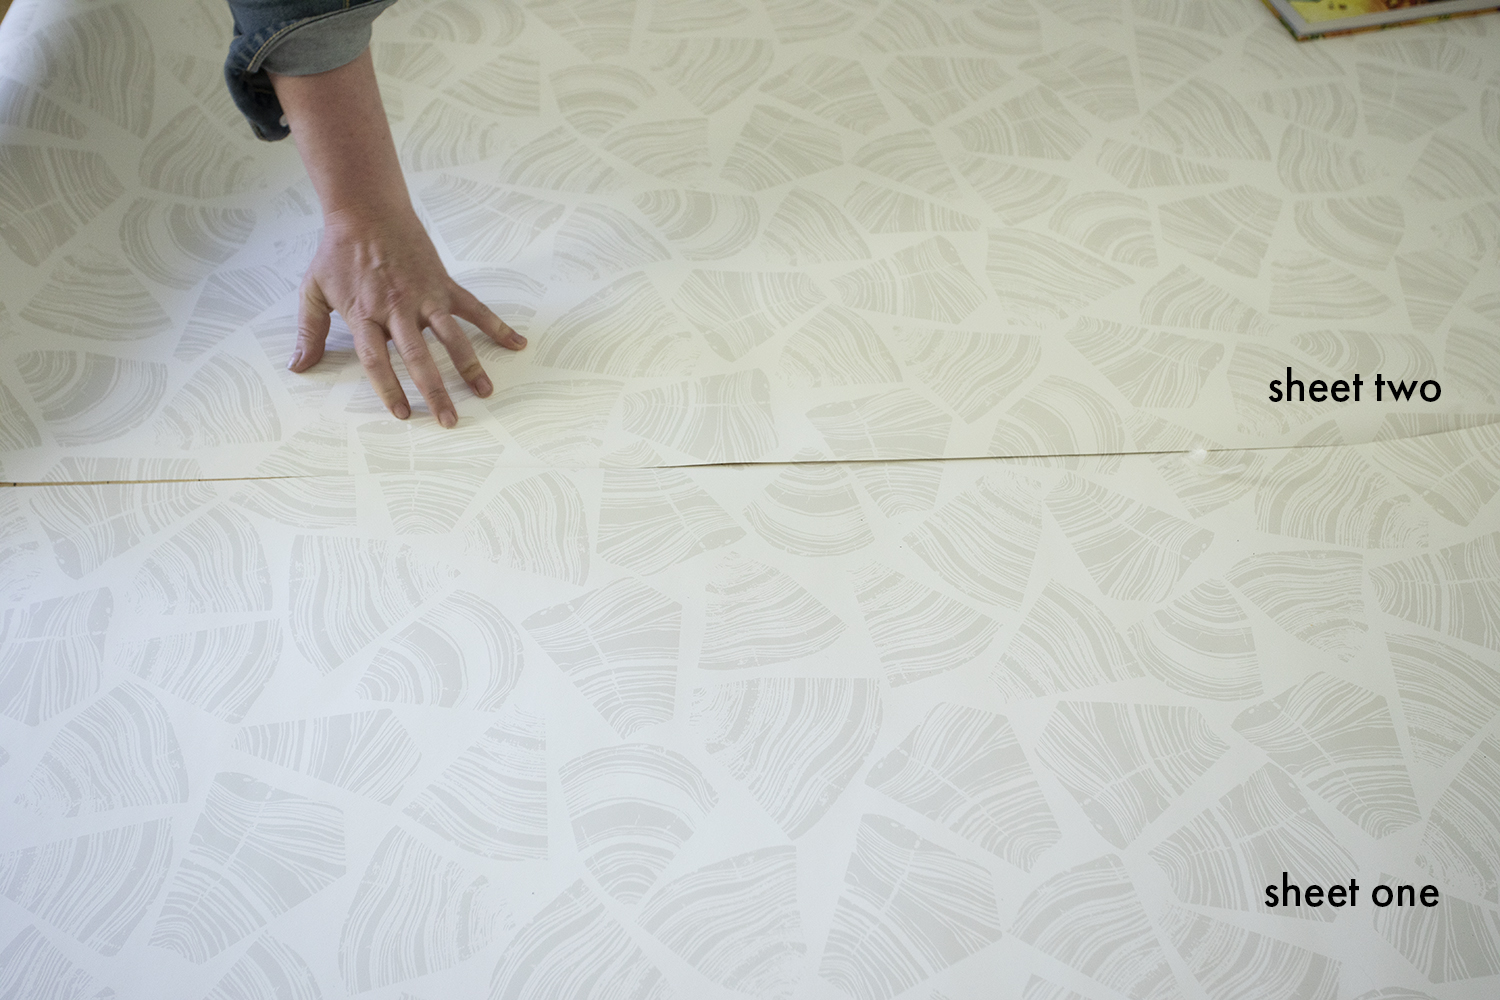
Prior to hanging the first strip of wallpaper layout the second strip on the floor to the left of the first strip. Wallpaper patterns have repeats, and you want to make sure to line up your second sheet of paper to match the pattern repeat from the first strip. When you have the pattern lined up, roll out the paper and cut the second sheet to match the length and pattern of the first.
*Note, your second sheet will most likely be longer than the first sheet due to the placement of the pattern repeat.
Roll Paste & Fold Paper Book Style
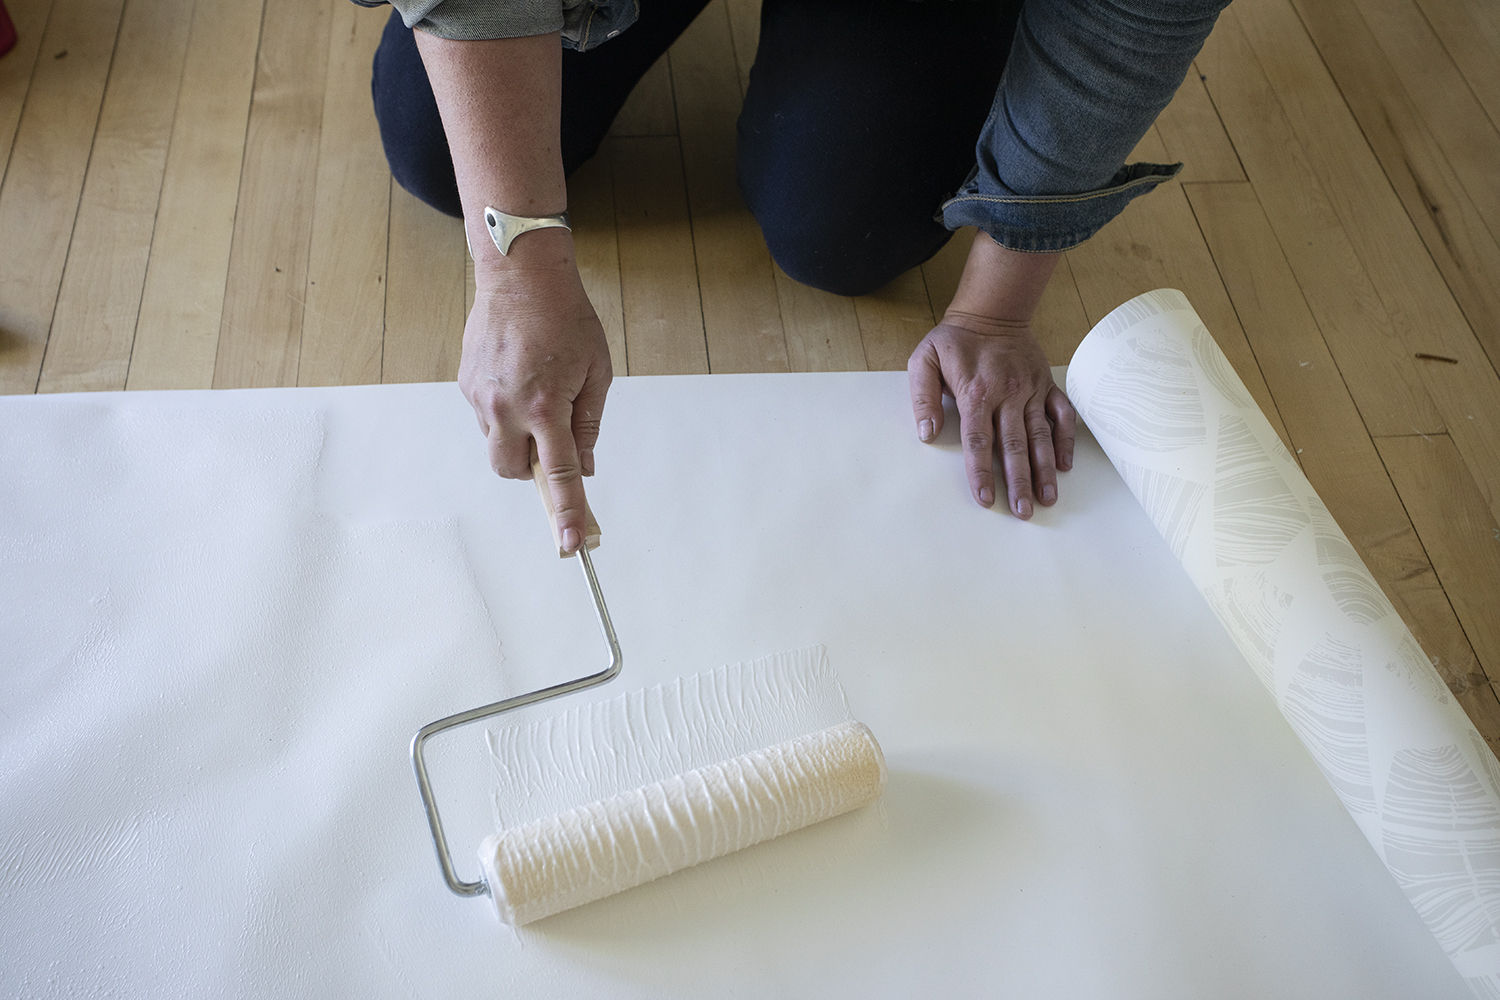
Make sure to read the label of your particular brand of paper before beginning to paste. Some wallpapers come pre-pasted, in that instance you only need to wet them to activate the glue. I’ve also used paper that only requires the walls to be pasted prior to hanging. The point is, make sure to read the label of the wallpaper as well as any instructions provided on the label of the wallpaper paste.
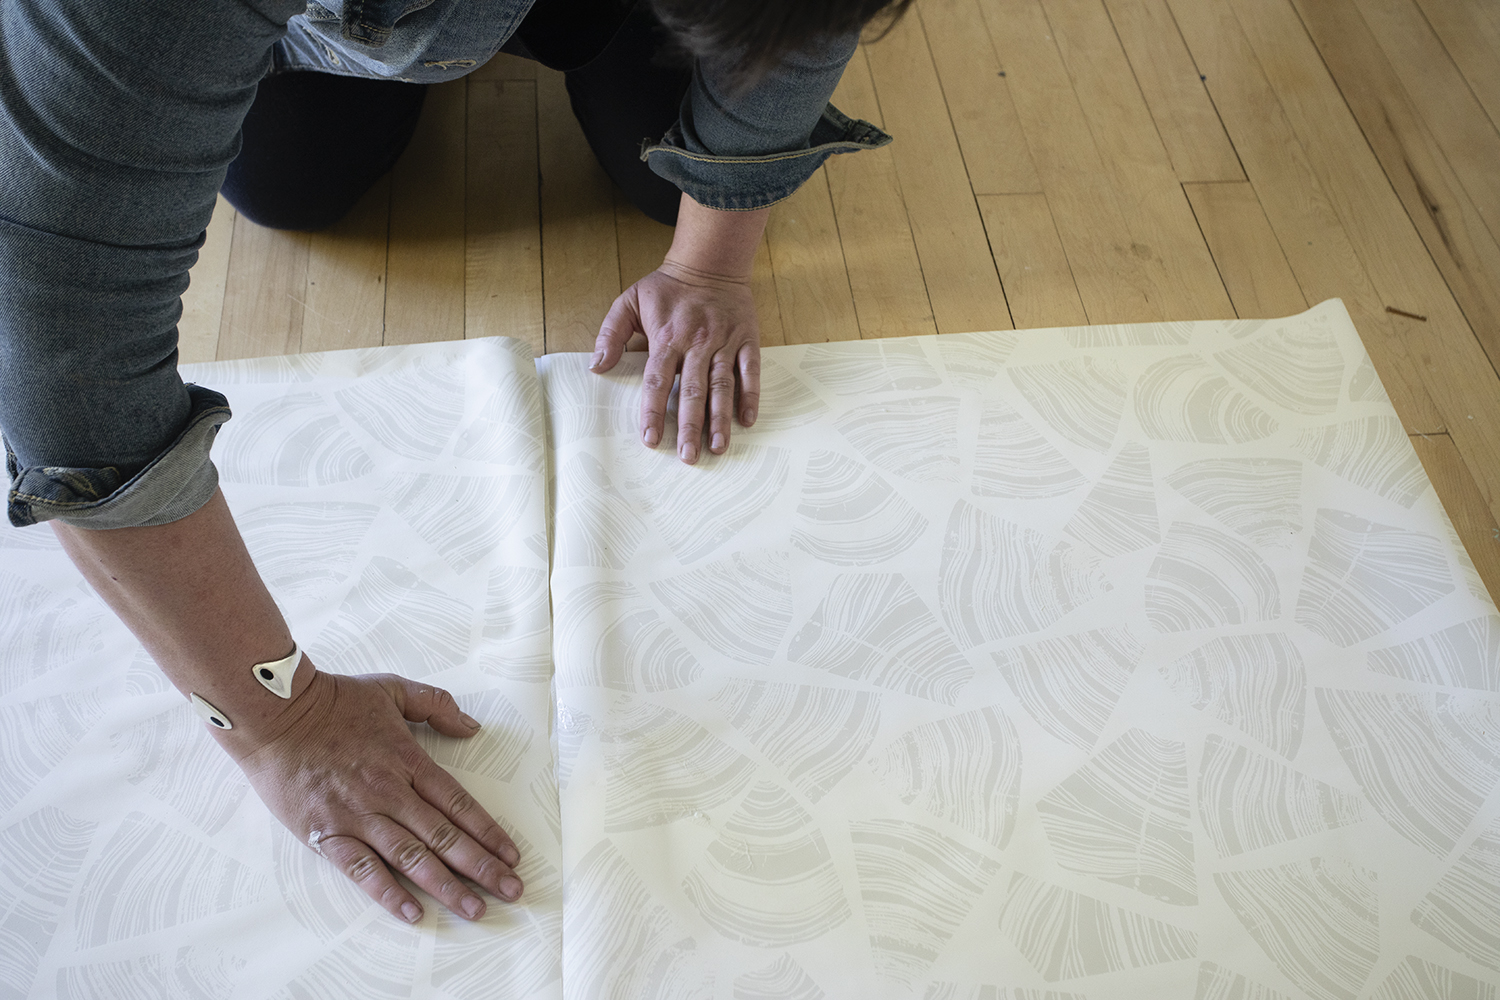
This specific wallpaper required me to roll out paste on the back of sheet of wallpaper. After a generous pasting I was instructed to fold the paper to the center (booking the ends). I made sure that the edges lay flat so the glue wouldn’t dry out. Booking the ends of the paper also allows you to easily move the wallpaper around the room without risk of dimpling or kinking the paper. After folding the paper wait 5-7 minutes for the paper to “relax” while at the same time allowing the glue to get nice and tacky. Feed it a cocktail to ensure extra relaxation.
Hang First Sheet of Wallpaper on Plumb Line & Smooth Out
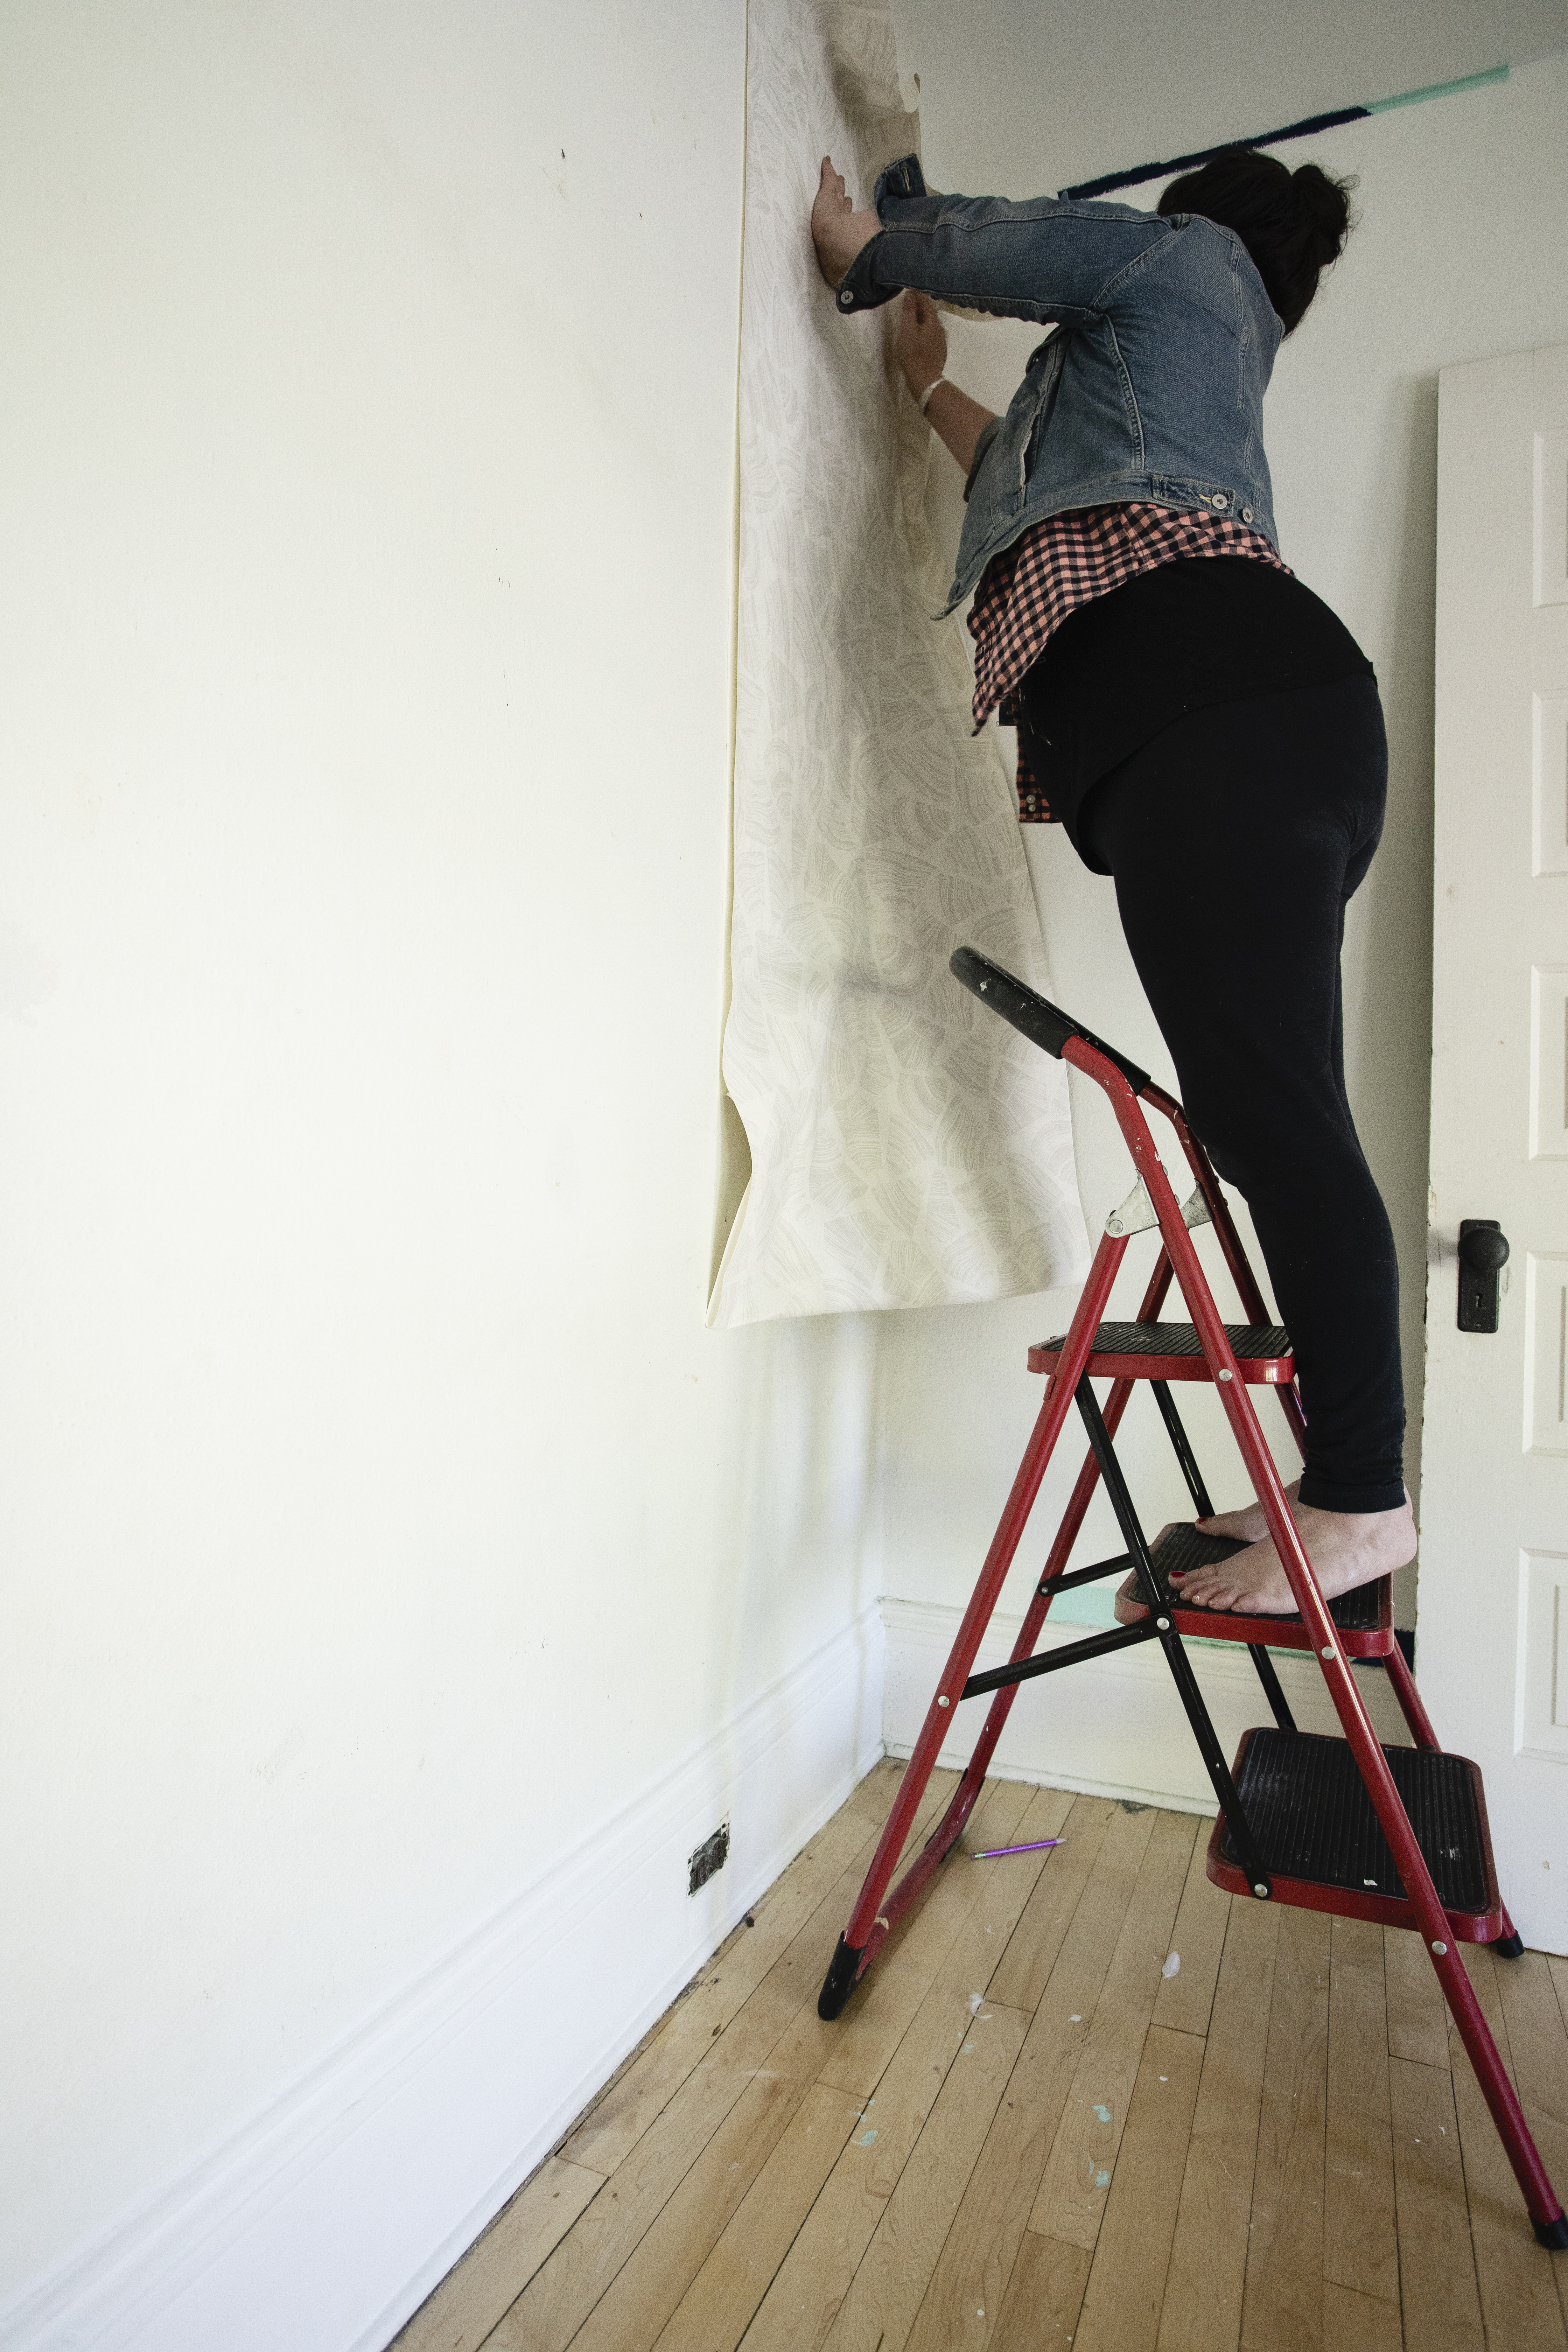
Now this is where it gets a little hectic. I’ve wallpapered three times now, and even though I think I am a pro, there will always be a few minutes of stress and chaos, guaranteed. Usually it happens sometime around the first or second sheet of paper.


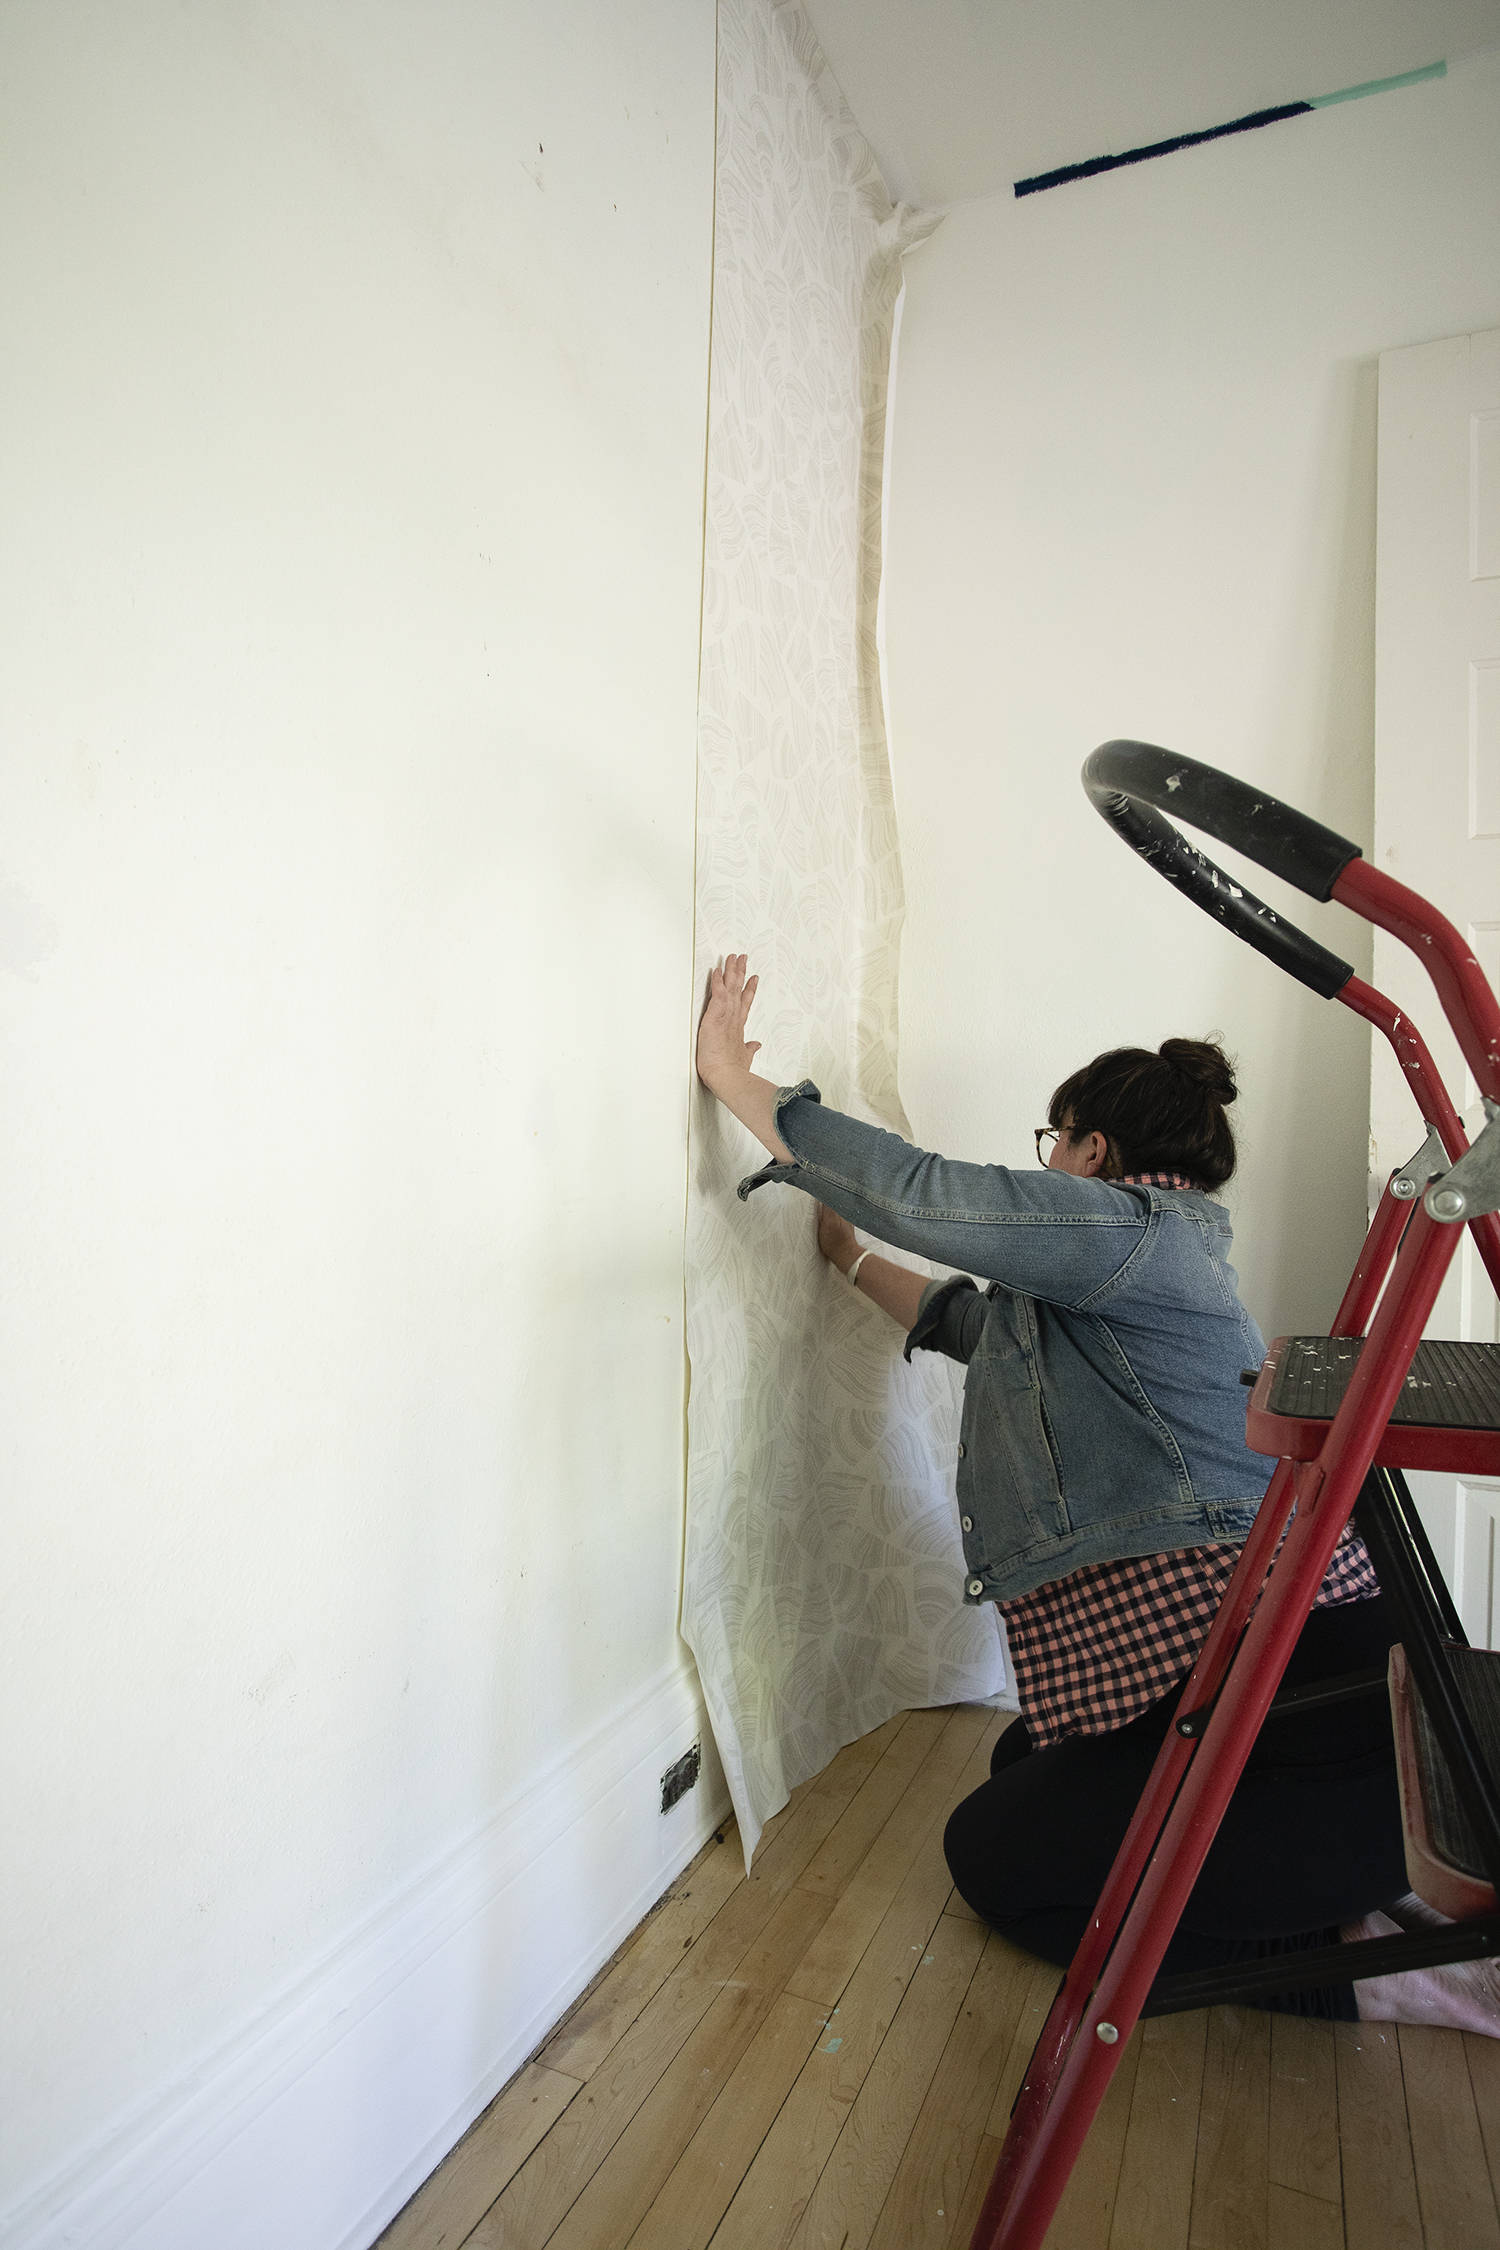
I start the process of hanging the first sheet by unfolding the paper, it easily drops down when you use the book method of folding. Begin lining up the paper with the plumb line you previously drew out on your wall. Once the paper is place, begin smoothing out the paper using your hands and good pressure. Follow it up by using a the edge of your smoothing tool (aka wallpaper squeegee) to remove bubbles. The squeegee tool is essential, and is the difference between having a successful project and a shitty one. If your wallpaper isn’t lining up how you wanted it to, try not to worry! I know, that’s hard, believe me. Go ahead and redo what you have done, partially remove the wallpaper from the wall and start over. Crazy, I know, but it can be done if you are working quickly and carefully. Generally speaking, you have about 15 minutes from the time you start hanging the wallpaper to get it right.
Line Up Third Strip on the Floor & Hang Second Strip
Now you might want to go ahead and hang that second strip of paper you have lying on the floor, but don’t! Before hanging the second strip use the same exact technique as explained in step 3 and 4 (above) to match your pattern and determine the length of your next sheet.
Trim Excess Paper with a Straight Edge and Sharp Utility Knife
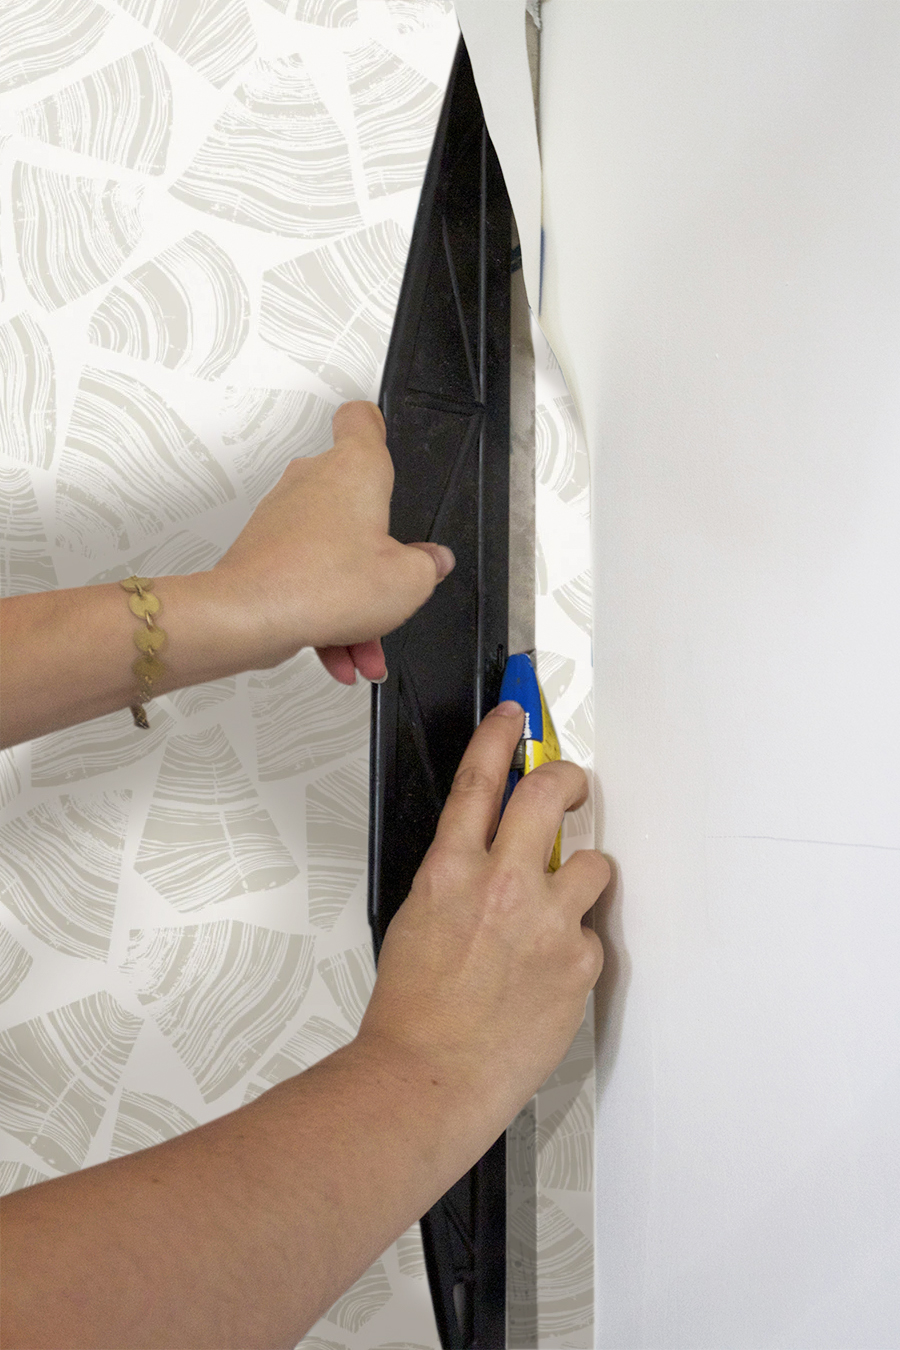
While you wait for 2nd sheet of paper’s glue to set up, go ahead and trim the excess paper from the first sheet hanging on the wall. This part is really satisfying because you finally get to see a crisp clean edge, and everything begins to seem possible! Use a straight edge and a very sharp utility knife to slice the edges of the paper. Be extra careful around corners and moldings. If you are wallpapering a large wall change your blade throughout the project.
Hang Second Sheet, Butt up Seams
Okay, now I give you permission to hang that second sheet of wallpaper! Begin by lining up the second sheet with the first sheet at eye level. I suppose they say to do this because that is where your eye will naturally go, so might as well have get it right at eye level, makes sense, I guess.
Smooth the paper out from the middle moving upward and out to the left, and then downward and out to the left. Follow it up with a good squeegee working down from the top. I find it works best to move your squeegee out from the seam, towards the left and across the paper. Don’t overlap the wallpaper, carefully butt the sheets up to one another. The paper will expand in contract throughout the seasons, so small gaps may occur depending on how humid or dry the air is.
It’s never going to be perfect, guys! Wallpaper has give and it will stretch! No matter what you do and how hard you try, it will never line up perfectly. The good news is that no one will ever notice except you, and even then you’ll really have to look for it. Believe me, I am crazy about that stuff and I barely notice.
Use seam Roller to Flatten Seams, Clean up Excess Glue with Sponge
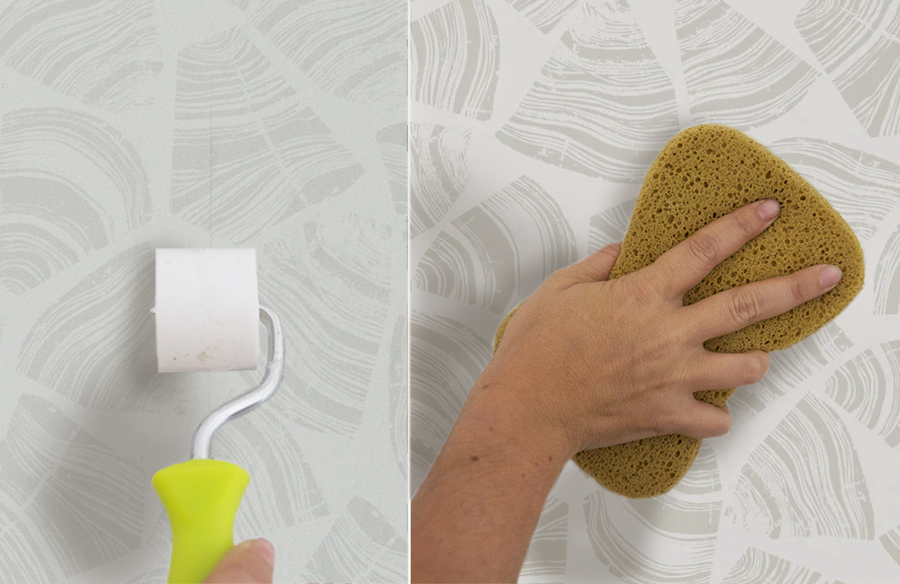
So your edges aren’t sticking down as nicely as you’d like? This is where a bit of glue and a seam roller comes in.
Using a brush add a bit of extra glue to the back edges of the paper. Using the seam roller and applying even pressure, roll it up and down the seam. Use a damp sponge to clean up extra glue that might spill out.
If your project involves an opening such as a door or window, cut the sheet as you would for a typical strip.
Then trim the paper down (I measured within about 4″ of the opening). This makes the paper easier to hang. Once the paper is on the wall start by cutting diagonal slits from the corner of the opening in the room (whether it be a door or window to the inside of the paper. For me, there was only one slit for each sheet of paper needed. One in the the upper right corner of the door, and the other in the upper left. Trim the wallpaper to size using a straightedge and a fresh blade just as you would for all of your edges.
Repeat!
I feel like you’ve got the hang of this, continue on repeating steps 3-9 until you finish your wall!
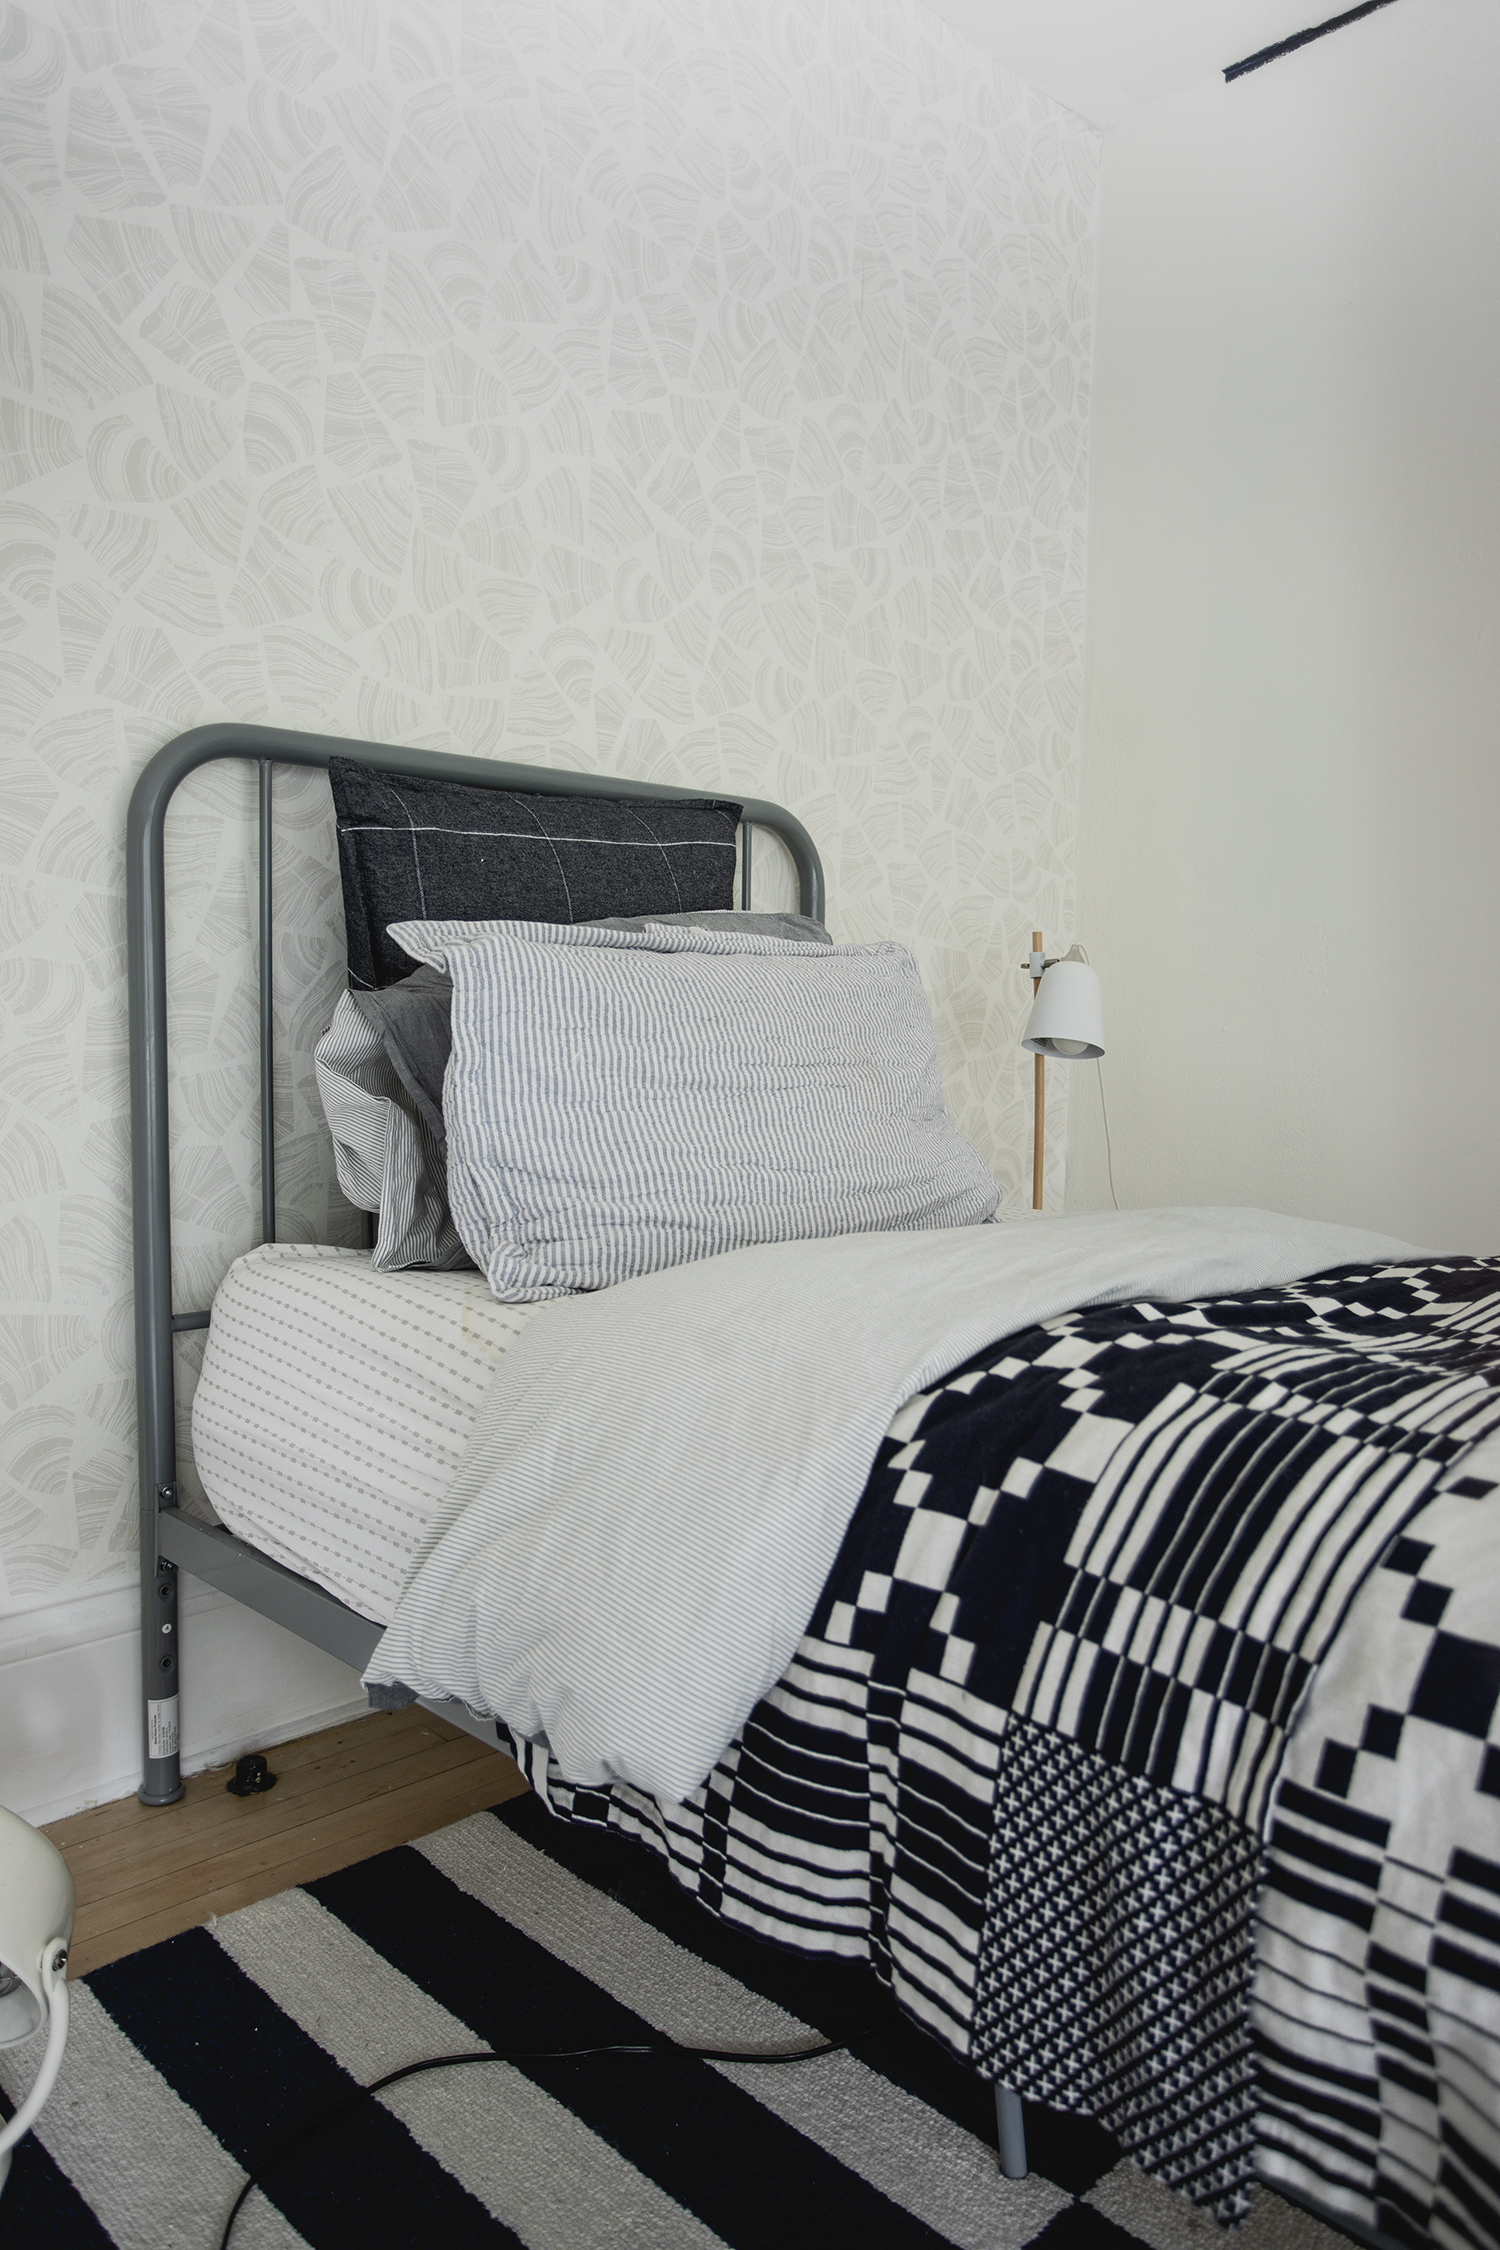
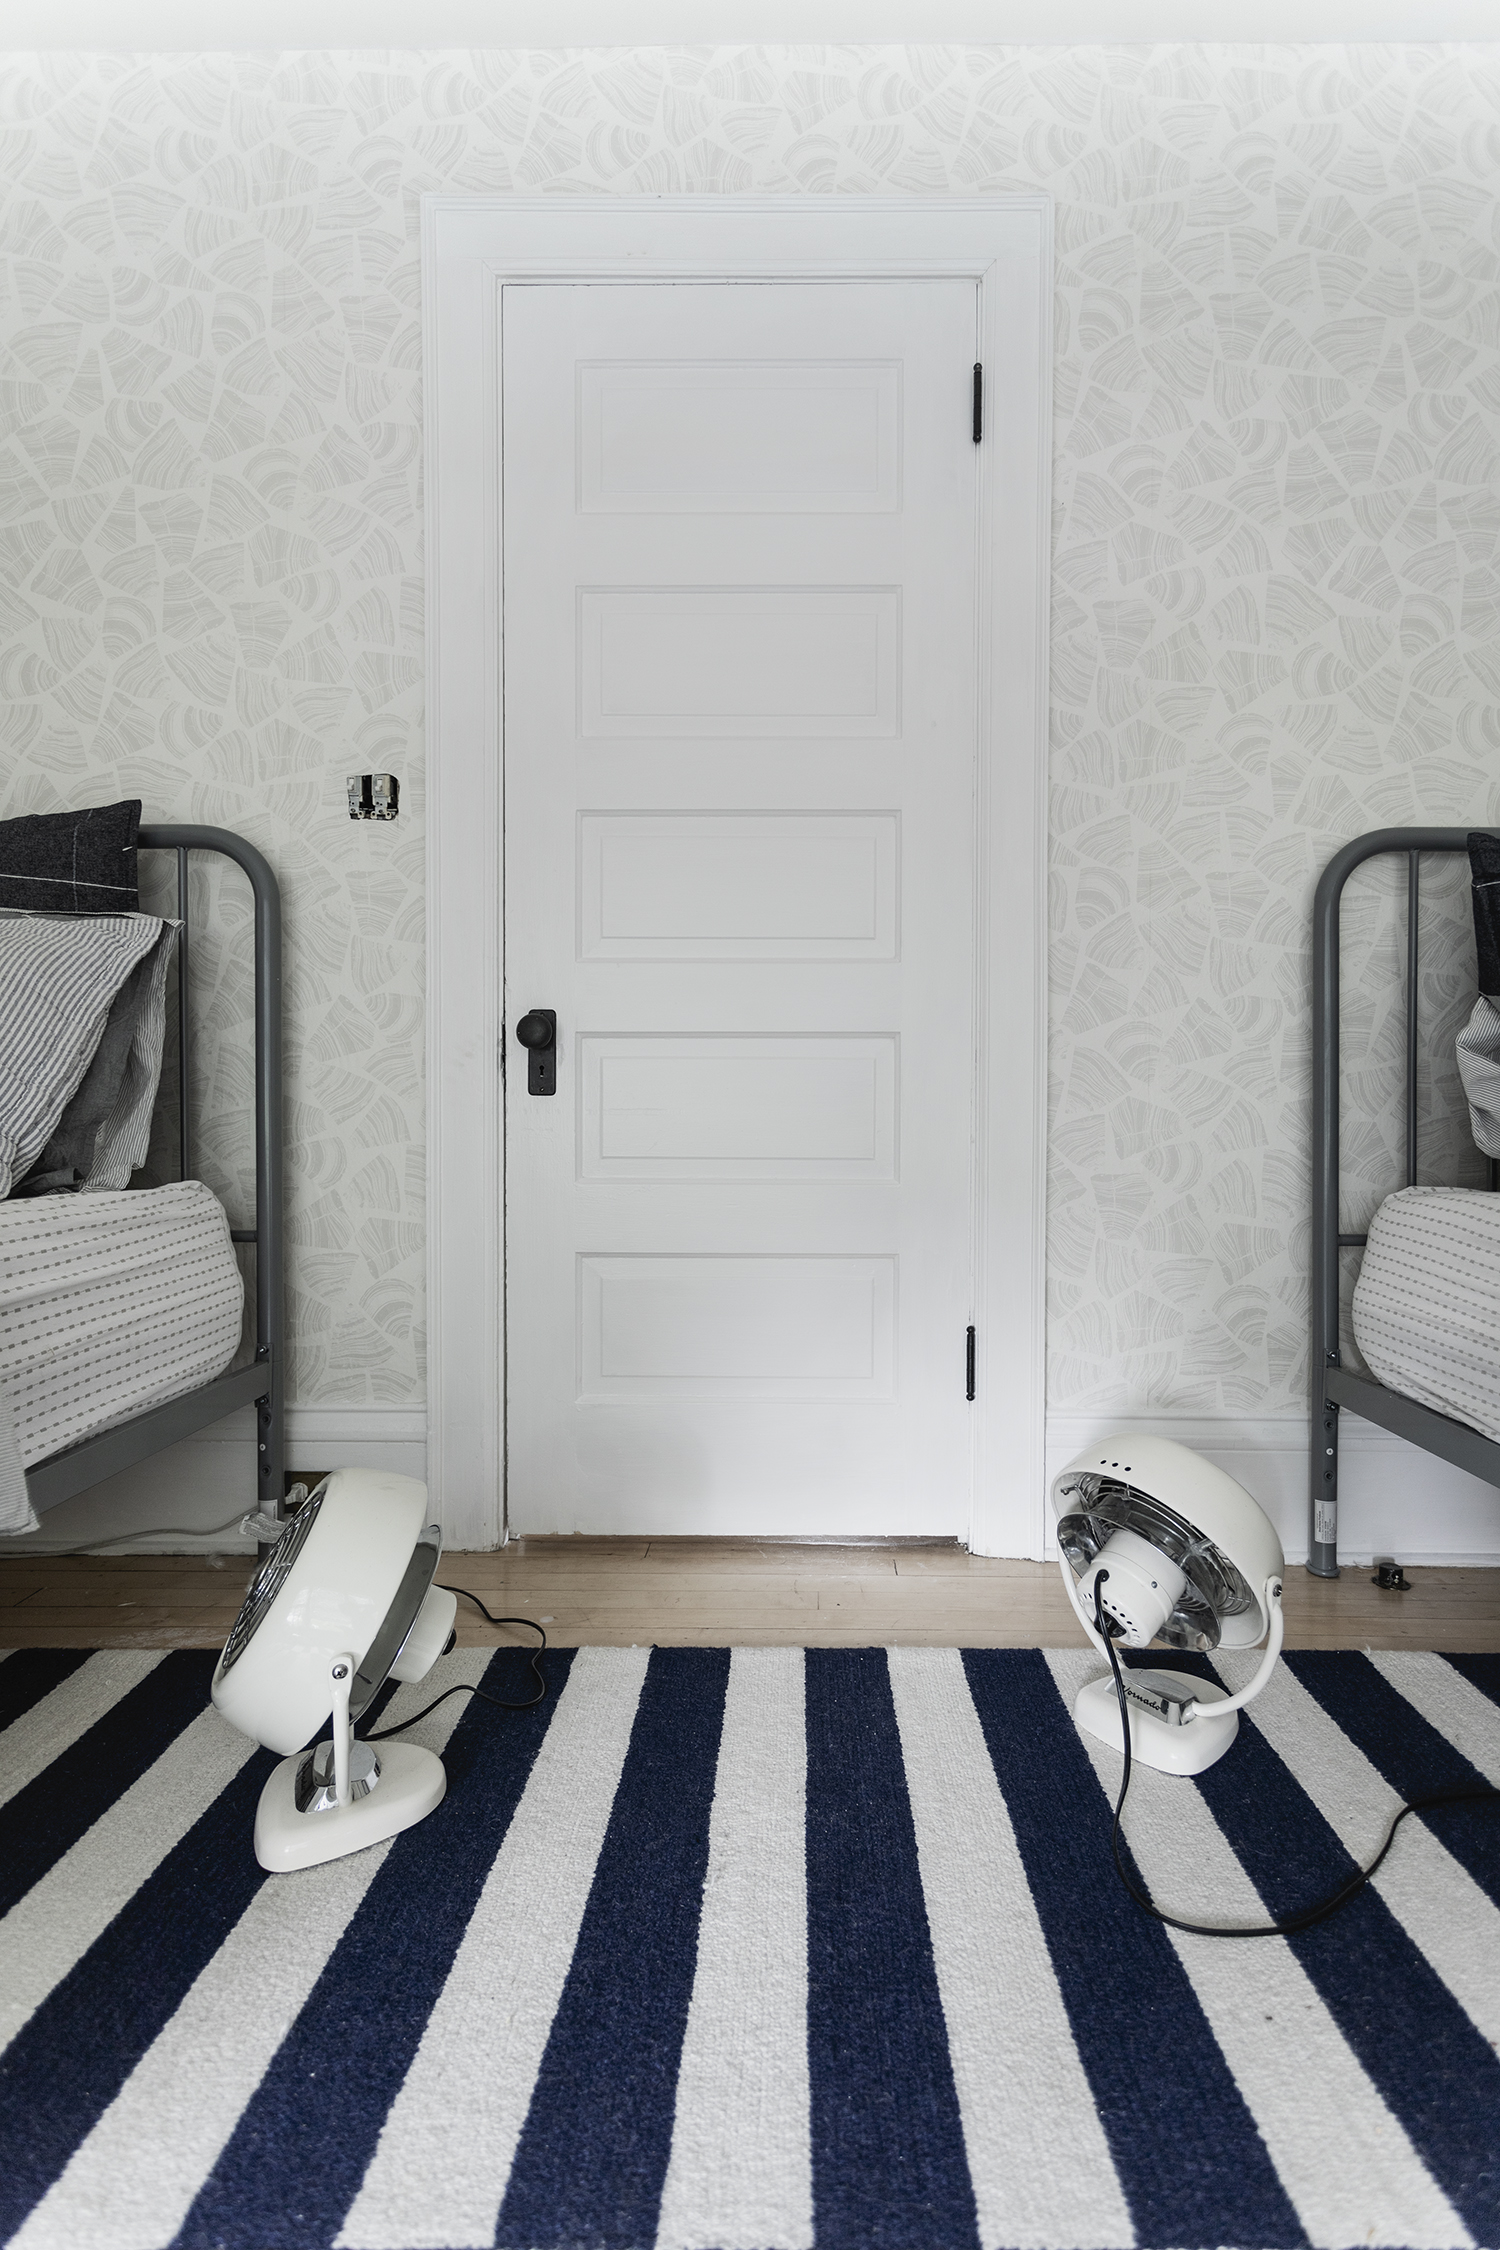
I leave you with this wallpaper update for now. I hope to chip away at the kids’ room project over this summer and I’d love to share with you how I am fixing up the baseboards, restoring hardware, fixing windows, adding decor and all the other stuff that comes with a deep dive into fixing up a space. Hope you are all well. See you sooner than later, I hope.
Thanks to Hygge & West for gifting the wallpaper for this project!


What about sizing? Everything I read says you should apply sizing to the wall so you can get the paper off later – and that’s the extra step that’s giving me inertia!
Looks so good! Love the beds and bedding and rug and now the wallpaper! So good!