


Music: “Like That” & “Xylohphone” from Lazerbeak – used with permission
Hey guys, I thought I would get overly ambitious today and put together a step-by-step demo (with photos and videos) on how to paint your old paneled cabinets. For me this has become quite the science, taking me a lot of trial and error to get the process just right. I thought I could drop some knowledge, and give you some advice if you were considering taking on a similar project.
Things to know about me and my cabinets:
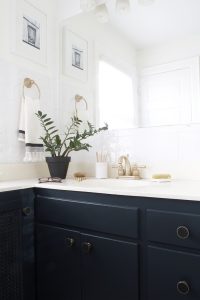
My cabinets were covered in at least three layers of paint, and there were lots of brush strokes showing. I’m telling you this because it’s nearly impossible to get rid of years of old brush strokes with out entirely stripping the cabinet. Honestly, I don’t mind seeing brush strokes, but that’s just me. With this process (described in detail below) I was able to get all of my old cabinets to close and latch properly (which is the greatest) while giving them a smooth and soft-to-the-touch finish, which will remain durable over time.
Please let me know if I missed something or if you have questions, although I think I was pretty thorough. I hope you think so too :)


Prepping your cabinets
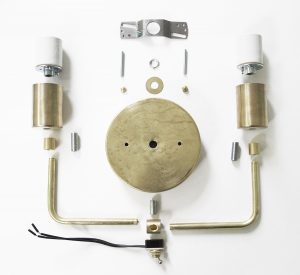
▽ Remove old hardware using a utility knife and flat headed screwdriver. (photo for reference)
▽ If your cabinets are old like mine, they may not be closing properly – this can be fixed. Over years and years houses settle, and you will have to sand your cabinet in order for them to rest in their boxes correctly. This will never be perfect with old cabinets and cabinet doors, but you would be surprised how much better you can get them with a little sand paper. I use a rough 60-grit paper for this part and my electric mouse sander and a sanding block. (photo for reference)
▽ Remove the cabinets from their hinges.
▽ Lay the cabinets flat with the interior side facing up – It’s best to start with the interior of the cabinet, just in case you they were to get scratched after being flipped to the other side.
Priming and Painting your cabinets
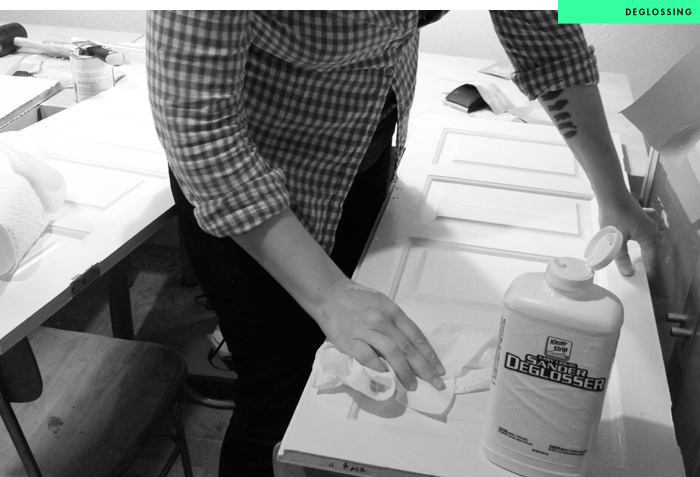
▽Wipe down the cabinets with deglosser. The deglosser helps remove the dirt, grease and grime and roughs up the surface so that it will adhere to the primer. If your cabinets are really messy considering washing with TSP as well. (photo for reference)
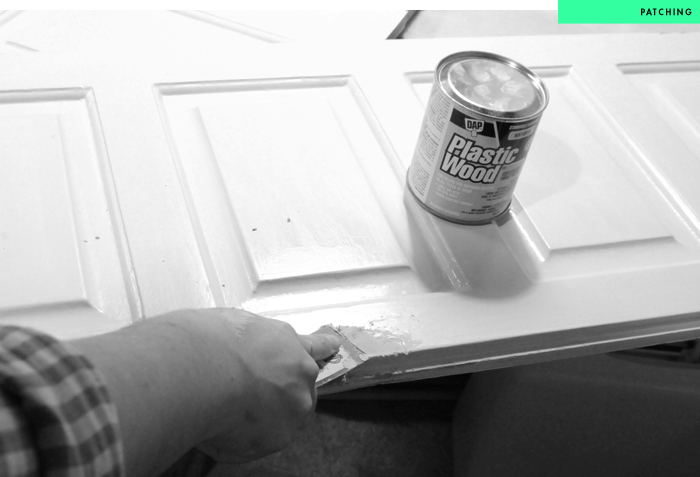
▽ Repair dings and patch holes. I like to use Plastic Wood and a small 1.5 inch putty knife. (photo for reference)
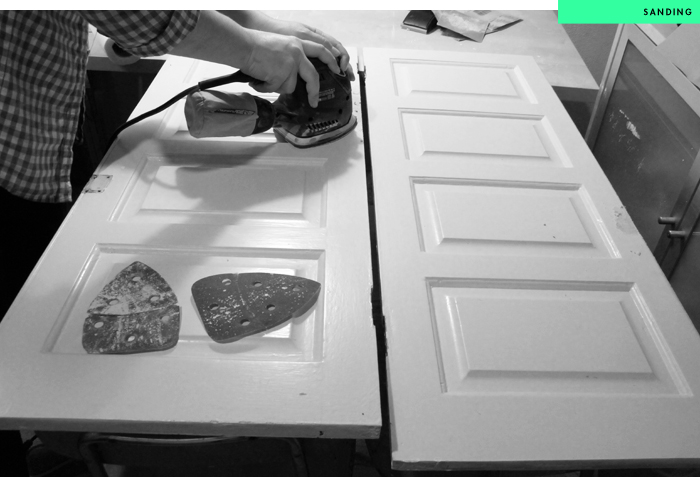
▽ Sand with a 150 grit sandpaper (photo for reference)
▽ Sand again with a finer 220 grit sand paper
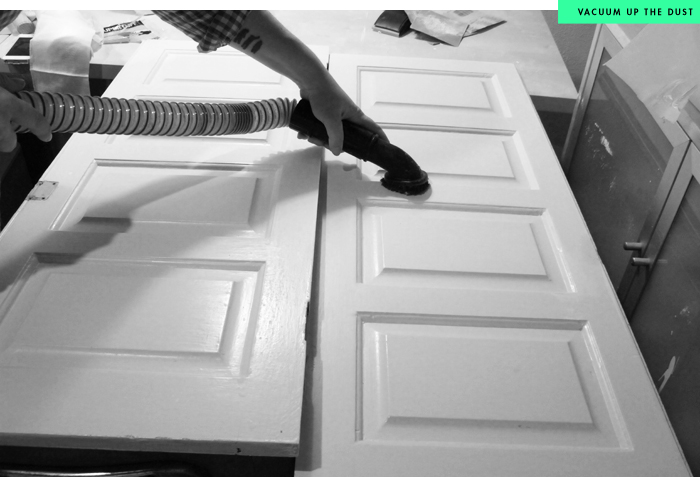
▽ Vacuum up loose dust and paint chips. It’s important to have a clean work area. (photo for reference)
▽ Wipe down the cabinets with a tack cloth.
▽ Paint cabinet with a layer of primer. I used an oil based primer, my cabinets had been previously painted with an oil based paint. I would also recommend pouring your primer and paint into a separate container. Do not work directly from a can. If the can were to get contaminated with dust it would be unusable, but if a small container would get dust or debris in it you could put it aside and start with a fresh container.
Priming your panels
▽ Start by priming the top rail, push the primer outwards to the cabinet sides being careful not to have the primer drip. Smooth the primer in the direction of the grain. Click here to learn more about parts of a cabinet door. (video for reference)
▽ Using a light amount of primer, prime the profile stiles and rails moving quickly as primer dries fast. Use your 2.5″ angled brush to get in the corners making sure not to let the primer pool. (video for reference)
▽ Prime the first panel, spreading the primer out evenly and with the grain. (video for reference)
▽ After primer is evenly dispersed on the panel, use your brush to touch up the profile. (video for reference)
▽ Prime the rail in between the panels and repeat the previous steps until all panels are primed. (video for reference)
▽ Apply primer to both stiles being careful not drip. I like to move the brush outward in small sections against the grain. Once the primer is applied to the stiles, finish by dragging your brush across the top with the grain taking care not to overlap into the rail and panel areas. (video for reference)
▽ Check for drips and touch up. (video for reference)
▽ After using an oil based primer you can continue with using an oil based or latex paint, but you can not paint with latex directly on top of oil based paint.
▽ Let the primer dry for a few hours.
▽ Sand cabinet with 220 grit paper.
▽ Vacuum up loose dust and paint chips.
▽ Wipe down with tack cloth.
Painting your panels
(Repeat these steps for the 1st and 2nd coat of paint)
▽ Start by painting the top rail, push the paint outwards to the cabinet sides being careful not to have the paint drip. Smooth the paint in the direction of the grain. (video for reference)
▽ Using a light amount of paint, paint the profile stiles and rails moving quickly as primer dries fast. Use your 2.5″ angled brush to get in the corners making sure not to let the paint pool. (video for reference)
▽ Paint the first panel, spreading the paint out evenly and with the grain. (video for reference)
▽ After the paint is evenly dispersed on the panel, use your brush to touch up the profile. (video for reference)
▽ Paint the rail in between the panels and repeat the previous steps until all panels are painted. (video for reference)
▽ Apply paint to both stiles being careful not drip. I like to move the brush outward in small sections against the grain. Once the paint is applied to the stiles, finish by dragging your brush across the top, with the grain taking care not to overlap into the rail and panel areas. (video for reference)
▽ Check for drips and touch up. (video for reference)
The final Steps
▽ Let paint dry overnight.
▽ Sand with 220 grit sand paper.
▽ Vacuum up loose dust and paint chips.
▽ Wipe down with tack cloth.
▽ Paint final layer referring to the steps listed above for painting.
▽ Let the final layer cure for at least 48 hours and up to 5 days.
▽ Flip over your cabinet to paint the cabinet face and repeat all of the previous steps.


I love the tutorial because women can easily follow it. There are things at home that is hard to do for women but this one is just a breeze. Thanks
Yeah, at my house the lady does almost everything. I don’t know where we’d be if it was all the handy work was left up to the husband.
I need serious motivation to paint my own cabinets, so I love this tutorial! (And I guess I also love it because I am a woman? Ha!)
You should paint them, but I’m gonna warn you, it’s a total pain in the butt. I’m losing my mind painting these cabinets, but I am getting so close to being done. I have no idea how hard tiling will be, but I’m guessing these cabinets will be the hardest and most tedious part of the whole operation. Be prepared to have a calendar and a system before you jump in! You should totally do it though!