


Hello, budz! It’s so weird writing posts without having the luxury of easily photographing the subject. We have such limited time at the cabin, that when I’m there, project time is strictly for projects and chill time is strictly for chilling. Get it? I bring you my best stab at on-the-fly documentation!
I took the photos for this post within a matter of minutes while the fam was waiting for me in the car. I crossed my fingers hoping that I got good shots, and would be able to share the story of what I’ve been cooking up in the kitchen (and it ain’t no dinner bay be!).
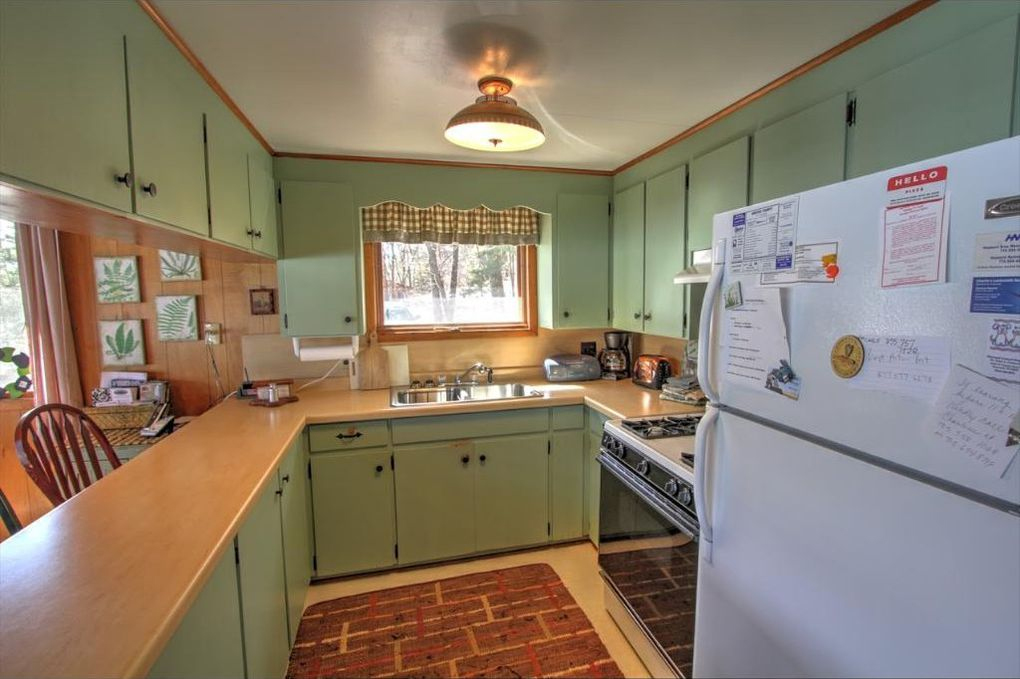
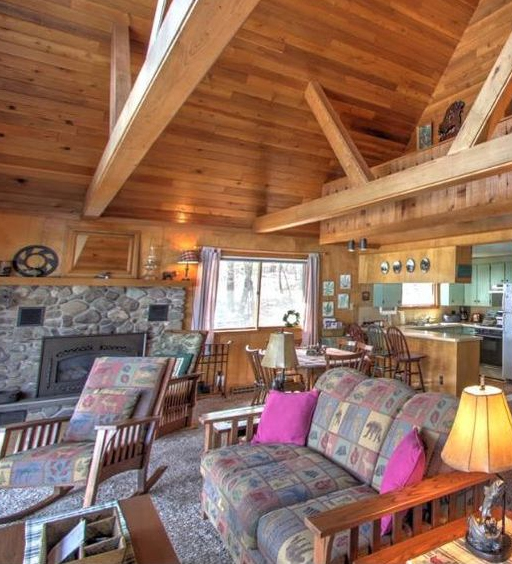
Let’s just take a little trip down memory lane, shall we? As seen below, the kitchen only a few short months ago when it was still pretty dang cute, but wasn’t just right for us.
We weren’t interested in a total overhaul, just enough to make it cool and functional, and a little more cohesive with the rest of the main floor living space. BeeTeeDubs, this is the first time I’ve had to work with an open concept floor plan. I’m way not used to this way of designing. Obviously, everything needs to work together because it is basically the same room. Spaces need to be created using visual cues like furniture arrangement, and cohesion needs to be made using using simple pattern and repeating colors. Or at least that how I’m trying to approach it (aka wingin’ it).
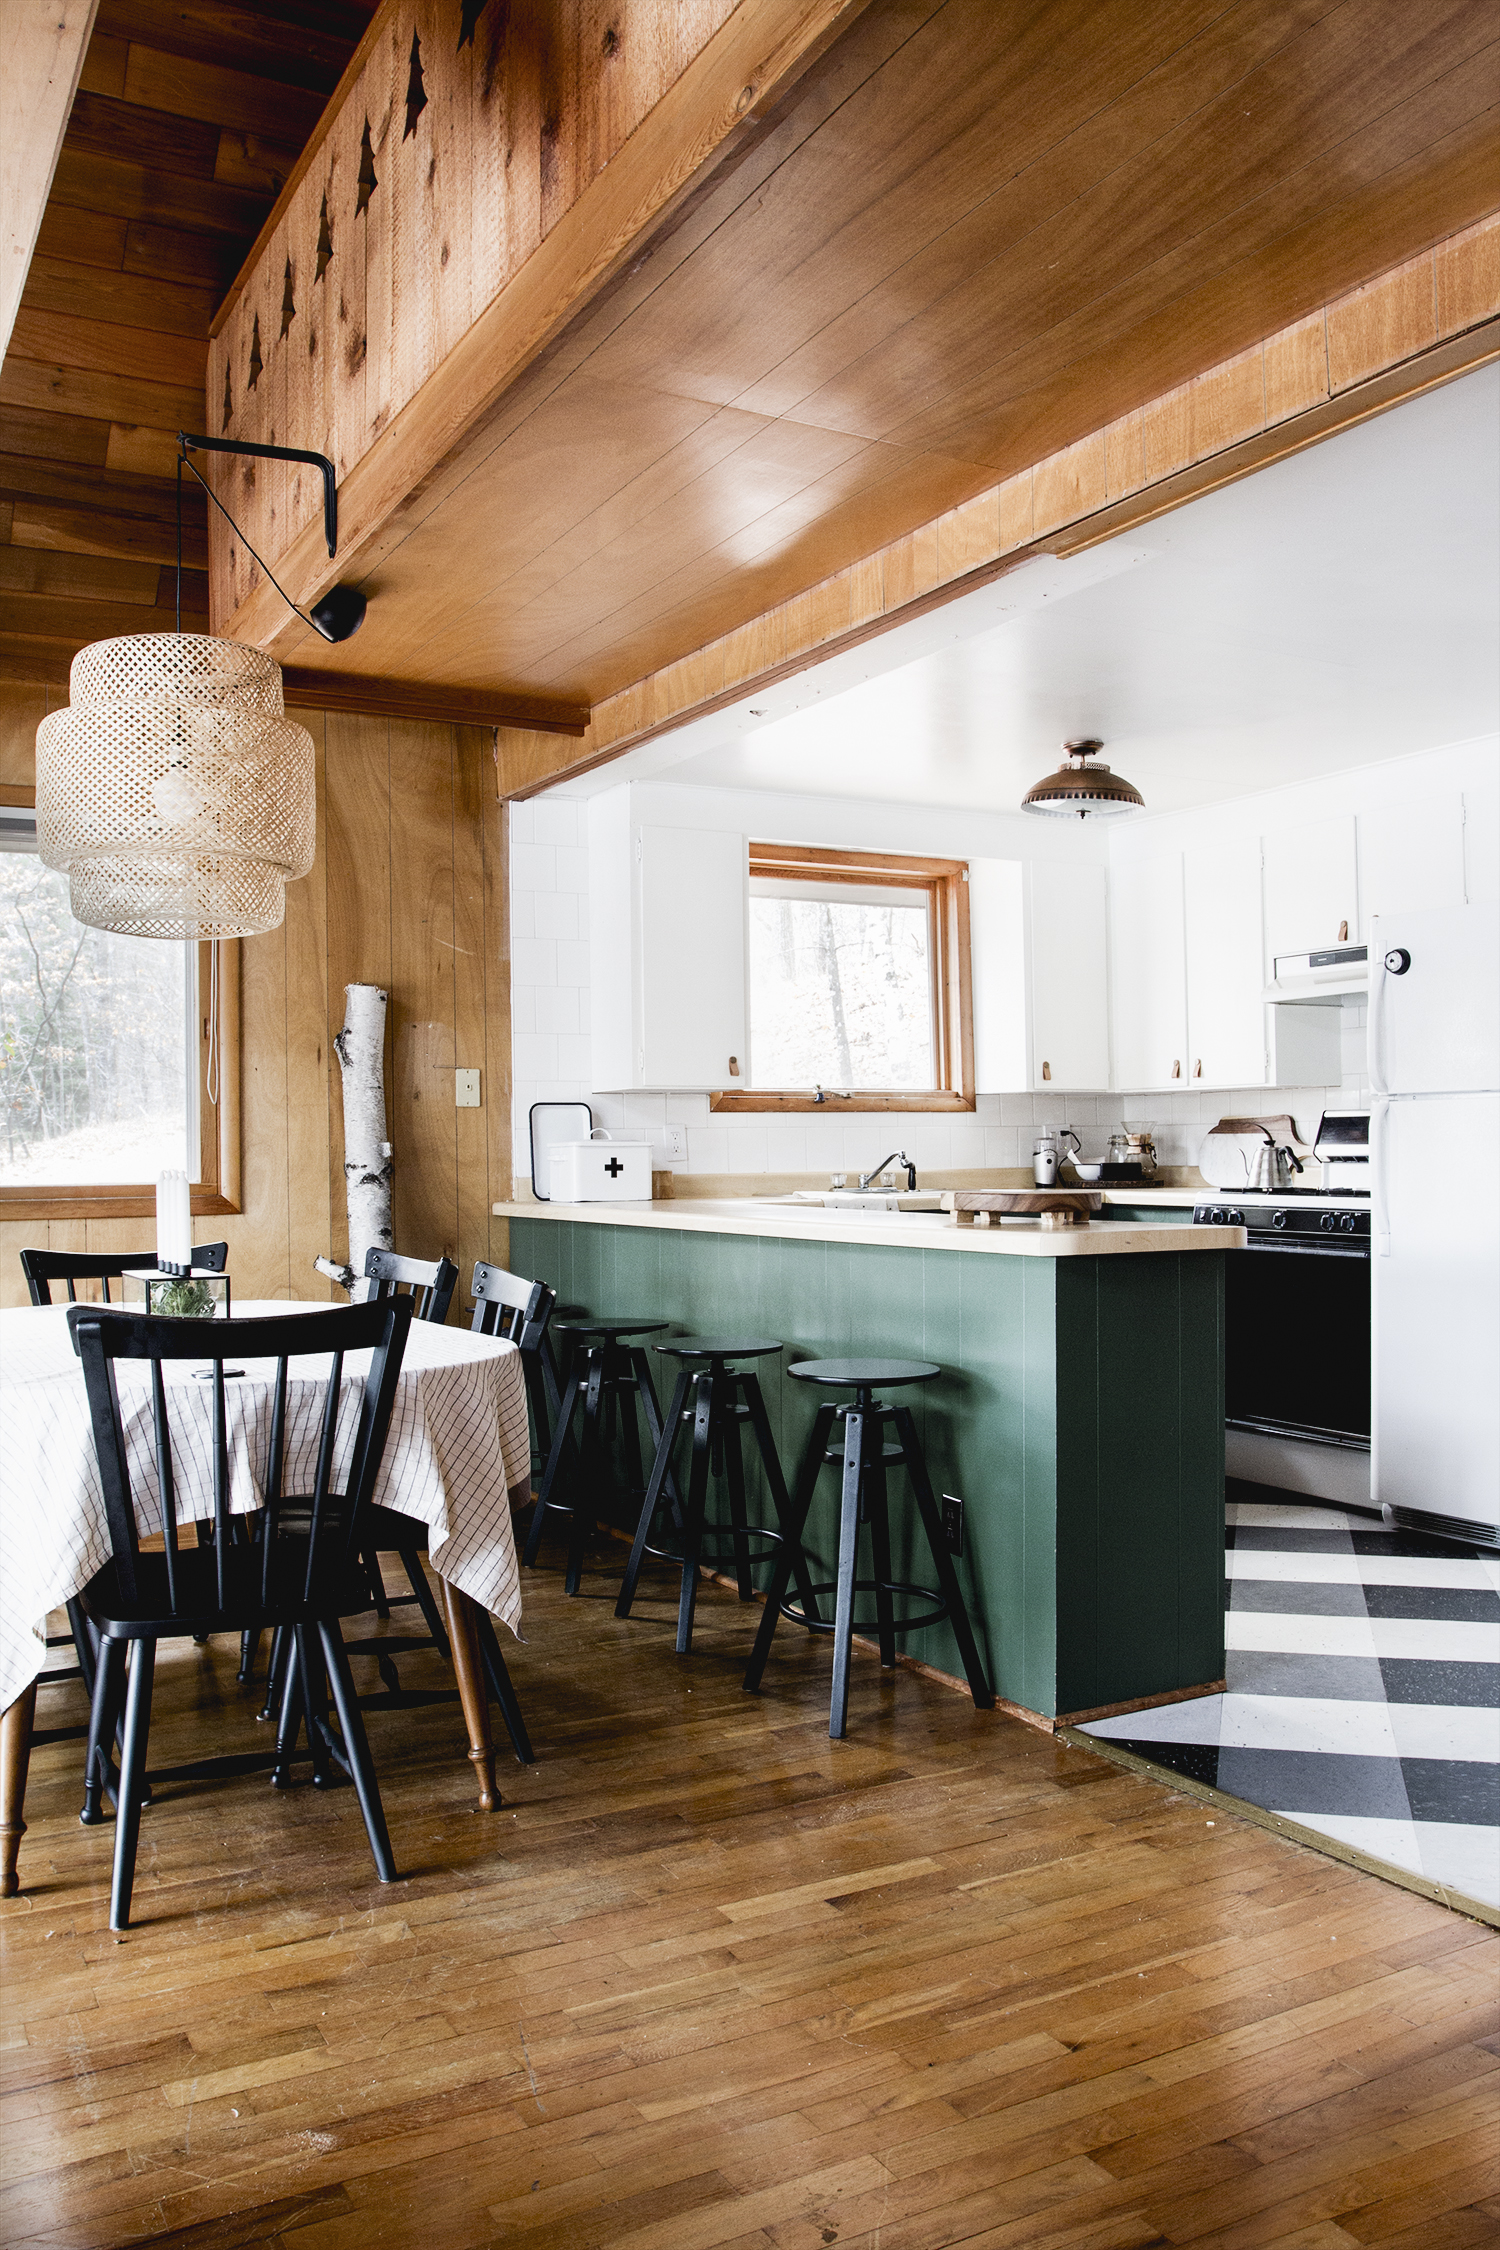
My ma and I took down the cabinets that hung over the peninsula before the ink was even dry on the mortgage. It changed the space instantly, opening it up the flow of the open living room to the kitchen. Not only did it allow the chef d’jour be able to chill with kitchen guests on the bar/peninsula/counter-thingy, but also allowed the cook to enjoy a sweet view while cooking – it’s hard to see through cabinets!
You may notice that part of the ceiling still needs to be patched. Just pretend you don’t see anything – it’s that lingering job that I just don’t want to do. If I were a betting man, and I’d say I’d be lucky if it would be fixed-up by spring.
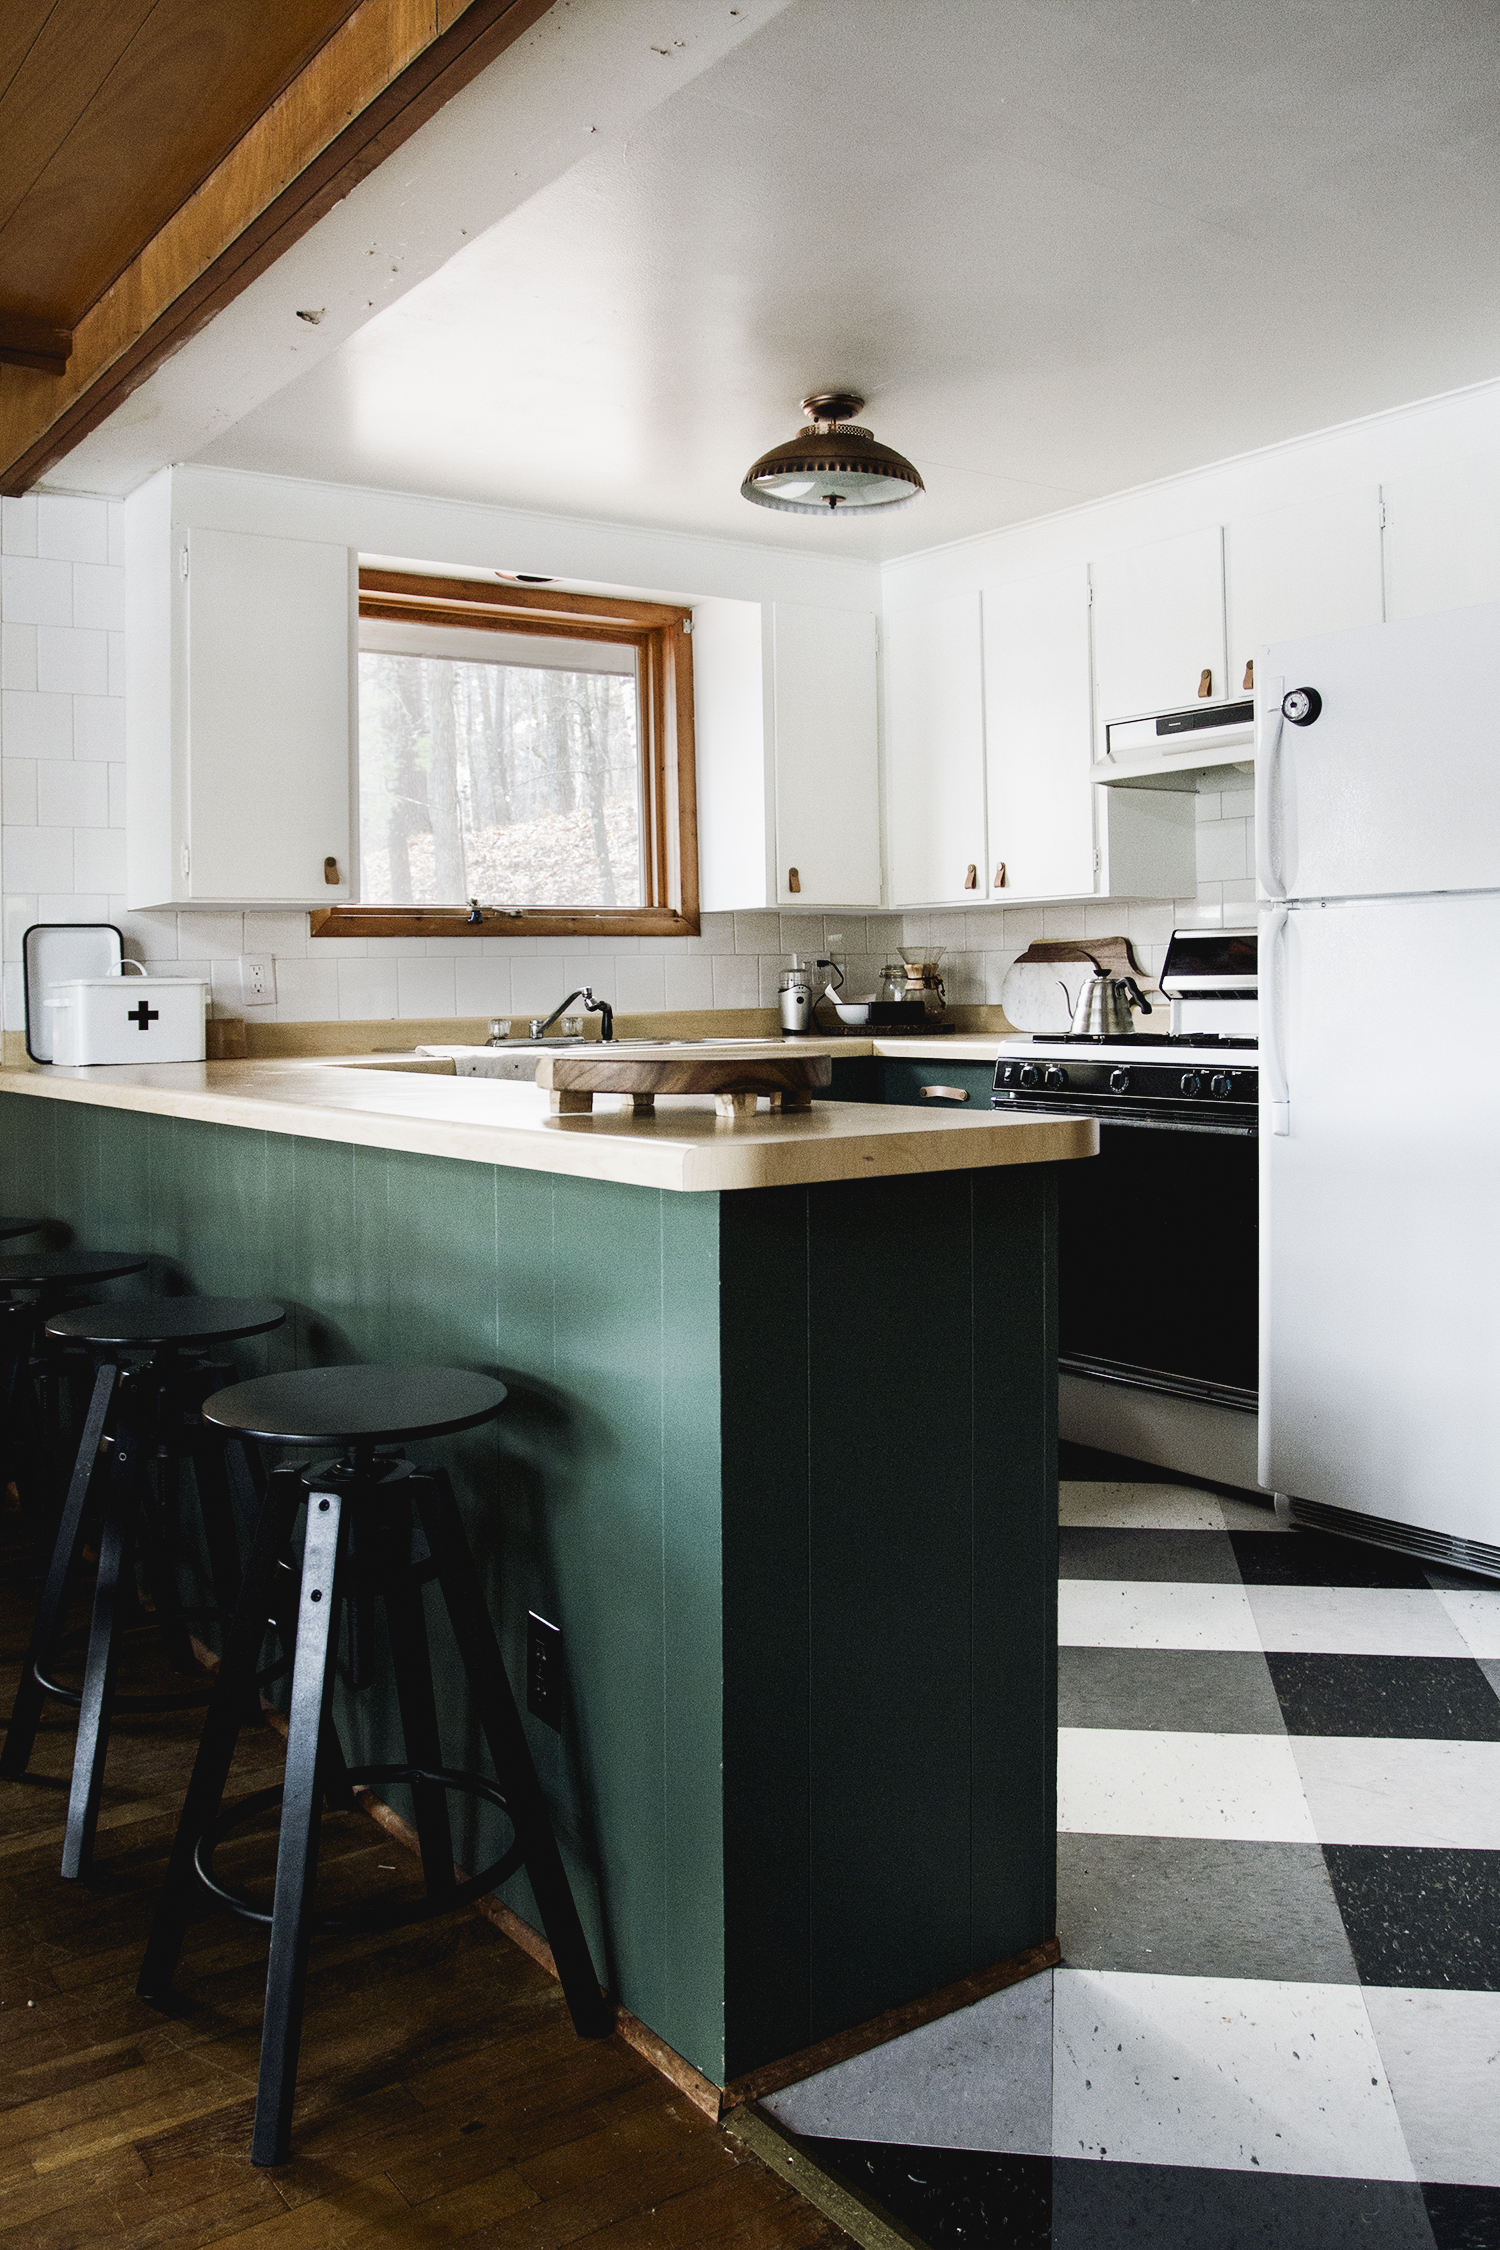
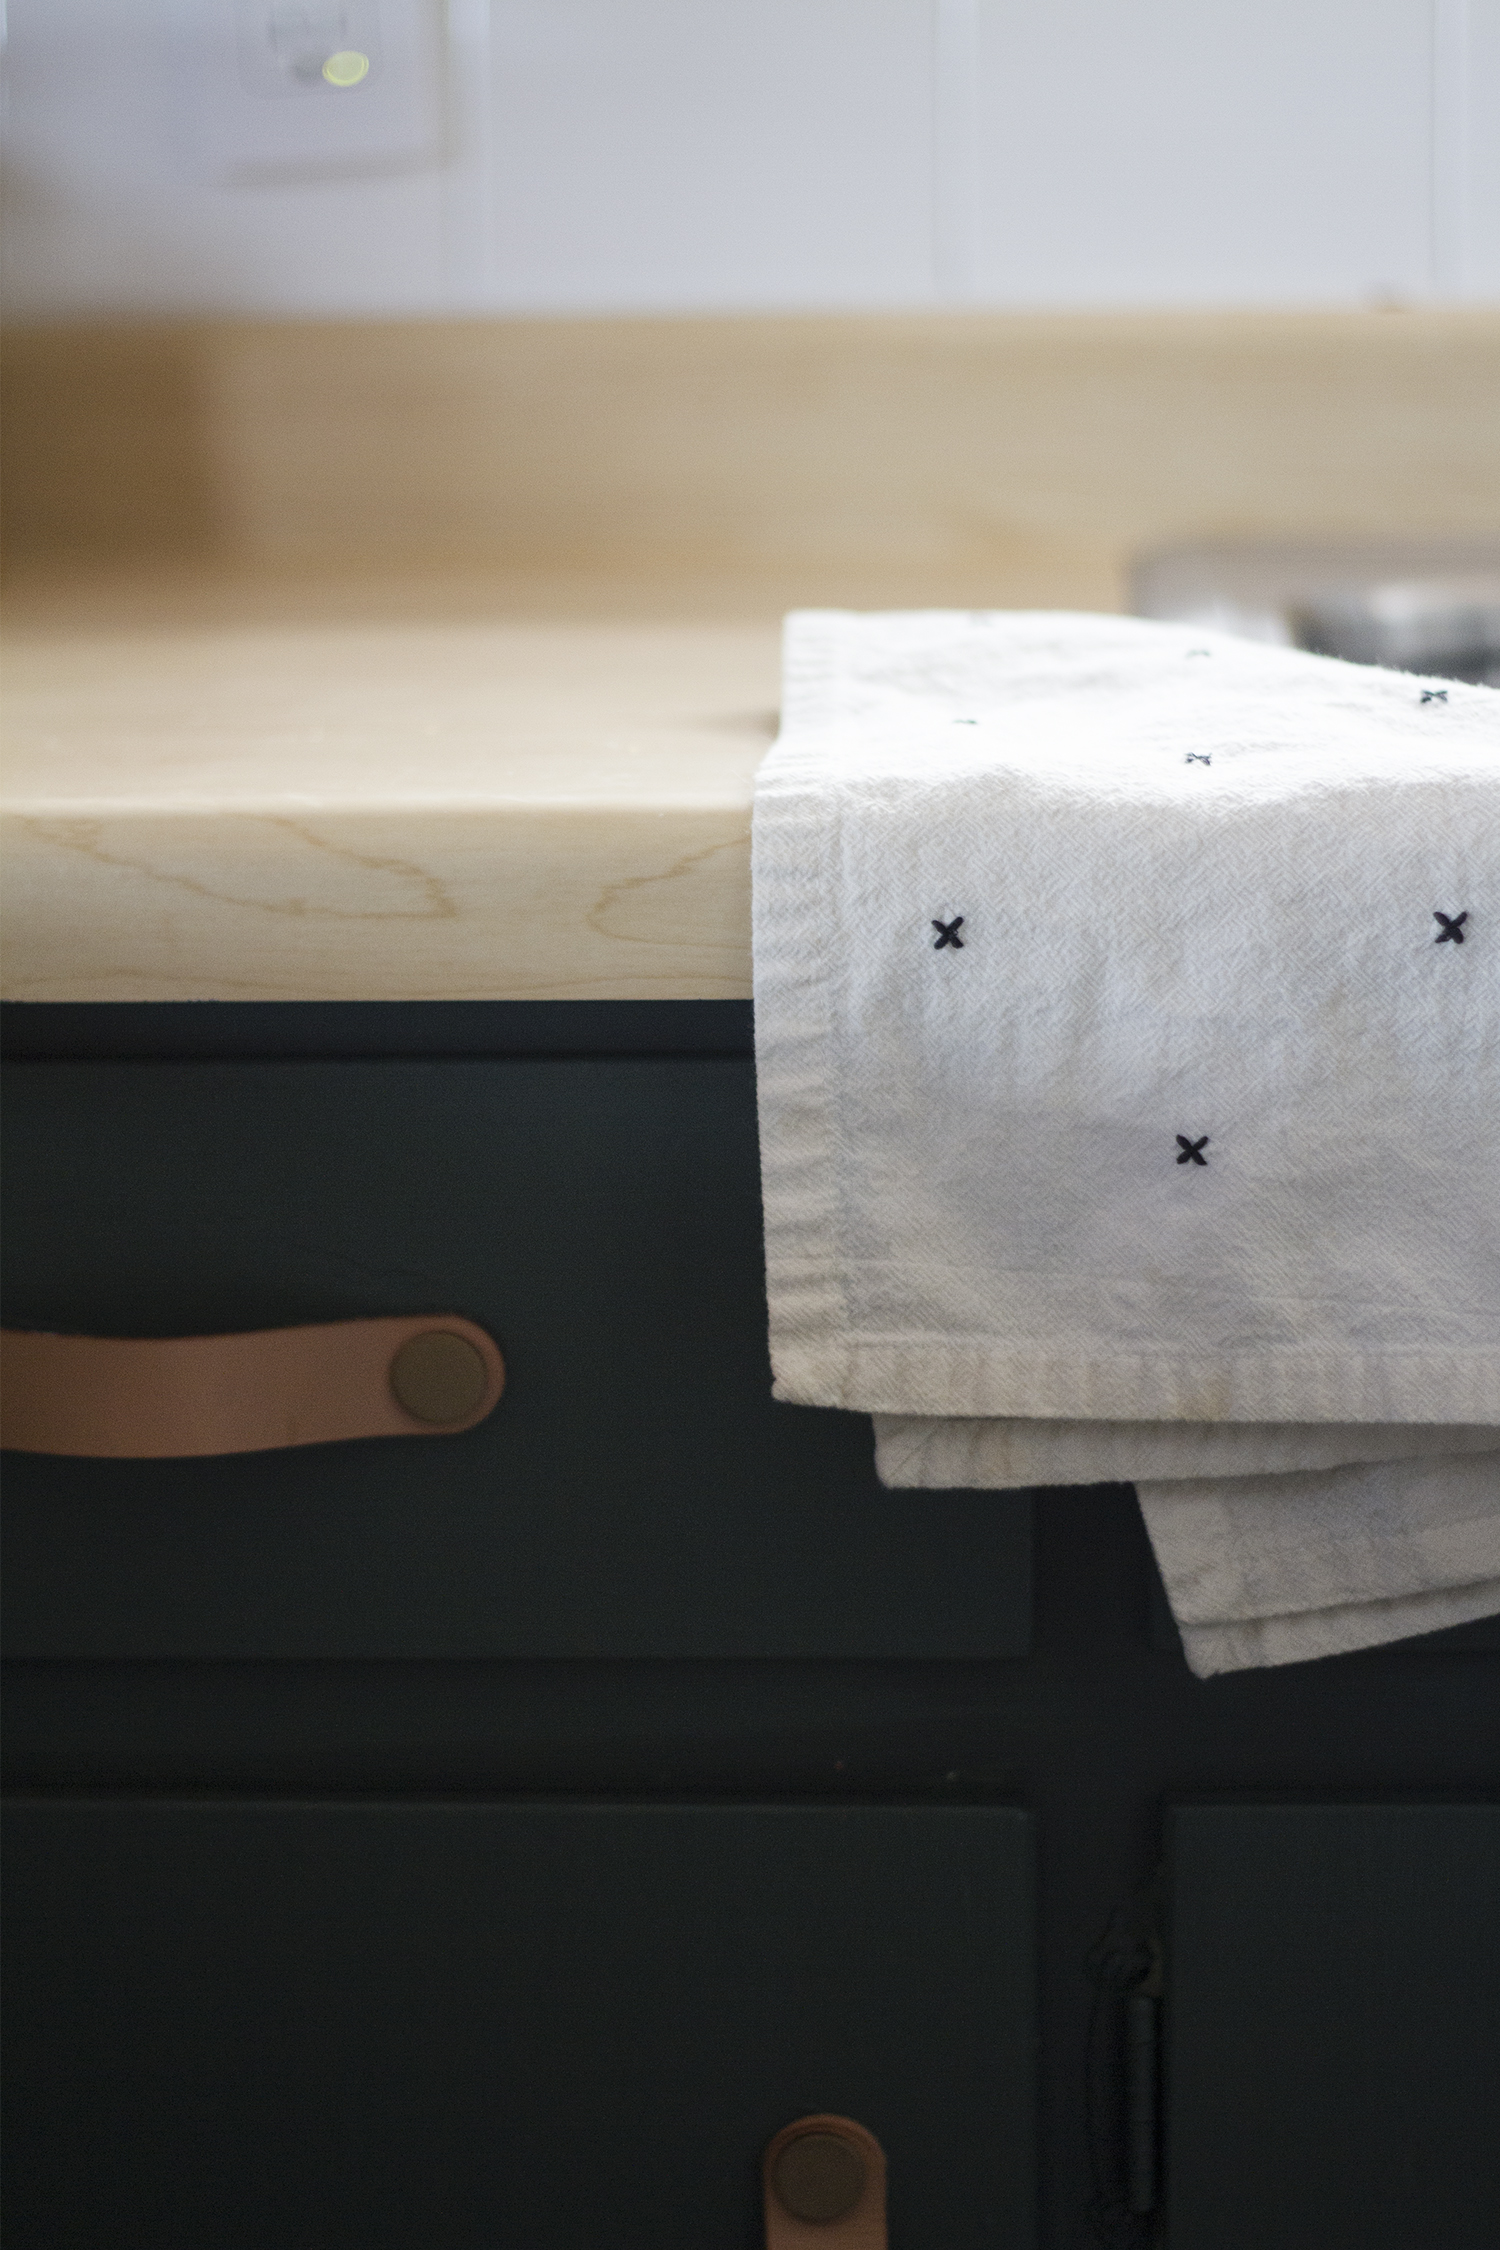
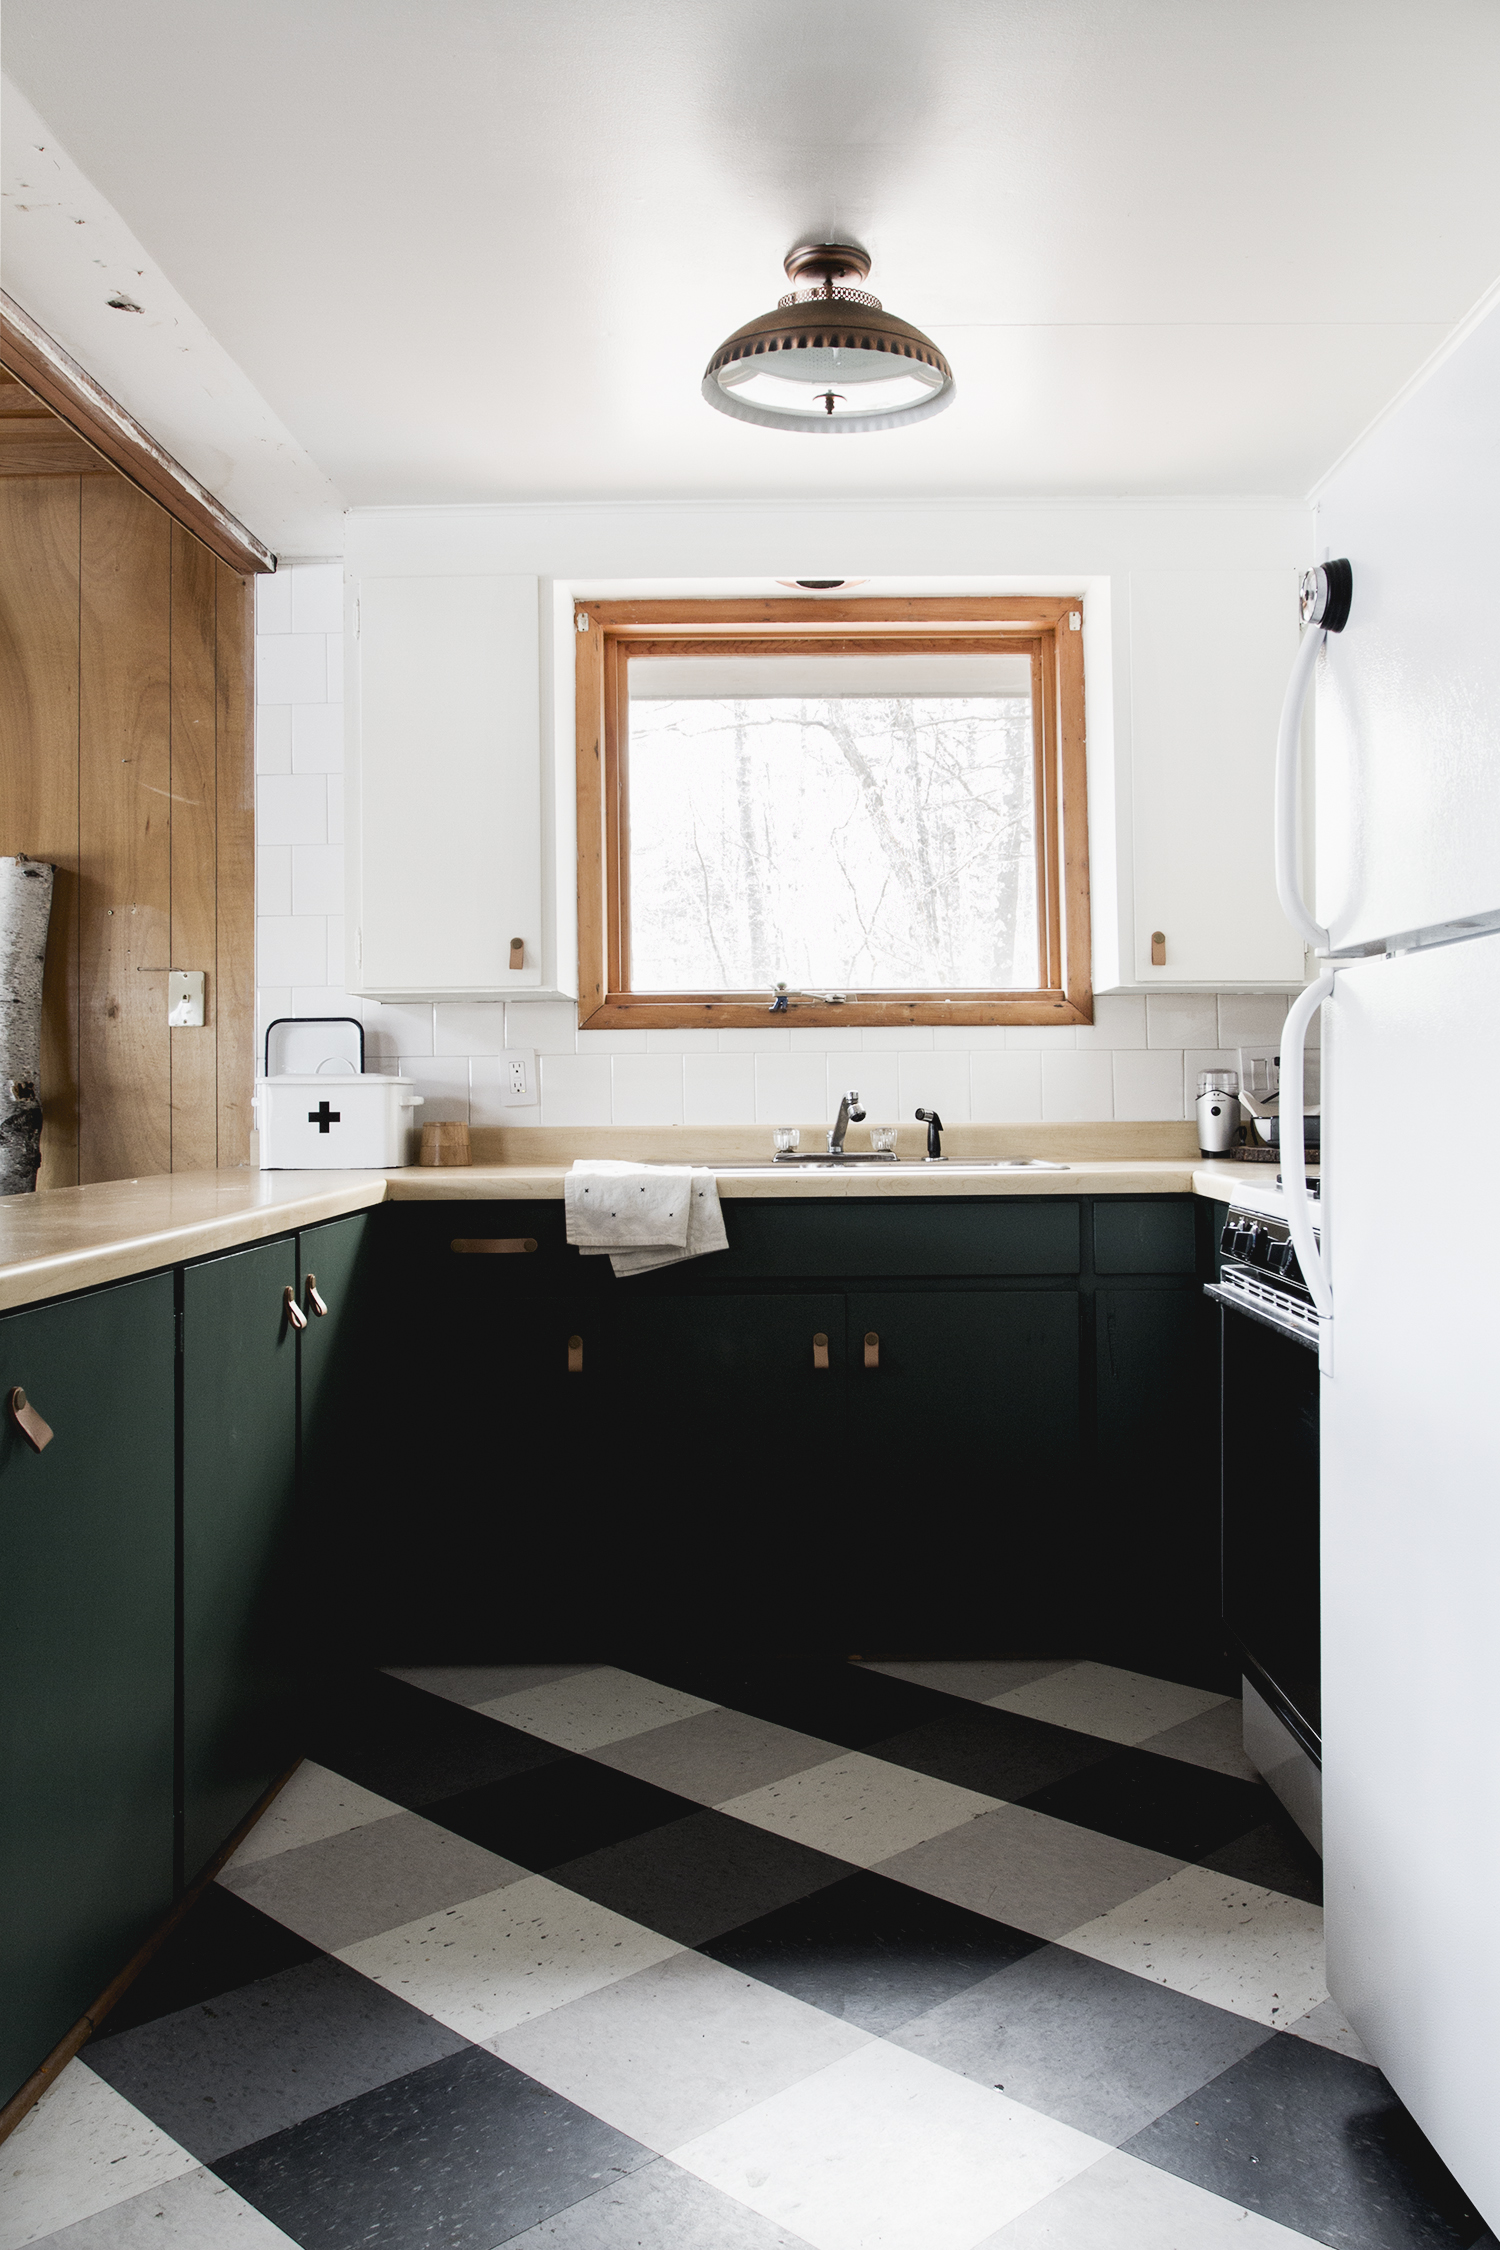
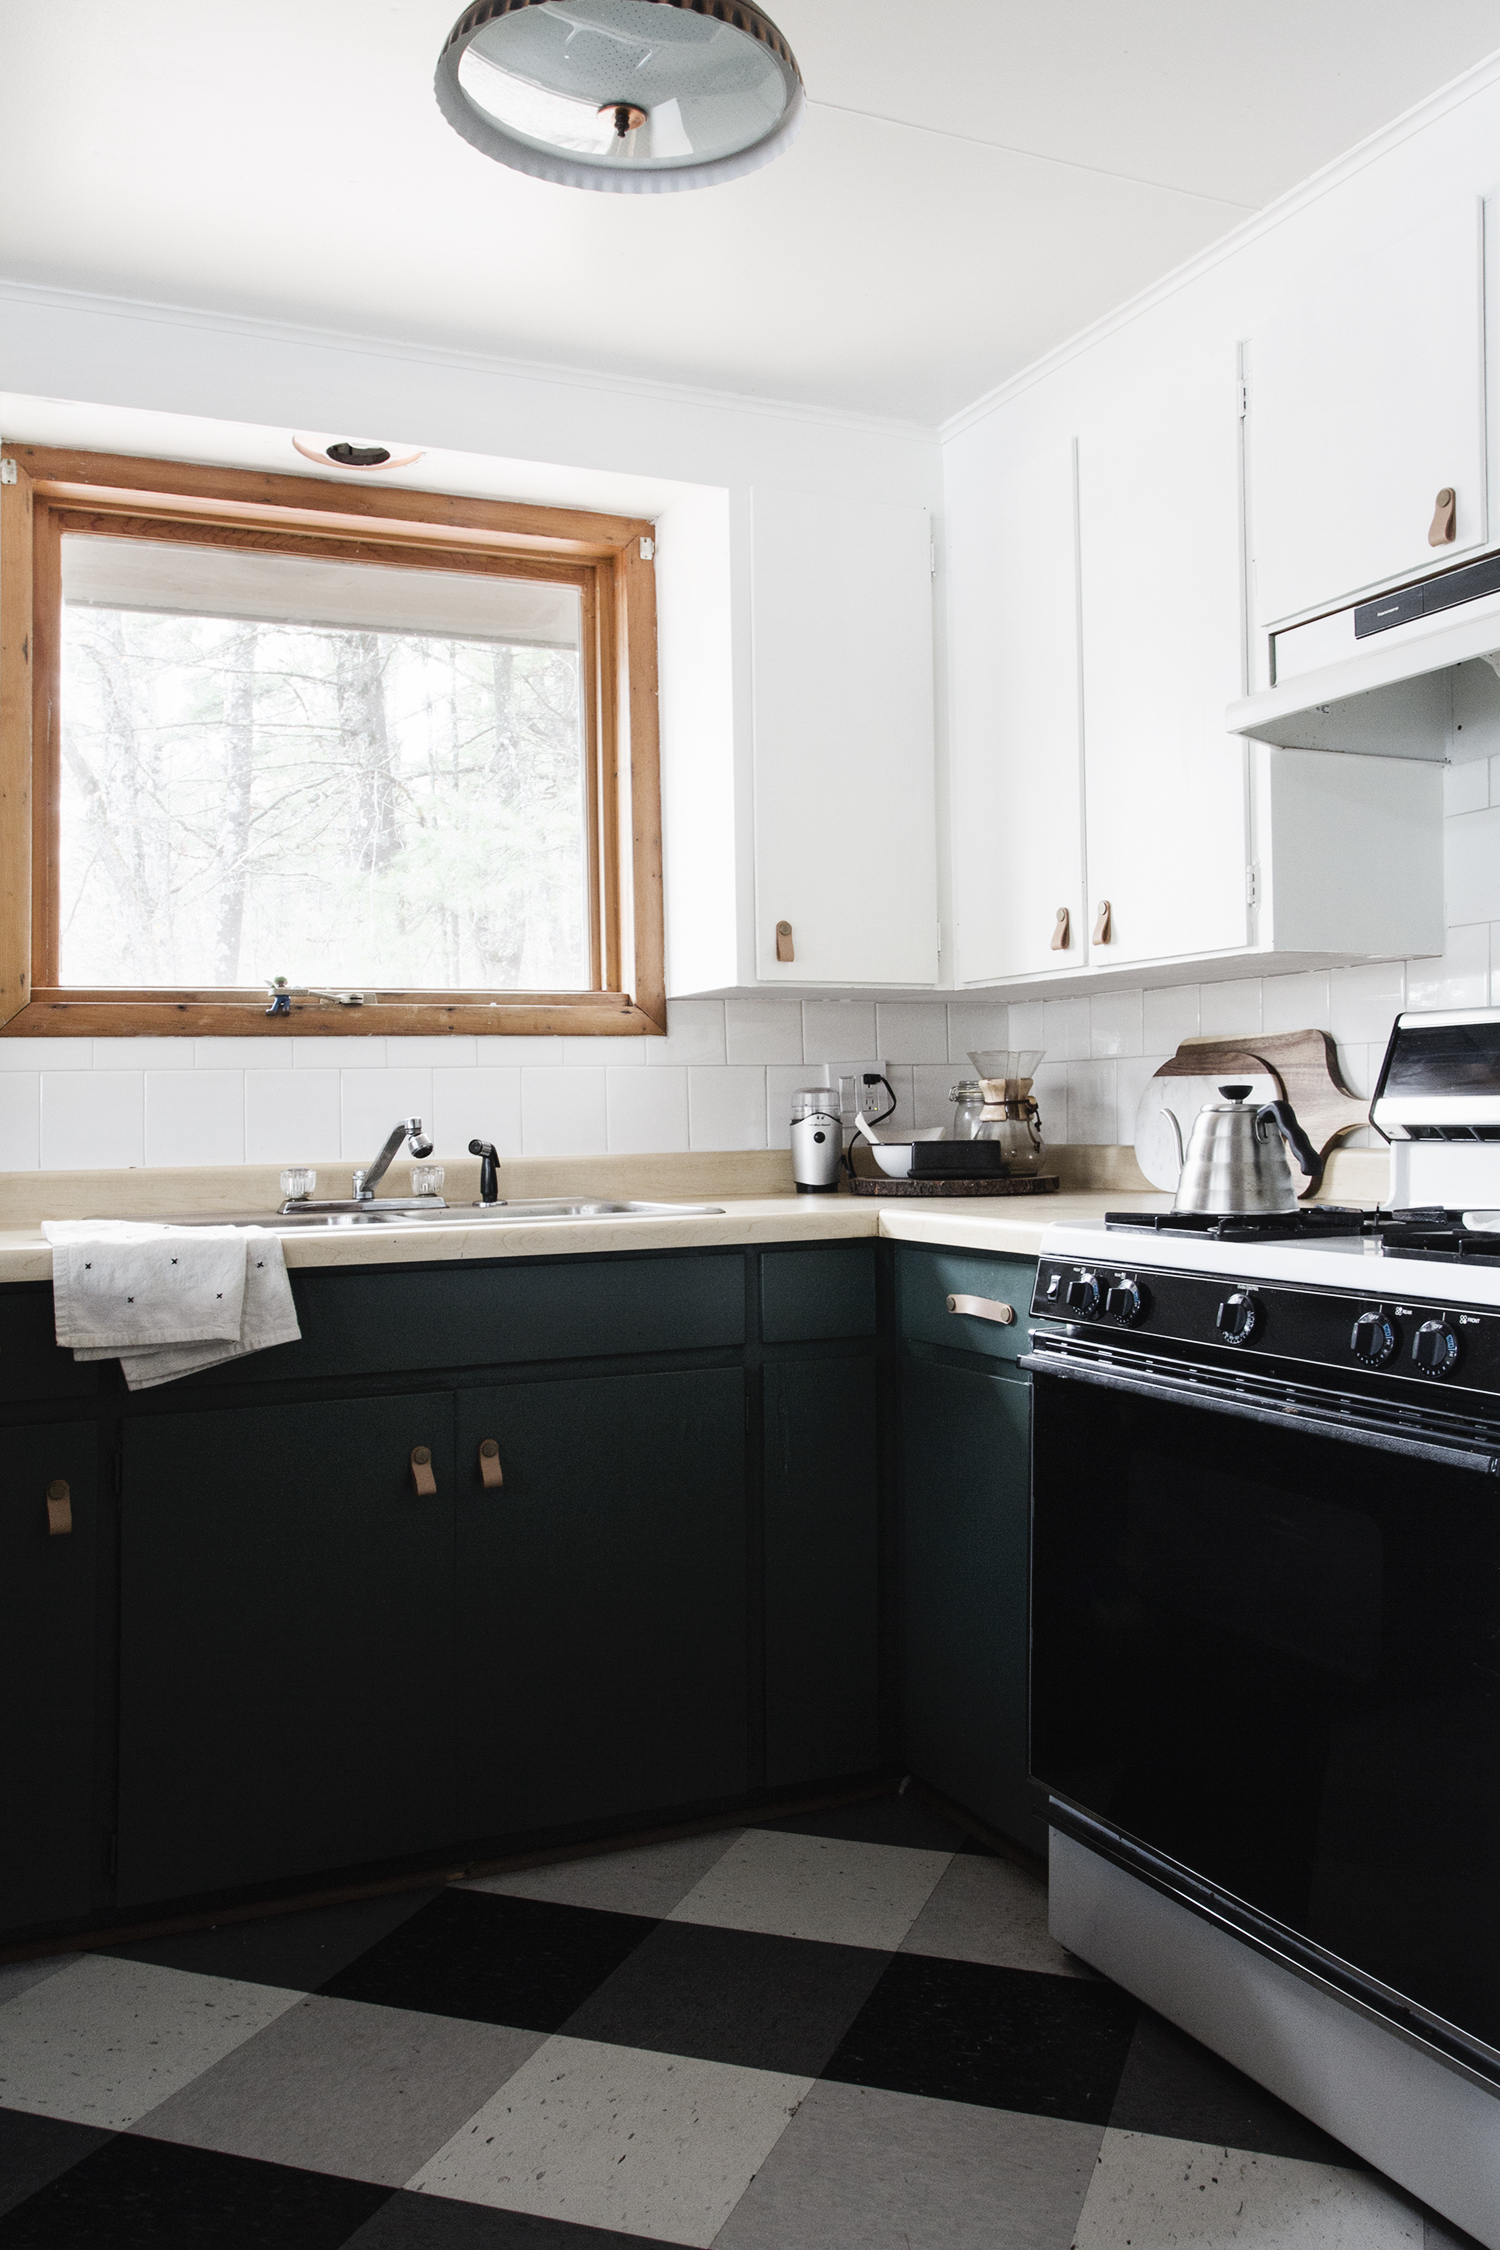
God bless paint. The cabinets are simple plywood cabinets, nothing fancy. They were functional, but they aren’t in the best of shape. We’re in no rush to replace them, especially since a few quarts of paint can make them seem about 10 bajillion times better (maybe a little exaggerated, but c’mon!). I whipped up my own custom blend of dark green on the bottom – I’m getting real experimental with paint colors in my old age. I’ll share the recipe if anyone’s interested.
The white paint used on the upper cabinets, is my go-to ‘Linen’ color from Clark & Kensington. It’s a bright white with warm undertones, and it always works well with the off-the-shelf tile.
And I tiled! Maybe you noticed that? Nothing is precious in this kitchen, and I just needed it to have a clean look. It only took two boxes of 6×6 white tile, and half an afternoon to complete the job. I was impressed with myself that it only cost around $100 bucks, and when I asked Jeff what he thought I had spent, he said “I dunno, $80 bucks?”. Point is, he doesn’t know what he’s talking about and I should never ever ask him a question like that. It looks way more expensive than an $80 dollar tile job, I’d say at least $150, wouldn’t cha?
I tiled right on top of the wood paneling because you know, lipstick on a pig, why not!? Sometimes you just gotta do what works in the moment, and since this was the moment, I wasn’t about to stop and take down the paneling and put up a plywood or drywall backing when there was perfectly good, perfectly solid wood paneling to tile on.
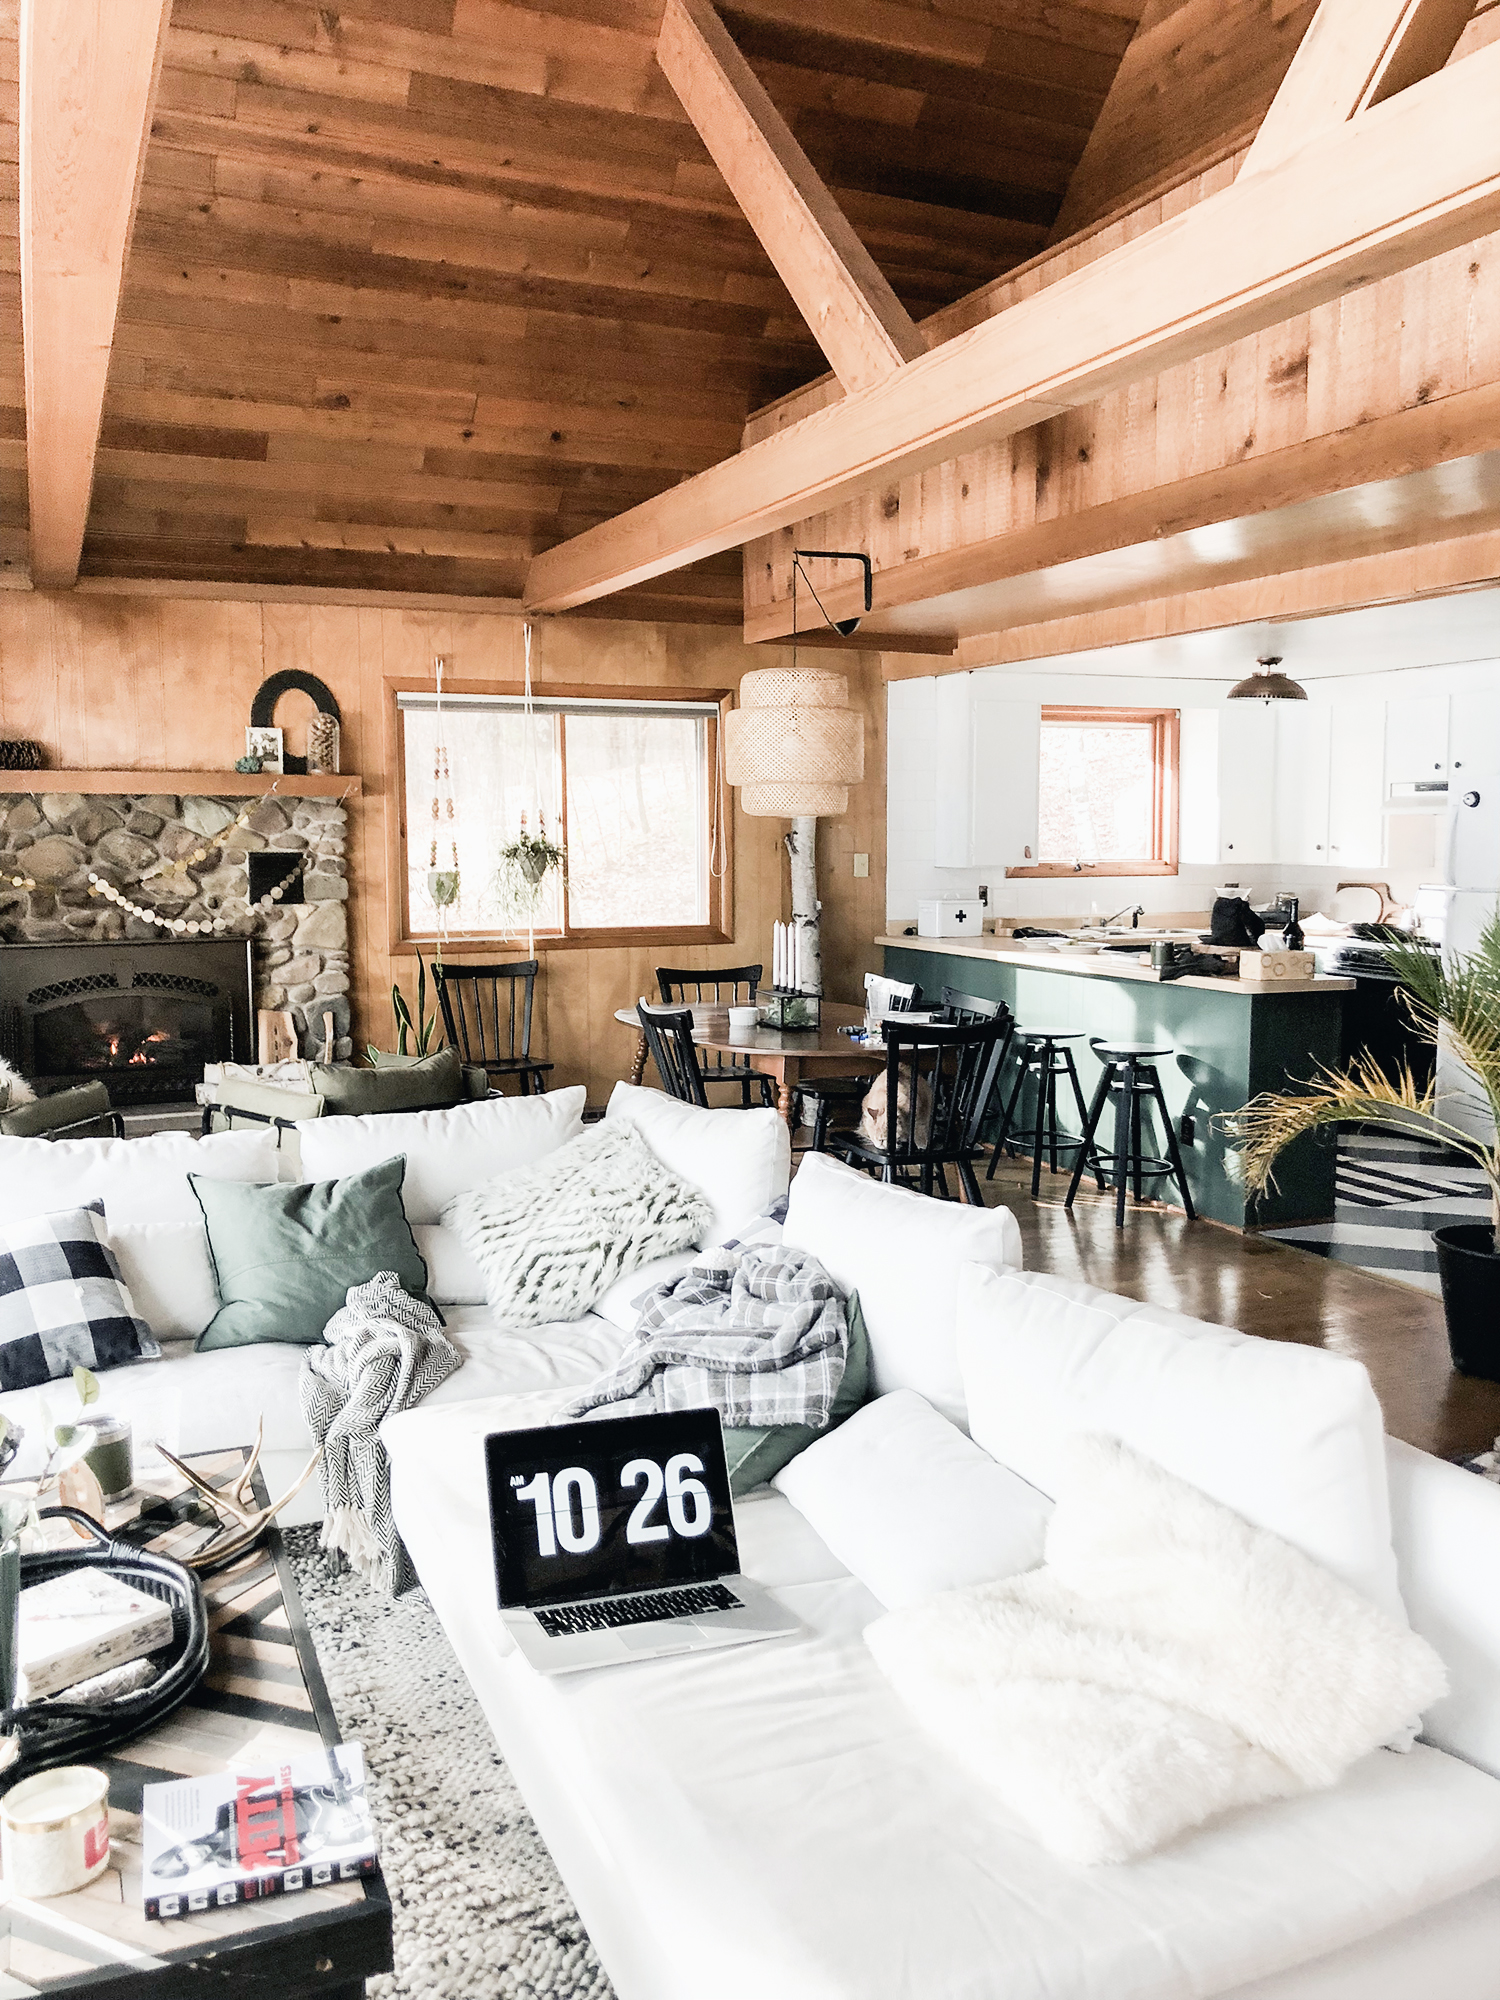
Check out these unprofesh phone photos of the main living area Before and After, or After and Before. See how taking down those cabinets in the kitchen really opened up the space? Not to mention a few other improvements like dem wood floors.
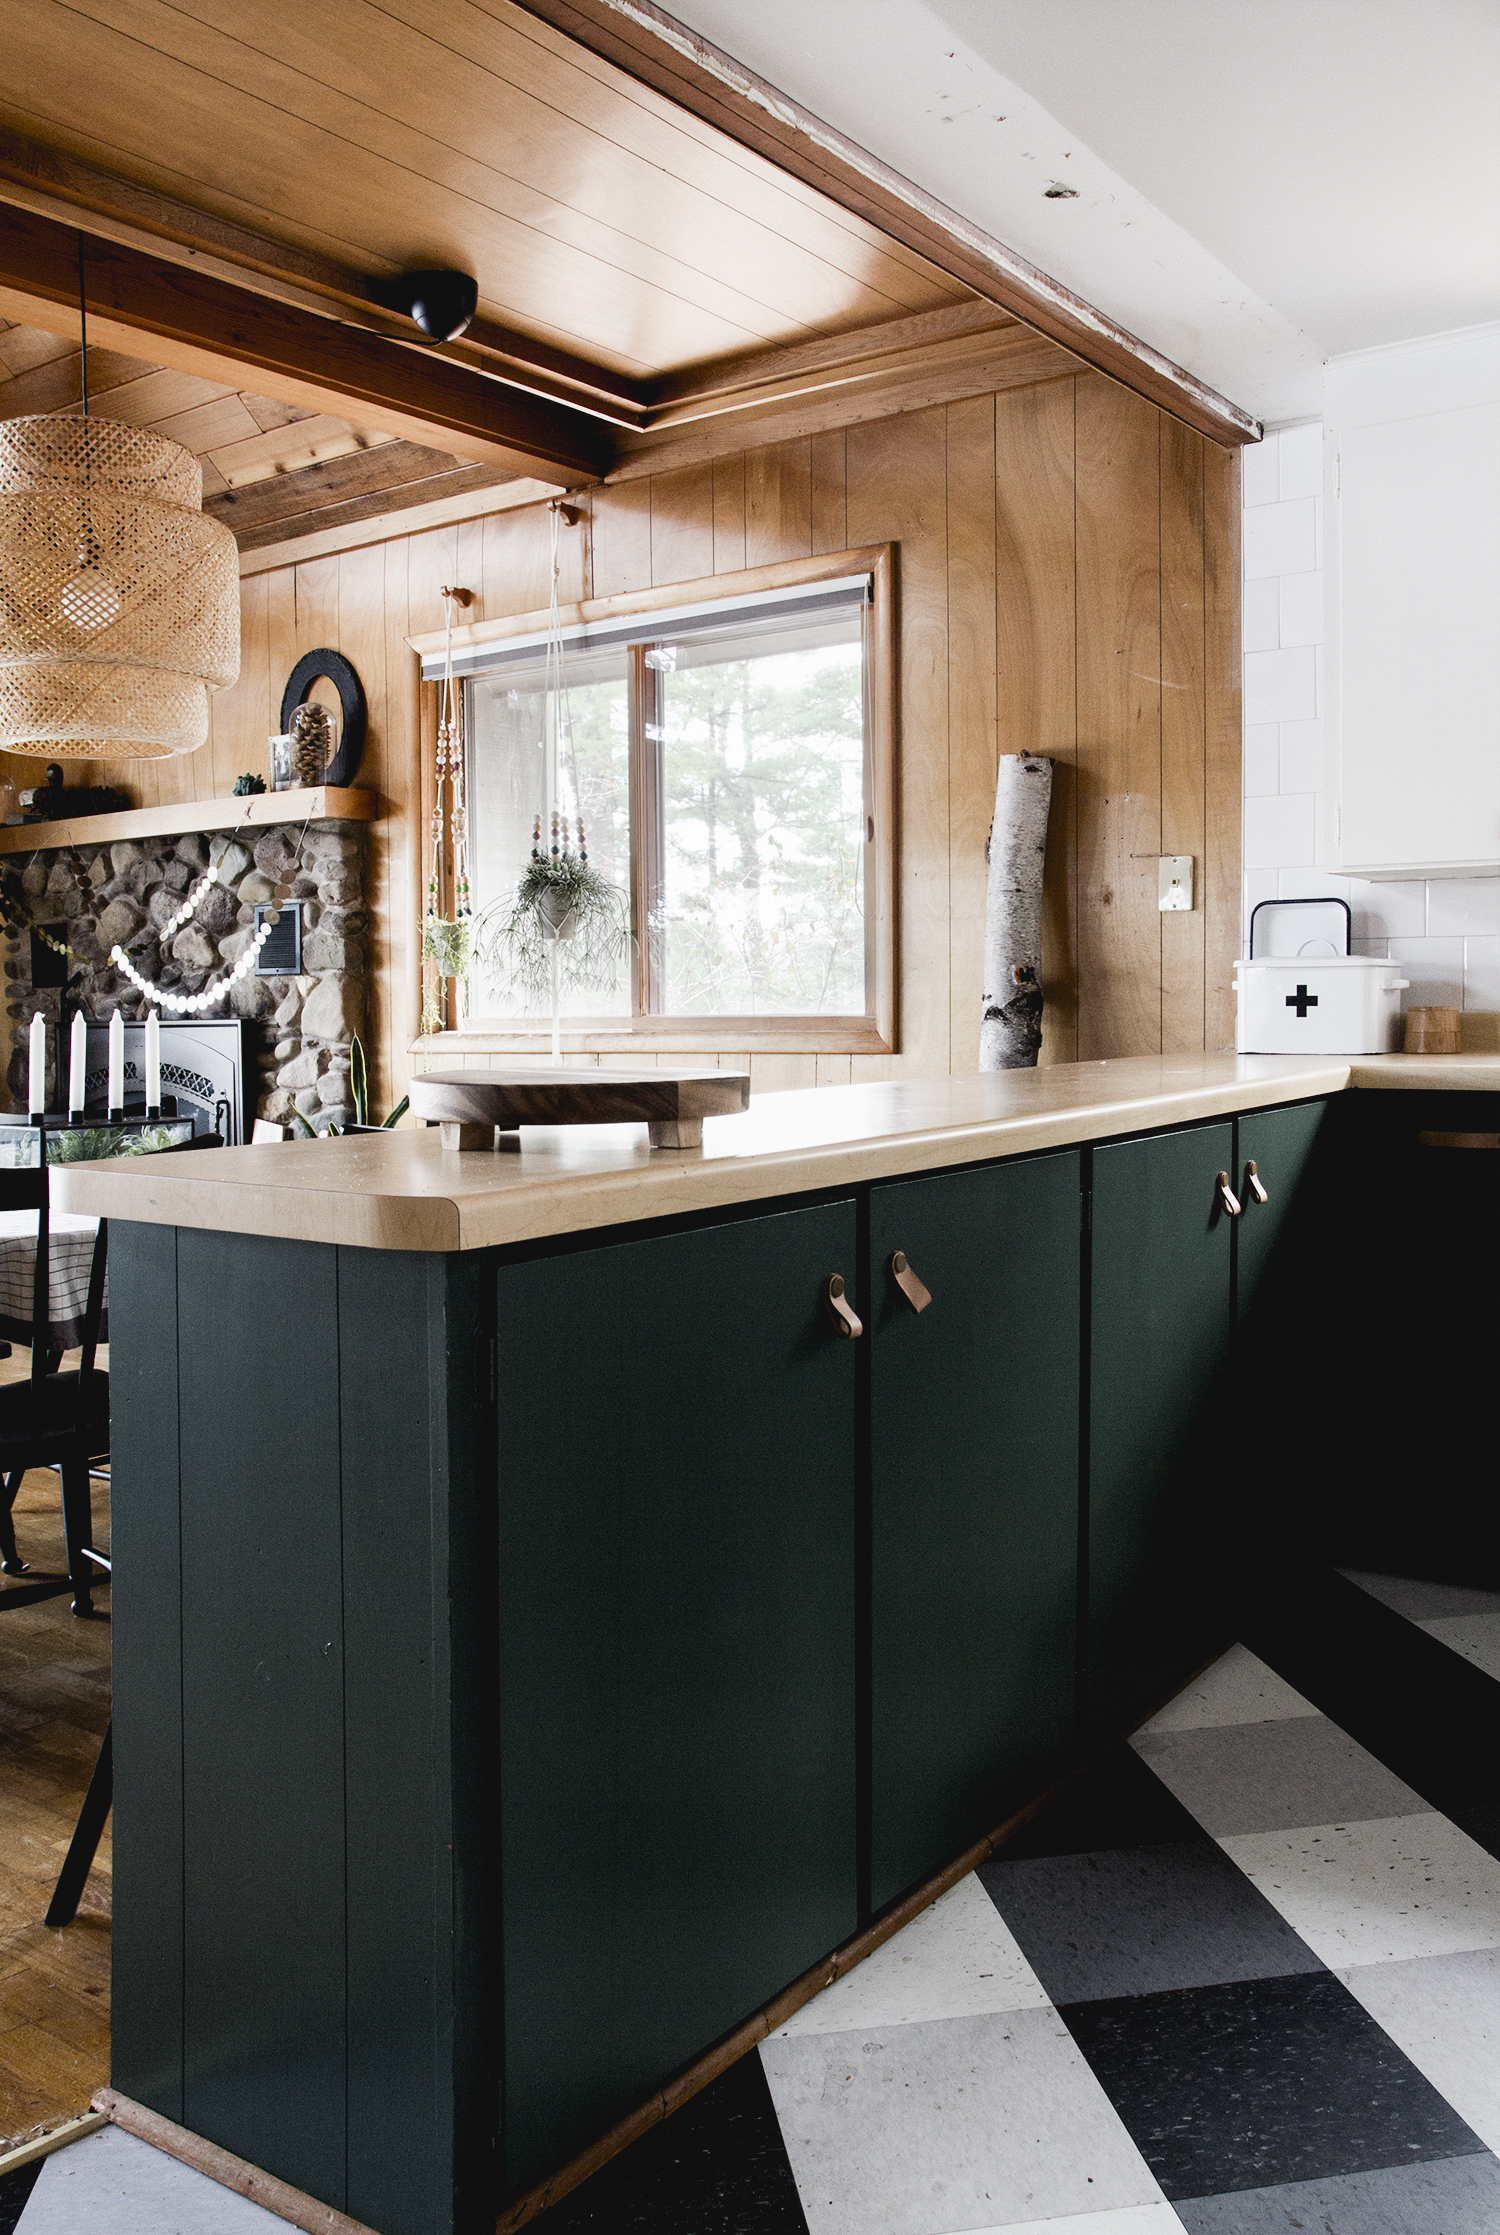
I’m not convinced that this was the best way for me to handle the transition between the tile and the paneling. I used a strip of white tile edge trim, which makes it look nice and finished. But I’m just not sure if, design-wise, there wasn’t a better solution. This is what happens when I rush.
After the paint and tile backsplash came the flooring. Just to remind you, we inherited a kitchen covered with sheet linoleum with plywood subfloor underneath it. I’d love to continue the hardwoods into the kitchen someday, but for now I just needed a solution that would work with the style of the cabin, and be as resilient as possible. After looking at a lot of different options of tile, it occurred to me that VCT (Vinyl Composite Tile) can be cool! Remember when Anna used it in her kitchen? Duh, this was the long-short-term solution that I was looking for. I then reread Daniel’s very amusing post about his kitchen flooring nightmare turned less scary dream, and I was convinced that this project was for me.
I considered doing the floor in a solid color, but I just couldn’t resist the idea of doing a large buffalo check pattern. I totally know that this pattern is a trend and will be heading to the hills like chevron did any day now (even though I HOPE to god that won’t happen). That being said, I think because this is a cabin and not a house, the pattern will have a longer life span because if it isn’t obvious, cabins and buffalo-check go together like Peas and Carrots (shout out to my guy, T.Hanks).
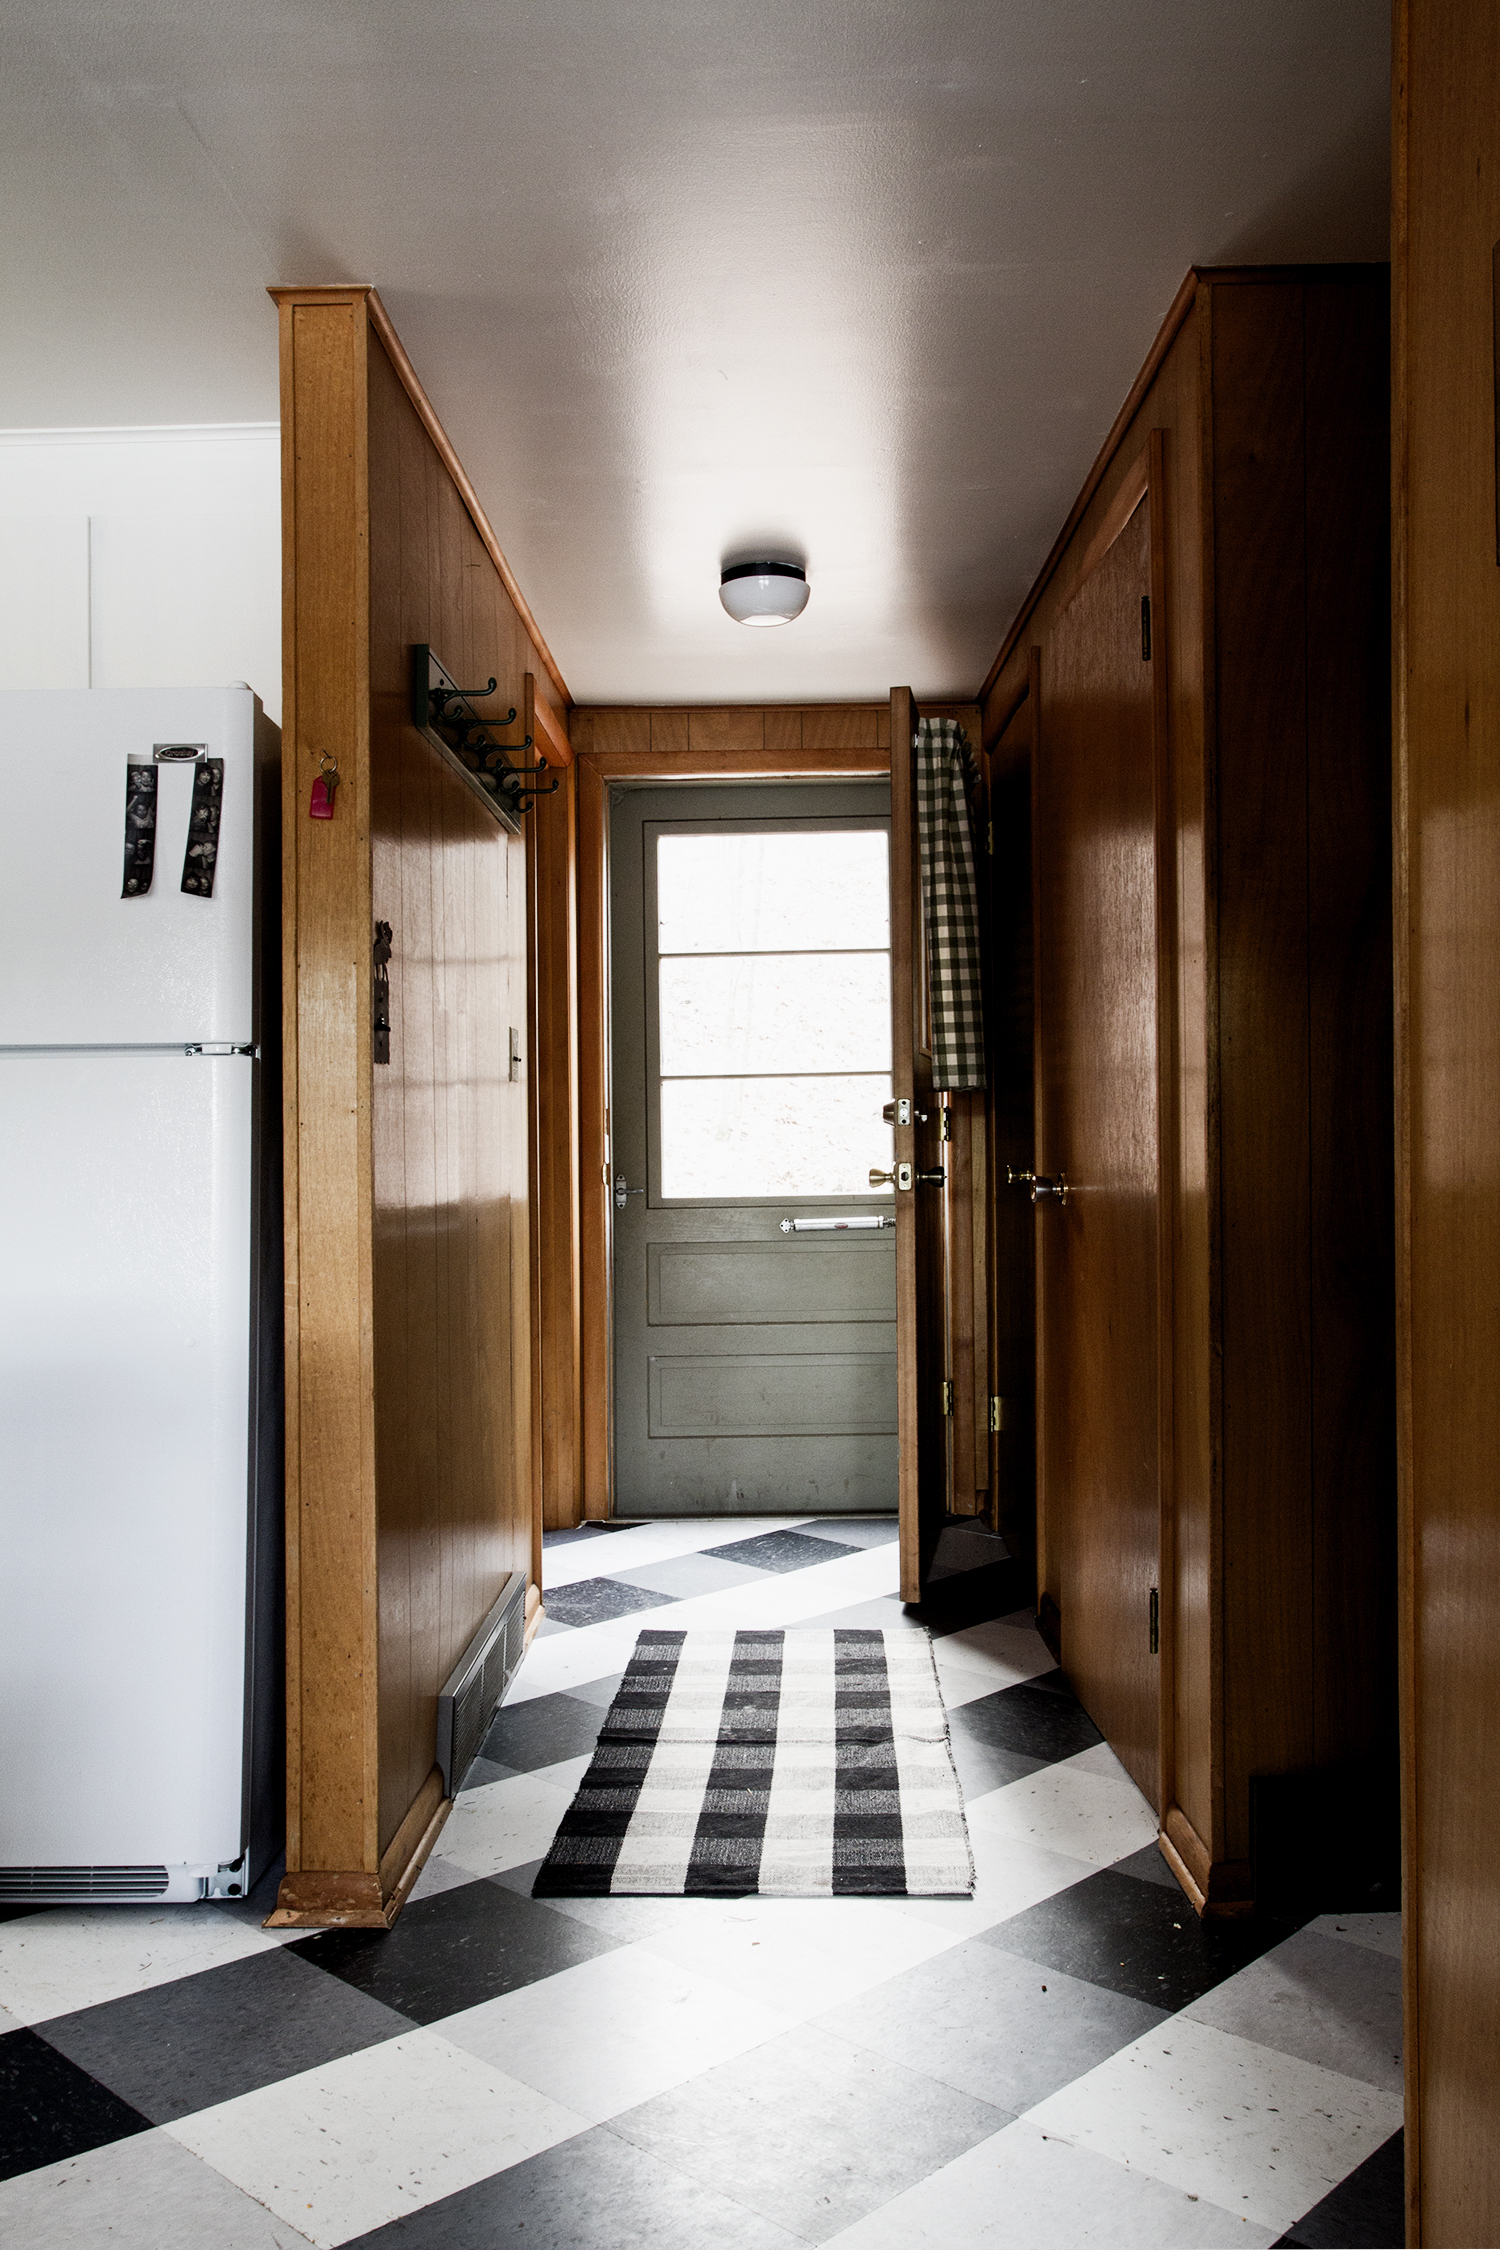
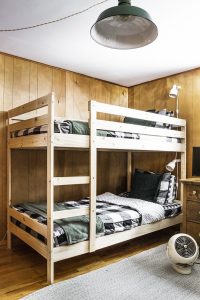
Also, that pic above is our hallway which is connected to the kitchen. There are two doors and a doorway on the right side of the hallway, the doors lead to a coat closet and a pantry, the doorway leads to the bunk room. On the left is another door and that leads to the main floor bathroom.

The actual installation of the tiles wasn’t too complicated, unless you are me of course and you decide to do this installation on the bias. Basically you lay down some adhesive, wait between 45 minutes to an hour for it to get tacky and lay down your tiles. But, because I thought that laying the tiles on a 45º angle would be “cool” and “unique” I gave myself at least double the work, double the pain with half the sleep. The kids had two days off school for god knows why, so I took them up to the cabin to play and hang out with their friend while I installed the floor. I had 24 hours for the job, and figured I’d have it all finished up no later than midnight. As my guy T.rump the chump would say, “wwrrronnggg”! I had no idea how much time it would take to scribe all of the corners on the diagonal. Flash forward to 2pm the next day and I was rushing the kids out the door after finishing laying the last tile and leaving a total mess in my wake.
A very cool human in bib overalls showed me (via youtube) how to make a jig to help in my predicament, but it was not 100% on-the-nuts accurate, I did not have the patience for such detailed brain melting work, but I was able to come close enough that I could fudge the difference with a little quarter round and caulk. And since we’re talking about cool guys demonstrating skills on the internet, this southern dude was very informative and helpful.
And not to over complicate this whole thing, because in all reality it should be fairly easy to do, but I like to make work for myself. I did a dry fit of the pattern trying it 4 different ways until I landed on a pattern that was centered with the cabinets, the hallway, and the bathroom. If you’re still following along, you can see some photos I took of the different layouts.
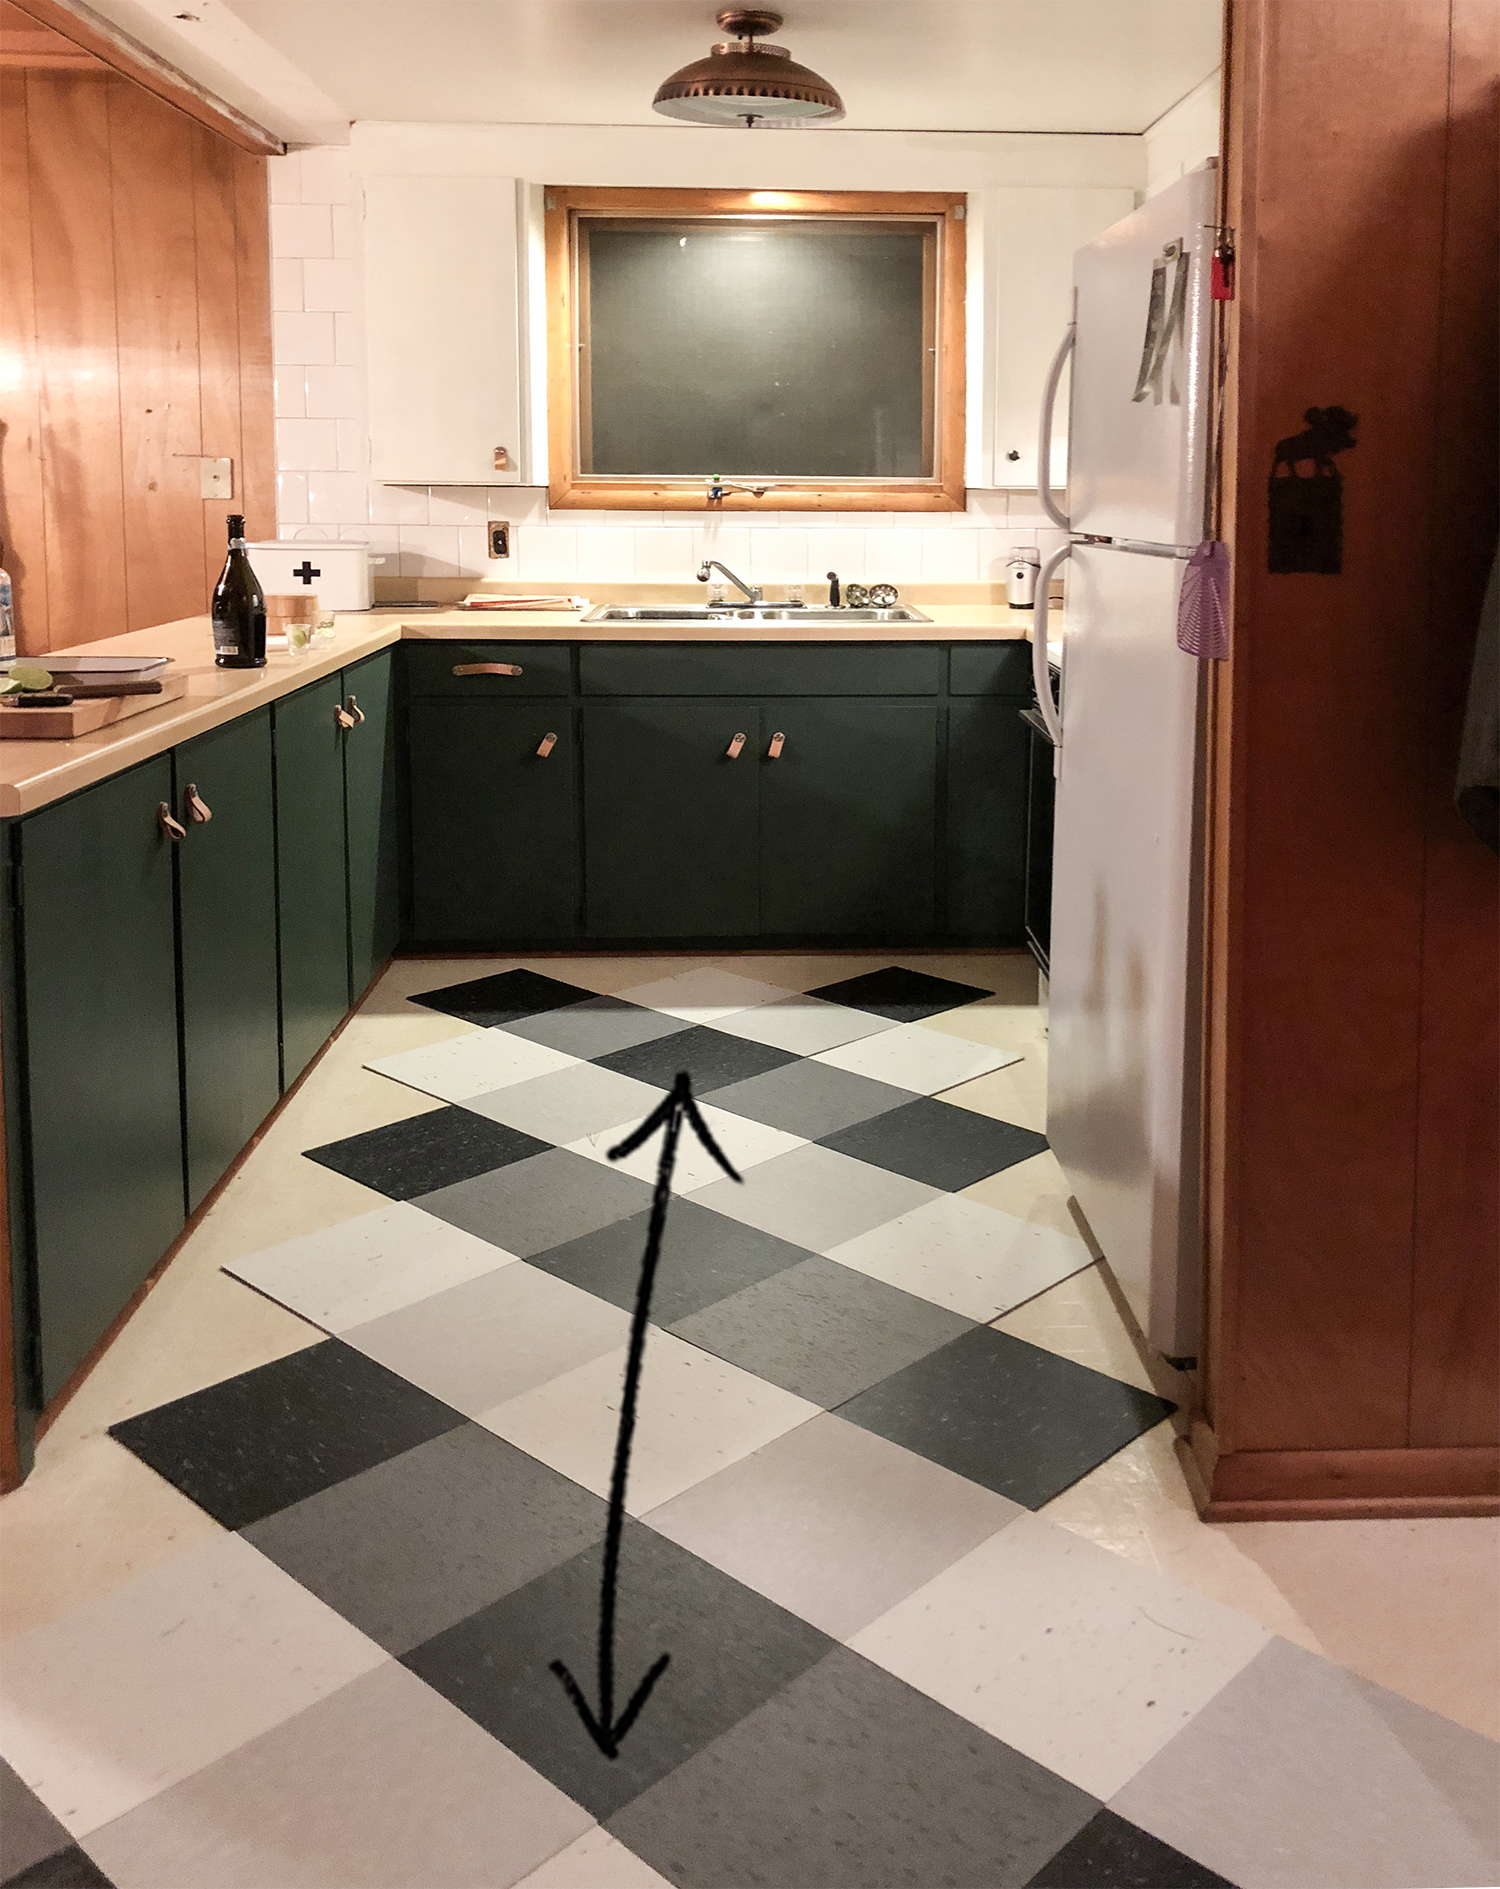
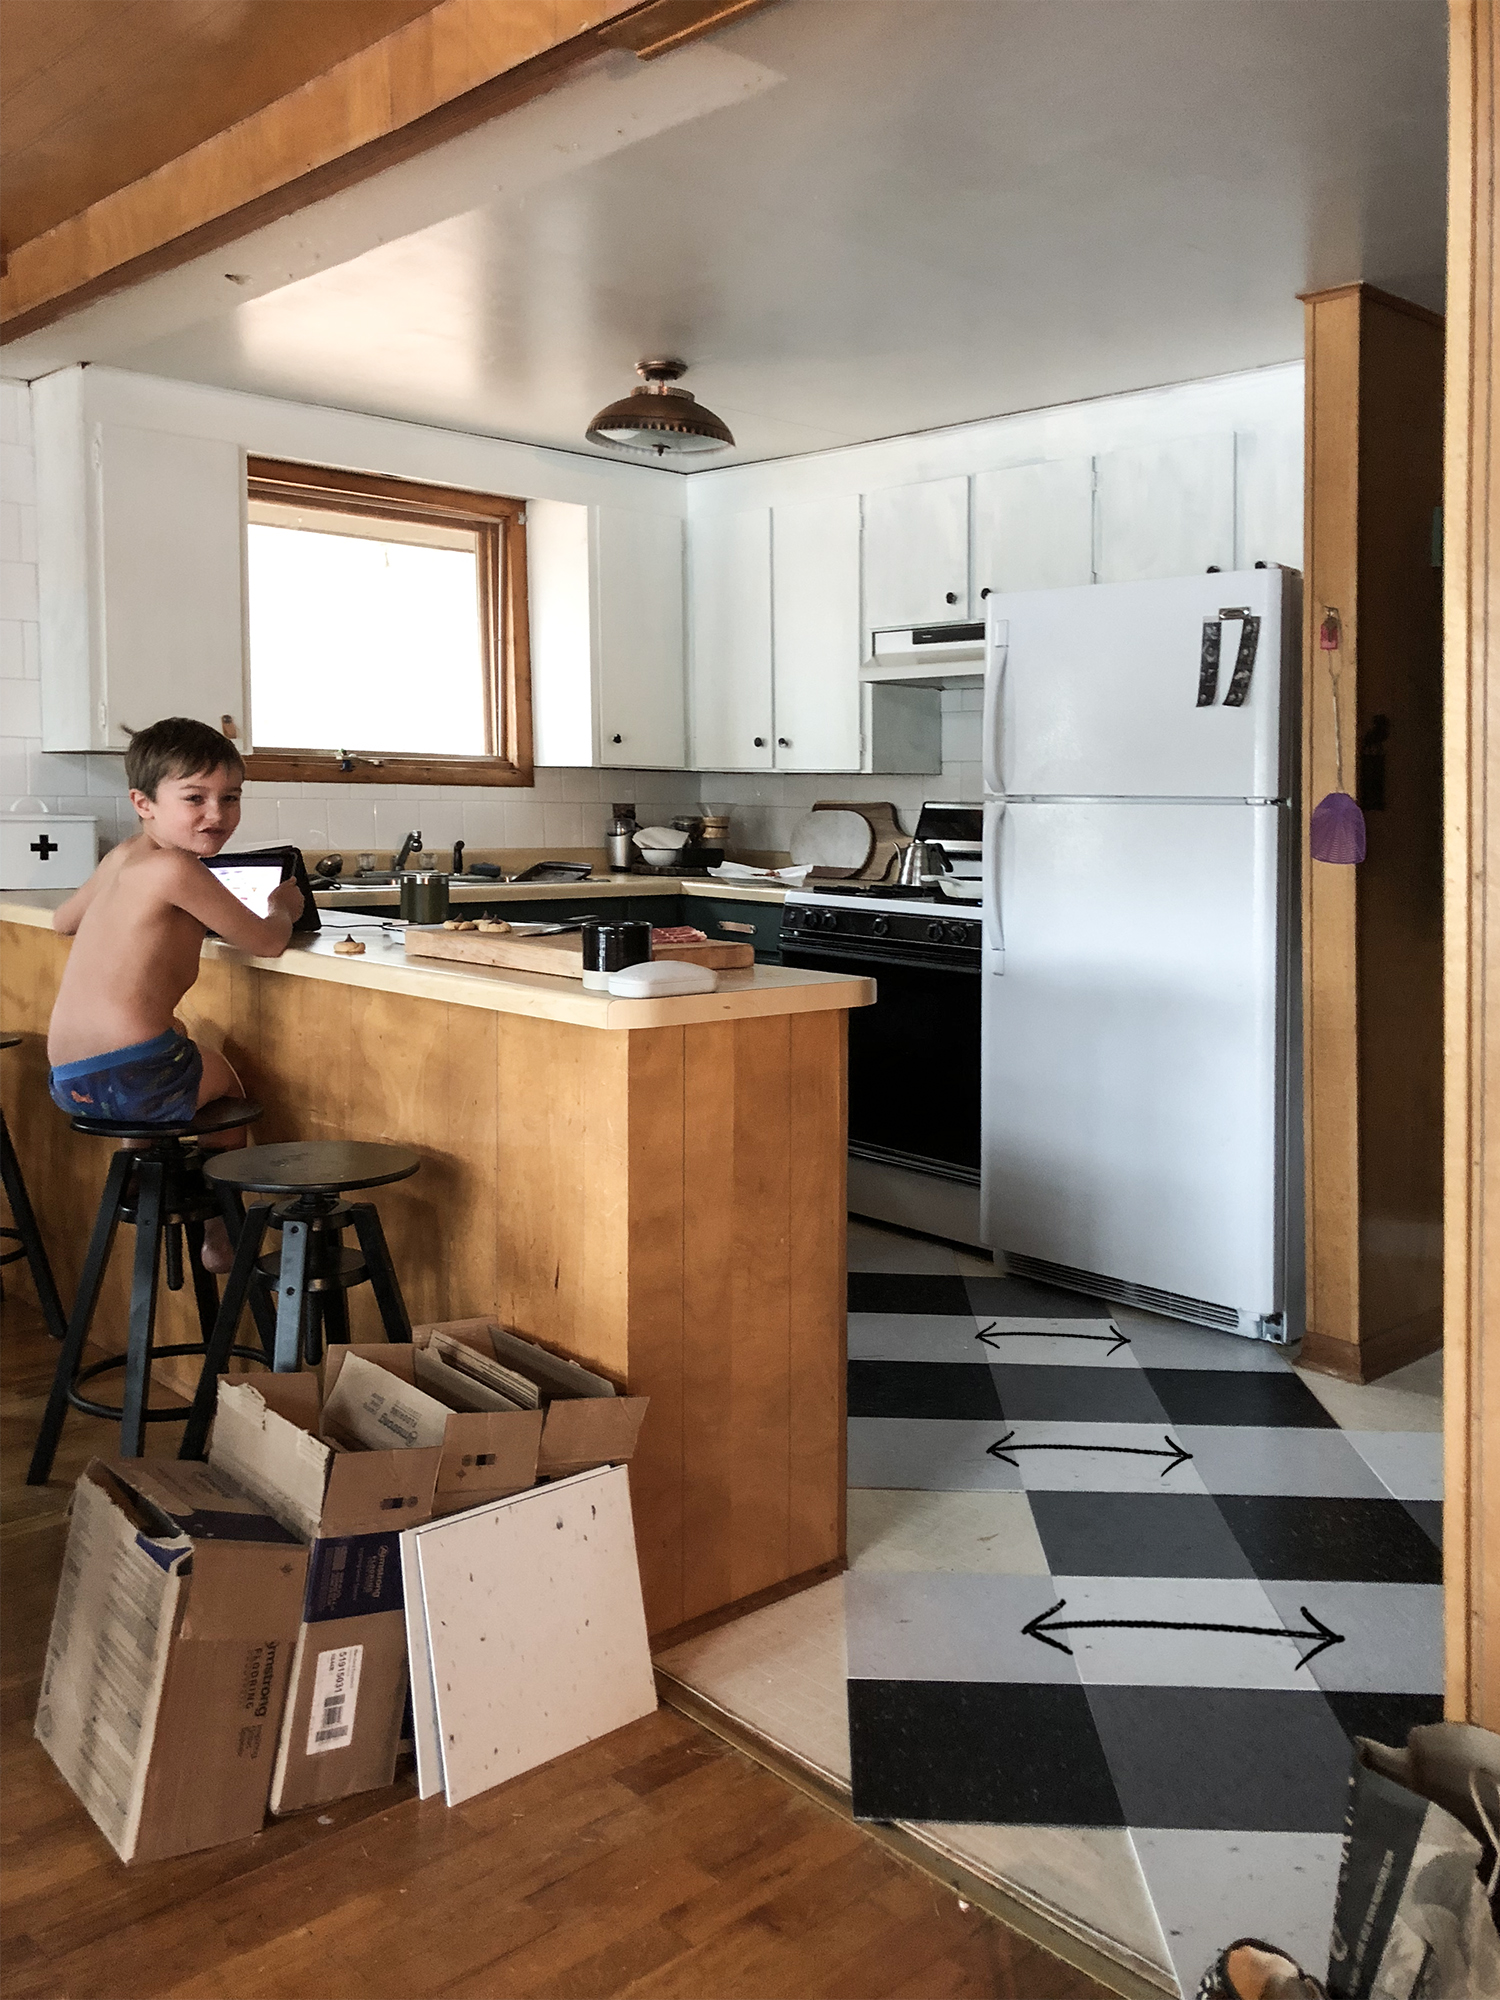
In the photo above, the tile is aligned with the center of the kitchen, but not the visual center of the cabinets (which is off center). It felt lopsided and wasn’t just right.
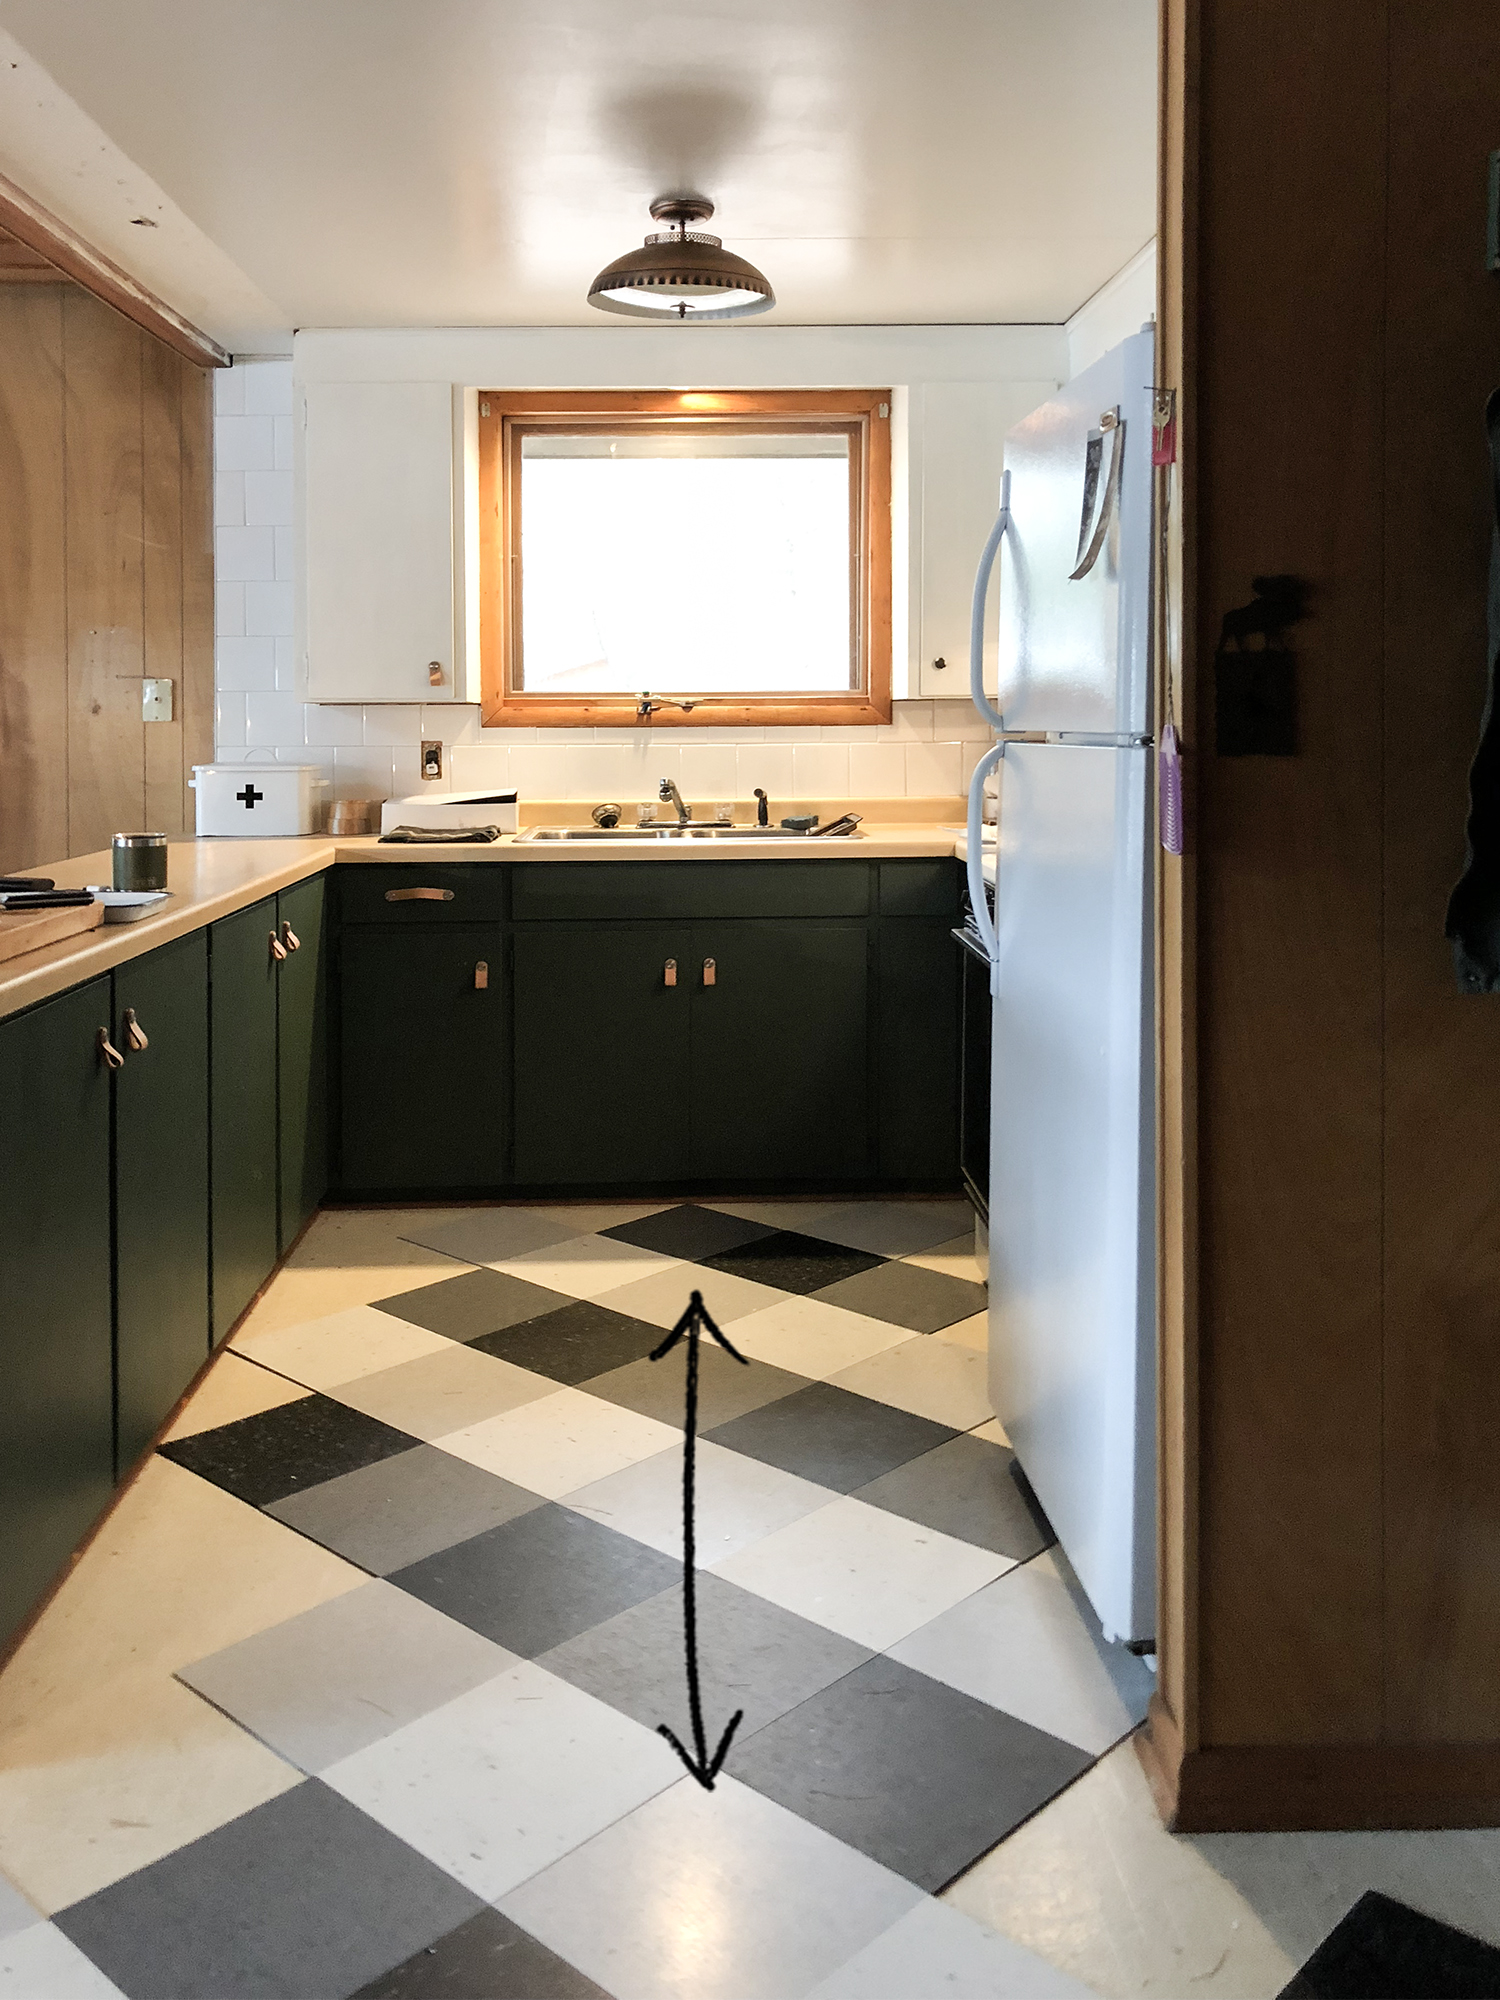
I center the first tile on the middle of the cabinet which lines up directly with the sink and window. This is good, but in the end I decide to move the tile so that the black tile is directly down the “visual center”, not the gray.
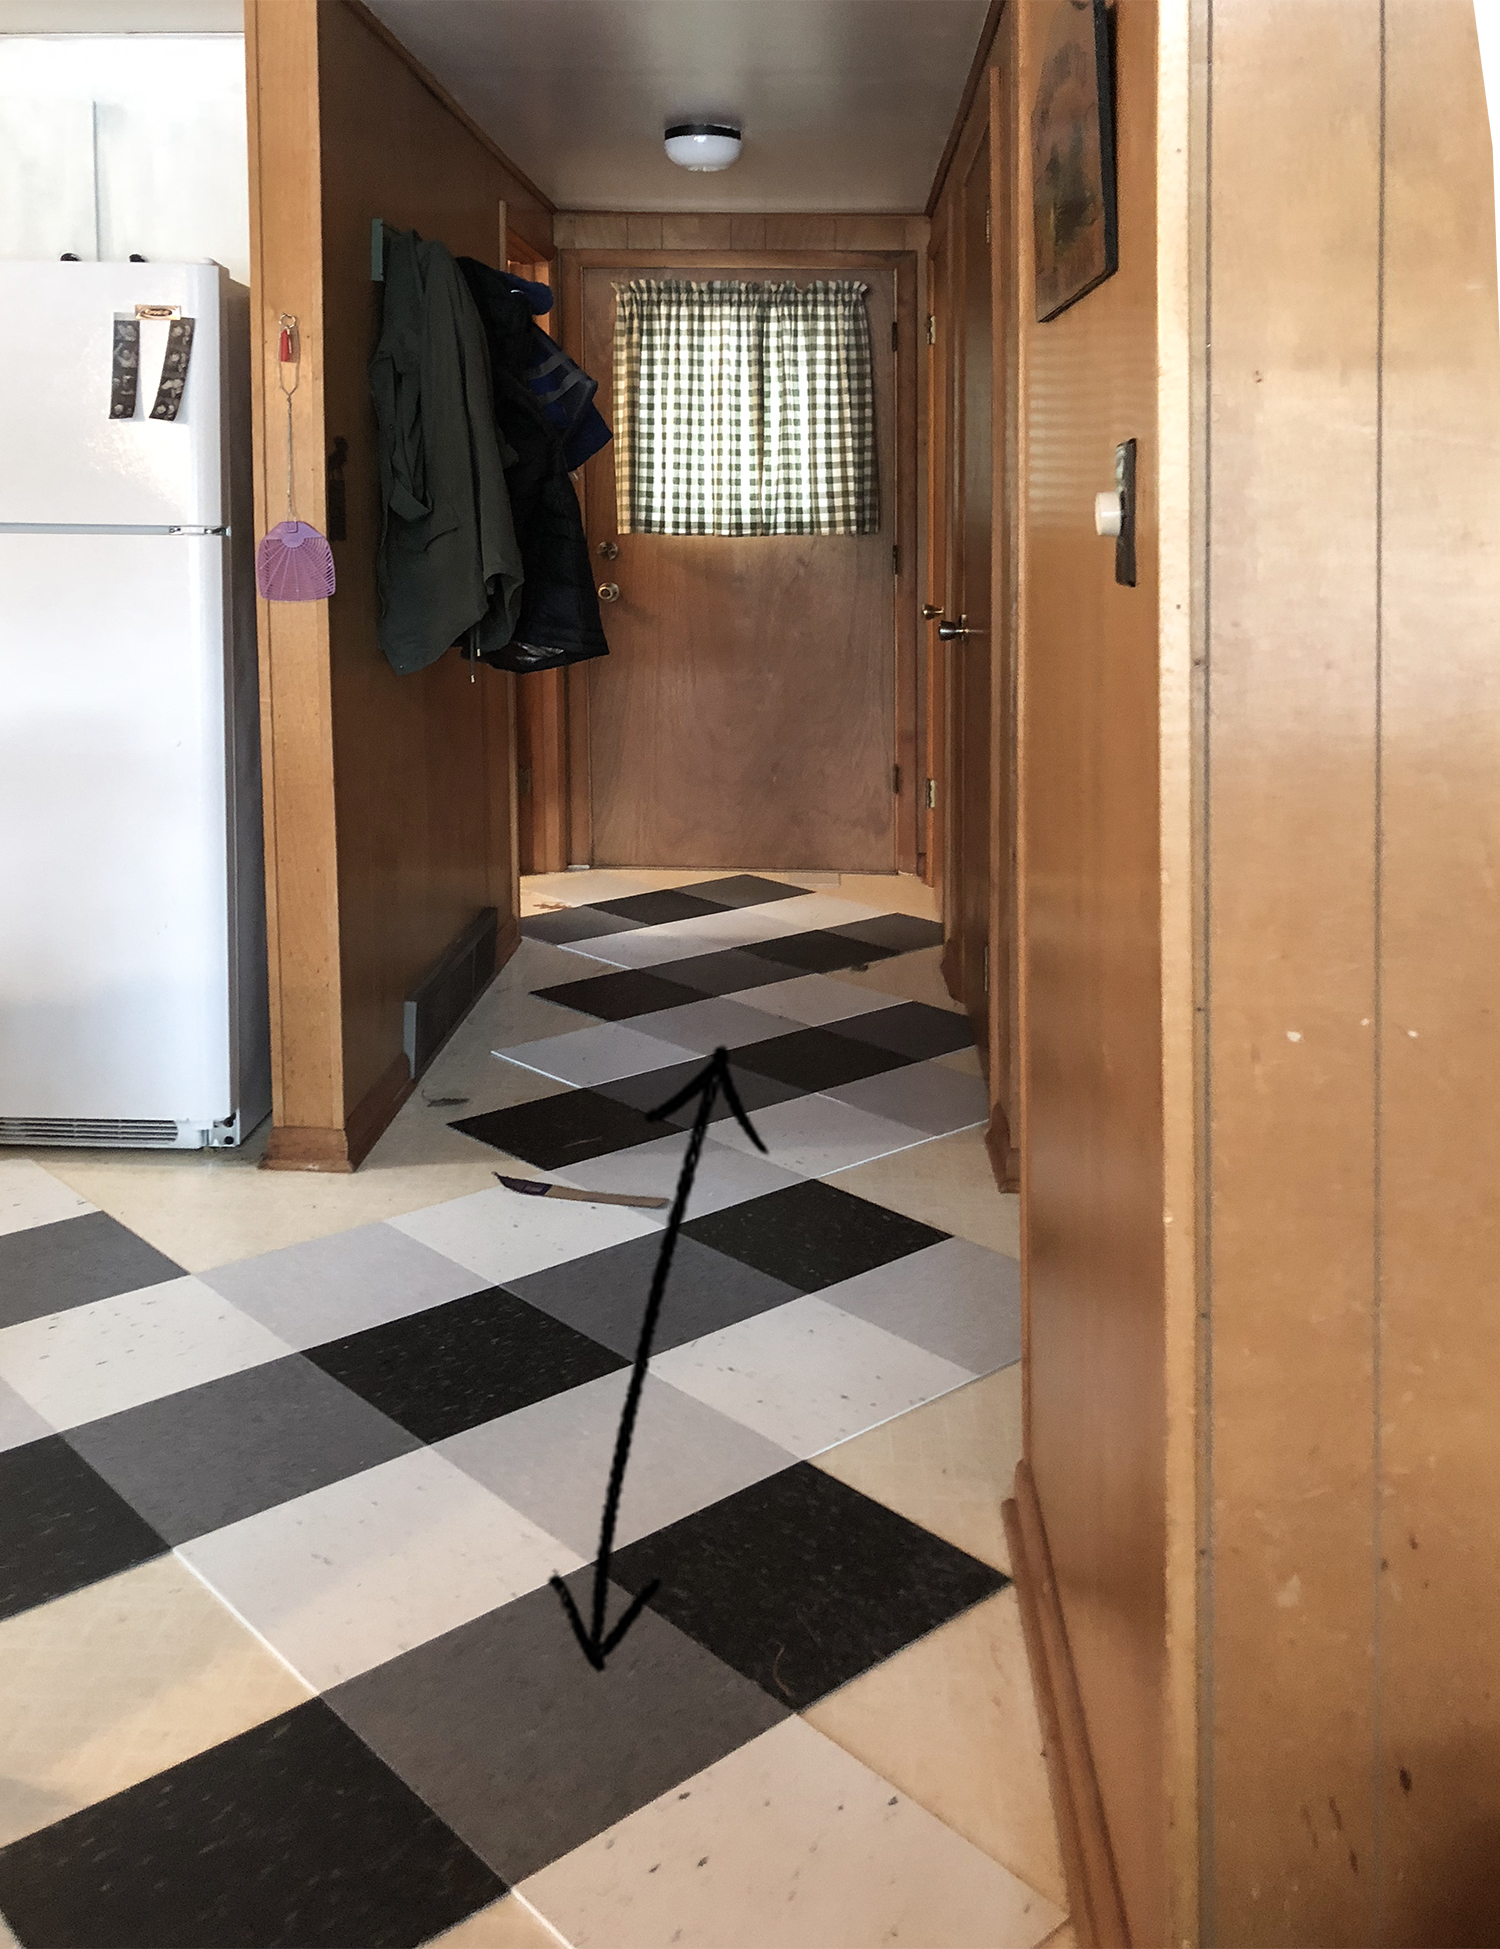
Another reason, I decide to use the black as the center tile starting from the cabinets. This is the same pattern as above, but illustrates how the pattern runs down the hallway. The gray runs directly down the center of the hallway, but would make way more sense visually if the black tile was aligned in the middle.
After figuring out exactly how the tile is supposed to be laid out, I have to make sure I’m not missing anything. I lay out the tile with the pattern running the opposite direction, and realize, I don’t like it that way at all!

Anyways, if you read all that, bless you. Please let me know if you have questions. I still have a few kitchen related items on my to-do list, including building a few new light fixtures. I’ll keep you guys in the loop!


Love it all so much! I’d have thought the tile job was more than $150 -it looks that good!
Thanks, Kari!
Beautiful work! We also just laid down a SVT floor in our kitchen, and also loved the YouTube videos from that southern gentleman — tickled that someone else got into his videos (and how insanely skilled he is at laying vinyl tile)!
Yeah, that guy knew all the stuff for sure! His video was really helpful, especially when it came to making cuts to fit around door jams and stuff.
So good! You are giving me inspiration for our new lake house in Danbury – similar era but very different layout. Loving the green in the kitchen!
Meredith – Good luck with your new house, so exciting for yas! Can’t recommend green in the kitchen enough, I love it!
It all looks awesome! Do you have a go-to process for painting your cabinets? I’ve been staring at my kitchen cabs for 4 years working up the nerve to finally paint them.
Hey There, So sorry that it has taken me sooo long to reply, I am a jerk. Yes, I do have a process for painting cabinets, and I outline it on this post right here! I do want to mention that the cabin cabinets were not precious and had been heavily used and abused, so I didn’t give them as much care and attention as I did on my cabinets at home. For this project, I wiped down the cabinets and then used a two and one paint in primer in a satin finish. For your kitchen cabinets at home I’d definitely follow my instructions in the linked post. Let me know if you have any other questions.
I’d say it was worth $80 bucks—per hour! Beautiful work, pattern, colors. All the craziness and headaches was worth it. It’s a perfect fit for the cabin. I think before, I would not have been so thoughtful with the pattern, but now I know better, so thanks for the lesson!
Thanks so much! I think that with any sort of tiling project figuring out the pattern and layout is well worth the time.
I’ve been trying to paint our condo and install a new dining room fixture for 9 months, and you can knock out a whole cabin in like 3?! DANG.
Ha, well I bet your dining room looks cuter without a fixture than my cabin did with old carpet and vinyl flooring ;)
OMG I freaking LOVE the buffalo check!!! And I totally agree, the lifespan will def be extended because of the cabin-y-ness. How much did that project cost ya? You may have said it but I didn’t quite make it through all the words. You are awesome!
You read just like me! I’m a skimmer too. The project was right around $100 for 4 boxes of tile and the adhesive.
You are so crazy talented!! Such a stunning transformation. And, oh so inspiring!
Awh. Thanks, Angela!
This is truly amazing!! Congrats on getting the floor done!
Thank you! I’m glad that floor is behind me!
Here’s a virtual pat on the shouder! Alison, you never fail to impress! Love that you kept most things. It’s incredible how much you’ve already transformed your lovely cabin.
Thanks, Tanja. That means a lot. I’m sorry that it took me so long to respond to all of your very nice comments, I really do appreciate them all though!
Big improvements Scoops! I’m glad you kept the light fixture, it’s cute.
I think the fixture is cute too, however I am wavering a little bit. There is also a recessed light above the sink and I think it would be really nice to have two matching fixtures in the kitchen. I might move the kitchen fixture to an upstairs bedroom and replace it with a matching set of something else. We’ll see…
Hi there! Hoping you see this – I am looking to update my S. Minneapolis basement on the cheap(!) and since we have the lovely asbestos tiles that we are not removing, I wanted to try to use vinyl tiles that I could install myself. Just wondering how these have held up, and if after a while of your use you would recommend putting them in a basement (with no water issues).
Thanks!
Would you mind sharing your bottom green cabinet color mix? It’s so beautiful!
Another request for your green paint formula!! I have the same cabinets and I’ve wanted to gut the whole kitchen since we bought the place in ‘07. Looks like several more years until that happens so I’ve recently started looking at inexpensive updates I can do. Mine are white uppers and lowers and it never occurred to me to paint the lowers another color. Yours look SO good! I want to give it a shot.
Can I get your formula for the green cabinets? Also, do you have any tips on cutting and measuring the tiles? Did you have to order online or can you buy the tile in the store?
Love it all. I am a do it myselfer and have a cottage in Door County and house in Milwaukee. The freedom of trying out stuff at the cottage is so fun! I saw you mentioned while looking for ways to hide a TV. Did you hide one in an ottoman? Have photos or plans?