


Budz! Have you noticed I’ve only been posting once a week, maybe twice at best. Sorry if I’ve been slow to respond to e-mails and comments, I’ll get to ’em. I’ve been so busy with all of this basement stuff, it’s consuming my life and I can’t wait for it to be done. Remember, we started planning this basement around this time last year, so it’s seriously time to wrap this baby up and be done.
I’m happy that I was able to do a lot of the finishing work myself, but it’s been a life suck. It’s one of those things where you have to ask yourself was it really worth it. All things considered, I think it probably was – I’m sure we saved quite a bit of money, plus I know I wouldn’t have been able to just stand back and let someone else have all the fun. I only have a few things left to do, mostly involving paint (which seems easy). Next week I’ll start upholstering a bench cushion, and then I will be so close to done. I am so ready for this all to be over, and I’m looking forward to a big project break over the holidays.
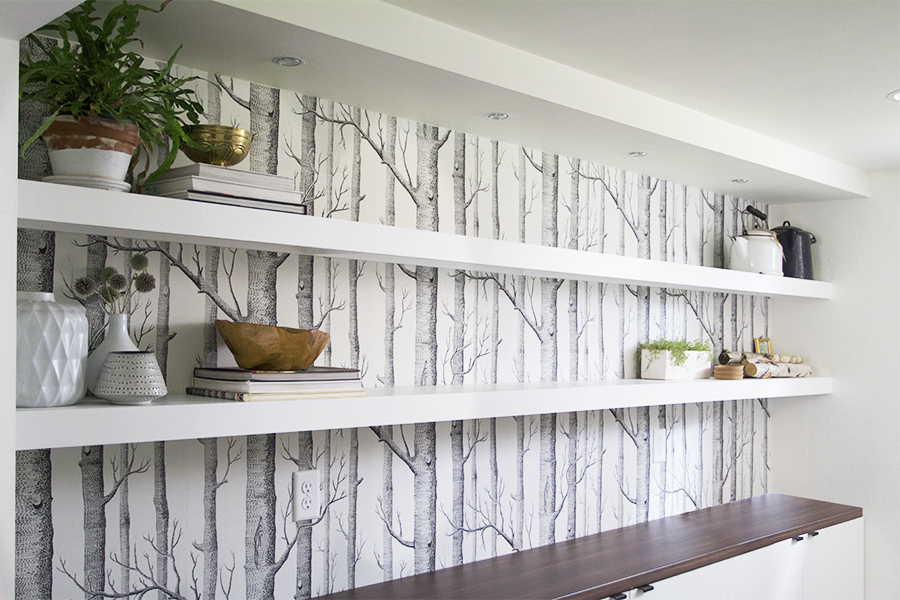
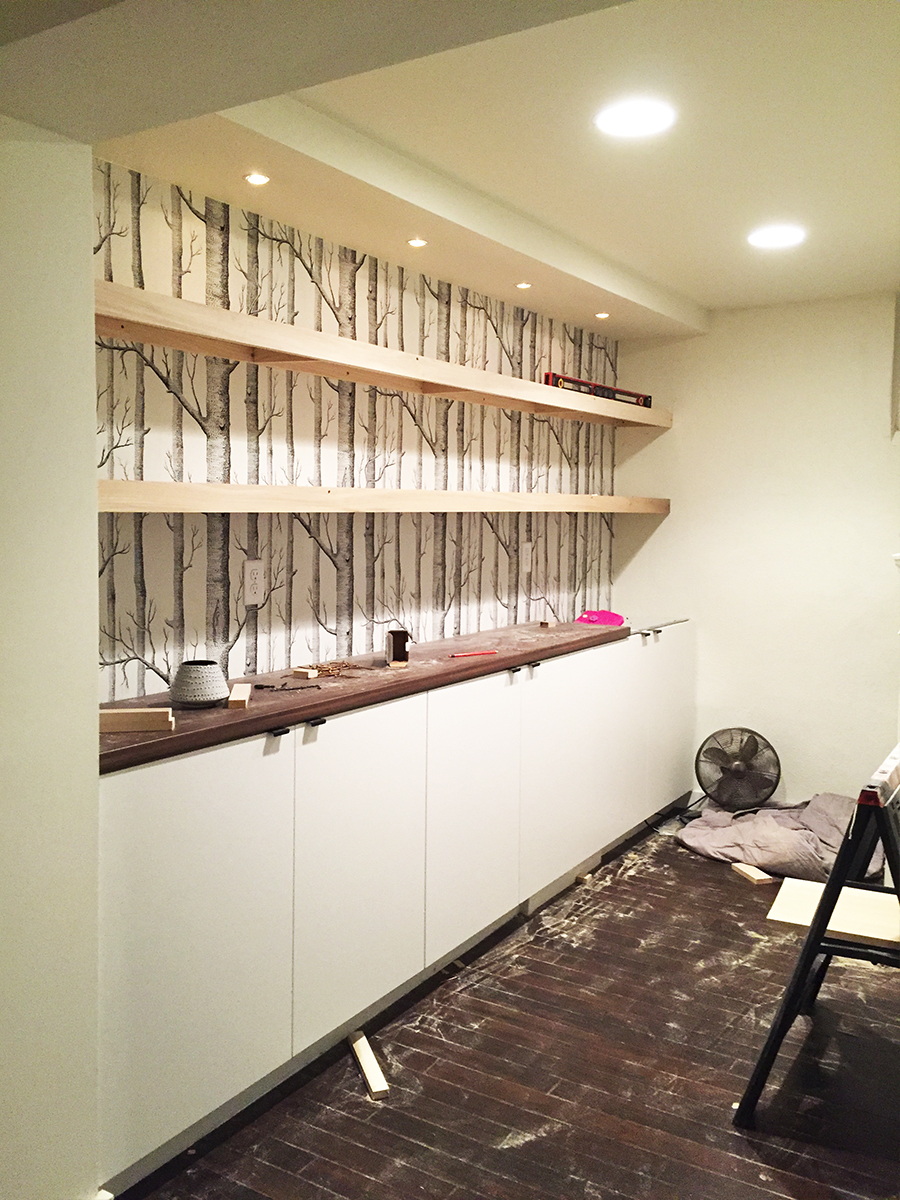
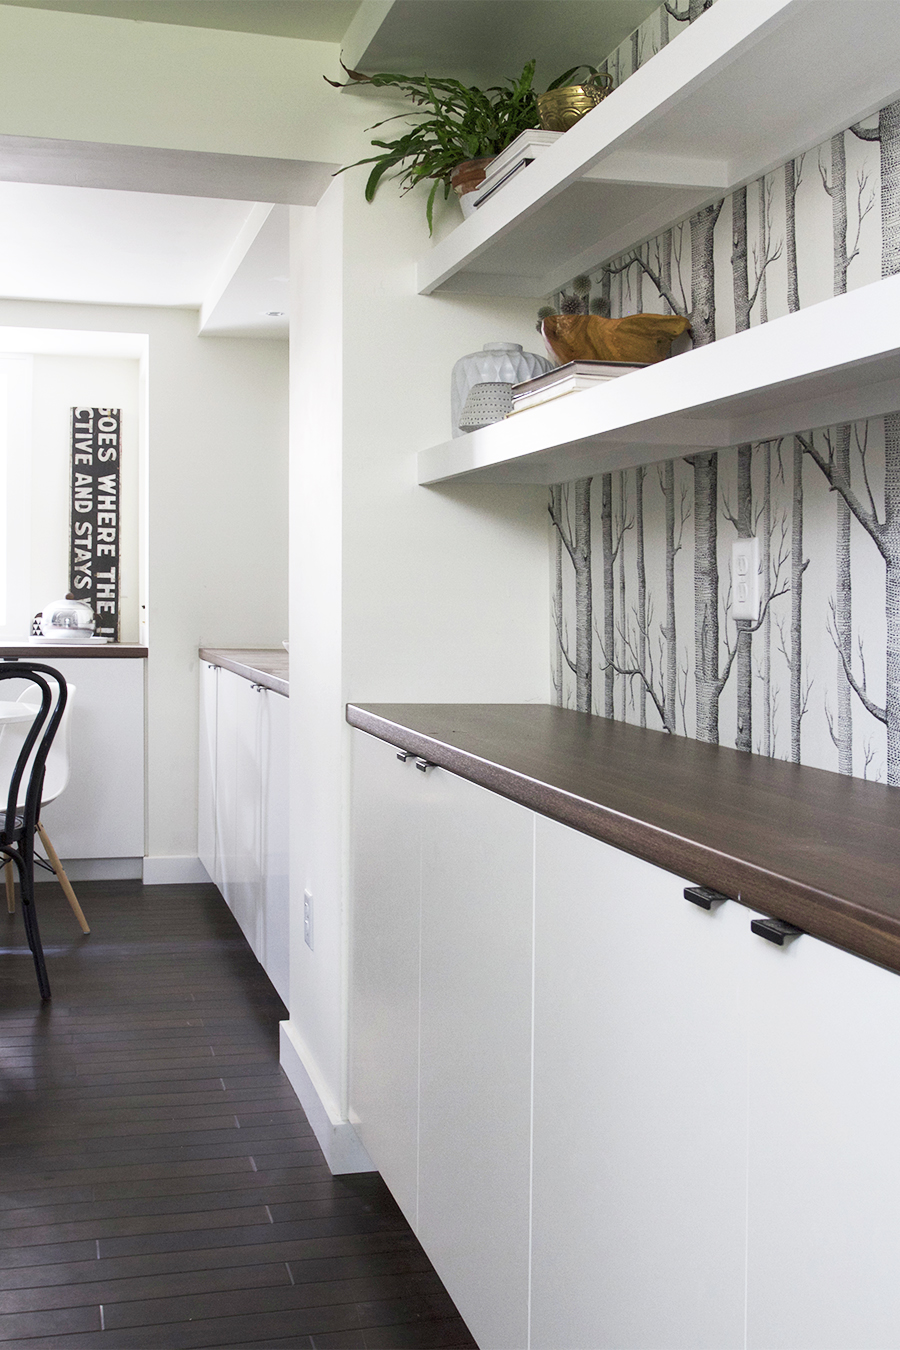
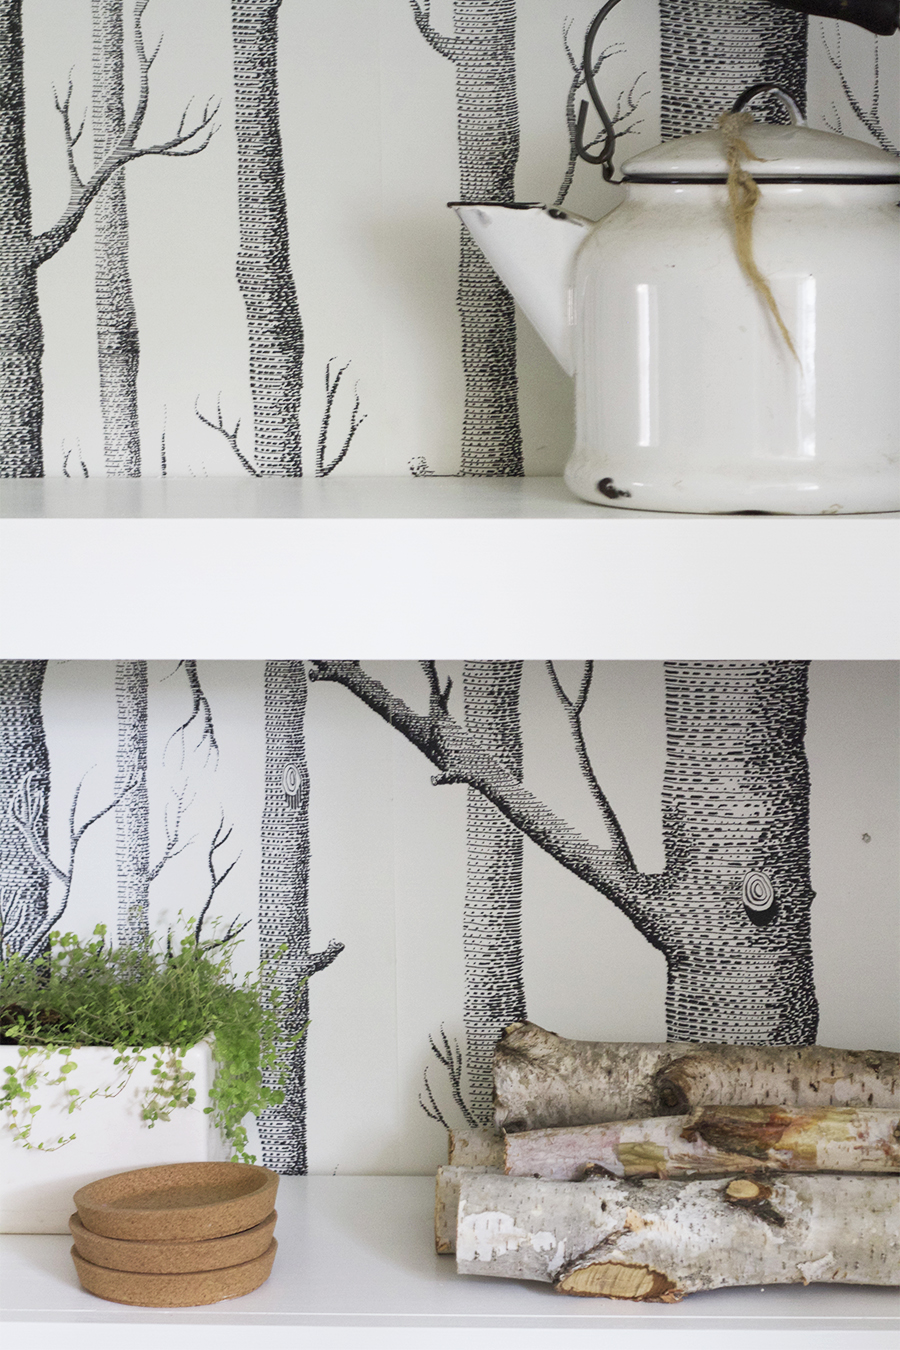
Okay, so one of the few remaining big projects was building and installing shelving in two of the spaces. This had always been part of the plan. In the living area we wanted to include record storage for our media zone. That is where this whole shelving plan had started. Then it seemed appropriate for the size and placement of shelving to be repeat somewhere else in the space. That space would end up being the hallway starting at the bottom of the staircase. Check this link for a floor plan modeling in case you are confused as to what I’m talkin’ about. There needed to be some visually intriguing elements to this narrow space, and what better way to bring it than with some chunky shelving.
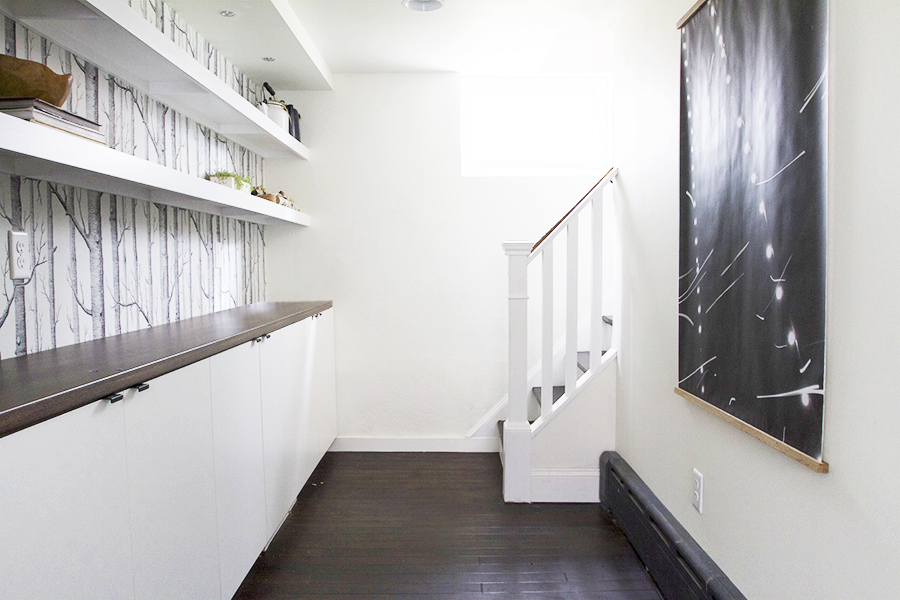
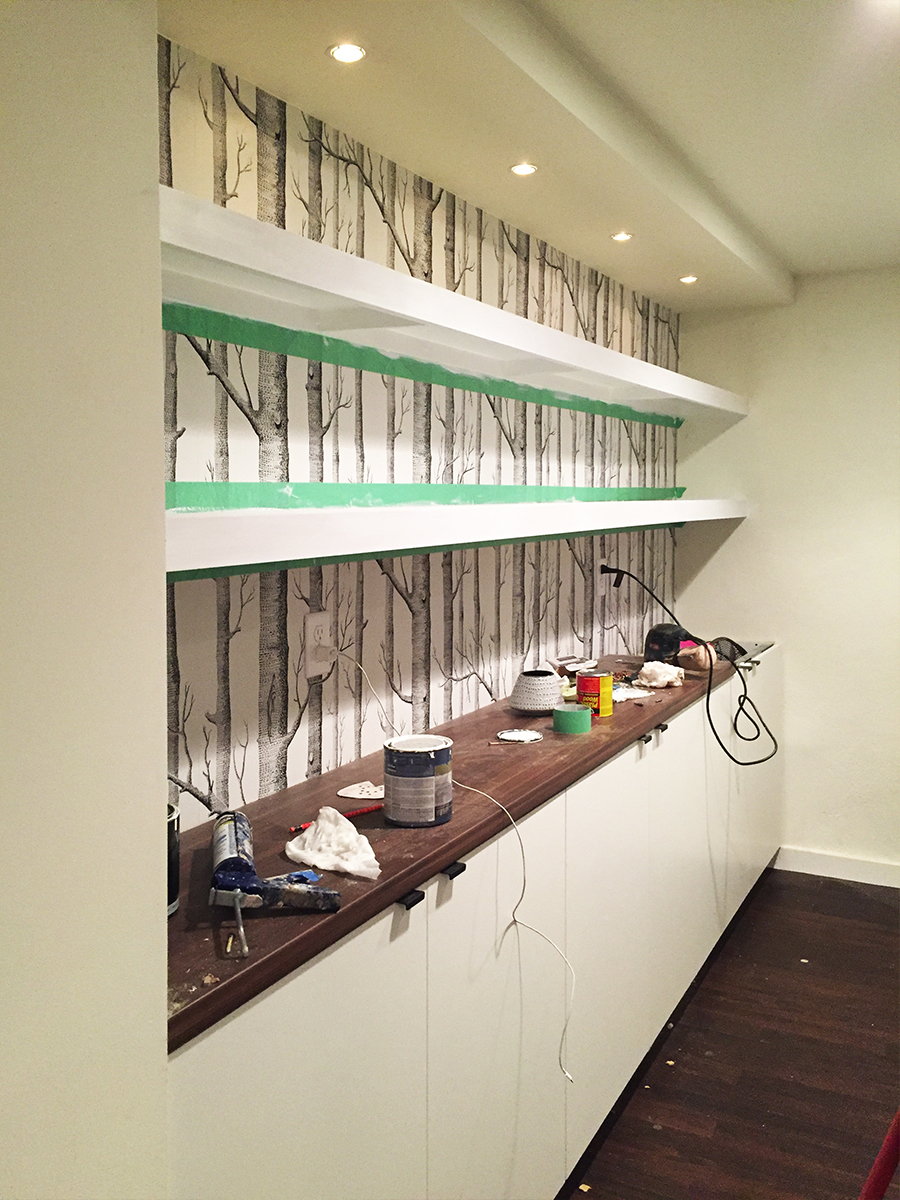
I’m still not a styling wizard by any means, but I did the best that I could with the stuff that I had on hand. We are sick of spending money on this proj, so accessories will just have to be found from what we already have or slowly acquired over time.


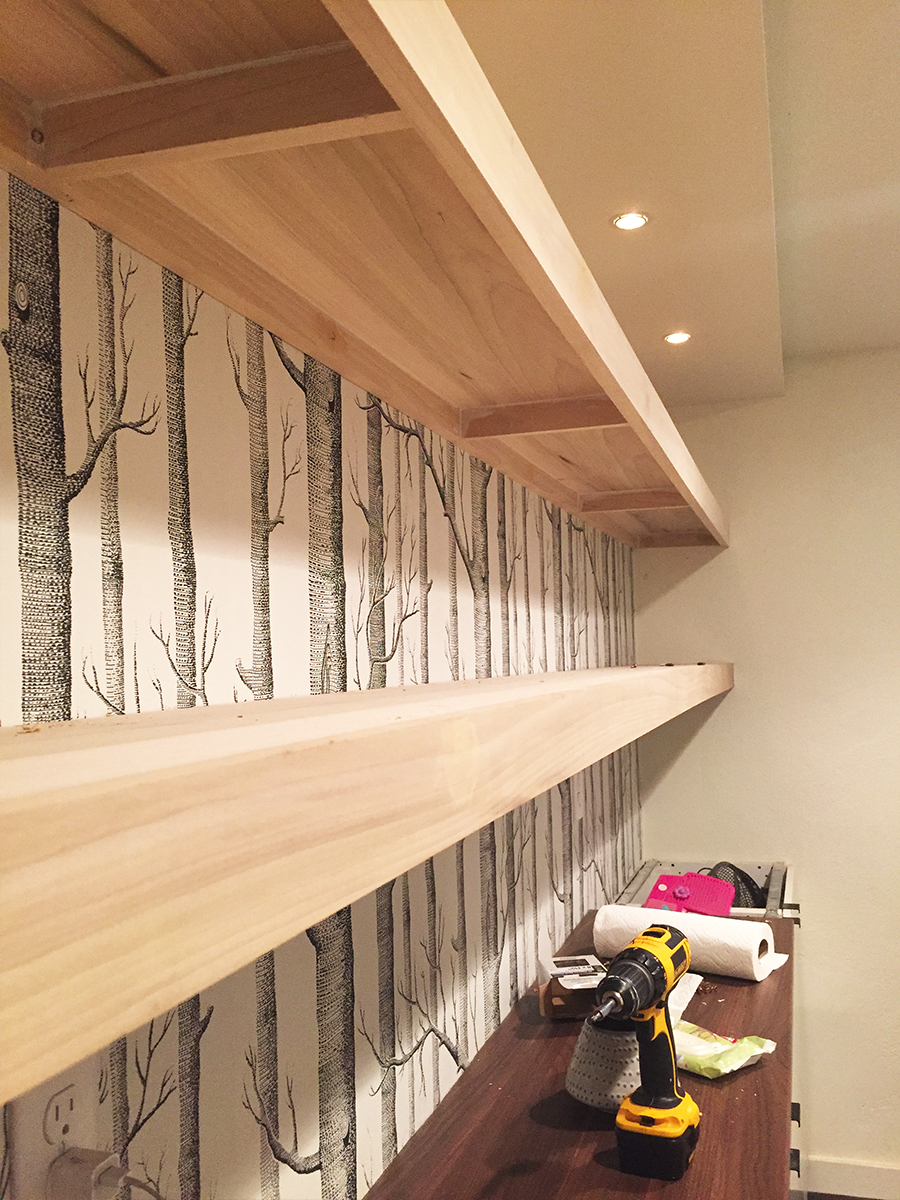
Here’s a little looping vid – it shows how I constructed the shelving. It’s not technically a floating shelf since there is some structural elements that can be seen from below, but the beefed up front really plays up the illusion.
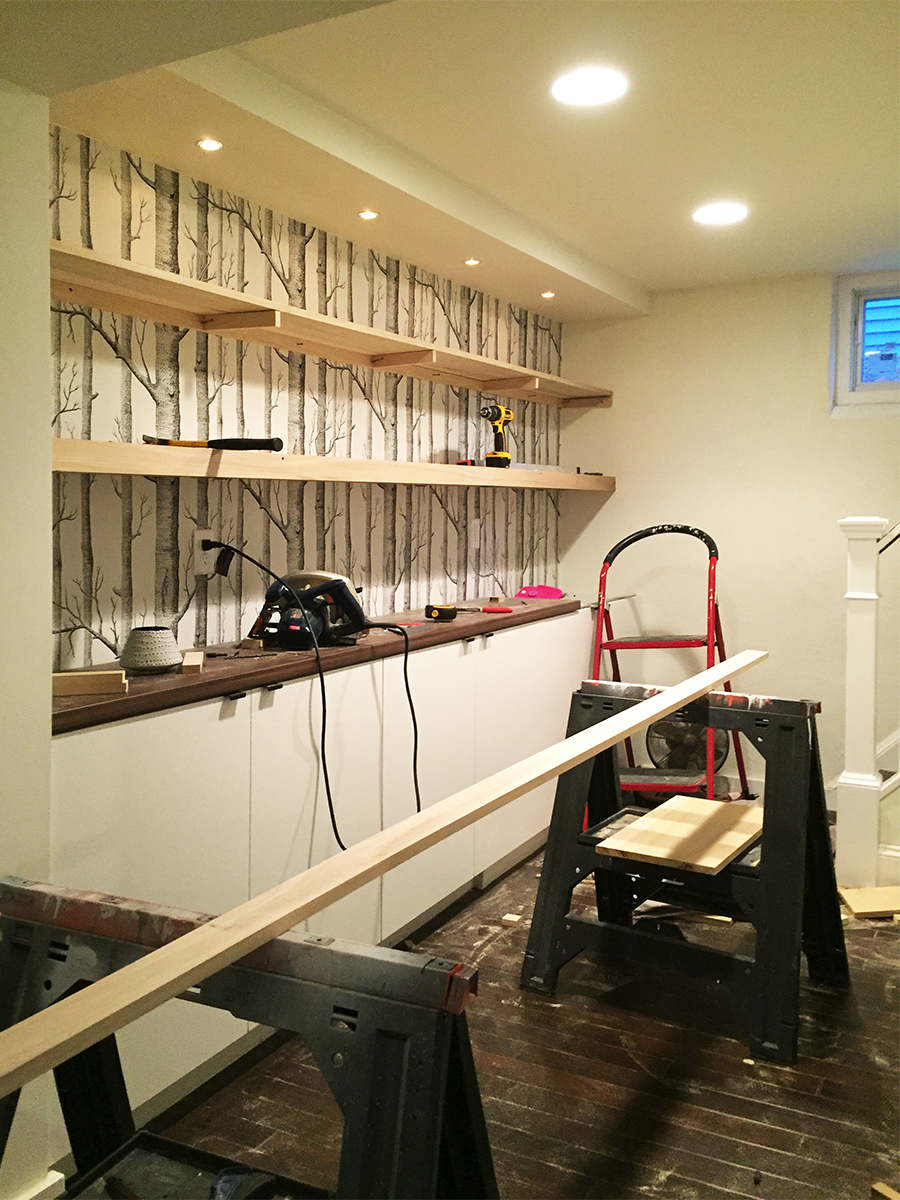
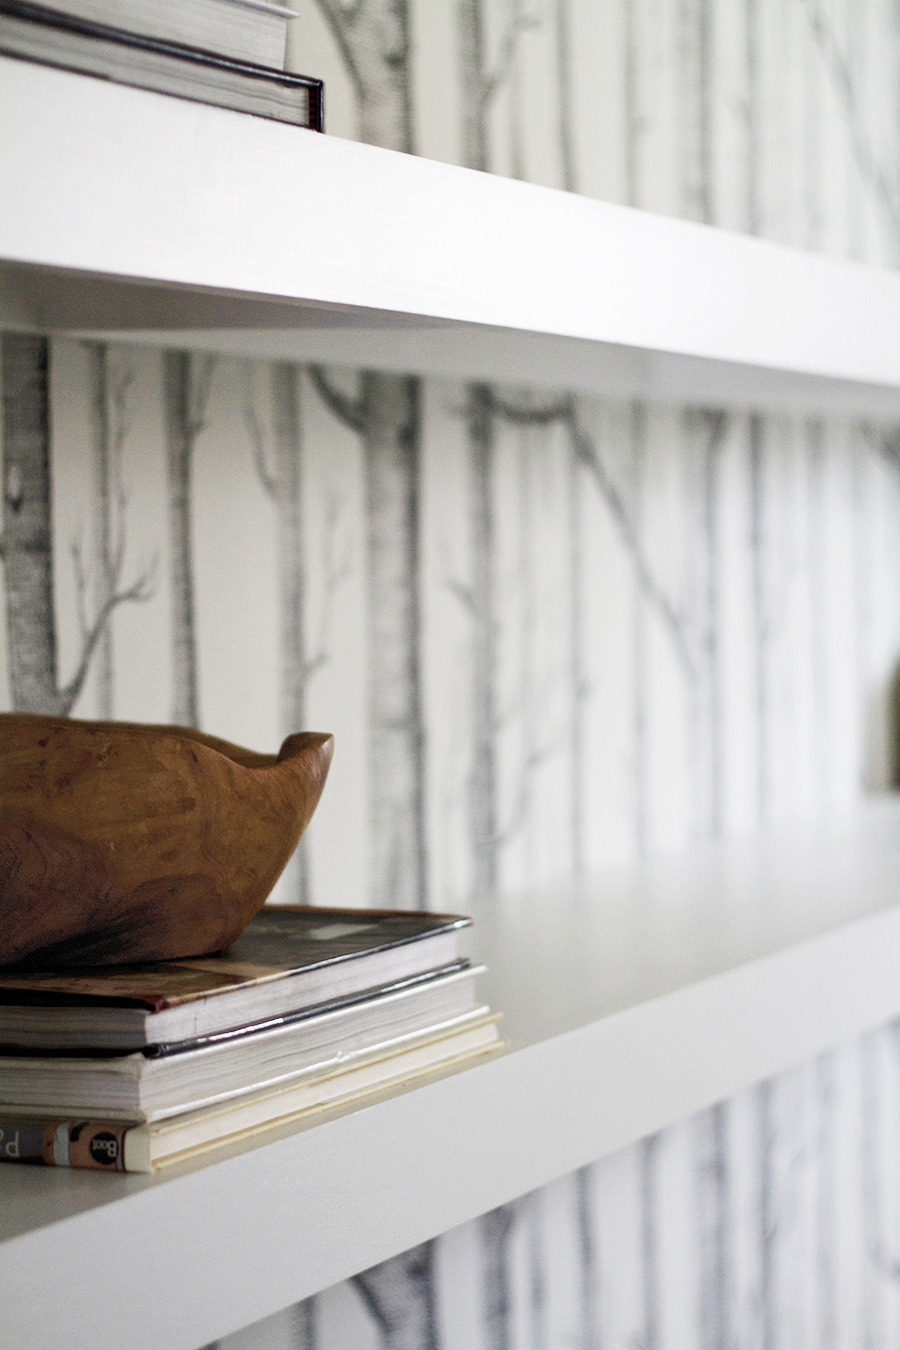
Each shelf was made up of 3 sizes of poplar lumber, dimensions vary based on the length of your space. The supporting back and side pieces were made of a piece of 1 x 2 (which is what they call it at the store, but is really ¾” x 1½”). The top shelf pieces is made of a 1 x 12 for the record area, and a 1 x 10 for the hallway area (respectively, ¾” x 11½” and ¾” x 9½”). The front face is composed of a piece called a 1 x 3 who’s dimensions are (you guessed it) ¾” x 2½”. The side supports were cut to the depth of the shelf piece. For example, the side supports in the hallway were chopped down to a length of 9½” to match the depth of the shelf. The long support piece that runs the length of the space is cut like so: length of space – 1½” = size you cut it. The 1½” account for the width of the 1 x 2s. Get it? The top shelf piece and the 1 x 3 face piece should both be cut down to the entire length of the space. Attach the shelf to the top, securing it to the structural supports on the sides and the back with countersunk wood screws. The face should be attached to the side supports and the shelf – also taking care to countersink screws so that they can be filled in later on.
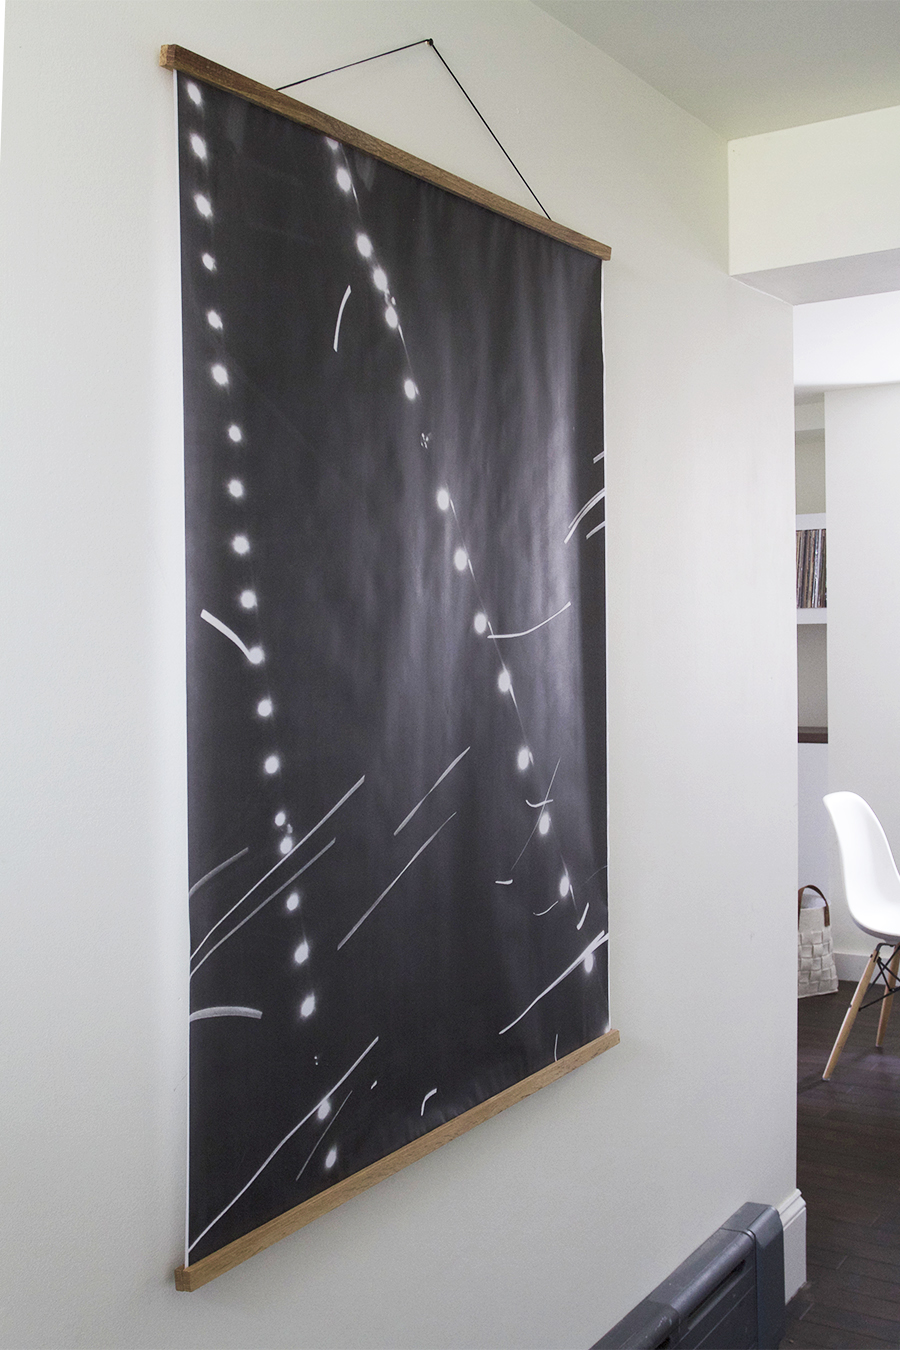
Finding large artwork on the cheap calls for an engineer print, don’t you think? I grabbed this one with magnetic mounting brackets over at Parabo Press. Party lights represent.


You guys, perfectly sized record shelves – they frame the collection like I had planned it, or some shit.
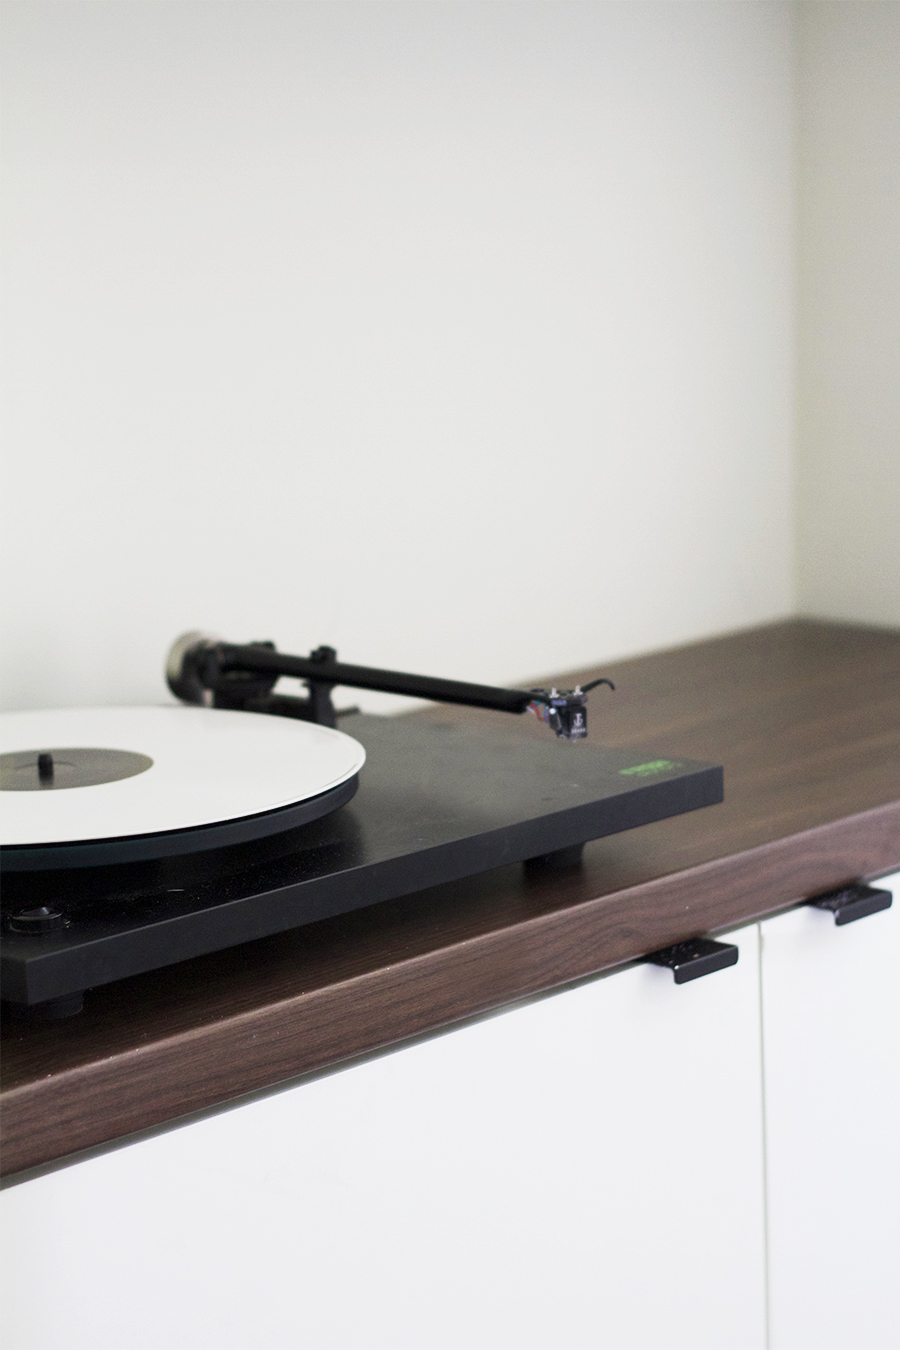
In case you were wondering, cause maybe you were… The basement record situation will be for casual listening only – we plan on bringing all of our multiple copies down here (cause there was a time that Jeff and I weren’t married) as well as going buck on the used classic rock section of the record store.


Good job on this Friend!
Thanks, pal!
Love the simplicity of everything. So thought out.
Thanks, Nikki! That’s good to hear. After living it with it pretty bare bones for months, it’s weird to see it differently. For a second I felt like it was too much.
Love everything you’re doing down here! Where did you get the minimalist cabinet pulls?
Thanks!
Thanks, Amy! I got the pulls at Ikea – I just spray painted them matte black :)
Love the finish on those shelves. I’m sure it was a lot of work, but it’s really impressive!
Well done!
Thanks, Ana! I’m still trying to master the perfect finish, but when it comes to a nice smooth surfaces, multiple thin paint layers, high grit sand paper and tack cloth are a must.
It’s looking great. Good timing, too. I’ve been intending to put some floating shelves in our bathroom for over a year. I need to get to it! They look so good.
Thanks, Sally! Get to it!
Amazing! And actually I started getting anxious about the record situation as soon as I saw this, so thanks for addressing the issue :-)
Ha! Thanks, Helen. Yeah the record situation is under control.
Everything in the basement–and leading to it–looks dope!
Please teach: why/how are the floating shelves strong enough to hold LPs? That front piece adds enough strength for the shelves not to bow? Or fall off the wall?
Thanks,
Hallie.
I just noticed that the LP shelves aren’t all that long–3 or 4 feet? Could you go longer?
I have done research on these things, but it doesn’t seem to stick.
Hallie! I am not a carpenter who is well versed in the magic of wood, but I will try my best. I think the key to having the shelves not warp when dealing with heavy objects is the size of the space you’re trying to fill. This space is 44″ wide, I don’t believe you’d want to go much wider than that. Secondly all the 1×2 supports are attached directly to studs with 3″ wood screws, I also added additional support brace at the half way mark. Both the shelf piece and the 1×3 face are both attached to this support as well as the other supports. When you start assembling and screwing all the parts together the entire thing becomes totally rigid.
I don’t know for sure if it won’t bow, but I would be surprised if it did. The shelves are solid, the hardwood shelf is 3/4″ thick and the front face will help support the shelf, as well as make it look good.
I should say, in contrast, I won’t be putting all the heavy stuff on the longer shelves, although those babies are not going anywhere. Also to be noted, the longer shelves have 3 support braces each – if you look closely you can see it in the photos.
Baah, I hope that kinda helps.
Right on–thanks!
Both sets of shelves look lovely! As ever, you’re an inspiration to me to get building something. Though I think at the moment my next project will be refinishing a secondhand chair from the 1920s I snapped up last week. Not quite on the same level…but cheaper. ^_^
Love them! I hope you post about reupholstering the bench cushion. I was just pondering the best way to tackle a similar project myself!
This is rocking my world! So. good. You are killing it. Shelves, storage, wallpaper. Really, just wow! Can you share more (or did i miss it, sorry) about how you built the storage below the shelves? Just awesome – give yourself a high five!
I like the beautiful look of the rooms. Nice and tidy. Where did you buy the white long wall to wall shelves ? Did they have holes for spotlights when they were bought ?