


I thought I’d do a post about how I edit my interior shots in photoshop. This is a little bit of a tricky topic because everyone has their own way of doing things in photoshop, but I thought I’d give you my two cents. Maybe it will help somebody out there and maybe you will laugh at me, either way it’s cool.
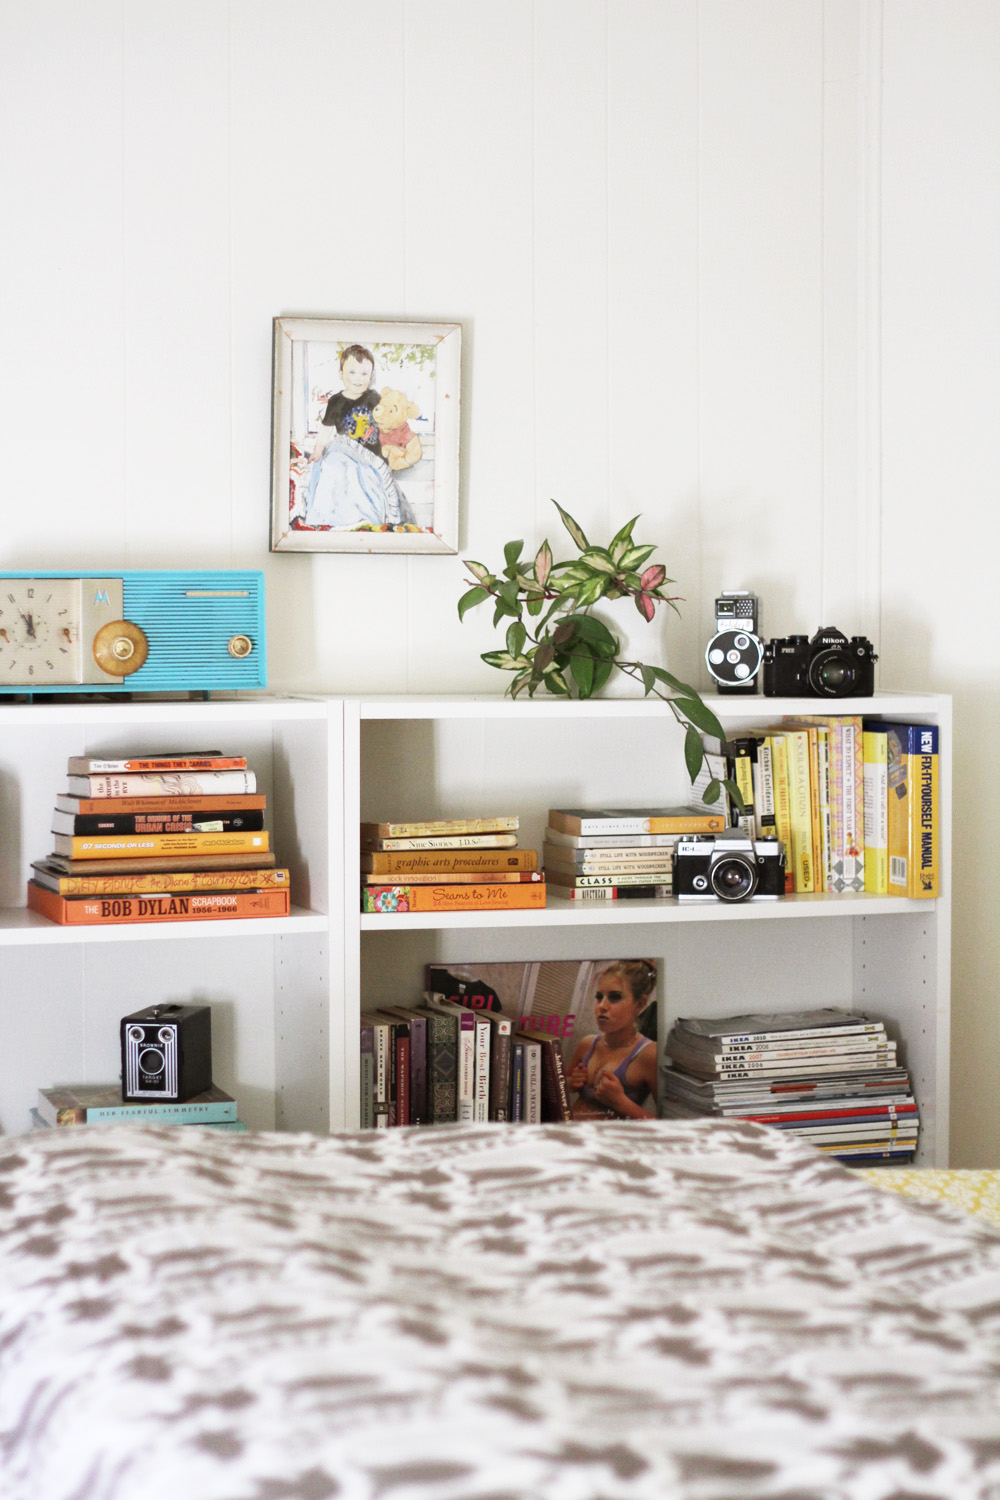
To start out this tutorial, here’s a before and after so you can get a feel for what this looks like straight off my camera and how light filled and airy a few simple steps can make your pics.

First off, I’m sure results can vary, so it should be noted that I white balance all my photos prior to shooting and I take them in natural light. Obviously, if you were not doing this, the stuff I’m about to show you might not help ya much. Also, I have no idea what a lot of the technical terms for some of these photoshop thangs are so bare with me. Click on the “READ MORE” below for a complete tutorial.
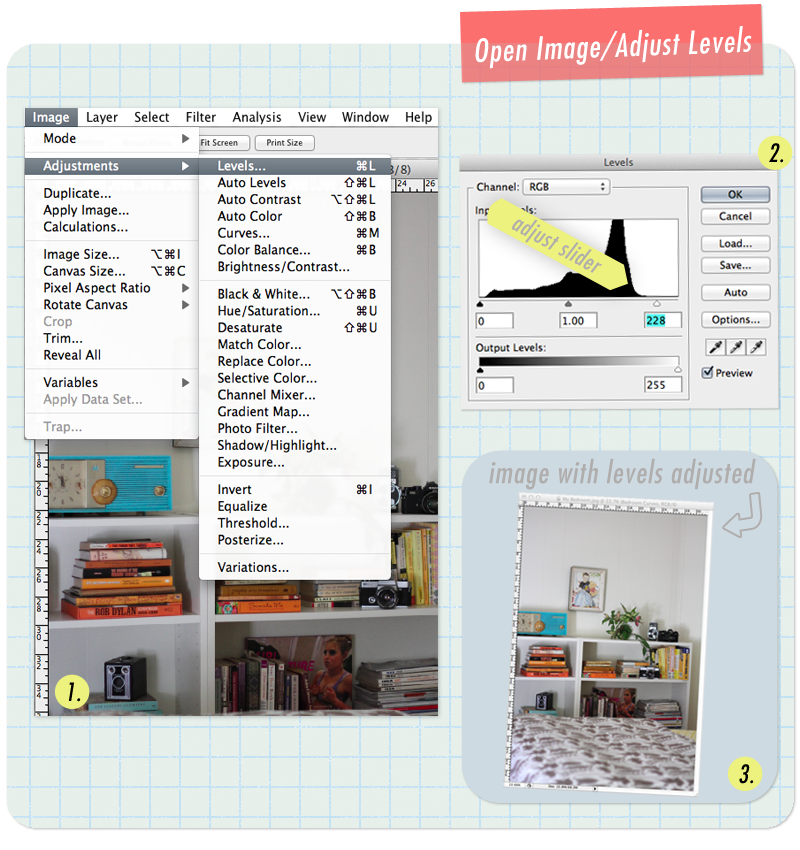
Step 1: Adjust your levels.
Open your image (duh). Duplicate the first “background” layer and rename it, I do this as I go so I can go back step by step and double check to make sure I’m adjusting things accurately. I have days when my eyes are just tired and they can’t make good decisions about what looks good and what doesn’t. Duplicating layers helps with this process and makes it easy to make changes if you decide tomorrow your photo kinda sucks.
Adjust the levels (Image > Adjustment > Levels). I usually move the white slider on the right hand side up until it sits directly under that black hump OR until right before the whites in your photo start to get blown out, whatever comes first. Be very careful not to adjust too much. In this case I stopped before the humps because all the white walls in my photo started turning nuclear white, (it’s a color that exists, seriously.)
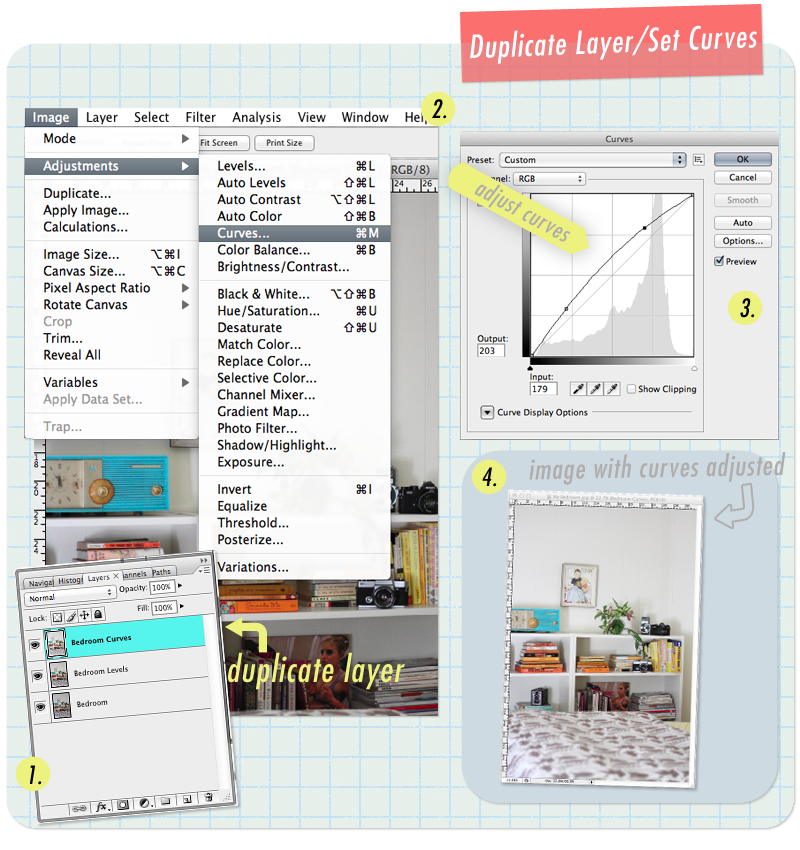
Step 2: Adjust the curves.
Duplicate the “levels” layer and rename it.
Adjust the curves (Image > Adjustment > Curves). Check out the image below for help. I always pull the curve slider up right around the lower left hand quadrant and then again at the upper right hand quadrant. The lower left hand corner helps determines the look of your shadows and the upper right hand slider determines the look of your highlights. Start with the bottom left, shadow side first. Pull up and move around with your cursor until you find a level that looks good to your eye. Then move the upper right “highlight” slider. This one is sensitive, again be careful not to blow out your whites. It’s easy to go too far.
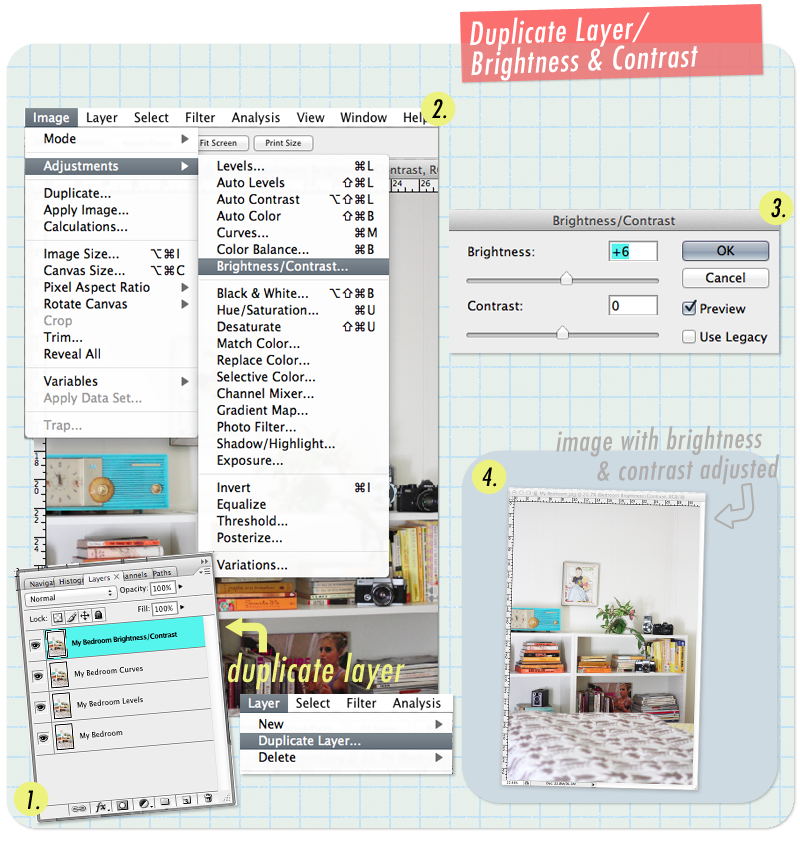
Step 3: Adjust the Brightness & Contrast
Duplicate the “curves” layer and rename it.
Adjust the Brightness & Contrast (Image > Adjustment > Brightness/Contrast). You will find sometimes that you need to up (up is what I call moving the slider to the right resulting in a positive number) the brightness quite a bit and sometimes you need just a little touch, like I do in the photograph of my bedroom. It all depends on the exposure you used while taking the photo and the lighting at the time. Occasionally, I will up the contrast a touch, but for me, this isn’t always necessary.
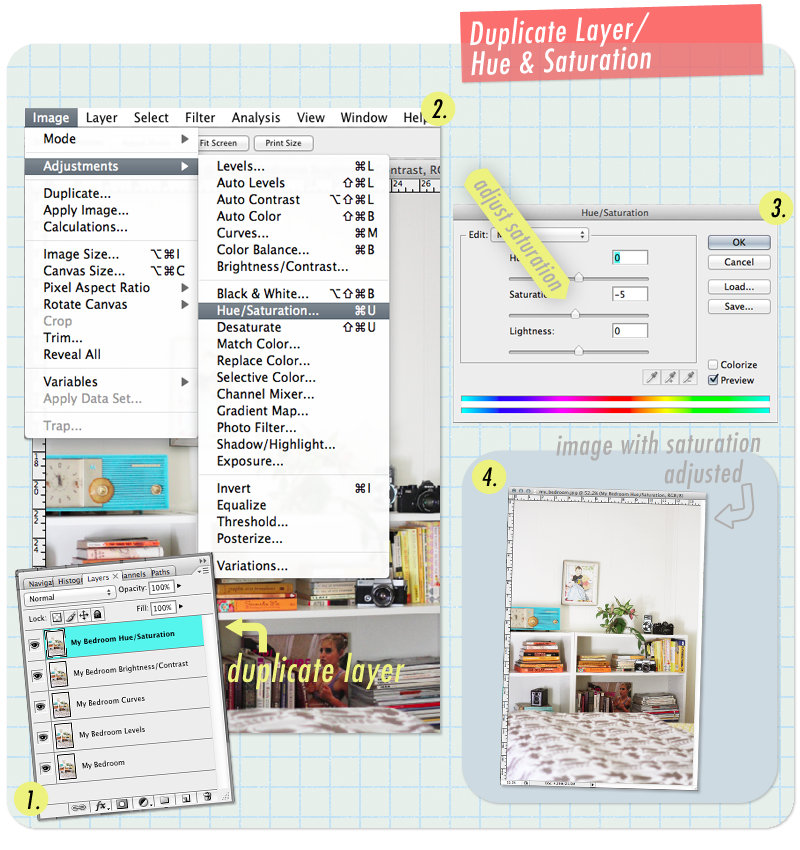
Step 4: Adjust the Hue & Saturation
Duplicate the “brightness/contrast” layer and rename it.
Adjust the Hue & Saturation (Image > Adjustment > Hue/Saturation). This step can be very important. With all that lightening & brightening we did in the previous layers our colors can get a bit over saturated. I kinda love this look because I’m a sucker for tons of vivid colors especially against neutral backdrops, but sometimes it can get to be a little too crazed. The Hue/Saturation tool will allow you to tone down those blaring colors by moving the slider to the left.
Cool! You are just about done, that is if my methods actually work for you ;)
Lastly I might adjust the “Color Balance” slightly but isn’t always necessary, especially if I/you white balanced prior to take taking the shot.
So like I said in the beginning, I do not consider myself an expert in this area. I’ve been using photoshop for like 15 years (holy geez), but I don’t make a habit of learning new things. I am an old curmudgeon that is stuck in my ways. I am sure there is a much better and more efficient way of doing all of this so if you have any tips for me I’d be happy to hear them.
Thanks for looking!
Sources:: Pugly Pixel Graph Paper


Try to use mask adjustment!
Thanks so much for the tips! I have always sucked at editing photos, but these steps really helped!
Thank you so much for sharing these tips! I’ve been looking for an easy tutorial for editing interior shots forever and I was able to follow all of your directions perfectly. Thanks again!
Nikki
Thanks. Useful for a quick interior workout delivery.
THIS TUTORIAL WAS SO SIMPLE AND EASY TO FOLLOW, MADE A HUGE DIFFERENCE IN MY PHOTOS TOO! THANK YOU SO MUCH!
Great, glad to hear. There is an even more recent tutorial right here and here.
Thanks! BTW, Sorry for the caps in my last message! In the info fields it wouldn’t let me type in anything else so I assumed it was the same for the comment!
Thanks for the marvelous posting! I truly enjoyed reading it,
you are a great author. I will ensure that I bookmark your blog
and may come back at some point. I want to encourage continue your great posts, have
a nice afternoon!
I see your blog needs some fresh & unique content. Writing manually is time consuming, but there is
solution for this. Just search for; Masquro’s strategies