


Budz! I know it’s taken awhile, but I finally got all items ordered, styled and photographed for our tiny bath at the cabin and I think it turned out soooooo good. Doing projects at the cabin is a super slow process, so I appreciate you all hanging in there with me. If you’re unfamiliar with the cabin half bath, I’ve linked the previous articles at the bottom of this post for your reading enjoyment.
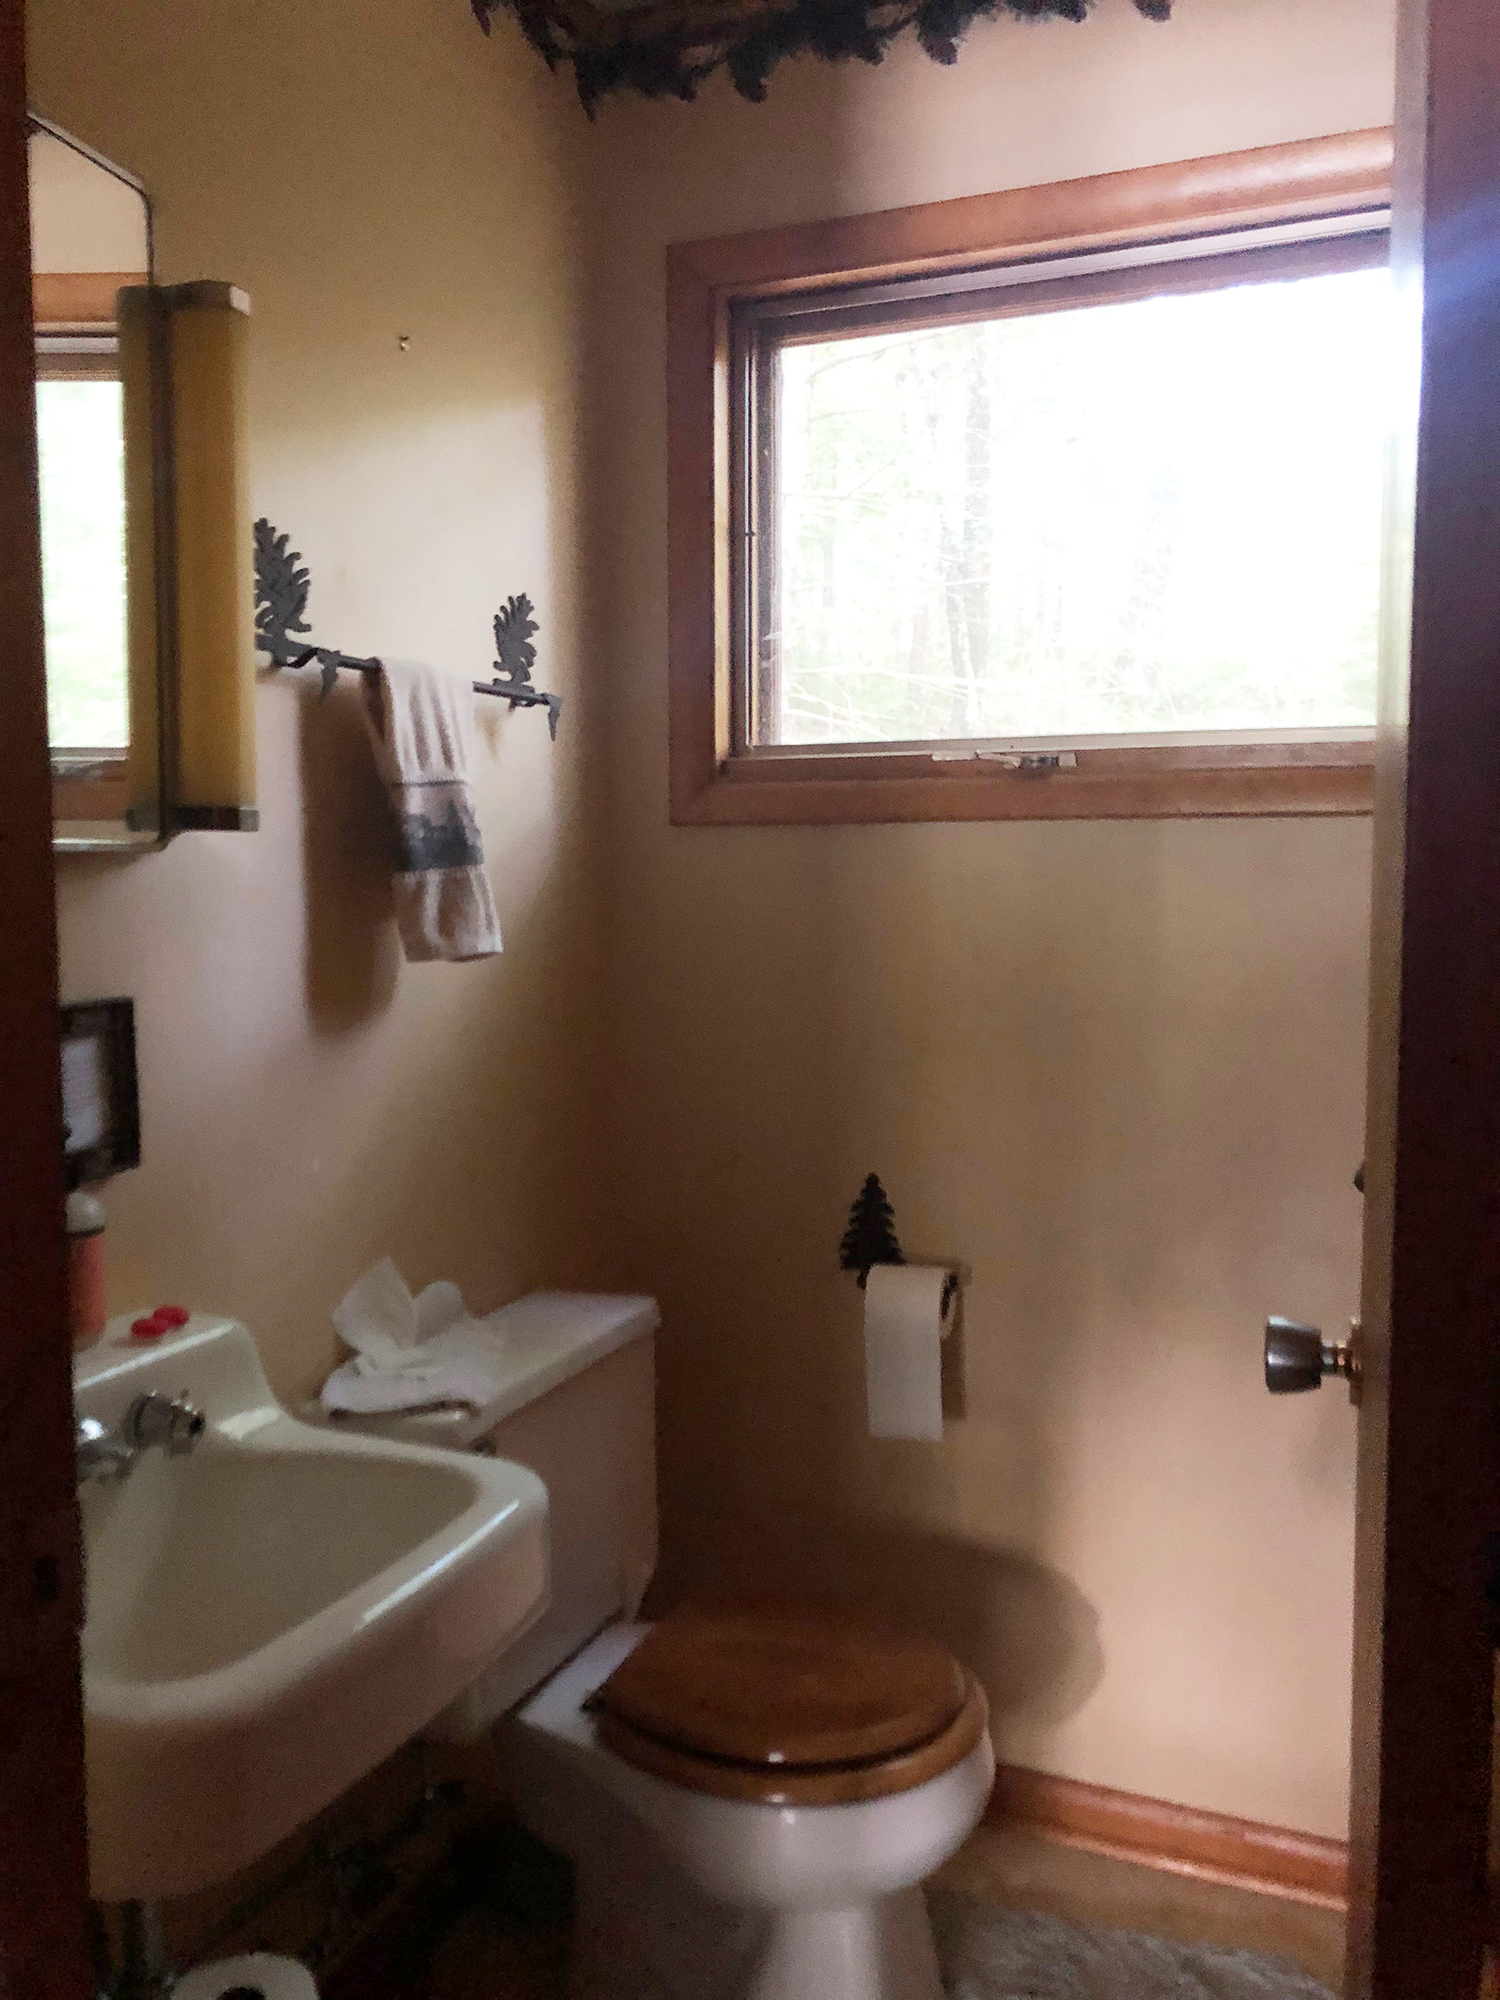
In a previous life, this bathroom had won the award for most overzealous use of pinecone paraphernalia as decor. To say that the pinecone and branch motif was popular in this tiny space is a lie, it was actually loved in a creepy way like a stalker might love Brandon Flowers (just saying). There was wallpaper, towel bars, trash cans, and even light switch covers all giving praise to the sacred pinecone. Although I’ve eliminated any trace of the pines in this bathroom, we still have other obsessive decor choices in the cabin. The main floor bathroom was voted worse case of moose-itus and has yet to be healed of this retched disease.
I’m drinking, can ya tell?
All moose and pinecone jokes aside, there were problems with the actual space. I needed to address the vinyl flooring which was discolored and groody, replace the wax ring at the base of the toilet, replace the interior of the toilet tank and the supply tube which had resulted in a slow leak. The leak resulted in a soft spot in the subfloor which has since dried out and is no longer an issue. The subfloor does need to be replaced someday, but like I said, the leak is no longer and issue and the toilet is working properly. There were numerous holes (with anchors) left in the wall and needed to be patched. A wallpaper border needed to be removed. The side lights on the medicine cabinet had yellowed over the years and needed to be brightened up, the light fixture needed to be replaced, and the exposed plumbing was looking pitted and worn.
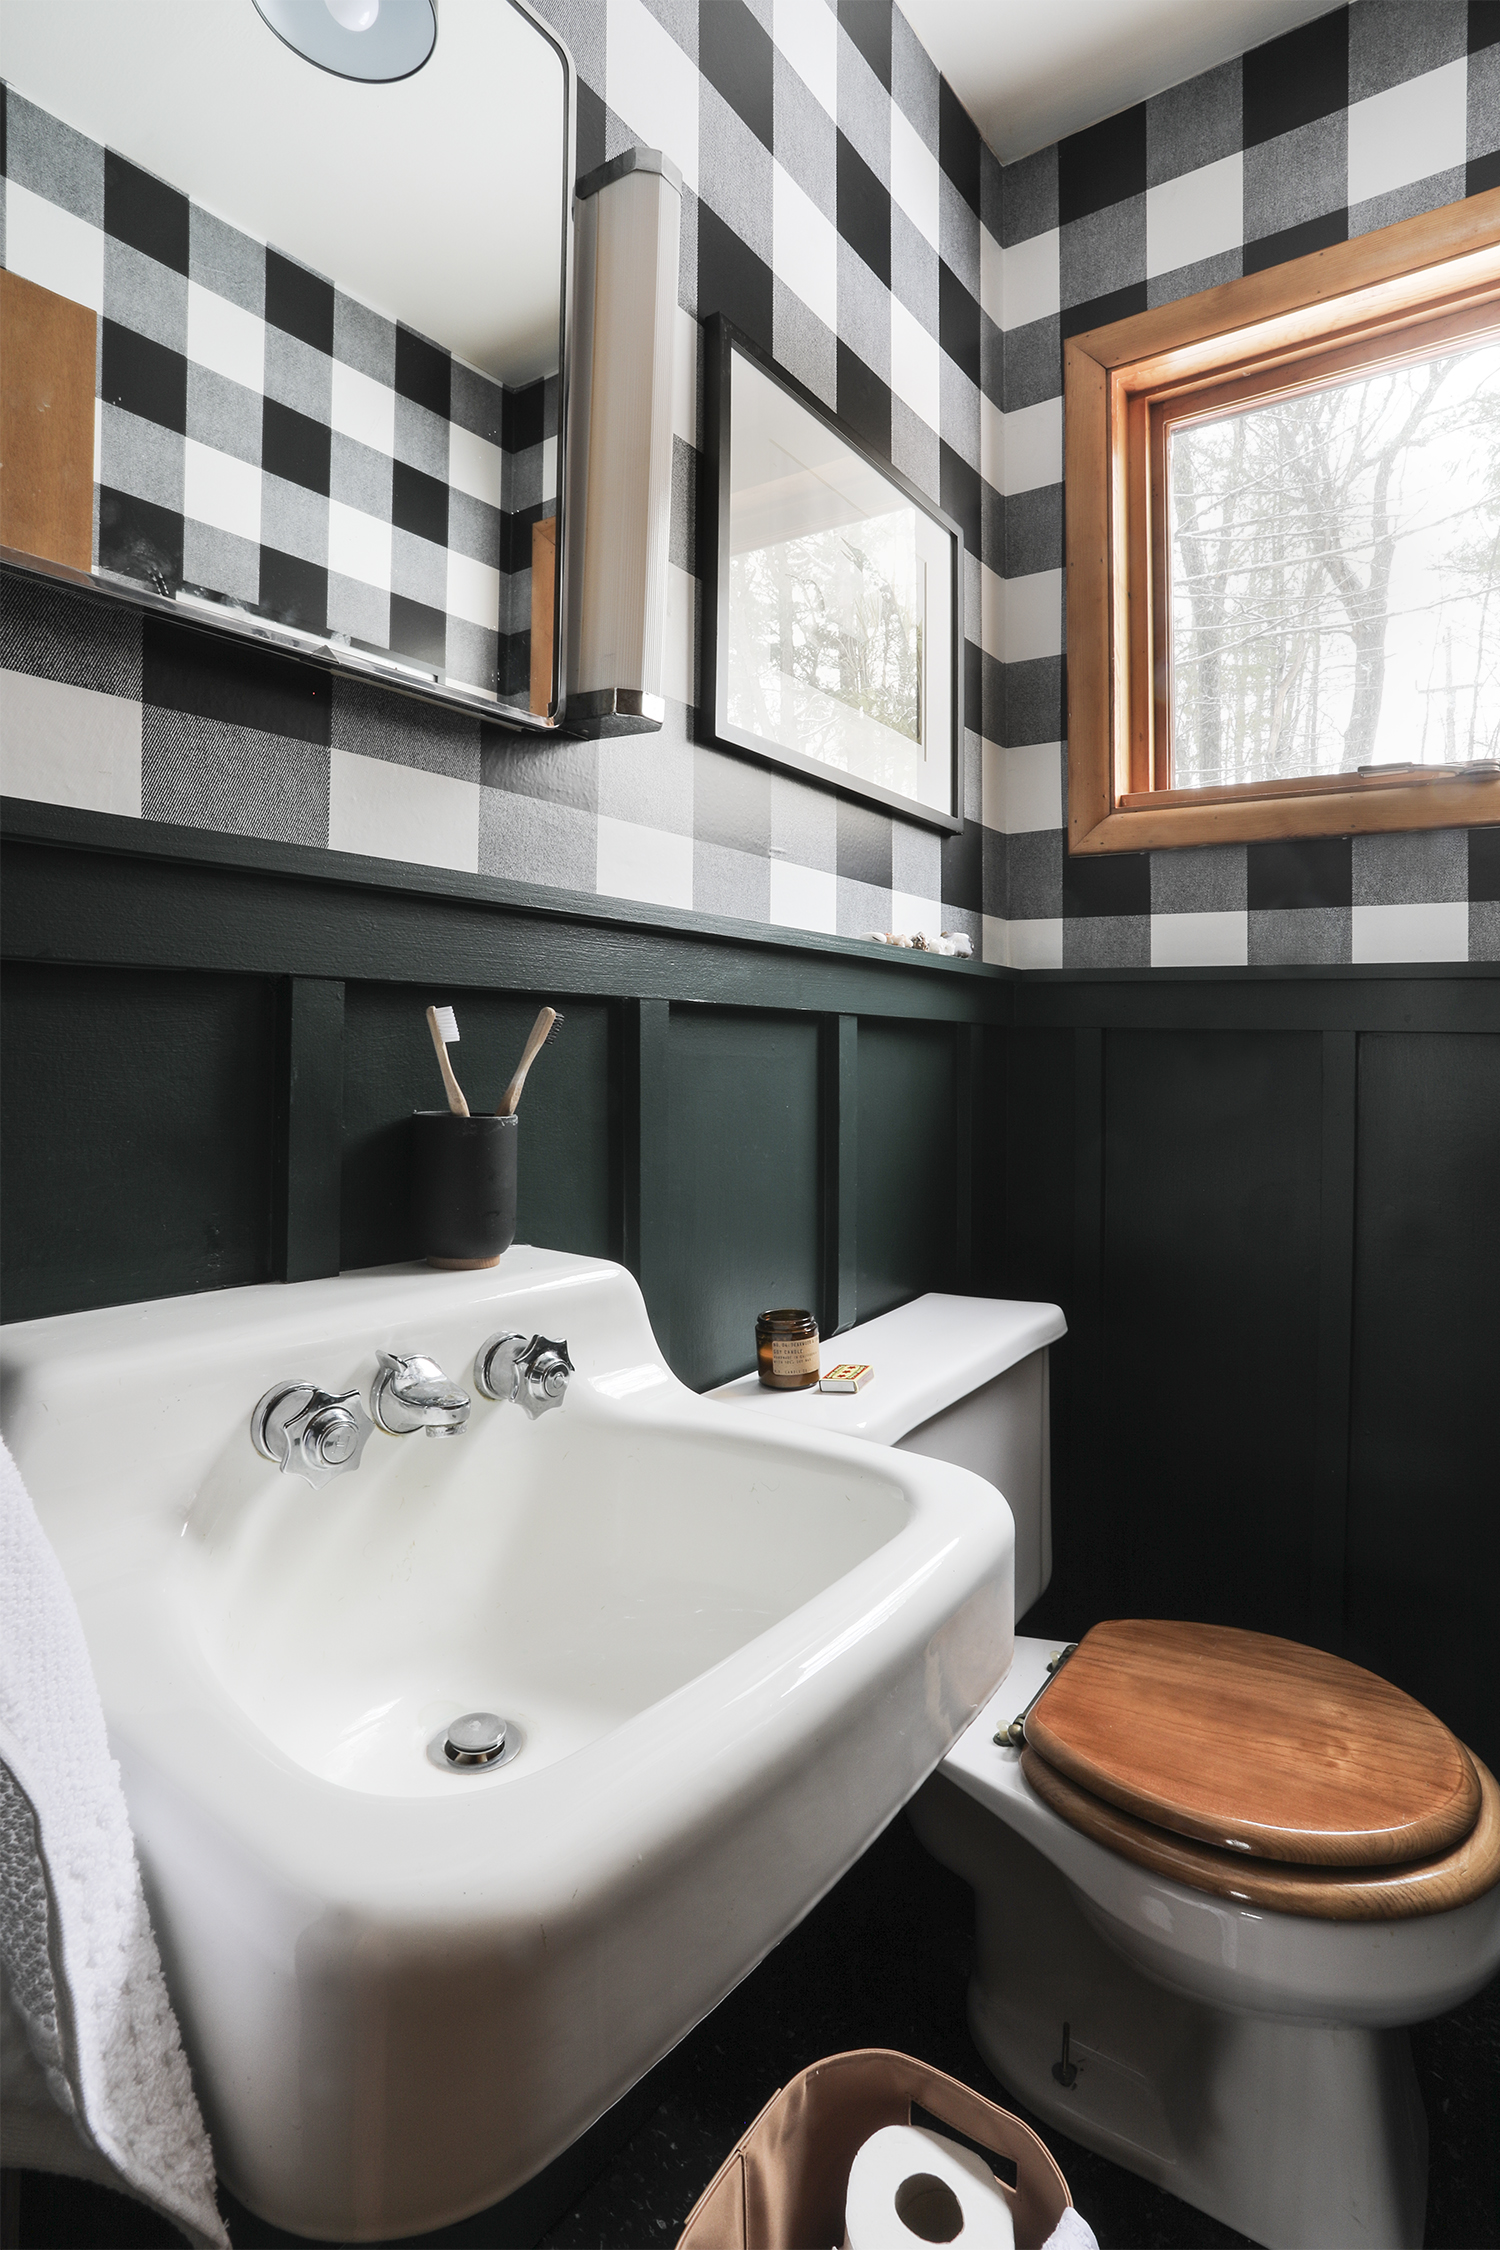
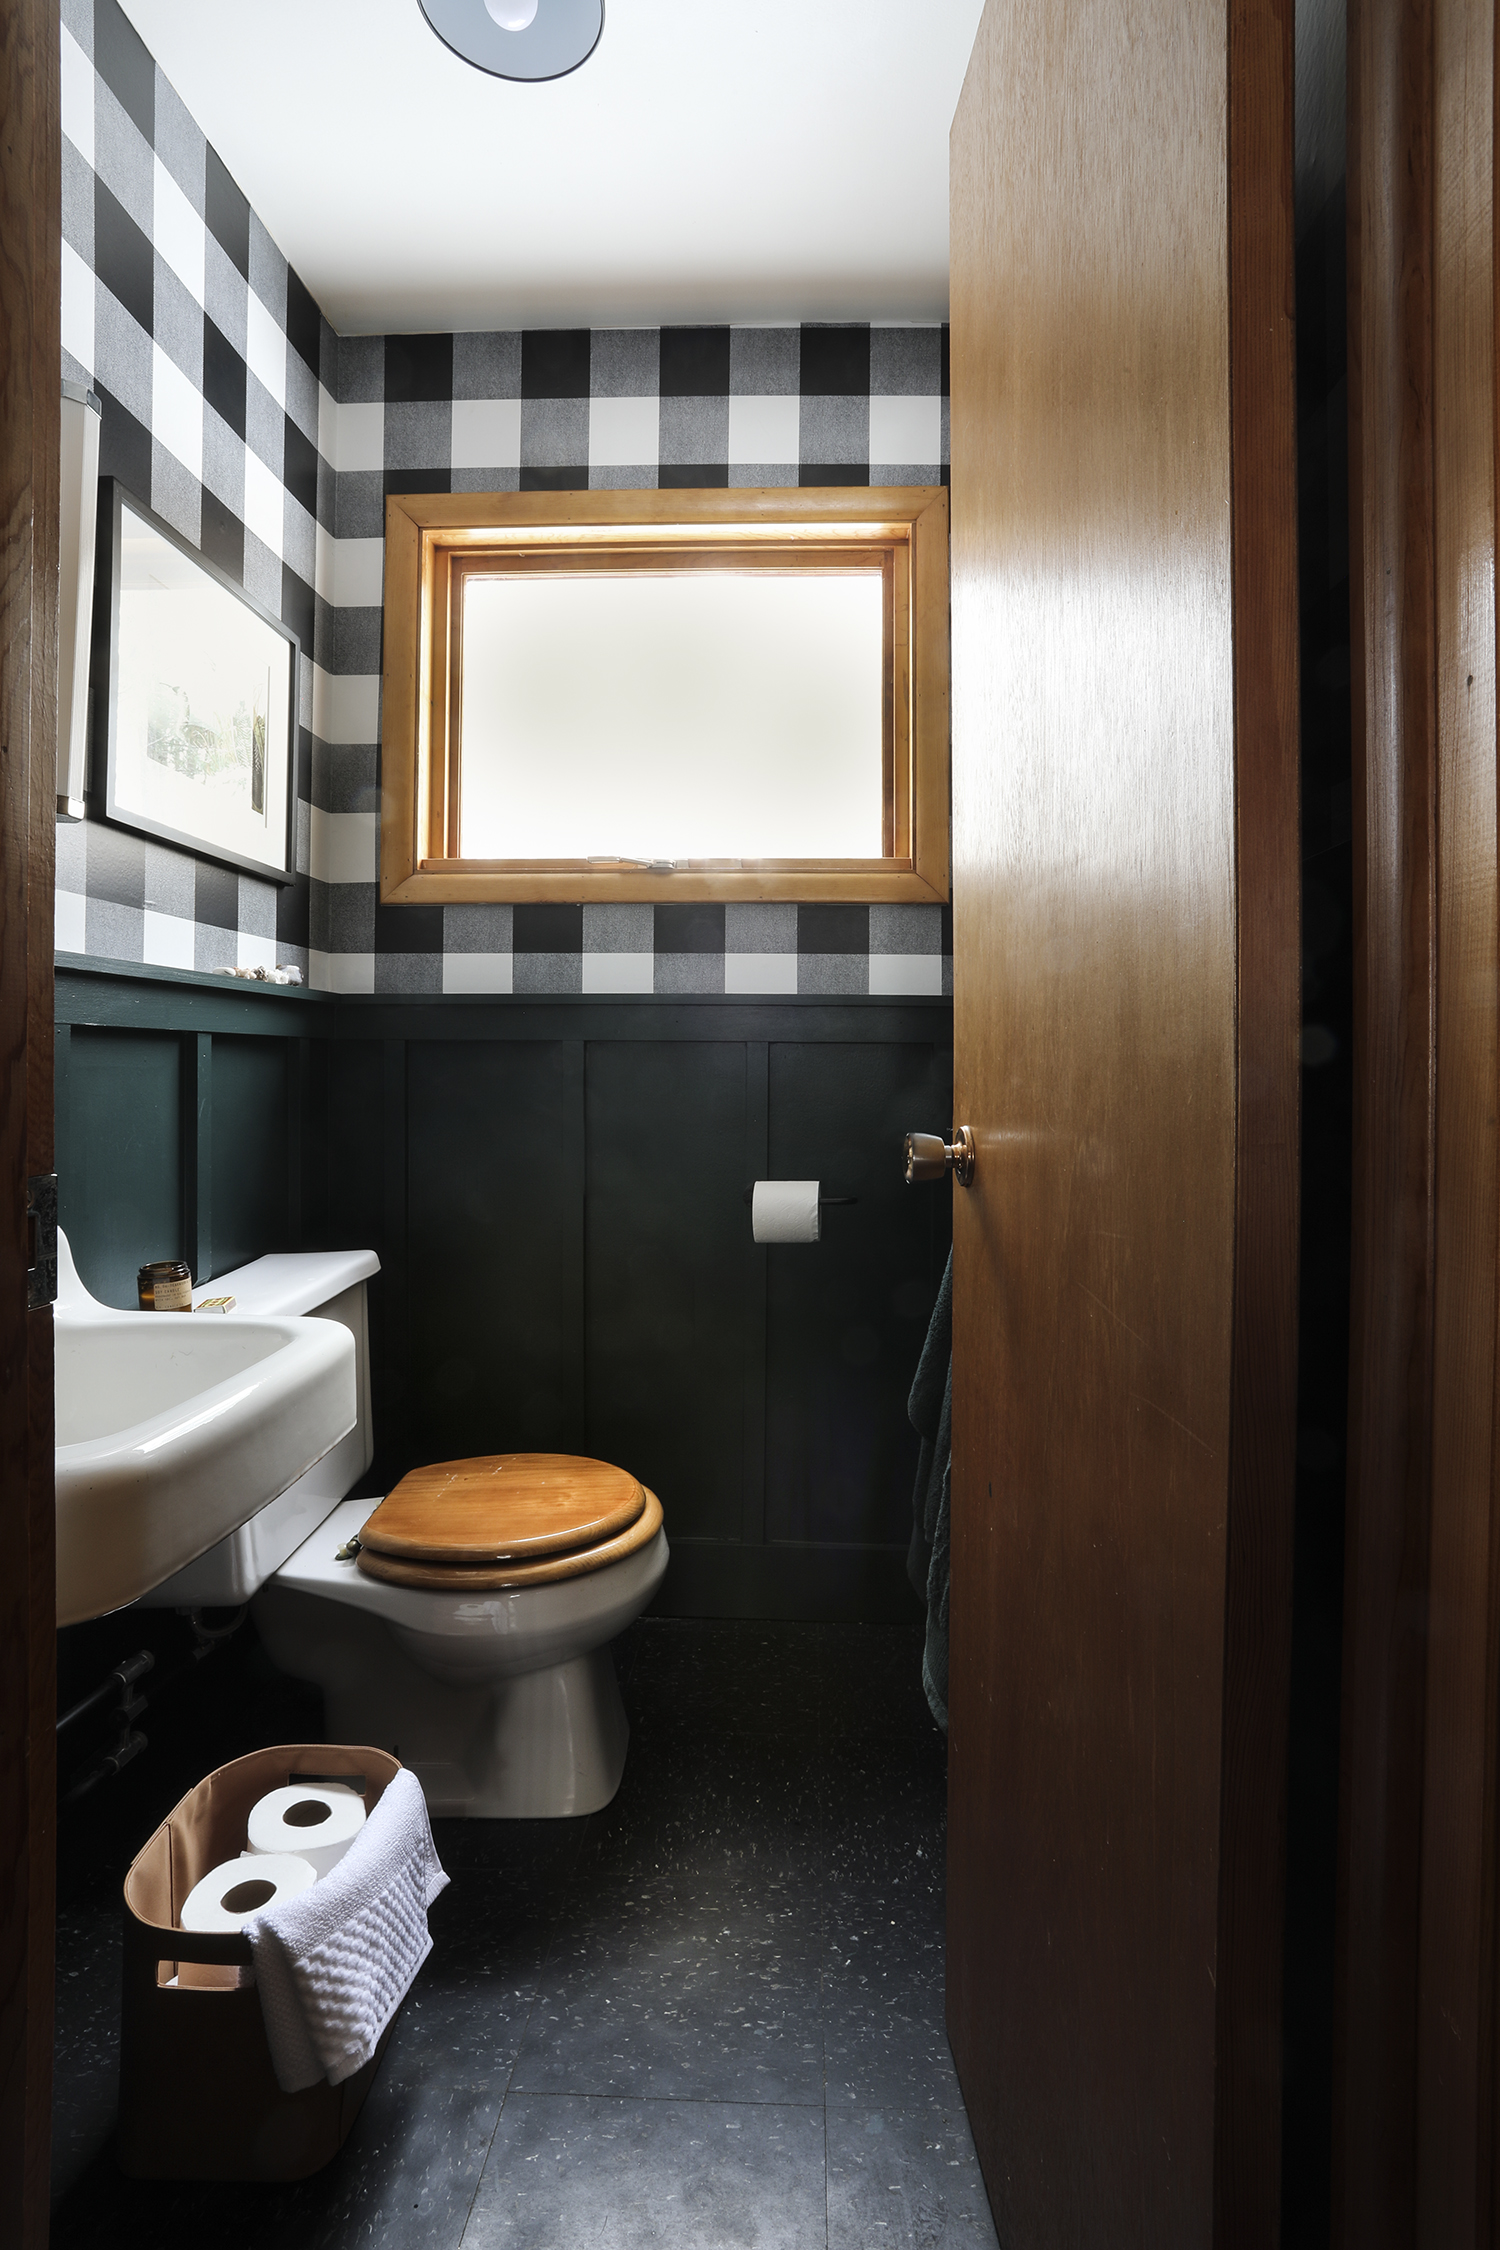
The inspiration for the space started with a buffalo check vinyl wallpaper that I came across at Target of all places. Buffalo check has become a repeat pattern throughout the cabin, and I thought it could be great in this small bathroom. Doing floor to ceiling buffalo check would have overwhelmed the space and it seemed rather obvious that a treatment on the lower part of the room would help to balance the graphic paper. As I recall it, the idea to do board & batten came naturally to me, but I’m sure subconsciously I had been inspired by my friend Ashley’s board and batten bedroom. Our cabin’s exterior is also clad in board & batten so it seemed like an easy jump from the exterior to interior. I often look to my spaces for inspiration, lots of time there you can find it in existing design and then you can repeat subtly (or on blast). I repeat textures, patterns, and colors all the time.
I attacked the project from the ground up. I started with covering the existing vinyl flooring with VCT industrial tiles. The tiles are laid with adhesive and bond nicely with the vinyl flooring. I also installed VCT in our cabin kitchen and outline in detail the process in this post. They’ll be durable and create a clean look for the time being. I didn’t want to draw attention to the floor, so black tile seemed like the least offensive choice.
Once the tile was installed I began replacing the guts of the toilet, the supply tube and gaskets, and the wax ring at the base of the toilet. It’s never fun getting up close and personal with a toilet, but no matter how gross, $25 bucks worth of materials and a little elbow grease seemed like the best bet for this revamp on the cheap.
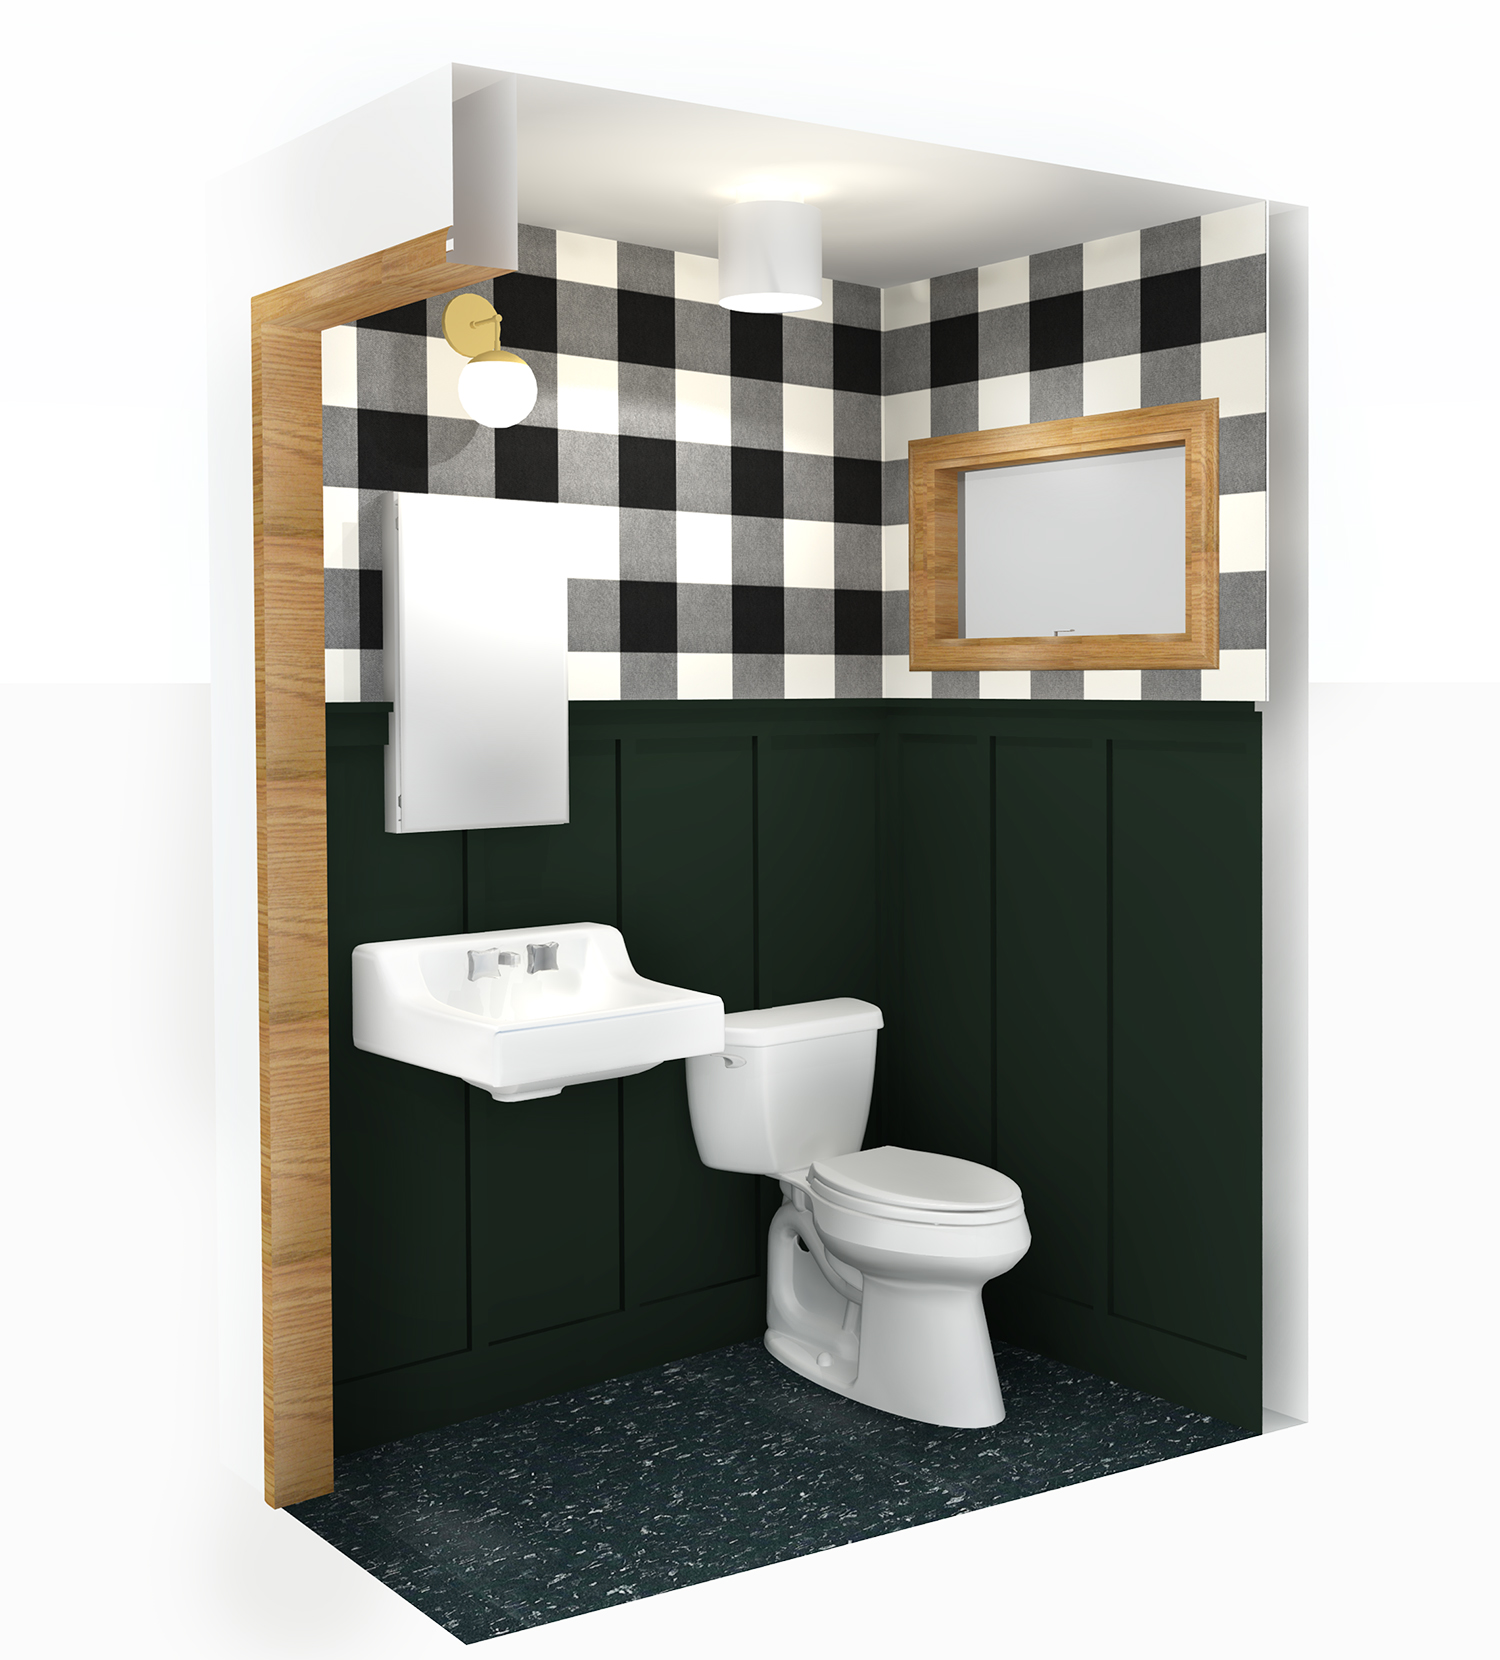
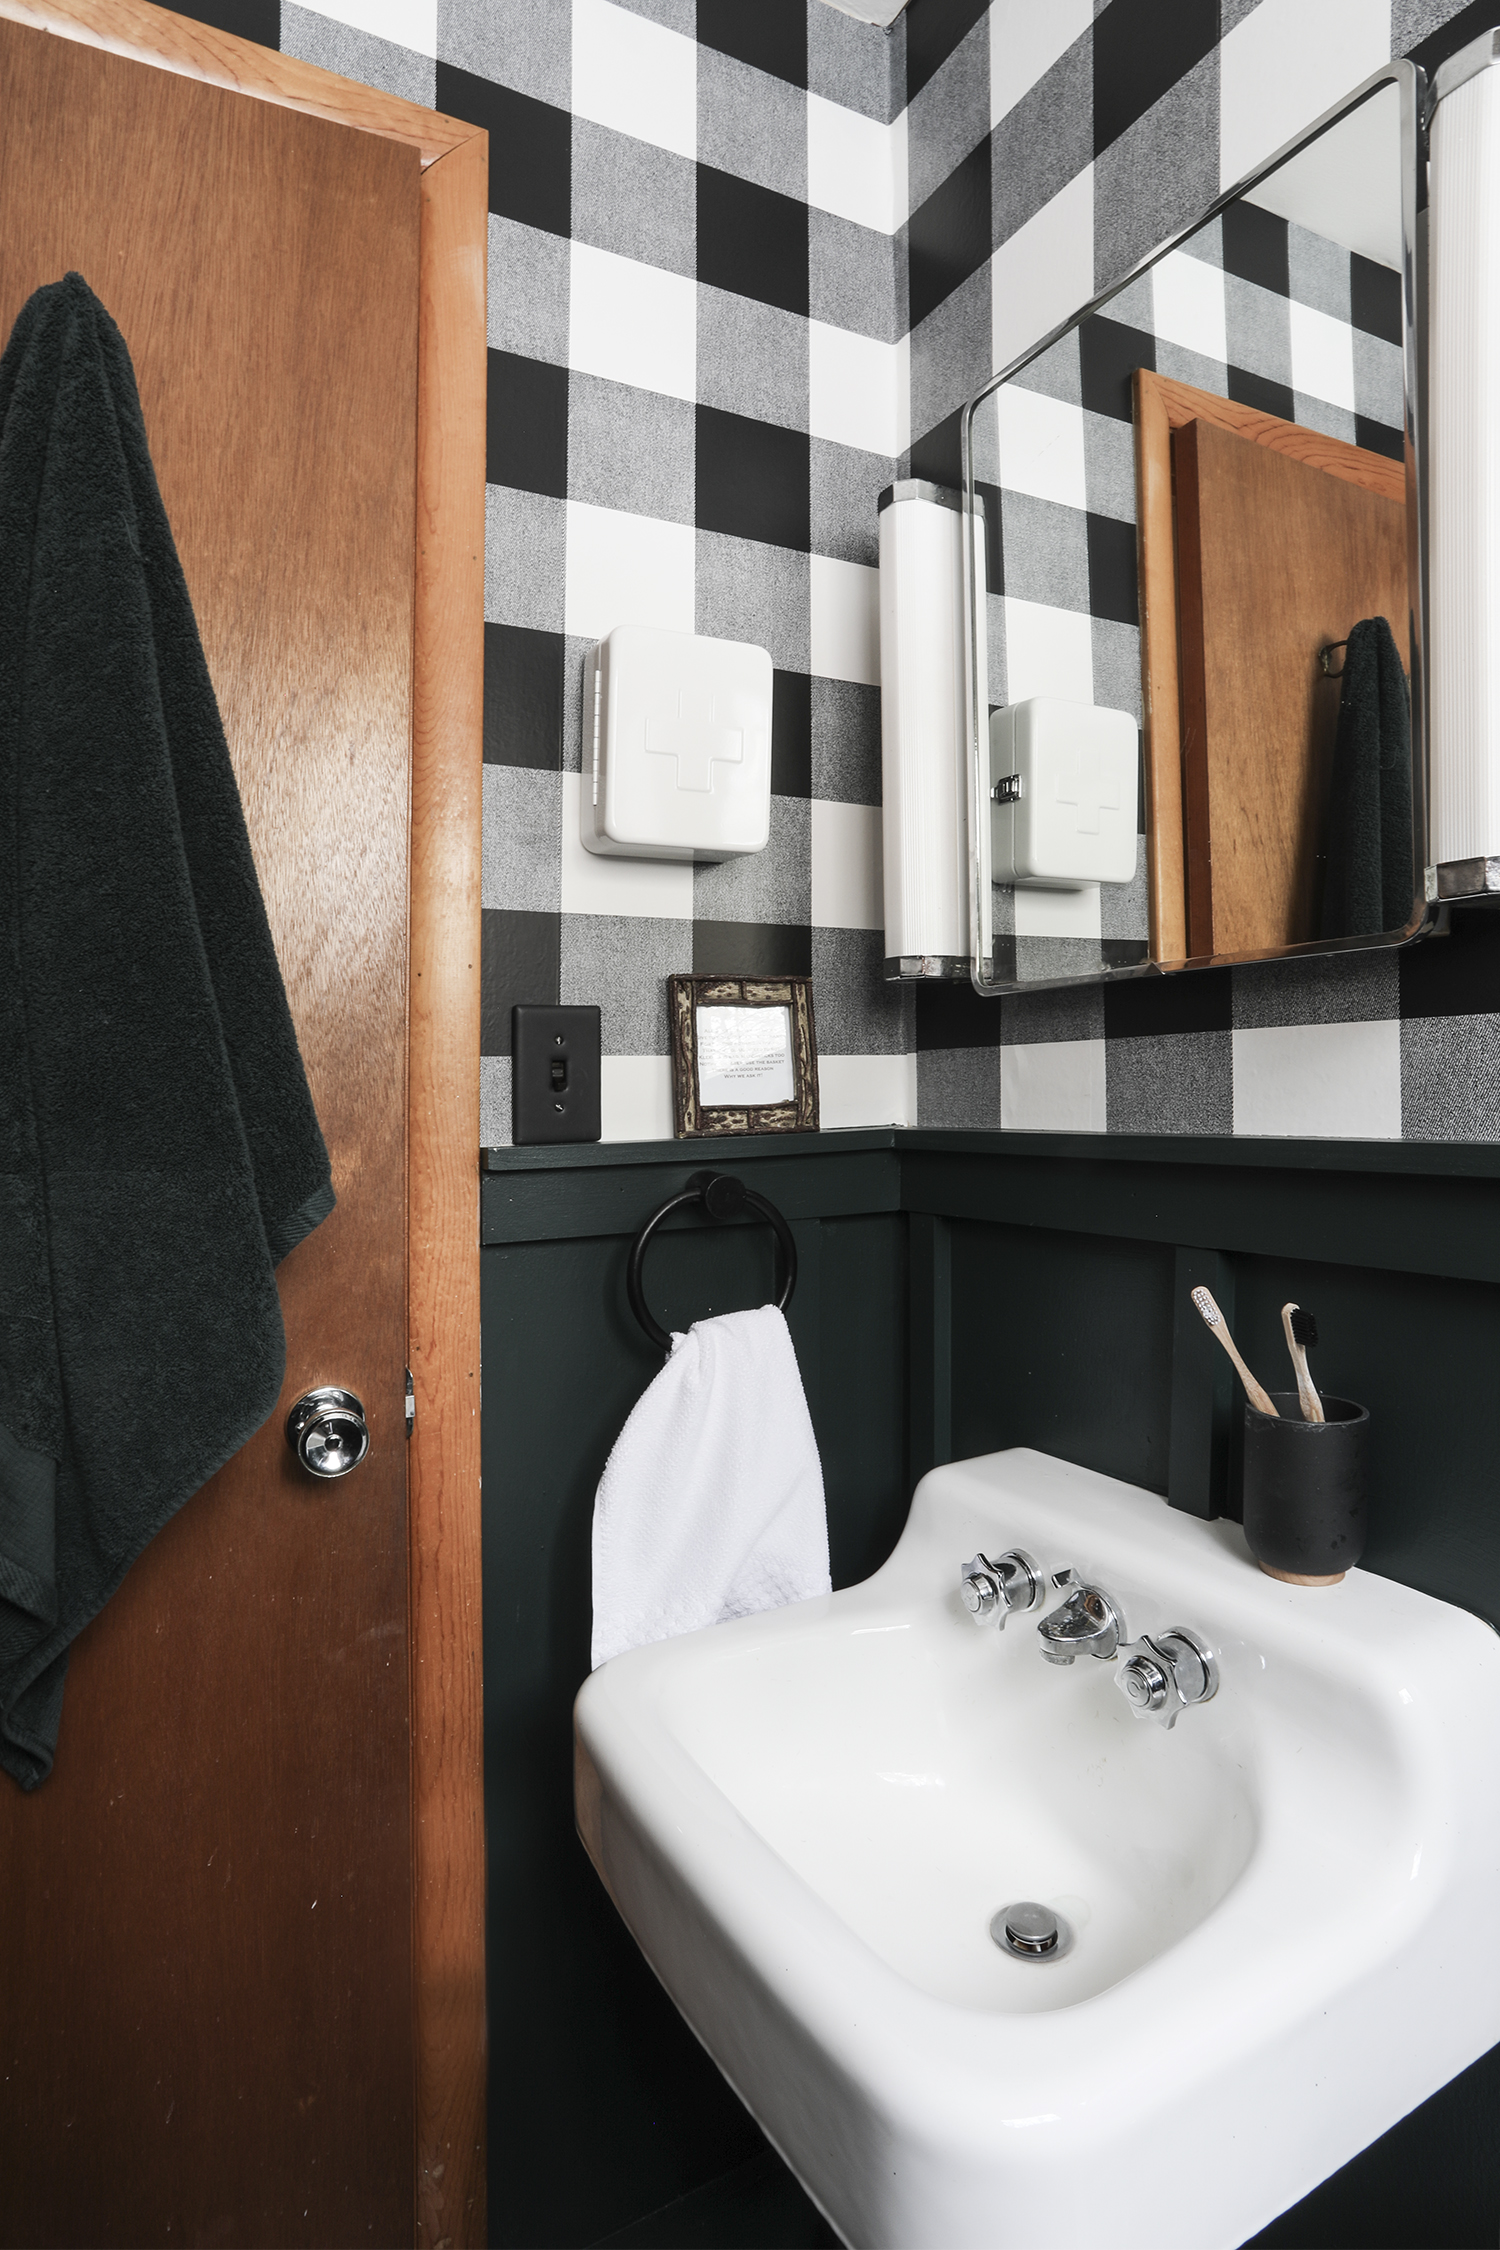
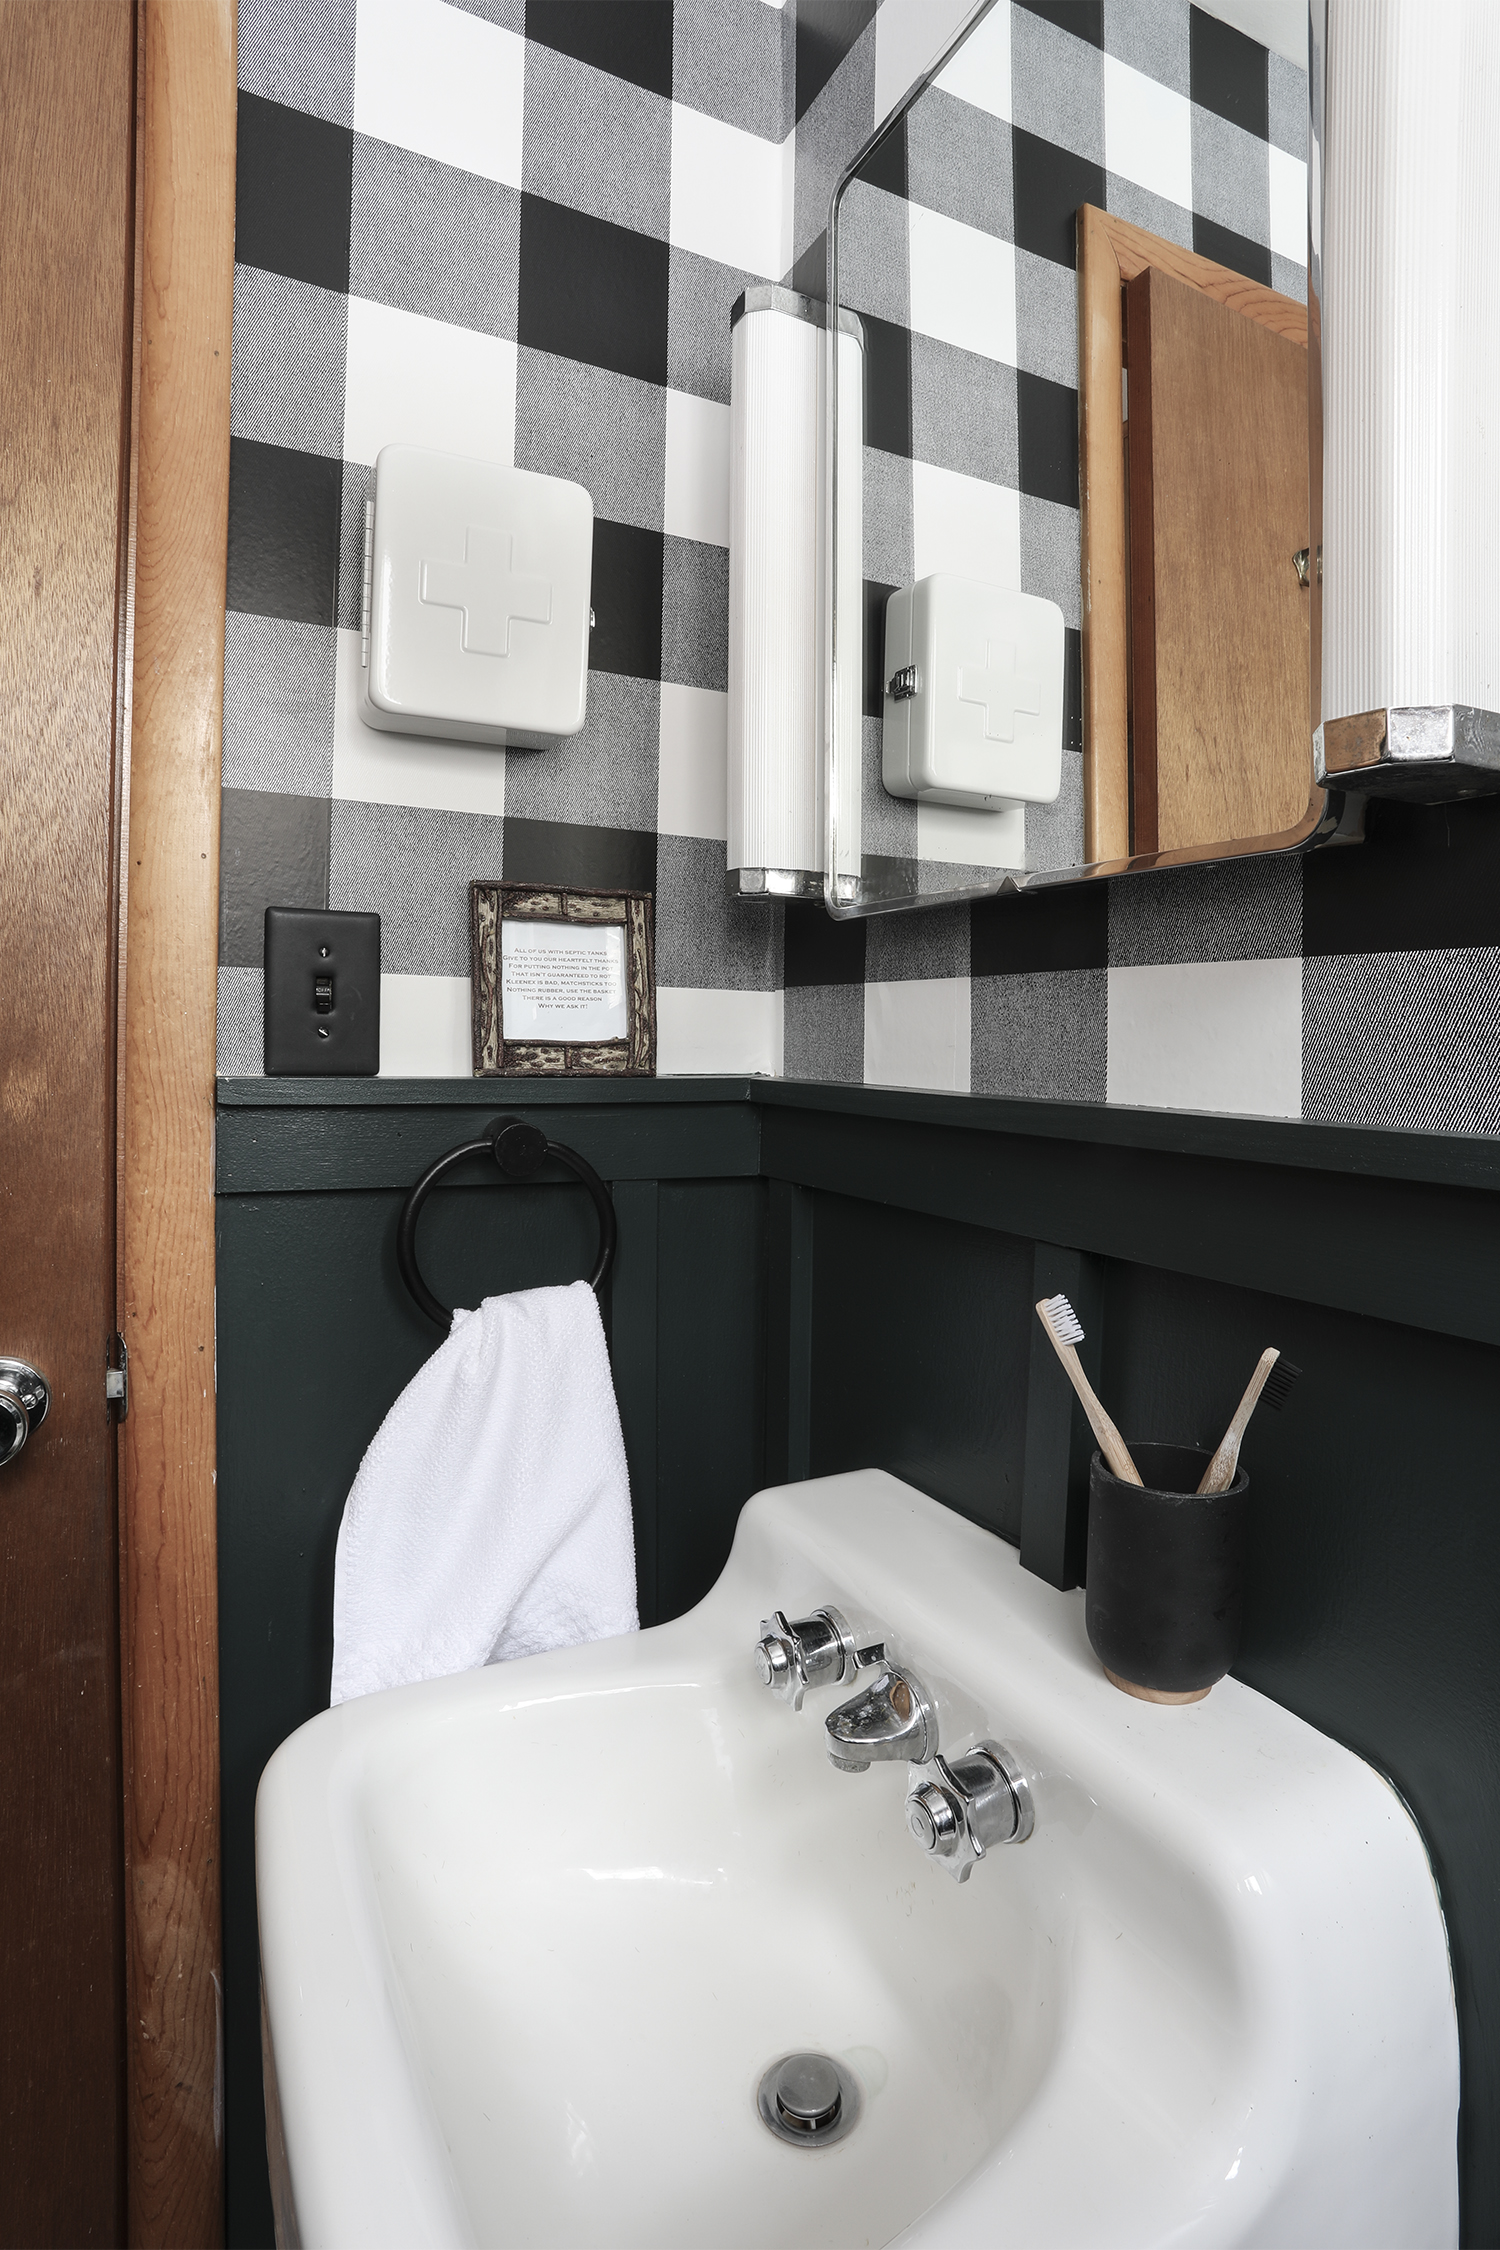
I considered replacing the medicine cabinet for something more modern. I was overwhelmed by all the things (ahem, pinecones) that were going wrong in the space, that I wanted to start fresh. After I installed the flooring and started to prepare for the board and batten, I realized that the medicine cabinet was actually super cute and paired nicely with the vintage wall mounted sink. You guys helped sway me to be pro medicine cabinet and see its inner coolness, twist my arm, fine, let’s keep it! The only reason I really wasn’t feeling it was the yellowed plastic light covers – not a cute look. After doing A LOT of research, I place the age of the medicine cabinet at around 70-80 years old. Of course plastic exposed to sunlight would yellow over this amount of time. I scoured the internet for replacements and came very close to finding something that was almost the exact dimensions of these yellowed shades, but the company had stopped producing the replacements a few years back. I even got in touch to see if they might have any laying around that they’d like to sell me. It was a no-go-situ-O. Plan B was to try every method I could find under the sun (literally) to whiten the plastic. I tried hydrogen peroxide baths, sun baths, bleach, and oxi clean. Nothing lightened the color of the plastic. Plan C was to just bite the bullet and hit the shades with a coat of white spray paint. I didn’t want to resort to this, but I felt that I had no other choice, and this is the option I choose. I really wish I could have found a better solution to this problem. I kinda hate it when things that are supposed to be functional but are just aesthetic. I’m still open to suggestions, so if any of you guys have ideas as to what I can do with these lights to lighten the plastic please let me know. AND please let me know if you are aware of a secret spot that produces reproduction parts for such a light. I spent the better part of a day researching reproduction lighting parts and came up empty handed, I’m so ready to jump back into that rabbit hole if it means that all my efforts might pay off.
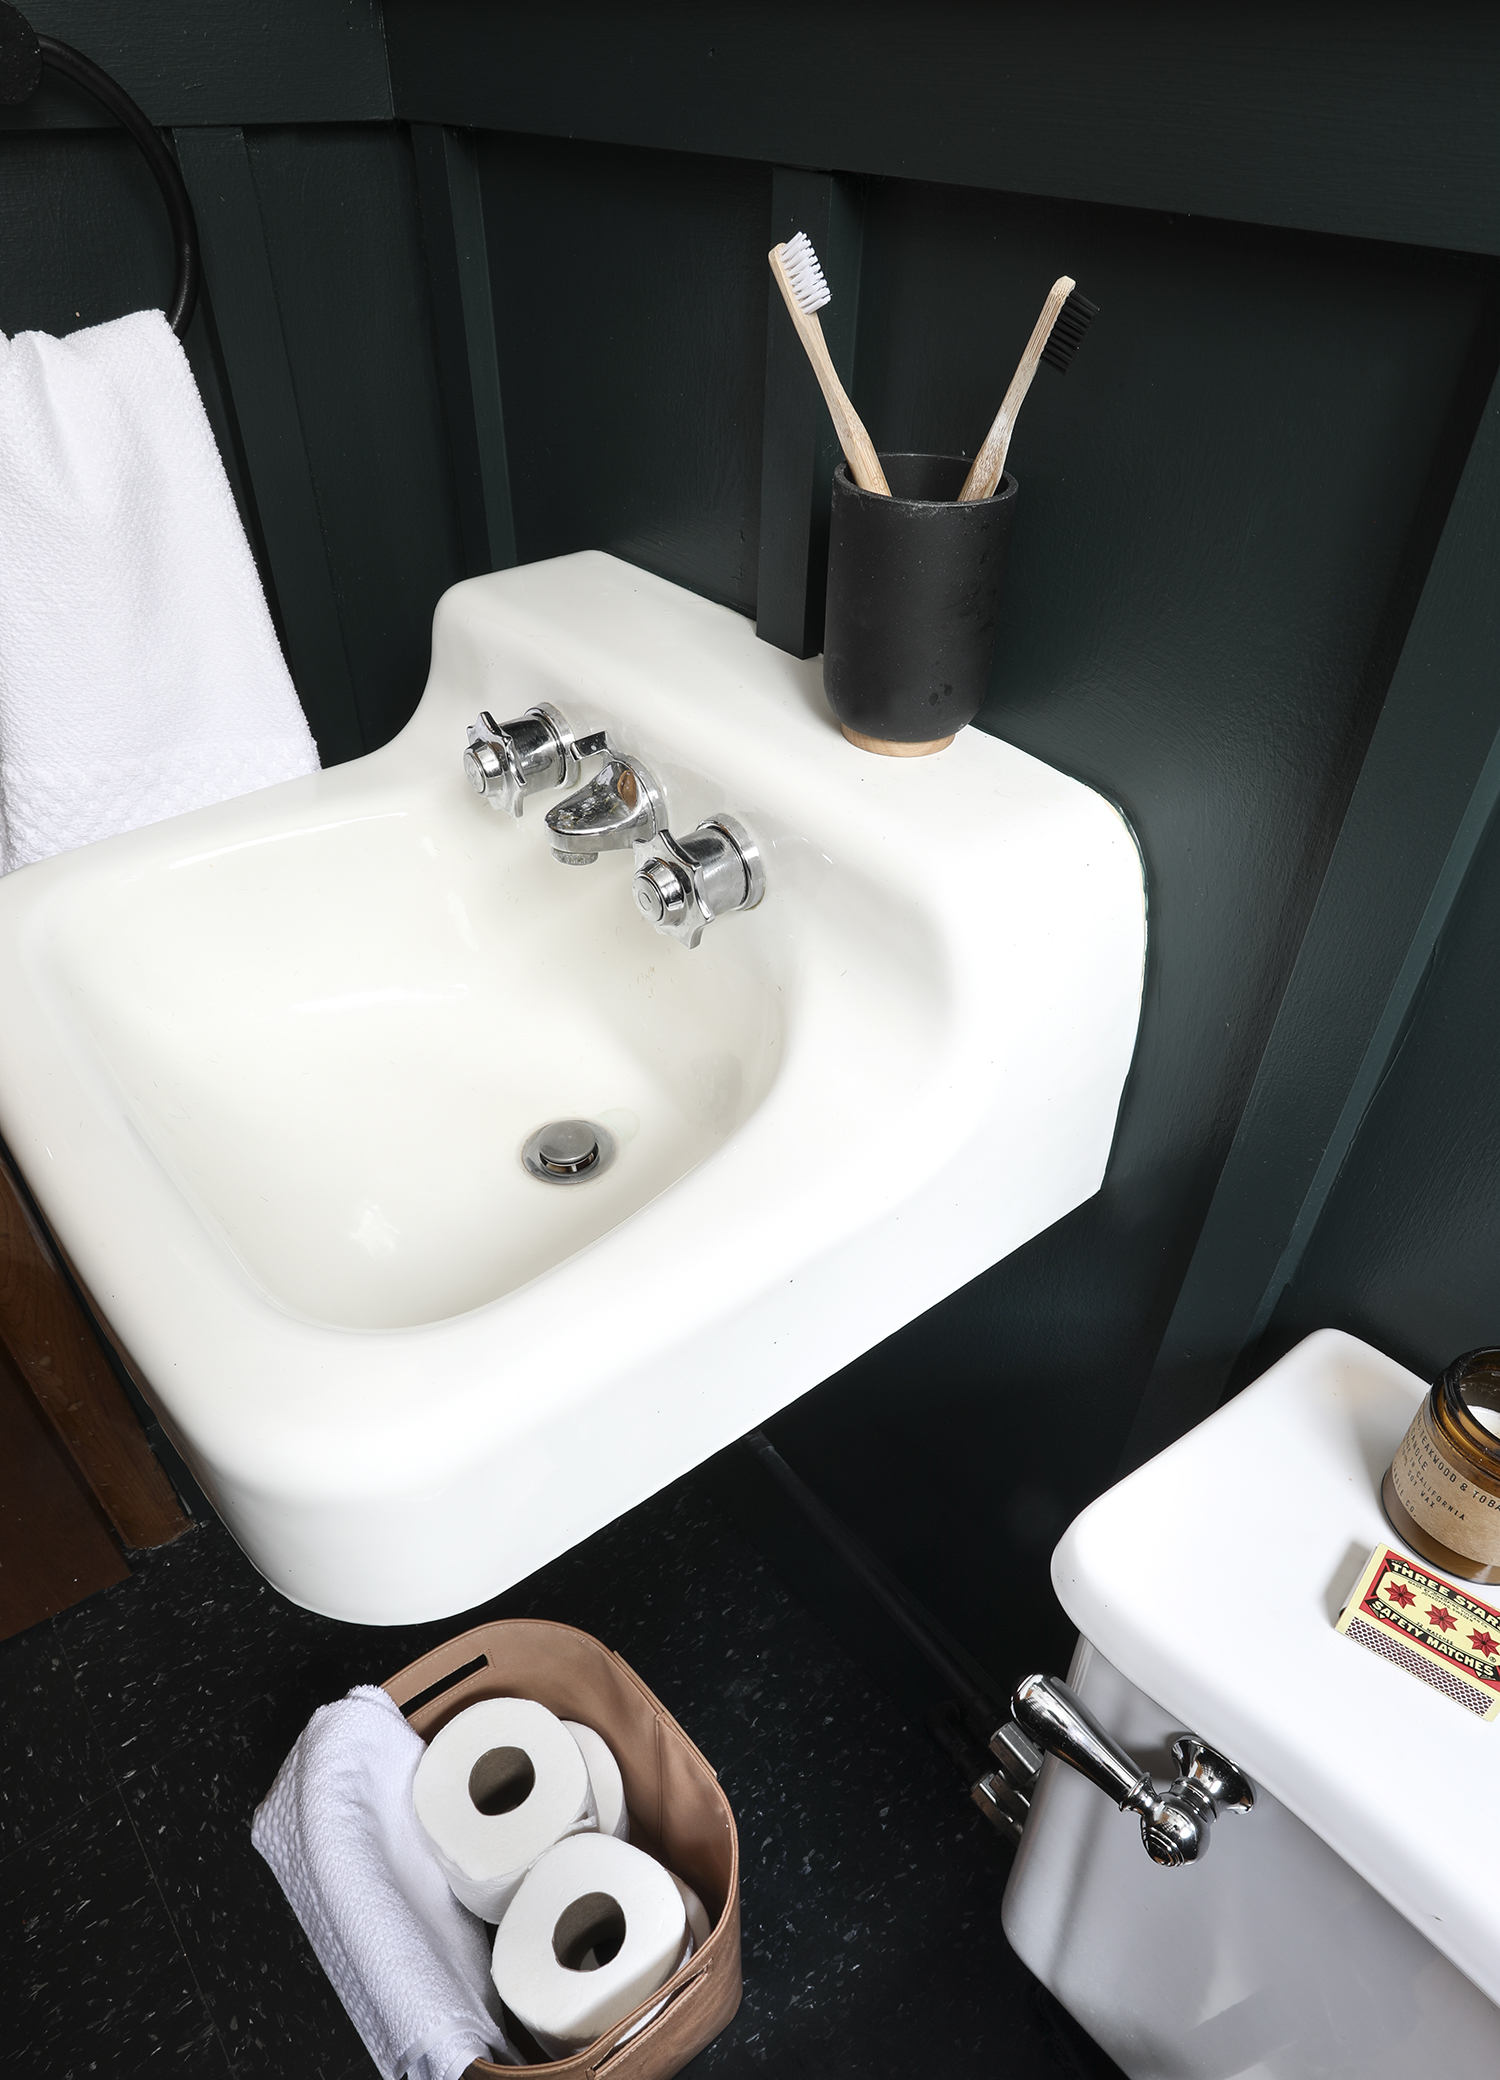
Before I painted and installed the board and batten I wanted to paint the exposed pipes going from the sink to the water line. I masked off all of the chrome connection points and painted only the copper piping to the faucets and the drain below the sink. Of course there was going to be overspray, but since I would be painting the walls dark green later, I wasn’t worried about it. Just like the black floor, the black pipes set against the dark green wall fade into the background. Perf McGerf,

The board & batten is made up of select pine boards that I purchased from the HD prior to heading to the cabin. I love this lumber for doing painted carpentry-esque jobs. The lumber comes pre-sanded, has fewer knots and is usually fairly straight. Since I had planned on having the boards painted in the bathroom, I decided to give them a coat of primer and paint before I even took them to the chop saw. For the first time ever I purchased a paint sprayer! I regret not going for a more fancy version, but the Ace hardware in downtown Hayward Wisconsin didn’t have the greatest selection. My sprayer did the job okay. Every time I started a new coat I had to do some test sprays to get the paint flowing properly. It was also a pain to clean up, but I’m sure in the long run it saved me time.
I brought my trusty and well loved, but heavy-as-shit miter saw to the cabin with me to do the cutting work. To achieve the look I used my laser level (that I couldn’t survive without) and shot it around the room to select the height of the b&b. I wanted it to sit below the window and medicine chest but above the sink. Once the height of the b&b was determined, everything else fell into place. You can check my older posts for a more detailed explanation of which size boards went where in the install.
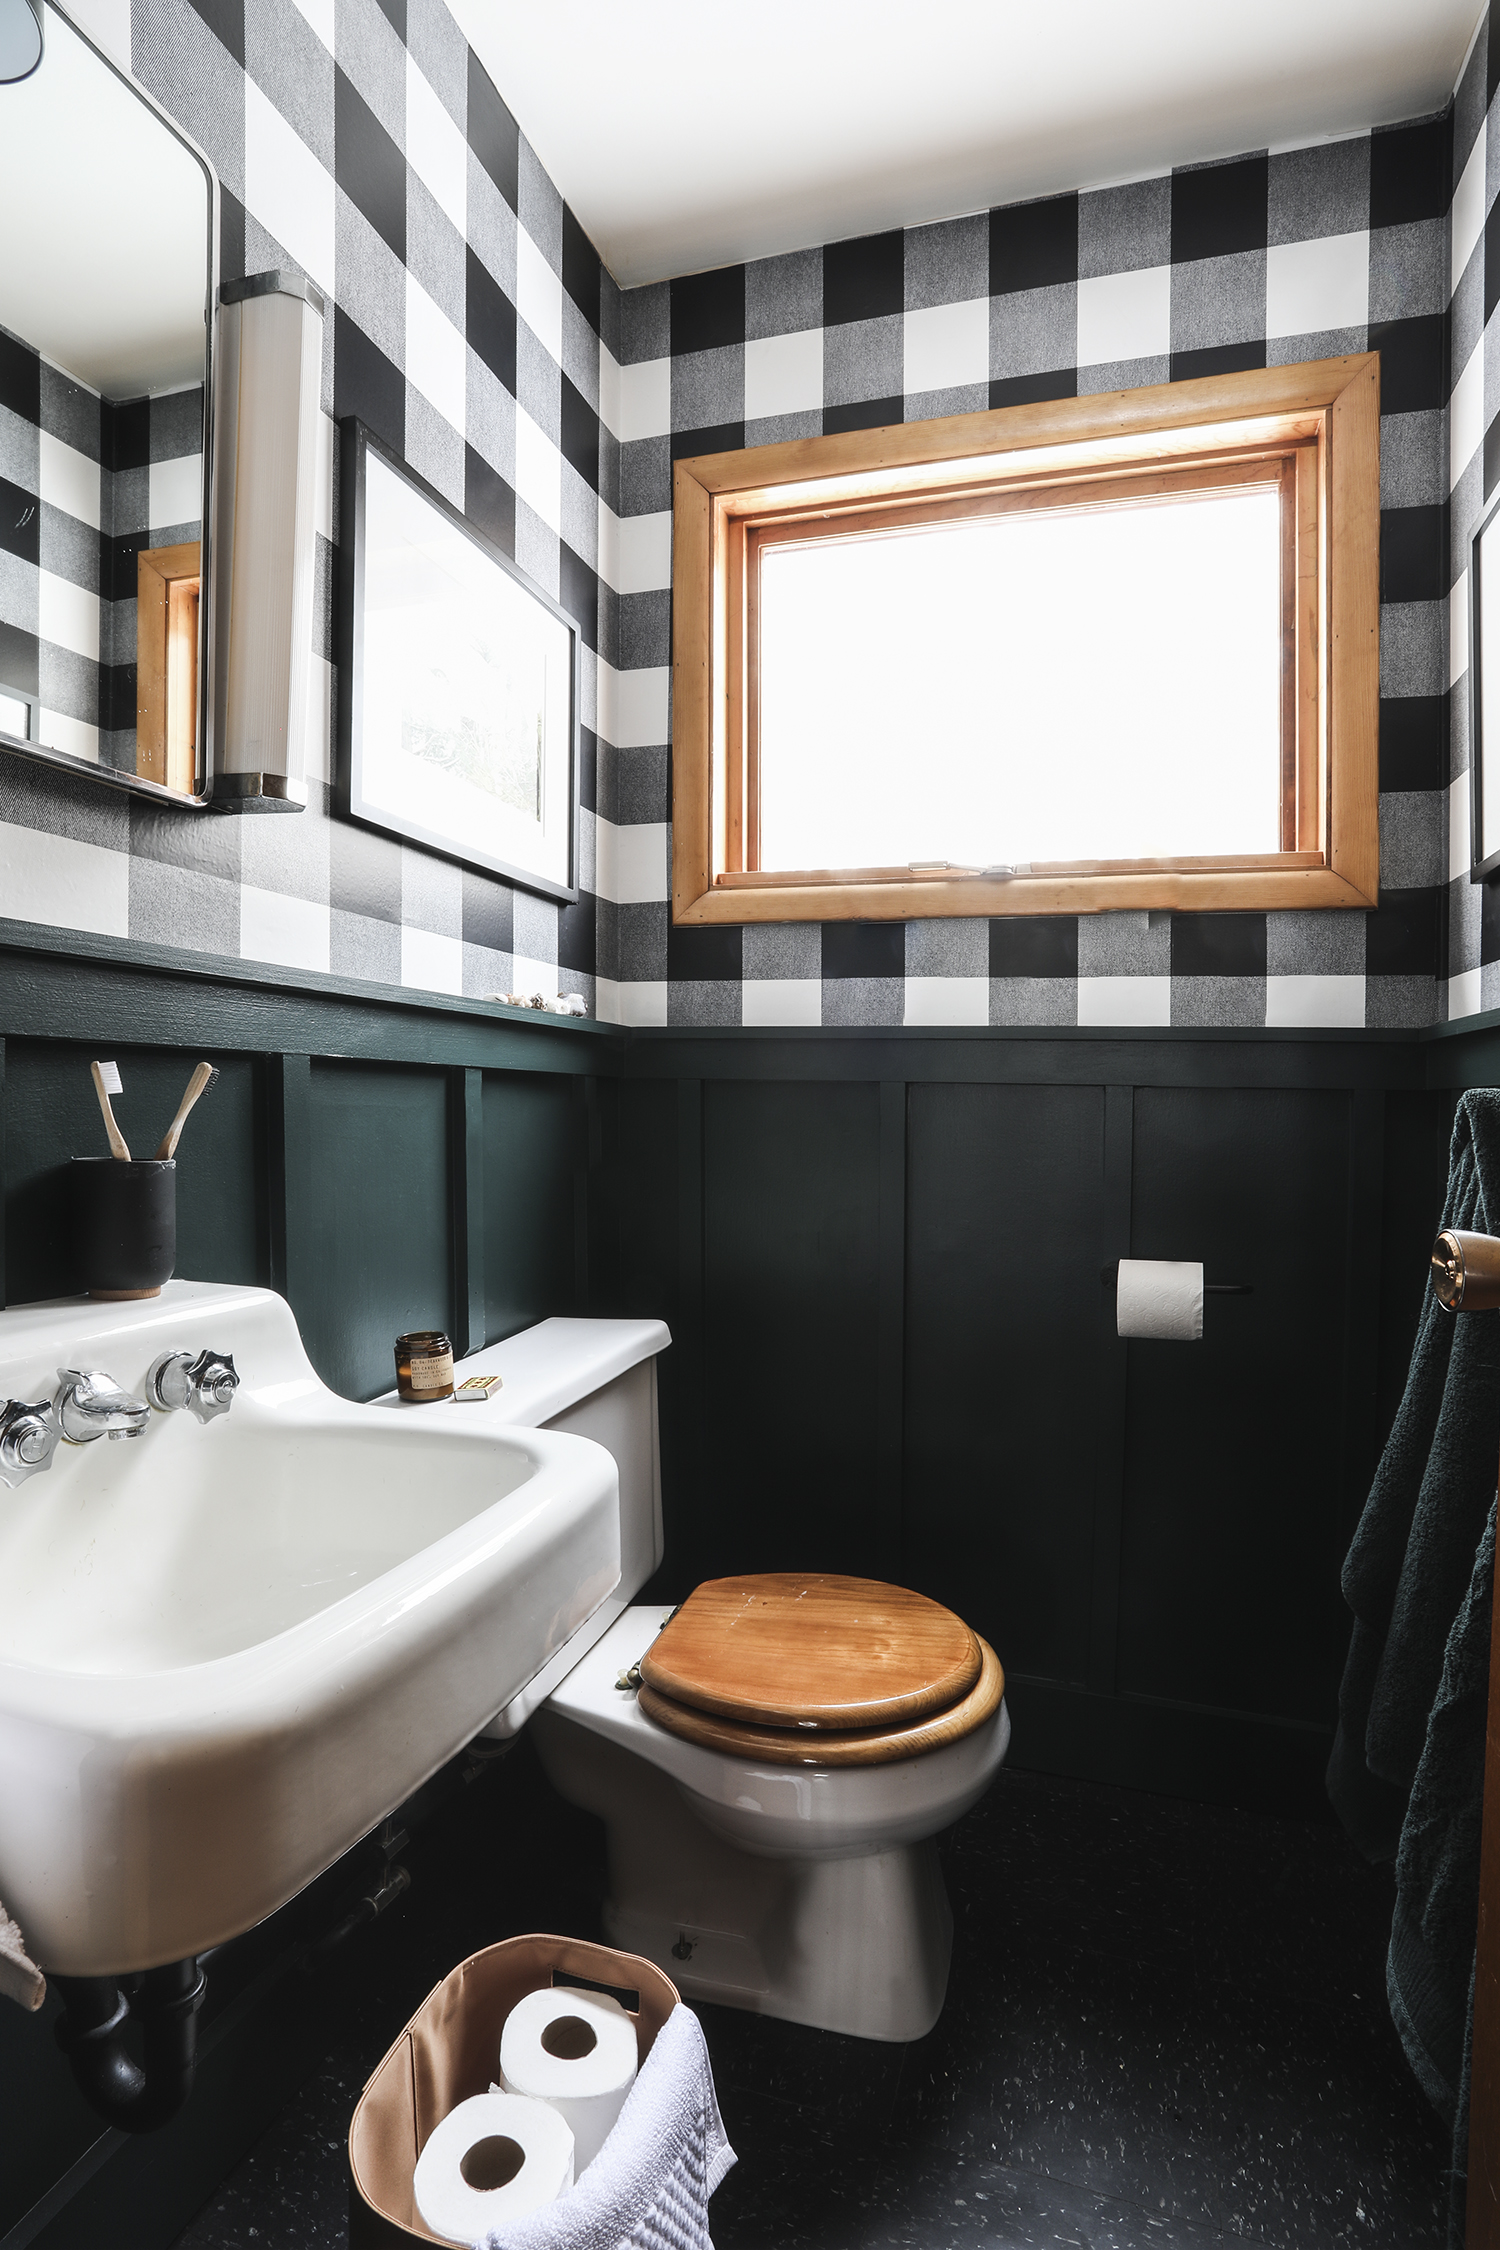
I mentioned these prints in my last update. The second I saw Yellow Brick Home’s lake house guest room gallery wall plastered in Audubon prints, I knew I needed my own Looney prints for the cabin. We Love Loons, people! I even have a Loon license plate on my 4runner! They are cool animals that make cool sounds, and mate for life, and know how to come back to the exact same lake every year. They are magic, what’s not to love? They are like penguins of the upper middle United States (Minnesota & Wisconsin) and maybe Canada (I dunno). For all I know they might go other places too, but northern Wisco and Minnesota are their favorite places to go, that is for sure. Anyways, there was no way that I wasn’t getting a Loon print or two for the cabin. Check Yellow Brick Home’s post for all the details on how to acquire such a print.
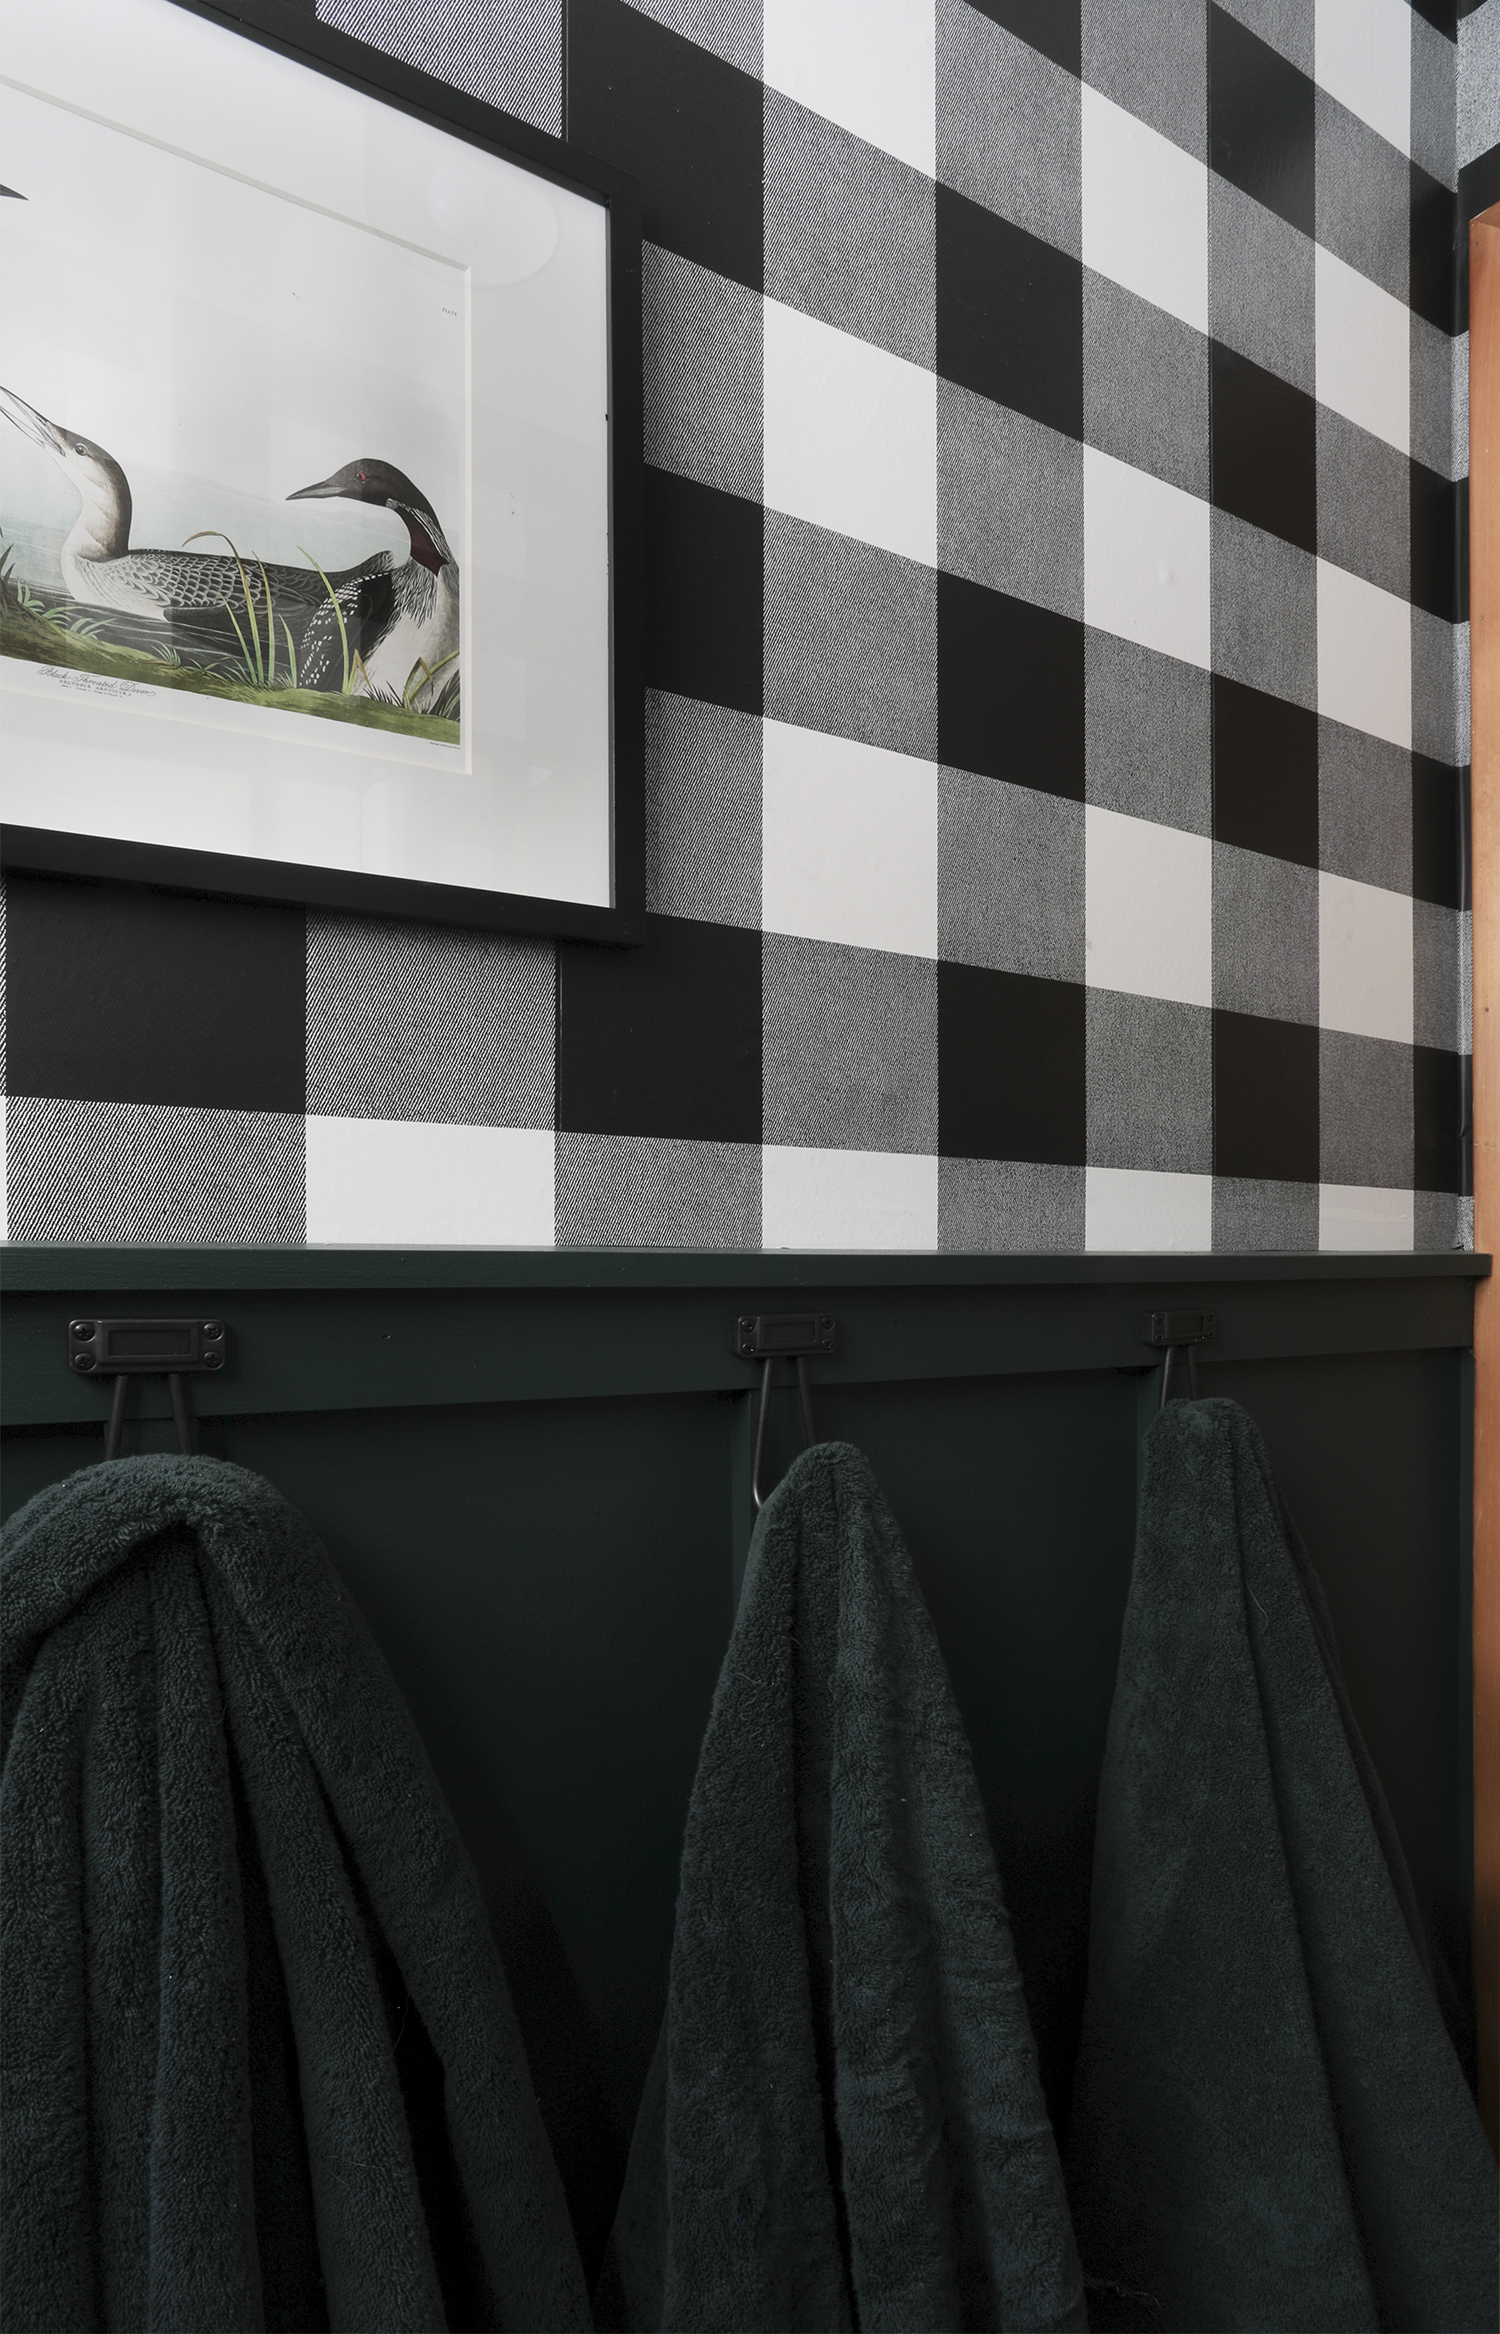
The happiest accident of them all! These towels match the Salamander green paint from Ben Moore perfectly. I had purchased the towels last year just so we could have fresh towels. I wasn’t anticipating that they’d end up being the perfect match to the paint. I was very pleased with the quality and size of the towel hooks as well. They were inexpensive and I wasn’t anticipating them to be high quality, but these hooks are really sturdy and are way more beefy then I expected them to be. Originally I had planned to hang them behind the door, but once I saw them IRL it seemed like hanging them from the b&b would be a much better solution. Since the towels match the paint so well, they fall into the background and aren’t over powering in such a small space. I’m considering adding little labels to each hook like “guest 1”, “guest 2” etc, so folks can keep their towels straight, but I’m worried that it might be a little too cutesie for this old gal.

The final step was to install the vinyl, removable wallpaper. The word removable is misleading. It is removable, however the paper itself loves to stick to itself and thus makes install a nightmare. Unlike typical paper which is made of paper and has a little give, the vinyl removable wallpaper has no stretch (only tear) and needs to be installed absolutely square and plumb every sheet. Would I choose this paper again? Not a chance. NORMAL wallpaper for me, please.
I kept the accessories minimal and functional. I added some special rocks to the narrow ledge under the Loon print. A leather basket below the sink adds function and texture to the space. There is an enamel first-aid box that hangs above the ceramic matte black light switch. The first aid-box is stocked full of bad aids and a sliver kit, because kids + nature = lots of slivers. The dated and v buggy light fixture was replaced with a matte black flush mount, and a small towel ring hangs next to the sink.
It’s just a tiny bathroom, but I feel like I incorporated as much style and function to this little space as I possibly could. It has got everything it needs for our guests and ourselves to get ready in the morning, brush their teeth before bed, or just a space to change out of a swimsuit. Check out the links below for my plans and progress.

Reveal : Modern Cabin Bathroom Remodel
Try This : Add a Corner Shelf to your Shower
Update : Phase 2 of the Cabin Bathroom
Update : Cabin Bathroom Phase 1
Progress Report : Cabin Half Bath


Ok, this is the perfect antidote to the pine trees and moose accessories. It’s cabin-y without being cutesy or predictable. I love that you kept the medicine cabinet and honestly? I thought that was a brand new but vintage style sink.
And, um, fun fact about Canada – we love those giant, soulful singing loons so much that we put them on our one dollar coin and called it a “Loonie”. Animal loving and weird, that’s how we roll here in the GWN.
Hey Stephanie! I did know about the loonie being a name for some denomination of Canadian money, but I didn’t know it was called that because there was an actual loon on the coin! Did you know that the loon is the state bird of Minnesota, so much love for that bird! Thanks for sharing something new with me :)
That sink is great. Speaking of Wisconsin and bathrooms, have you been to the Kohler museum and showroom? They have sinks like that in the museum in baby blue. And the showroom is a crazy land all of its own.
Hey Ellen! I would really like to make it to the Kohler museum someday, it seems like it would be epic!
I bet there is a place out there where you can have molds made of those shades and then have them 3D printed…? I love that you kept them and I am always looking for similar cute, simple and utilitarian in the best way bath lights like these! Someone needs to reproduce these! Love this update!
I was going to chime in and say look around and see if you could have some new plastic covers 3D printed. There could be a “Makers” studio close to you that could help with this. I’m sure it’s not too complicated a process (I say this having NEVER 3D printed anything in my life!)
The bathroom is beautiful!
Thanks! I’m going to look into it as an option!
Woah, Lucas! That is a big idea, but I like it. I feel old that I didn’t think of it, like even considering 3d printing is not in my bag of tricks. I’ll have to explore that option and see if it’s feasible, thanks for the suggestion!
Looks so good!
Thanks, Sally!
This bathroom looks as if my den, my kitchen, and my bedroom all had a polyamorous affair and had a baby. All this to say, I adore it. You did a GREAT job, yet again.
YES! This is my ode to you! I told you I was in love with your Salamander guest room and I was going to use that color the next chance I had.
1. I love you and all your drinking jokes
2. Clicking your BF link was the highlight of my day so far. Back in love.
3. The bathroom looks great – still can’t figure out why that window looks twice as big now? Magic!
4. You forgot the anecdote from this bathroom where you got one of your best girls’ poop water on your face!
5. Love ya always!
CAMANTHA!
1. Thank you for always loving me no matter what.
2. Thank god you are back on board with BF.
3. I love that the window confuses you so much.
4. Oh, shit (pun intended) I should’ve told the people how we are one now.
5. Love you too. XO
Gah! I thought I had posted on this already, but alas… AMAZING! I love how fresh and original it feels. The perfect cabin bathroom!
This might be late, as I’m a newer reader catching up from the very beginning. But as a preservationist who hangs out with a bunch of people who are always looking for vintage replacement parts, I can say that these specific light covers are going to be really hard to find. As I’m sure you know. I found an interesting article here where somebody managed to find some close replacements, but of course, even that option is discontinued now. Here’s that link, if you’re interested – https://retrorenovation.com/2014/04/29/curved-light-bar-replacement-shades-vintage/
You would probably have the best bet using something like this to get covers custom made. Not knowing if it would be cheaper or easier than dealing with 3D printers, though this is potentially a similar process – just an option: https://lightcovers.com/wraparound-diffusers/
Anyhoo – all that aside. I love love your blog. I’m both happy and sad I’m getting all caught up now. It’s been so fun following along from the beginning, and I’m so excited to see all the great things you’ll be coming up with in the future. :)