Hello Team! So many things went through my mind this weekend as I was beginning phase 2 of our budget bathroom remodel at the cabin. I made a mental list as I was working so that I can share with you now. If you need to catch up, phase 1 of the bathroom remodel can be found here and my initial plans are over here.
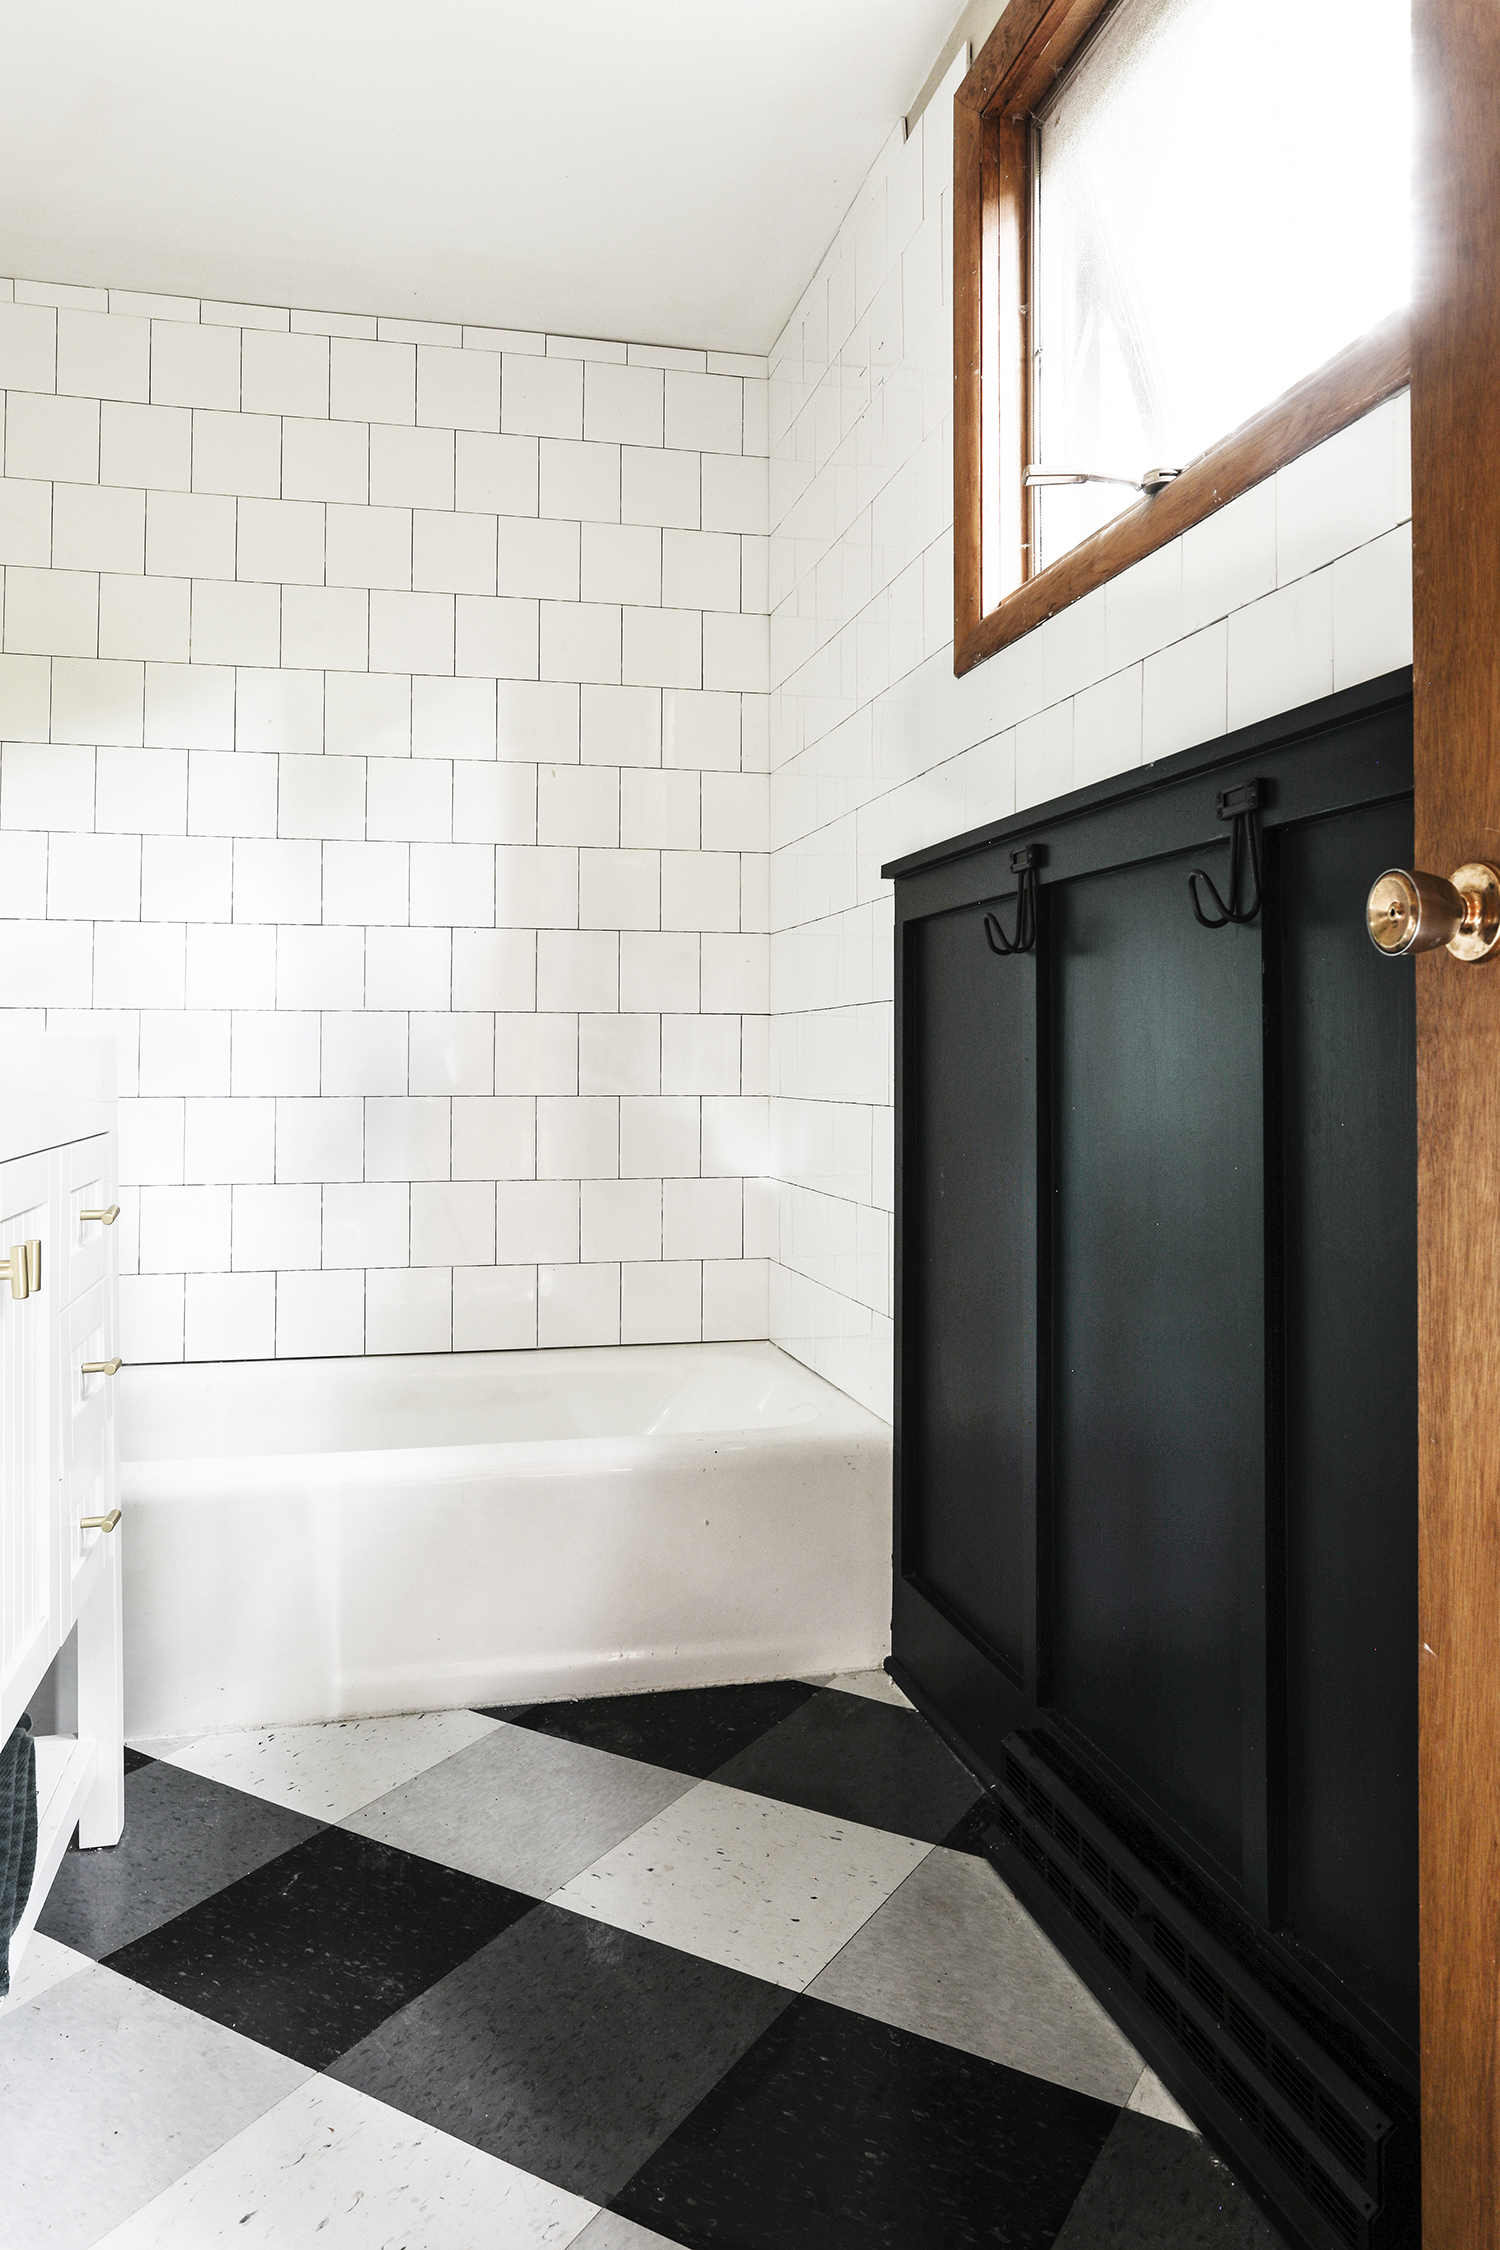
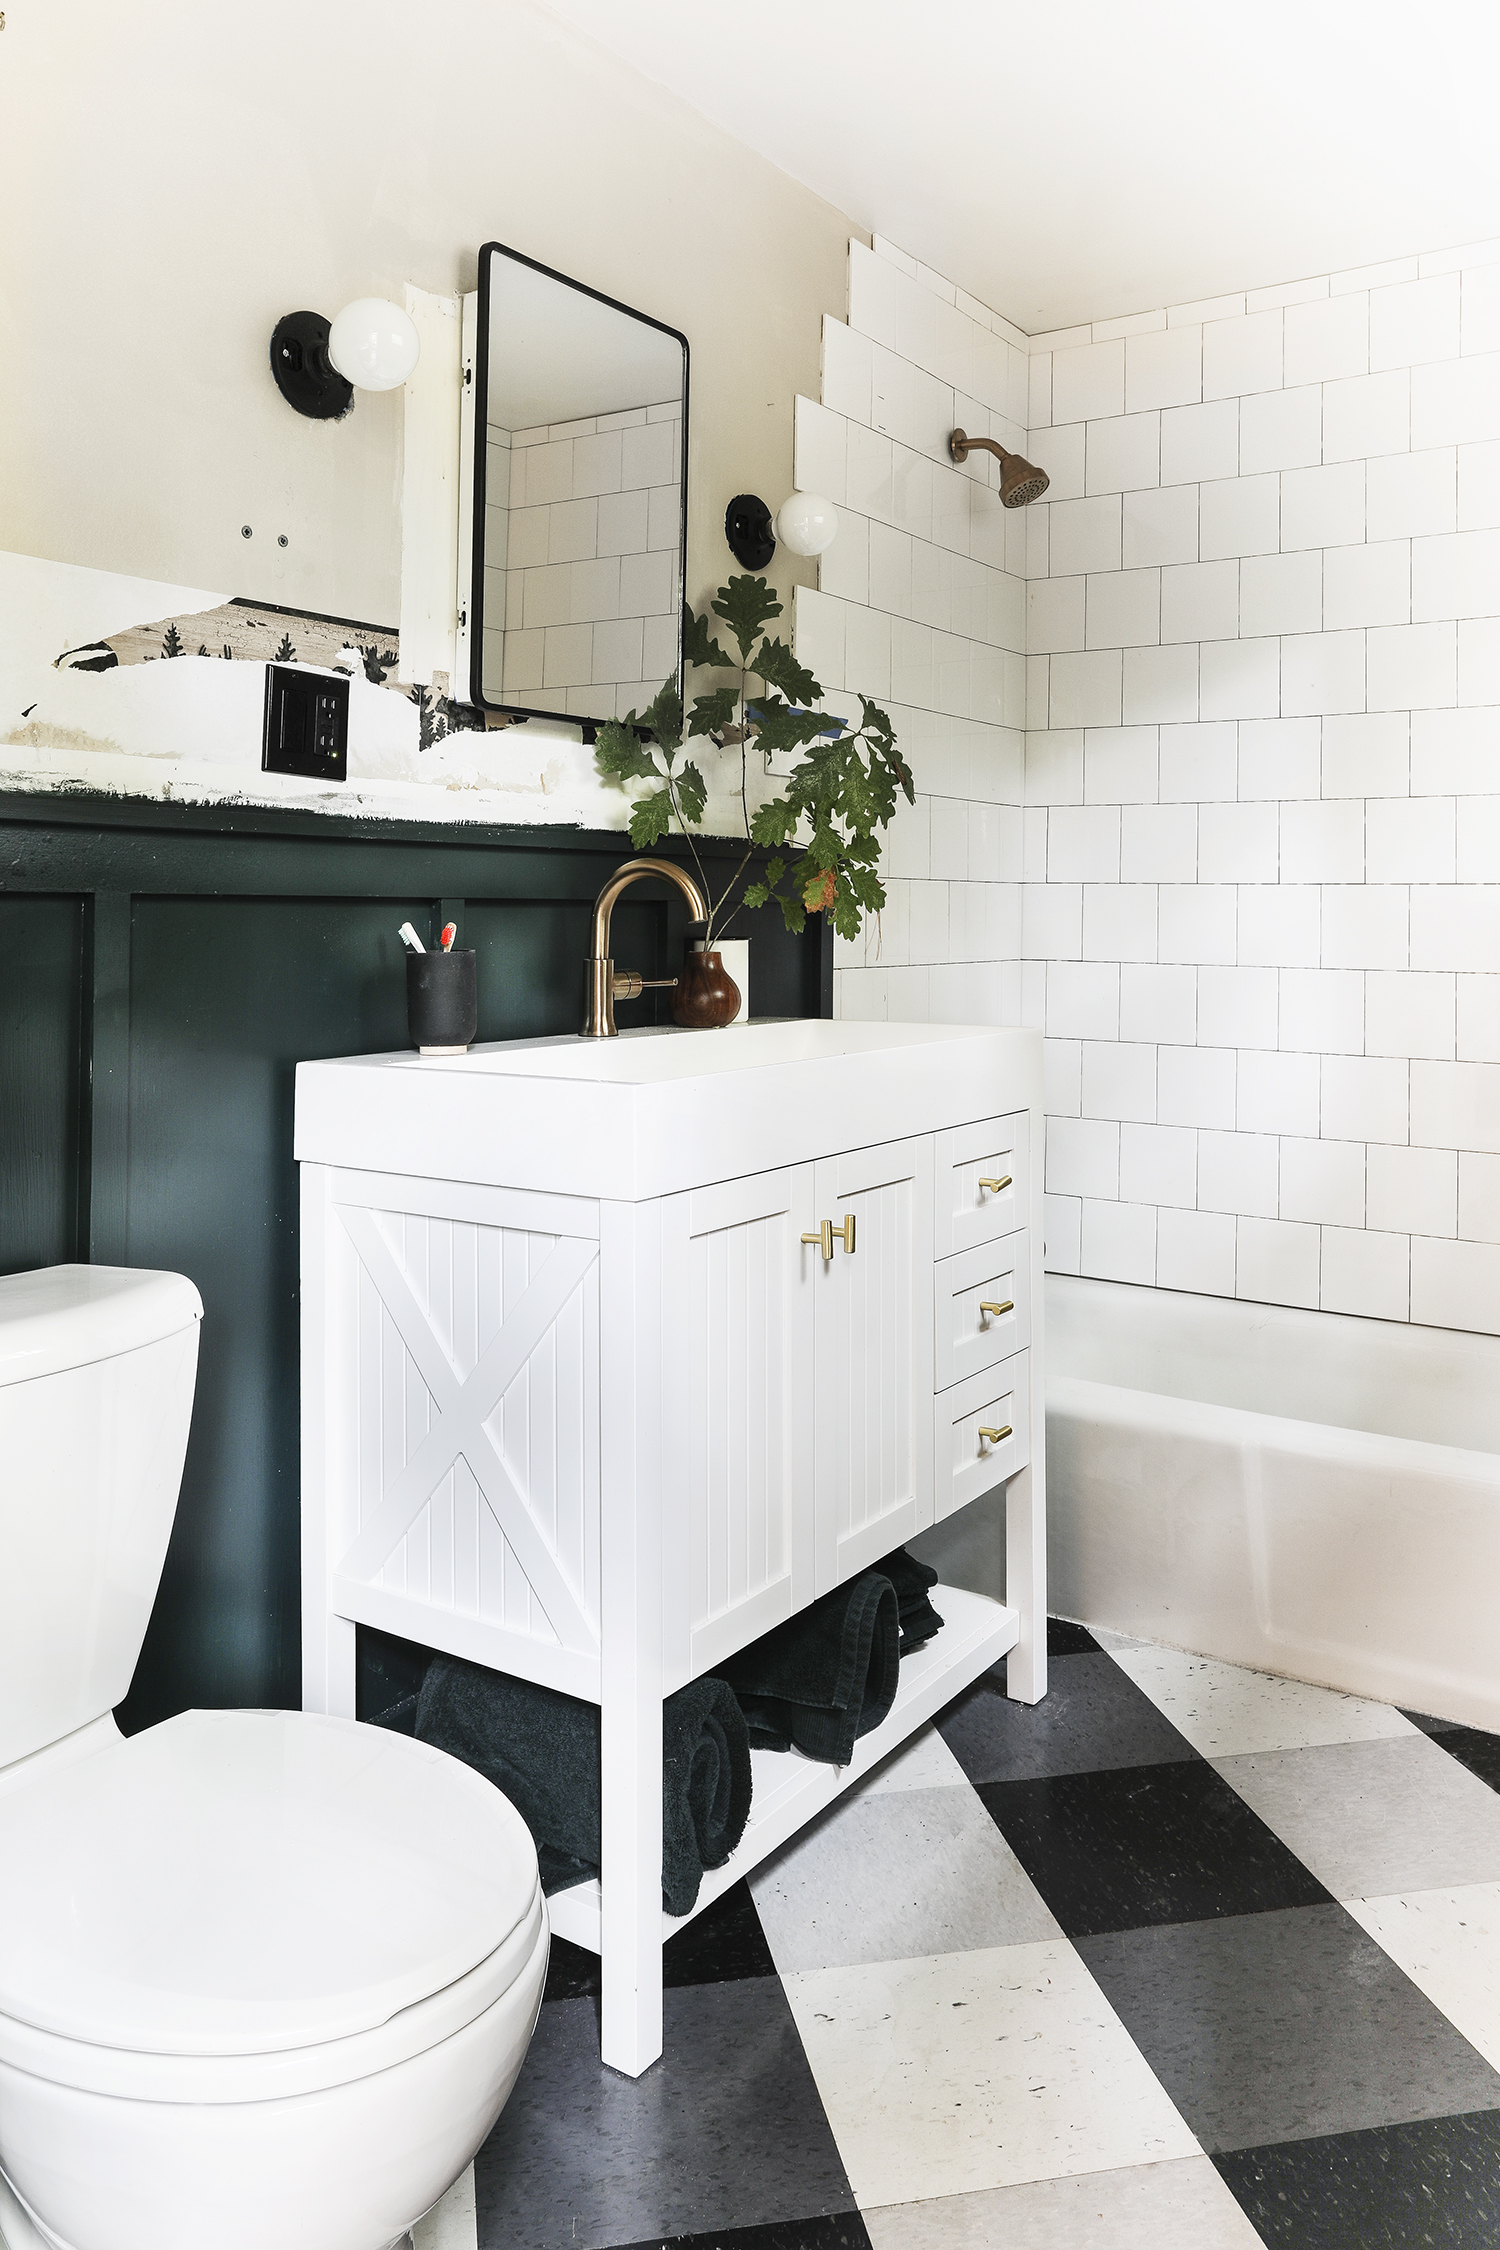
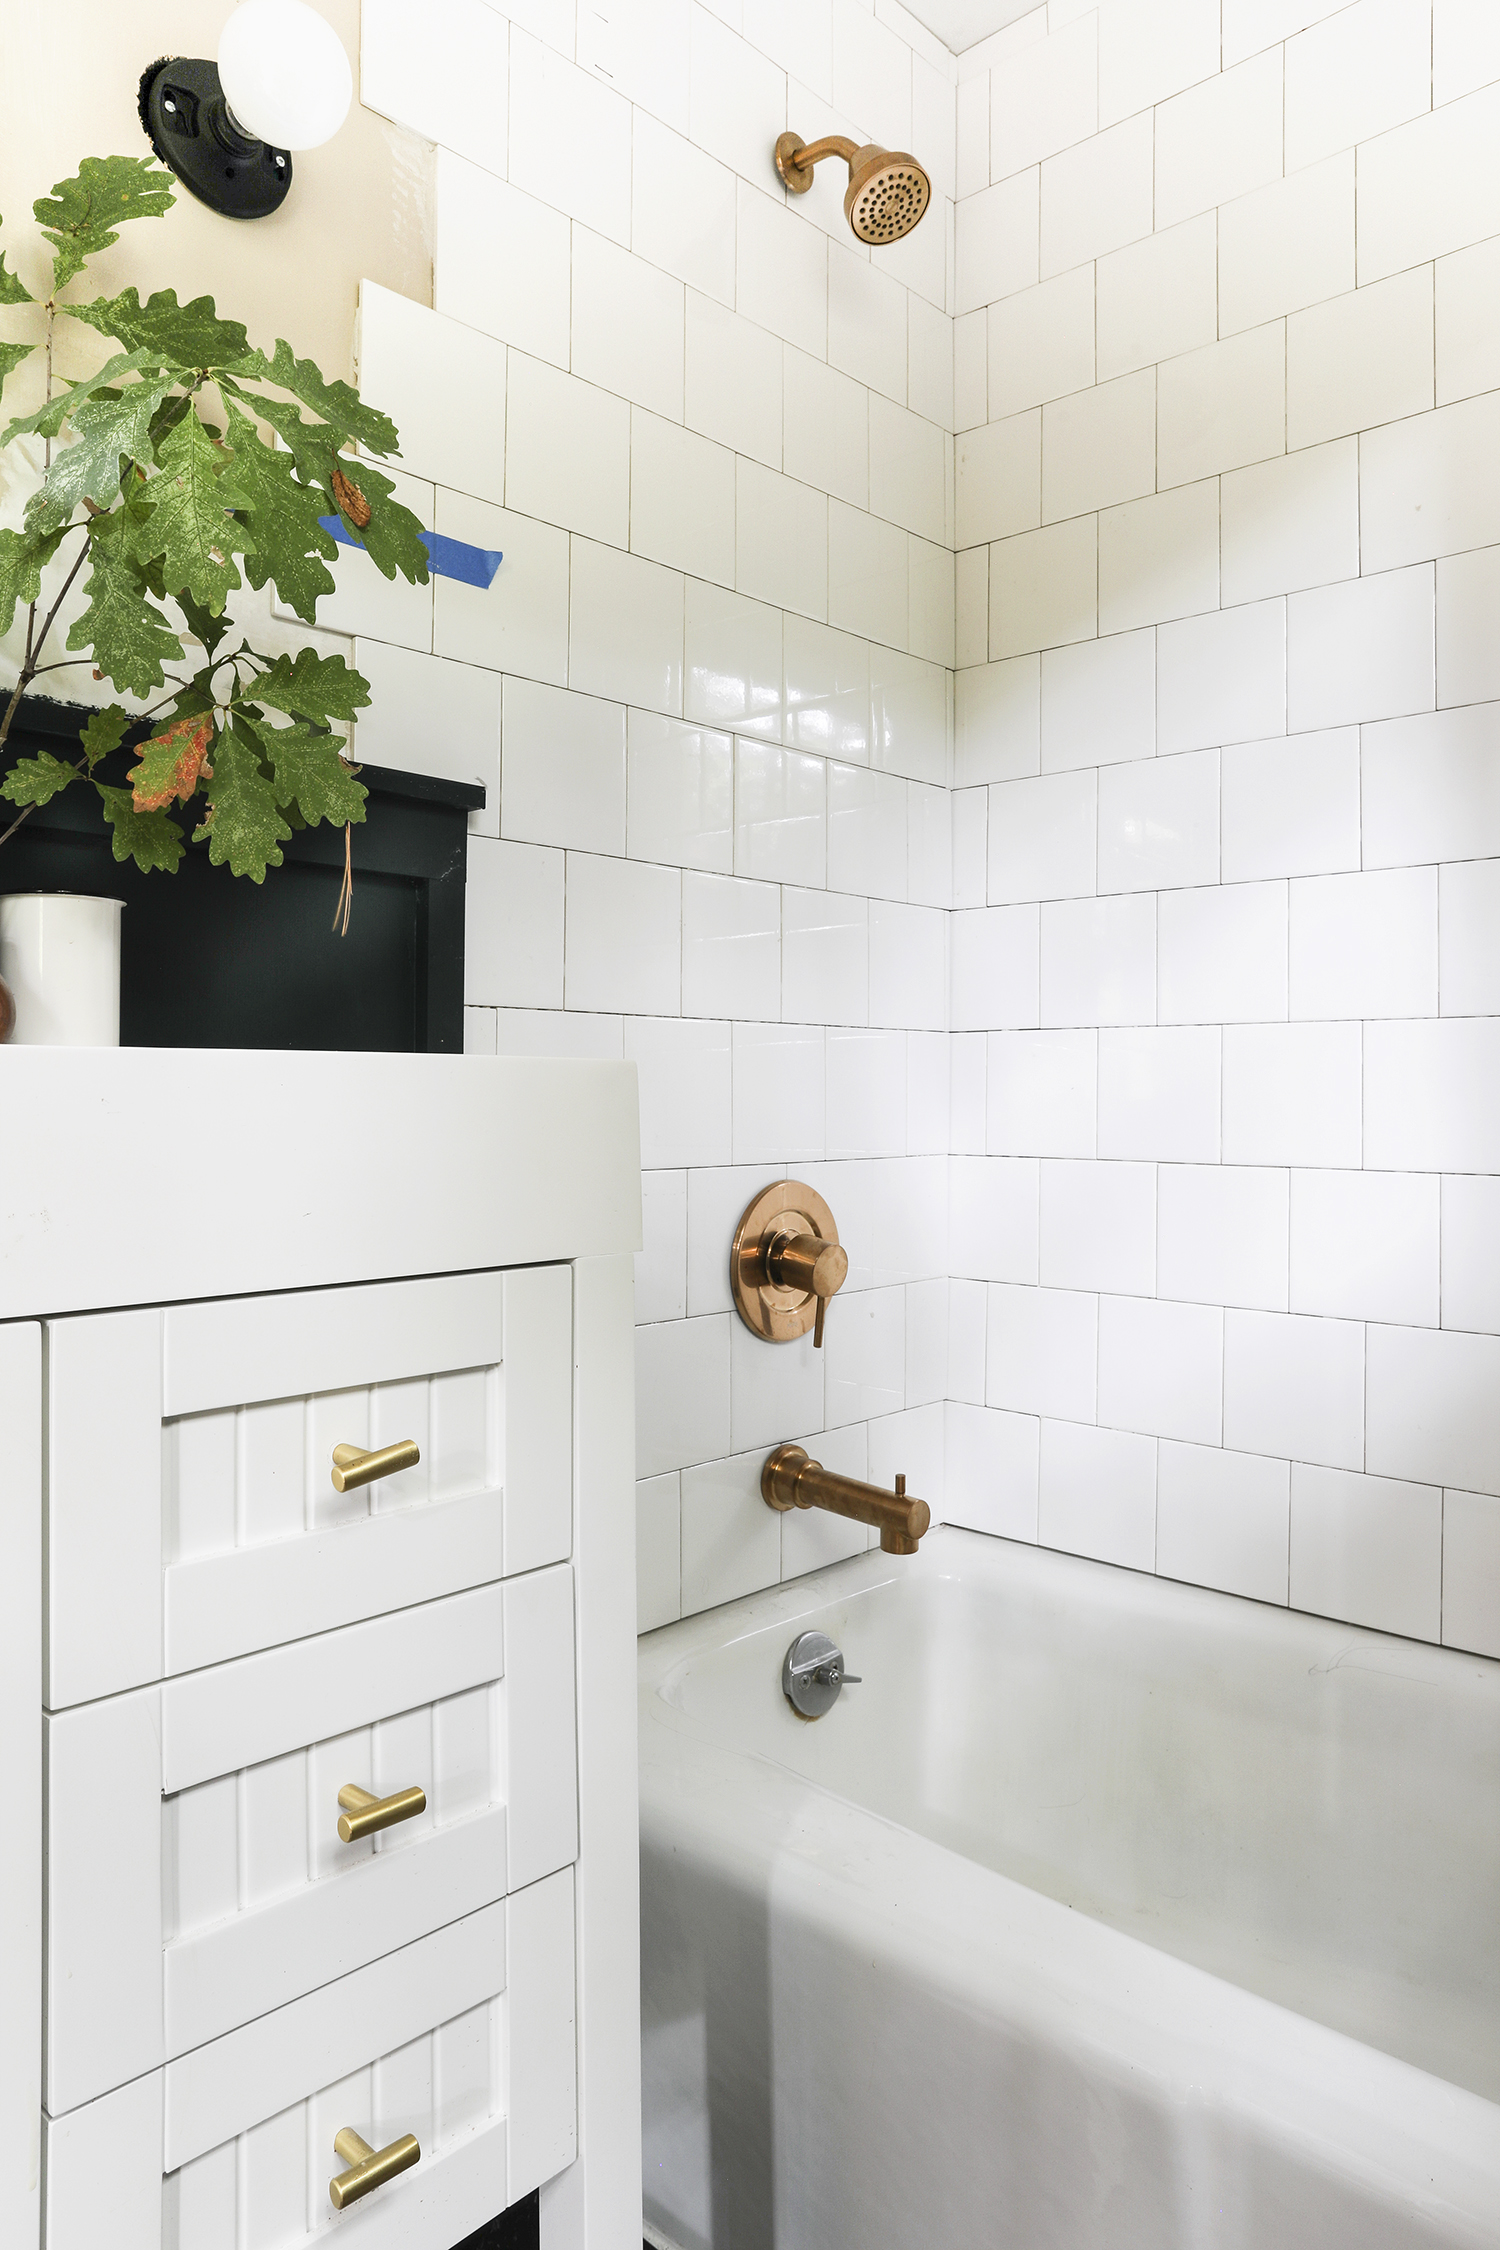
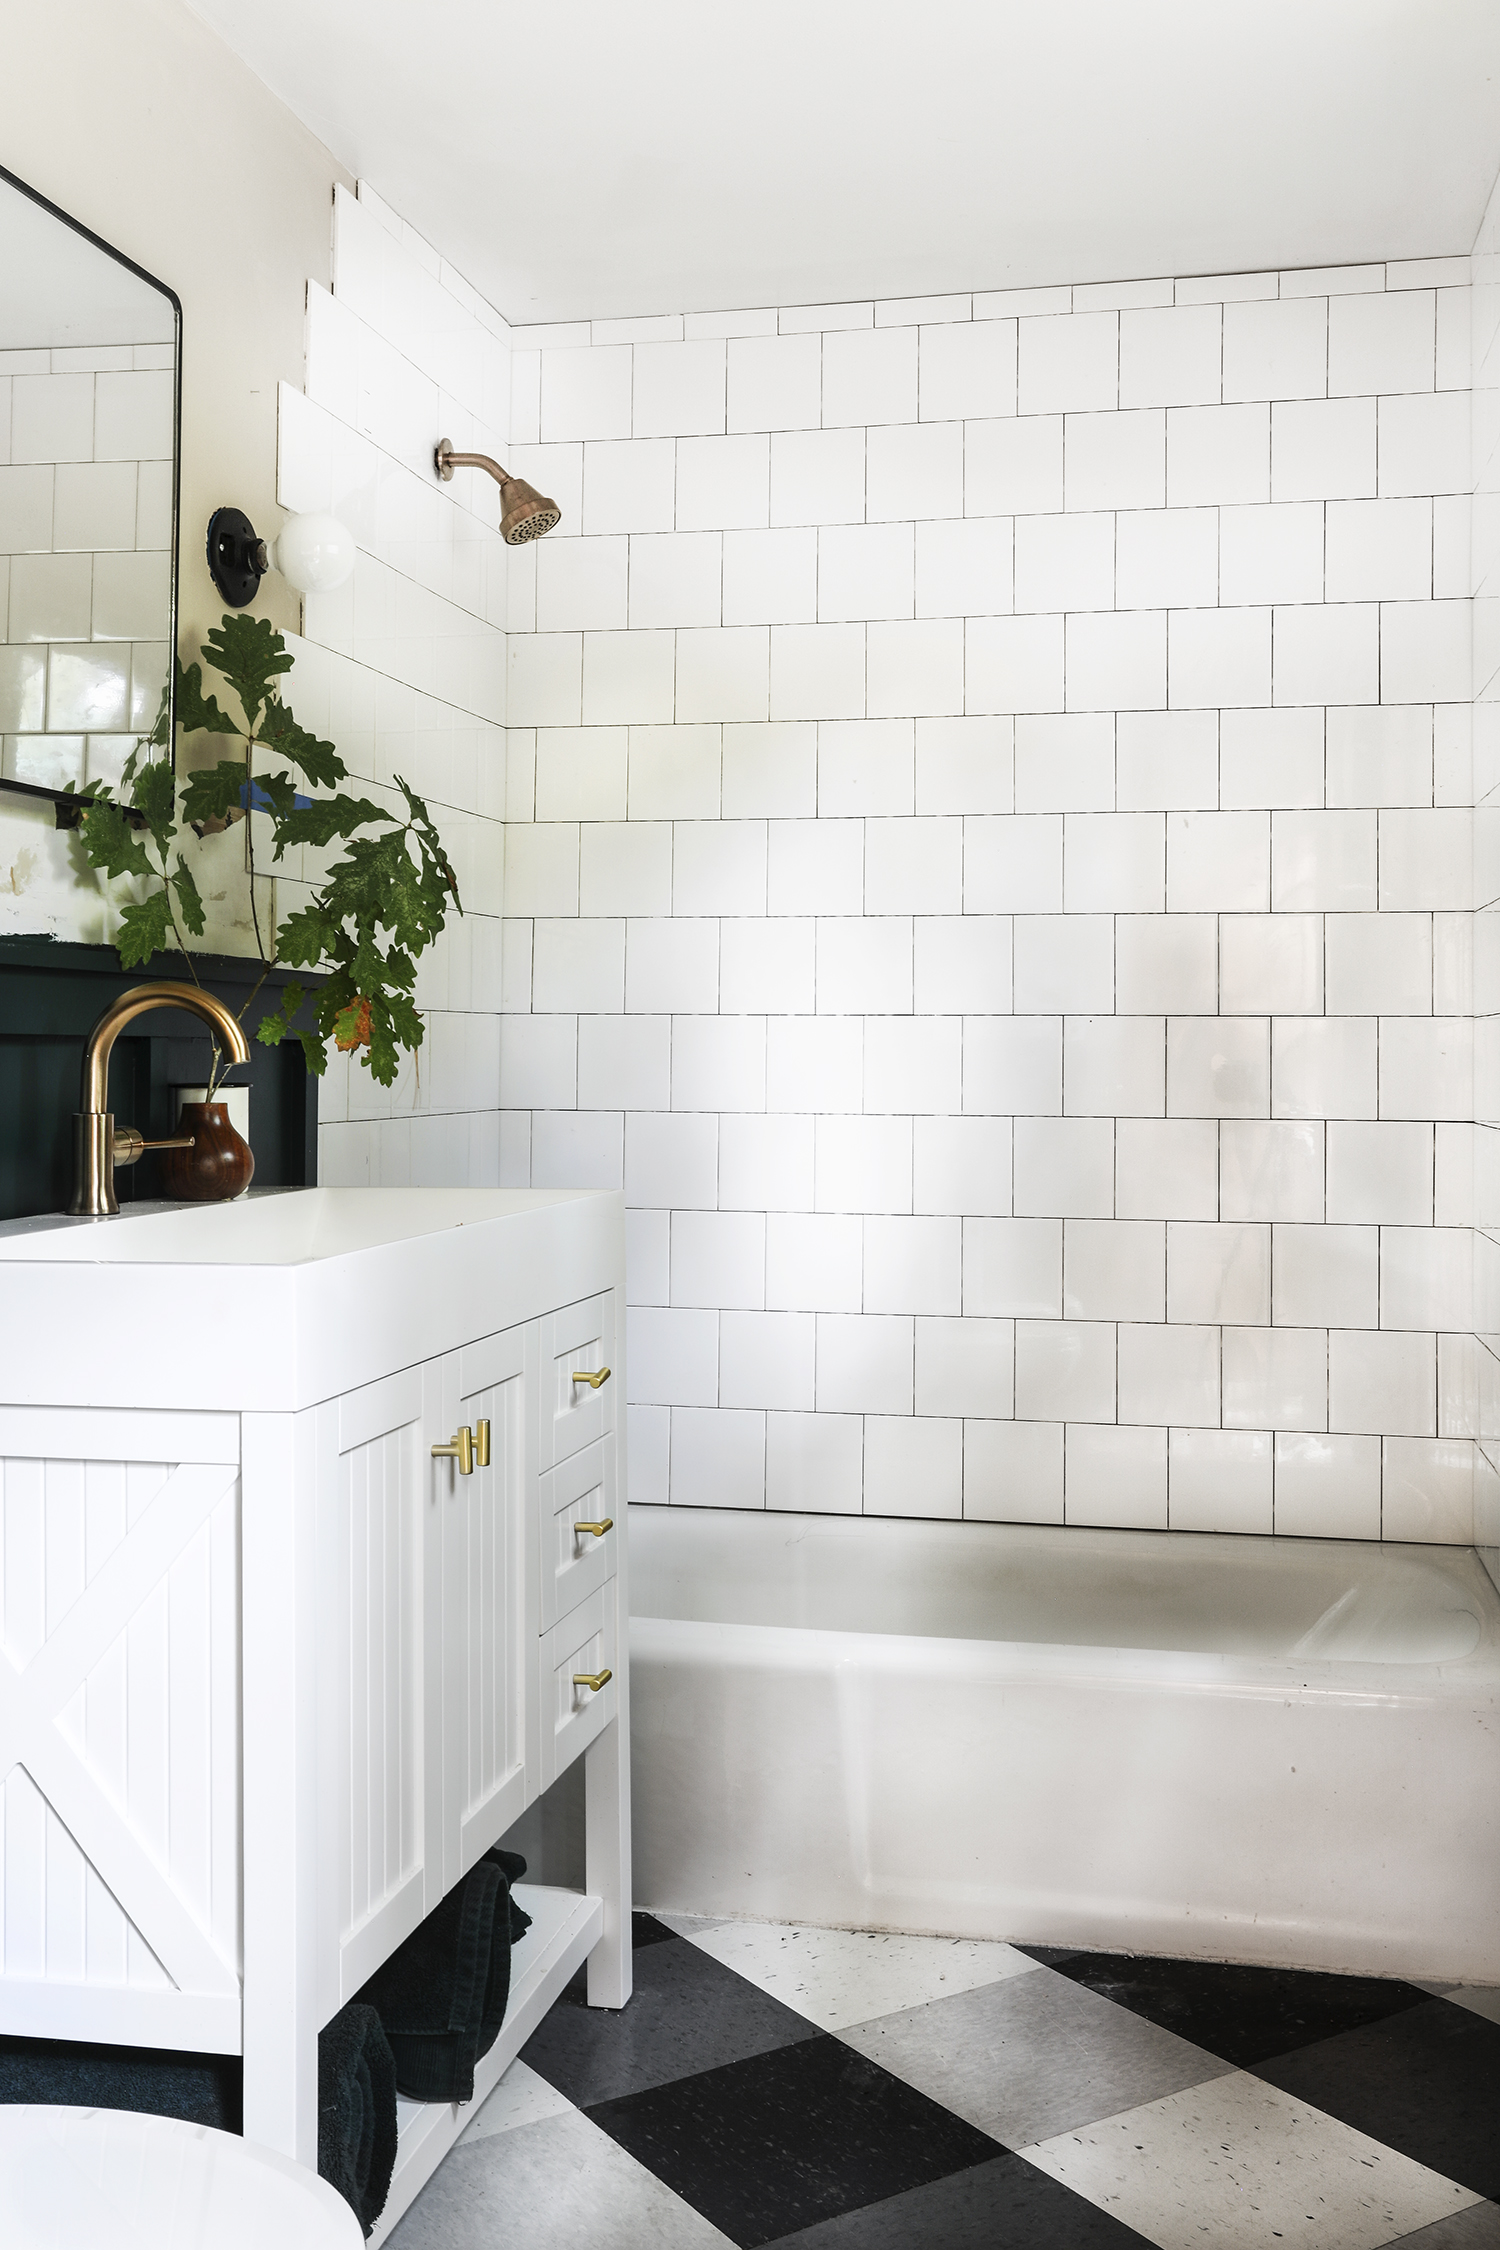
As you might recall, I needed to work in phases because I can’t have the bathroom out of commission because this is our only bathroom with a tub/shower at the cabin. We already don’t shower enough as it is when we are on cabin time, can you imagine having no shower at all. We would be so stinky and gross! Phase 1 of the bathroom project involved demo, patching the floor, adding the board and batten, roughing in new electrical, modernizing the medicine cabinet, and installing the sink and faucet. Phase 2 is all about the tile and giving the tub/shower a major facelift by replacing the fiberglass tub surround with 6″ x 6″ subway tile and replacing the shower and tub trim. Phase 3 will be decorating and styling.
I’ve done a handful of tiling projects starting with the backsplash and mudroom in the kitchen, and going all in on our basement bathroom doing floor to ceiling tile! I’ve also helped friends with tiling projects and I feel like I’ve come a long way in understanding the installation process of tile. I like to think I am a perfectionist when it comes to installing the tile – I don’t want the finished work to be mistaken for anything less than professional grade. I wanted to take you guys a long and show you the whole process. I kept you guys in the loop as I went in my many IG stories, and it was so cool to have such a warm response to them – expect more in the future. In case you missed it or would like to look back, I added them all to a highlight titled “Bathroom“, you can find it here.
There’s a lot of other little details besides just the tile to consider, so let me fill you in on my thought process.
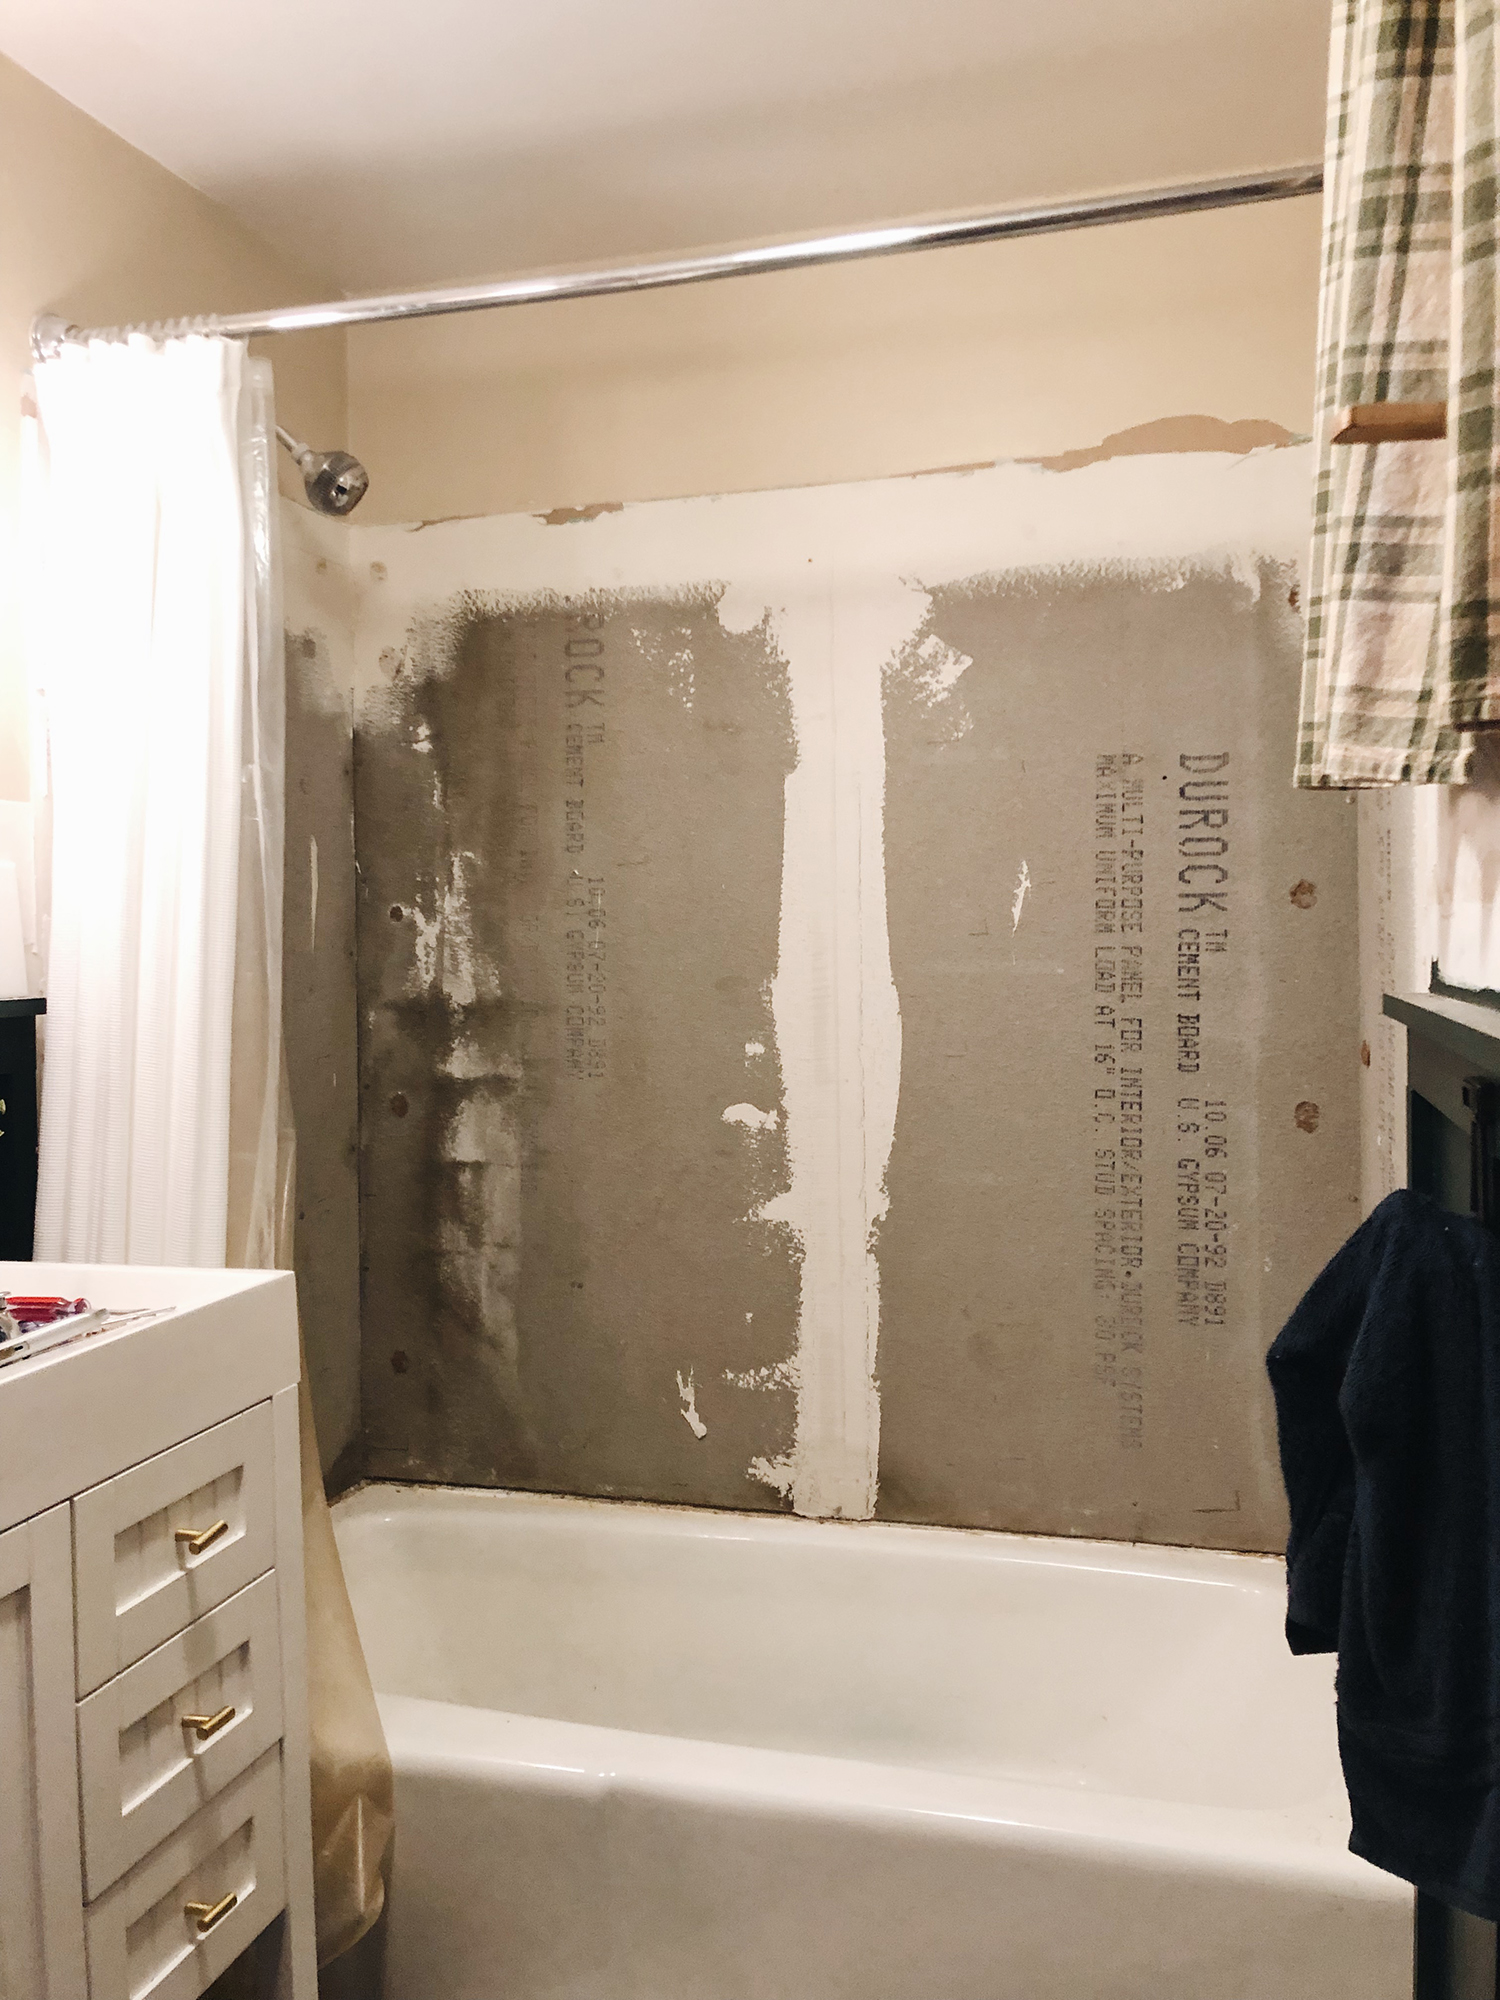
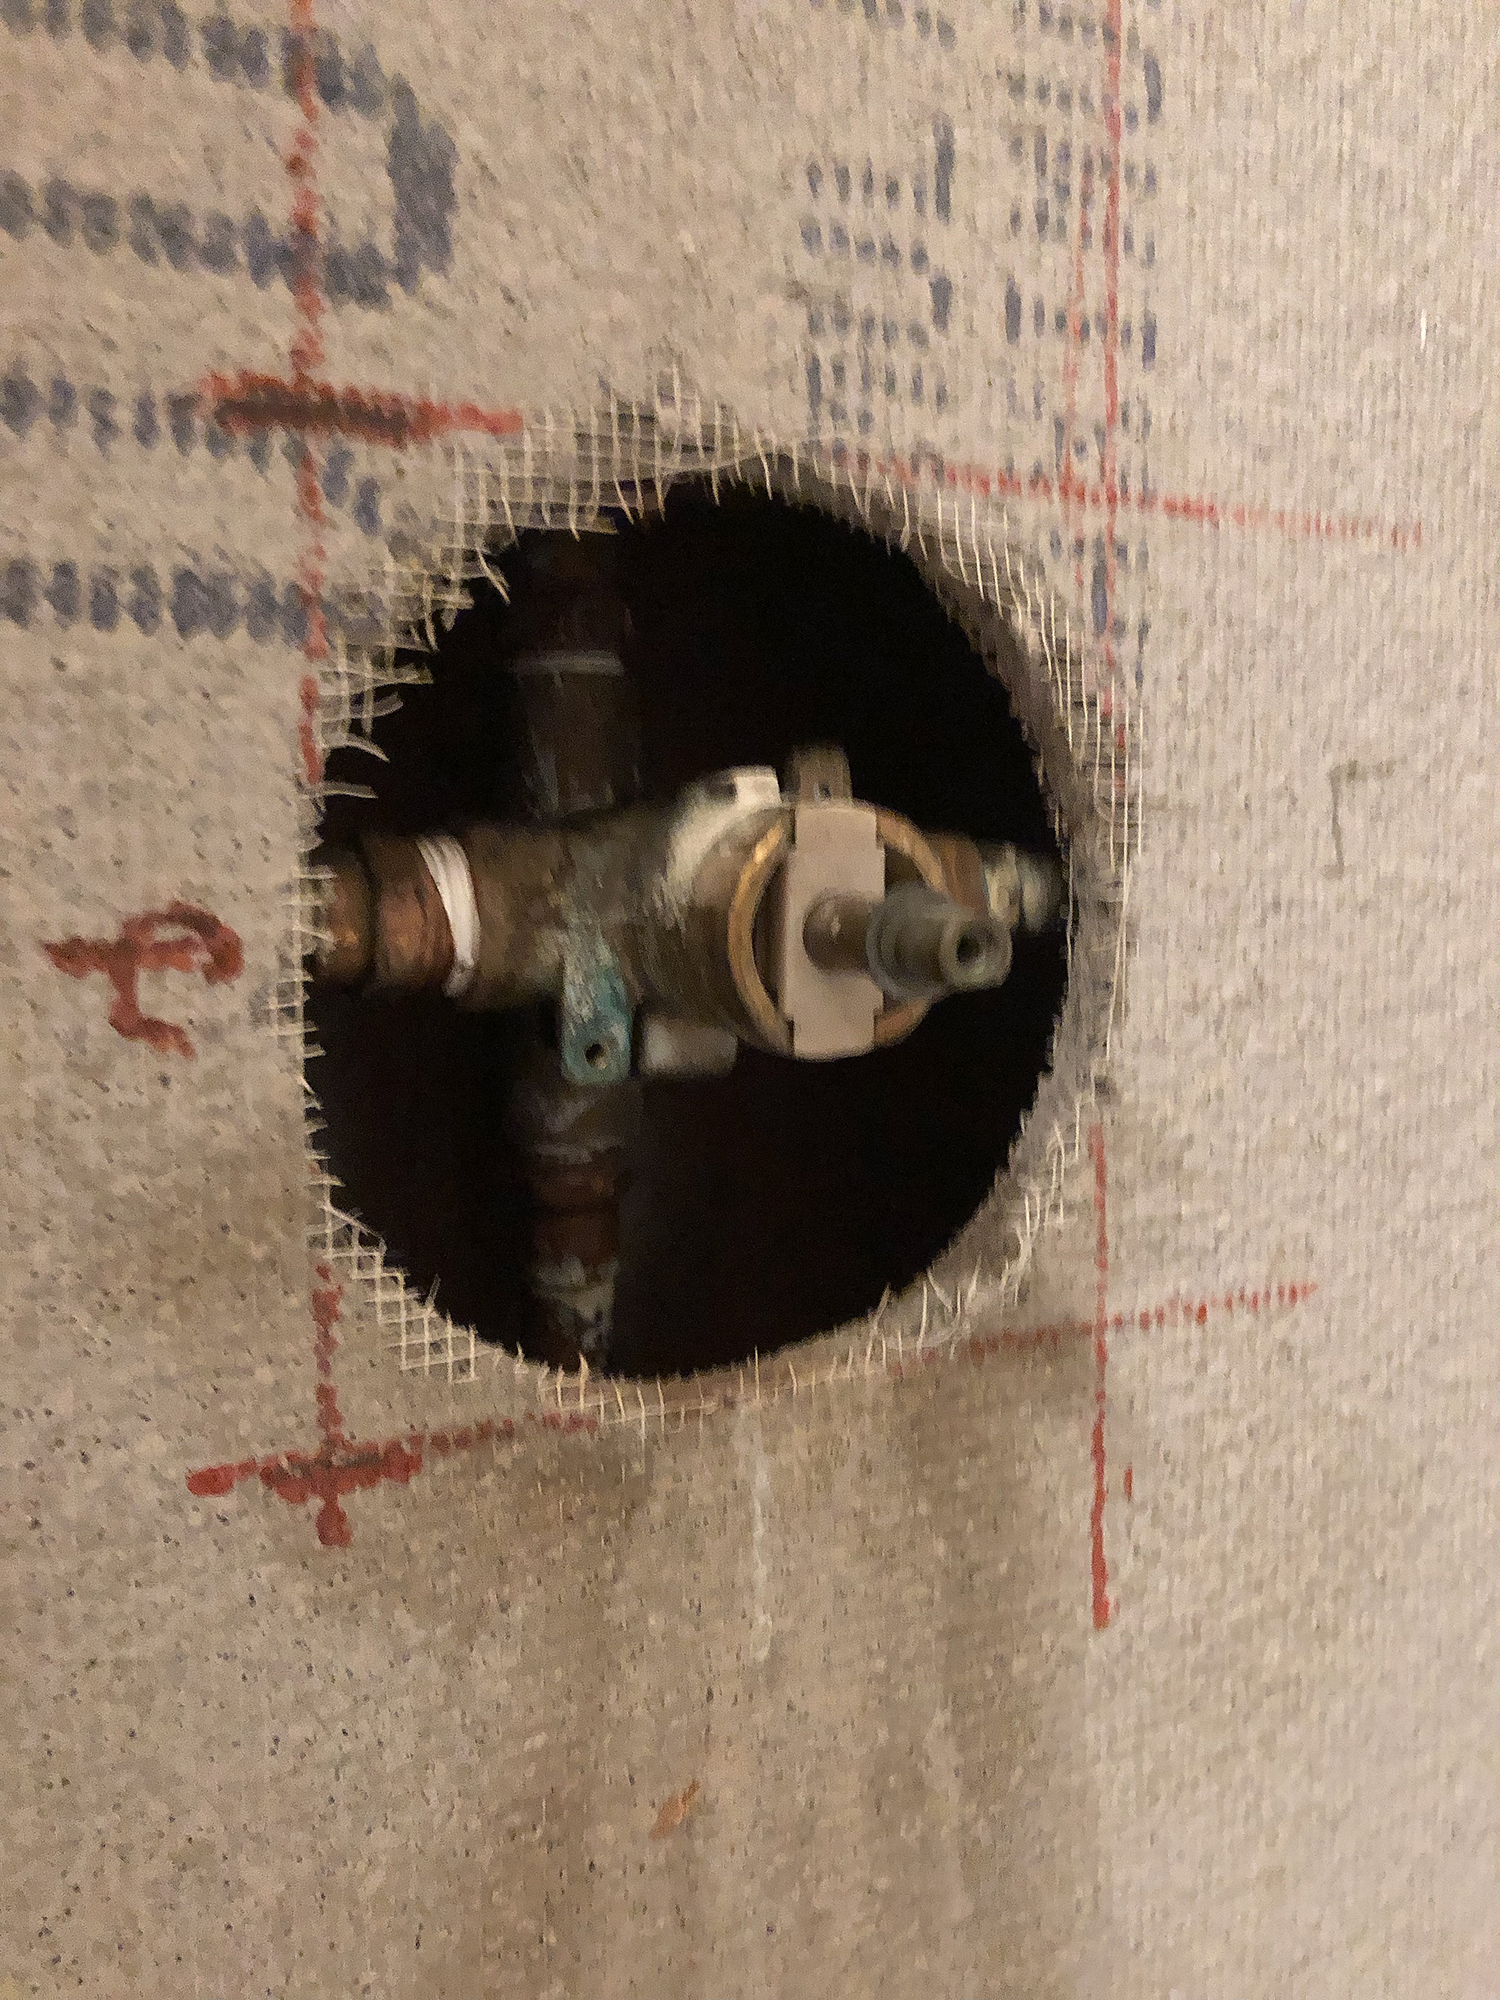
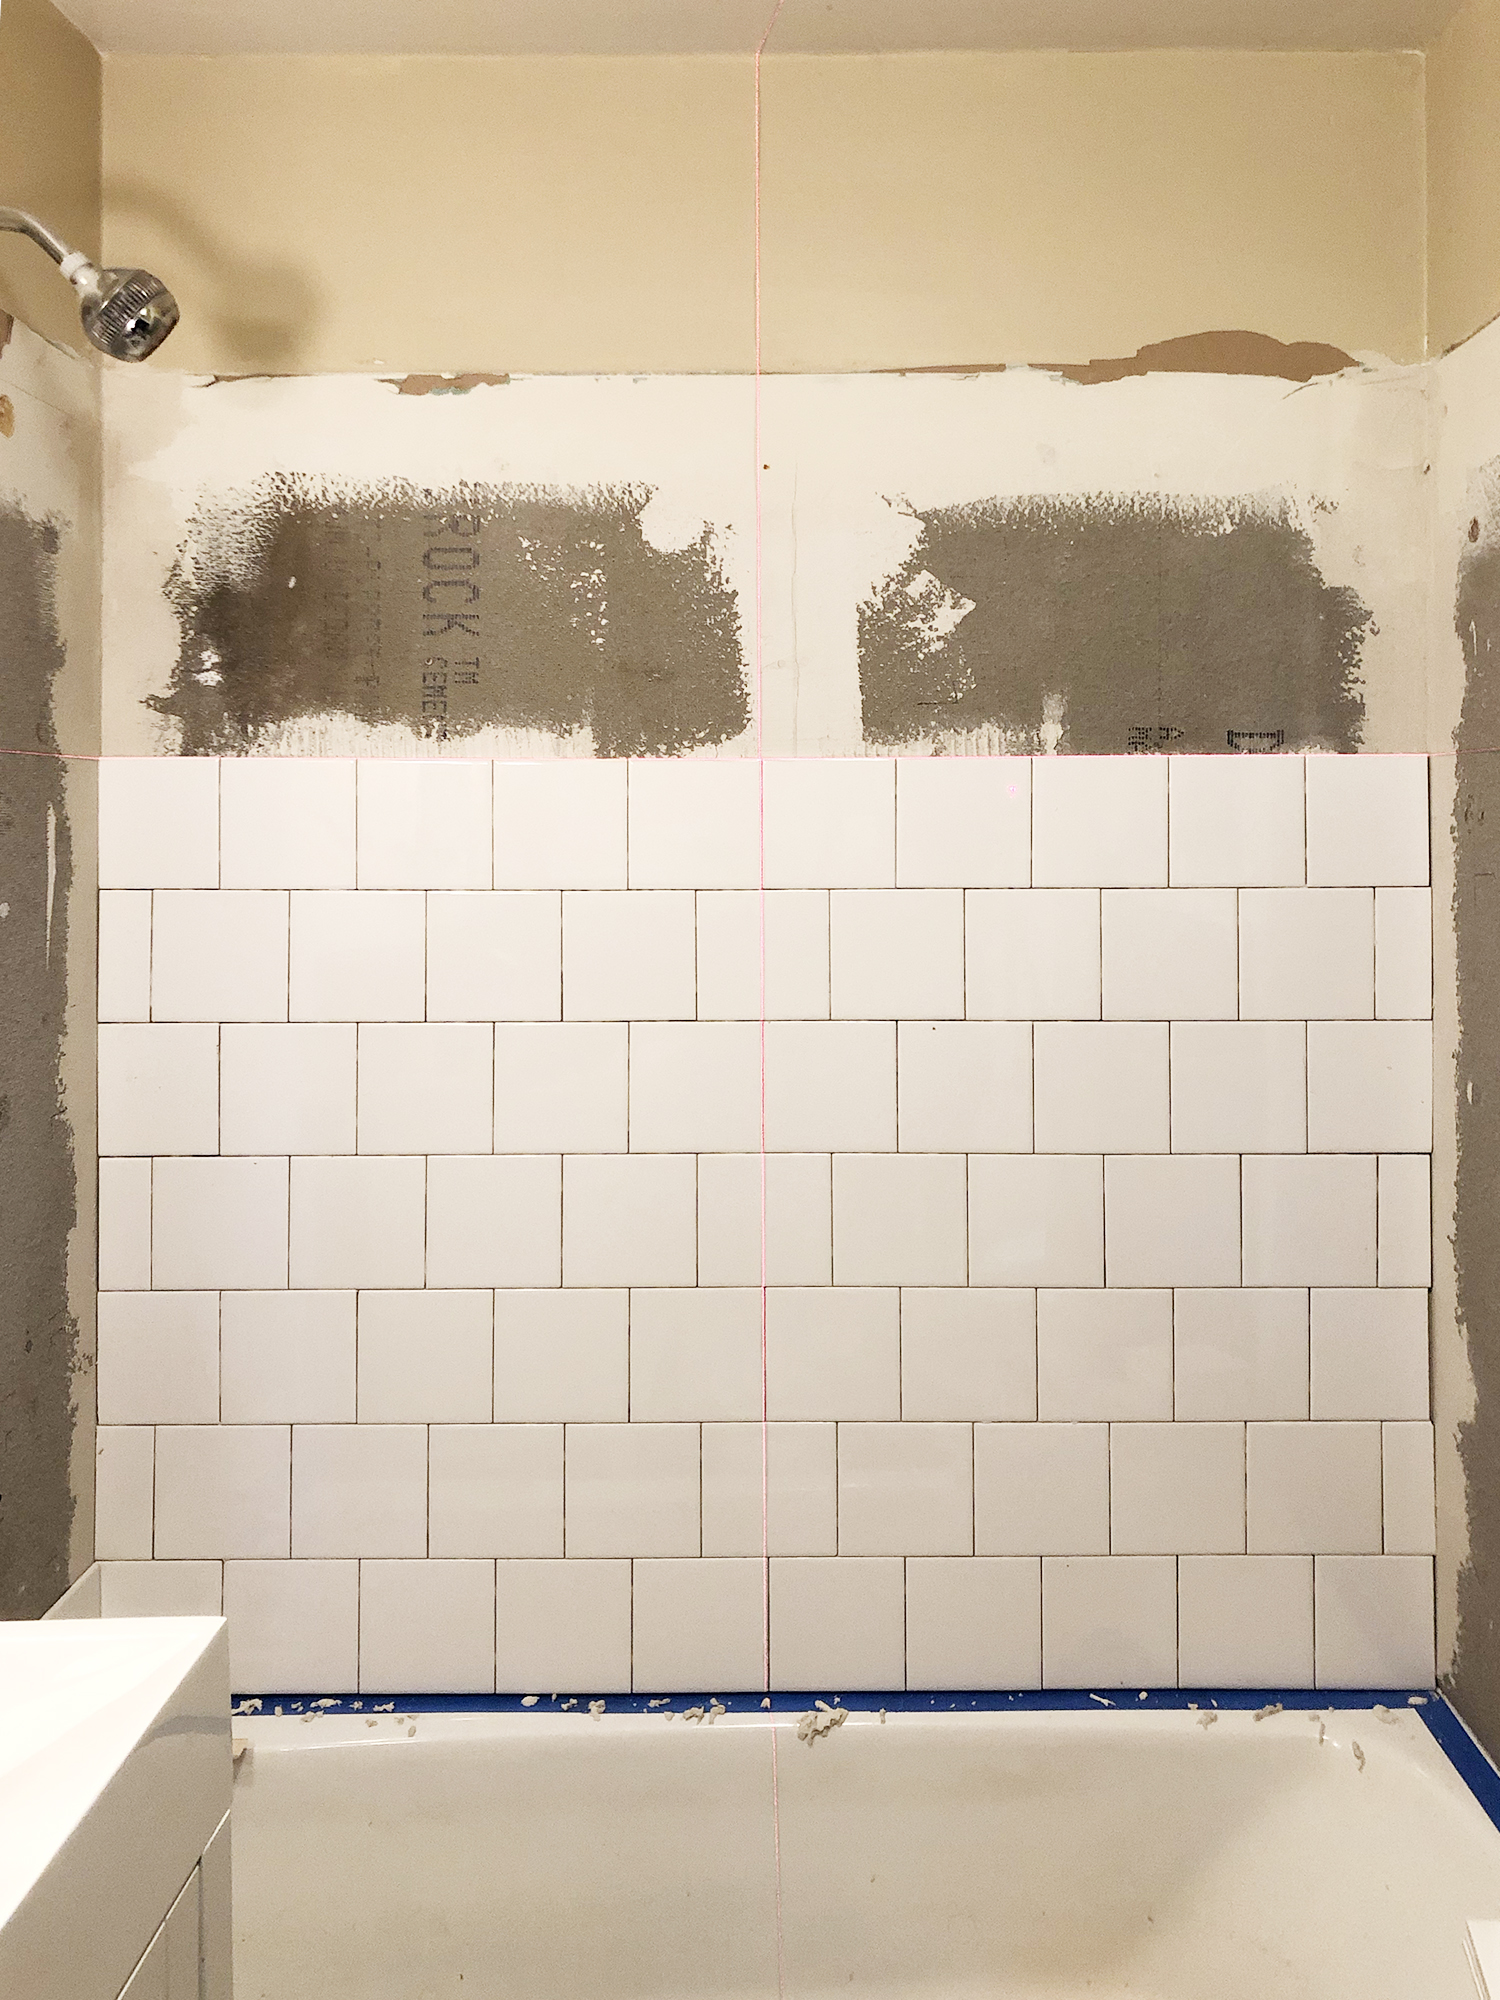
To start, I needed to remove the old fiberglass surround. I was expecting to find drywall behind the surround instead of cement backer board, but to my surprise I found perfectly intact cement board. I had planned on replacing the shower valve (which is the mixer part of the shower) removing the drywall and replacing with new cement board. I didn’t need to do any of that! I was legit bits giddy after finding out this wonderful news.
There was one thing I needed to adjust in my plan, and that was the tub and shower trim. When I was under the assumption that the drywall would be removed and the plumbing would be exposed, I had anticipated that I’d be replacing the existing shower valve with a new valve from a different brand. I had wanted to do all the bathroom trim in the champagne finish of the Delta Trinsic line. That is what I had used for the bathroom sink faucet. However, when I discovered the cement board I needed to change my trim plan. I didn’t feel like ripping out the cement board to access the plumbing so I decided to use the valve that was there (which saved me about $200 bucks) and find a shower/tub trim that I could live with in the same brand as the valve. The valve that was at the cabin was a Moen valve. Here’s a little something to note, every brand of plumbing trim comes with its own shower valve. Some of them get really fancy when it comes to mixing and diverting water. They all hook into the hot and cold lines in slightly different ways and they all have differing specs when it comes to installation. For me it was worth the compromise. I gave up the trim I had originally envisioned to save time and stress (plumbing isn’t my fav). I found that Moen had a nice modern trim set in a brassy finish (with red undertones) that is nearly the same as the Delta faucet. I’m actually considering getting the Moen faucet to match and bringing the delta faucet home and replacing it with our very dated bathroom faucet in our main bathroom.
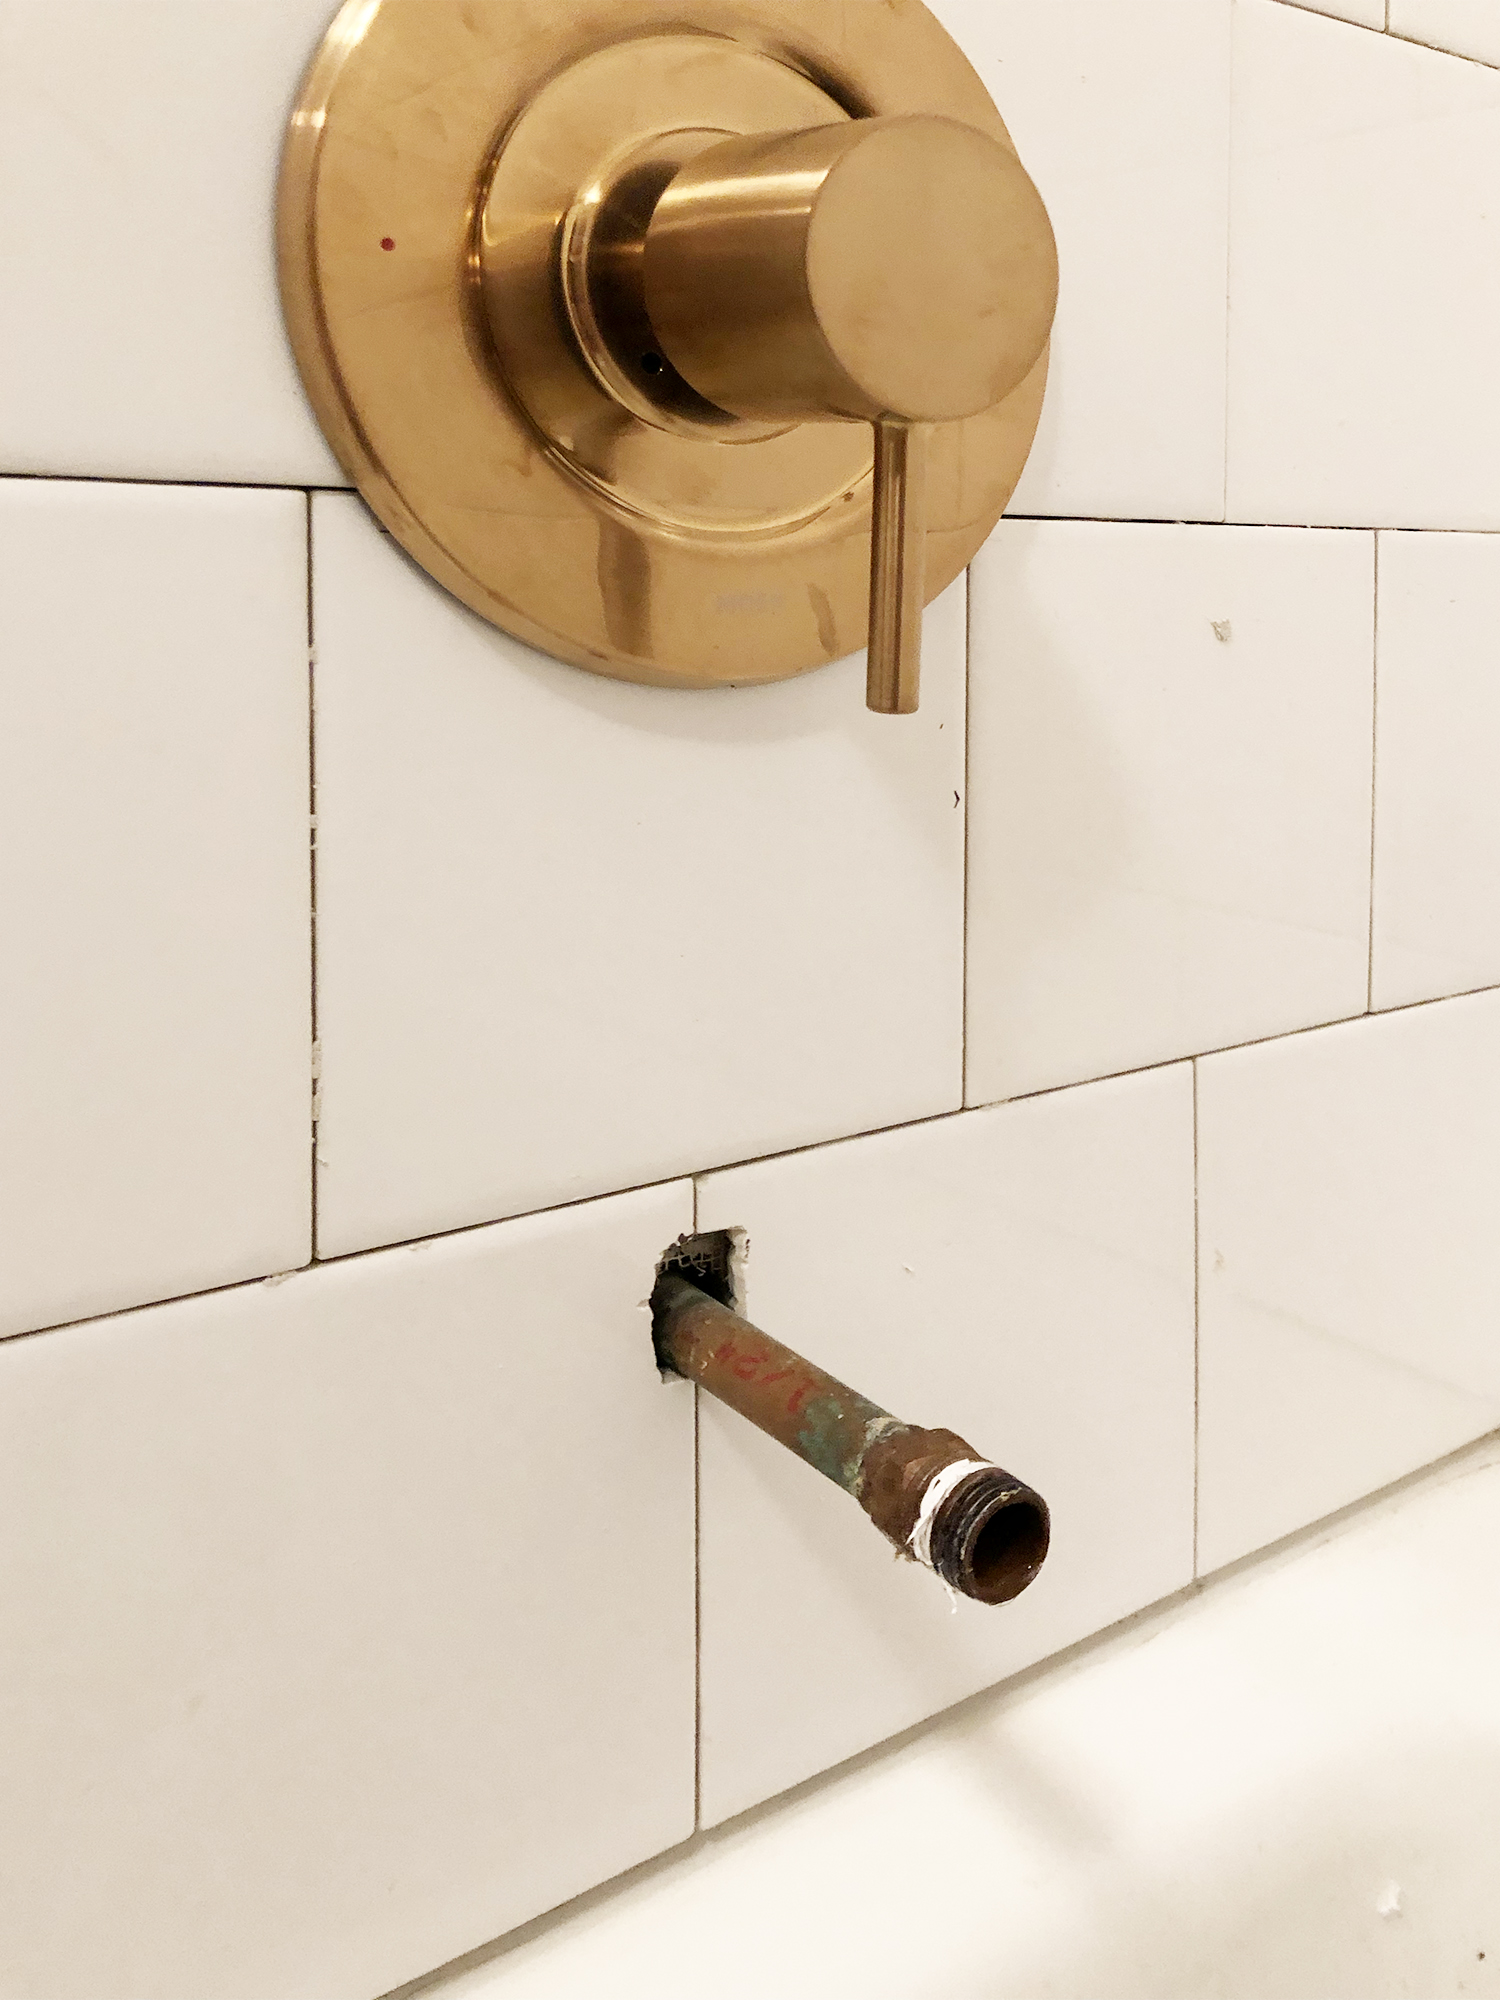
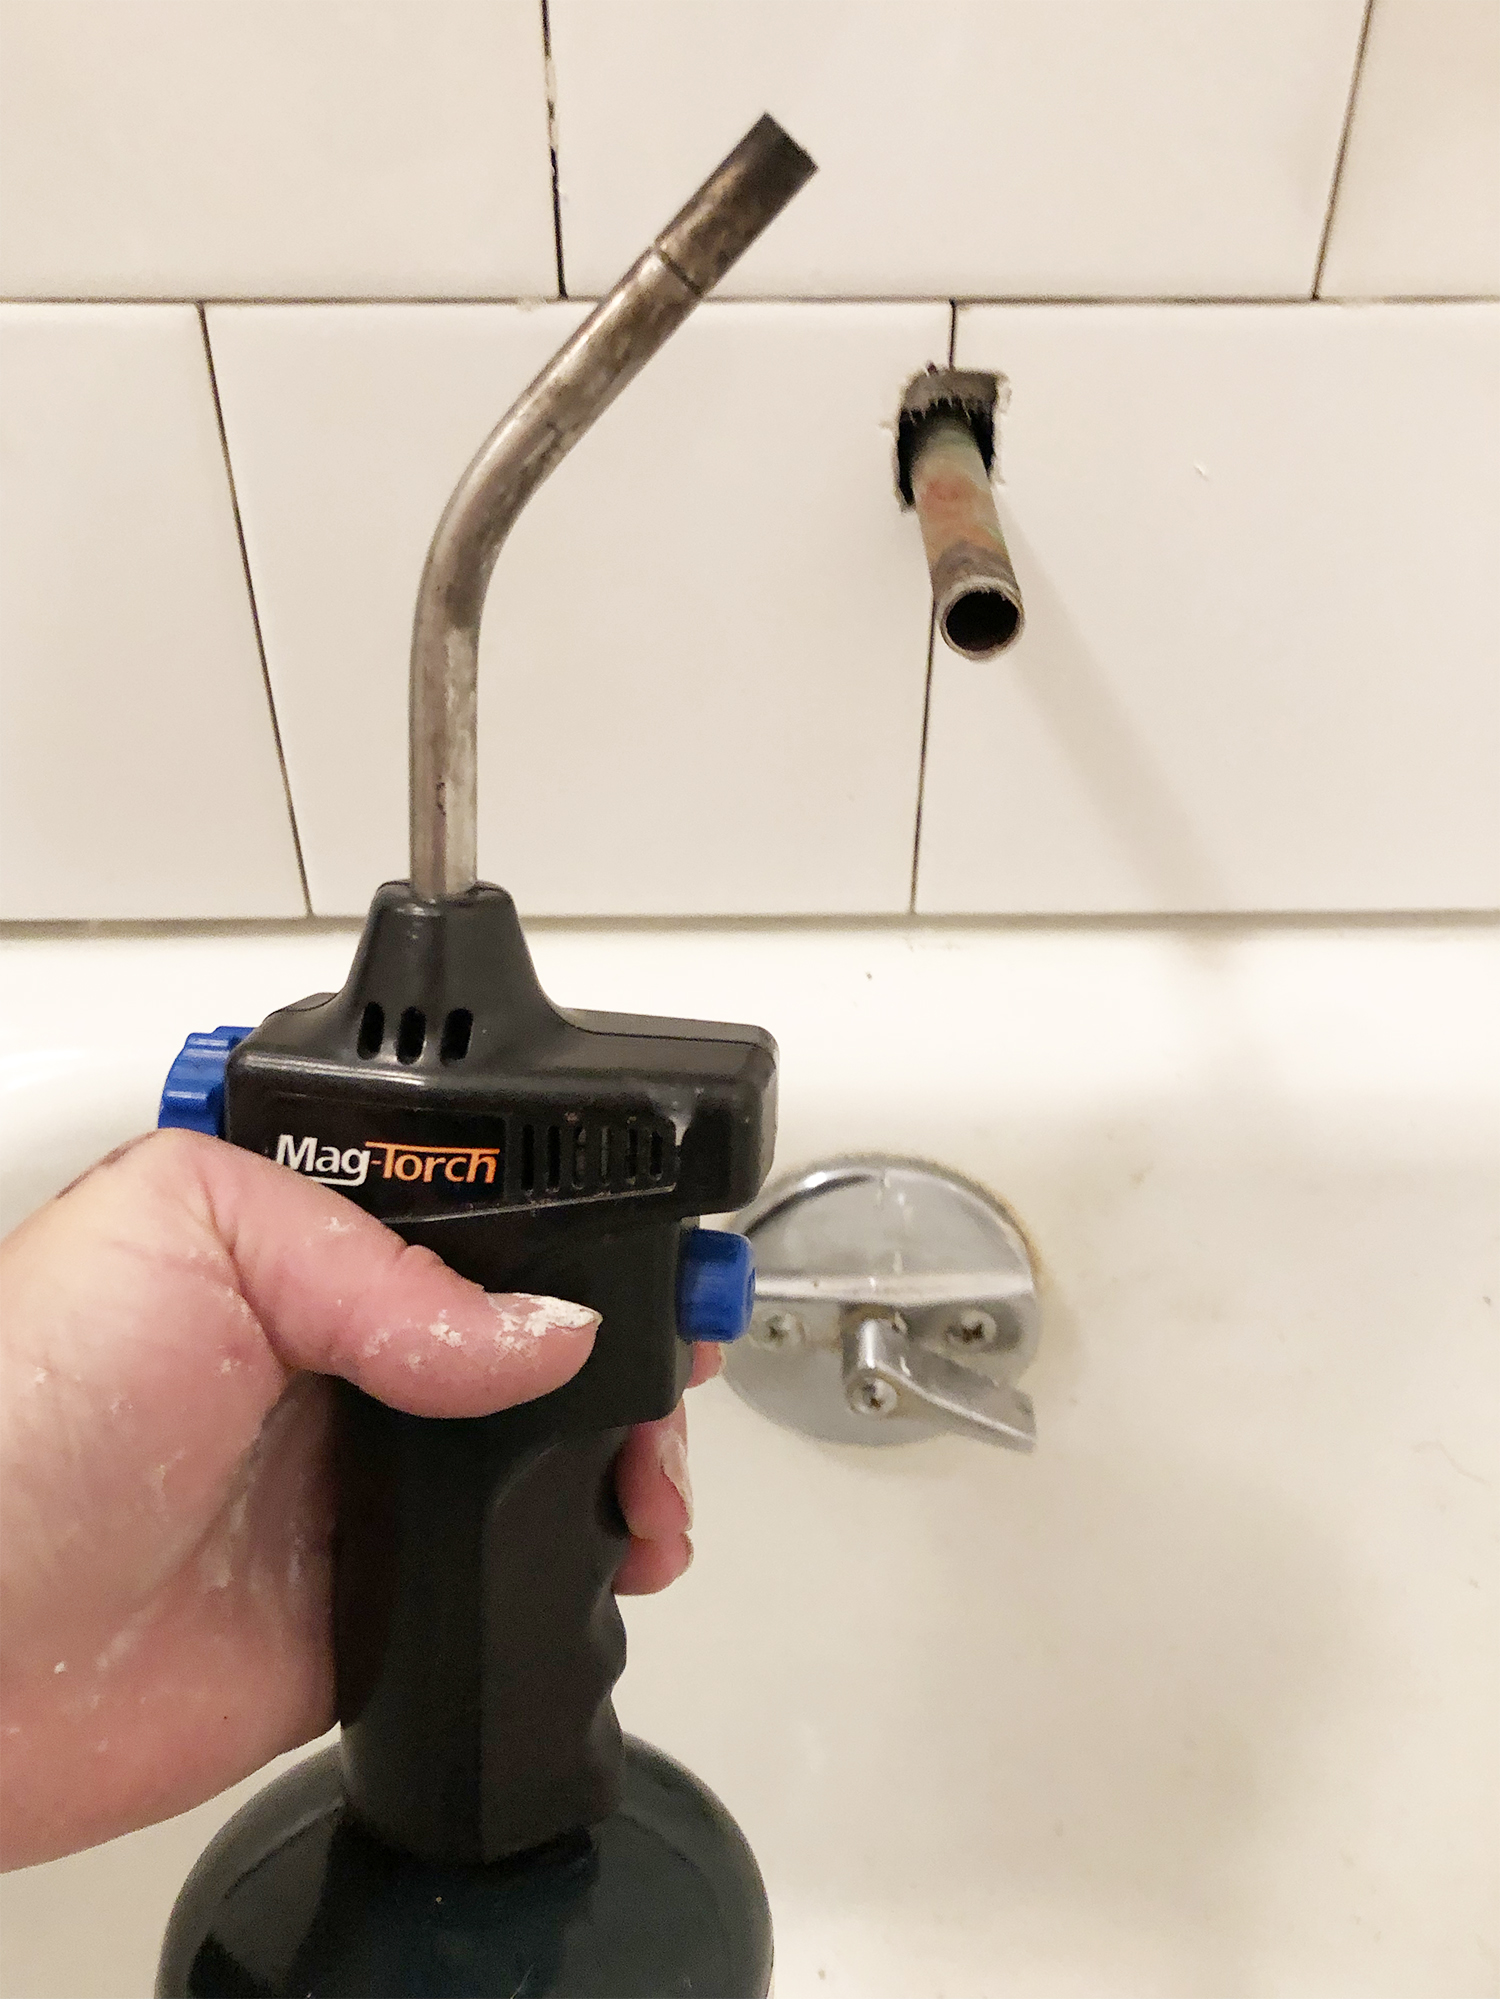
Replacing just the trim of shower/tub trim is actually very easy to do and makes such a big improvement. I did a dry fit of the trim package to make sure it would sit flush on the tile and that it worked with the valve. It took less than half an hour to install the new trim, and now I’m shaming myself for not changing out our shower trim in our ugly and very dated bathroom at home – . I mean, it’s only been ten years, ya big dummy. There are three parts to a shower and tub trib; the valve trim (which is the mixer), the shower head, and the tub spout. The valve trim takes the longest to install. It doesn’t require more than three screws though! The shower head threads into a stub from inside the wall. You’ll want to use teflon plumbers tape around the threaded end of the shower head before installing. You can tighten it with a pipe wrench and towel. The towel is used to prevent the wrench from leaving teeth marks on your new shower head. The tub spout might cause you to retrofit the copper stub that is coming out of the wall. My old tub spout was threaded on to the end of the pipe stub and the new tub spout was meant to be clamped around the stub. I didn’t need the threaded part, so I could either heat the pipe to melt the solder with a torch and remove the threaded end OR I could have used a pipe cutter to cut off the threaded coupling. I decided to use a torch. Once the threaded coupling was removed it was easy to place the tub spout and tighten the hex screw around the pipe to install the spout.
I could tell you guys step by step how to tile, but it is really straight forward and there are so many videos and tutorials out there. I thought instead that I’d fill you in on some of the questions I first had when I started and combined those with the great questions I received from you guys on IG.
Mastic is an adhesive acrylic product and is most similar to glue. It’s much stickier than thinset and therefore can be easier to work with. Since mastic is not waterproof it is great for in dry applications such as black splashes or walls.Both mastic and thinset can be purchased in pre-mixed tubs. Mastic is typically more expensive than thinset and pre-mixed thinset is usually more expensive than powder thinset. With powder thinset you can have more control over the consistency of the thinset, however it is a lot of work to mix and clean up. Pre-mixed thinset is much easier to clean up and you can seal it and store it if you take breaks, however the consistency is quite thick and can be hard to work with.
*FYI – Because there hardware stores are so few and far between in Hayward, I order all of my supplies online at homedepot.com and then those nice worker-folks in the orange aprons go pull it all for me and have it ready on a cart. All I have to do is sign for it. What used to take me an hour plus to complete, now takes 5 minutes. This has been so handy on these jobs where I need to bring everything from another state. I also have the really big stuff shipped to the cabin, because there’s almost always free shipping on big orders.
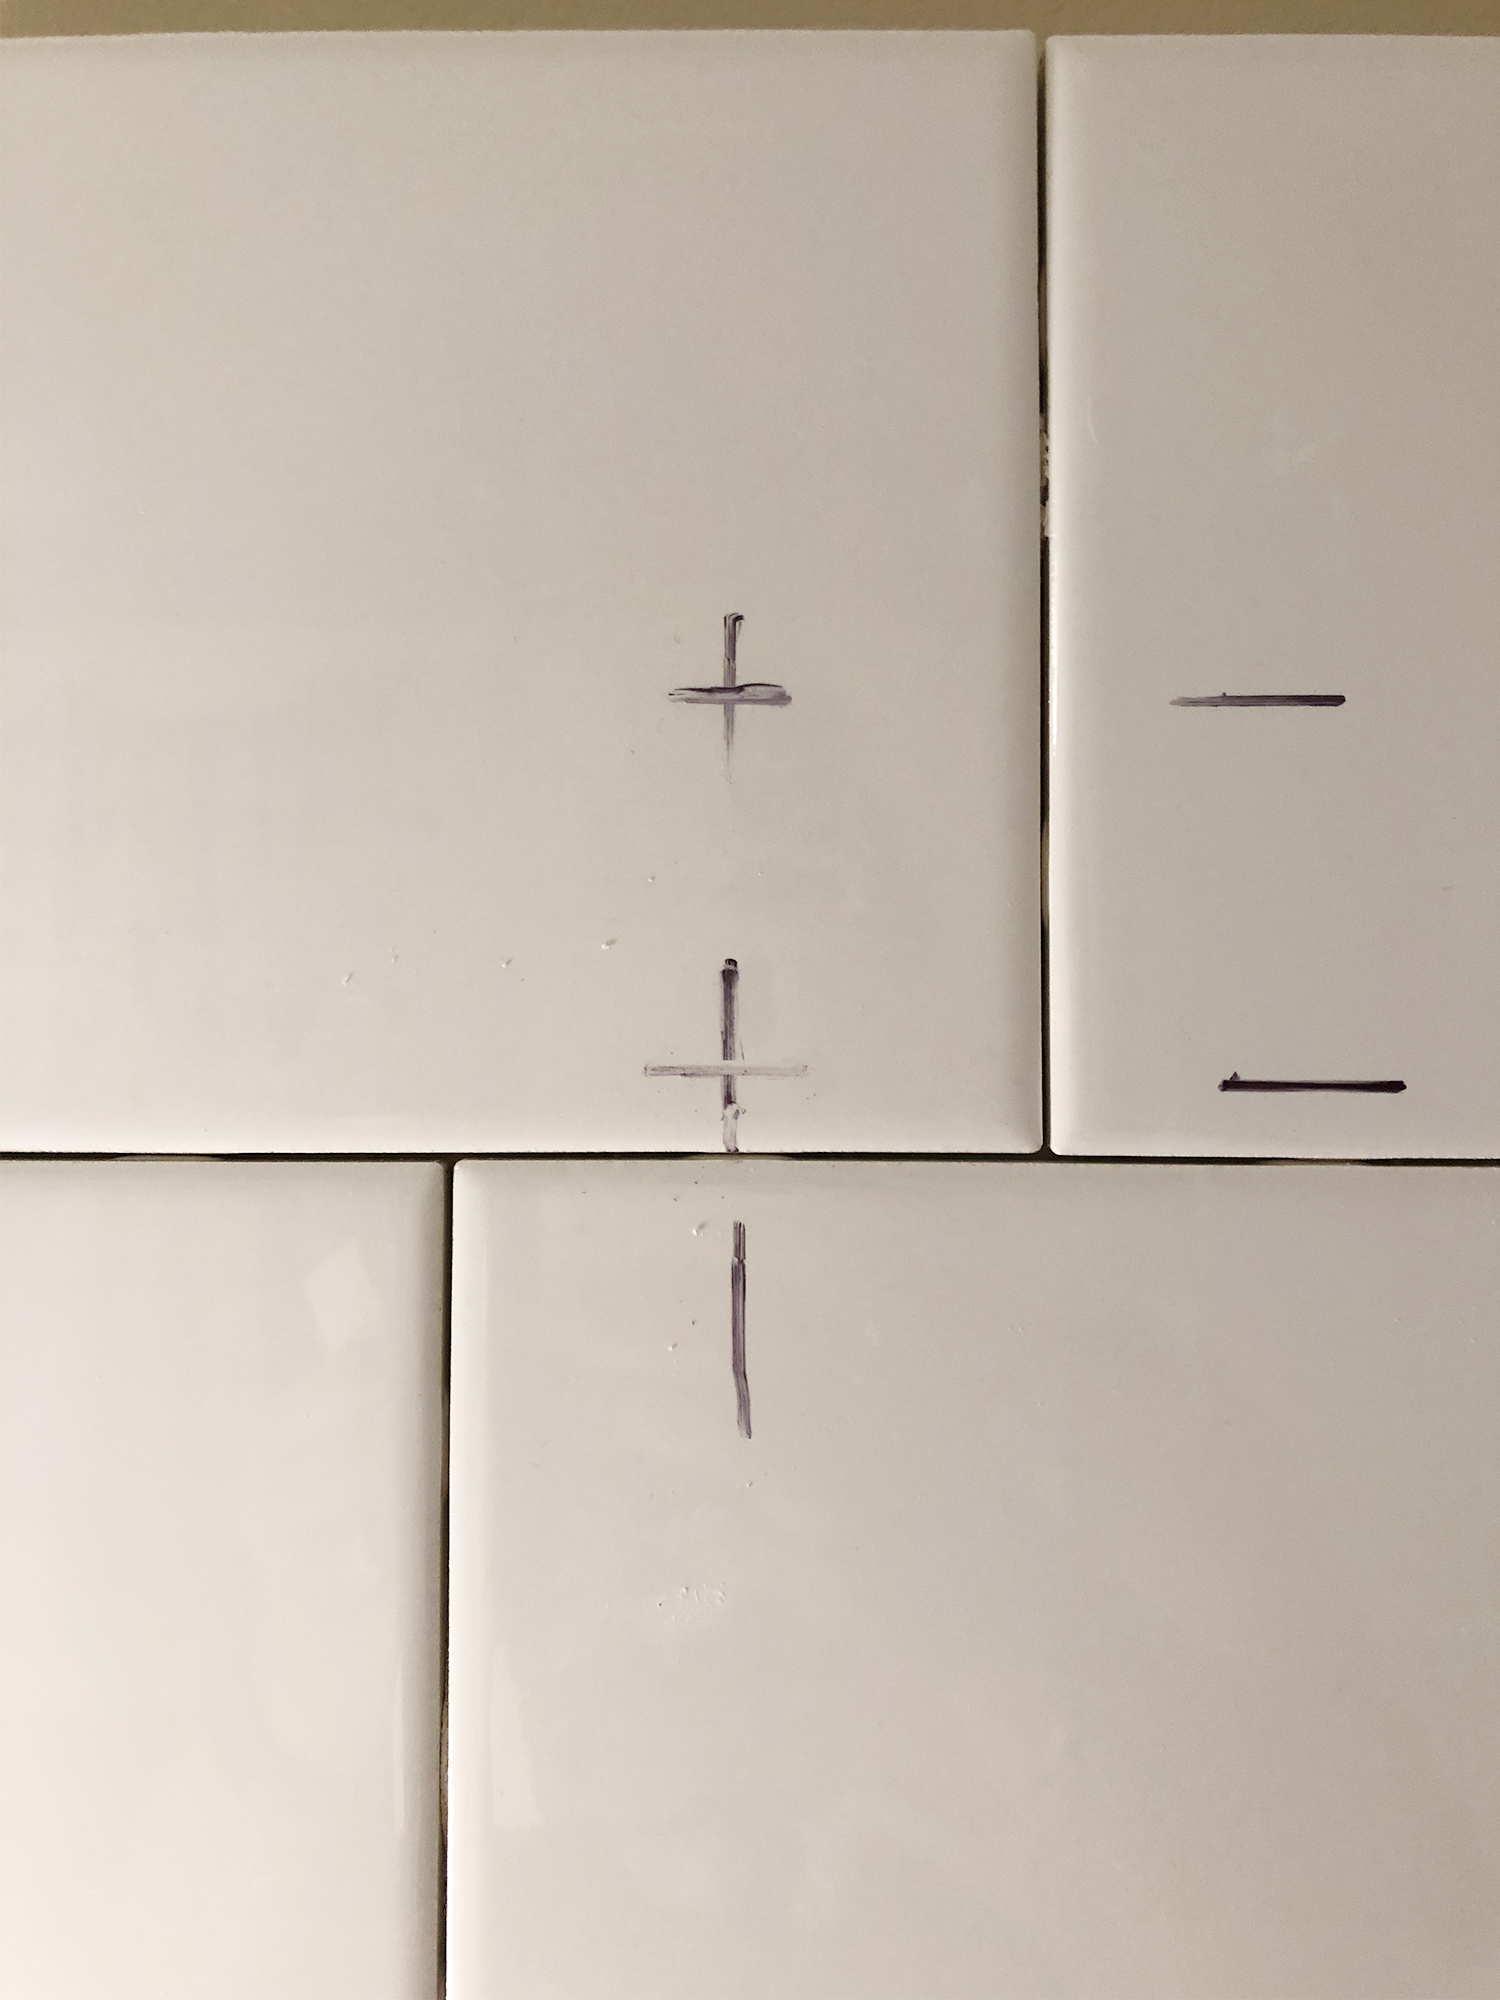
What type of spacer you uses depends entirely on what type of tile you are using and what type of grout line you prefer. Some tiles such as zellige tiles are meant to not have a grout line at all, although you always could. Tile such as the 6″ square subway tile that I used for this project have small notches on the side of the tile – basically a built-in spacer. Other tiles need a spacer, and what type of spacer you get depends on what type of grout line you prefer. Typically, grout lines are around 1/16″ – 1/8″ but can be as large as 3/8″ – 1/2″ thick depending on preference. I prefer the notched tile, because it’s easier – but it’s not always available, especially with more high-end tiles.
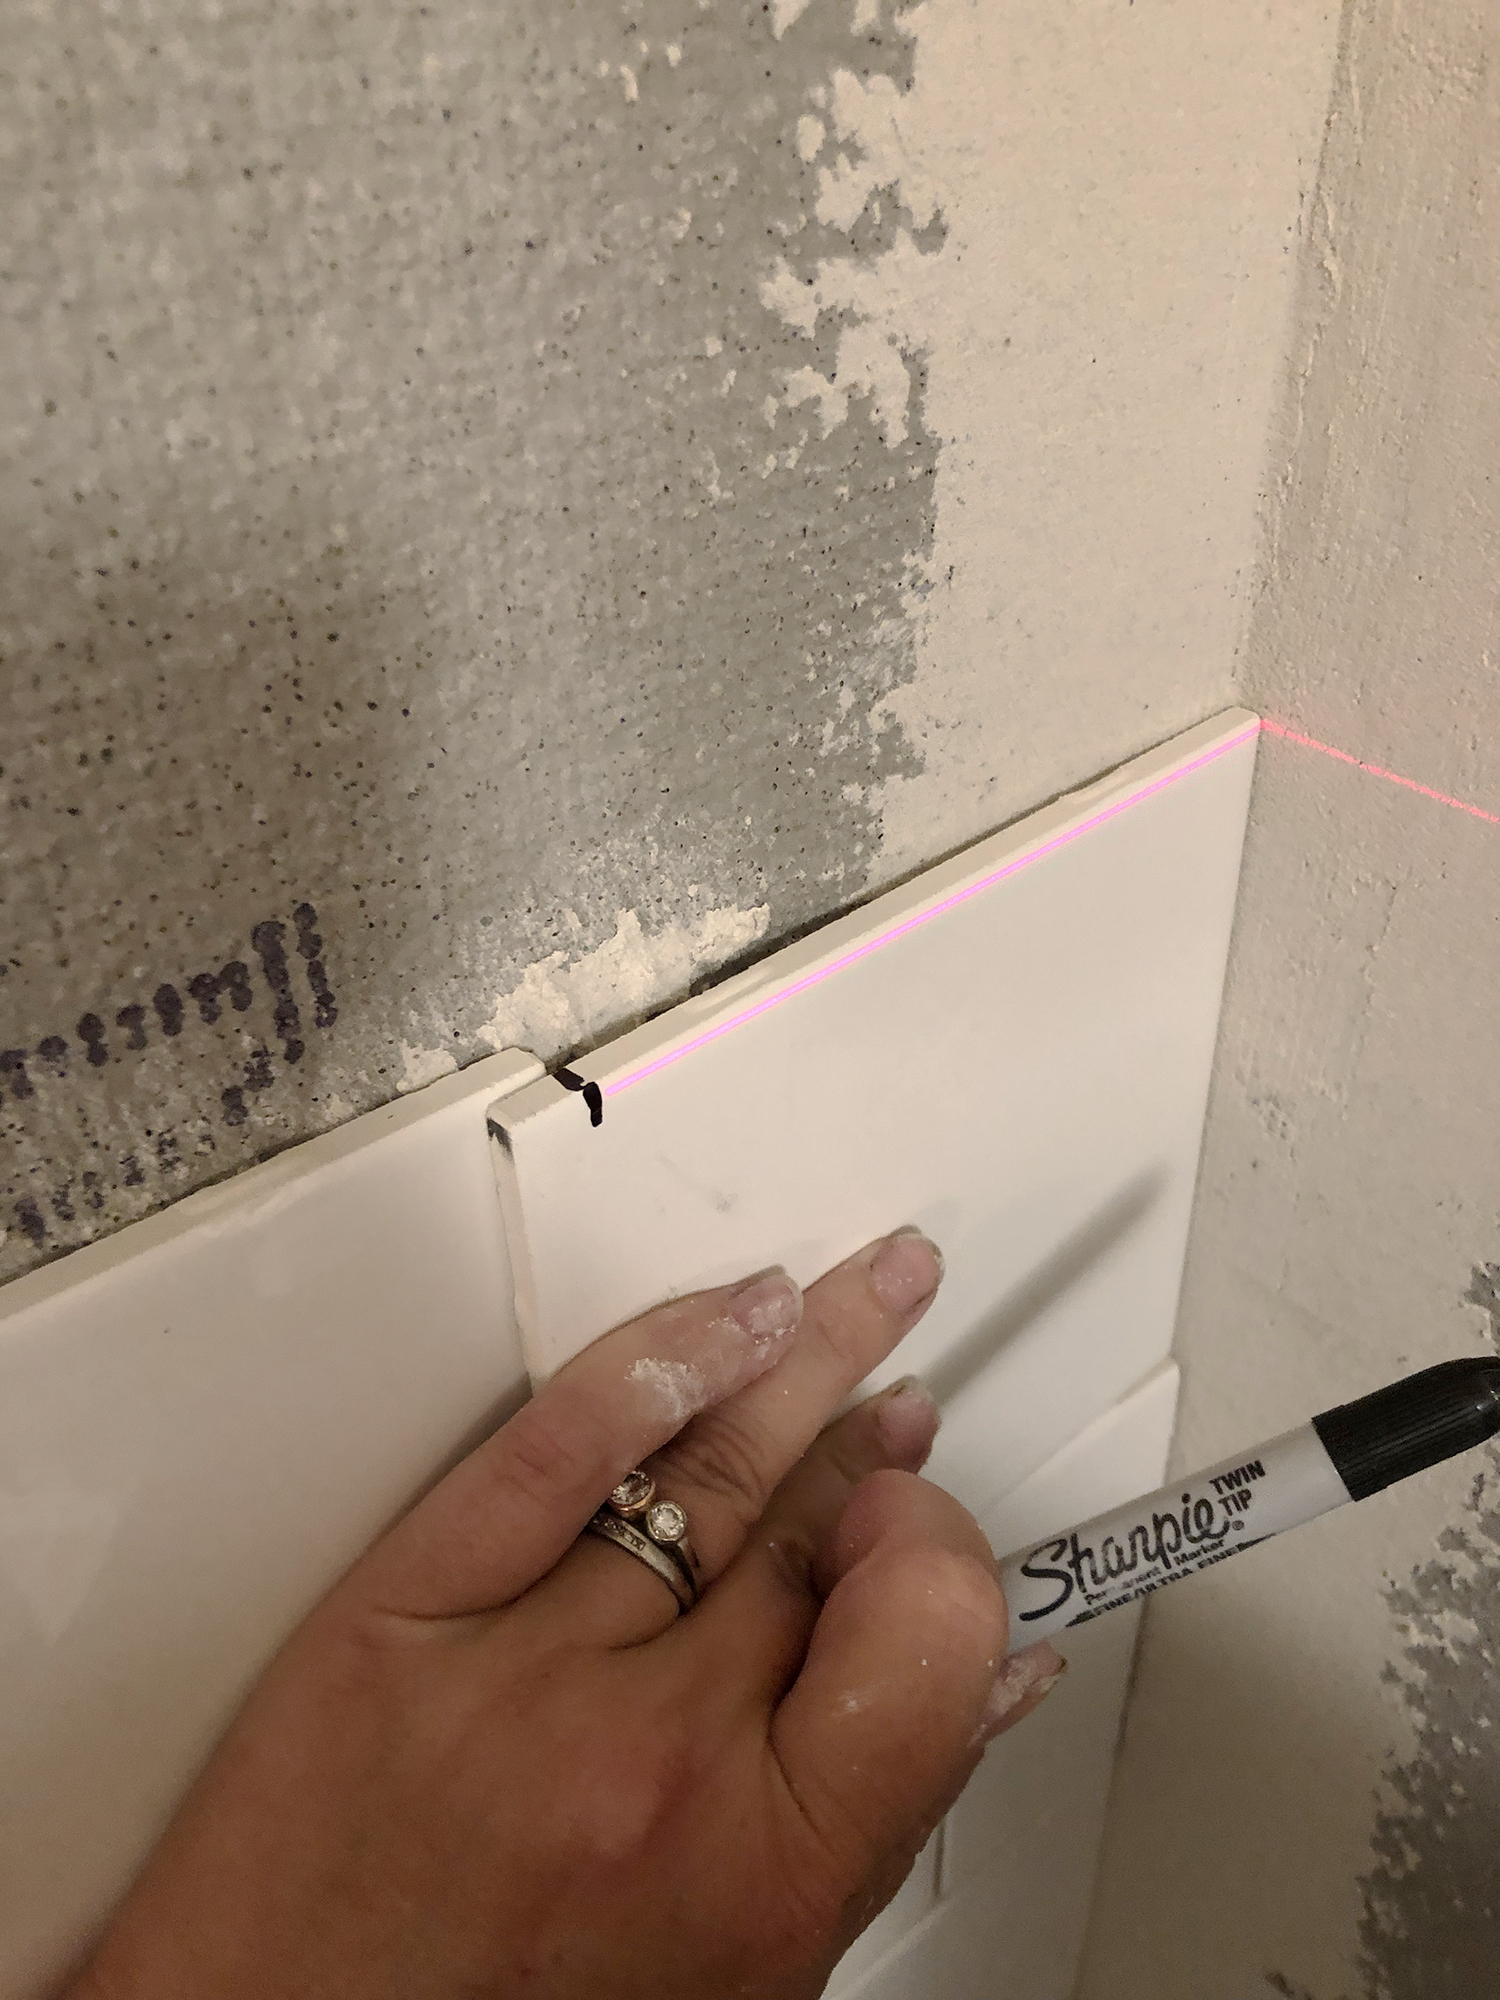
I would never ever think about doing a tile job without my laser level and tripod. I love that thing! It is worth its weight in gold. In keeps me on track and makes me aware of any deviations I may have made. It also comes in really handy when planning out your tile pattern and determining where tile courses will fall.
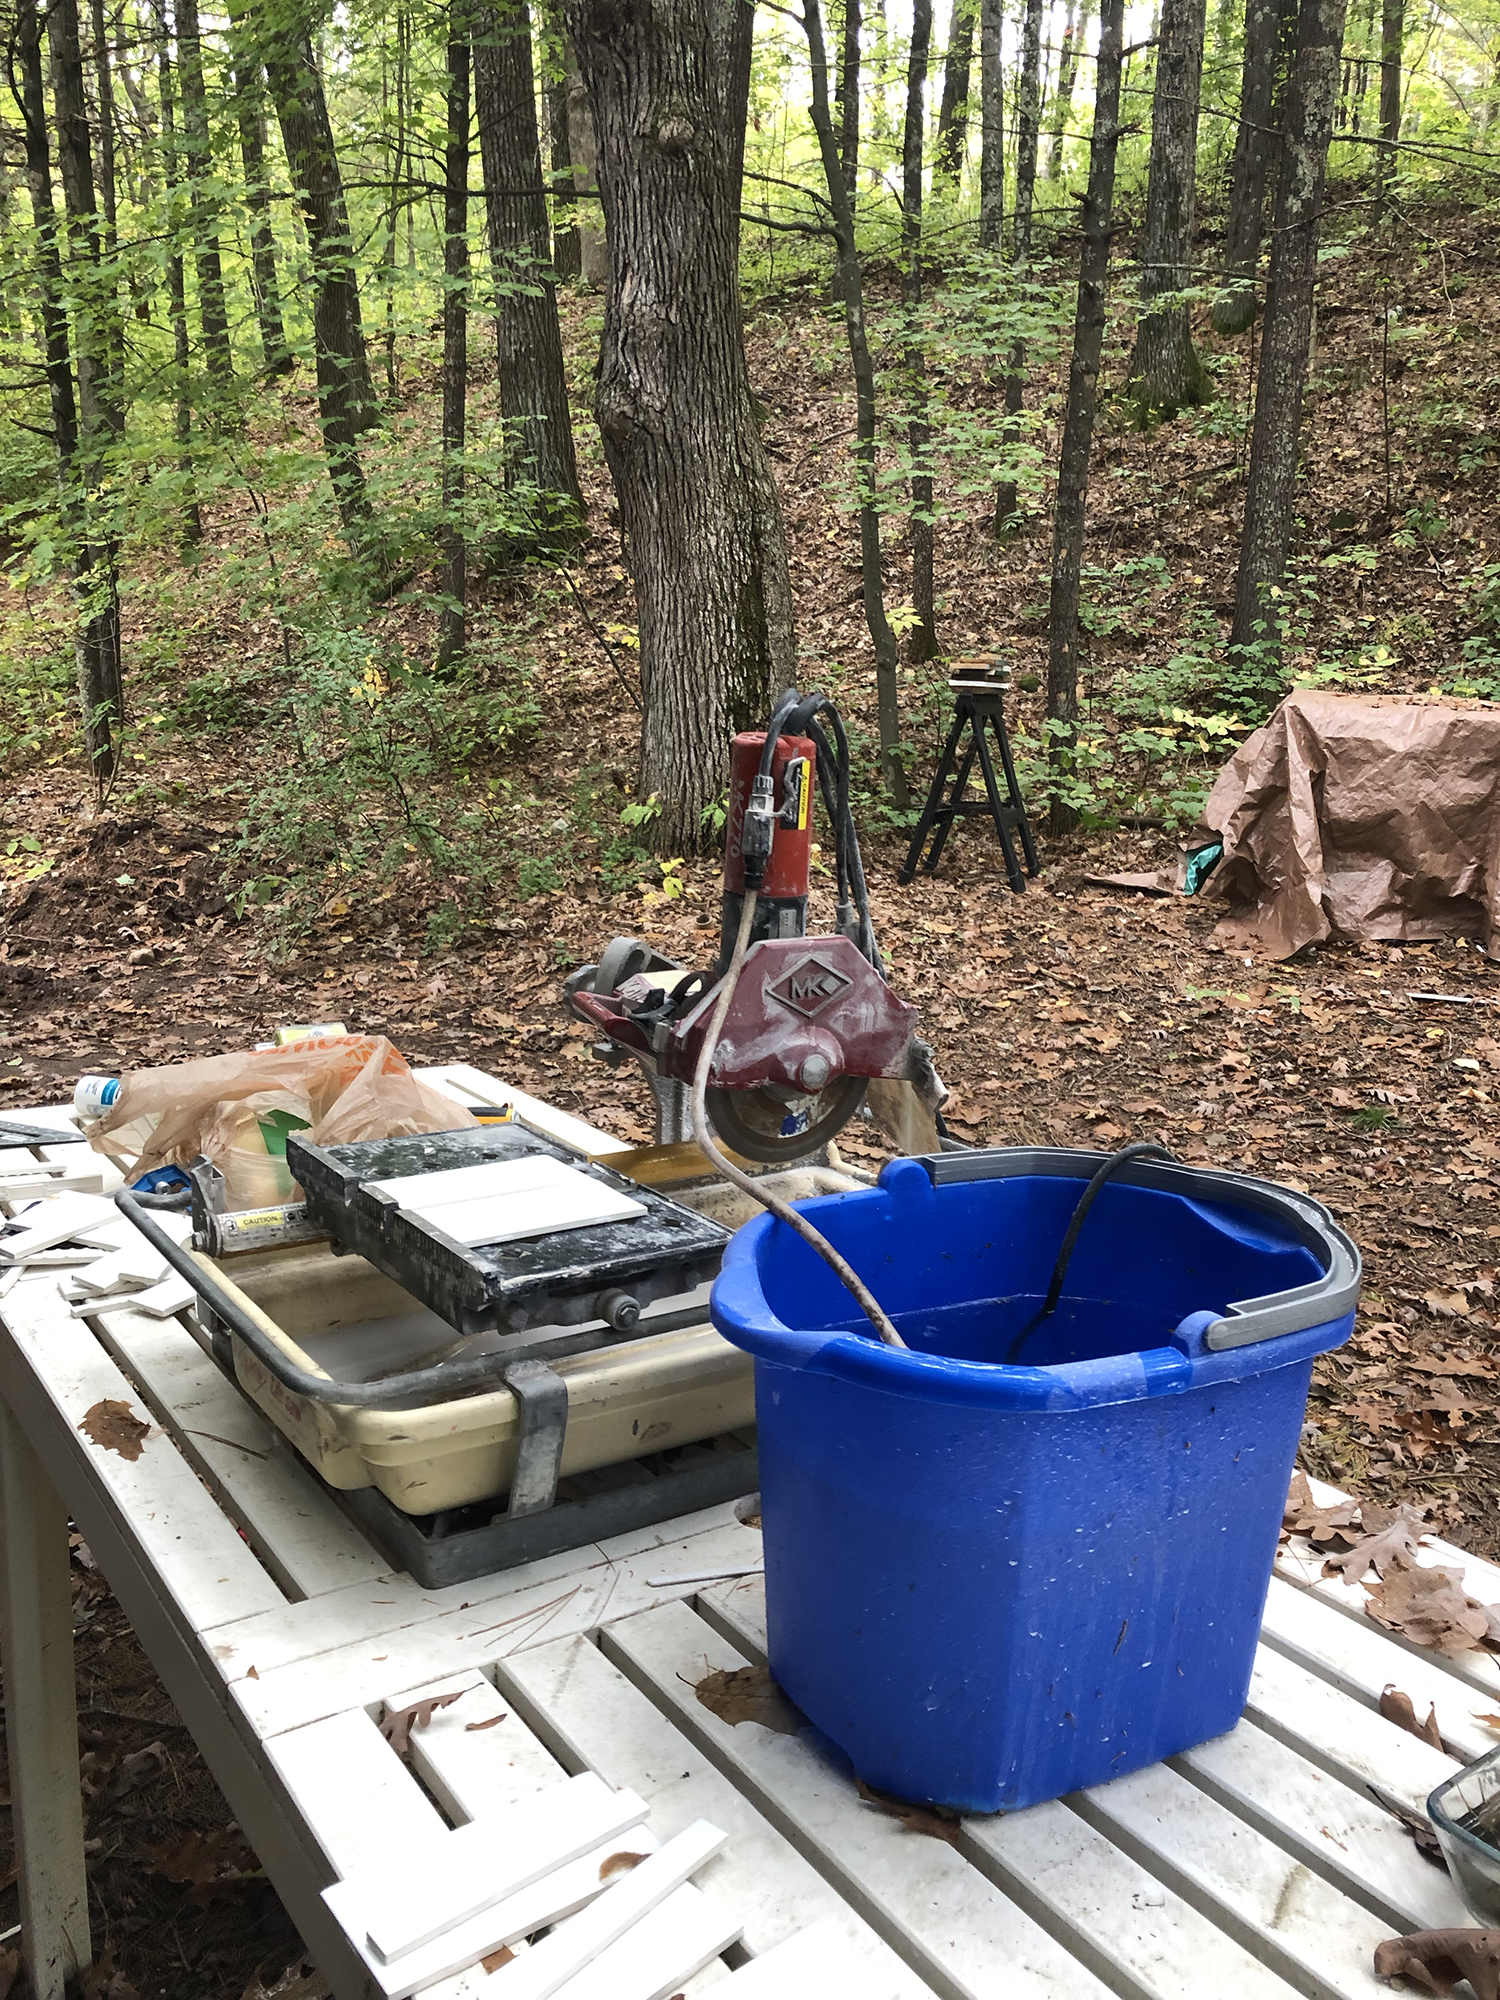
I love my tile saw as much as I love my laser level. Owning or renting a wet tile saw can make all the difference when it comes to tile installation. It makes the job way more accurate, you have much less tile waste and it’s not impossible to make precision cuts. The downside of course is that a wetsaw can be expensive – starting at around $130 and going as high as $600. I don’t actually own my saw, it’s my friends’ saw, but together we have compiled a small tool library. We all contribute to some of the more expensive tools and then we are able to borrow them from each other without guilt. That’s one way to finance a saw or any other tools.
If you’re not up for the big investment you can easily rent a saw from your local hardware store too OR if you have just have a small project like a backsplash you can probably get by with using just a tile cutter and a nipper. I did our entire kitchen with just those tools (although there was a lot of waste and a few frustrating moments).
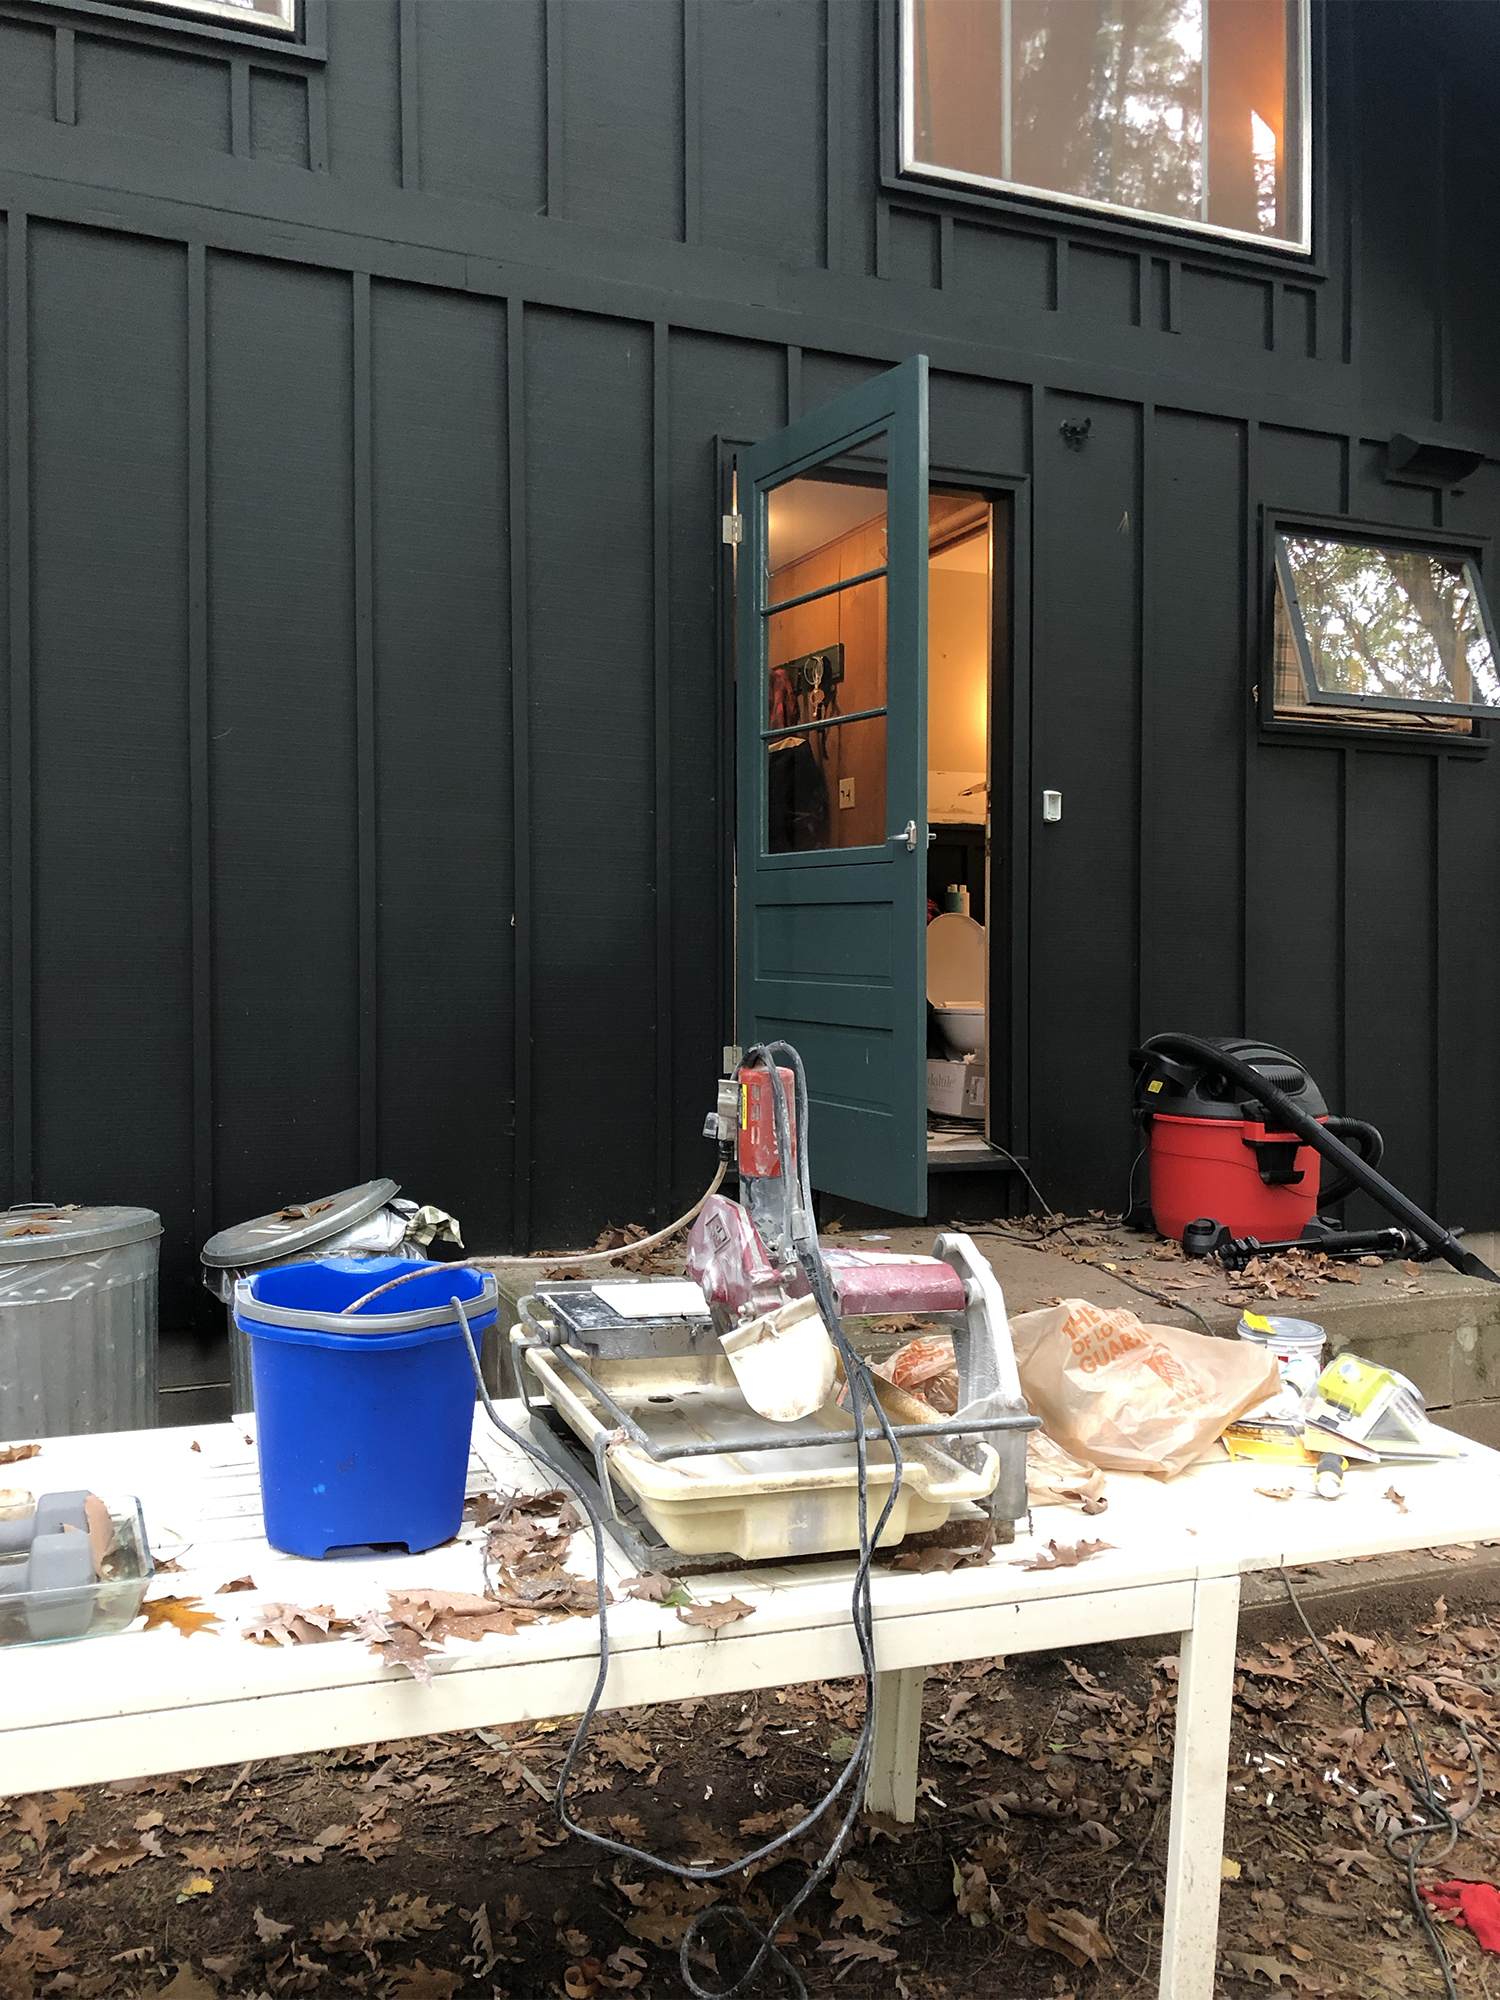
One other thing to mention about the wet saw. It is wet, like very wet. I prefer to do tile projects when I have the flexibility to work outside. Here’s a tip, if you’re tiling in colder weather – like I am this fall – fill your water bucket with warm water.
Sometimes (like the middle of winter) tiling outside isn’t an option. When I tiled my basement bathroom in January, I worked in our laundry room and I covered the entire place in sheets of plastic and set the saw up above the basement floor drain. It did a good job of keeping the space clean but my laundry room was out of commission for weeks. Plus, it took a lot of extra time setting up the waterproof-ish wet space.
I always try and plan a efficient outdoor workspace when tiling. You don’t want to be running from inside to outside without a plan. Keep your saw as close to your project as possible, and make sure to lay down drop cloths or rosin paper to protect your floors and keep them clean.