


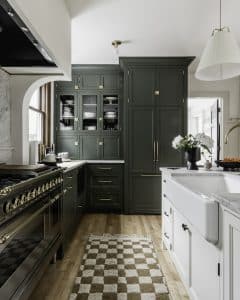
So stoked to share the cabin kitchen revamp (mostly on a budget) with ya, I mean it’s only been a year in the making. Talk about slow design! Of course, some of that slowness is by necessity, renovating a small cabin kitchen when you leave 120 miles away isn’t going to happen over night. When I get presented with a design problem like our kitchen cabin, my first instinct is to make the most trying to maximize design on a budget. This isn’t just to save money, although that’s a huge reason why, it has a lot to do with wanting to live with the space before we decide to do any sort of big renovation or remodel. It’s easy to feel like you need the newest things like virgin drywall and brand new cabinets, but for me and our living spaces, I like to know that I’m making the best design decisions for how we live in the space before diving in with those bigger projects. This kitchen remodel is the essence of that.
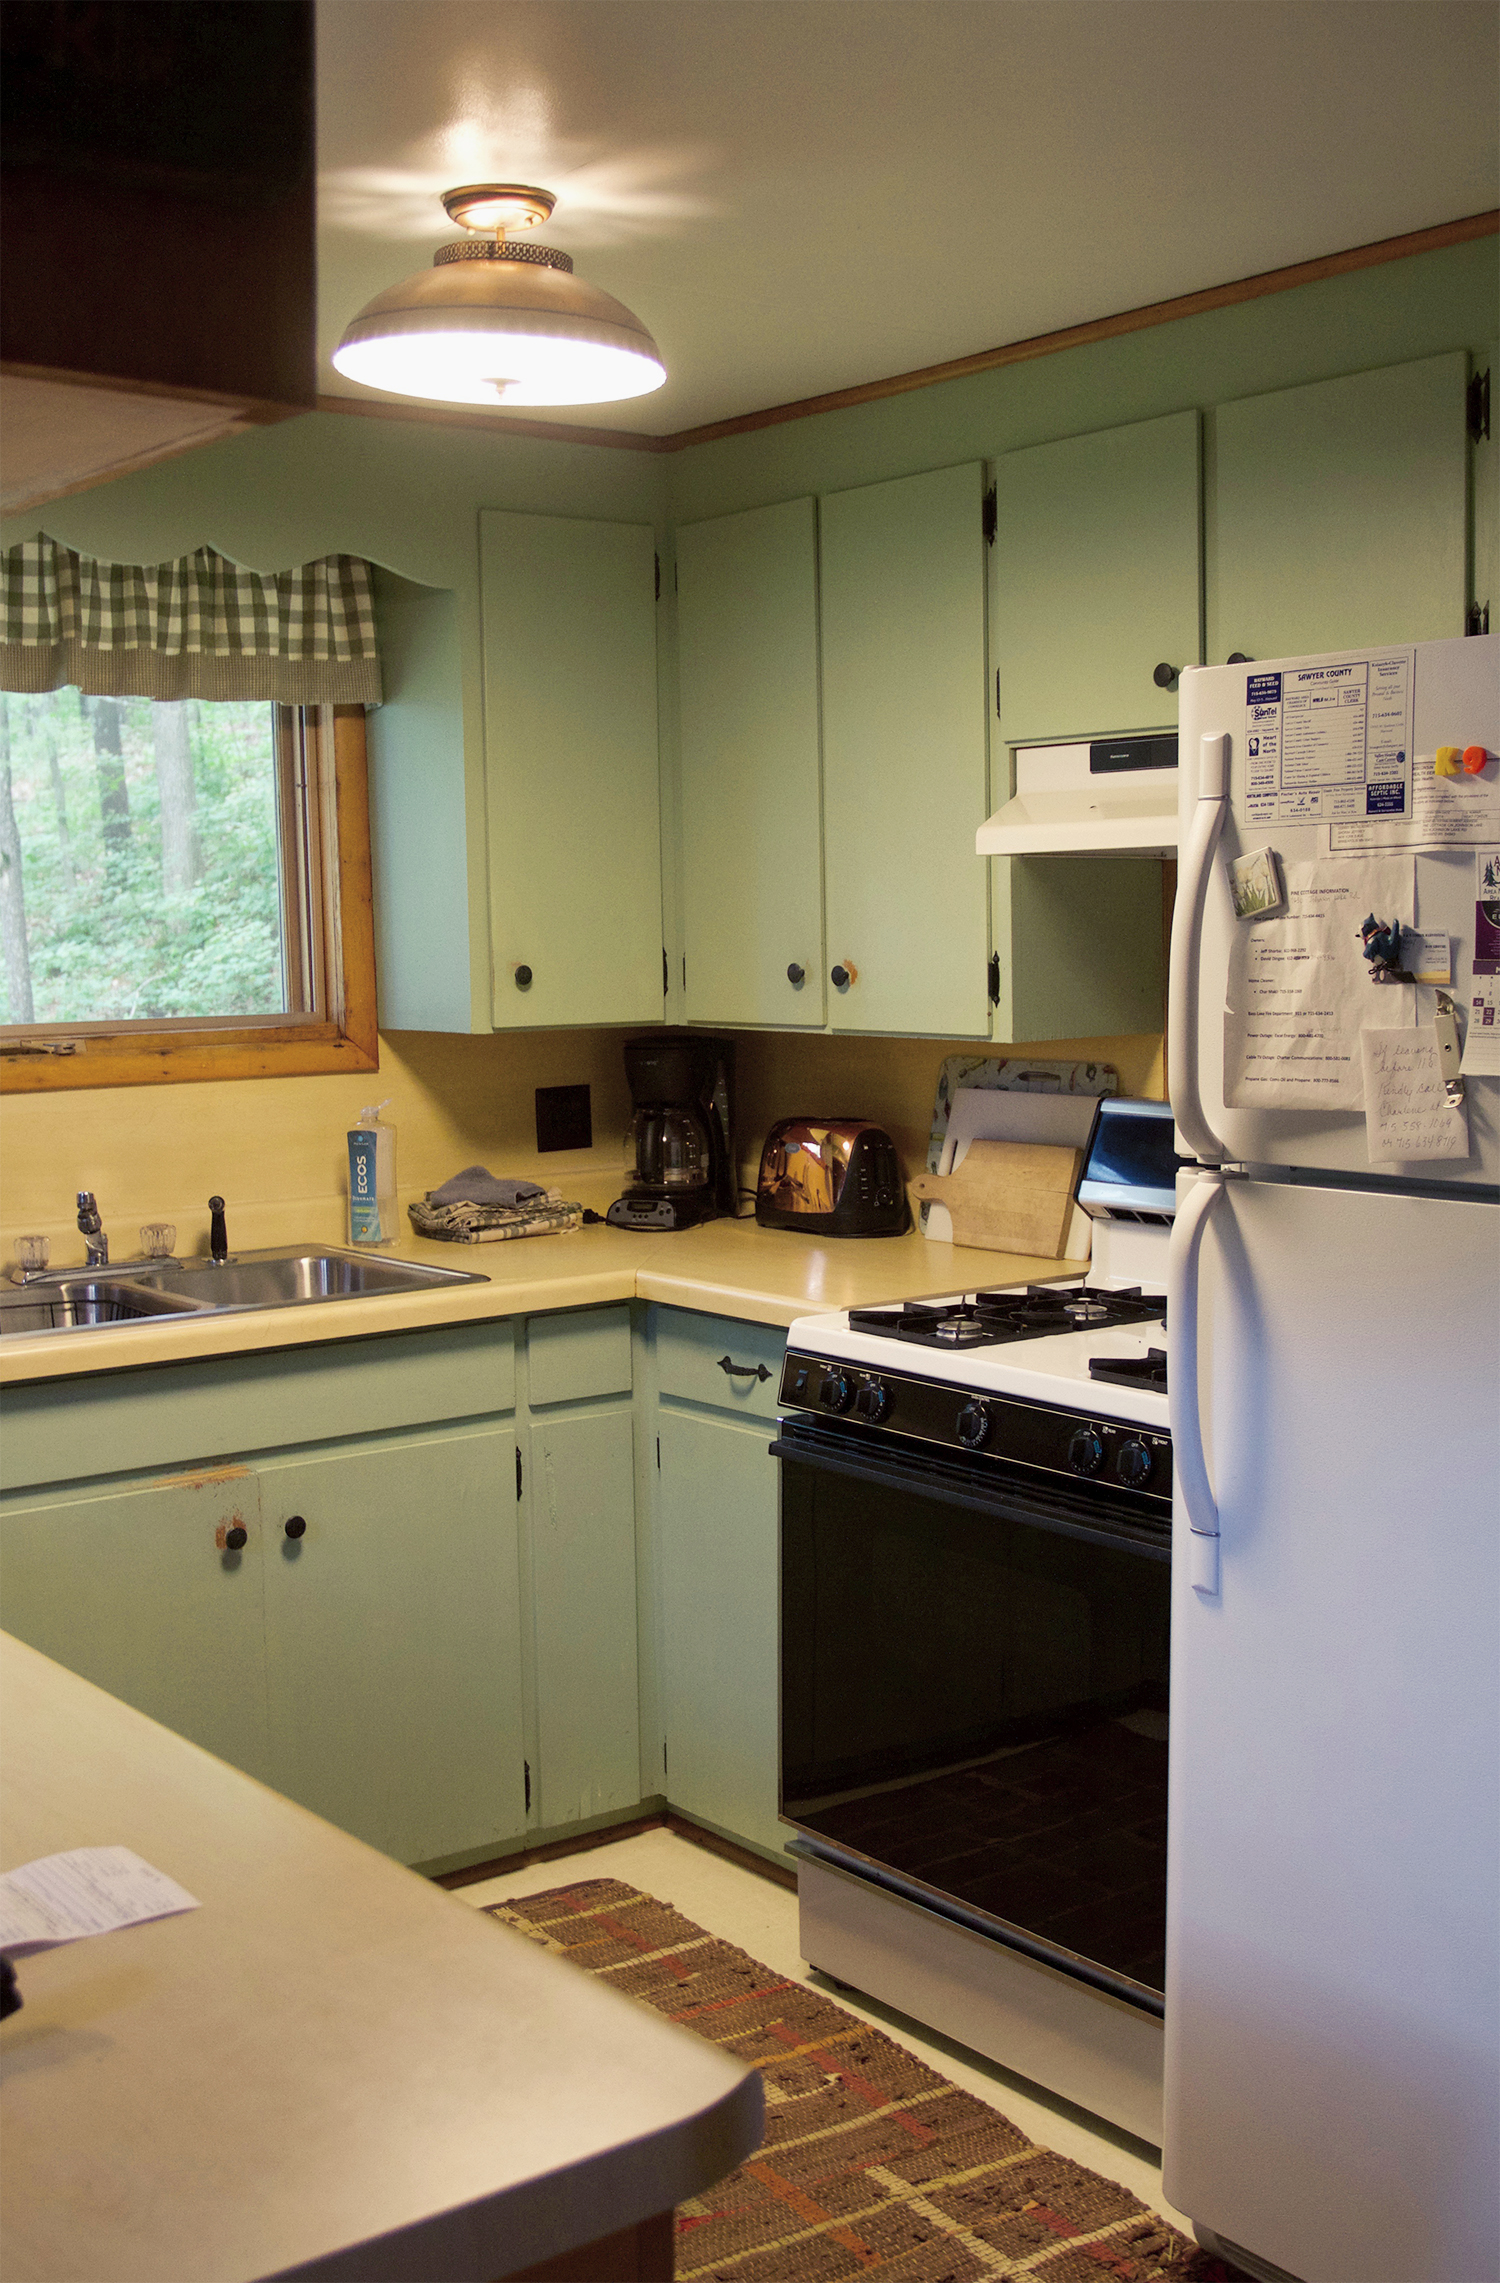
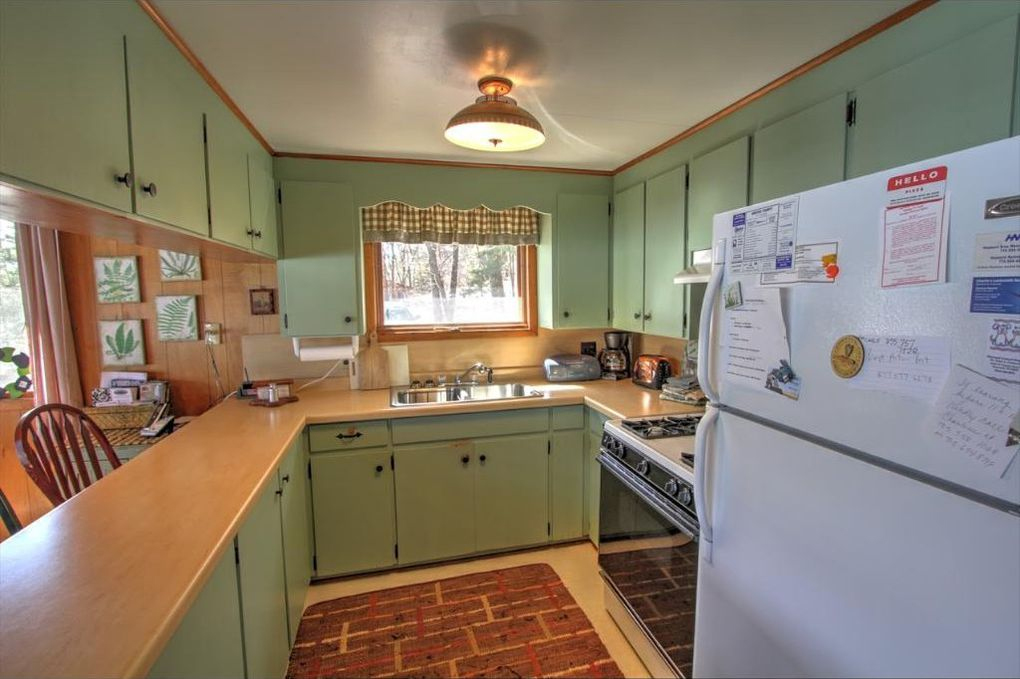
It may not look like it from the photo above, but I had a good base for this space. No I didn’t have pristine hard wood floors, or lush soapstone countertops, but I did have solid wood (albeit plywood) cabinets boxes and fronts. They are simple and uncomplicated, and they can be painted with little effort, and easily transformed with standard lumber sizes.
Painting Cabinets
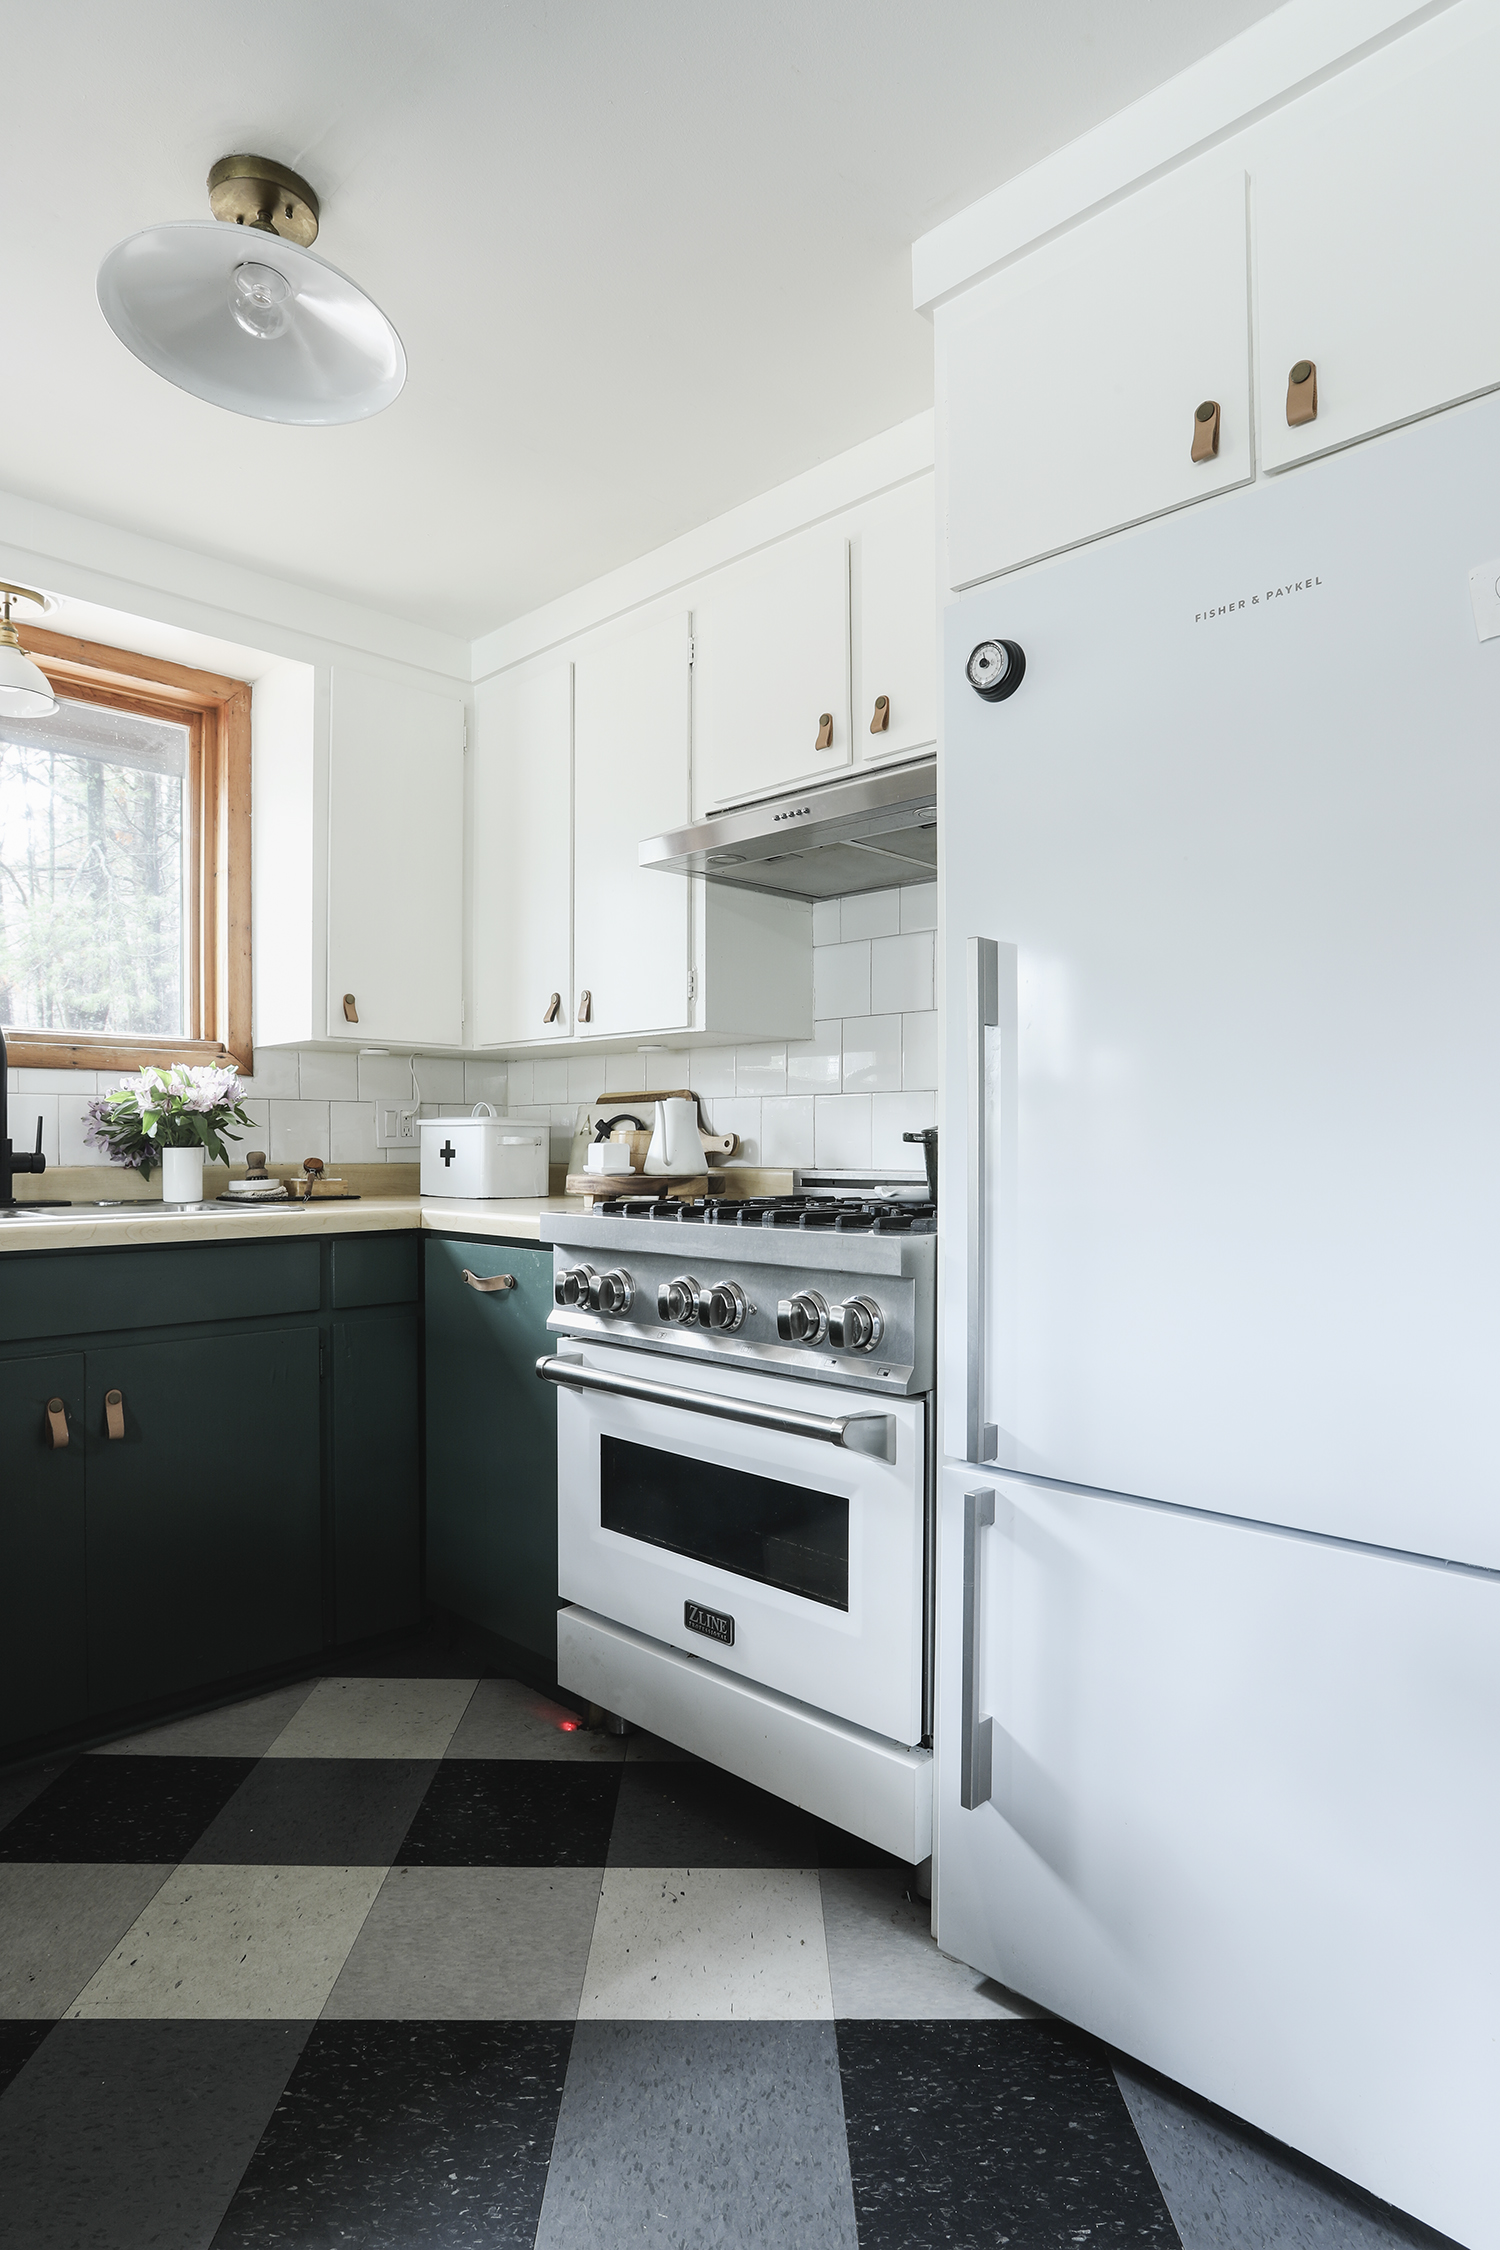
Painting the cabinets two-tones was generally pretty straight forward. I quickly sanded and then painted the cabinets with a satin latex paint. The hinges were dated, and it was hard to find affordable replacements with a more modern hinge, so I decided to just paint them – that way they would blend with the cabinets and fade to the background. I regret not doing a better job sanding the cabinets down and following the more intensive process that I did for our cabinets at home, but really it came down to time. Our cabinets are already starting to chip a little, and I’m sure in the future I will be touching them up. All good for cabin use though, and I’m not too worried about my git-r-done paint job.
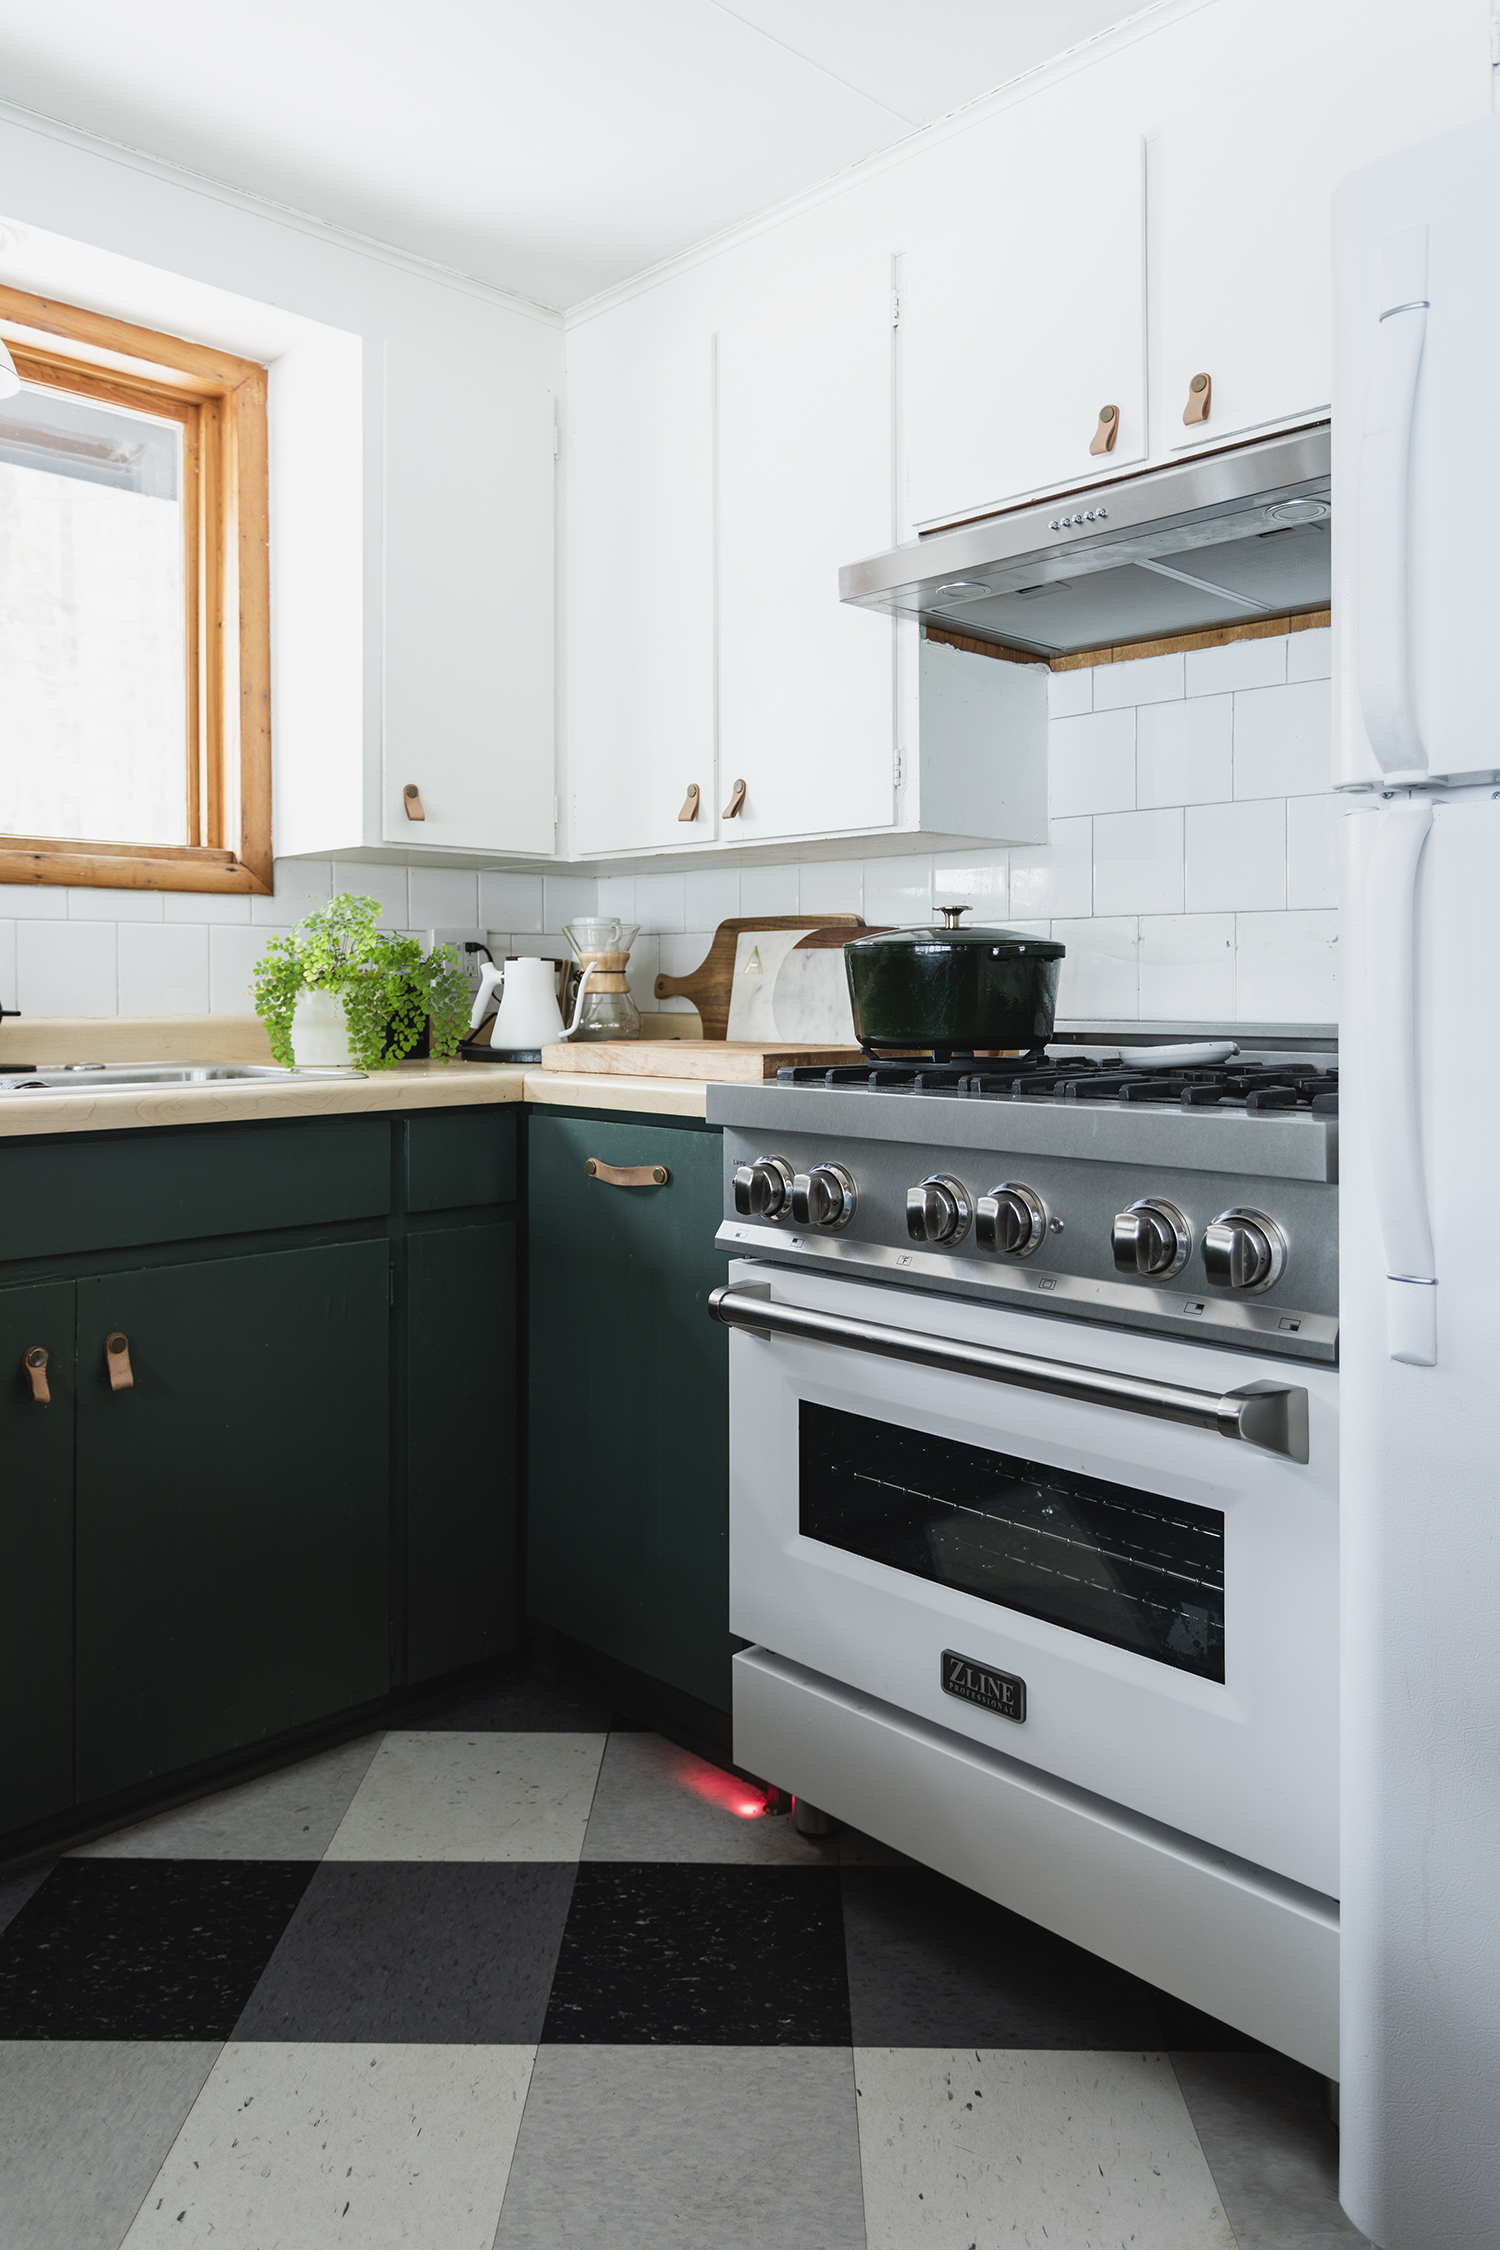
The lower cabinets were a combination of two paint colors – Once I settled on a favorite hue, I had the paint color matched at Ace. I’ll add the color recipe here once I get back to the cabin to review my paint cans :)
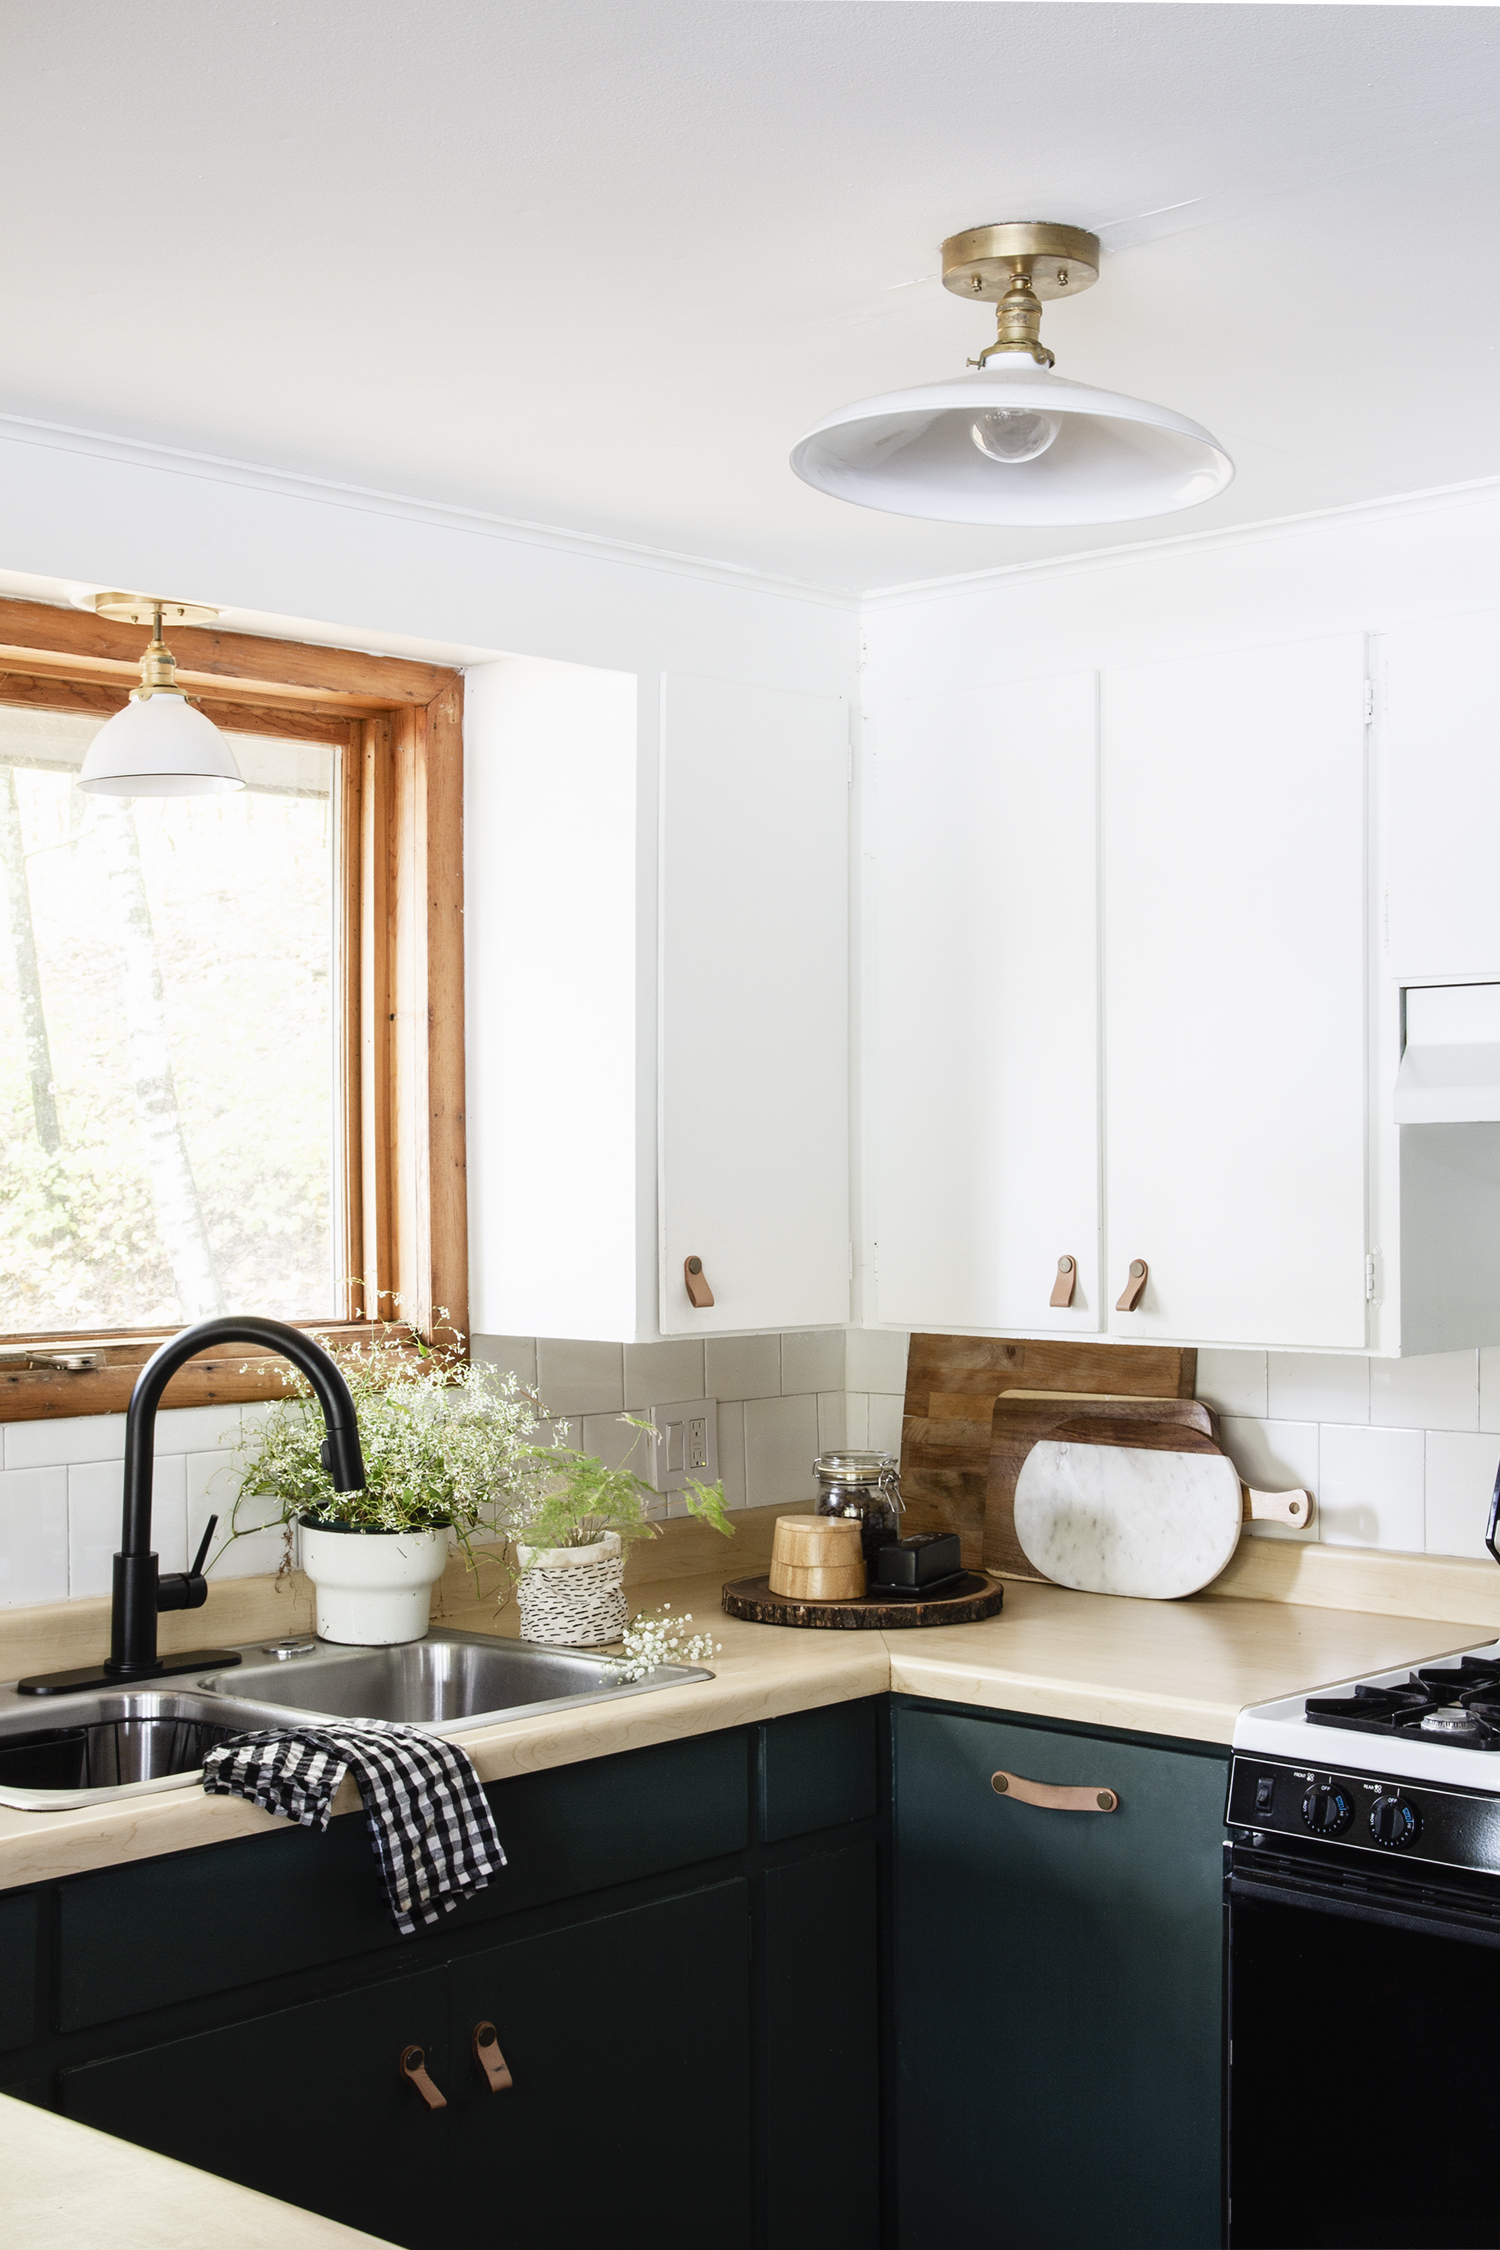
The upper cabinets are satin ‘Linen’ by Clark & Kensington
Removing Upper Cabinets
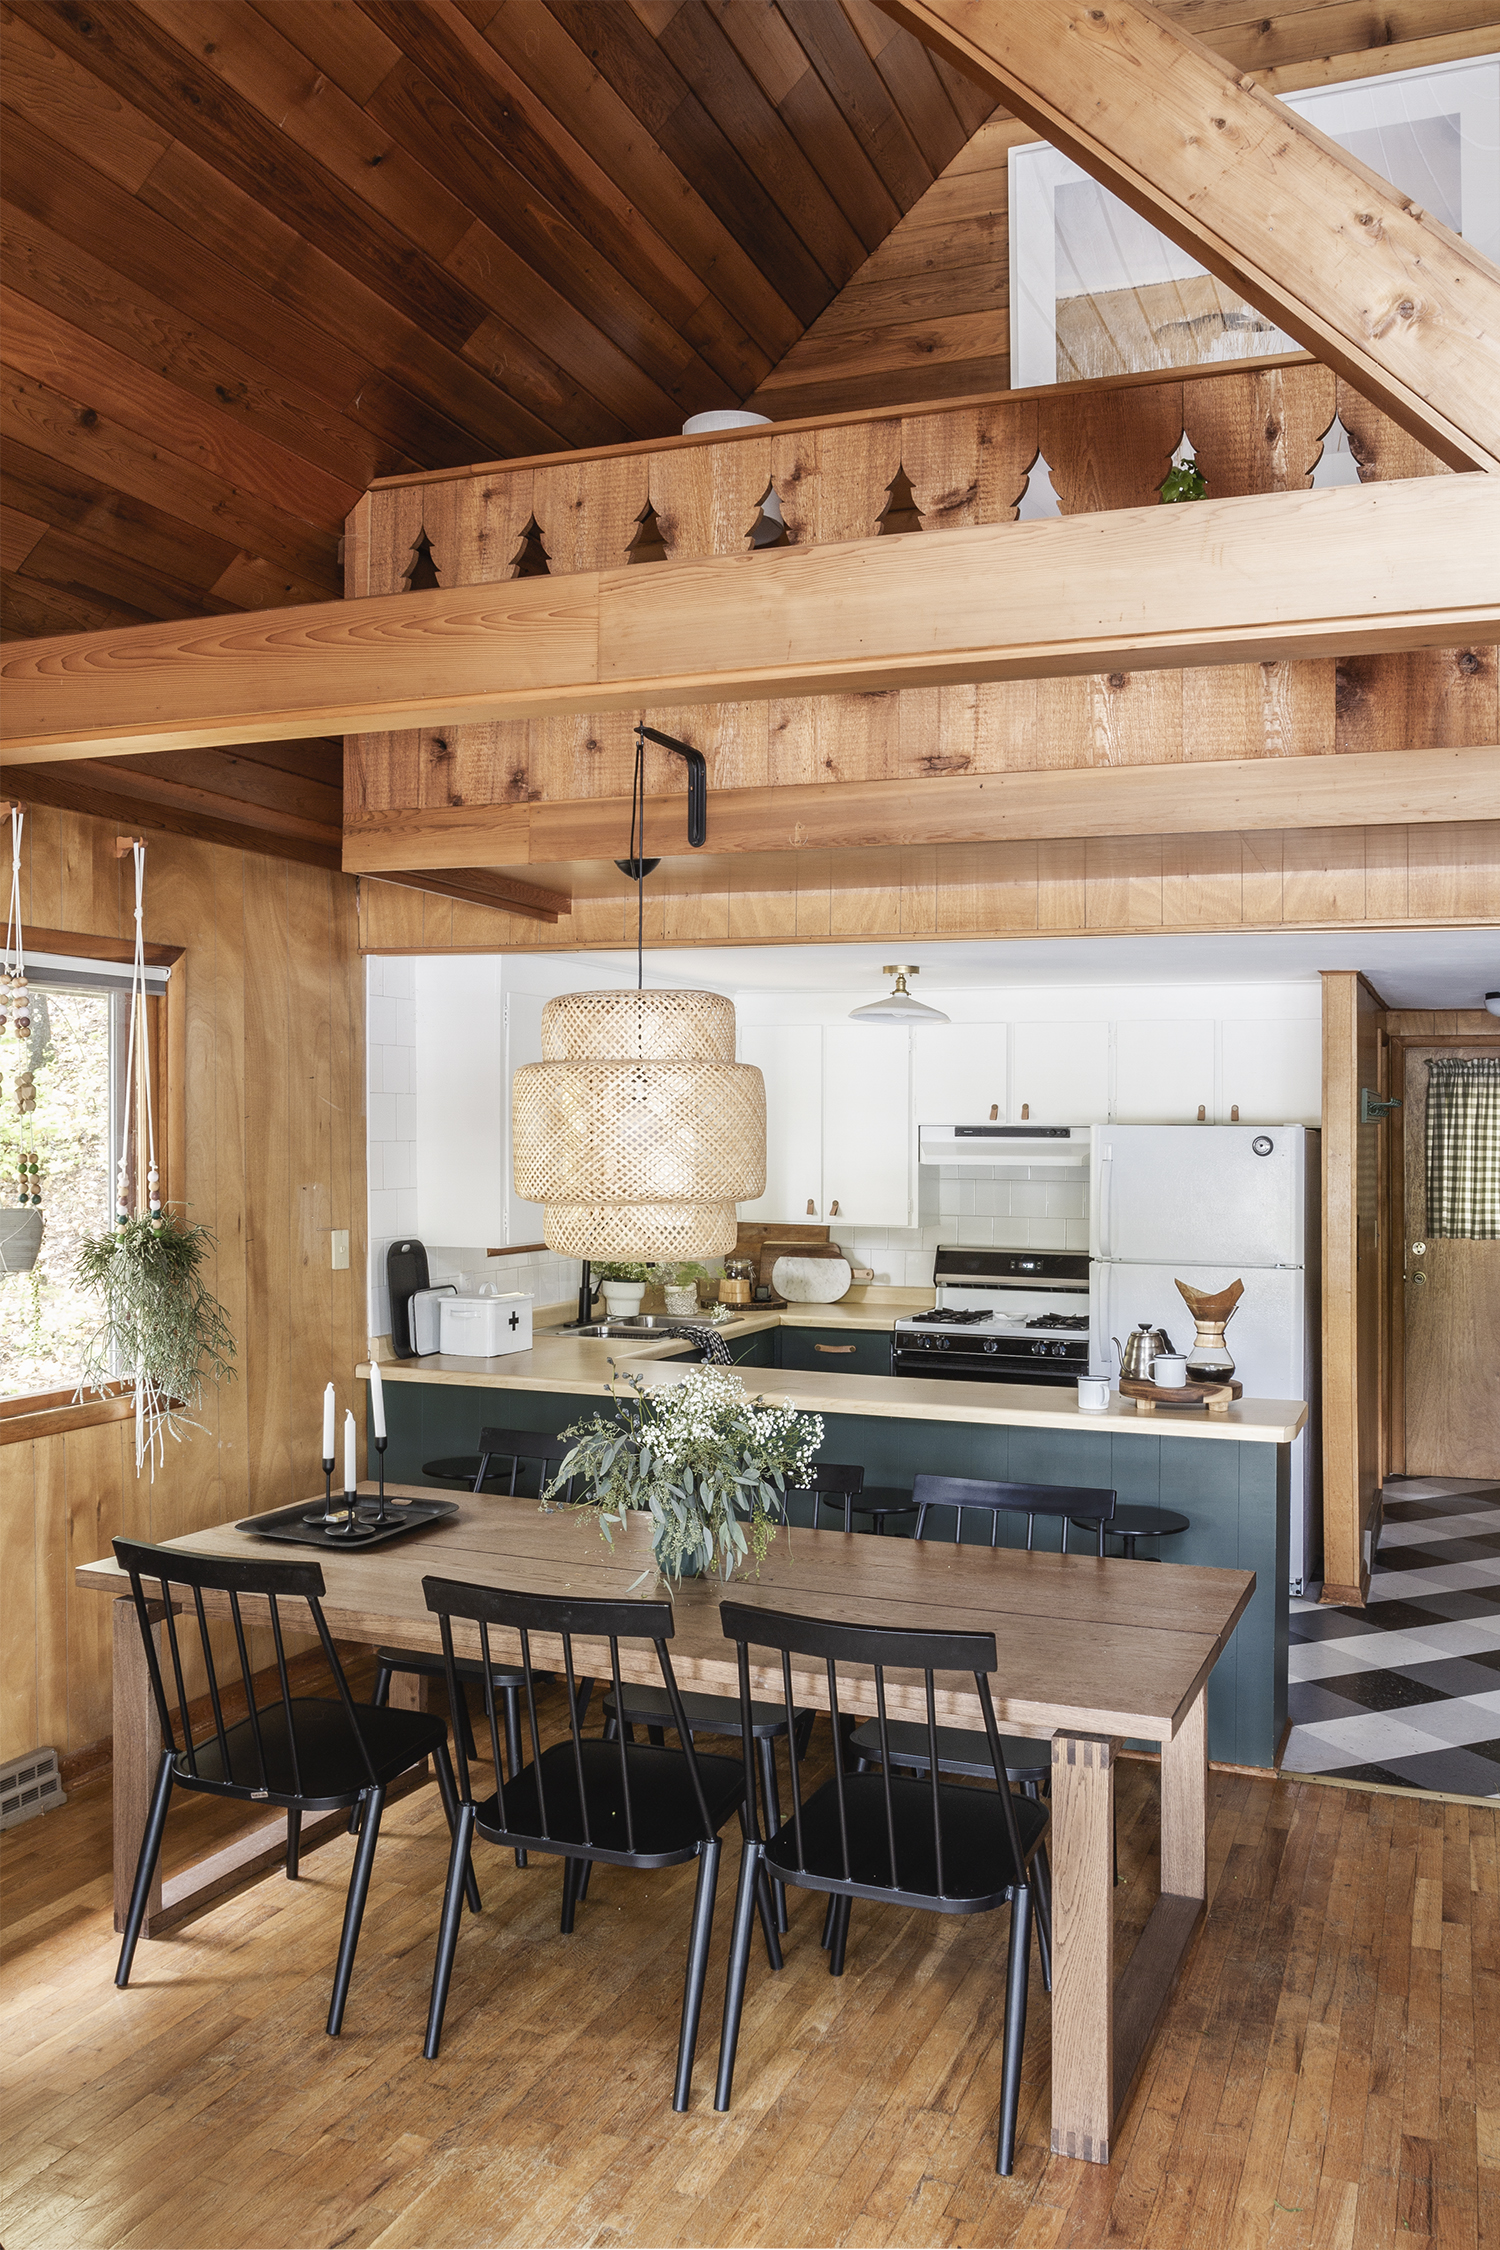
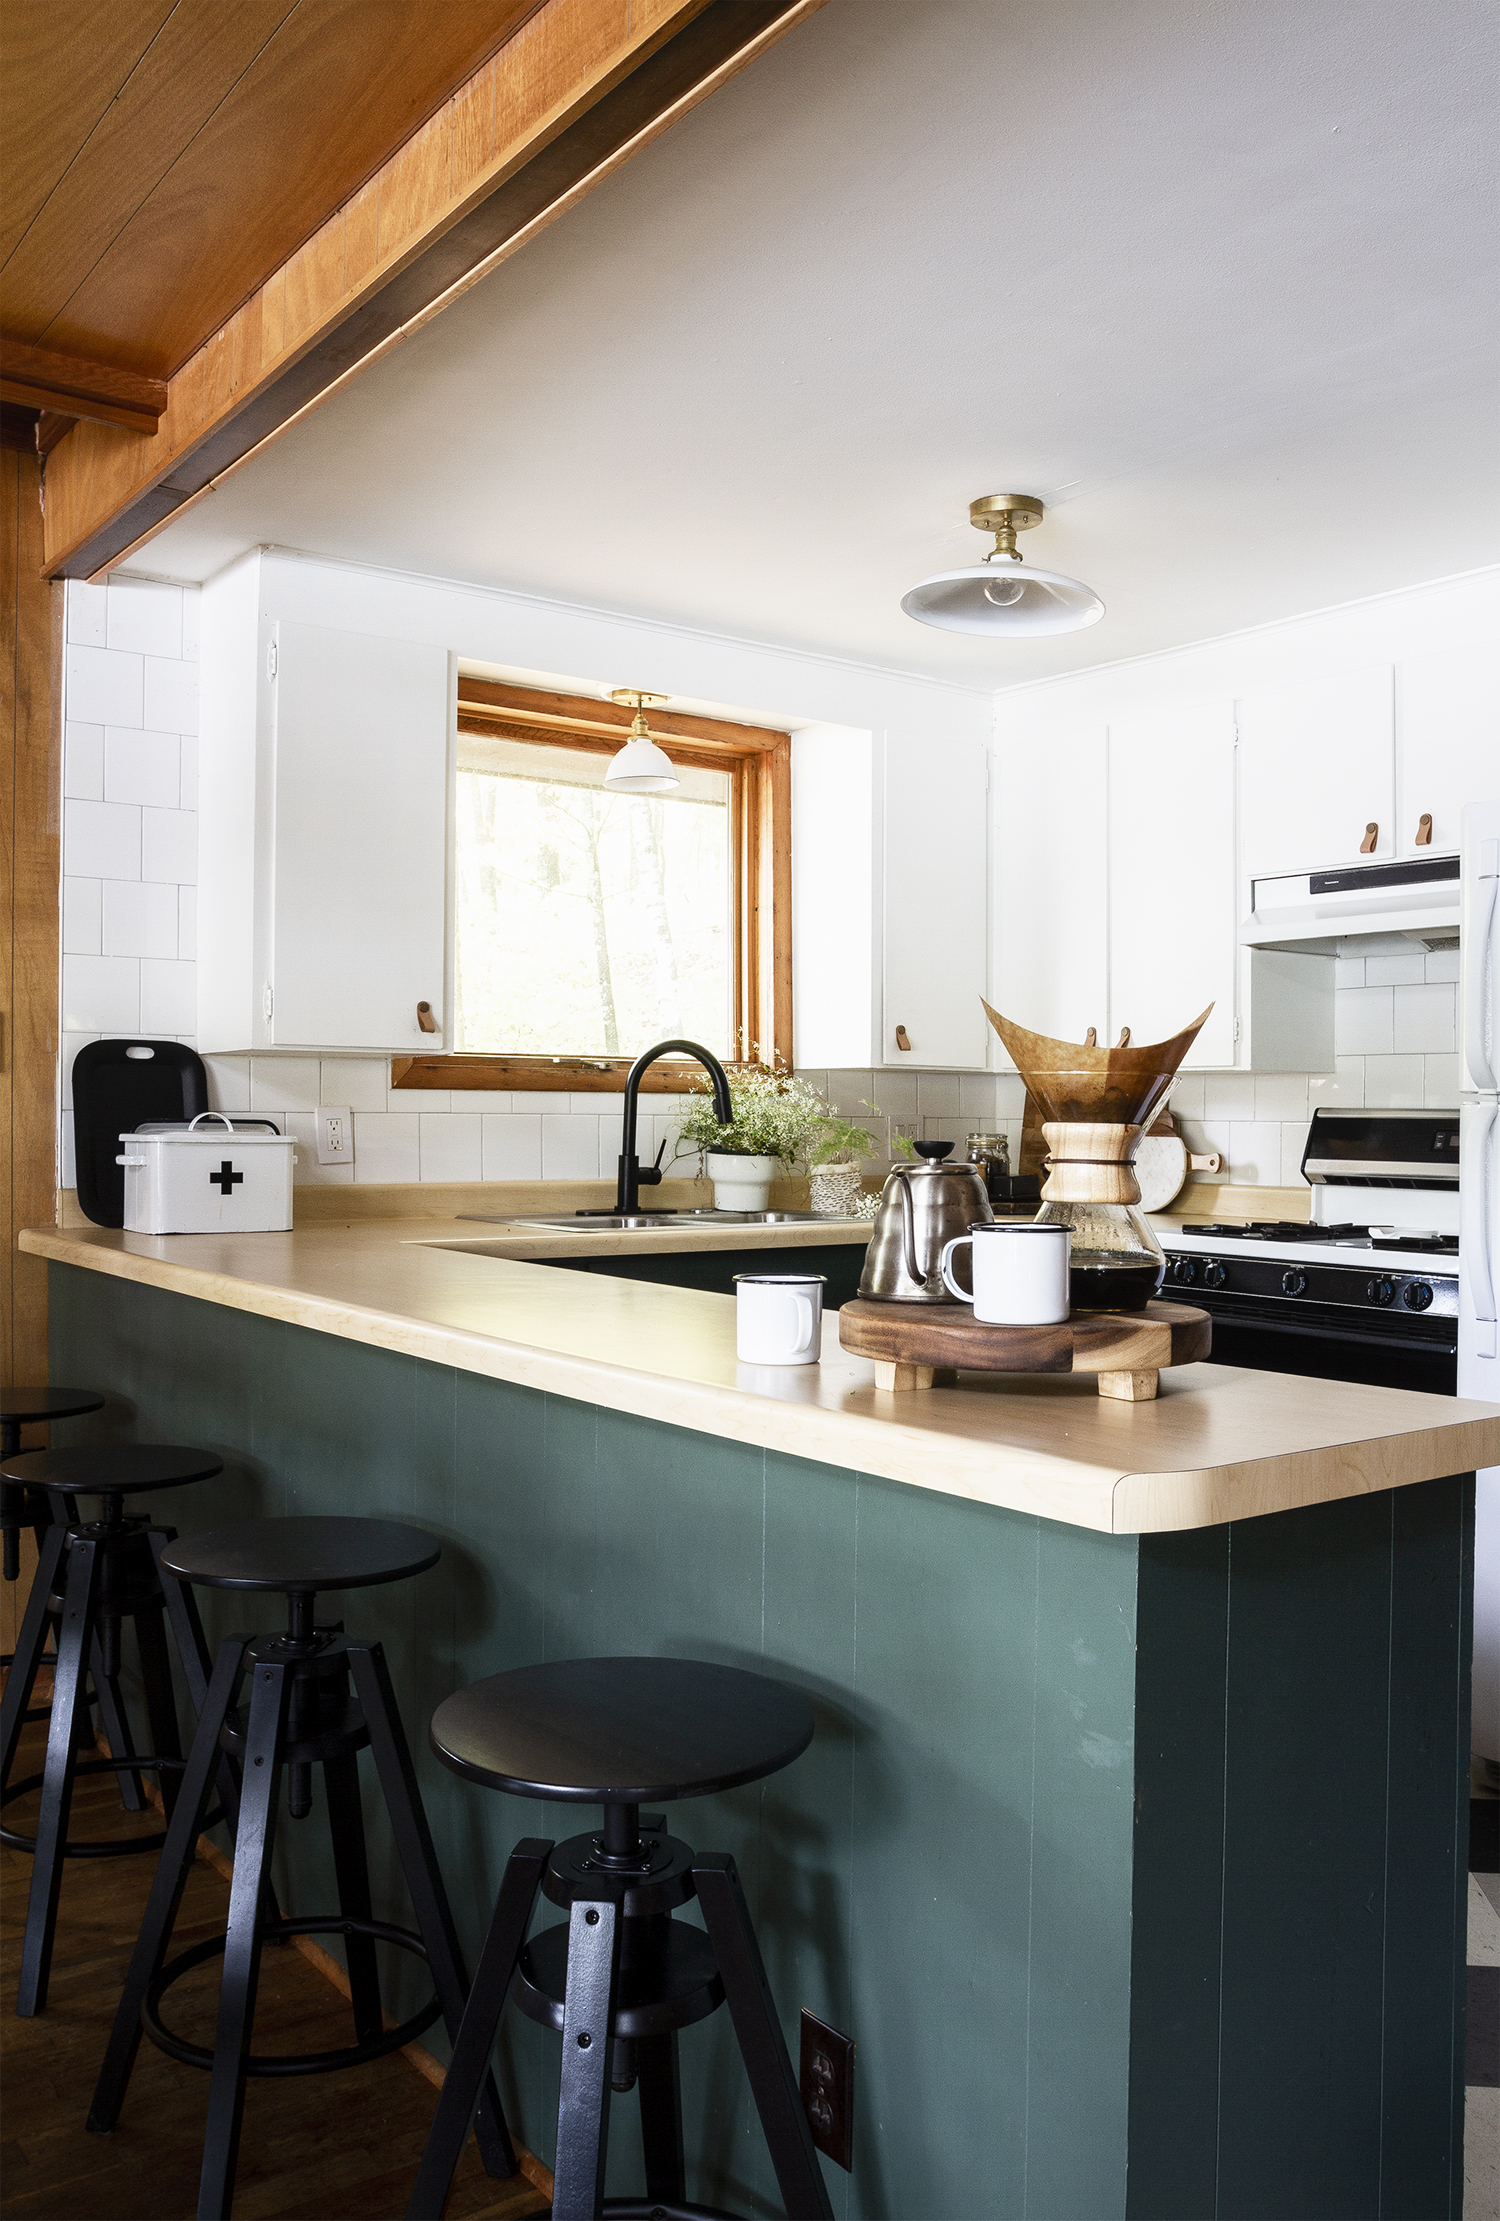
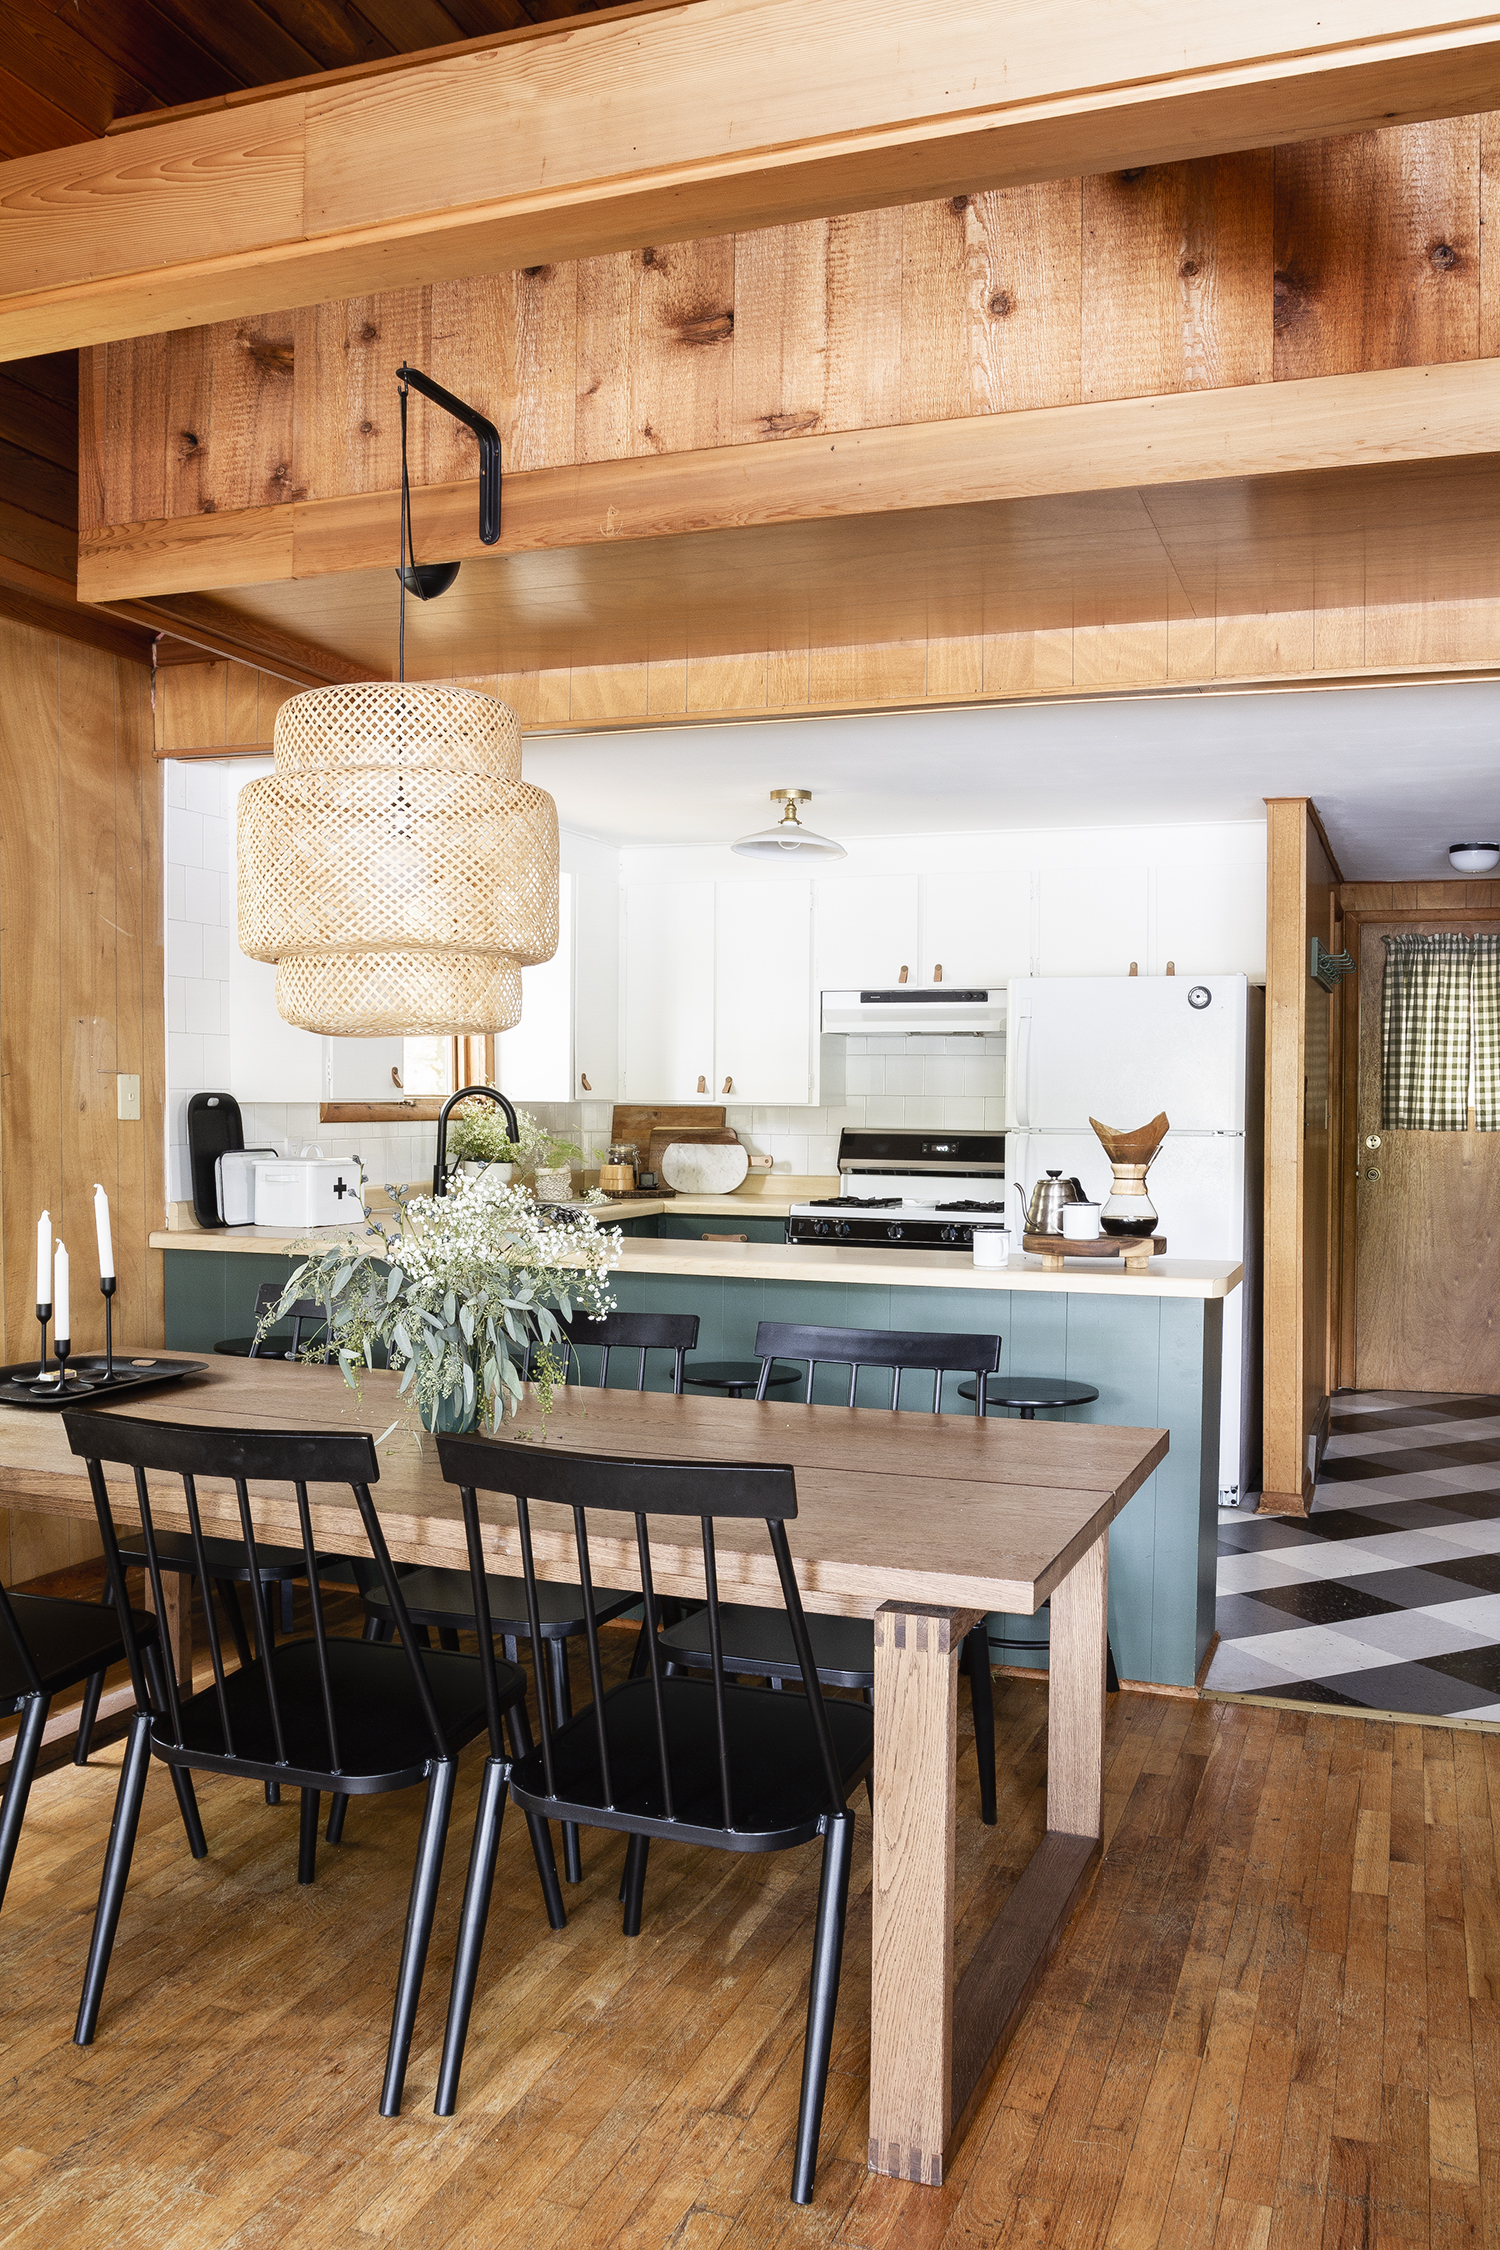
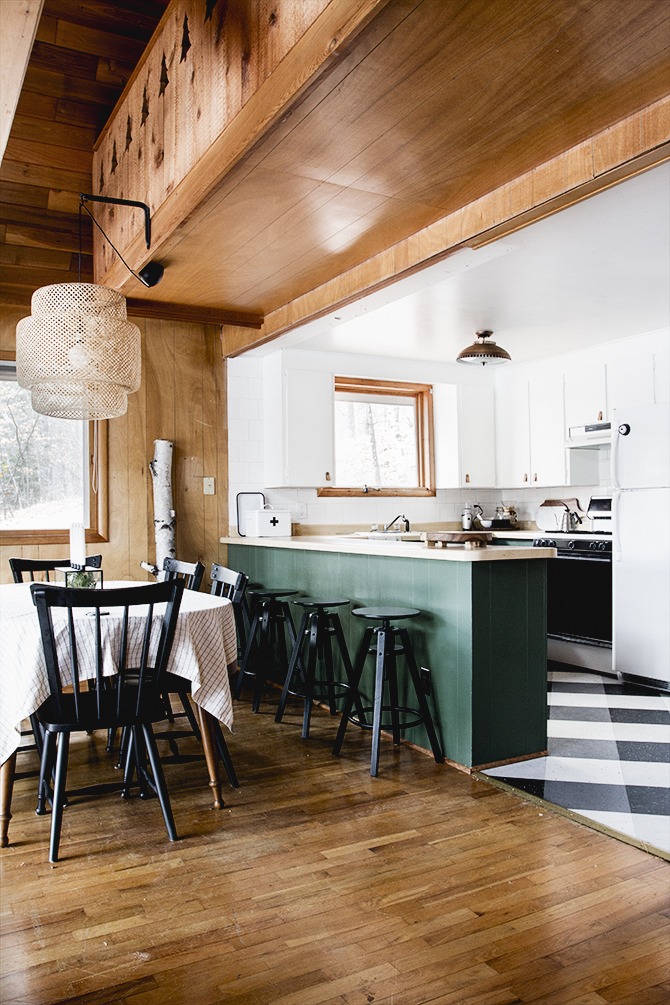
One of the biggest changes we made to the space was removing the upper cabinets that hung from the ceiling over the peninsula. The cabinets added additional storage in a small space, however they completely blocked the view of the lake from the kitchen, and vice versa. We attempted a few weeks in the cabin leaving the cabinets hanging and empty just in case the value of added storage outweighed the view. We wanted to be absolutely sure we wouldn’t regret eliminating the extra space. We never missed the storage the cabinets provided, so down they went. My mom and I removed them ourselves last summer, and it instantly changed the entire feel of the space. The ceiling needed to be patched where the cabinets had been hung, but other than that it was a painless process. We saved the cabinets and reused them in the basement for storage.

Reworking The Cabinets
As we continued to use the space and make plans for efficiency two things became very clear. Not having a dishwasher does totally suck, and having only two small drawers is stupid.
The Dishwasher
I am usually pretty good at figuring out solutions to problems or needs in spaces, but finding a spot in this tiny kitchen where we could fit a dishwasher had me stumped. The peninsula was not deep enough to host a dishwasher, and there was not enough space below the sink either. I was open to reconfiguring the cabinets if we could make it work but we had no room to push the kitchen out in any direction. I researched everything from drawer-style-dishwashers, commercial dishwashers, and even RV dishwashers, and was coming up empty on solutions. I was aware that an 18″ dishwasher could fit next to the stove, but I did not want to settle for one because I didn’t like the idea of a wall full of appliances as this is the same wall that makes its home to the range and refrigerator. Then it hit me to search for an 18″ panel dishwasher which would allow us to hide the dishwasher behind a custom panel – problem solved.
We choose a Bosch 18″ panel dishwasher because of it’s storage potential. The interior of the dishwasher has been thoughtfully organized, there’s even a narrow upper rack for silverware. The middle shelf is modular and can raise and lower based on our needs. We’ve been really happy with it – it seems like it fits nearly as many dishes as our standard size dishwasher at home does.
Like I mentioned above, the best part of this dishwasher is that I could fit a custom panel to it. Normally this would be used in a much nicer kitchen to hide the dishwasher behind a cabinet panel and make everything look real luxe and built-in. In kind of makes me lolz that we hid the dishwasher behind a painted piece of 1/2″ plywood painted green to match the other cabinet fronts – so classy.
Can I just say that I FUCKING LOVE this hidden dishwasher so much! It blends into the cabinets perfectly, and both Jeff and I get way too excited to show it off.
Of course installing the dishwasher was much more complicated. Thank god for SketchUp. I was able to put all of the dimensions of the current kitchen cabinets into a plan. Having the SketchUp rendering, I was then able to rework the cabinet every which way I could think. Basically SketchUp allowed me the convenience of digitally pre-building the cabinet, and then when it came time to building the base frame, I knew all of the exact dimensions and had a solid plan of how to go about the task.
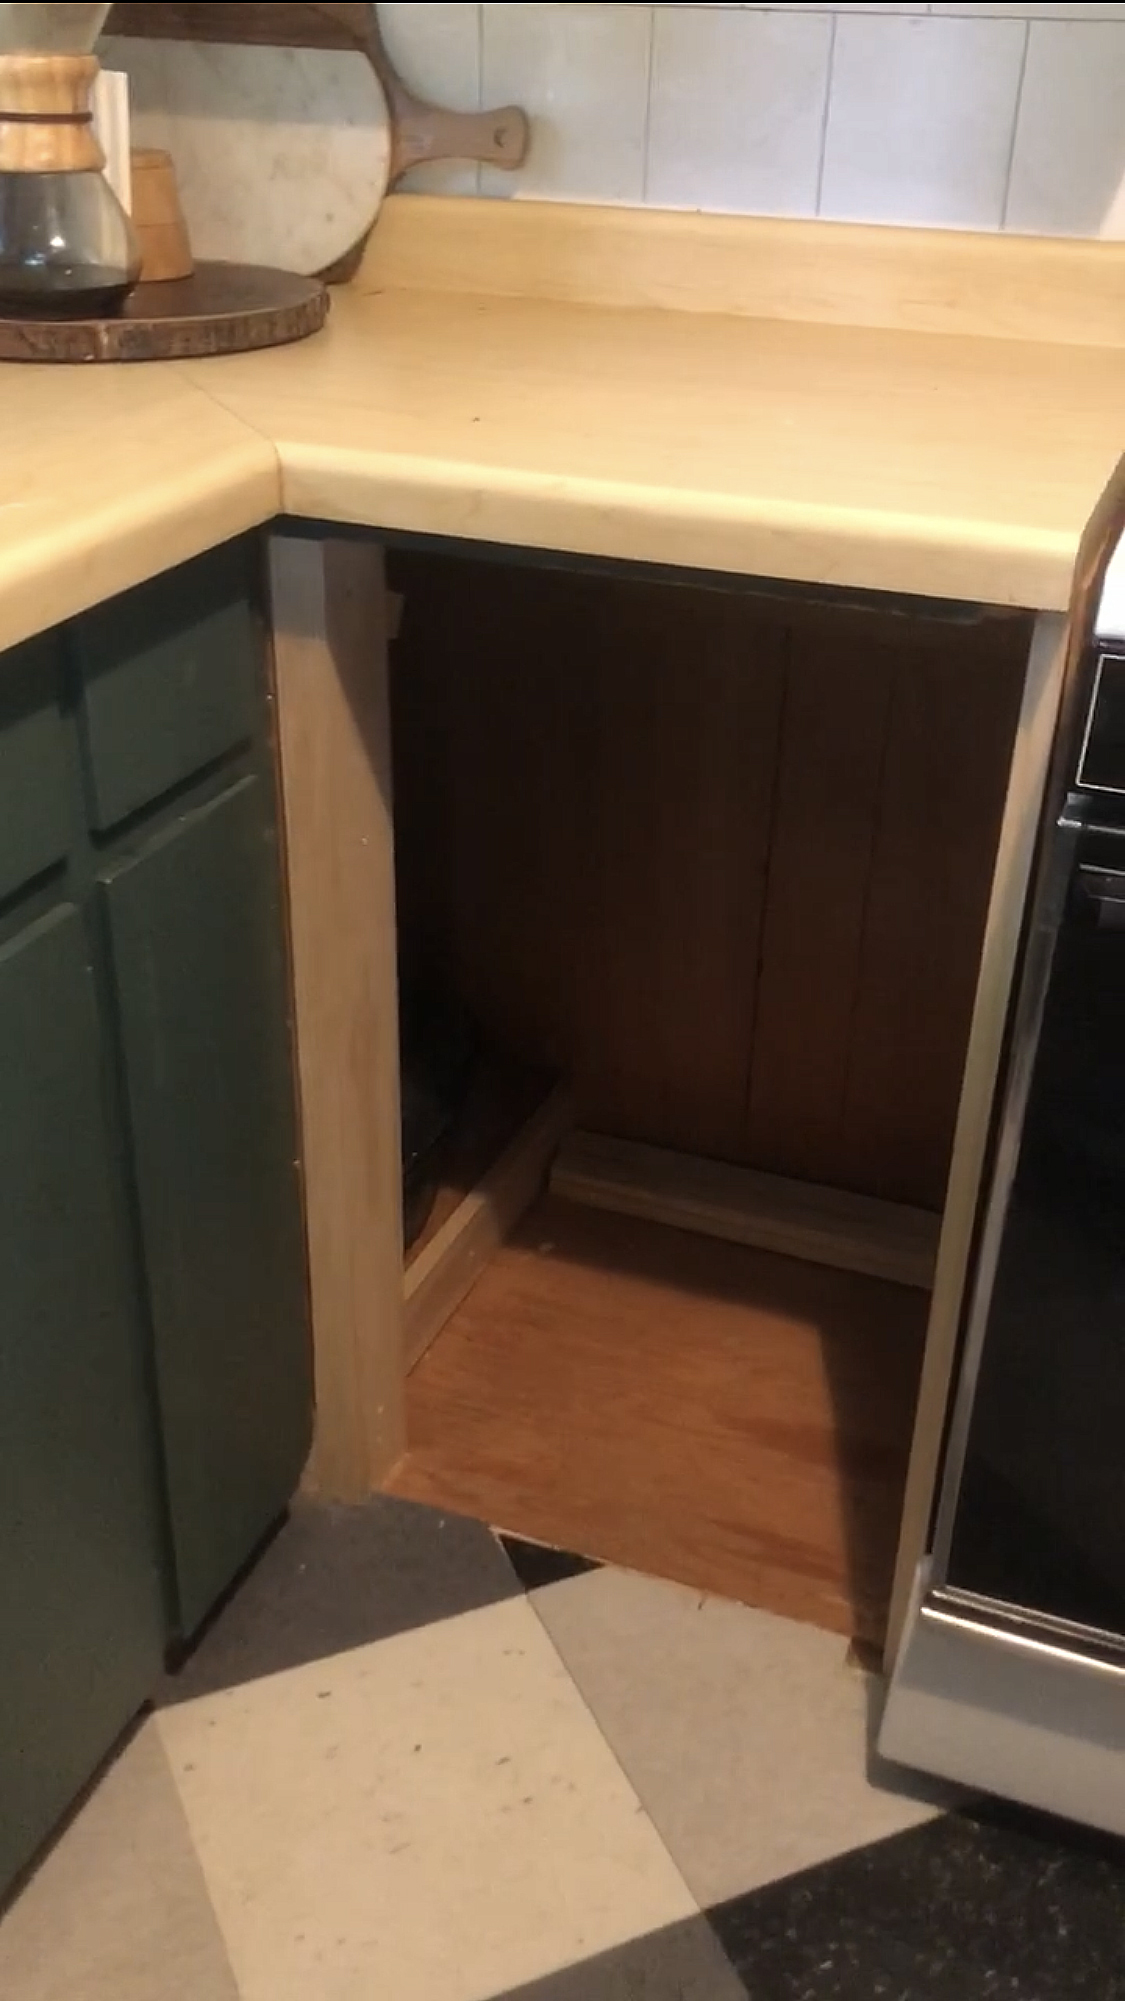
Building the cabinet frame was quite the job! Because of the way the cabinets were built, I had to work from the inside out leaving the countertop on while assembling the box of the cabinet from below. Working from inside a cabinet is not the easiest of chores, and I was relieved to have that part of the project behind me. We hired out a plumber and electrician to run the proper lines for the dishwasher. If this was a straightforward dishwasher installation I probably would’ve attempted it myself, but this was more complicated than a regular install. Our house has some weird old plumbing that I wasn’t familiar with and the space was so tight that I didn’t feel like I’d have adequate room to maneuver. I was glad we spent the money to have a pro take this part on, as the plumber constantly swore about European appliances whilst taking many a smoke break.

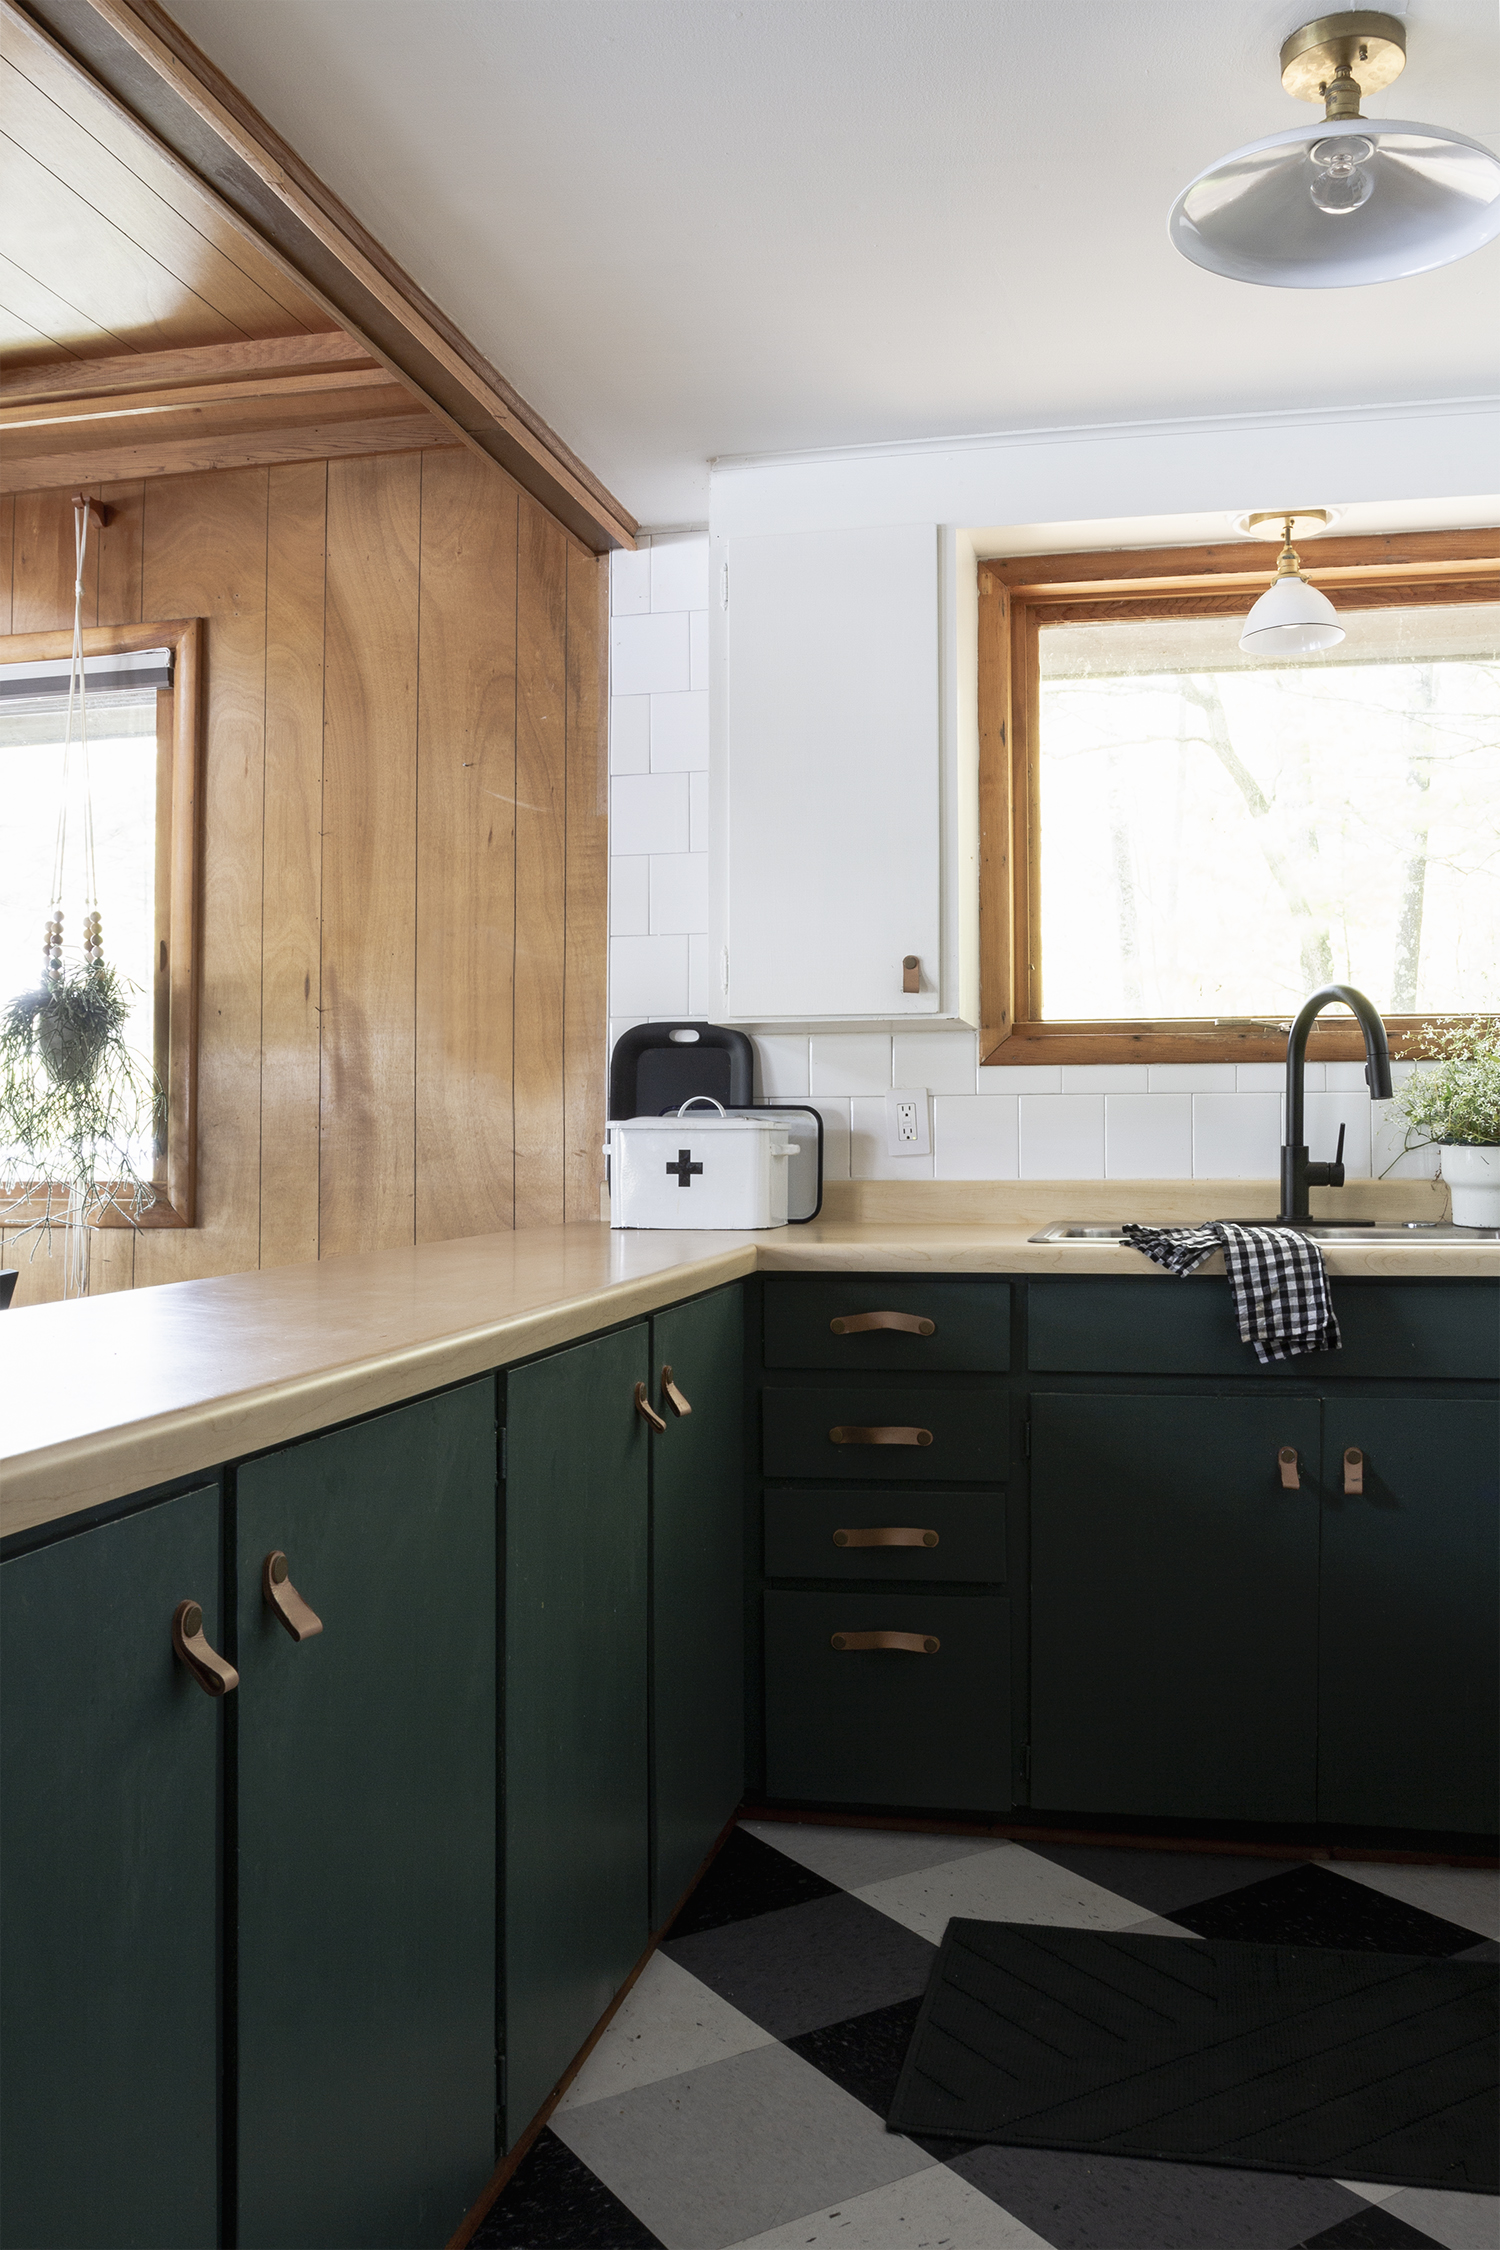
Building Drawers
When we added the dishwasher we lost one of only two kitchen drawers. Of course we needed drawers for flatware and spoons and other sorts of cooking utensils, and just one would not do! There was a kitchen cabinet and drawer next to the kitchen sink. Using the existing drawer as a template, I again made a plan and SketchUp and then executed the task of adding 3 more drawers to the space digitally before attempting it IRL.
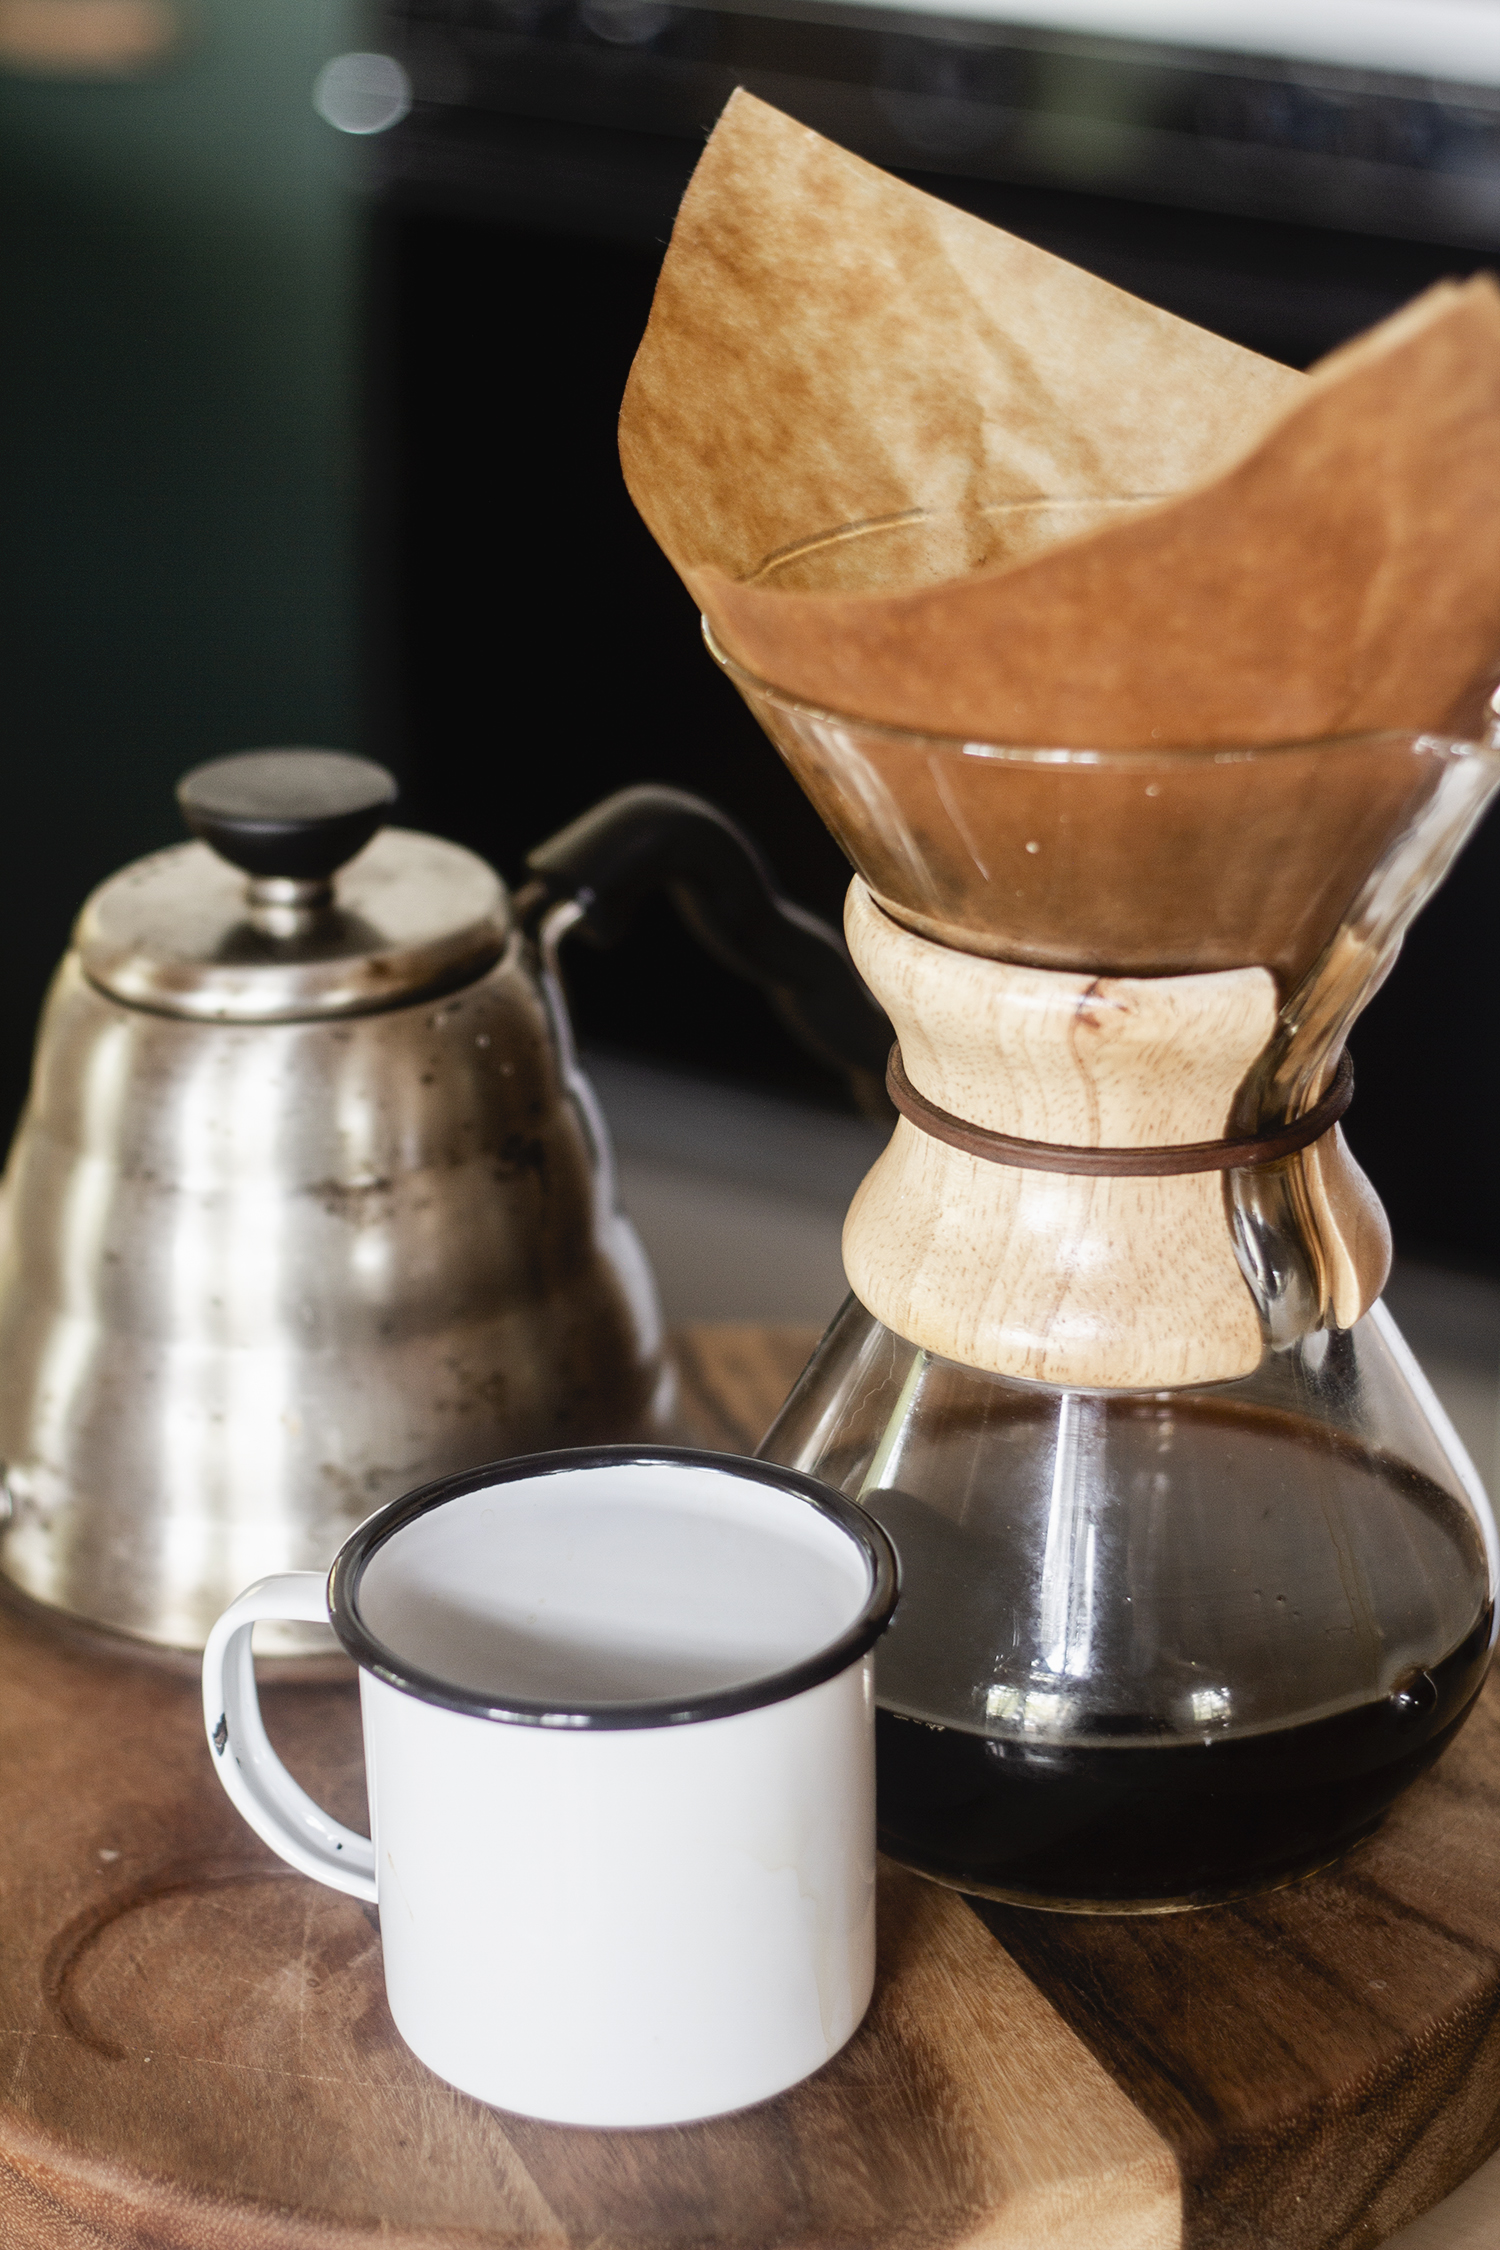
Now we have drawers for spoons, utensils, flatware, knives, as well as dishtowels, parchment paper and tin foil!

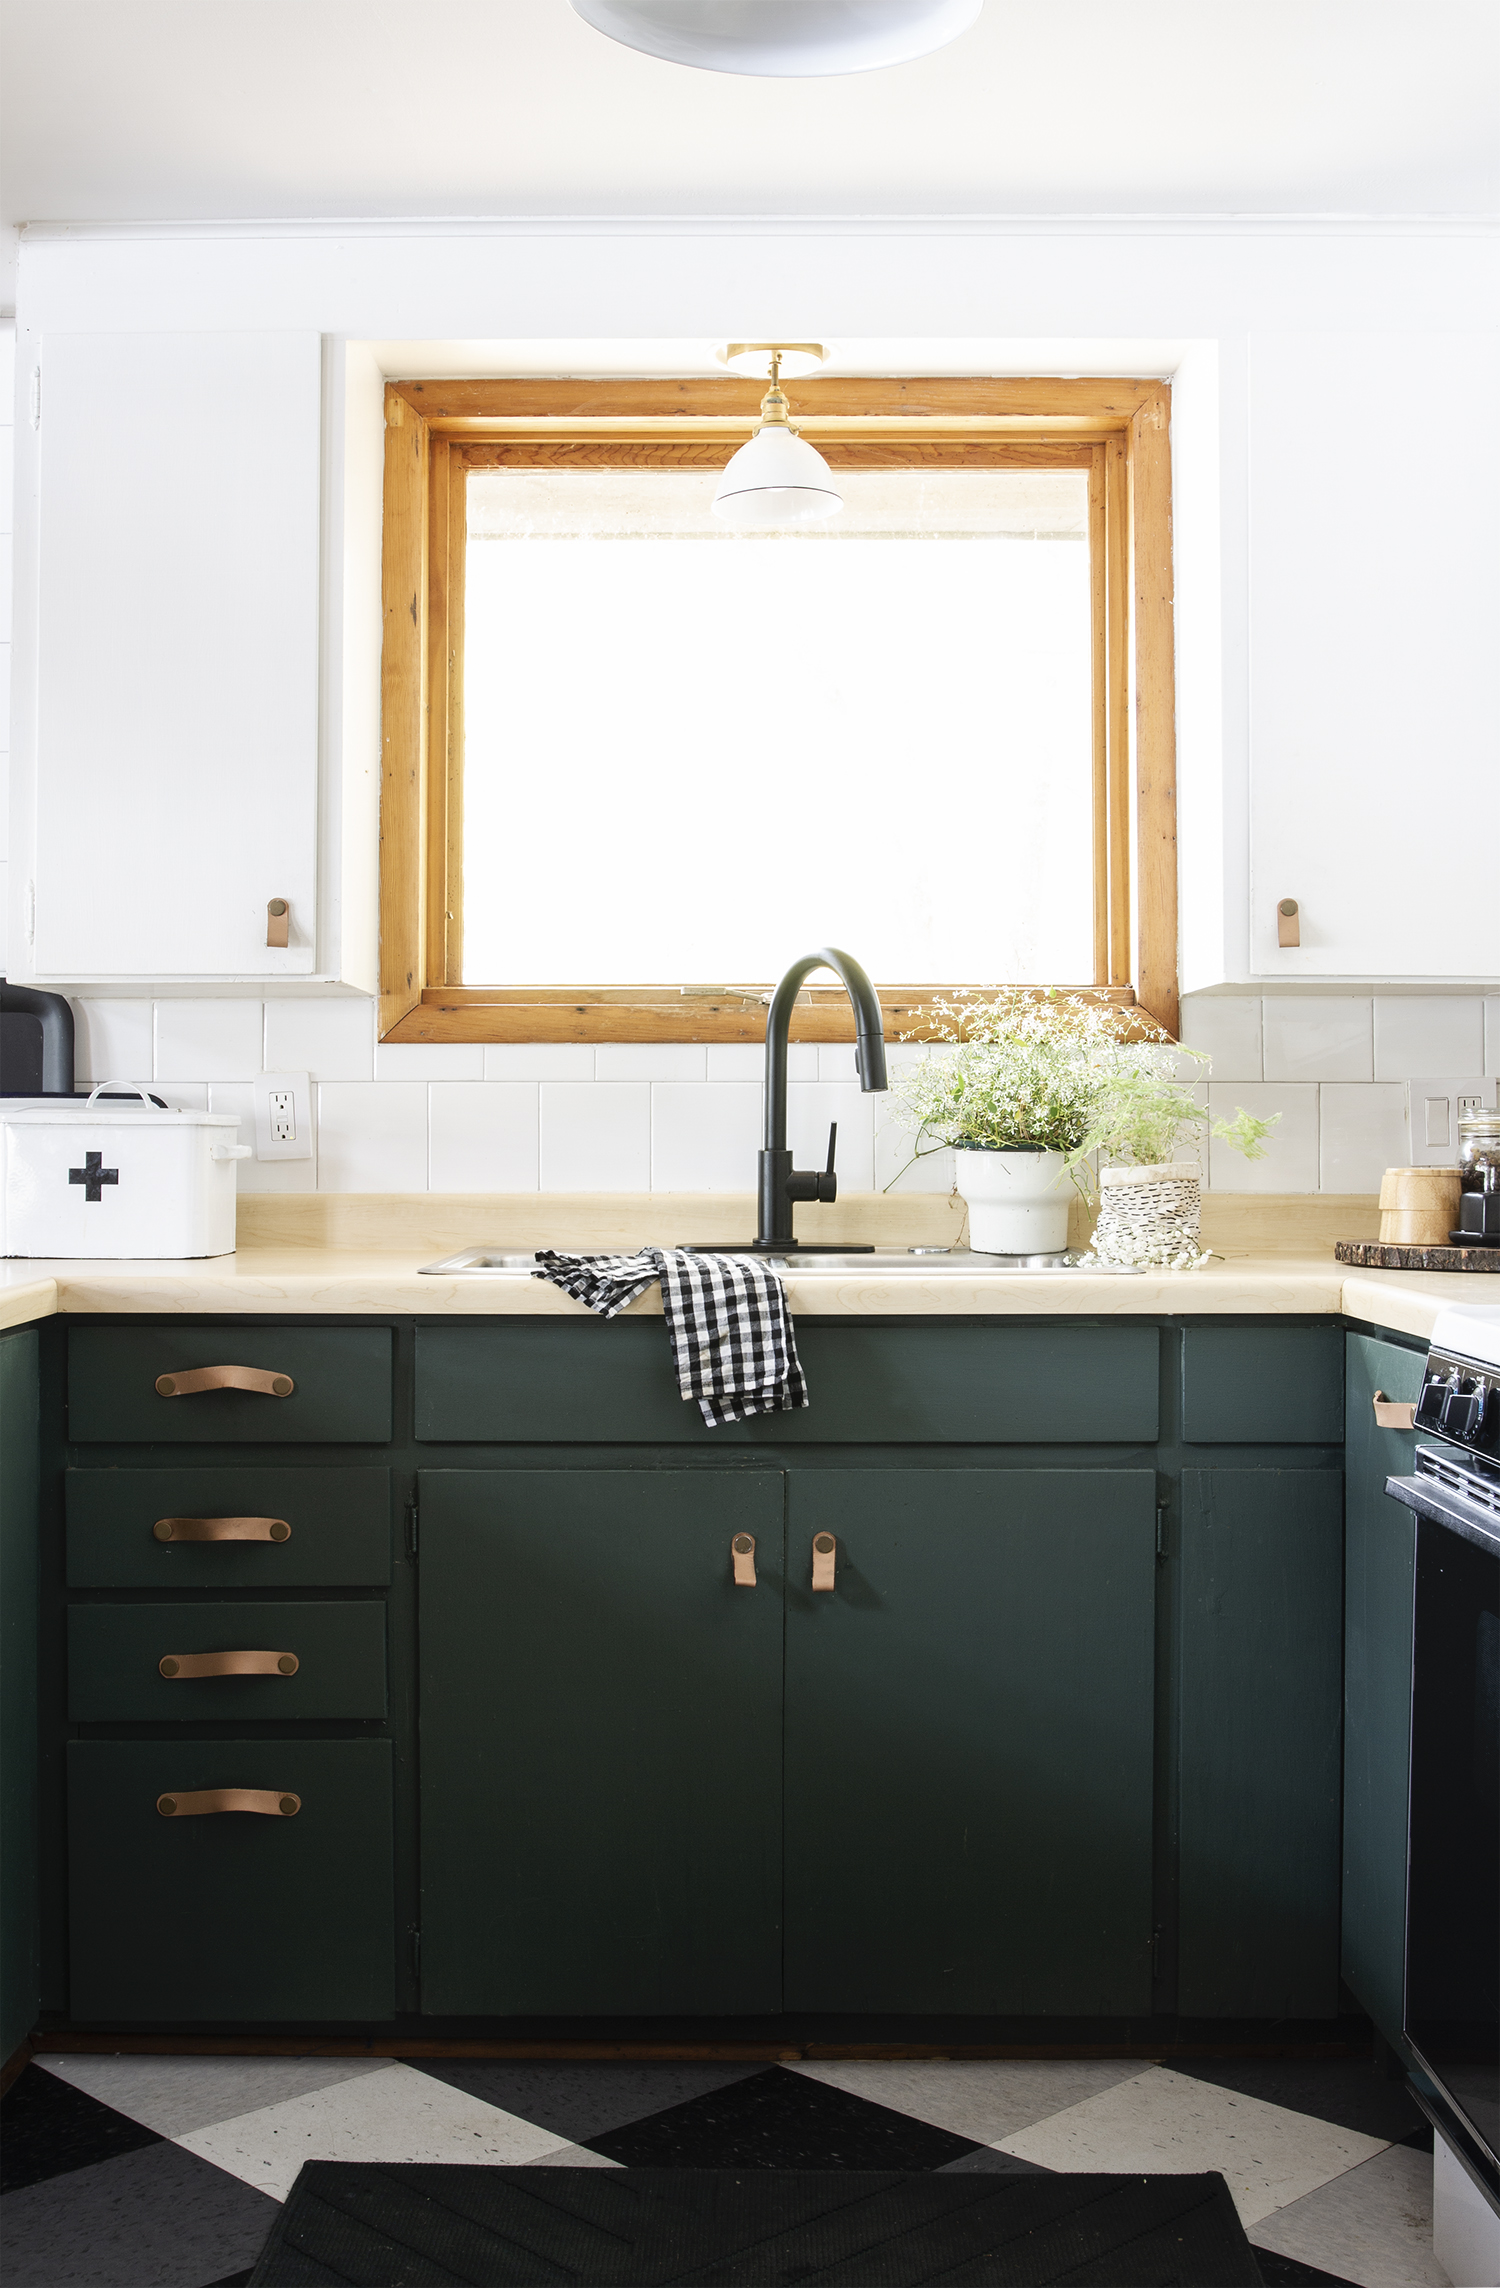
Making Light Fixtures
If you read the blog, you probably already know that making light fixtures is one of my favorite hobbies. For these two fixtures I incorporated some white enamel metal shades and brass fittings.

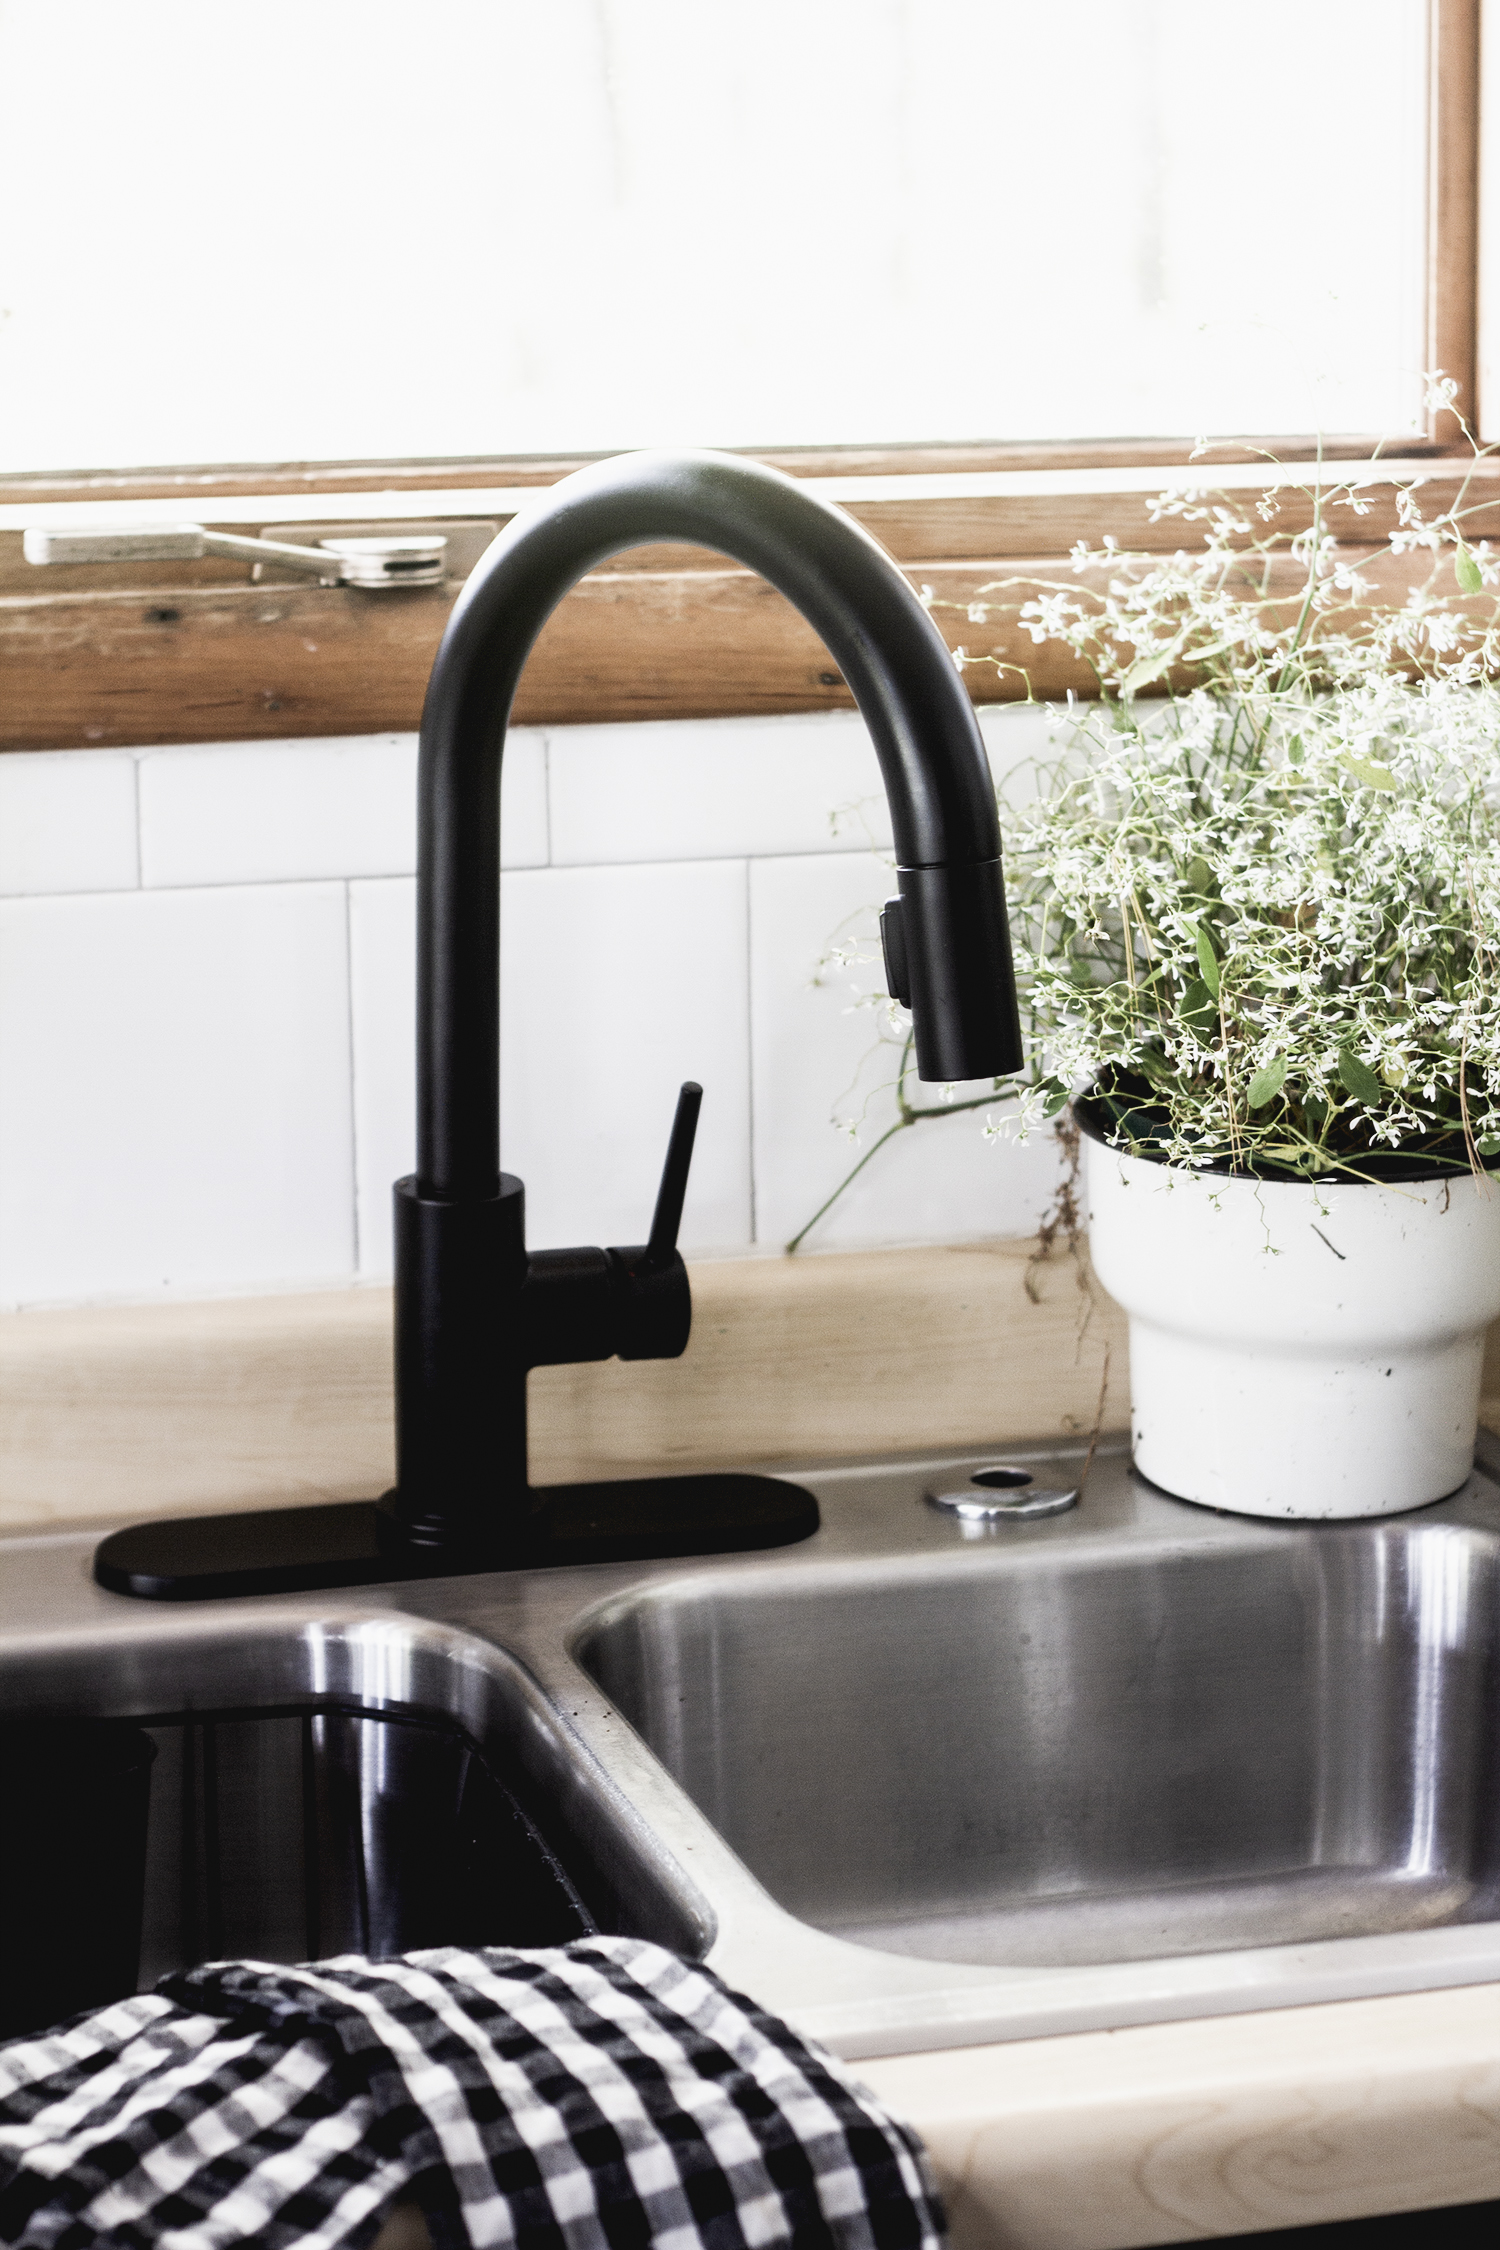
Replacing the Faucet
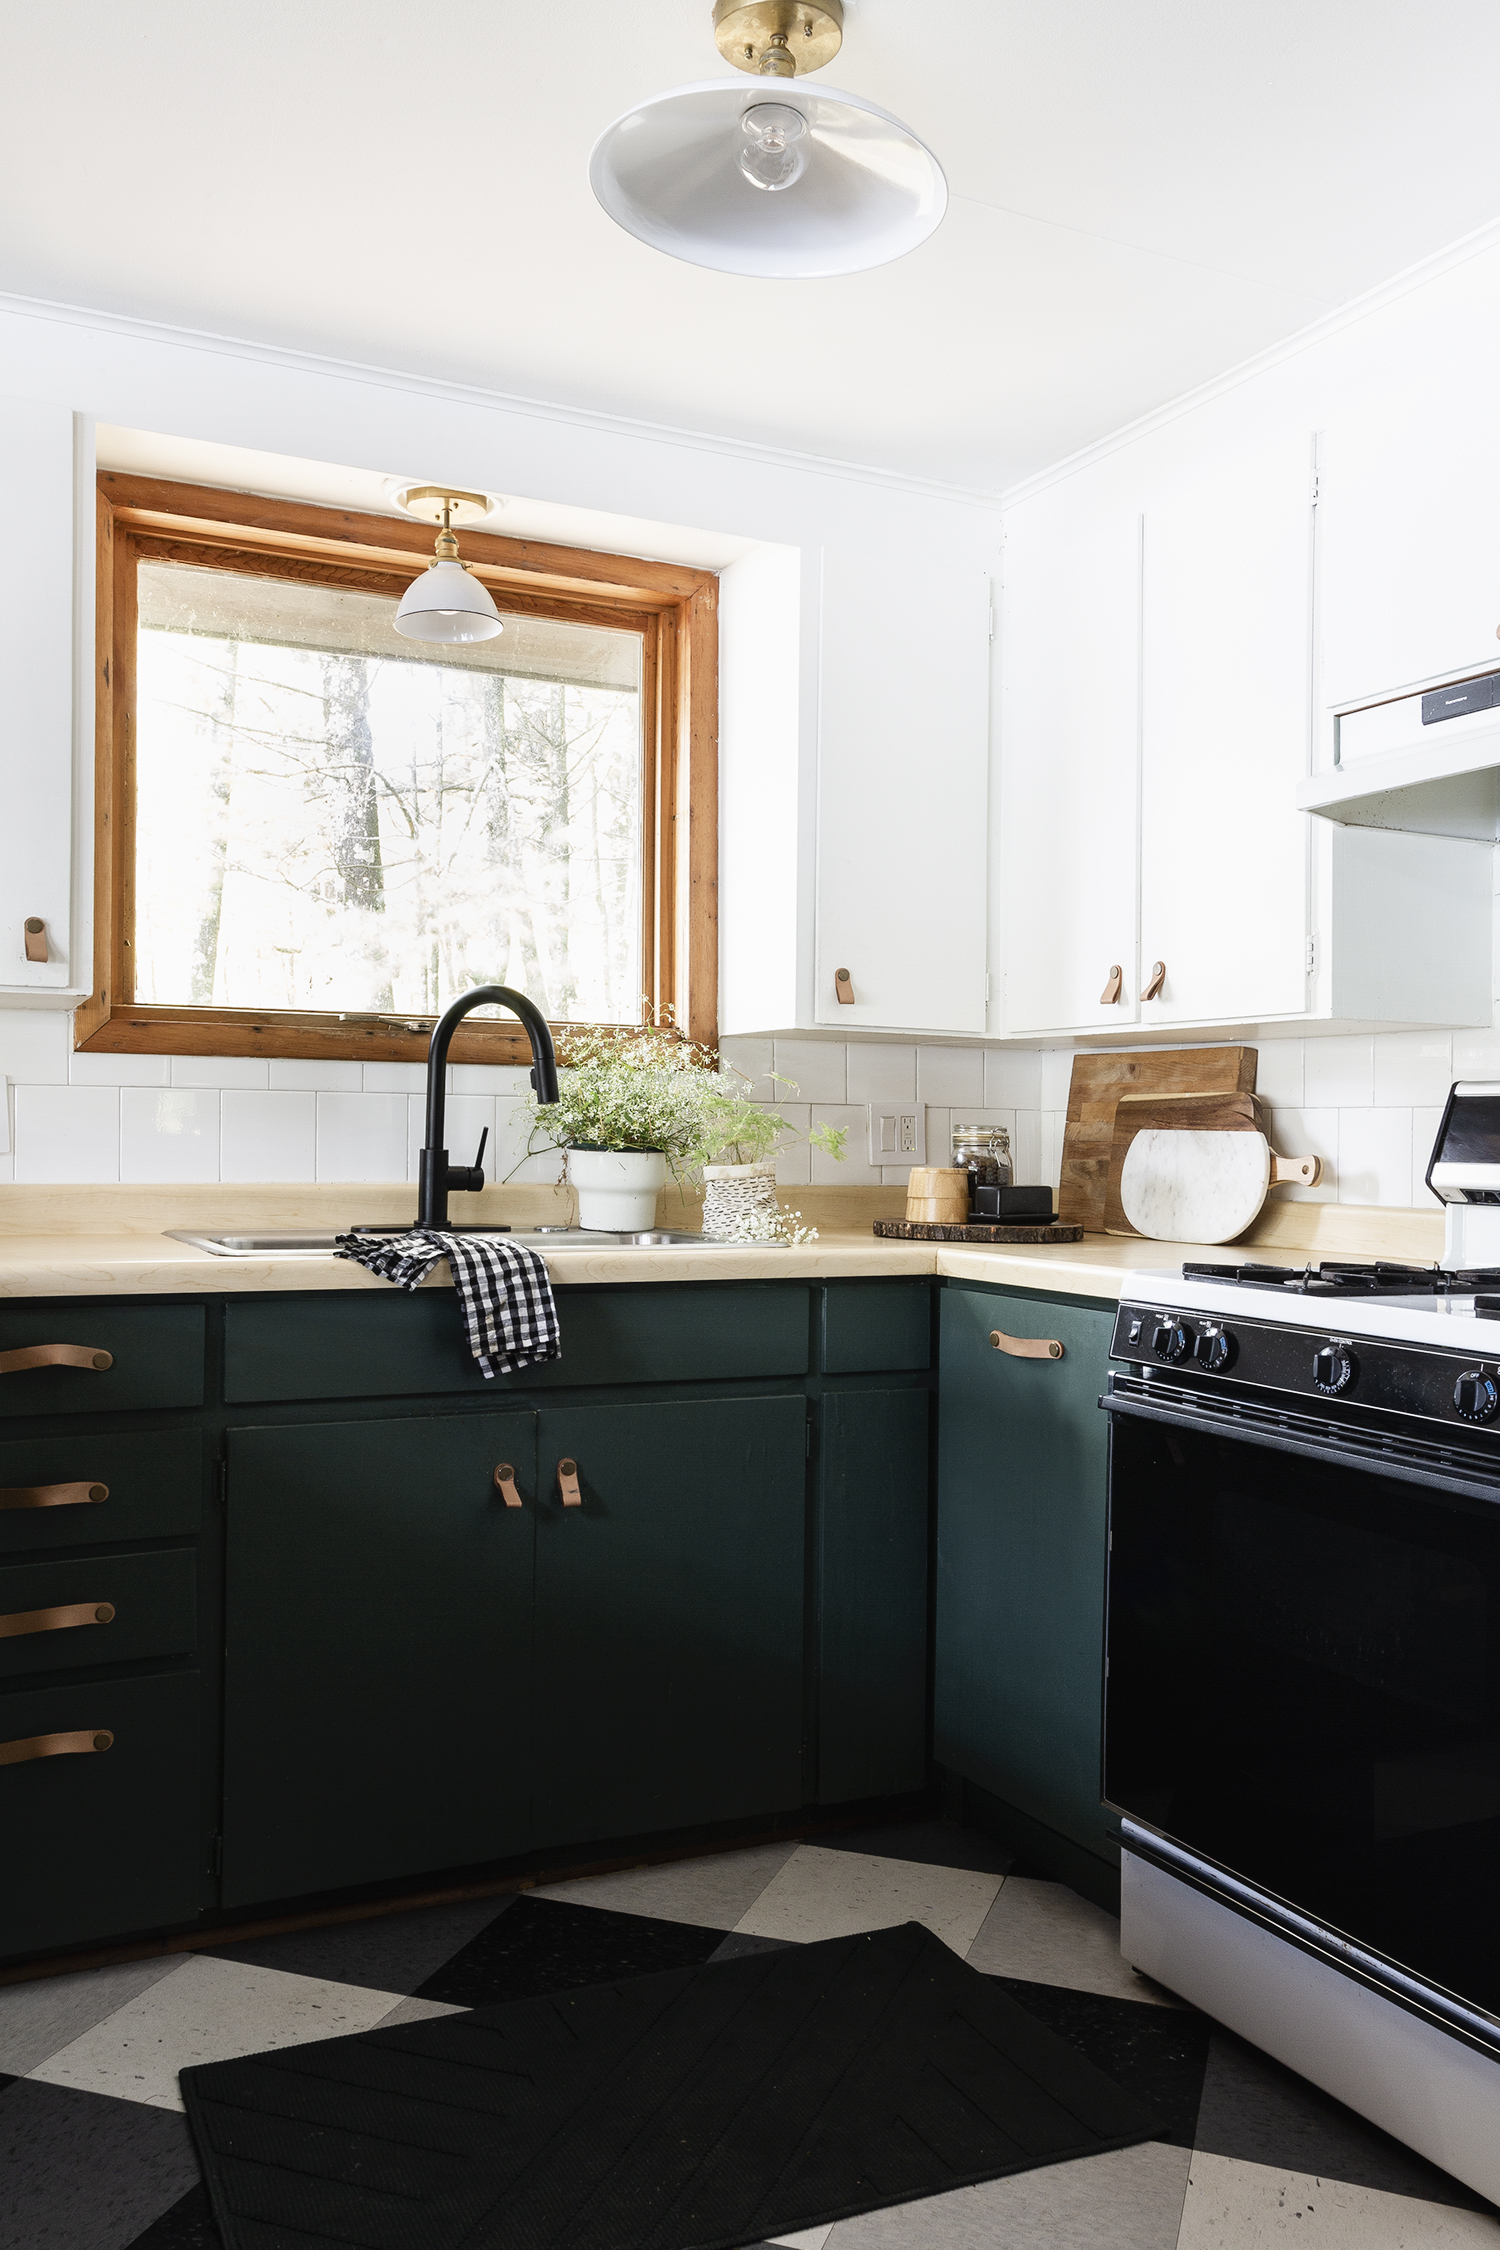
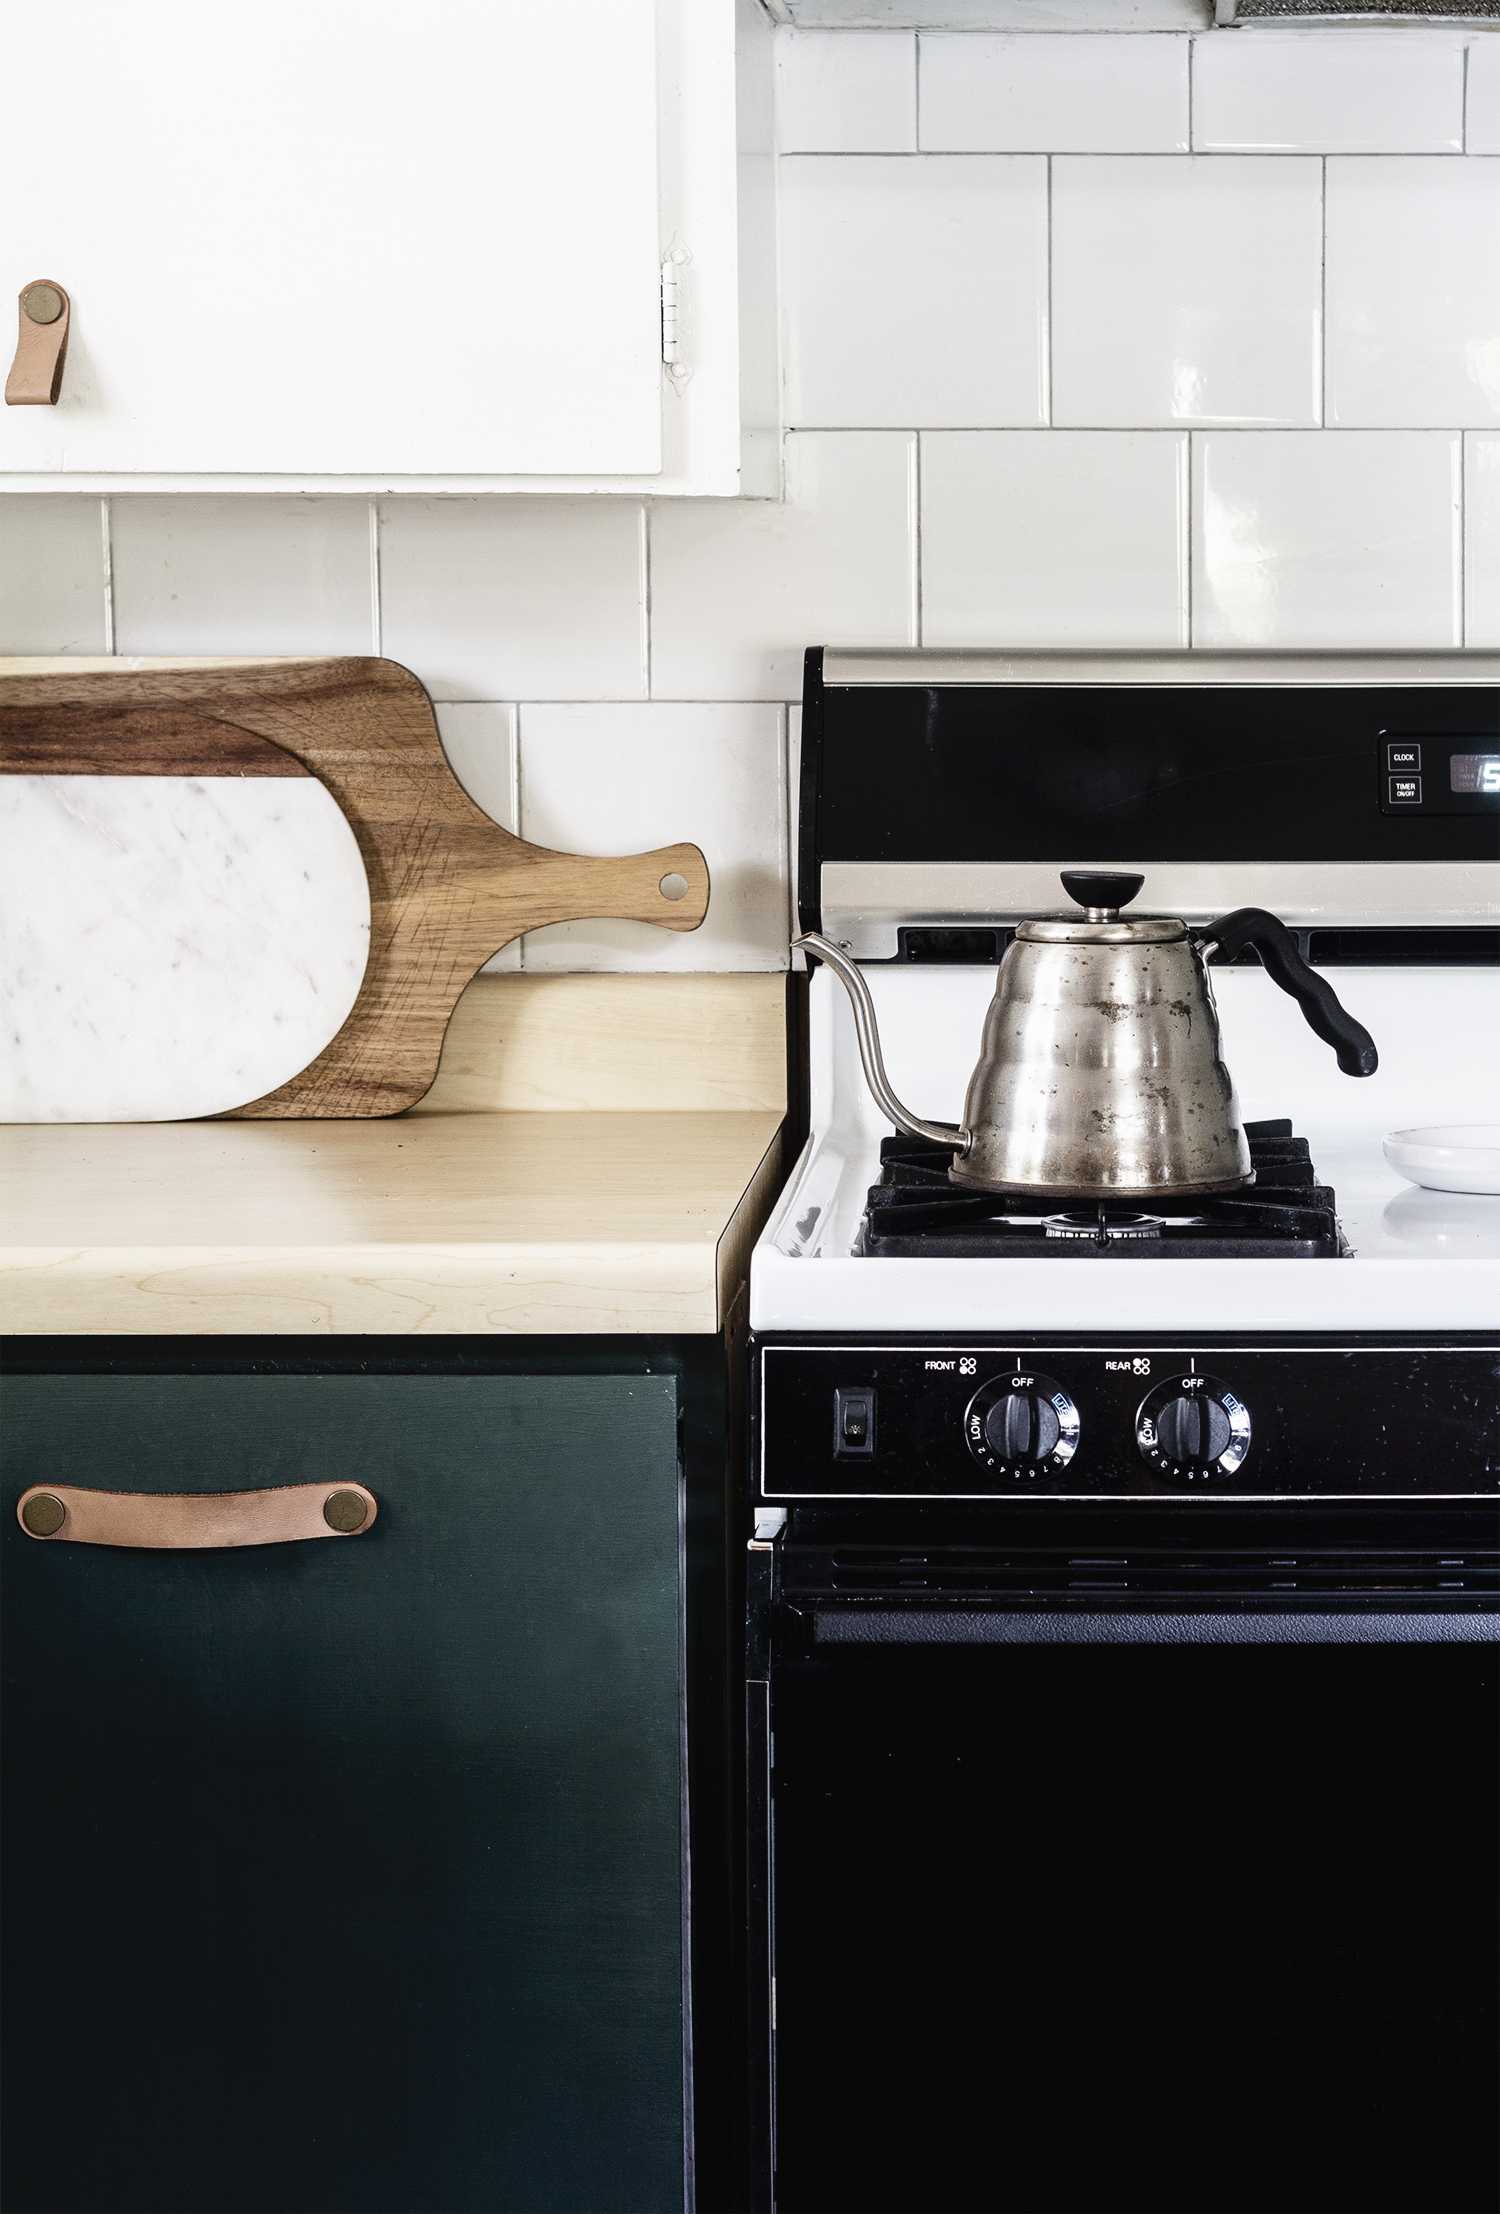
I did put on my plumber pants when it came down to replacing the kitchen faucets. Usually faucets are pretty uncomplicated, and besides having to deal with some old and worn compression fittings, it came together pretty quickly.We decided to go with the Delta Trinsic faucet for the kitchen. I went back and forth between the matte black and champagne bronze finish, and after much debate it came down to the vibe of the kitchen, which is casual and understated. I think the black suited the not-too-fussy side of this 60s-era-cabin. Not only does the faucet have a clean look, but it has a generous goose neck which makes pot filling and washing dishes so much easier. It also has a retractible spray nozzle which I also very much appreciate. Our sink has remained spotless now that we have a faucet that can reach all the corners of it.
With the new dishwasher and faucet came one other behind-the-scenes star of the kitchen makeover. A water filtration system! The water at the cabin is fed by a well, and is unfortunately very rusty – we are near the Iron Range after all. Before investing in a filtration system we had to live with rusty toilets and sinks, and dishes that would constantly be covered in a greasy film. Now our toilets are white, our sink shines, and the dishes sparkle. Plus our water tastes delicious out of the tap and we don’t have to constantly be refilling the Brita pitcher. So glad we made the investment in this unlikely star.
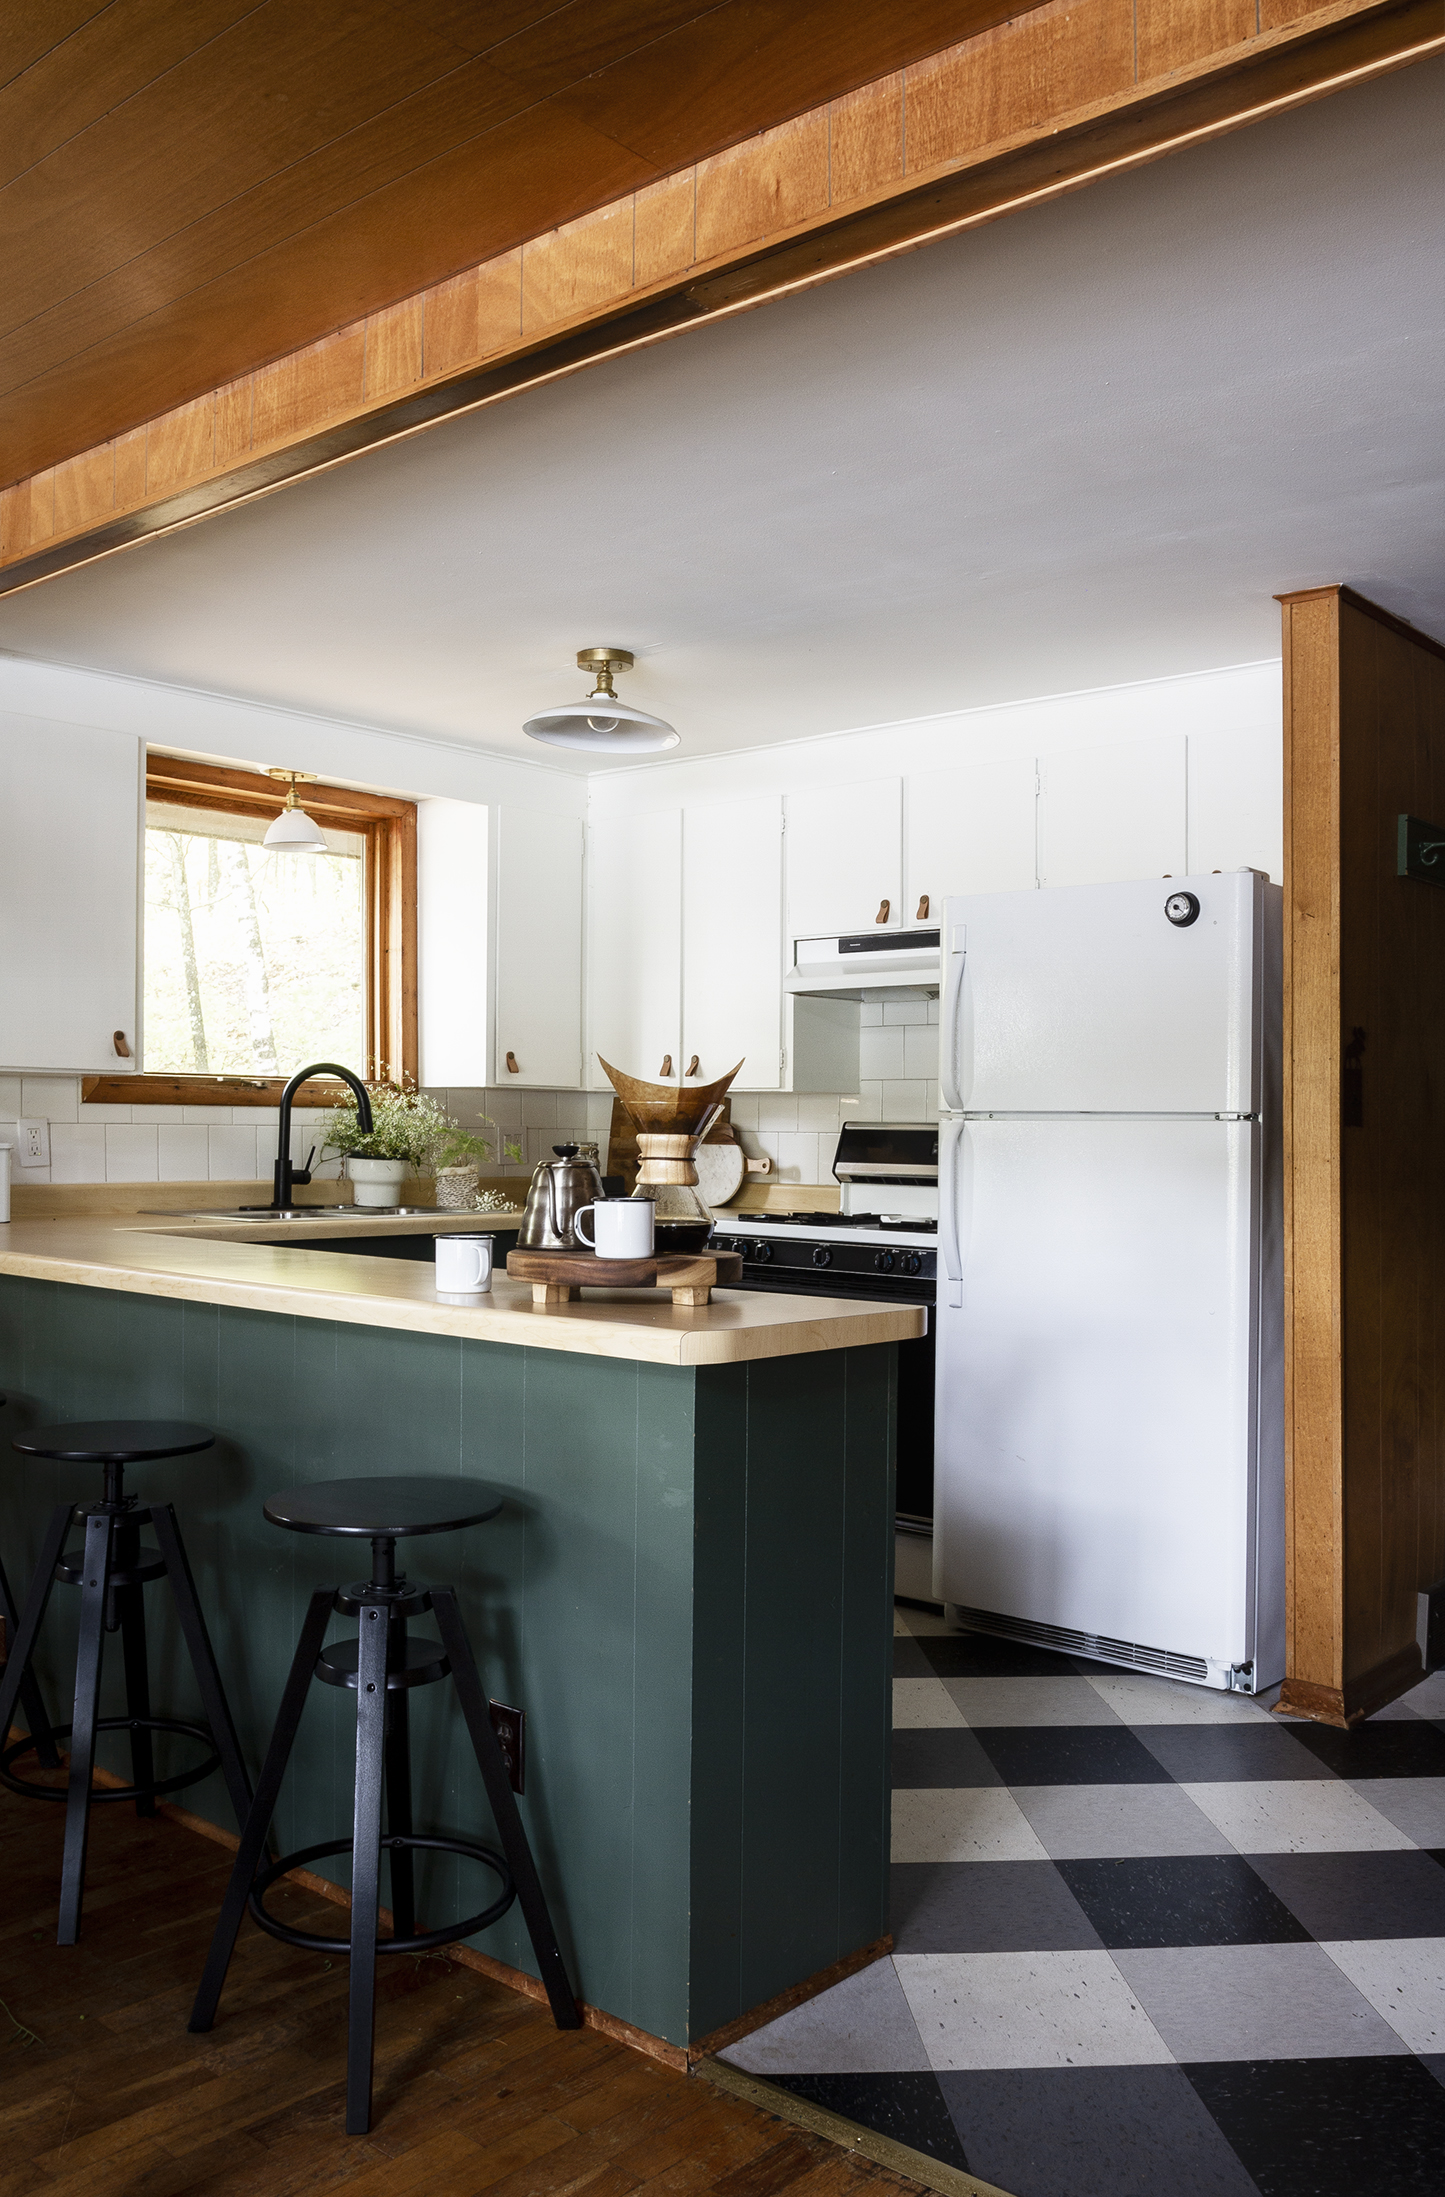
New CVT Flooring
You may have noticed in the before photos that the kitchen floor used to be covered in a vinyl sheet flooring. I did a little exploring right off the bat. I had hoped that there was wood floors under the vinyl just like I had found under the carpet in the rest of the cabin, unfortunately came up empty handed. I weighed my options and decided the best most inexpensive route would be to tile the floor in an industrial CVT tile – this is the same type of tile you’d see on a school floor, or in a Target. It can be polished or left matte, and it is durable, inexpensive and comes in an array of colors. I had already been using buffalo checks throughout the cabin, and decided it might be cool to repeat the pattern on the floor of the kitchen using the CVT tiles. Not only would it have a more refined look then just regular vinyl checkerboard tiles, but it would also stand up to all of the wear and tear and daily use that comes with having a cabin in the woods. I previously documented the entire install in this post, check it out if you’d like to know more.
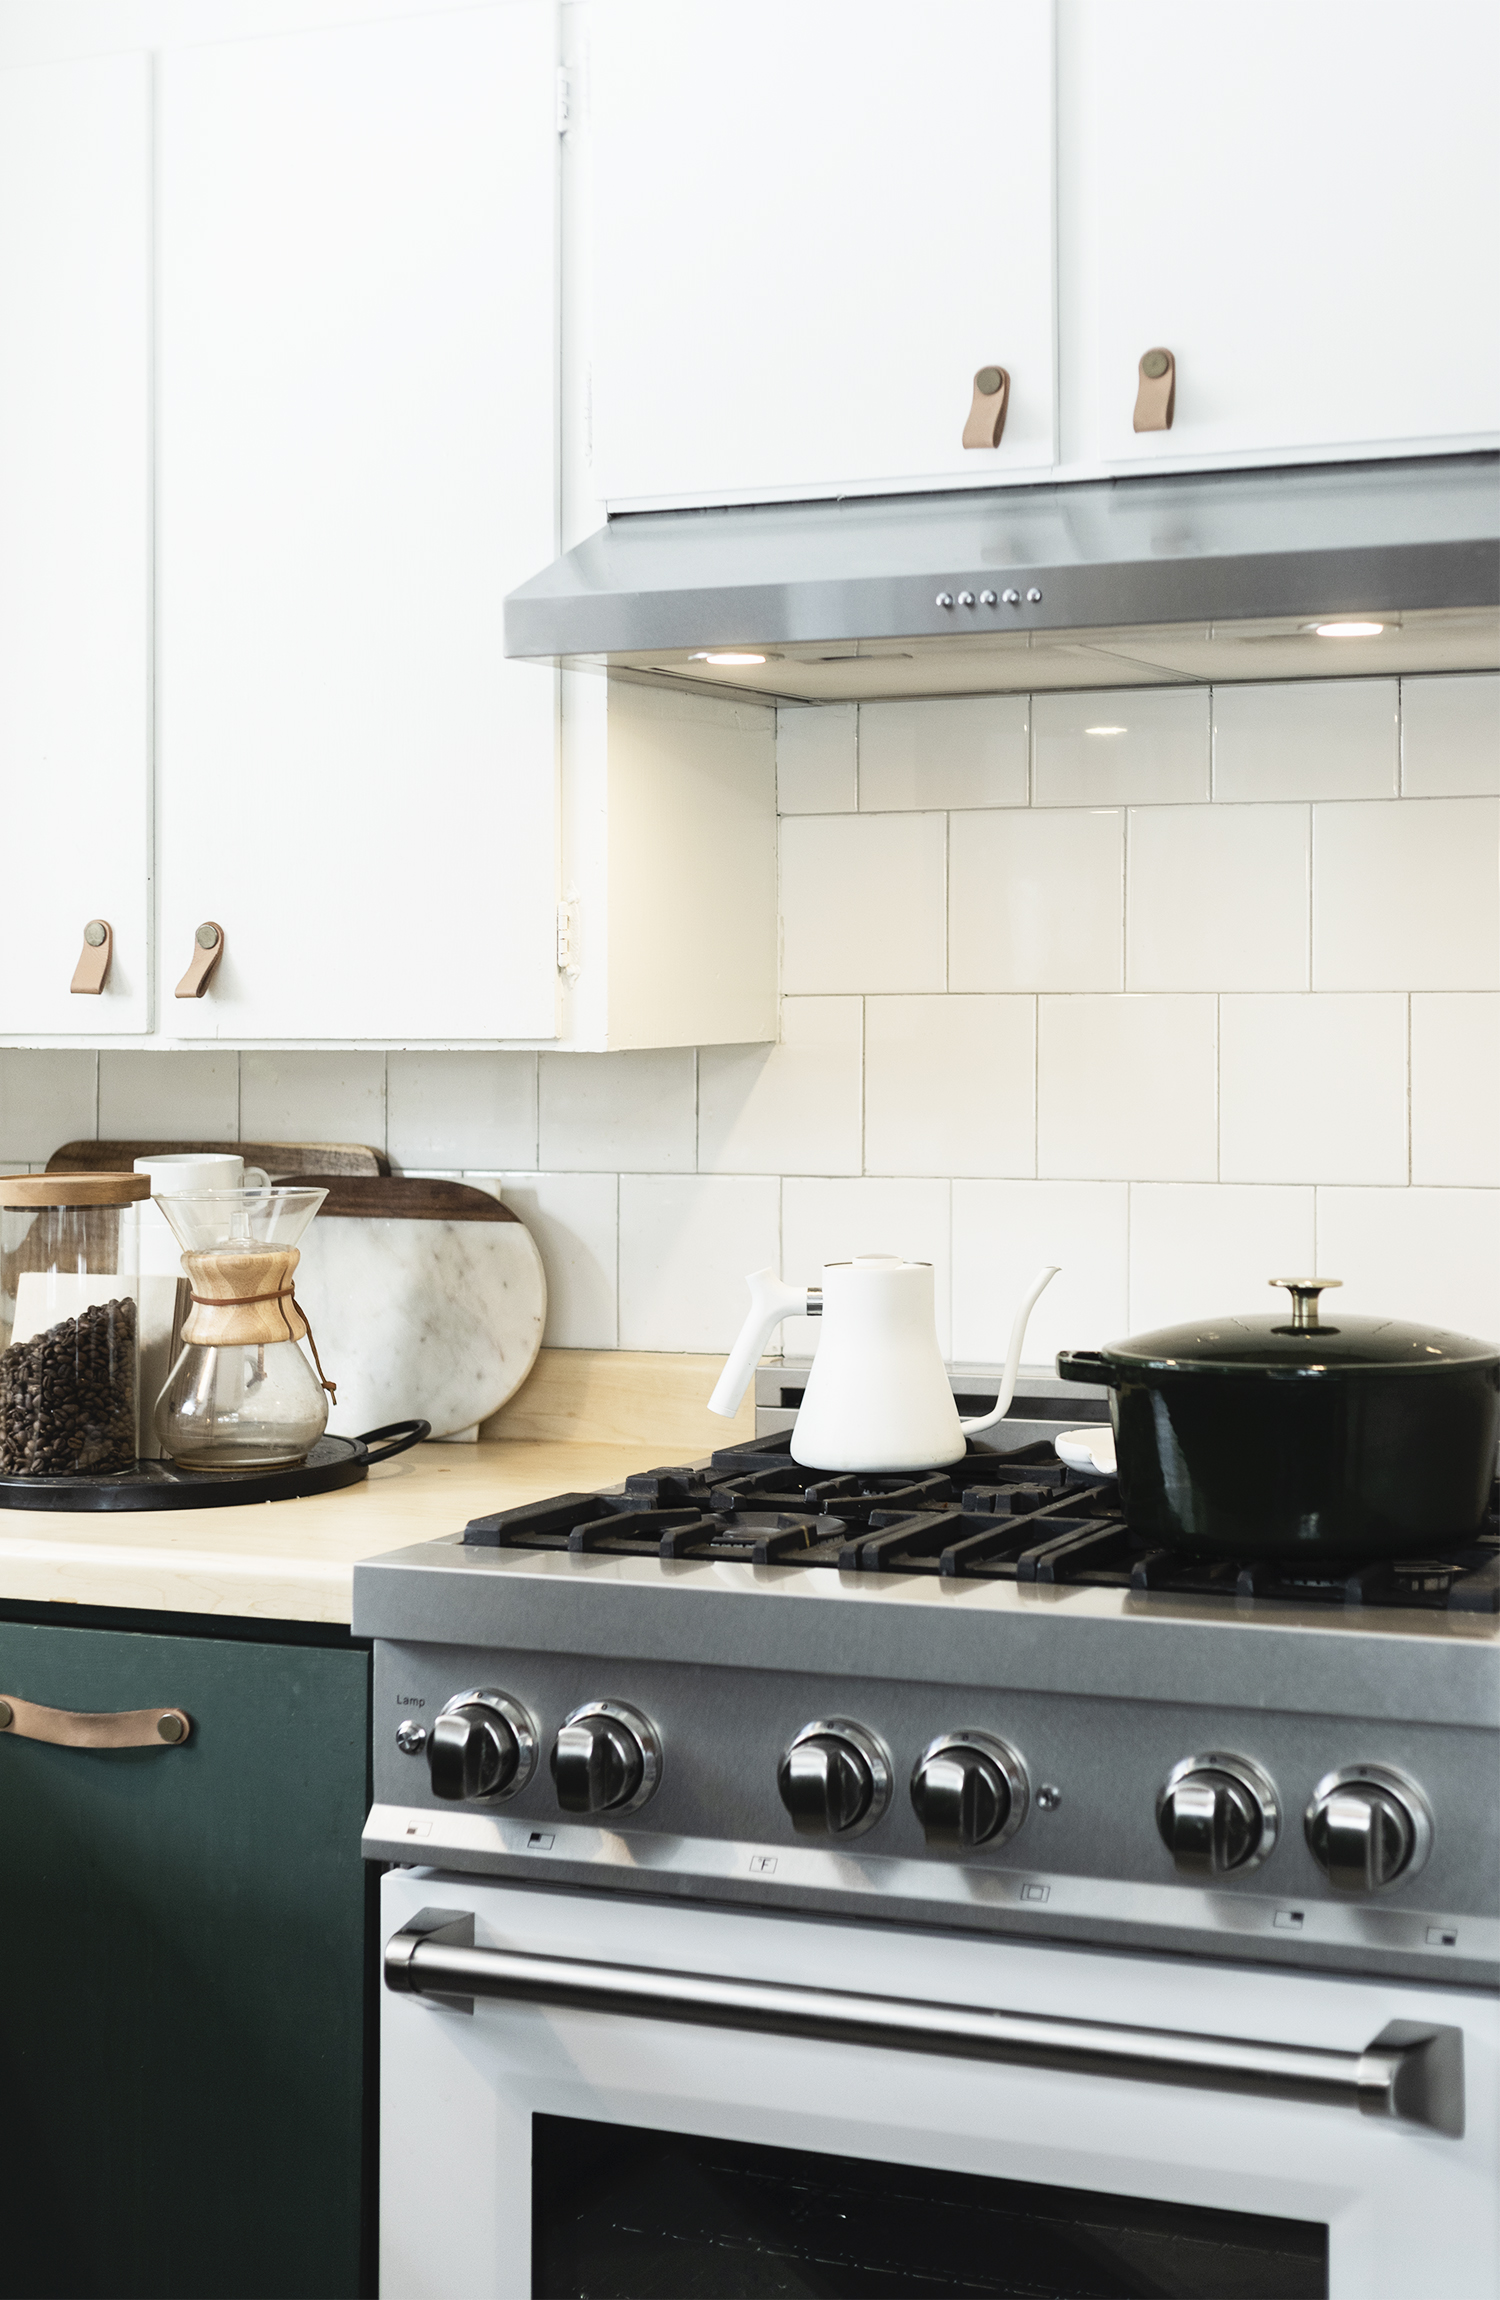
Tile Backsplash
The backsplash was installed as soon as the paint began to dry on the cabinets. At this point, I feel like I’m half way to a professional tiler, and I new the job would be easy.
Tiling used to be something that I was so intimidated by – I thought that it was for experts only. I was scared that I’d screw it up or use the wrong materials. I was so wrong, when tiling, especially in an area that is exposed to a small amount of water, it’s pretty straightforward. Kim & Scott over at Yellow Brick Home recently put together a comprehensive video all about DIY tile jobs, and they explain how easy it can be better than I ever could. If you’re considering a tile project, checking out this vid is a must – I wish I would’ve had it as a resource before my first tile job.
The Budget
↬ Door pulls – $122
↬ Paint 1 gallon green – $31
↬ Paint 1 gallon white – $31
↬ Lumber for base cabinet and drawers – $100 (apprx)
↬Faucet – $351
↬Dishwasher – $939
↬Plumber for Dishwasher install – $700
↬Electrician – $350
↬4 boxes of CVT tile – $170
↬Adhesive – $19
↬Trowel – $14
↬2 – Box of tile – $48
↬Grout – $15
↬Mastic – $15
↬Trowel – $14<
↬Fixture over the sink – $43
↬Ceiling Fixture – $62
The Lost Year : Cabin Kitchen Update
Patching Tile
It’s Bonkers
Cabin Update : The Kitchen


What a great space! I’m sure you’ll be making a ton of memories here for years to come.
Quick question- what filtration system did you install? We have a lot of iron in our water. We already have a softener, but it looks like we should have something more powerful.
Thanks!
Thanks Jackie!
Alright, so my husband was in charge of the filtration system set-up. We went through a place in north west Wisconsin called Gibson’s Water. The machine is environmentally friendly – they way I understand it – it forces water through a filter that oxidizes the iron. That’s the best info I can give you.
I’m sure they have similar operations at Commers and Culligan too.
So inspiring! Great work!
Thanks, Kari!
Soooo good!
Thank Ya!
That’s a very nice redo. The floor is really attractive. I like that you kept the cupboards and didn’t glitz the space up with different countertops.
The layout of the area seems spacious. You’ve got a lot of counter space. I have a weekend home and I enjoy cooking when I’m there, so I know that you’ll get good use out of all that prep area, and that the dishwasher will be worth it, and keep the countertops cleared off as you won’t have dishes and pans drying on the countertops.
It doesn’t look like you included the water filtration system in the project budget. That’s a whole-house and not just a kitchen improvement?
Hey! Thank you! Yes, this kitchen layout is more functional than ours is at home. I don’t mind a tiny kitchen as long as it works!
I didn’t include the filtration system in the budget for both the reason that it services the entire house, and because we pay a monthly plan until we reach a point where we can buy the system, so it’s hard to explain and break down.
This looks wonderful! You made so much out of what you had.
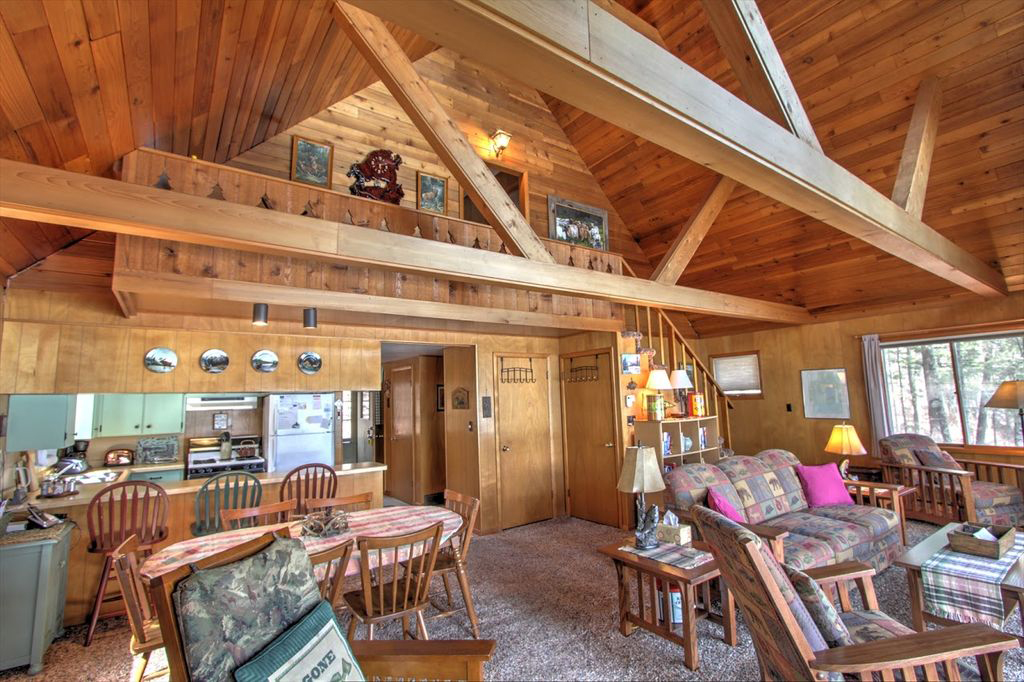
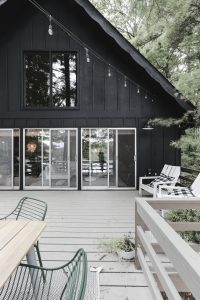
Can I ask about the large framed photograph on your balcony? I’m trying to figure out how to find something good and frame it without it costing a fortune, since we’re on a budget.
Thank you!
Hey, Emily! Thanks so much! I was so happy to have a wall that was big enough to hang a large piece of artwork, there was no way I was going to let it sit there naked. Unfortunately the photograph did cost a pretty penny. If you’re interested, the photographer’s name is Brian Lesteberg My best tip for getting large scale framed artwork on a budget would be to wait for sales at places like framebridge or minted. I know how expensive it can be. Sorry I can’t be of more help than that.
Gah, this all looks so good! Love that you made the most of the original kitchen. Strong work.
Thanks so much, Marti! I’m so happy with how it all came together!
You never cease to amaze! What great design and with added functionality, too. Keep up the awesome work and thanks, as always, for sharing!
Hey Danielle! Thanks so much – I’m glad you guys still like reading and catching up :)
Your kitchen is beautiful. The view from the dining area is stunning. I love the cabinet color you chose. Such an awesome makeover!!
Hey Brandi! I agree, the view from the dining area is pretty spot on. Thank you!
Beautiful! The matte black faucet was definitely the way to go!
It was a last minute decision, but I think it was the right one.
It’s like an entirely new kitchen! It looks so inviting, bright and cozy – the perfect place to cook some delicious meals. You’re right about the hidden dishwasher – it’s brilliant. And I love how you’ve done this fantastic makeover on a budget, I would have never thought it’s possible. Maybe the only thing I would add is some suitable, unique rug, to spice up space even more. ;)
Hey Katarina! I agree – a cool rug would be the perfect thing to add to this space ;)
LOVE that floor! And the dishwasher is genius.
Thanks, Karin!
This is so good! I love it! When it comes time to replace my 40 year old dishwasher, I know what I’ll be doing!
Is there a chance you’ll post a DIY for converting those cabinets to drawers? I really need to do the same & I’m super intimidated by it.
Hey Lori! 40 Years is an impressive run!
I don’t know for sure if I’ll be posting a DIY for the cabinets because they are sos specific to my cabinets. I do have diagrams for how I assembled rails – and basic drawer assembly. Maybe these will help?
Psst. Architectural specifier here: it’s VCT, not CVT. You had it right in your initial post. I’m sure that if you don’t deal with these acronyms on a daily basis, it’s easy to get the letters switched around. :)
Also, love the transformation.
Hey Molly! Thanks for helping a lady out. I always get the acronyms for CVT and LVT mixed up. I’ll go change that right now. ‘Preciate you.
Pretty much spit my milk out over how amazing of an idea you made the floor tiles into a plaid-shirt design. Love how perfectly it coordinates with the dark green and wood accents of your kitchen to finish off the overall cabin. Not buttering your toast– but forreal– this is probably the best remodel I’ve seen on the internet and I’ve been browsing through this stuff for waaaaaaay longer than I need to admit.
Love this kitchen! I think I might of missed it. What is the green color for the base cabinets?