


Sorry for disappearing the last two weeks. I had a very thorough and detailed plan to get the bathroom completed, and this post was supposed to be making its debut much much sooner. That was until our house was ravaged by some ungodly disease that made gross stuff happen to your body (aka Norovirus). Let’s just say, that new toilet bowl and I have gotten to know each other pretty well, and I’m thankful it was brand new and clean and not grossing me out as much as the old one would have been.
Can I just say that I am so excited to share the final results of this bathroom renovation!
Dudes, this is for sure is the biggest job I have taken on thus far, and it harbored the biggest amount of unknowns. A few years ago I would’ve only wished and dreamed that I could actually renovate a bathroom myself. But after building my skills along the way this project didn’t feel as intimidating as it did a few short years ago.
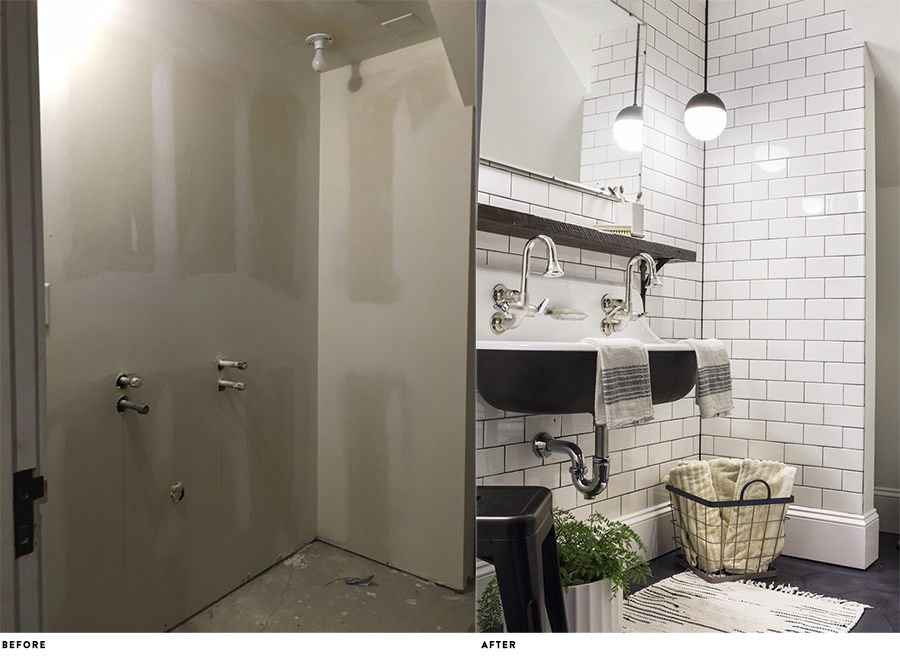
Let’s start at the beginning. In June of 2015 the basement renovation began. We had contractors in our house for eight weeks during the summer and during that time they gutted the basement, installed new electrical, tore up the floor, installed new plumbing, and framed and dry-walled the space. That plan included a rough in for a basement bathroom, however the budget did not allow for completion of that project until a later date. Prior to the basement renovation there had been a bathroom in the basement, but it left a lot to be desired. The shower was inoperable due to a bad tile job on the floor and there were general creepy vibes and disgustingness. The new basement floor plan allowed for a larger area dedicated to a double sink, a much larger shower stall, and a small amount of tucked away storage for linens and such.
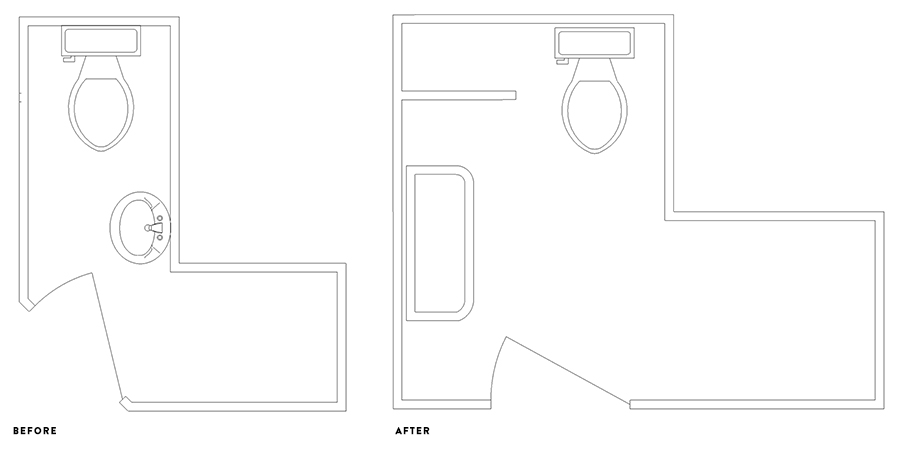
I had basically designed the basement in early 2015, I knew what sink I wanted to install, where the lights would hang, the mirror would go, and the closet shelving would reside. I needed to have the contractors rough in plumbing to the exact places I needed it, electrical so that I could have pendants flank the mirror perfectly, and an accurate description of where framing needed to go for the shower and closet. To accomplish this, I used SketchUp to draw out my plans — it isn’t the most intuitive software out there, but it helped me to communicate my plan to the contractors down to the 1/8″ of an inch. There were no surprises when it came time to do all the finishing work.
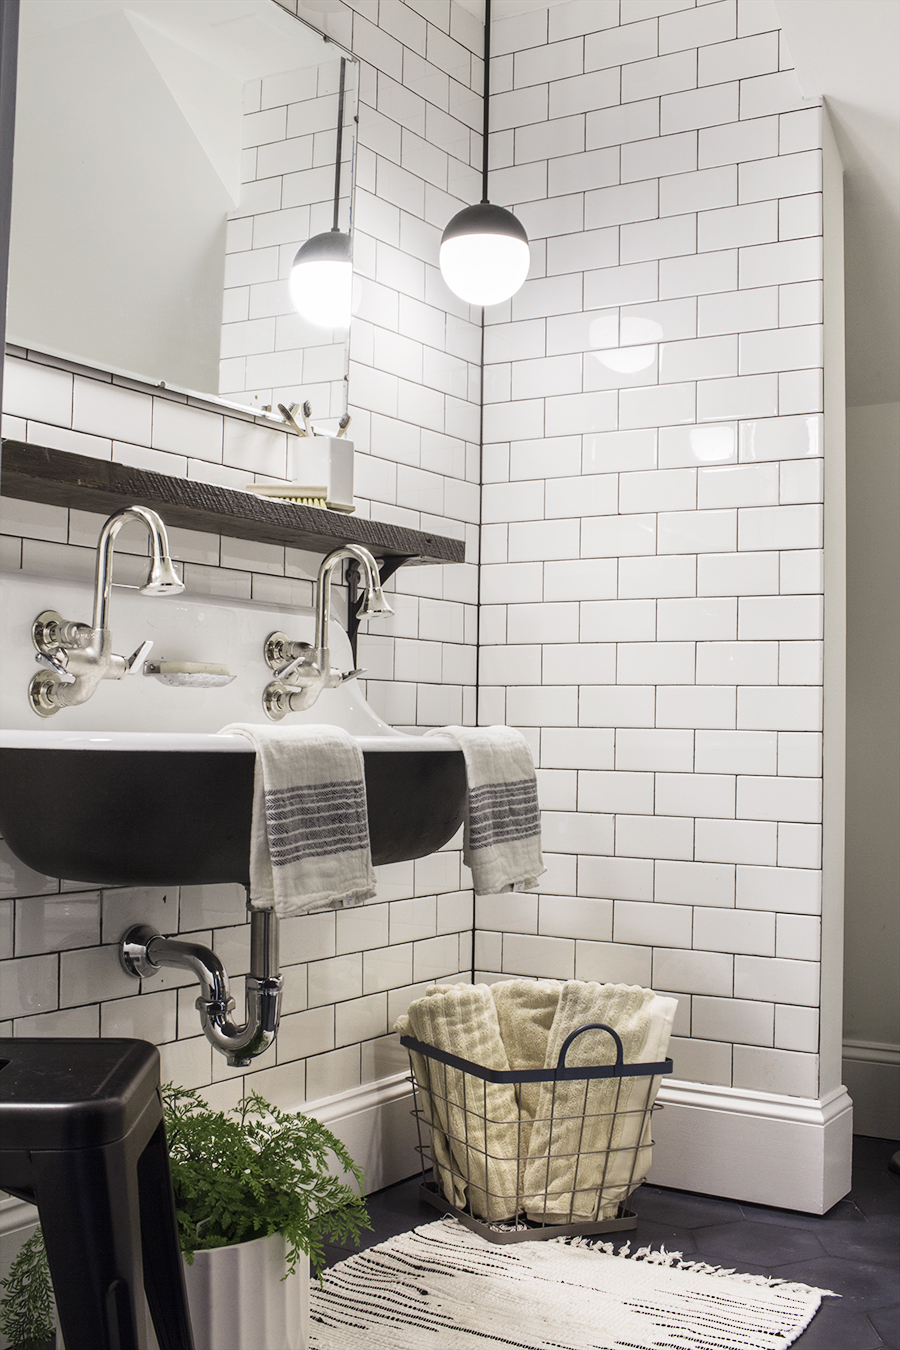
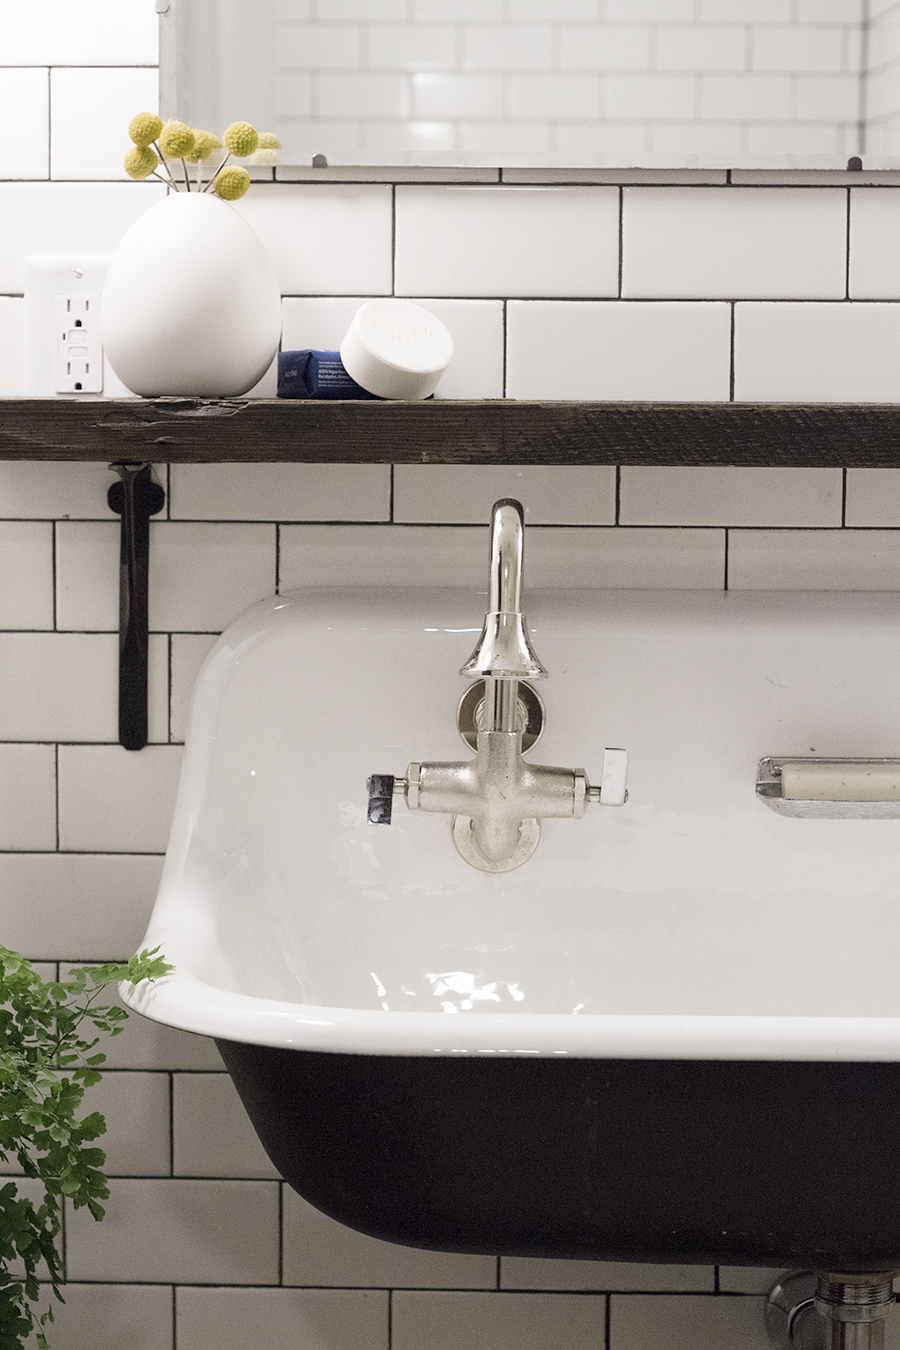
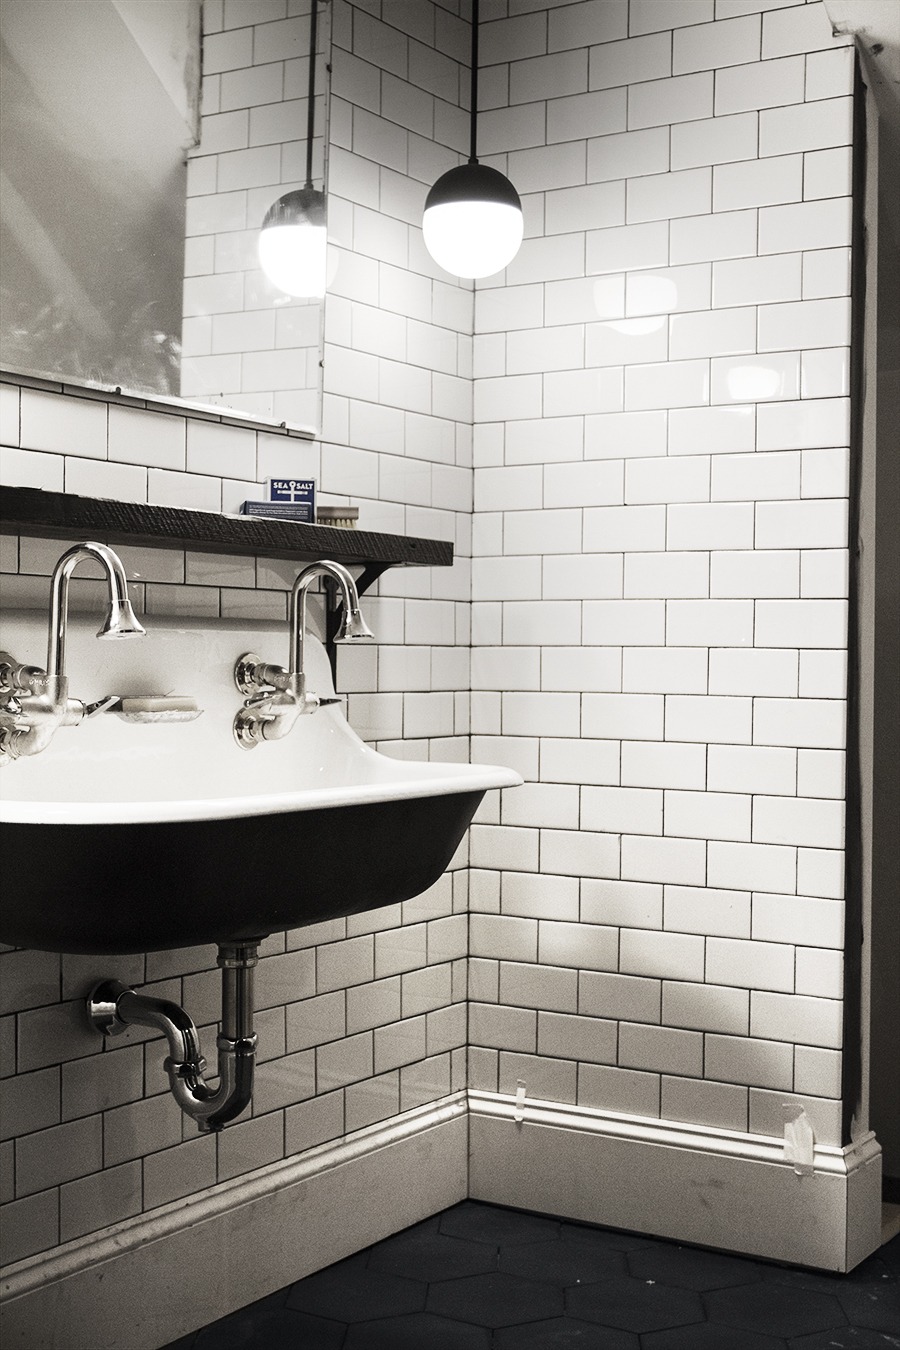
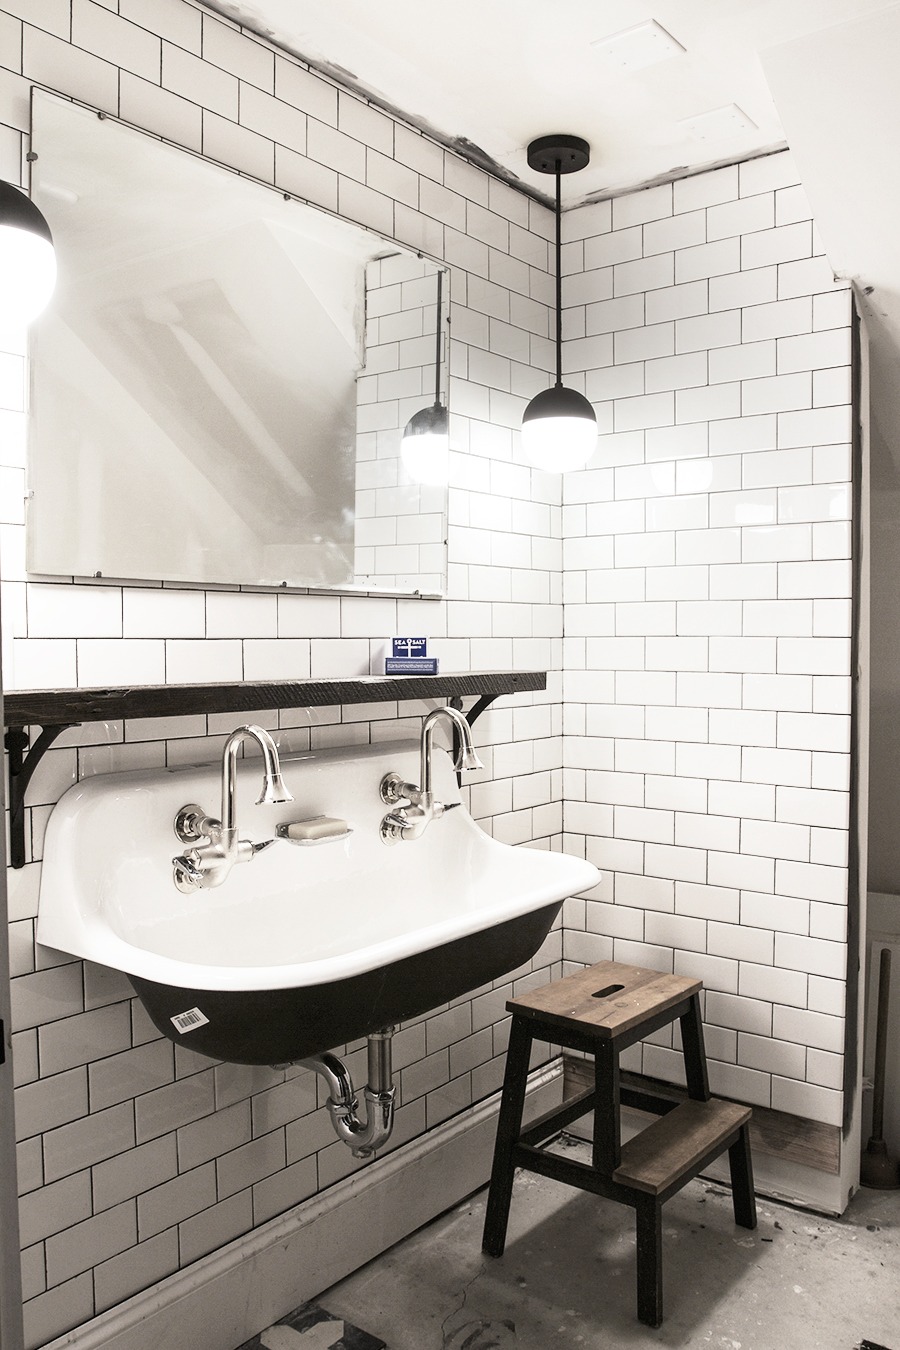
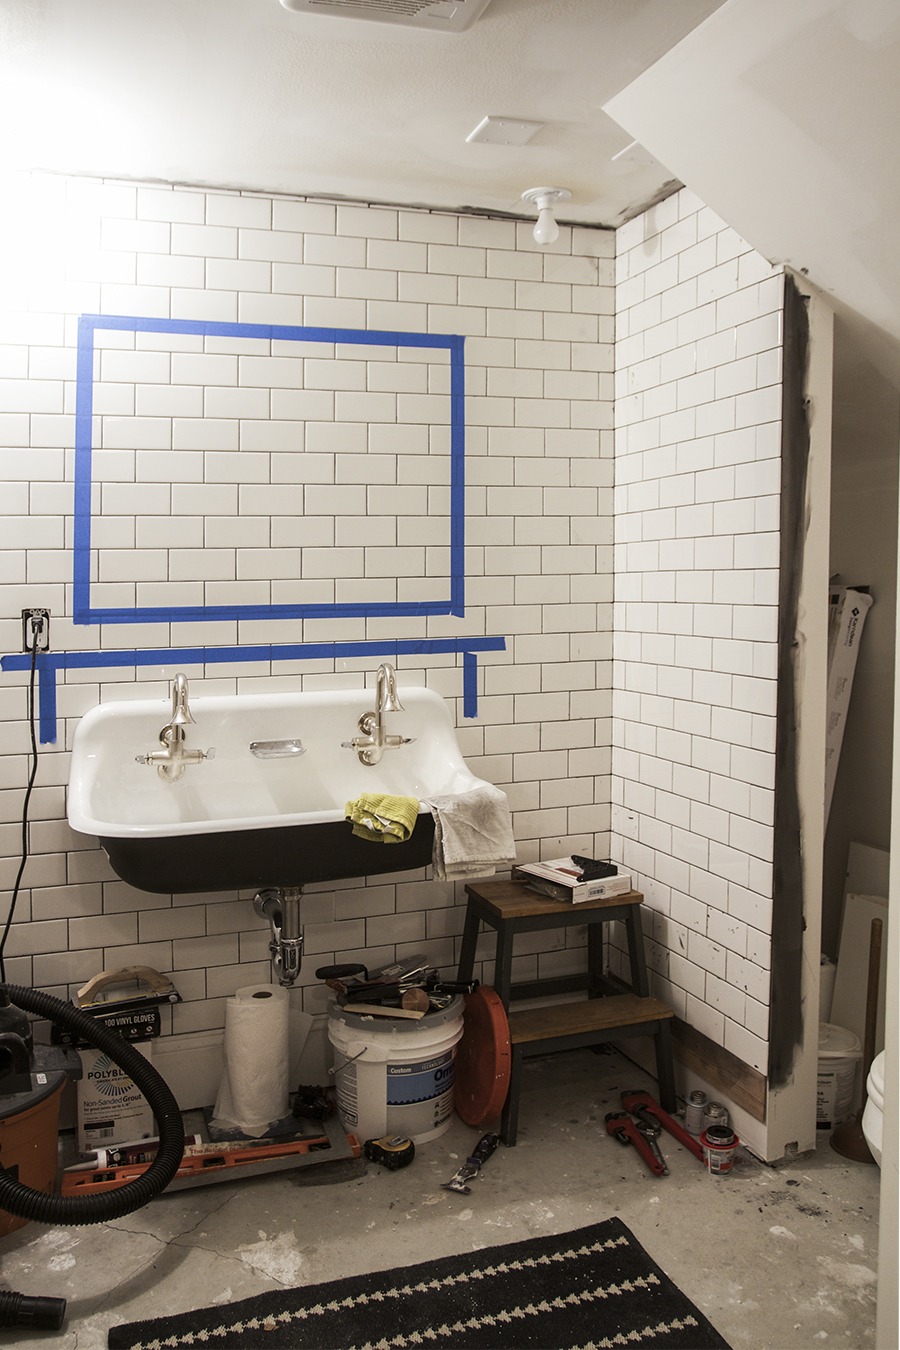
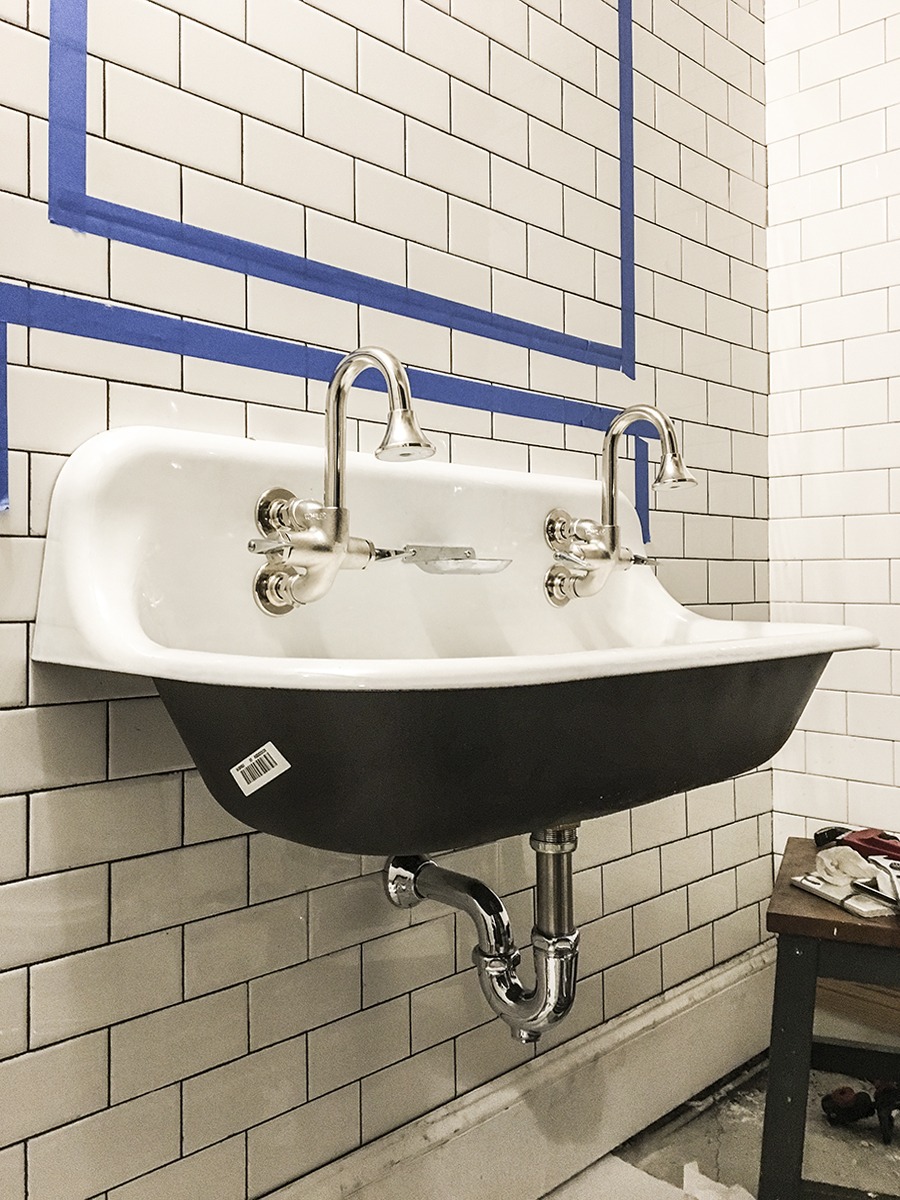
Alright! So let’s talk about the space and the stuff that’s been happening here! First up is that beautiful sink! The Kohler Brockway sink is the centerpiece to the bathroom. I was first introduced to this sink on Manhattan Nest when Daniel (via a friendly neighbor tip), scored a vintage version of the sink for himself! I basically couldn’t get the sink out of mind, and when I began designing the basement bathroom a few short months later, it was a must that I get my own version of that sink! I knew it would provide the right amount of antique vibes to the bathroom. It gives a shout out to the fact that we have an older house while still being able to hold up against some more modern elements such as the pendant lights and tile floor. Kohler provides all the rough-in specs online, so I was able to hand that off to my plumber without having the sink on hand, and he was able to install the plumbing, drain, and bracing in all the right spots behind the wall based on those specs. All I needed to do was find my vintage sink, but alas I came up empty handed again and again. After a summer of hunting at the local salvage shop I found every type of the sink except the double tap version. Frustrated I asked the internet for help, and who comes to my rescue but Daniel! He puts me in touch with the fine folks at Kohler, and they graciously agree to send me a brand new Brockway sink, along with a shower kit, and toilet. It was truly amazing and I am forever thankful.
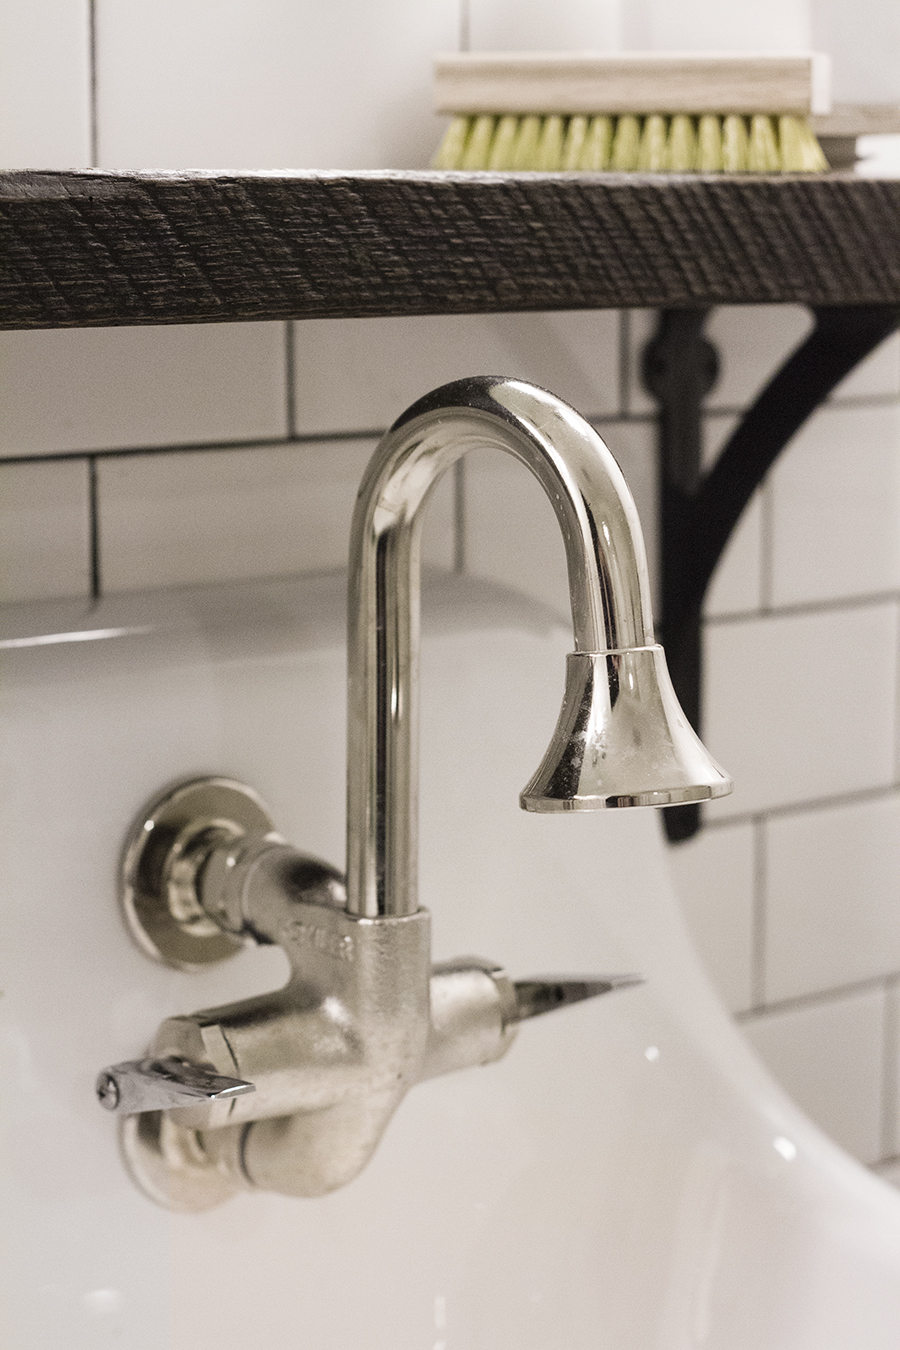
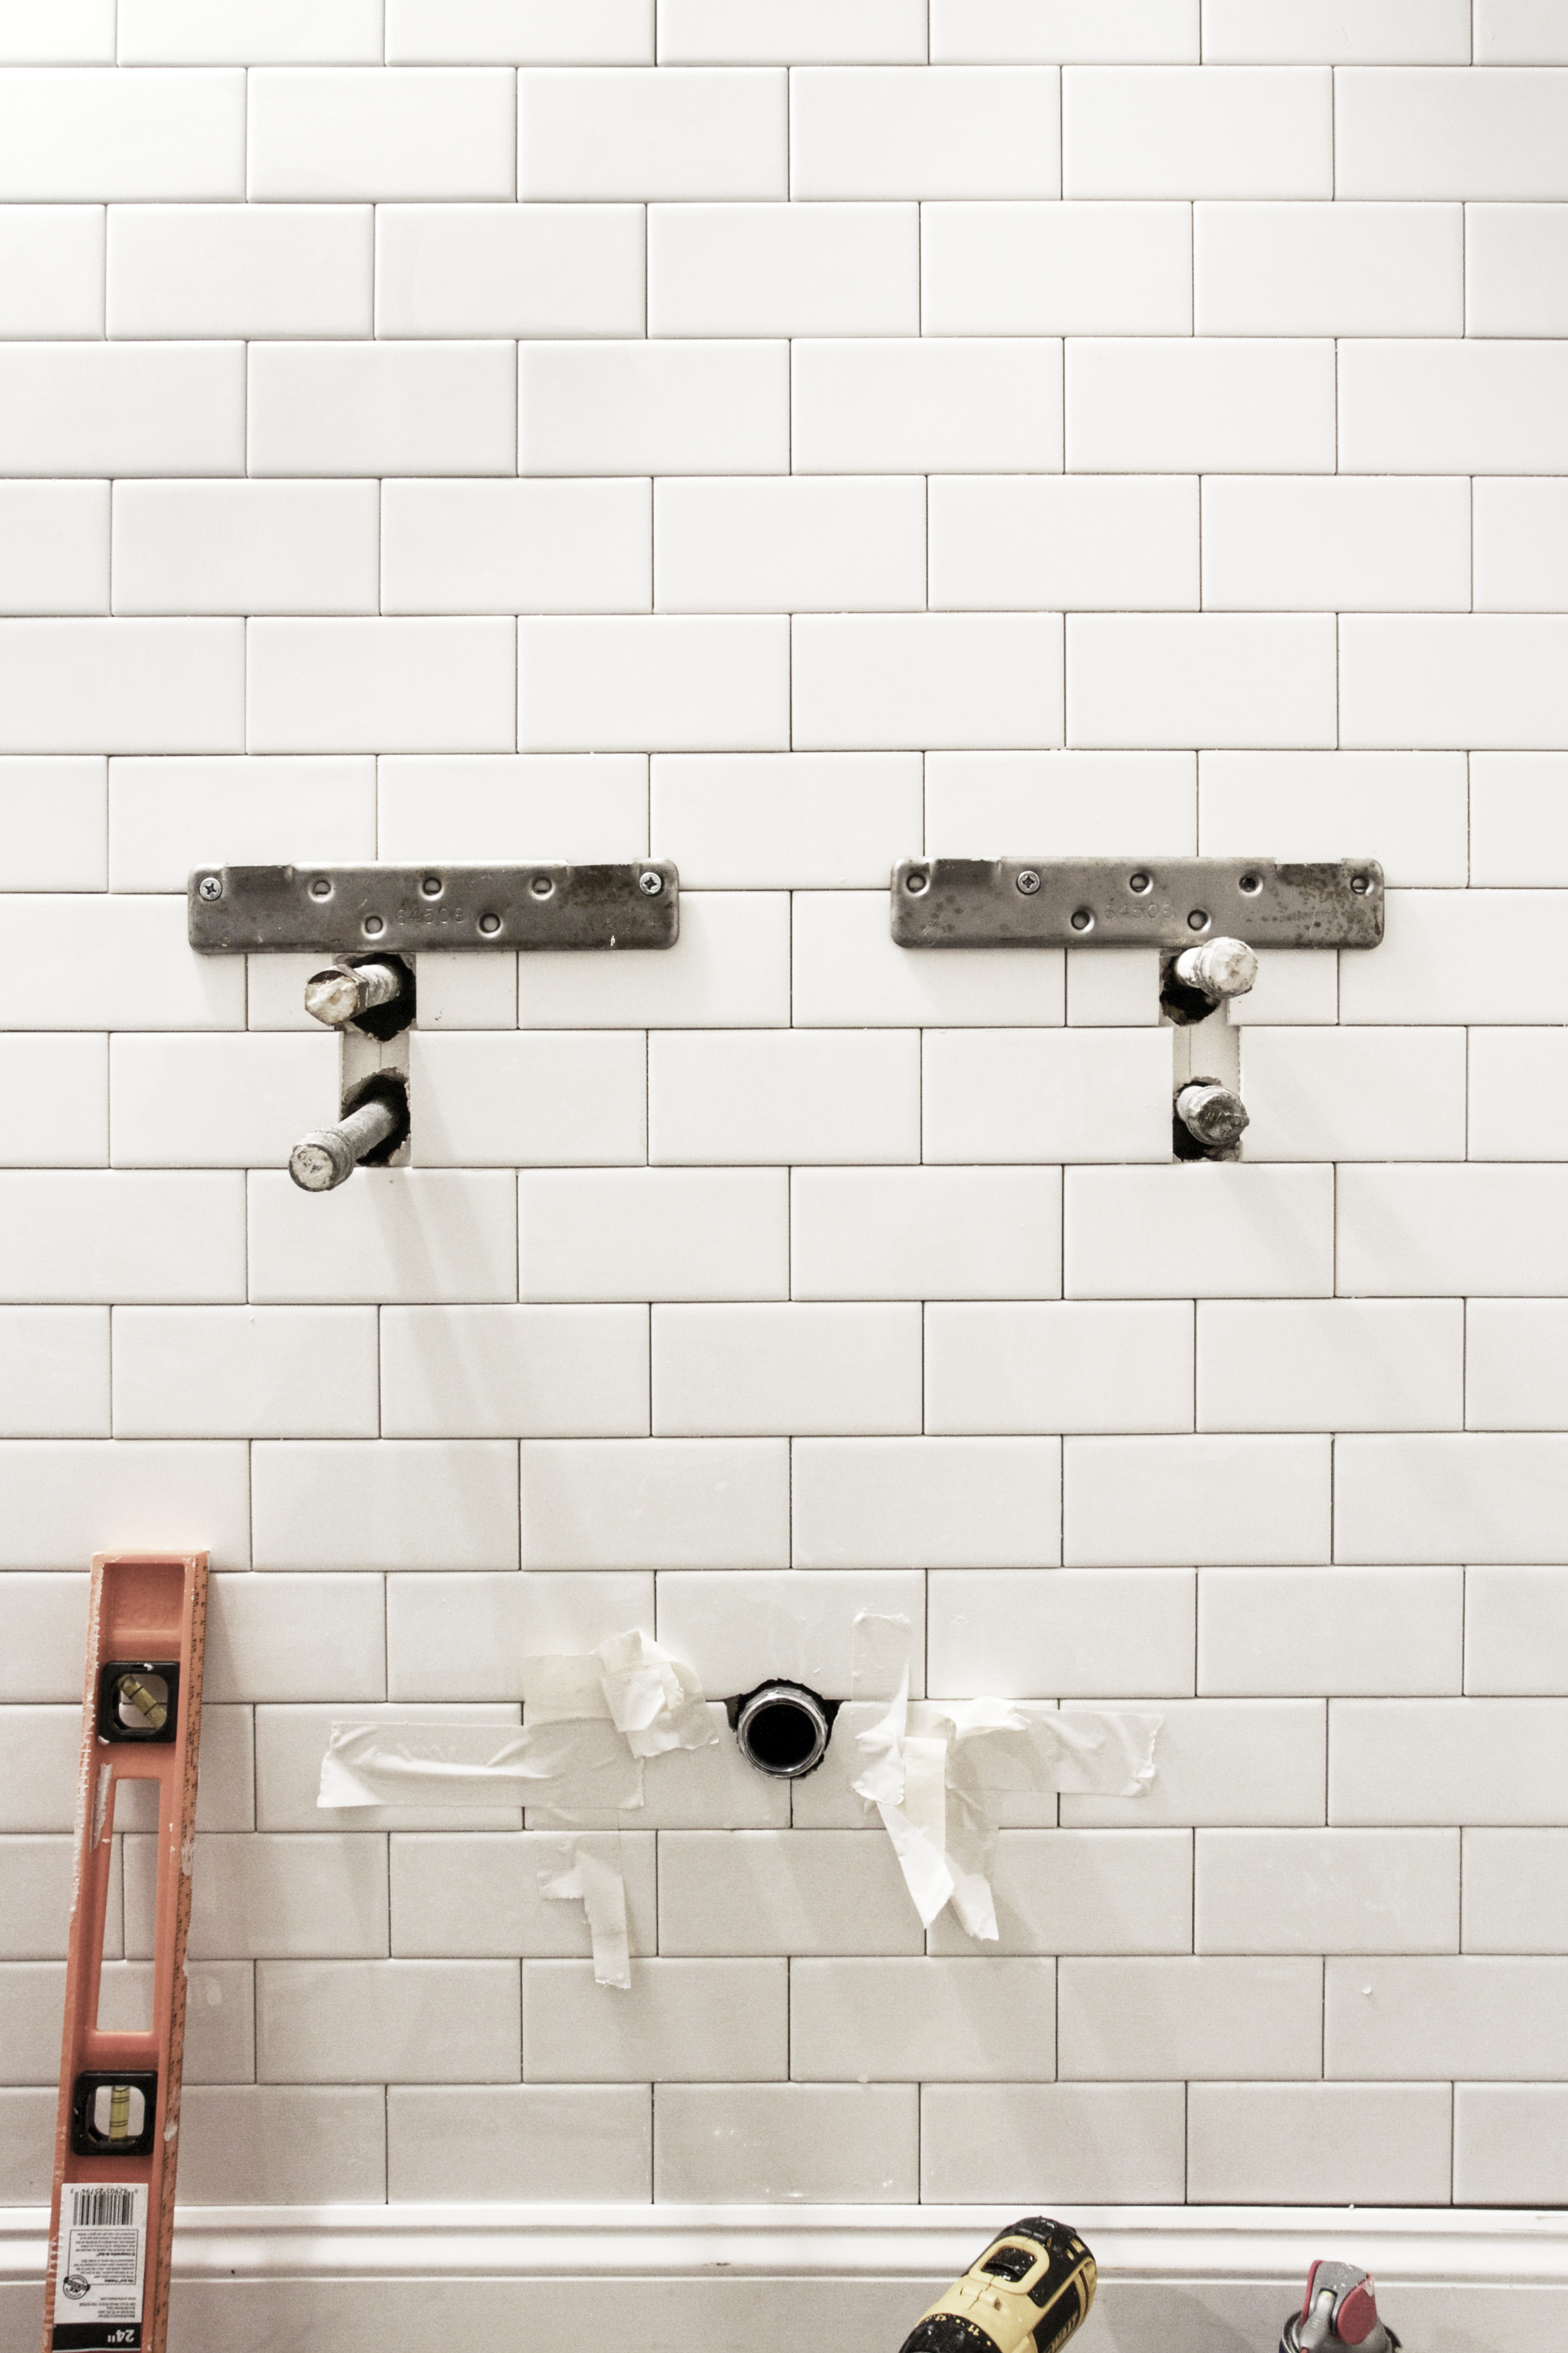
The sink was my first big challenge right out of the gates. Not only did I have to figure out how to hang a 90lb cast iron sink onto a wall, but I also had to install two faucets. Let’s just say it took a lot of dry runs. I did a dry run installing the sink without plumbing, and I did a dry run installing the taps without the sink. When I was feeling like I was headed in the right direction, I was ready to begin tile installation. However, I couldn’t tile until I had the baseboard installed, and I couldn’t install the baseboard until the floor tile was installed. Since the floor tile would not be delivered for months I used a ledger board in place of the baseboard and started the first row of tile on the wall. After the tile was installed I needed to remount the sink bracket on top of the tile. This involved drilling through my prestine tile which gives me all kinds of anxiety. Thankfully I had a laser level to help me keep track of the exact location of the bracings behind the wall and I didn’t went into installing the sink-mounting-brackets on the tile without much worry that I was in the wrong spot. Whew. Are you still with me?
[metaslider id=12511]
Once the sink was installed, I began the very tiring job of installing the Cannock faucets. This was tedious because there was so many variables when it came to plumbing connections. Not only were there four connections that needed to be made with the threaded plumbing pipes inside the wall, but each faucet had four nuts that needed to be tightened. That’s a total of 16 potential leaks for both faucets – and believe me they did. I had originally been making the plumbing connections with plumbers tape around the threaded piping, but found out through trial and error that pipe joint compound worked better for this application. In the end I was left with one pesky “leak” that I toiled with off and on for over a week, before I realized that it was actually just condensation from the hot water line.
The trap under the sink was much easier to install. I needed to cut it to size which is intense because the pipe is solid brass. I used the metal bit on my jigsaw after lots of “measure twice” and “you better not screw this up” moments, I quickly and accurately sliced right through the pipe. I was connecting to a black ABS drain pipe within the wall, and found a fitting online that made a solid brass to ABS connection.

Installing the subway tile is monotonous, but it’s hard to screw up, especially when there is a laser level (sorry I’m gonna mention that thing about 100 times during this post) to keep you on track. Grouting is the worst, and I hope I never have to do it again any time soon. It’s a job I’d consider hiring out, not because it take a lot of skill, but because it’s so annoying.
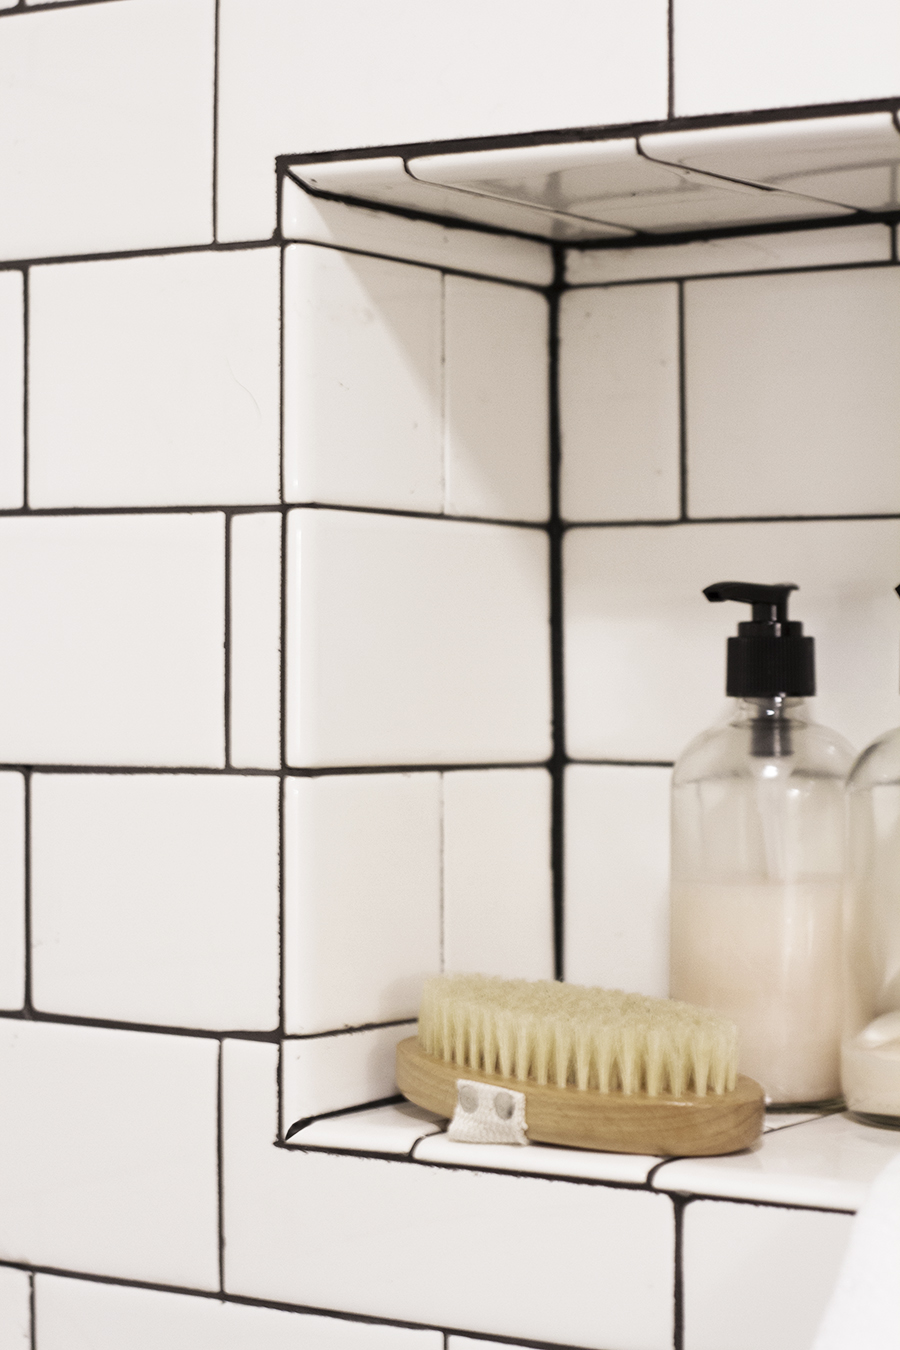
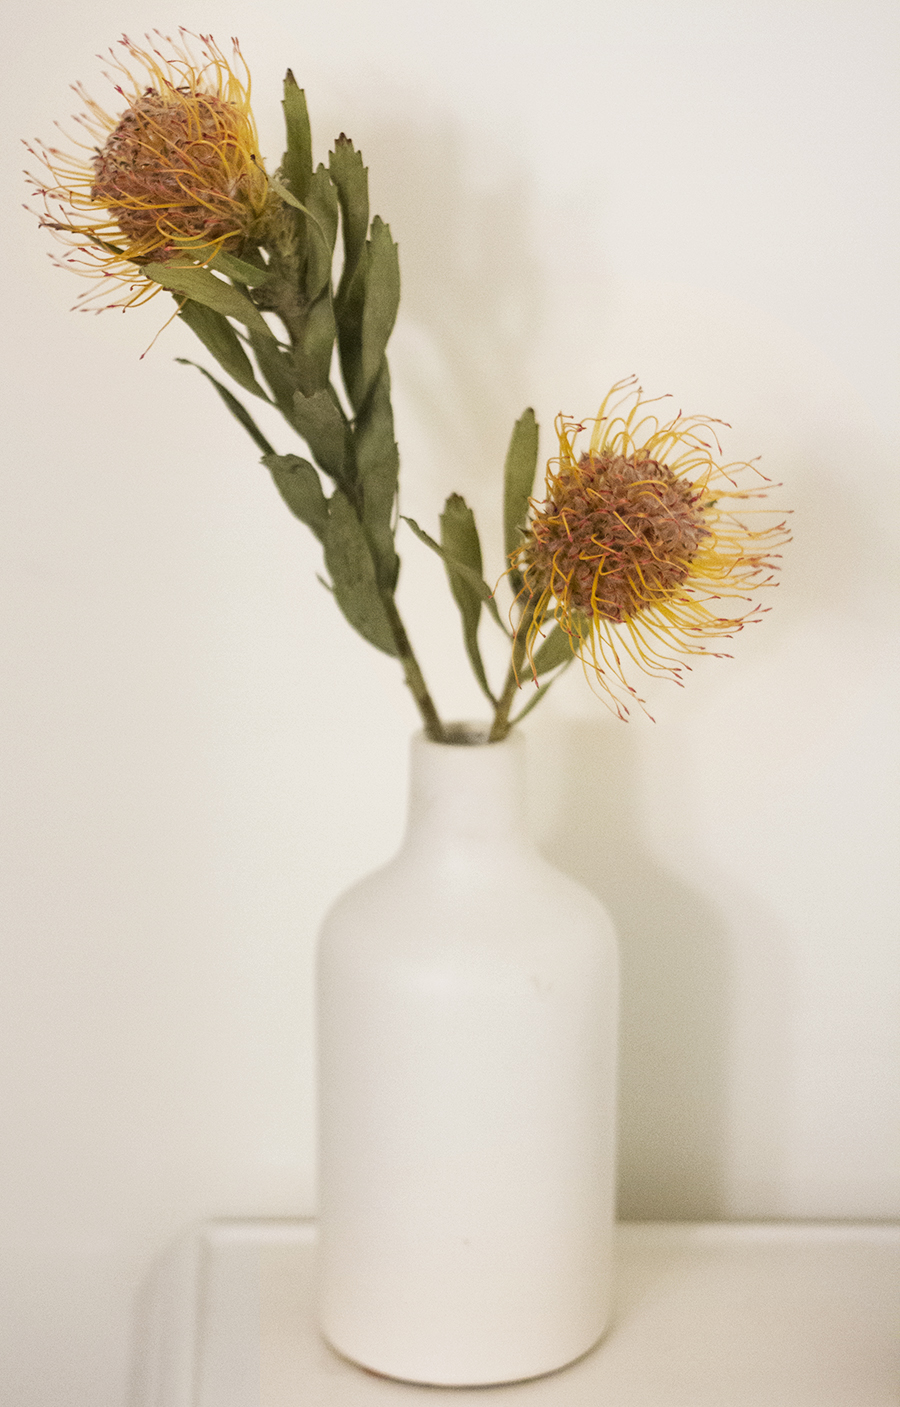
Above the sink I choose to hang a shallow shelf, our intent is this to be used as an everyday bathroom, whether it be for the boys when they are older, or us grown ups now. That being said we’re gonna need to have a spot to set tooth brushes and the like. Plus it doesn’t hurt to have a spot to set out a simple bouquet of flowers or a small potted plant. I ordered this piece of reclaimed lumber online in a dark walnut, I choose the walnut to mirror the dark brown floors in our basement living room. The beveled mirror hanging above the shelf, was found in our attic and I believe that it’s from the 40’s. I thought that there were no goodies left up in the attic and then one day while investigating the dark corners I found three mirrors, including this one. It makes me happy to put an old part of the home back to daily use.
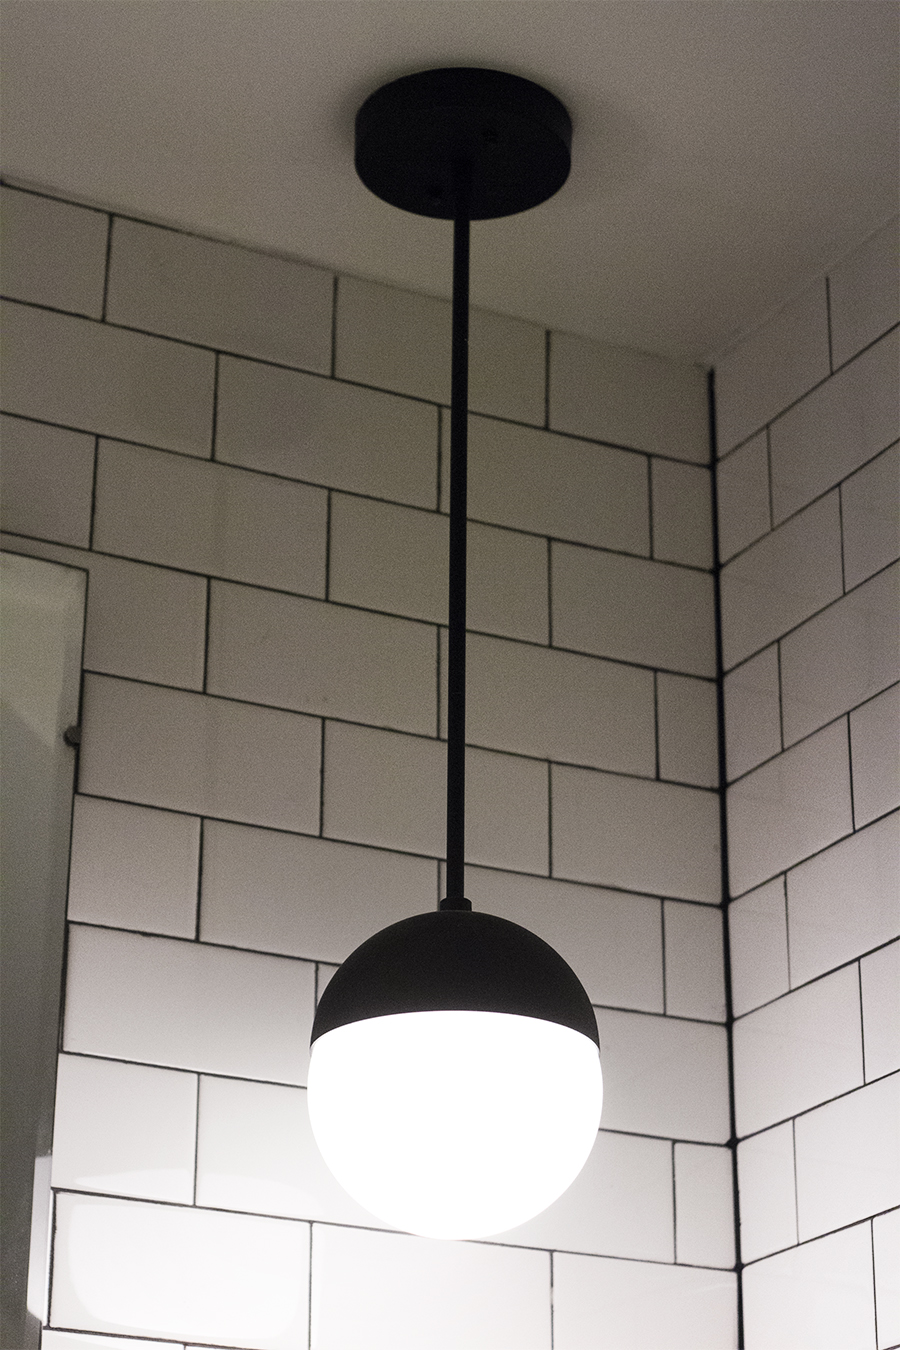
The sconces flank the mirror and are the major source of lighting for the bathroom. Because this is a basement bathroom, there is no natural light (which is such a bummer when it comes to taking these pics!). It was important to have adequate lighting in here. These sconces are on a dimmer, which might seem a little extravagant for a bathroom. But I wanted to have super bright light for all that supermodel primping I do (ha), and being able to make it moody in the evenings. It needed to be done. You might remember that I built the sconces myself using lighting pieces found online, and don’t you worry, there will be a tutorial on that soon — along with a bunch of other bathroom related posts!
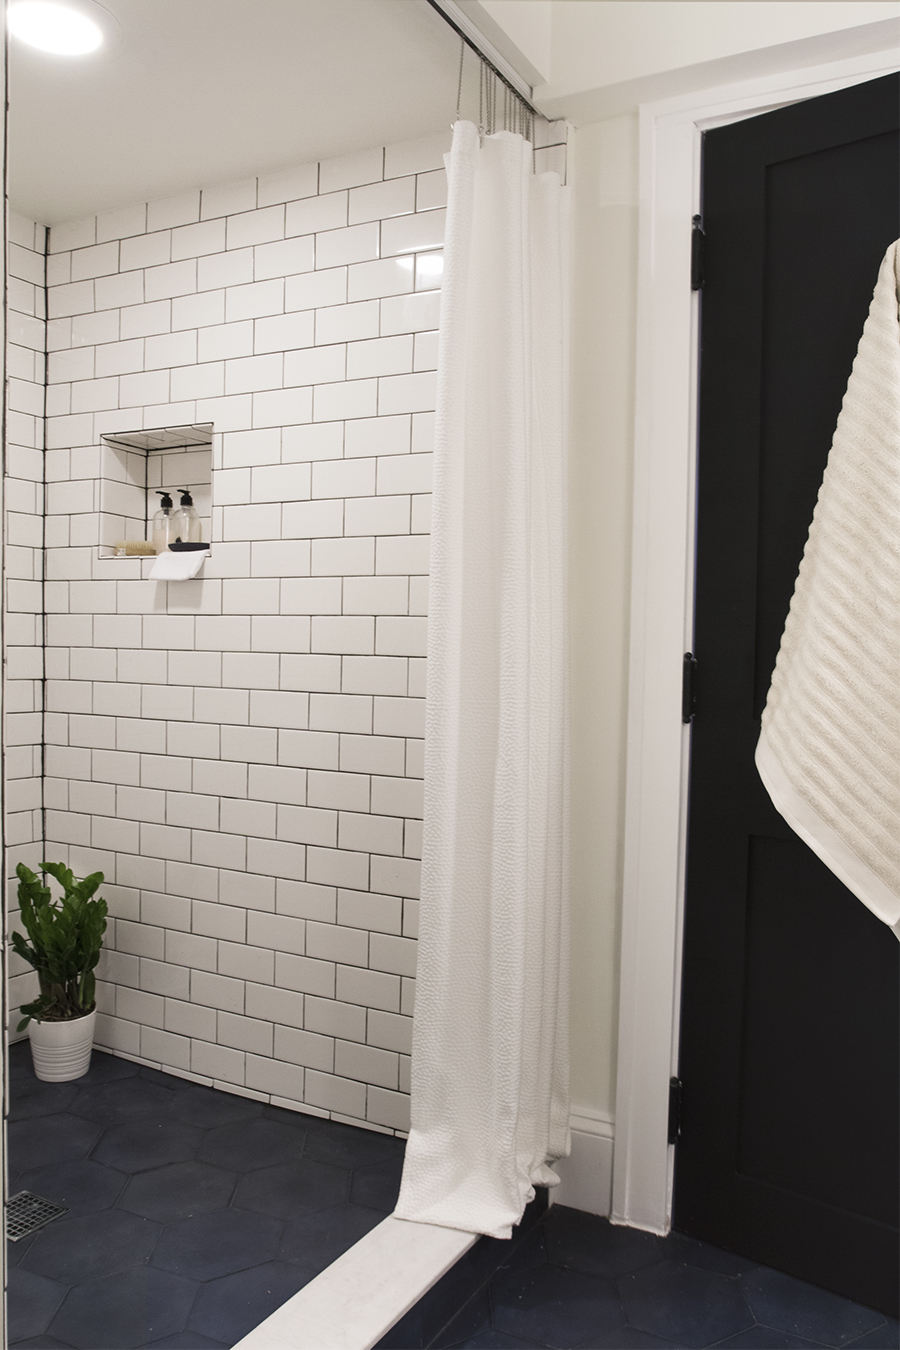
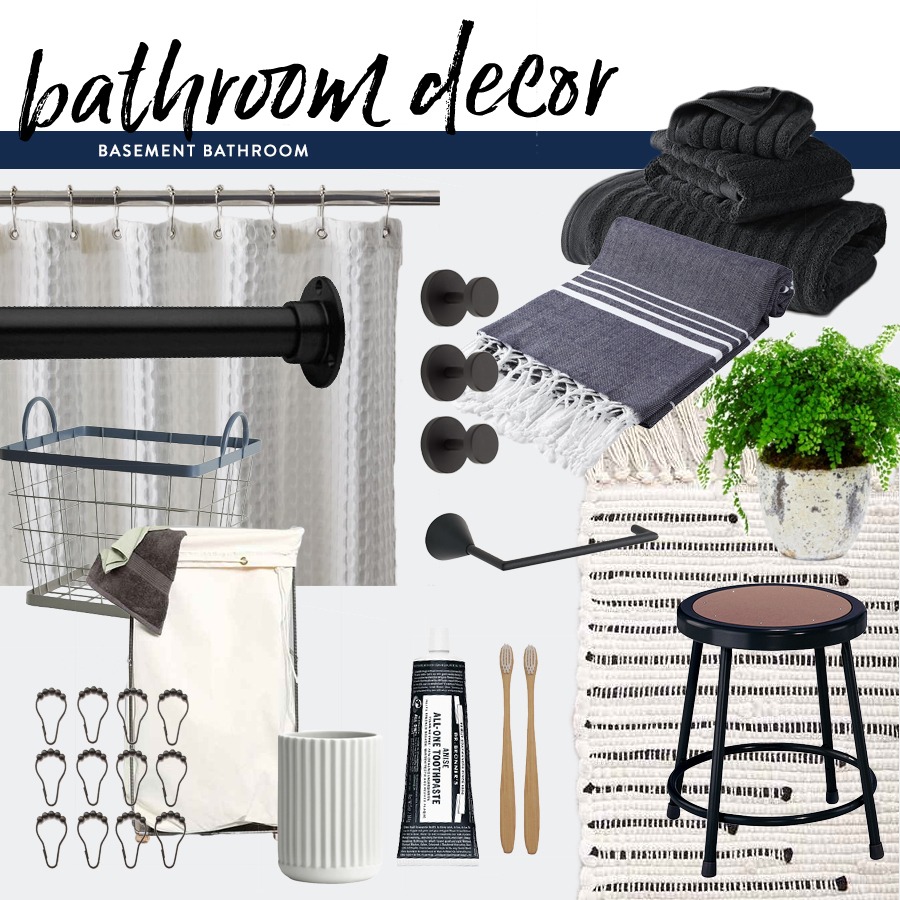
Shower Curtain | Shower Curtain Track System | Bath Towel | Towel Hook | Soap Bottles
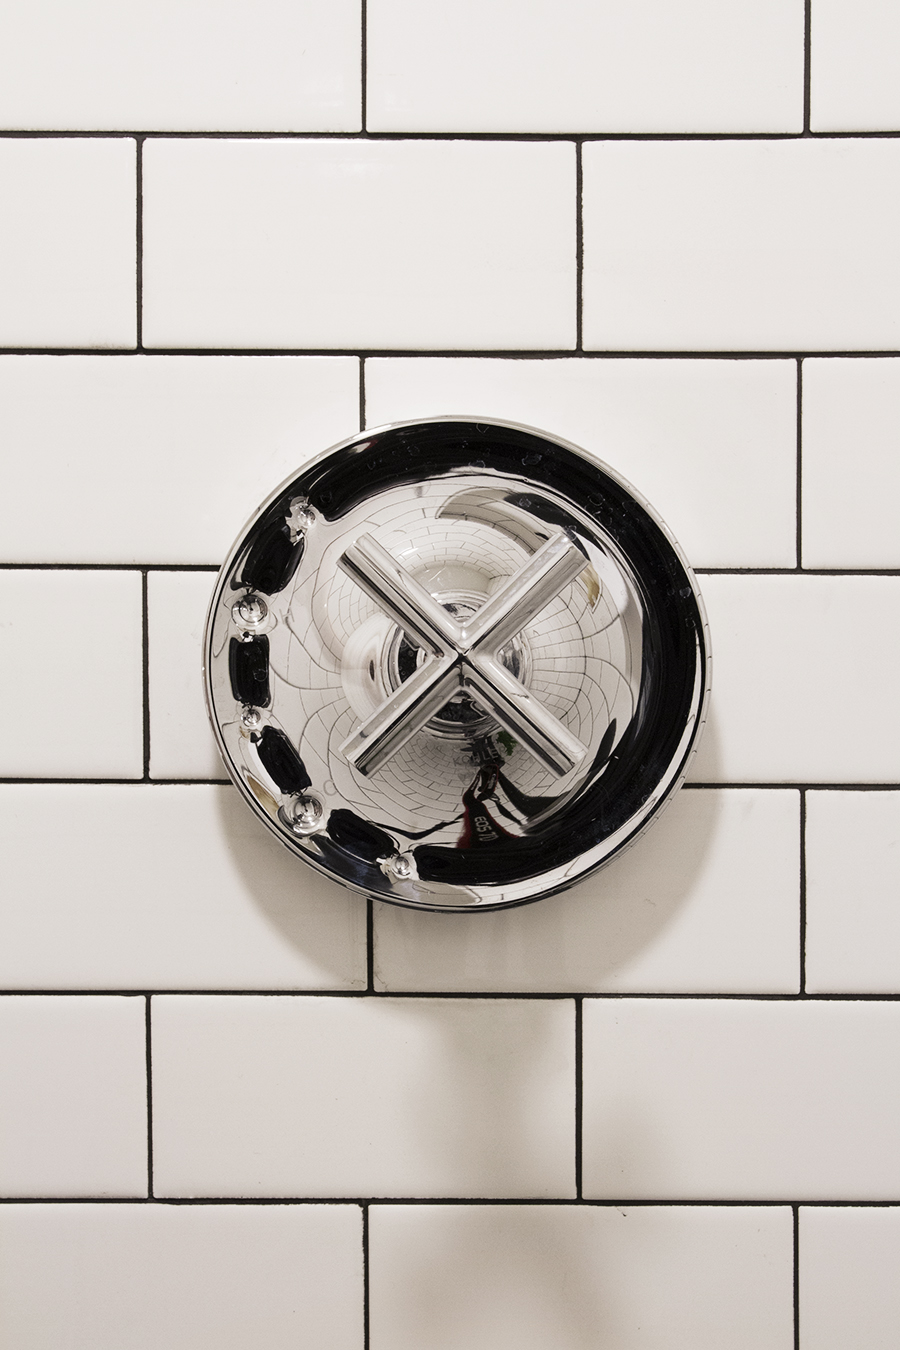
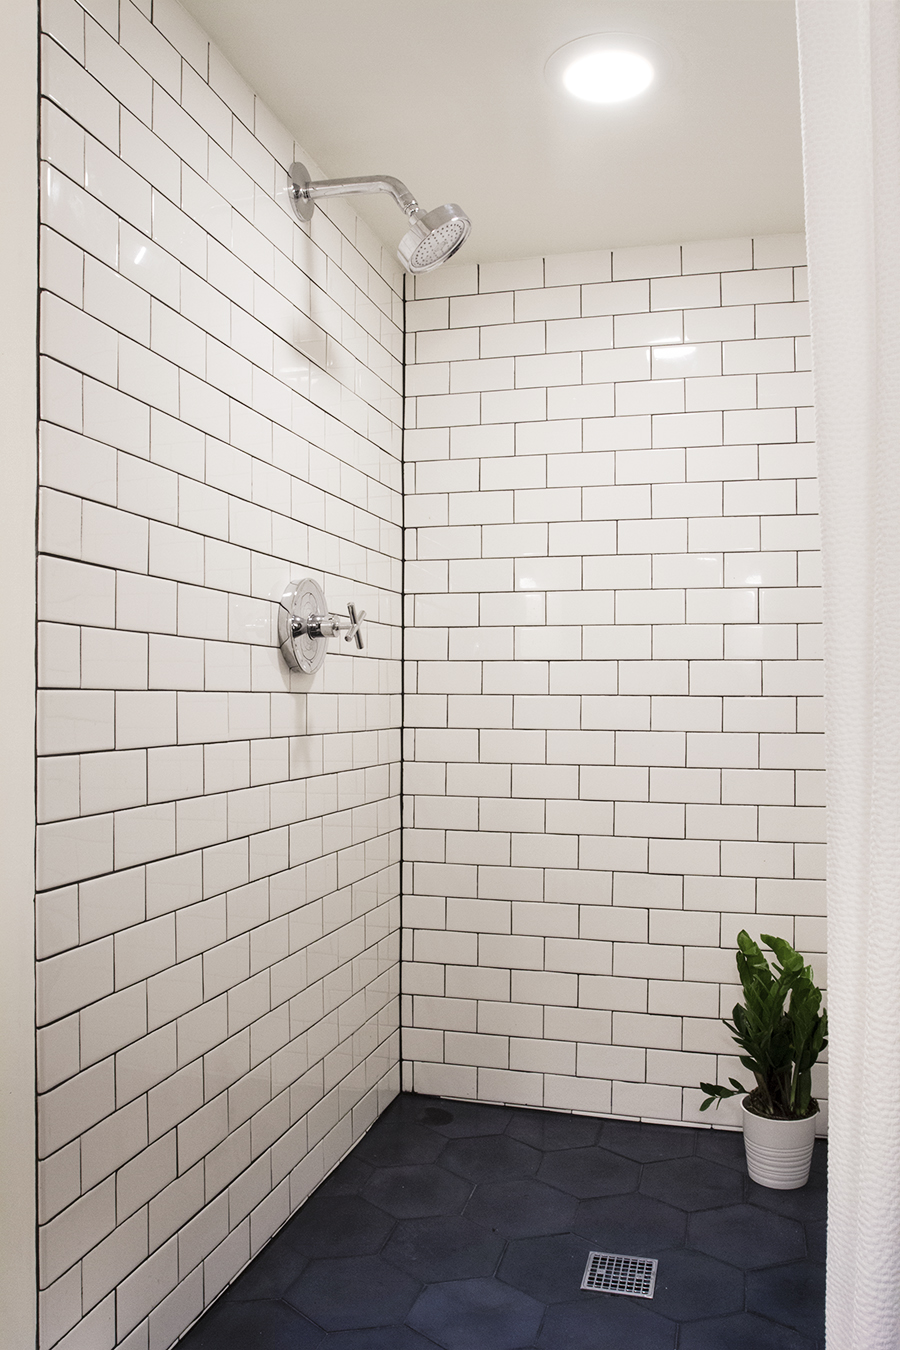
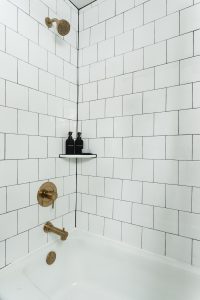
Moving on, let’s talk about that shower stall. It mostly consists of tile (duh), but there is still some complex stuff going on behind that. For example, I needed to figure out how to replace the old shower valve with a new Kohler Valve. A few Youtube videos (this ones a real doozy) later I was starting to grasp the general concept of how the nuts and bolts of this whole operation was going to work, but I still didn’t know exactly how I was going to plumb it. There was already an existing combination of pex and copper piping. Not wanting to invest in tons of plumbing tools and equipment I found a do-it-yourselfers BFF: Sharkbite. This stuff allows you to connect pex, copper and even brass threaded fittings. With my new friend Sharkbite by my side, I did some measurements and had the new valve connected and braces into place within an afternoon. Because our shower stall is adjacent to our unfinished utility room, it was easy for me to take down sections of drywall to work on, and test the plumbing from the other side.
Once I had the plumbing tackled installing the shower valve trim and shower head was super easy. The Kohler Purist fixtures take a vintage aesthetic and make it modern and new. I am actually turning into a shower person now – that says a lot because I am a die-hard bath girl. I’ve taken two showers since finishing up the job, and I plan on taking many more. This stuff is good.

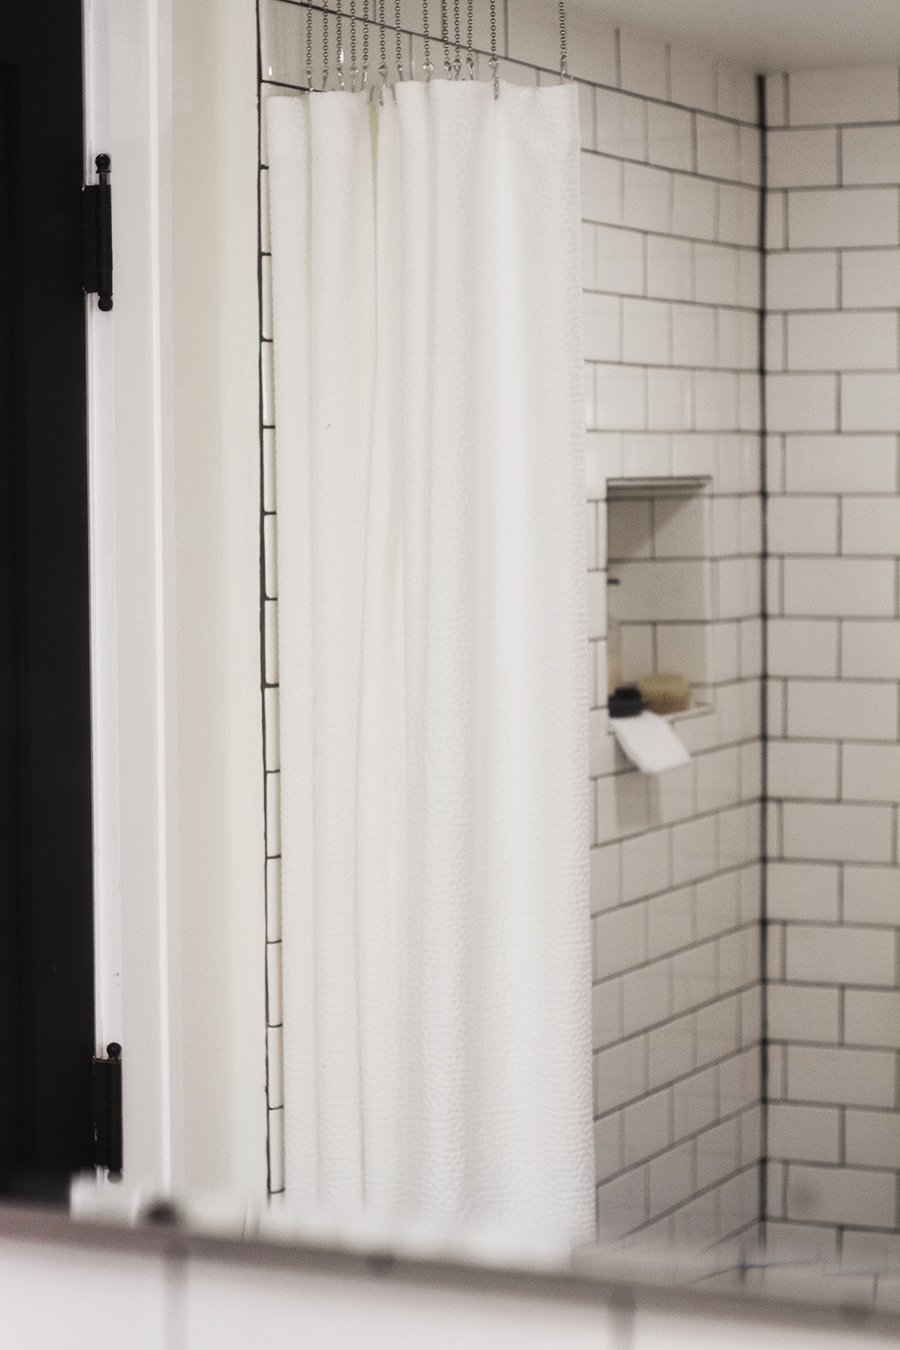
The other big hurdle in the bathroom was that little niche. You wouldn’t think much of it, but from a tiling perspective this little thing deserves a lot of consideration. I planned out how the tile would intersect at the niche for the better part of an entire morning. I wanted the tiles around the niche to seem centered, more or less. It would be such a bummer to tile the whole way up the wall only to realize that the tile that abuts the bottom of the niche is nearly full sized and the tile at the top of the niche is only a sliver. I would seriously die if I tiled all the way up to the niche just to find out that the intersected it all wrong! During this whole planning sesh I had also decided that I wanted the tile on the back of the niche wall to continue the pattern and line-up with the tile on the surrounding wall. Around the perimeter of the niche I had used bullnose tile to give it a nice finished edge and I also mitered the corners. Who’s da boss?
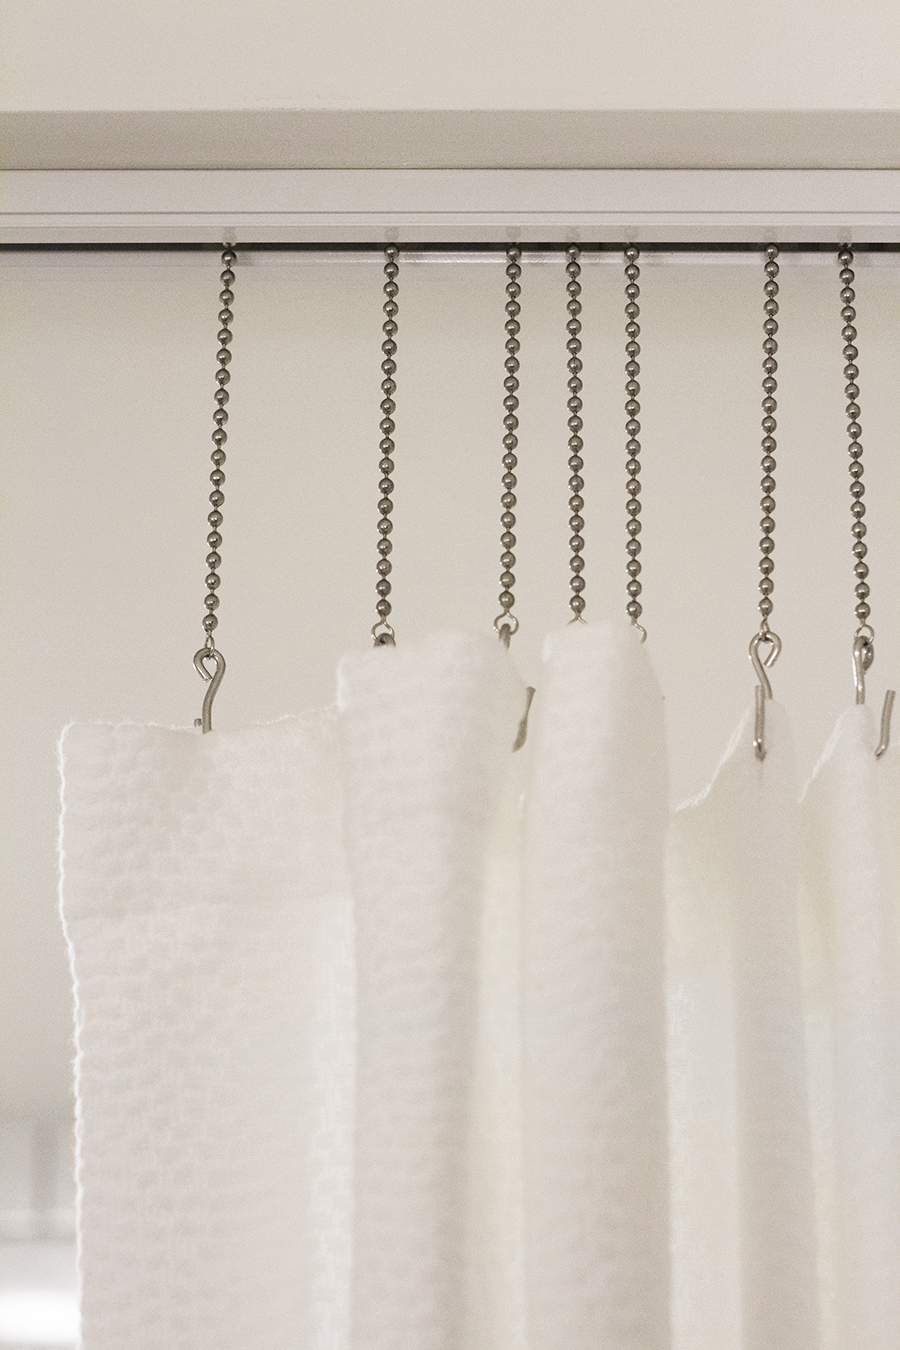
Something that I hadn’t planned on being an issue was finding the right shower curtain. Originally I thought, no biggie, I’ll just throw a shower curtain rod up and blamo! Done. However, I hadn’t taken into consideraysh the fact that my super tall husband would have to duck every time he entered the shower. I needed a new solution and after brainstorming I thought maybe some sort of hospital track system could work. With a hospital track I could mount the track directly to the ceiling forgoing the need to drill holes into the tile while also making it super easy for the old man to get in and out of the shower.
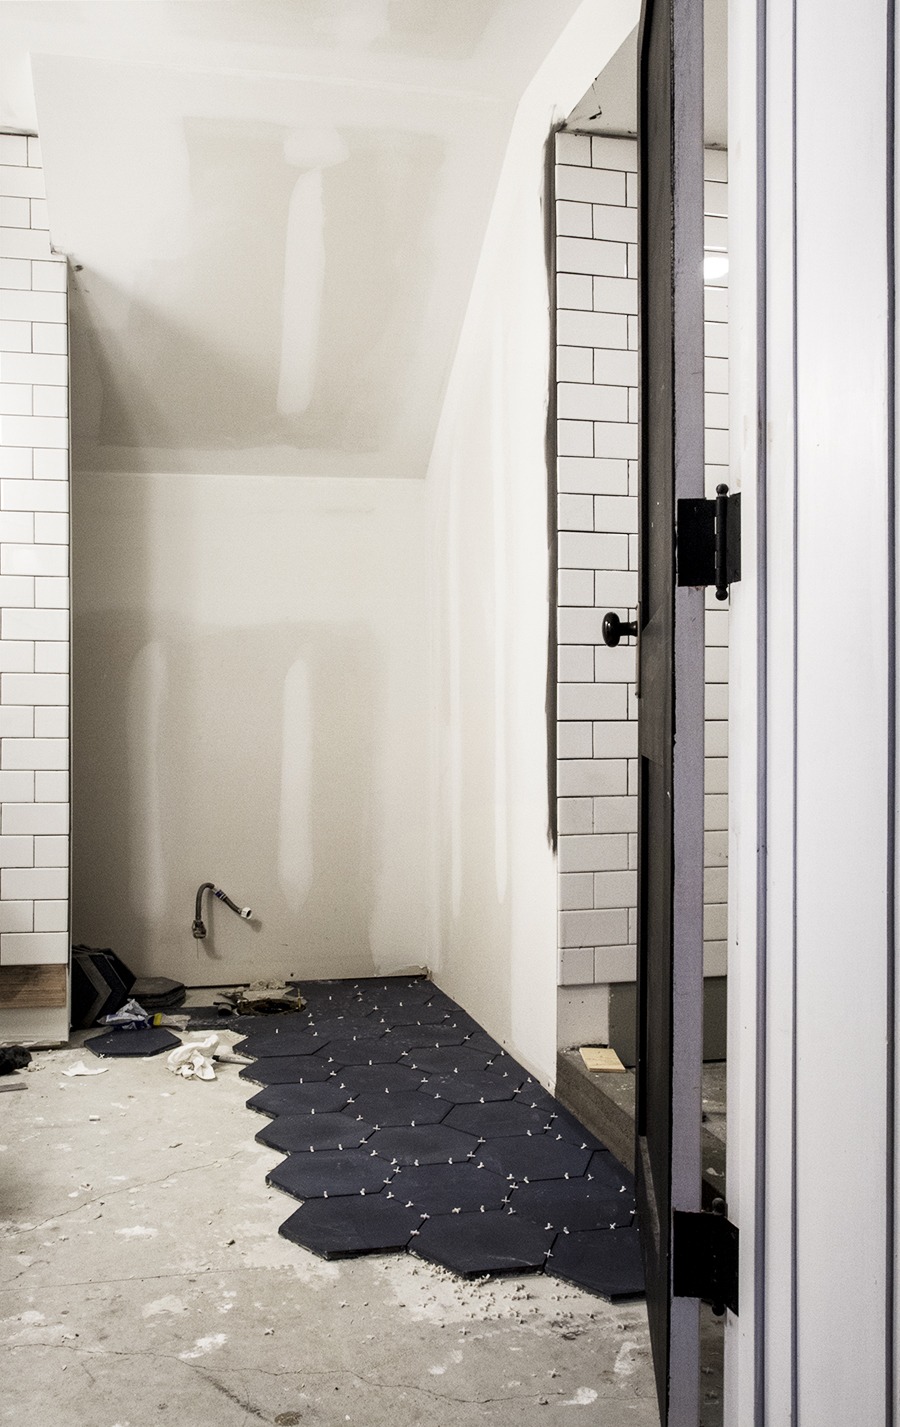
Half way through January my floor tiles finally arrived from Clé Tile, and I was ready for ’em! Again, as it is with all tiles, planning is half the battle. I laid the floor tile out in a few different configurations. I had a few objectives. First, I wanted the tile to run centered under the sink. Second, I preferred it to not intersect the toilet in a strange way. Finally, the drain in the shower needed to be centered as well. I found a layout that would fulfill all these needs and I started tiling like mad. It took the better part of a week to finish, but the results are pretty great.
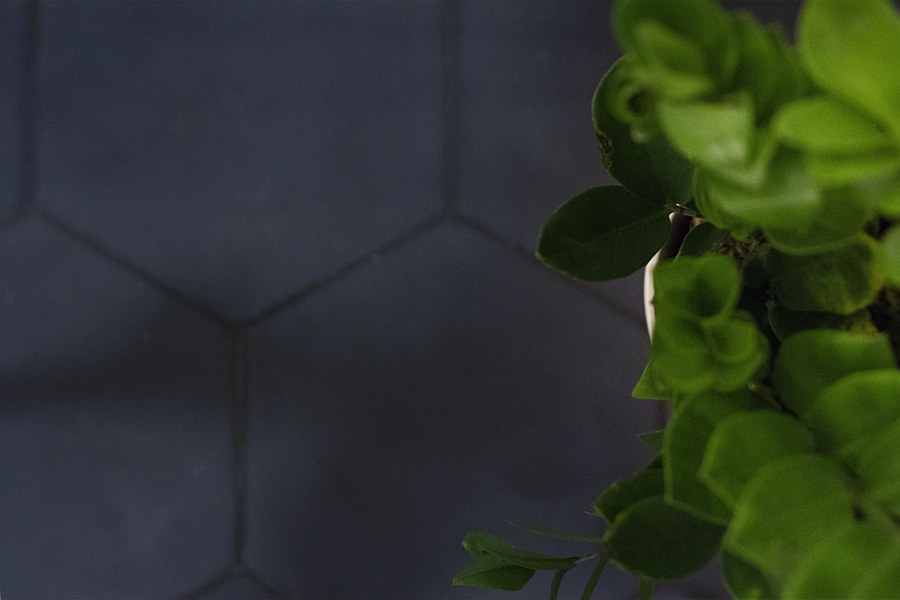
I had almost pulled the trigger on ordering a matte penny tile when I happened to come across cement encaustic tiles and was smitten. I had to dump the penny tile asap, and with the bucks I was saving on the sink I could be okay with spending some dough on the floor tile. I honed in on this dark blue tile in a large 8″ hex. The hex pattern is a nod to the era of the house where this tile pattern would be commonly found, although in a much smaller size. See, it’s like a modern version of an old standard not any different than Brandon Flowers singing Frank Sinatra.
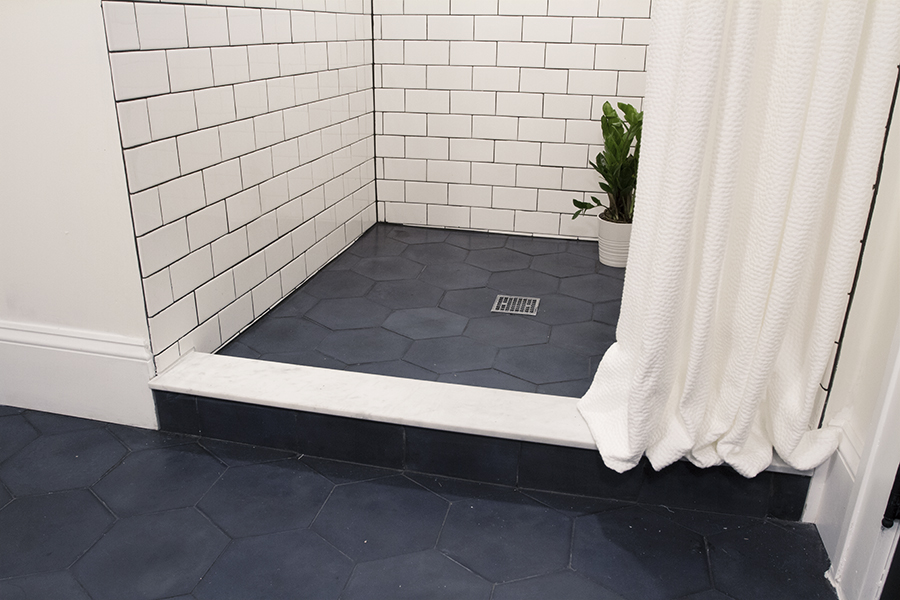
One of the only things I hadn’t planned for was the shower curb. I didn’t really know the best way to approach it, and I figured I’d either have to do it in subway tile or the blue hex. The subway tile just didn’t look right, no matter what configuration or types of bullnose subway tile I tried. I was afraid of doing the hex because I would have to do miter cuts within a pattern to give it a finished look, and that seemed very intense to me. Thankfully I roll with a crew of very smart women (aka The She’Vaughn’s) and they suggested to me that I cap it with a piece of marble. I was a little hesitant that it would look strange considering there were no other places in the room that I used marble. They told me to shut up, trust, and stop overthinking it. I found a place online that sells large chunks of marble stuff in all sorts of widths and lengths, and then ships it in absurd amount of packaging to keep it safe. I ordered a 6″ x 48″ hunk of this stuff, and then trimmed the edge down with a wet saw to fit my curb perfectly. It was the right choice.
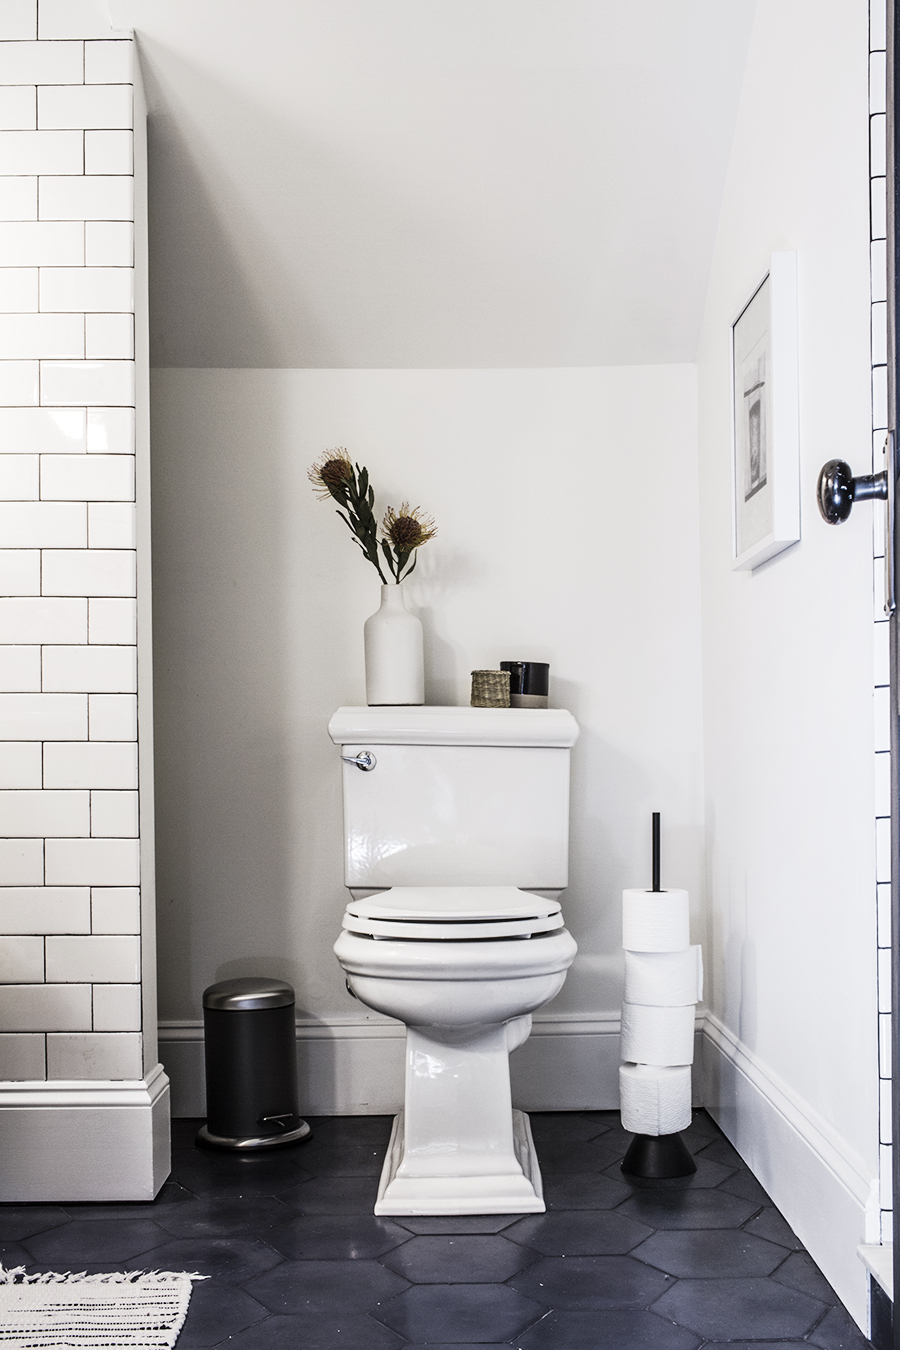
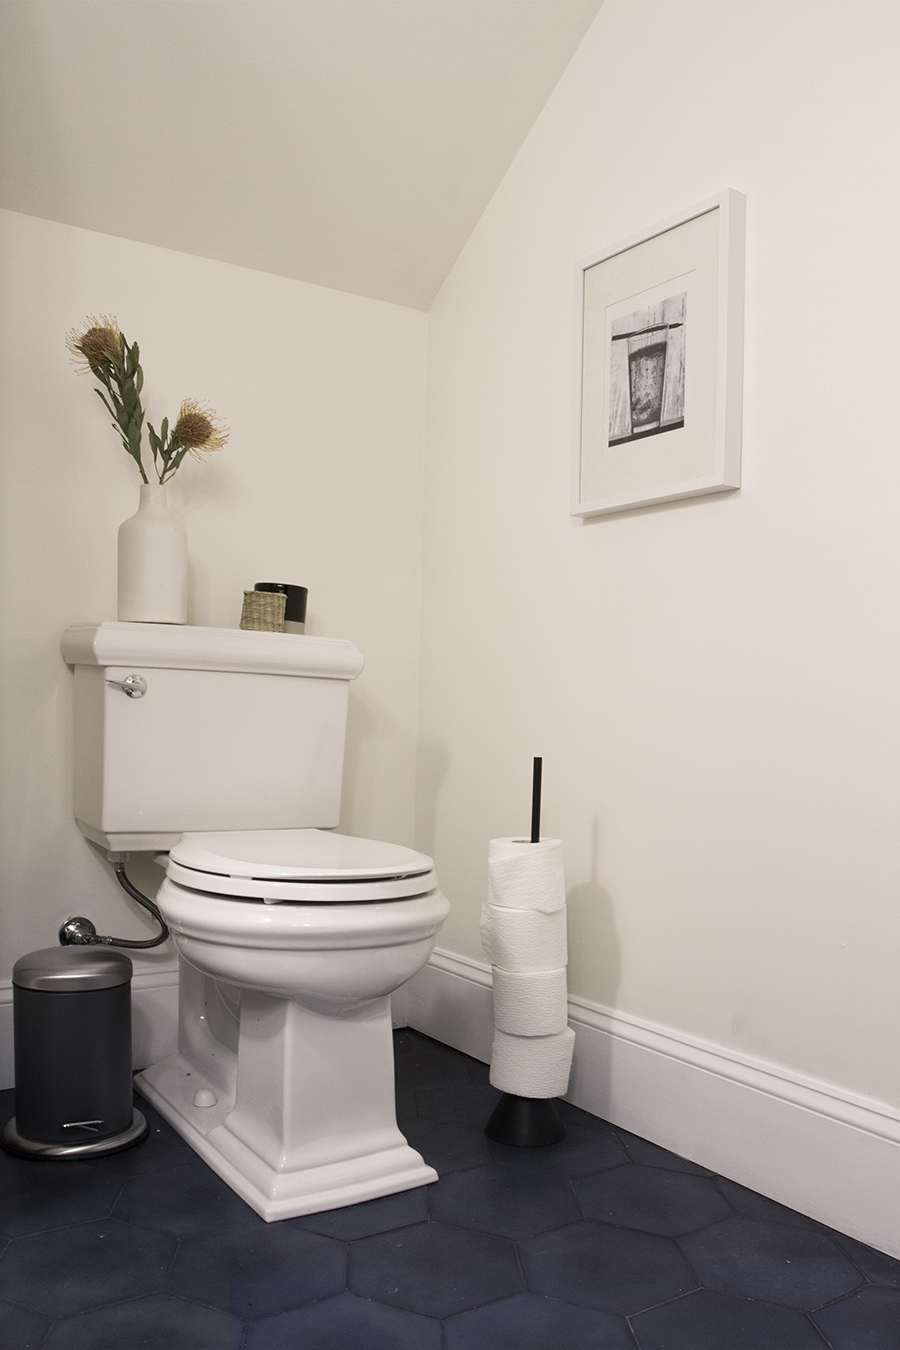
Now comes the easy stuff, the finishing touches. I replaced the old toilet with this new Memoirs jam from Kohler. The Memoirs toilet has a classic skirt reminiscent of the lines repeated in the baseboard molding around our house. I felt that this was a good fit to balance the old with the new. As an added bonus it’s high efficiency and has the potentsch to save us up to 16K gallons a year. So tyte.
I had never installed a toilet before, but it became clear quickly that this is a very easy upgrade. It comes down to removing the old toilet, and setting the new one in its place. The only thing you need to do is turn off the water temporarily while doing the change out, and replacing the old wax ring with a new one at the drain connection. It’s all very basic plumbing and shouldn’t scare anyone off. I had my computer open to an article from This Old House and I didn’t even need to read the whole thing, that’s how easy it was.
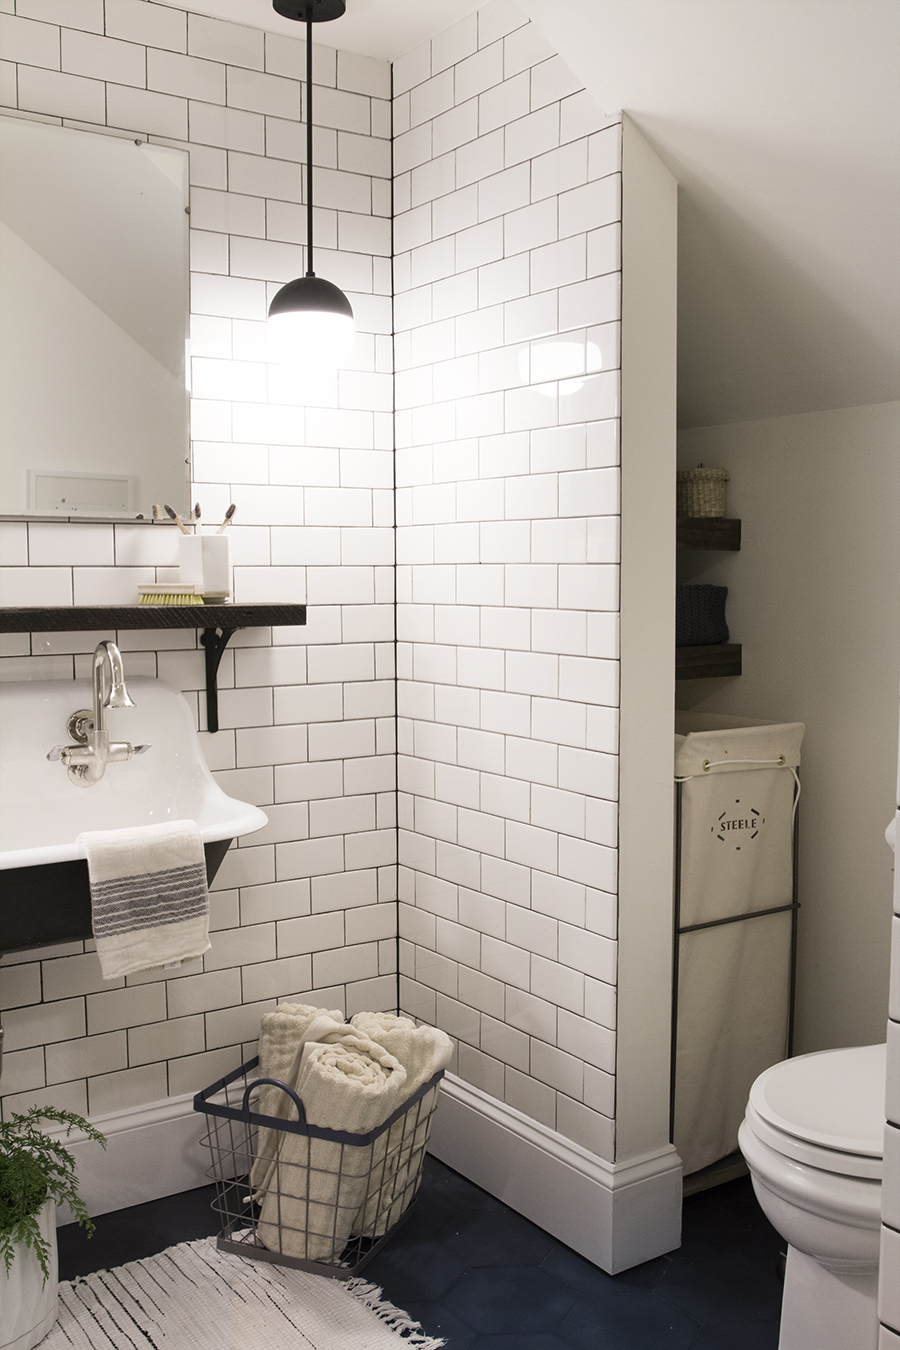
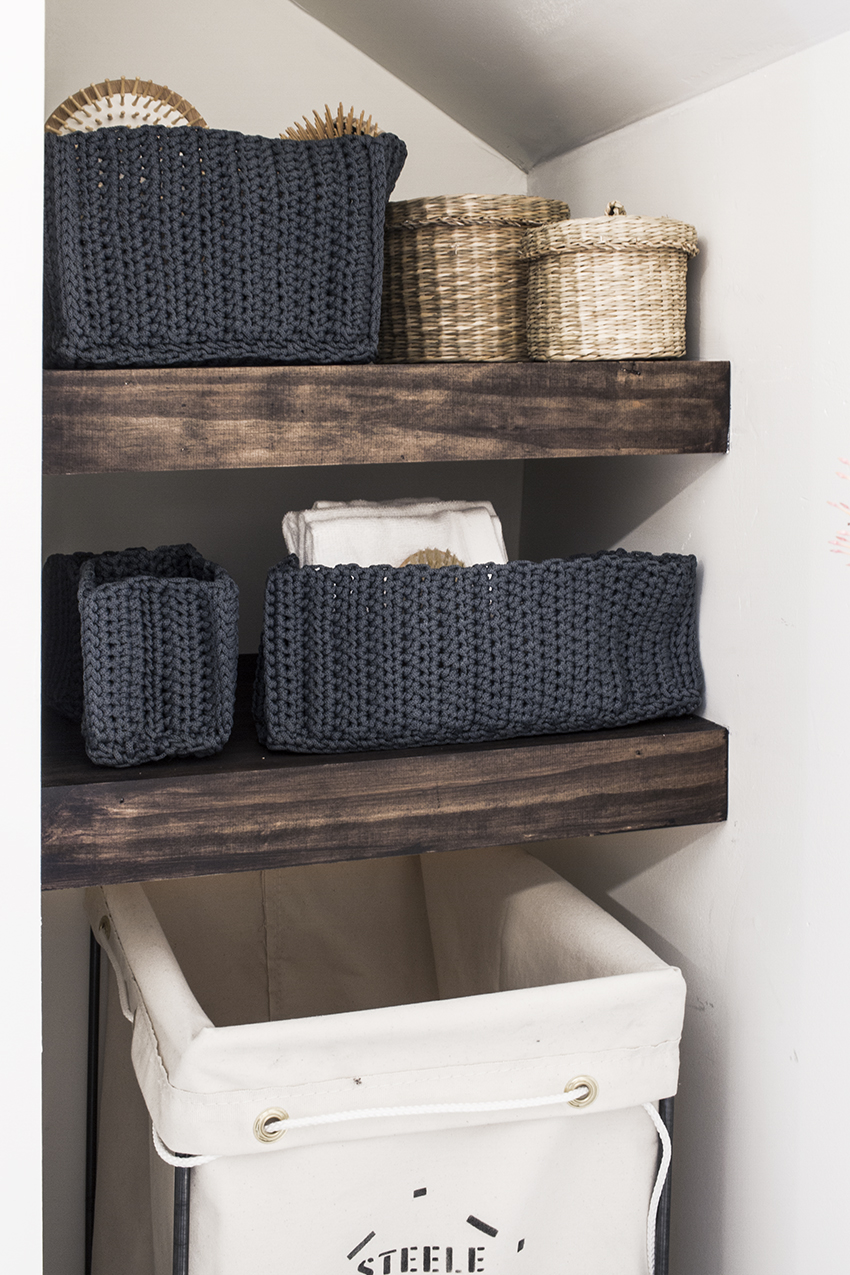
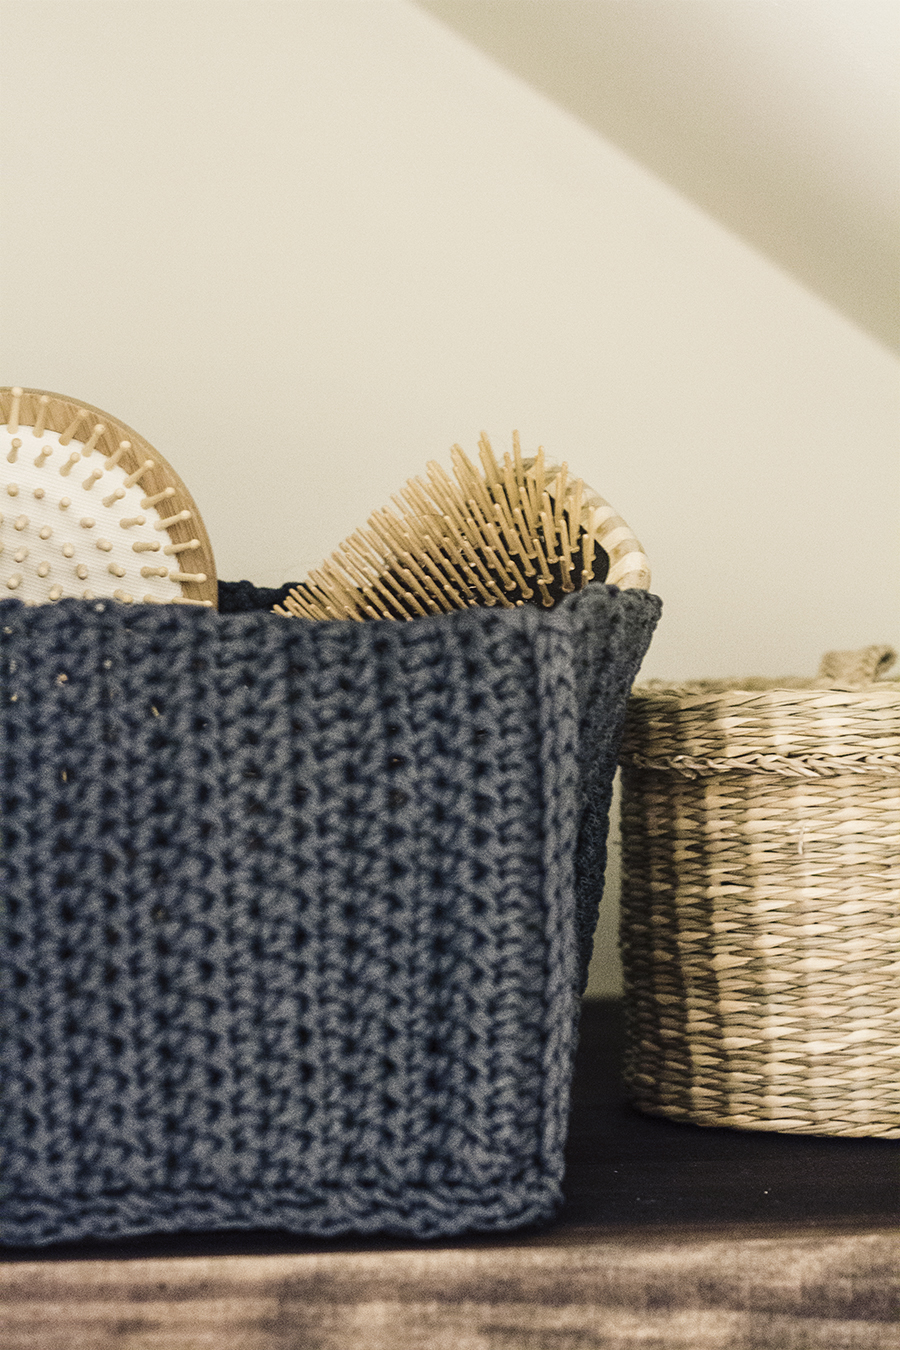
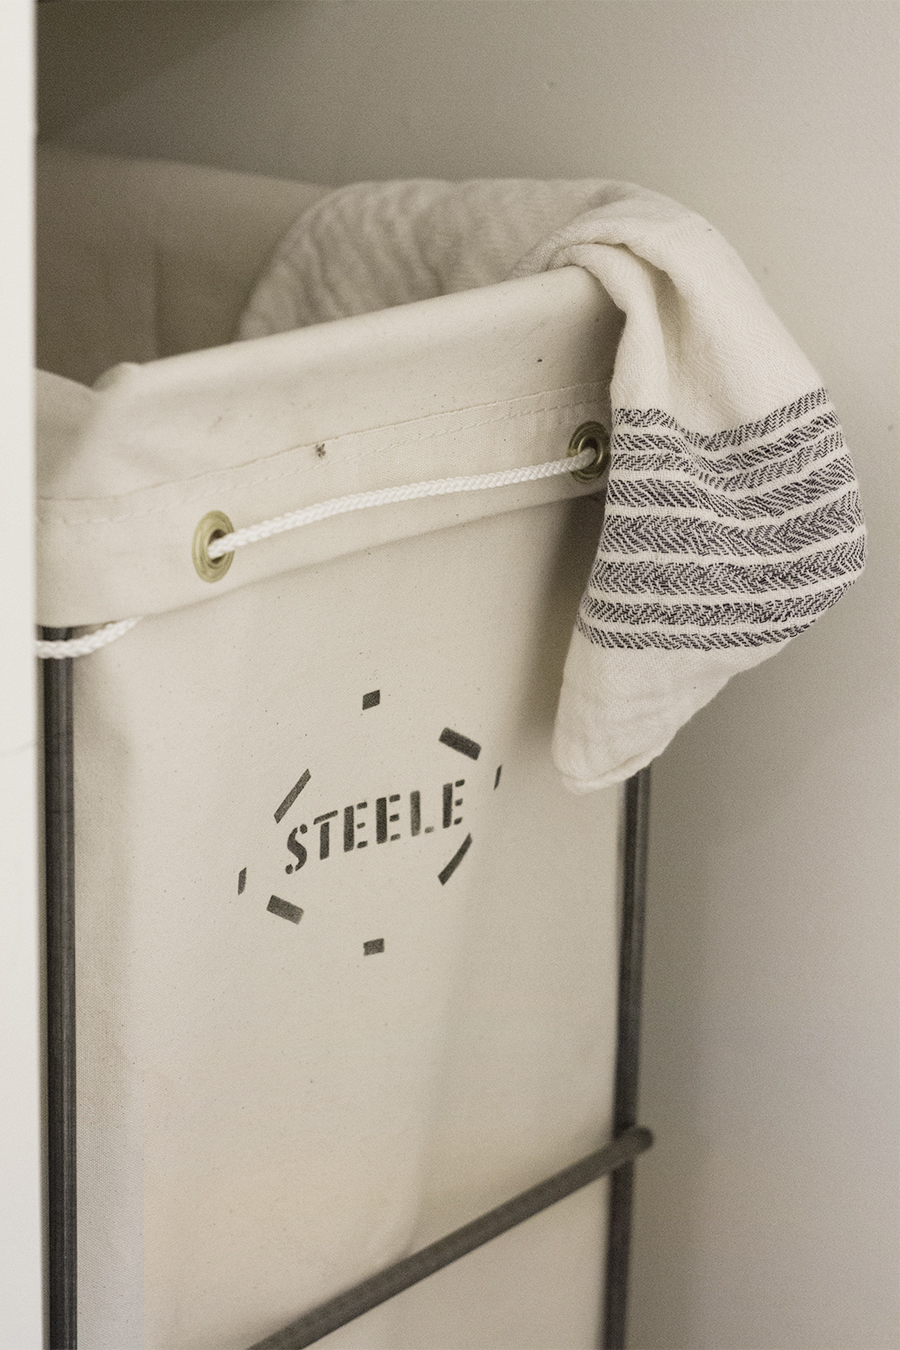
The finishing touches included adding floating shelving to the linen closet nook. After all the labor put into the rest of the bathroom, this job was easy peasy. Installing shelving like this is very simple and I’m going to get more into the details on an upcoming post – stay tuned. Because there is not a lot of room for storage in the space, everything has to have duel purposes. For instance, instead of using the valuable storage space in the shelving area for towels, I instead set a basket on the floor full of towels and also hung a fresh towel on the back of the door with a hook. Since I didn’t want to use the shelving for toilet paper storage, I purchased a free standing toilet paper holder that can hold up to four rolls. This is also good because no one changes out the toilet paper at my house (we are the worst). I wanted that valuable shelf space to be used for toiletries so I organized items into small baskets that can be brought out when primping and tucked away when done. There is also a hamper below the shelving that I added casters too. The hamper is a canvas back on a wire rack so it can easily be pulled out from under the shelves when it comes time for laundry-doing. It’s like I thought of everything, or something.
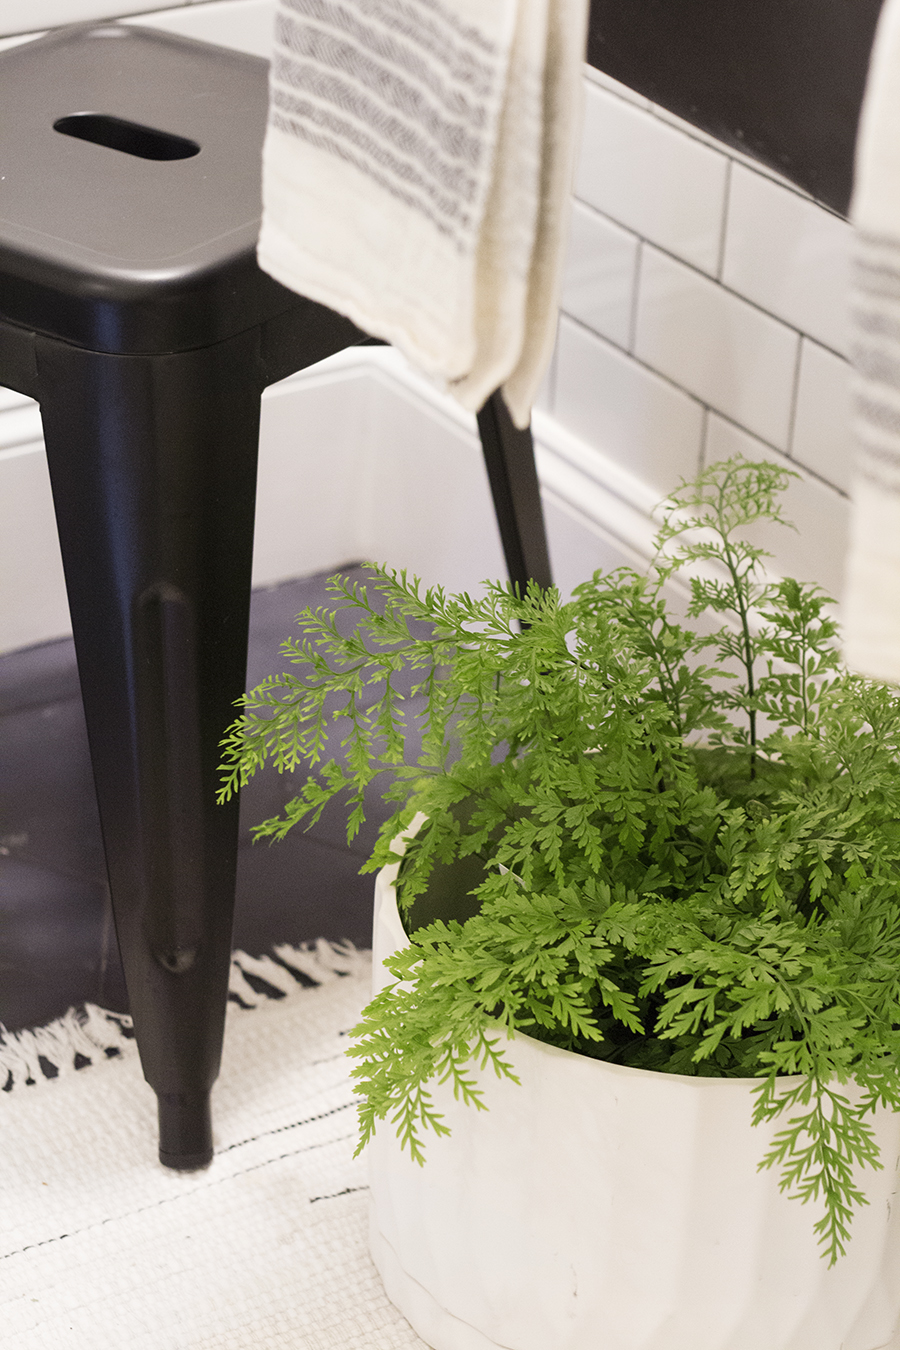
Being that there is no natural light, I may have gone over board with the plants, but I think it helps to add life to the space! I used a stool as a plant stand (for now) but anticipate the kids pulling out the stool to get a look at themselves in the mirror or grab a tooth brush, or a place to throw a towel before you hop in the shower.
The last day or two I installed the baseboard, it sits atop the cement tiles, that way the tiles can expand and contract as needed without having to be constrained by the baseboard. The baseboard is the same that we used in the main part of the basement and is reminiscent of the antique baseboard we have in the rest of our home. Everything that wasn’t tile got a fresh coat of paint, and it was actually kind of enjoyable to paint knowing that the more I painted, the more I could see the finish line. Not to be forgotten is the door to the bathroom, I painted it flat black and I love the contrast it adds to the space.
In conclusion ma friends: I’m still waiting on a few more hooks to arrive for towels, but I couldn’t stand not sharing the B-Room with you any longer. I’m stoked that it’s finally done and excited to share a few more details in the coming week(s).
If you’d like to recap, here are links to the week-by-week progress:
Week 1 | Week 2 | Week 3 | Week 5 | Week 6 | Week 10 | Week 11

Basement Bathroom : Week 11
Basement Bathroom : Week 10
Decking Out the Bathroom
Basement Bathroom : Week 6
Basement Bathroom : Week 5
Basement Bathroom : Week 3-ish
Basement Bathroom : Week 2


You did an AMAZING job- love every detail. Enjoy your new loo!
Thanks Marie! We are so excited to have it done and to be able to use it too!
I am in absolute awe of this, and am now inspired to take on my own little half-bath as a springtime project. Such lovely work!
KK, First of all, thank you! Secondly, you should do it! It’s so satisfying to see your plans come to fruition!
A-MAZ-ING!!!! Seriously. I’m so inspired. I have a really ugly first floor bath: Kermit the Frog green shower/tub and sink, 1980s beige flowered floor tiles…Ugh. I’ve been working with it, but now I think it might just need a good demo! (and white subway tile, hex floor and rockin’ sink).
Hey hey! Ooh all that green is tough! I saw that Anna from Door Sixteen has been working with her green bathroom too, maybe there is some “in the meantime” inspiration to be found on her blog or IG feed.
Where do I start? I like so many things you put into the bathroom, but most of all that you did it all yourself! Bravo. Other things you got so right: the black door, the dark grout, the hex tile, the double tap sink, the floating shelves, the shower curtain…. the list could go on and on. :)
Emelia! Thank you so mucho! I feel really good about doing all of it myself, and I feel lucky that I can share it with you guys!
I have SO enjoyed your honest postings in this series–I feel like I see so many DIY makeovers that never really talk about the nitty gritty details! This room is STUNNING and you should be SO proud!
Hey Abbie! I would love it if every blogger out there got into the nitty gritty, that’s the stuff I love and I think that’s how others learn. Sometimes just seeing else do it makes the whole process make sense! I am proud, and THANK YOU!
Oh goodness, SO GLAD you guys are doing better…that sounds like a nightmare! And you know I’ve been watching this transformation from day one, so the fact that it’s finally finished makes me so giddy, as if it’s my own space! OBSESSED with the hospital track idea – I absolutely abhor curtain rods, but since a nice, sleek shower door isn’t in the budget for our master bathroom at the moment, I’m going to consider your idea. XO
Hey-a! Yes, it was the worst sickness ever, totally miserable and so glad it’s behind us. I’m stoked that you liked watching the whole process, sometimes I don’t know if all the details get boring or redundant. You should really consider the hospital track, if you do a pinterest search i.e. “Shower Curtain Hospital” you might be convinced. I saw a lot of pretty setups out there. It would work really well for someone that had a claw foot tub too, because they have archs that can be added on to create right angles and you can cut any size to length.
it looks amazing!! can you share your hospital curtain source?
We just DIY’d our 3rd bath reno, so the intense amount of work required is fresh in my memory. Gah! I enjoyed watching yours progress. You crafted a stunner!
Wow, 3?! That’s insane! I want to someday do our upstairs main bath but I’ll have to wait until this one is a distant memory. I suppose it’s kind of like pregnancy, eventually you forget how much work the whole process takes and someday it sounds like fun again.
Amazing! You should be SO proud! I’ve been looking forward to the reveal for weeks, and it did not disappoint! I can only imagine how glad you are to have it completed. (In excitement, I even texted my friend who first introduced me to your blog. We’re fellow Minneapolans.) :)
Hey Neighbor! So glad you’re into it! I am super happy to have it be done, it was a lot of work and I’m looking forward to spending more time doing blog stuff etc! Enjoy the warm weekend!
Congrats – its gorgeous :D
Thanks, Kate! I’m so happy with the results!
Absolutely incredible! You worked so hard on this for so long. You should be really, really proud of yourself! I hope you have plans to celebrate. You must be so happy to have this beautiful work of art of a bathroom be a part of your everyday life.
p.s. I’m impressed you kept going even to those little finishing touches. I still have random shelves and things I need to hang after completing our basement reno over a year ago!
Hey Alyssa! Thanks! I am really proud, not gonna lie, I feel pretty great about it. Yes, of course I’ll celebrate – I love an excuse to pop a bottle of champ. We’ll probably try and get the entire basement super clean and enjoy it as a finished product while we laze in front of the TV.
p.s. There are still two tiny things on my punch list, I need to grout one small section that needed to be tile last because of the shower curb, AND the shower curtain is only pinned, I haven’t actually hemmed it yet. I only hope I take care of these two things in a timely manner.
Wow! It looks amazing!! You did such a beautiful job designing the space and then to top it off, did all the work yourself?! Mind blown.
Thanks Danielle! This sort of work makes me so happy, and I’m glad I have the opportunity to share it with you guys!
This looks amazing! I’ve been following along closely, as my husband and I are starting a bathroom reno in a couple weeks (and it’s our only bathroom, and we’re expecting our first kiddo in mid-May, so super time crunch!). This makes me so excited for our own new bathroom! Would you happen to remember what color the white subway tile is that you used? We’re also going with white subway tile and are trying to source it so it all matches (your link to the short end bullnose is CLUTCH!).
Oh my goodness, that sounds crazy to start a reno when it’s your only bathroom! Keep that toilet intact until the very last minute! The subway tile was Daltile, I purchased the regular tiles at Home Depot in the standard white. The bullnose I found online at Wayfair you can find the link here. I too like the look of the bullnose edge on the “short” side, I’ve seen people do it the vertical way and make a border as well, but I don’t like the look of that as much. I grouted around the bullnose corners so that it has that nice black edge and then just cut in with a paint brush and white paint to give it a crisp look. Congrats on the babe-in-the-oven!
Totally amazing! I can’t imagine how proud you feel to have accomplished this all yourself! You are a rockstar and all of your planning paid off. Looks excellent.
Thanks, Emily! Super sweet of you to say :) I’ve been loving seeing your nursery come together, super cute!
Congratulations on a stellar re-do! We have completed a bathroom + powder room in our project, + it looks like we like the same finishes as you. Fun!
Hi Kay! Congrats on finishing up your projects! I’m sure it both look great with those finishes!
I think the bathroom looks absolutely beautiful and am in COMPLETE AWE that you did it all yourself. Congrats!! You deserve that glass of champagne!
Hey Jeewon! Thank you! Who am I kidding, there will probably be more than one glass ;)
Hot damn, this looks awesome. I love everything about it. And, it really boosts my confidence to continue my own forays into DIY plumbing. Congrats, and thank you!
Yeah! There is so much good stuff on the internet regarding DIY plumbing, and I can’t recommend that SharkBite stuff enough for connections. It’s a little spendy, but cheaper than a plumber! Good luck on your proj!
It looks fantastic; great job! Quick question: where did you find the “collar” (not sure if that is the correct term) that covers the spot where the drain pipe from the sink goes into the wall? I put subway tile in my bathroom and have been looking high and low for a way to cover the place where the pipe from the sink meets the tile. It’s an old sink so there is no vanity, otherwise I wouldn’t worry about it.
Hey Sara, I will try and help with this. Our “collar” also known as an escutcheon or flange, came with the p-trap. You’ll want to know the diameter of your pipe to purchase a one-off piece. This is the trap we purchased and you can order individual parts here. Our trap was 1 1/2″ diameter, yours might be different. You can also find escutcheons at many local hardware stores and often they are adjustable. Here is a search from Amazon.
Amazing! So inspirational that as a total never-commenter internet introvert (internetrovert?) I had to pipe in to say that your basement reno is perfection! It looks like the best hangout!
We have a 1906 foursquare in Chicago upon which I’ve been dying to foist my rehab vision… like for years. Thanks to your keeping-it-real documentations I finally convinced myself to leave my husband alone to tinker with his pinball machines in the garage, let the kids fuss a bit, and take matters into my own hands.
Any additional tips re Sketchup – recommended tutorials (there seem to be a million) etc.? When you were modelling your vision did you get super-exact down to the inches, or more loosey goosey to convey the general idea?
Allison! Good pun! I love puns maybe a little too much.
Yes, you gotta take matters into your own hands! I highly endorse this. Sketchup is just weird, I searched for you tube vids that did “step by step wall making” or “floor plan tutorial”. I remember this one specifically and it’s for 8th graders, so… The annoying things is that you have to change tools all the time, so it’s best to learn the key commands to be efficient. I was very exact because I am crazy, but I would recommend erring on the edge of preciseness. Good luck, and thanks for saying HI!
It’s all freaking awesome. The tile, that sink, the lighting… love it all. You totally nailed it!
Thanks, Lizzie! We love how it all came together!
Really well done. I have been following this project since the beginning and I am so impressed with the results and the patience and perseverance you had to get this done on your budget. It looks stunning and you should be so proud!
Hey Ana, Thank you! Yes, I am super proud, I can’t wait to have some friends over so I can show it off. I feel very fortunate that I have the platform to share my handy work with you guys ;) Have a great weekend!
LOVE. I’d love to transplant it into my house ;)
Also love that you’ve had a chance to really break in your new space and told us about it. A few years ago the ENTIRE family was sick on Thanksgiving. Three bathrooms were not enough. The house was under quarantine. Friends left crackers and applesauce at the front door and then bolted. It got to the point were we ran out of clean bedding and towels for the whole house. It was so bad. We’ve named the event Pukesgiving, it it’s gone down in family lore. So I can truly imagine how comforting a newly remodeled bathroom would be while sick!
No! Pukesgiving! That sounds so similar to our house. The husband was the only one who made it through unscathed — he was so worried about getting sick. At one point I needed new bedsheets, and he just opened the door to our bedroom and threw them in. I don’t blame him, after seeing (and hearing) how we looked, I wouldn’t want it either.
A lot of work, but the results are just stunning – I LOVE IT! I also love following along your diy journey. I really appreciate that you actually diy the work, including the plumbing – how inspiring is that?!? And thanks for showing us all the details and steps. Though I might not want to grout now. I love the shower track, how brilliant! I am totally going to built floating shelves like yours too. And I’ve been dying to have that farmhouse sink too!
Thanks so much, Julie! I love doing the work! As I’ve gotten older, learning how to take care of my house has been the most satisfying and rewarding endeavor. I’ll have a mini tutorial coming soon regarding the shelves, they are pretty straight forward, but I’ll throw in a diagram or two too so that the general concept comes across accurately.
Fantastic Scoops!
Thanks, Vanessa!
I looked through to find the source for the Lights but couldn’t find it. I just love them and the whole bath is so PRO! Congrats!
Hey Kathy, I actually made the pendants myself and I’ll be sharing the DIY tutorial in the next week or two. Otherwise you can check out these lights from rejuvenation, they are what I based mine off of and they are on sale right now :)
this looks awesome!! i love the look of this so much! did you happen to purchase the white or oyster color of the crate and barrel shower curtain?
Hi! I LOVE your bathroom. Can you tell me where the bath mat, hand towels and soap dispenser (in the shower) are from? Thank you!
Found this on Pinterest and it is like my dream bathroom! I’m doing a similar style.. could you tell me what color grout you used for the subway tile? I’m unsure if it’s black or charcoal grey. Also what size spacers did you use? Of all the pictures of subway tile I’ve been looking at this is my fav!
Absolutely beautiful! I love the tile you used, although it doesn’t appear that the dark blue is still available. One person warned against dark time in one of your previous posts. Now that you’ve lived with the tile, any regrets? Water marks? Did you use any additional sealers after the install? I want to order from Cle Tile but want your feedback first. Also, I can’t find the link to the DIY lights. Thank you for any help you can give!
Pode ter certeza de que será seu melhor investimento. http://www.jaimelesstartups.fr/oneclickdevis/
I know I’m quite late to this party. But I’ve been researching some ideas for my own basement bathroom install. What an awesome job you’ve done here. Just the inspiration I need!
Hi there, I found your site by means off Google even as searching for a similar subject, your
site got here up, itt lookls great. I have bookmarked it in my google bookmarks.
Hi there, simply become alert to your blog through Google, and located that it is
truly informative. I’m going to be careful for brussels.
I’ll appreciate in the event you proceed this in future.
Many other people can be benefited from your writing. Cheers! http://delta.Universalware.de/jump.php?url=https://Mixmag.com.tr/read/carl-cox-istanbul-news
If you want to take a great deal from this article then you have to apply these
methods to your won webpage.
With havin so much content do you ever run into any problems of plagorism or
copyright infringement? My site has a lot of exclusive content I’ve either created myself or outsourced
but it appears a lot of it is popping it up all over the internet without my permission. Do you know any ways
to help stop content from being stolen? I’d definitely appreciate it.
Truly when someone doesn’t know after that its up to other people that they will help, so here it takes place.
Ever since online poker was started, there was a tremendous rush on the on the internet sites, propelling on the internet to like a multibillion dollar industry.
There are many the poker room currently available that
accept US players, but not them all do. For Example:
You are in third position, (three seats as soon as the small blind), with pocket sevens
(7 diamonds, 7 hearts).
Thank you for the sensible critique. Me & my neighbor were just
preparing to do a little research about this. We got a grab a book from our area library but I think I learned more clear from this post.
I am very glad to see such fantastic info being shared freely out
there.
Userbola is a trusted maxbet agent that has collaborated with official maxbet providers
since 2014. All of us are tasked with serving betting players who wish to sign up
for an recognized maxbet account in Indonesia. We here as a
maxbet list site also have an recognized
PAGCOR license to market internet gambling games.
In addition, Userbola as a maxbet agent always becomes positive input
from betting members such as fast deal services, safe obligations and complete betting games.
The data of members who have registered at a trusted maxbet agent userbola are also
protected safely. The userbola team also always provides benefits
to all betting members every week such as a rebate reward or
cashback that you will not get on the official maxbet site.
From the assessment of our own betting users and official providers
that have made userbola the amount 1 reliable maxbet agent in Indonesia.
How to Register a Maxbet Account
Online gambling players who want to register for a maxbet
account through the trusted maxbet list site userbola only need some
important data like the full name according
to the bank-account, account number, phone number that can be contacted, and email address.
These data can be filled in via the registration form on our website.
Very interesting details you have remarked, thank you for posting.
dinhvinh243 kgjs grergs rrgesf